
Just like its predecessor, Payday 3 offers multiple ways to accomplish many of its heists. Although going loud can easily be an answer, it’s typically more rewarding to leave without causing an alarm. Even the first heist of the game provides you with this choice. Here’s how to complete PD3 No Rest For the Wicked in Stealth.
How to Complete No Rest For the Wicked in Stealth for Payday 3
Since there are random elements at play, this guide will go over some stuff in a broad sense. It’s also good to remember that higher difficulties will include more guards, cameras, and potentially additional objectives.
An important aspect of this heist is that only the guards will be suspicious of you throughout most areas. The workers in the bank won’t assume much as long as you haven’t brought out your mask and gun yet, so feel free to walk around them.
We also highly recommend bringing a weapon with a silencer. It’s possible to do most of this before masking up, but if you do need to take out a guard, it’s best to do so silently. Another option is to bring a quiet throwable or perform takedowns to incapacitate anyone.
- Getting into the Bank
- Finding the QR Code (Higher Difficulties)
- Turn Off Power to the Gate
- Disable the Security System/Stealing the Keycards
- Opening the Gate
- Opening the Vault
- Looting the Vault
- Escape
Getting into the Bank
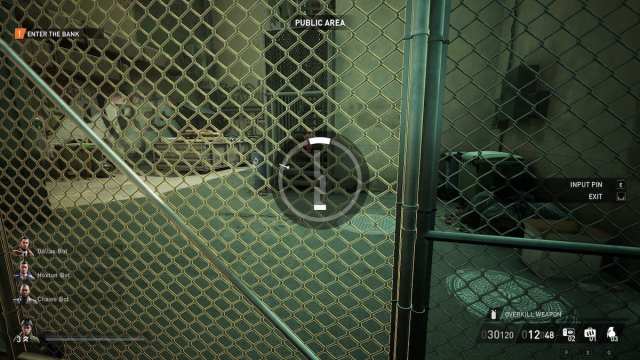
The first step will be to get into the bank and the best method is to go through the roof. Walk around the left side of the building and through the parking lot. In the back, you’ll see a fence that you can lockpick. Make sure not to perform this action in front of the guard in the parking lot or the other guard who patrols the back of the building.
Walk up the stairs in front of you and keep going until you reach the roof. You’ll find either a small storage room or a room requiring a keycard (in all of my playthroughs it’s required a Red Keycard). A door is located around the corner, leading to a stairwell, likely with a camera watching over it. Head into the stairwell to gain access to the rest of the bank.
Finding the QR Code (Higher Difficulties Only)
This special objective only shows up on higher difficulties, and in my experience so far only on Overkill. The second floor might be locked off from the stairwell unless you have a QR code. You’ll need to copy a phone in the Manager’s Office or the IT room, both of which are on the first floor.
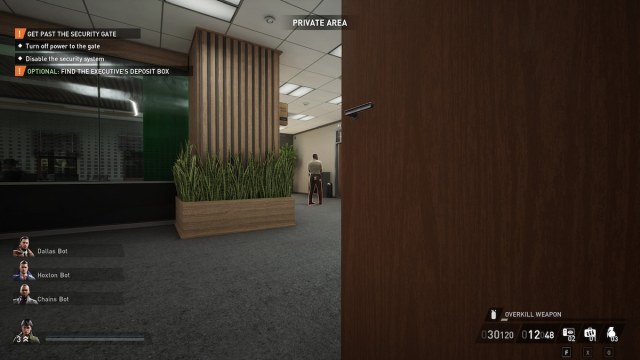
Turn Off Power to the Gate


It’s time for your next objectives: Turn off Power to the Gate and Disable the Security System. There is some leeway for which order you tackle the smaller steps of each, but we’ll talk about the former first.
A power switch for the gate can be found in one of two places: the IT room on the first floor or within the room adjacent to the Office on the second. Both rooms are conveniently found on their respective floors by exiting the stairwell and entering the room all the way to your right.
Make sure not to turn the switch off when a guard or civilian is watching, as they’ll be alarmed. You’ll know if someone nearby has a line of sight if you see an “(Observed)” prompt appear under the action.
Disable the Security System/Stealing the Red and Blue Keycards

The trick to disabling the security system is to steal a Red Keycard from a guard and then use it on a door locked with a Red Keypad. To make it easier, we’ll call it the Security Room. This room can be found either on the roof (as mentioned earlier) or on the second floor. If it spawns in the latter, it can either be next to the stairwell or on the other side of the floor next to the bathroom.
You’ll find the Red Keycard on the backside of a patrolling guard from either the first or second floor. A majority of my runs had it on the second floor, but RNG can affect this. Whichever one doesn’t have it will carry a Blue Keycard instead. All you need to do is approach from behind and steal it off of them. Similar to the power switch, make sure to do this without anyone noticing.
You can optionally go for the Blue Keycard as well. This allows access to the camera room on the second floor. You’ll find it on the second floor in either of the two places the Security Room can spawn in. Take out the guard in here, and the cameras will no longer be an issue. This isn’t a necessary step and will require a player to mask up, but it certainly can make things easier.
Related: How to Set Up Private Lobby in Payday 3
With the Red Keycard in tow, make your way to the Security Room and go inside. There will be a computer that you can hack. Start the hack, then wait a few seconds until you can confirm the gate is disabled. A nearby screen with the words “Cable Controller” will be highlighted. Interact with it to reveal a specific colored shape. This will be different for each run, so keep it in mind.
Opening the Gate and Flipping the Switches
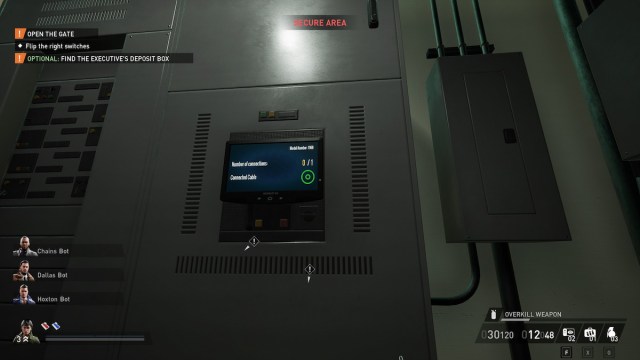
Your next objective is to flip a switch to open the security gate. There are two different places to do this, but the best one seems to be next to the gate itself. As a reminder, they can be found exiting the first-floor stairwell and heading all the way left. Open the little box near the floor and flip the switch that matches what you saw in the security room. This will allow you to head inside and reach the vault.
Opening the Vault/Finding an Executive

The vault door isn’t so easily opened — it requires a four-digit code and a Bank Executive. If you’re lucky, the bank manager you need will be alone in his office, which is next to the IT room. The next best option is that he’s on the second floor in the room next to the office. Simply use him as a human shield, drag him to the face scanner at the vault, and shove him into it to make it work. Consider tying up any civilians and incapacitating any guards that might see you beforehand.
If you’re not lucky, he might be in the lobby at the front of the bank. In this case, we recommend closing all the curtains in the room and waiting for him to end up at the perfect spot to grab him and drag him towards the vault.
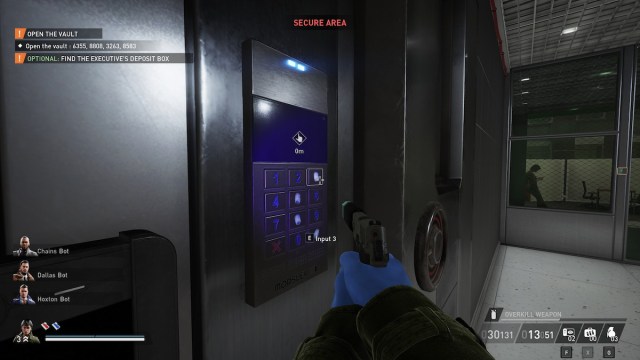
This won’t open the vault just yet though. Doing this will send a code to the manager’s computer in his office. Head over there and log into his computer to see a message displaying four different codes. These should be displayed in the top-left, so no need to break out a pencil. Head back to the vault and approach the keypad to automatically use a UV light over it. You’ll see the fingerprints of which keys have been used. Enter the correct code and you’ll be able to open the vault.
Looting the Vault
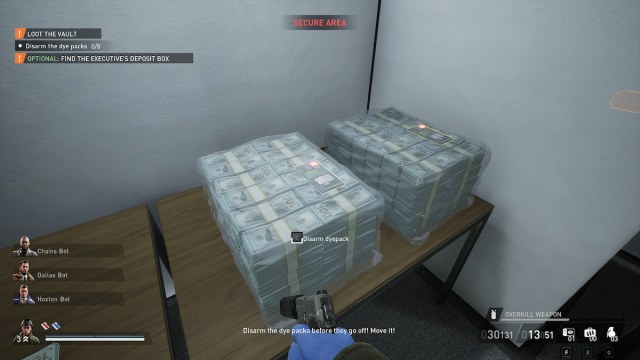
Your primary goal here is to lockpick the gate and steal the bags of money inside. These all have dye packs bundled in them, which are set to go off once the gate has been opened. You can save all the bags as long as you have at least two people, but with one, you can save six if you’re fast. Rush in when you’re ready and interact with the blinking lights on the bags to disarm the dye packs.
You can also loot the safety deposit boxes here. If you’ve been searching through random files throughout, you can immediately pinpoint a special box belonging to a Wixia Executive. You’ll find it anyway if you plan on opening them all though.
Escape
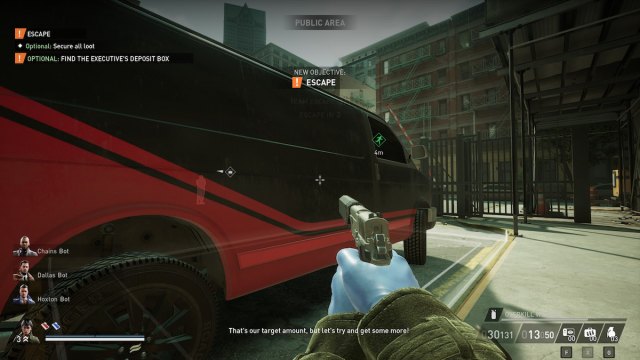
The last step is to take the bags of money out and place them into the getaway van. The amount of bags you need to take depends on the difficulty and how much you saved.
Naturally, the van’s location is also RNG-dependent. The best location will be in the parking lot. You’ll only need to avoid a guard or two and a couple of civilians. If you still have a guard radio answer, feel free to take out the one that patrols this parking lot. Throw the bags into the back of the getaway vehicle and make your escape.
Conversely, the worst location will be if the van spawns in the street. Do your best to avoid suspicion (especially if you’ve got a gun out) and throw the bags. Either way, just leave once you’re satisfied with your haul.
That covers how to stealth No Rest for the Wicked in Payday 3. For other tips, including some solutions for those pesky matchmaking errors, check out our PD3 guides hub.


Published: Sep 23, 2023 12:36 pm