Pocket MapleStory launched on mobile recently, bringing the popular MMO IP to our pockets. There’s a lot players need to know, and we’re here to help.
We started with a simple guide to getting started in the game and the Demon Slayer. Now we’re giving you the second of our class guides — Levels 1-10 for the Dual Blade.
This guide will consist of two parts, a spoiler-free (ish) summary section that will give you a general rundown on things and a more detailed section that outlines your quest objectives. Don’t worry, we’ll let you know when the spoilers are about to start.
The Basics
The first ten levels of the Dual Blade take place in and around Kerning City — the home of the Black Wings. In fact, a whole series of quests will just be you talking to the same guy multiple times. Unlike the Demon Slayer, Dual Blade will offer you a good amount of side quests early on. These extra quests will unlock after you finish Quest 8 of the Main Story
Since you’ll gain access to side quests early on, it’s a bit harder to pinpoint exactly what levels you’ll hit at specific points. But you should be at Level 10 by the time you finish Quest 13 of the Main Story.
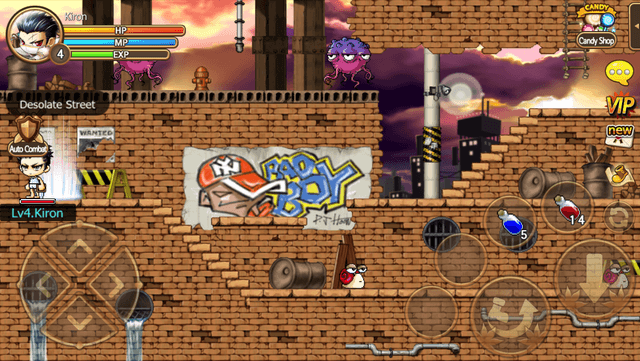
You’ll start your story as Arang, an orphan and initiate to the Black Wings. You’re in one of the many areas of the city of Kerning about to pick a fight with some monsters.
You’ll spend all of your time between Levels 1 and 10 in Kerning City and its surrounding areas.
Skills
Skills in Pocket MapleStory are grouped into sets called Job Advancements. Skills can be “mastered” — with each skill requiring a different amount of skill points to master. As a Dual Blade, you won’t have any skills until you complete the Rogue Job Advancement Quest, at which point you’ll get your first Job Advancement with five skills.
Job Advancement 1
You’ll get your first job advancement from a quest around LvL 5 — a little earlier or later depending on some options you take while leveling. (I got mine at LvL 8 since I elected to do sidequests first.) This advancement will give you 5 new skills that need anywhere between 10 to 20 skill points to master. You’ll get your first skill point to invest when you hit LvL 10. Stats for these skills will increase as points are added.
- Nimble Body (Master LvL 20) – Permanently increases Accuracy and Avoidability
- Disorder (Master LvL 10) – Temporarily neutralizes a monster’s attacks. Boss monster attacks and monster skills cannot be avoided.
- Dark Sight (Master LvL 10) – Hides in the shadows for a certain period of time by consuming MP. You can neither attack nor be attacked.
- Double Stab (Master LvL 20) – Quickly stabs an enemy twice.
- Blade Storm (Master LvL 20) – Attacks multiple enemies in front of you.
Non-Passive skills can be added to your ability/item bar by pressing the shortcut button in their info screen.
Gear
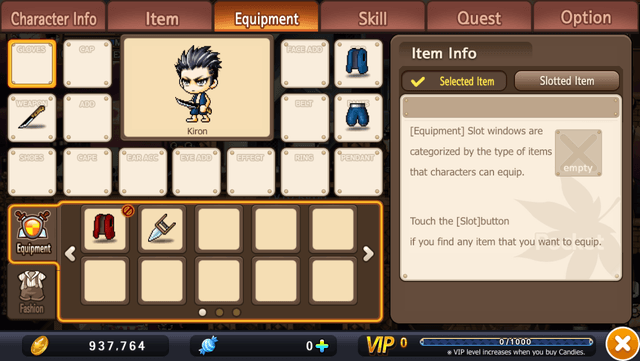
For your first few levels you may be tempted to purchase weapons or equipment from the vendors in the village. DON’T. Your quests will provide you with the exact same gear before you’re even able to use it. Save your money for something else. That said, the minute you hit Level 8, swap that gear out.
Surviving
Unlike the Demon Slayer, the Dual Blade runs a pretty high risk of dying when going out on his first hunting/killing missions. This is likely due to the fact that the majority of his earliest quests take place in the main hub and consist of running around talking to people. So stock up on Healing Potions before heading out to fight any monsters. They’re pretty easy to come by — if you’re not receiving them as rewards for quests finished, you can purchase them in the village. They’re not terribly expensive.
Making money (Mesos)
Levels 1-10 are basically all still part of the introduction/tutorial area. There won’t be a ton of opportunity to make money just yet, but there doesn’t really need to be. Pocket MapleStory practically hands players Mesos every time they log in. There are rewards for logging in daily, different holiday “events” that will grant you items and cash, and more. Of course, you can earn extra by taking a little extra time to kill a few more things while out on quests and bringing back the loot to sell.
The Dirty Details: In-Depth Guide
Above we covered the basics for Levels 1-10. If you’re wanting to play and experience the story for yourself, what’s above (plus our Getting Started in MapleStory guide) will give you everything you need to survive the first ten levels of your life as a Dual Blade. So, stop here. Because anything beyond this point contains SPOILERS.
We’ll break this area down into sections based on levels. Keep in mind that depending on your own play-style, levels may vary — especially with so many side quests opening up so early.
Level 1
Intro
The game starts with you — as the orphan Arang — trying to catch Blue Snails in order to prove yourself as an Assassin. However, you find yourself surrounded by Snails and unable to defeat them on your own. Luckily for you, your friend Cain makes an appearance and scares the Snails off.
Cain then tells you that you need to return to town, as someone named Hiver has called a meeting. You’ll follow Cain back to town in time to listen to Hiver discuss the impact “frequent” invasions by the Cygnus Knights are having on Kerning City. He then tells the villagers that they will be raising taxes again in order to support the efforts of the Black Wings. Upset, the villagers turn on you and Cain when you try to defend the actions of the Black Wings.
You and Cain run. Once you’re far enough away, you realize you’re late for your first day of class with the Black Wings. Go talk to the instructor-owl Shadow Blade and he’ll criticize you for being late and offer you your first quest.
1st Quest – Getting Started
- Objective: Talk to Shadow Blade
- Location: Kerning City
- Rewards:
- 60 XP
- 190 Mesos
Tap on Shadow Blade again and he’ll tell you that you finally seem ready and that the first lesson just consisted of him watching you. He’ll tell you to go see Master Hiver.
2nd Quest – The Second Lesson
- Objective: Talk to Hiver
- Location: Kerning City
- Rewards:
- 60 XP
- 190 Mesos
You’ll find Hiver standing just behind Shadow Blade on the same platform. Talk to him and recieve the reward for the second quest. He’ll immediately give you your third.
Hiver will tell you that becoming a Black Wing is too hard for you and advise you to quit. Being the stubborn little dude you are, you’ll insist that there’s no way you’ll let him down. After some more discussion about what the Black Wings stand for, Hiver will offer you the next quest.
3rd Quest – Gathering Intel
- Objective – Collect useful information from a dude who goes by the name of JM From tha Streetz (I’m just going to call him “JM” from here on out, because his name is totally ridiculous.)
- Location: Kerning City
- Rewards:
- 60 XP
- 190 Mesos
You’ll find JM 3 levels down and to the right, wearing a blue hoodie. When you talk to him, he’ll tell you that he’d like to help but can’t because he’s lost his notebook that he keeps all his intel in. Just settle in with him for a bit. You’re going to be standing here for your next few quests.
Quest 4 – Lost Notebook
- Objective: Talk to JM
- Location: Kerning City
- Reward:
- 60 XP
- 190 Mesos
- 5 Red Potion
You’ll ding your next level after accepting this quest.
Level 2
Talk to JM again and he’ll ask for your help.
Quest 5 – Notebook’s Whereabouts
- Objective: Talk to JM again
- Location: Kerning City
- Reward:
- 60 XP
- 190 Mesos
This time when you talk to JM you’ll notice that there’s something in his pocket, which will immediately kick off the next quest.
Quest 6 – Who Put It Here?
- Objective: Talk to JM one more time
- Location: Kerning City
- Reward:
- 60 XP
- 190 Mesos
- Return Scroll
When you talk to JM this time, you’ll actually get somewhere. He’ll tell you that someone suspicious has been lurking about and expresses his hope that the Cygnus Knights have come to eradicate the Black Wings. After a bit of debate on that matter he’ll tell you that you have the info you want and ask you to leave.
Quest 7 – Reporting In
- Objective: Report to Shadow Blade
- Location: Kearning City
- Rewards:
- 60 XP
- 190 Mesos
- 5 Red Potion
Head back to Shadow Blade and fill him in. He’ll tell you that if the mysterious person is a Cygnus Knight, they’ll “get what’s coming to them.” Whatever that is will have to wait though, because it’s apparently time for another lesson — and you actually get to do some fighting this time.
When you accept the quest you’ll ding another level.
Level 3
Quest 8 – Training Begins
- Objective: Kill 8 Blue Snails
- Location: Desolate Street
- Rewards:
- 120 XP
- 248 Mesos
This quest won’t be too dangerous. Just keep a few healing potions on you and be aware that you’re still working with basic gear.
Once you kill the Blue Snails, head back to Shadow Blade and turn it in. Unfortunately, you’ll only gain about a fifth of a bar while slaying the 8 snails; meaning you’ll be out there for a while if you decide to grind out a level by killing more.
When you turn in the quest Shadow Blade will immediately offer you your next lesson, killing Red Snails.
Quest 9 – Sturdy Armor
- Objective: Gather 8 Red Snail Shells
- Location: Desolate Street
- Rewards:
- 160 XP
- 276 Mesos
- Sniper Potion
Once you acquire this quest, you’ll see Shadow Blade has another he wants to offer you — indicated by the lightbulb over his head. At this point, side quests all over Kerning City have opened up, so grab the one from Shadow Blade and then go find the others. You’ll be able to get one or more each from Hiver, JM, a city-dweller named Mr. Pickall, and a young girl named Nella.
As all of these quests are acquirable now, I’m going to list them here before continuing.
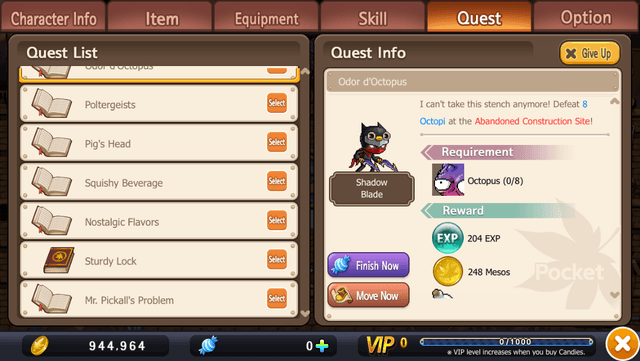
Side Quest 1 – Odor of Octopus
- Offered by: Shadow Blade
- Objective: Kill 8 Octopus
- Location: Abandoned Construction Site
- Rewards:
- 204 XP
- 248 Mesos
- 7 Blue Potions
Side Quest 2 – Poltergeists
- Offered by: Hiver
- Objective: Collect 10 Hats from Shades
- Location: Old Quarter
- Rewards:
- 552 XP
- 280 Mesos
Side Quest 3 – Pig’s Heads
- Offered by: JM
- Objective: Collect 10 Pig’s Heads
- Location: Danger Zone
- Rewards:
- 350 XP
- 280 Mesos
- All Cure Potion
Side Quest 4 – Squishy Beverage
- Offered by: JM
- Objective: Collect 8 Squishy Liquid from Slimes
- Location: Construction Site Backstreet
- Rewards:
- 259 XP
- 276 Mesos
- 8 Blue Potion
Side Quest 5 – Nostalgic Flavors
- Offered by: Mr. Pickall
- Objective: Gather 8 Orange Mushroom Caps
- Location: Construction Site Backstreet
- Rewards:
- 327 XP
- 276 Mesos
Side Quest 6 – Sturdy Lock
- Offered by: Mr. Pickall
- Objective: Collect 8 Blue Snail Shells
- Location: Desolate Street
- Rewards:
- 120 XP
- 276 Mesos
Side Quest 7 – Mr. Pickall’s Problem
- Offered by: Mr. Pickall
- Objective: Kill 8 Stirge
- Location: Abandoned Construction Site
- Rewards:
- 176 XP
- 248 Mesos
- Blue Dream Bottoms (Armor)
Side Quest 8 – Nella’s Report
- Offered by: Nella
- Objective: Collect 8 Octopus Leg
- Location: Abandoned Construction Site
- Rewards:
- 204 XP
- 276 Mesos
After gathering all these quests, head to Desolate Street and knock out your main quest. You’ll ding Level 4 while killing Red Snails, but you’re not done yet. Since you’re here, go ahead and get those 8 Blue Snail Shells for Mr. Pickall’s Sturdy Lock Quest.
Level 4
Once you’re done, you can either begin to pop over to other areas and knock out more side quests or return and turn in your main. I’d suggest the former, because the difficulty level in these quests varies greatly. By turning in your main (and any quests you did with it) and grabbing the next quest in the line, your level should be in line with what you’re doing.
If you return to Shadow Blade, he will offer you the 10th quest in the main story line, which also happens to be the quest that grants you the Rogue Job Advancement. This is the first Job Advancement leading to Assassin.
You should be hitting Level 5 right about now.
Level 5
When you hit your next few levels will vary greatly depending on how you go about things. So the next level we’ll mention directly will be Level 8.
Quest 10 – Rogue Job Advancement
- Objective: Gather 8 Stirges Wings
- Location: Abandoned Construction Site
- Rewards:
- 176 XP
- Sharp Dagger
Head to the Abandoned Construction Site and get those 8 Stirges Wings for Shadow Blade. You’ll also have the opportunity to knock out a couple of side quests while you’re here: Odor of Octopus, Mr. Pickall’s Problem, and Nella’s Report’s objectives are all located here. Go ahead and knock all of those out before heading back.
After completing these quests and returning to Shadow Blade, you will be granted your first set of skills — listed in the spoiler-free guide above — and be offered yet another kill quest. This time he wants you to kill some Slimes. This will be the first chance you have to try out your new skills, so give them a whirl.
Quest 11 – Rogue Basics
- Requirement: Kill 10 Slime
- Location: Construction Site Backstreet
- Reward:
- 259 XP
- 250 Mesos
- Blue Dream (Armor)
Pop over to the Construction Site Backstreet and take out some Slimes. While you’re there, you’ll also be able to Collect the 8 Squishy Liquid for JM’s Squishy Beverage quest and the 8 Orange Mushroom Caps for Mr. Pickall’s Nostalgic Flavors quest. Keep in mind that you’re going to have to go up several levels to find the mushroom caps.
Return to Kerning City and turn these quests in. When you turn Rogue Basics in to Shadow Blade, he’ll relay that Hiver is looking for you.
Quest 12 – Hiver’s Summon
- Objective: Go talk to Hiver
- Location: Kerning City
- Rewards:
- 208 XP
- 190 Mesos
- Dexterity Potion
Hiver will ask you if you’re aware of the suspicious person snooping around the city — you know, the one you told Shadow Blade about. He’ll then tell you that they think that person has been spotted in The Danger Zone and that he wants you to go check it out.
Quest 13 – Who Goes There?
- Objective: Find out who the person in the Danger Zone is.
- Location: Danger Zone
- Rewards:
- 208 XP
- 190 Mesos
Level 8
By this time, you should be Level 8. So, before you head out on your next quest, take a moment and swap out your gear. You should at least have some new armor you can put on.
Once you’re all geared up and ready to go, head to the Danger Zone. Keep in mind that while you’re here you can knock out JM’s Pig’s Head quest.
When you get to the Danger Zone, you’ll run into a Ninja-looking character named Rayden. He’ll tell you a group called the Jr. Wraths wounded him and ask you to get some medicine for him.
Level 9
Quest 13 – Enter Rayden
- Objective: Get 10 Medicine With Weird Vibes
- Location: Old Quarter
- Reward:
- 440 XP
- 280 Mesos
- 5 Red Potion
Go to the Old Quarter and get Rayden’s medicine. At the same time, kill some Shades and collect the hats for Hiver’s Poltergeists quest.
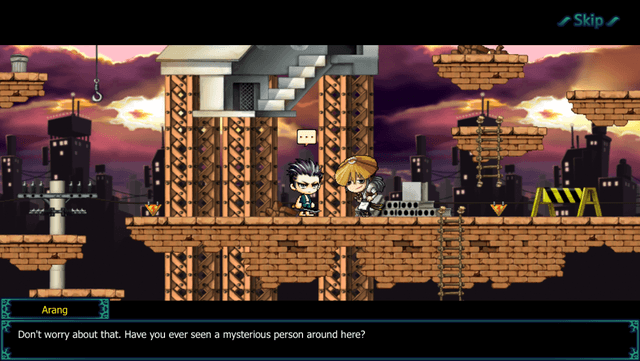
When you return to Rayden a cutscene will start. You’ll talk to him for a bit and he’ll tell you the medicine worked and that he owes you one. When you ask him about the mysterious person, he’ll say that he’s been alone the entire time — causing you to wonder if HE isn’t actually the person you’re looking for.
It turns out that he’s been investigating the Black Wings, but he denies any association with the Cygnus Knights. Instead, he asks why you helped him and tells you that he’d like to show you the truth about the Black Wings, as they are not what you think.
You’ll try to attack, but he’s just stealthier than you are. When the cutscene ends, you should be Level 10.
And there you have it.
Levels 1-10 of your journey as a Dual Blade. Of course, when you hit levels may vary depending on whether or not you pick up the side quests and in what order you elect to do them.
In the meantime, keep an eye out for the next guide. Levels 1-10 for both the the Angelic Buster is on its way.


Published: Dec 7, 2015 04:58 pm