It may take a few days for the ins and outs of RO: Idle Poring‘s character progression. Heck, you may still be a bit lost on how to actively improve your characters to push to higher stages.
We’re going to go over each of the game’s character improvement methods available to you and how to use them to your benefit. You can’t really just rely on accelerating to get you to the strength point you need to be at to progress, since levels and gear itself only go so far — though you should definitely accelerate daily.
Are you doing everything you can to progress your characters quickly? You’re about to find out! Let’s go over Idle Poring‘s many methods to improve your characters and how to use them properly.
Getting and Improving Gear
 You can get new equipment not only from fighting your way through stages, but also through the Smith and the Market.
The Smith is a more effort-intensive option, as it requires you have accumulated Smelting Points via smelting gear you don’t need — but you’ll often be able to get items that are improvements to your own via the Smith.
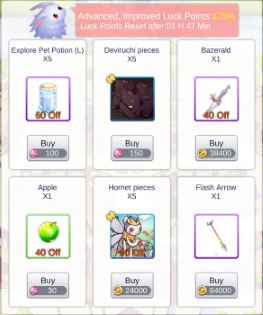
Getting them via the Market is more expensive. Though both the Smith and the Market charge Zeni to refresh, the Market demands you spend either Gems or Diamonds or Zeni to get what’s on it. Never spend Diamonds on equipment on the Market.
Refining and Gem Socketing
The game explains these systems to you — but if you’re not a diehard Ragnarok Online fan or are just not familiar with Korean-style MMORPGs, these systems may seem optional. Surprise: they are not.
Refining
You can refine your equipment via the Hero menu simply by tapping on a piece of gear and then on “Refine”. There are a few things to know about refining:
- Refinement bonuses are attached to the equipment slot rather than the actual piece of equipment (so you can change your actual gear out and not have to refine it again)
- Every 10 refinement levels you have to spend Enhance Metals (and after 30, materials from MVP fights) to break the equipment slot through to the next tier, giving it a sizable bump in its primary stat and allowing you to continue to refine
- You can only refine up to your current character level
- Most of your Zeni is going to be used to refine
With all of this in mind, you can push forward with refining your slots with no stress. There are absolutely no downsides to refining all of your equipment slots to the maximum level you can, outside of the drain on your Zeni balance and Enhance Metals.
Gem Slotting
This is another carry-over system from RO and in this iteration is a fairly painless process.

Much like refining affects your gear slots, Gems are also not tied directly to the equipment you have in a slot. The only restriction on them is whether or not an item has a slot or not. And you generally do not want equipment with no slots.
Slotting Gems costs no Zeni and removing them is similarly free — plus you don’t have to worry about socket size.
To attach a Gem to a slot, simply tap the equipment, then Gem, and then choose the one you want to attach.
Getting More Out of Your Gems
The game goes over combining your Gems to make them more powerful, but after the first explanation it expects you to remember. You may not have, so here’s a reminder.
Go to the Bag menu, and then tap on Gems. You can see all of your Gems in this menu and you can fuse them together simply by tapping on a stack of them and then choosing “Compose”, then paying the fee.
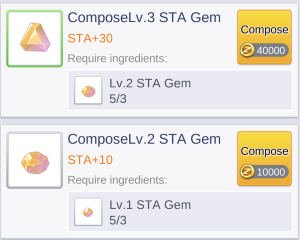
You can combine Gems up to several tiers, with each tier requiring 3 of that exact Gem to craft a better one.
Slot your best gems (keeping your character’s wanted stats in mind) for a boost to your overall power.
Pets
Pets are a huge component to how powerful your characters are, especially once they get a few affection levels on them. They grant hefty flat stat bonuses along with percentage increases to your combat abilities, such as reducing the damage you take or healing a percentage of the damage you do.
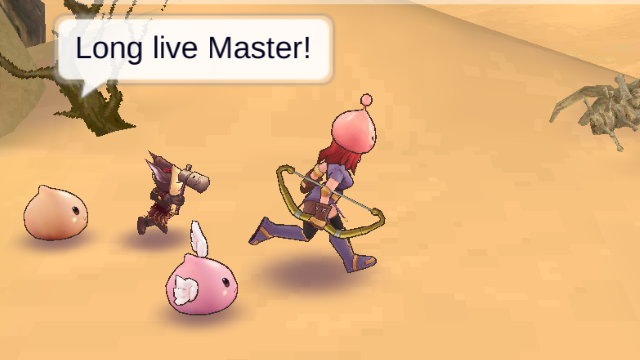
 I’m going to level you up, I swear.
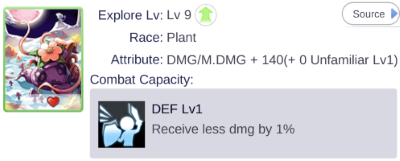
Because pets are so important, it’s vital you keep them improving via exploration missions and advancing them when they hit their level cap. Each level improves their attributes and each advancement improves their combat capacity. Choose your pets based on your pets’ attributes and combat capacities.
You can get pet fragments from raiding, as gone over below, but you also get 31 free fragments per day in the Store.
Boss Raiding for Pet Fragments
This is another feature that doesn’t get mentioned much by the game but factors heavily into your progression.
Boss raiding may grant you pet fragments, and you’re allowed 3 boss raids a day (though the game is currently just throwing Boss Challenge Tickets at players).

 You can access boss raiding via the Map button in the Battle menu. This will open up the map and let you choose which area you want to raid for fragments.
I do not recommend choosing your raids willy-nilly. Instead take a look at your pet Grimoire and see which ones you are either close to obtaining or want, then tap on the small icon with a plus sign next to the fragment bar to see where you can obtain their fragments.
Attribute Allotment
This is the most basic set of building blocks for any Idle Poring character and it’s the most important, since you can stack tons of points into your preferred attribute to specialize one way or the other.
I don’t really like to give attribute allotment advice — a lot of people are currently testing going all-in on a class’s primary attribute, whereas I’m not too keen on the all-in approach.
I will say that, after testing different stat approaches between two characters, that dumping most of your attribute points into a character’s primary attribute does do well over the first 40 levels. If you’re not keen on your current attribute set up and don’t feel like you’re doing as well as you should, you may want to adjust your stats by using an Attribute Book (look in your items).
It’s doubtful that sticking with one attribute will do as well at high levels, due to the frequency of status effects and the high value many of the non-primary stats (CRI, EVA, Tenacity, ATK Spd). If you want to know what your attribute points really boil down to, I recommend reading my Idle Poring attribute allocation guide.
Skills
The skills you have equipped, the order they’re in, and their levels are a pretty sizable chunk of your overall combat efficiency. You can have some amazing stats but still fall flat if your skills aren’t organized in a way that plays to your benefit.
In both PvE and PvP situations, critical hits and status effects are king. Stun, freeze, and/or sleep your opponents to get a few free hits in and to keep enemies from casting.

The Berserk skill is a must-have for most skill layouts because of its critical rate boost and Tenacity buff (it says “control free” on the skill at the moment). Pairing Berserk with whatever your class’s double-hitting skill is will make you pack a wallop.
Test out different skill orders with bosses if you’re floundering but seem to have a chance to win.
This advice is all information any RO:Idle Poring player needs to know. Like its namesake, the actual Ragnarok Online, the game isn’t going to hold your hand and take you exactly through each and every thing you need to do. Stay diligent with your progression and the facets of it mentioned here and you’ll do just fine.


Published: Sep 20, 2017 02:17 pm