Shipbuilding is a complex, time-consuming affair in Bethesda’s grand space RPG. It can cost you quite a bit to make a functional one. And there are plenty of places to start. If you don’t know what you’re doing here, don’t worry; here’s how to build a good ship in Starfield.
How to Find Ship Technicians to Build a Good Ship
But before we blast off, this guide to building a good ship isn’t a guide to building the best ship in Starfield. That’s an entirely different conversation. We’re not building a mega ship here but giving tips and tricks for putting the puzzle pieces together. How you choose to solve the puzzle is completely up to you.
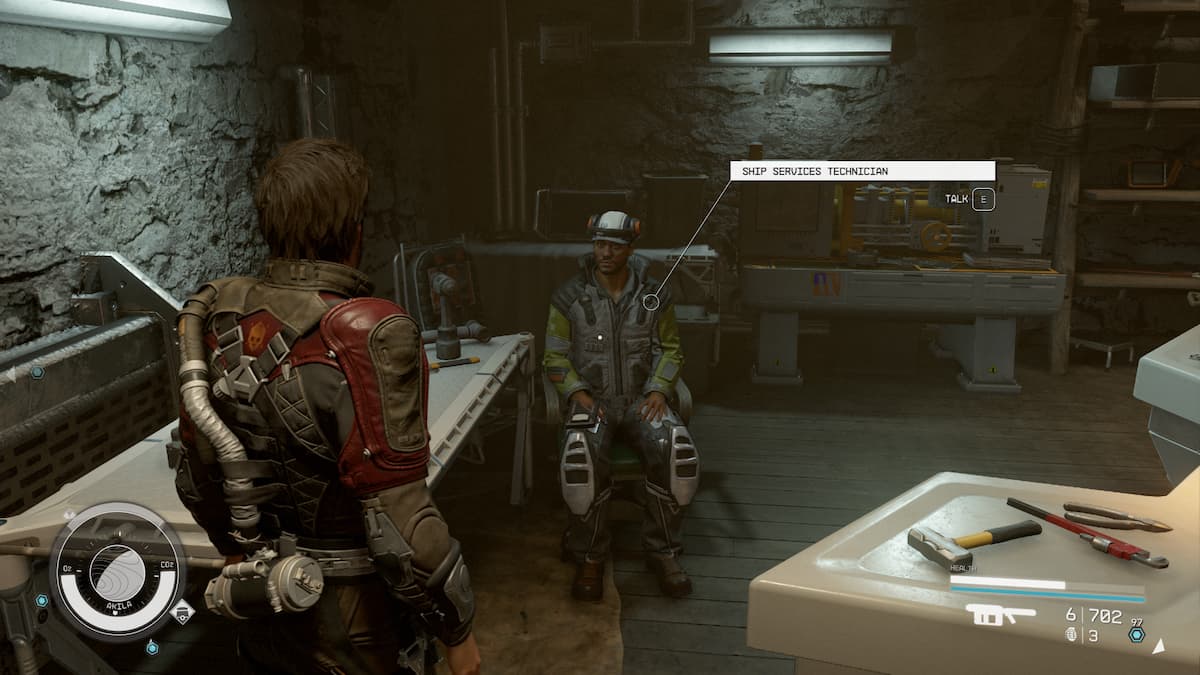
To build a ship from scratch — which is the primary focus here — go to the nearest Ship Services Technician. You’ll find one in New Atlantis at the start of the game, but Neon and Akila also have these NPCs, as well. Unfortunately, they don’t show up on the map, but you can find them near every Starport in a city. Sometimes, they’ll be in a building. Sometimes, they’ll be roaming the area. Look for an NPC dressed in flight gear with a cap and earmuffs on their head.
Once you’ve located a Technician, it’s time to build a ship. Interact with the NPC, and choose the option for viewing and modifying your ship.
In your quest for a ship to be reckoned with, you’ll want to gather one of each of the following components: Cockpit, Habitat, Landing Gear/Bay, Reactor Docker, Cargo Hold, Fuel Tank, Shield Generator, Grav Drive, Engines, and Weapons.
Building a Good Ship in Starfield: Step by Step
Cockpit
Let’s start with the place you’ll be flying the ship from: the Cockpit. You’ll want this area to have some solid cargo space and crew space. You and the crew will be here a lot, and cargo space can get full quickly if you’re not careful. A good choice here is the Stround-Eklund Viking CP-220 Cockpit. You get four crew stations with it, as well as two weapon mounts and four general connections. It has a manageable mass of 12 and a respectable cargo space of 280.
First Habitat
The habitat is basically your common room. This is where your crew and companions hang out and where you can add equipment like different benches. Find a habitat that offers enough slots for your crew and doesn’t weigh your ship down. These won’t break the bank, but they’re not cheap either, and you should be OK spending a bit for them.
Keep in mind that you’re not limited to just one hab. If your crew is large, it’s worth investing in a second one. I’m a military spacefarer, so I decided on the Armory Habitats when making ships, as they include weapon racks, helmet displays, mannequins to put Spacesuits on, and extra storage. Remember, your mass will go up with each habitat you add, so make sure you’re considering the balance and negatives that can come with too much mass when it comes to maneuvering a ship.
Landing Gear
With the cockpit and habitat in place, it’s time to add some landing gear. These tend to work regardless of which brand you choose, so as long as it fits with your ship, choose whichever type you like the look of.
Landing Bay
The Landing Bay may seem like a vital part of a good ship, as it’s responsible for safely landing the ship, but it’s actually not that important. The Landing Bay is the little docking tunnel that allows you to connect to ships and other space stations throughout Starfield. Although you need it, which one you choose is pretty irrelevant outside of the fit.
Docker
Dockers are used for landing in space stations, and the stats don’t matter much here, either. Pick whichever one suits your looks the best, but don’t worry about this one too much.
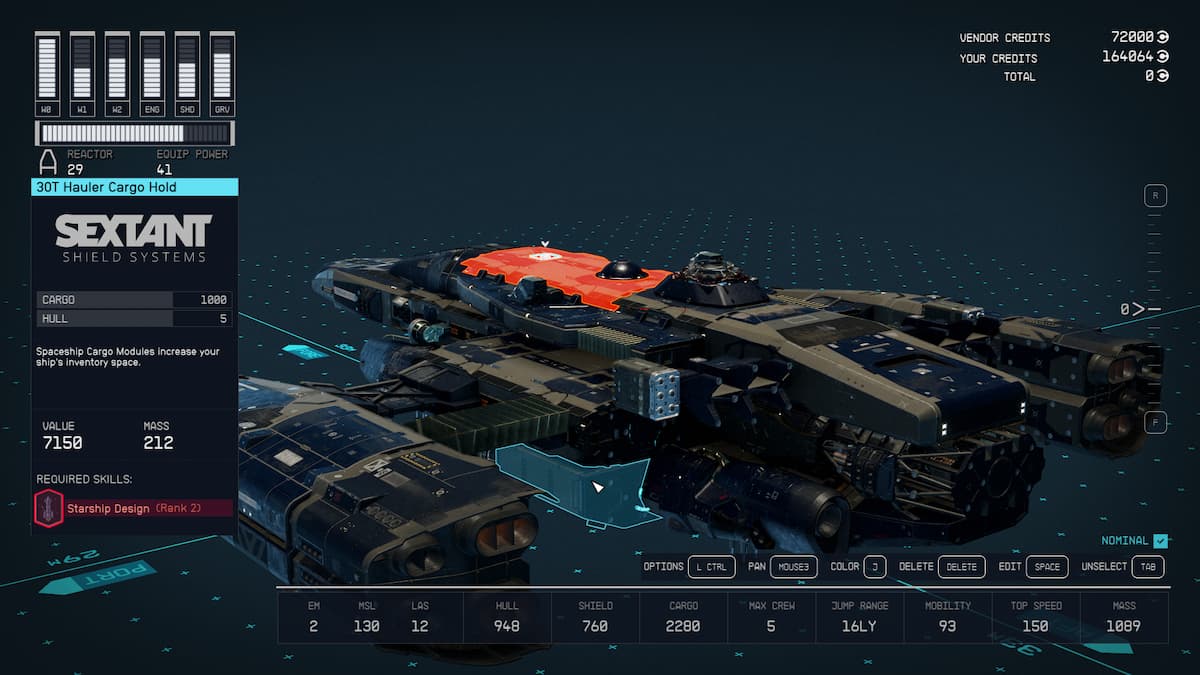
Cargo Hold
Cargo holds are incredibly important when it comes to exploring the galaxy. This determines how much room your ship has to pick up items, and it can fill up very quickly. You can have multiple cargo holds if you’re feeling fancy and carry a lot of cargo/contraband. Since we’re keeping things straightforward, we’re recommending the Caravel V101 Cargo Hold. It’s got a solid capacity of 223 and a manageable mass of 48. If you collect everything in sight, then a cargo hold should be something you emphasize in your ship build.
Fuel Tank
Next up is the fuel tank, which is integral to supporting your spacefaring ways. Sometimes, when trying to travel to another system, you’ll see the notification that you’re “out of fuel range.” That’s because your fuel tank isn’t strong enough to make the long trip, and you’ll have to jump to a neighboring system to get there instead. It essentially determines how far you can Grav Jump.
To remedy this, I would go for a high-priced one for even just a good ship, as you don’t want to skimp when it comes to fuel. You need to make sure you don’t have too much mass here, or you might run into problems with maneuvering. The 700 HE3 Tank is a solid choice and won’t cost you that much in the process. It gives you 400 fuel, 5 Hull armor, and takes up 50 mass. You can certainly break the bank here to be able to jump across the galaxy on a whim, but we’re assuming you’re working with a budget.
Grav Drive
Grav Drives are important when it comes to flying from one system to another. The difference between Grav Drives and fuel tanks is the Grav Drive determines if your ship can make the jump to other systems, while the Fuel Tanks are there to figure out if you can make those trips without having to refuel. Refueling happens over a period of time, so you can’t manually do this. A high-quality Grav Drive can make up for a lackluster Fuel Tank, so consider this balance when crafting a good ship.
In a spaceship fight, enemies can target your Grav Drive. If this gets busted, you’re out of luck. Getting a Grav Drive with good stats is paramount, so don’t worry about spending too much here. The 6 Aurora 13G Grav Drive is a solid choice, though it’s a bit pricey. You’ll need 81 Mass for it, but in exchange, you get a Grav Jump Thrust of 33 and Drav Drive Health of 162. This will ensure your Grav Drive can take a little bit of a beating during a fight before falling out of commission.
Reactor
We need some power to make all those systems go, and the reactor’s the key, providing power and letting you distribute it where it’s needed. Look for one with a great Repair Rate, Reactor Health, and Power Generated, but also remember that you need to stay at a reasonable mass. Repair rate is particularly important here as that determines how fast your Ship Parts will heal your ship when you’re in a bind.
Shield Generator
Shields are incredibly important during the tougher spaceship battles in Starfield and can mean the difference between life and death. A strong Shield Health, a sturdy Regen Rate, and plenty of Max Power are critical to making our journey across the galaxy a successful one. Not everyone will be engaging in tons of space battles, but if that’s you, make a good Shield Generator a high priority.
The 4104D Guardian Shield Generator is a great choice that has a Shield Max Health rating of 1350 and a manageable regeneration rate of 5%. You’ll be able to take a ton of damage with this shield, but you will be taking up a ton of mass here, as it has 129 in this department. For our needs, this is very much worth it.
Engines
If you want a ship that can make tight turns and fly circles around your enemies, then a good engine is incredibly useful. Max Power, Engine Thrust, and Maneuvering Thrust are what we’re looking for here. A ship with good mobility can make a tough fight into a cakewalk, and it’s one of the most important things a good ship can have. Engines can be shot out by your enemies, so being able to last a battle is key.
The 4 Hercules DT160 Engine is a great choice that gives you a 24300 Engine Thrust, Hull of 5, and engine health of 114, so you can relax knowing you won’t suddenly lose power in the middle of a fight. It’s a hefty one, with a mass of 140, but this isn’t an area you should start cutting costs on.
Weapons
You won’t be winning many battles without a good arsenal to back you up. Starfield has specific weapon types used for specific things, and it’s important to know what you’ll need each for. Energy weapons will take out an enemy’s shields, which is crucial to actually damage them. Ballistic weapons will shred up the ship’s base health, which is where you want to focus your money if you’re interested in leaving no evidence behind. EM weapons, or Electromagnetic weapons, are important if you want to be able to board ships.
You can also take out sub-systems of a ship like Grav Drives or shield systems with EM weapons, and when facing off against the tougher ships in the game, you’ll need to employ this strategy to come out of it alive. A solid mix is important here, and while some ships will only support two weapon types, you should make sure you’ve always got ballistics, as it’s the most effective way to actually win fights.
My weapon of choice at the moment is the KE 42 Cannon for Ballistic purposes, as it eats through ships with ease. For Laser weapons, the Vanguard Pulse Laser is a perfect fit for any ship. You can take down shields incredibly fast with this weapon, and I don’t take on any space battles without it. The final piece of the puzzle is the Nullifier 1750 Suppressor. This EM weapon is masterful at taking out targeted systems with haste, allowing you to either board a ship quickly into a fight or destroy an enemy’s shield and weapon systems to weaken the competition.
That’s everything you need to know when it comes to building a good ship in Starfield. Hopefully, this helps you build the most feared ship in the galaxy. For more guides on Starfield, check here.


Published: Oct 26, 2023 09:53 am