The Street Fighter 6 Drive Systems is new to the series and includes several sub-mechanics: Overdrive, Parry, Rush, Reversal, Impact, and Burnout. This makes it quite different from its predecessors. While the tutorials teach you these mechanics, you may not want to pause the game or leave a mode to remember the ins and outs. Our guide covers all aspects of the SF6 Drive System so you can have them at your fingertips.
Street Fighter 6 Drive System Overview and Tips
While you’ll be able to throw out Super Arts and base versions of special moves just fine, you’ll be missing out on many key abilities if you’re not using the SF6 Drive System. It isn’t an exaggeration to say that nearly every mechanic in Street Fighter 6 is linked to this system. Understanding its strengths as well as how to exploit its weaknesses is fundamental for your improvement.
Here are the Drive System inputs for both Classic and Modern controls at a glance, alongside a quick notation key. I’ll dive into each of these mechanics in deeper detail below.
- F = Forward
- HP = Heavy Punch
- HK = Heavy Kick
- DI = L1/LB
- DP = R1/RB
| Move Name | Classic Controls | Modern Controls | DG | Notes |
| Drive Impact | HP+HK | DI | 1DG | |
| Drive Reversal | F+HP+HK | F+DI | 2DG | When blocking or during a successful Drive Parry. |
| Drive Parry | MP+MK | DP | Continuous DG | Hold button to extend the move’s duration. |
| Parry Drive Rush | F+F | F+F | 0.5DG | During Drive Parry. |
| Cancel Drive Rush | F+F or MP+MK | F+F or DP | 3DG | While connecting with a special-cancelable move. The secondary notion is being added on June 24th update. Secondary notion can only be used while in neutral or pressing forward. |
Drive Gauge Explained
At the core of this new system is your Drive Gauge, represented by six green bars underneath your health. These bars are required to activate various drive abilities. Blocking hits or being hit by specific moves can also deplete the bar, while hitting an opponent can quickly refill it. Try to keep yours filled while also aiming to completely deplete your opponent’s!
What are SF6 Overdrive Moves?

Anyone who’s played a previous entry in the series or nearly any 2D fighter will recognize Overdrive as the EX Special moves system. At a cost of two bars, players can perform an enhanced version of a special move that is called an Overdrive Art. These differ from normal special moves by having better properties (faster startup, higher damage, etc.)
An Overdrive Art is performed by using the same motion but with two of the same button type. Ryu’s Hadoken is famously a quarter-circle forward + punch, while the enhanced version comes out when two punches are pressed instead of just one. If you need a refresher of each character’s specials as well as the rest of their toolbox, our complete SF6 moves list guide can help.
How to do a Drive Impact
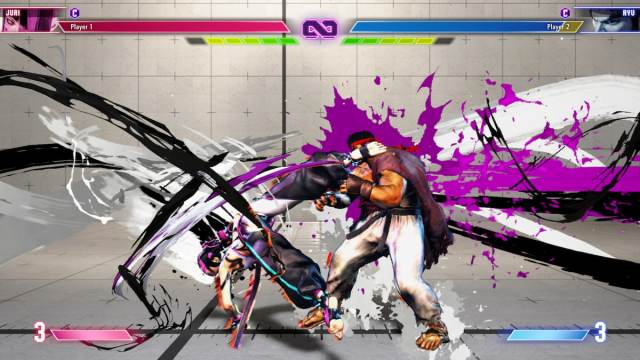
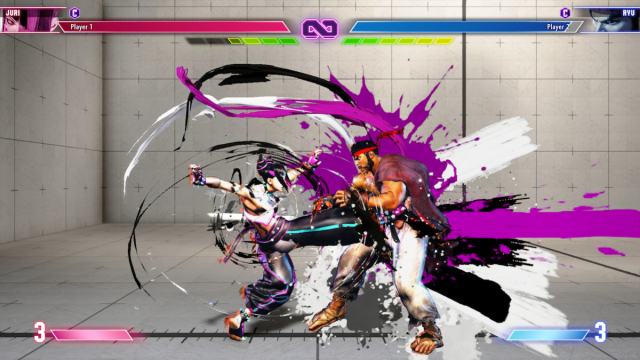
This is the move/mechanic you’ll notice the most at first due to how flashy and powerful it is. Drive Impact is an attack that can easily turn the tides in a fight, leaving an opponent in a crumple state on hit or causing a wall splat when near a corner. With a cost of only one bar and an armor property that absorbs two hits, it’s an imperative tool for every player’s arsenal.
Blocking it is an option, although it will still deplete your drive gauge nonetheless. Countering it with your own Drive Impact or a Drive Parry can result in a more advantageous setup. Drive Parry is performed by pressing the heavy punch and heavy kick buttons at the same time.
How to do a Drive Parry
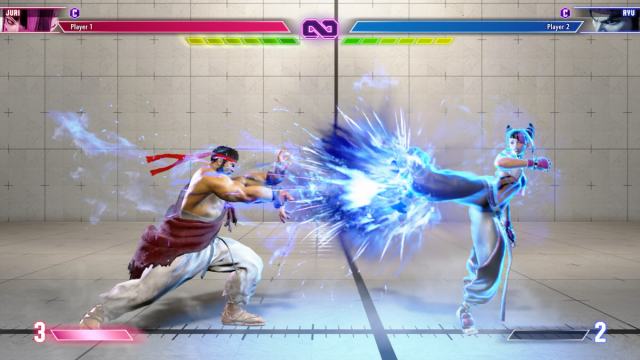
Blocking is simple, but a well-timed Drive Parry can be the better option. Costing half a bar and then continually depleting if the command is held down, you can parry incoming attacks and build up your drive gauge at the same time.
A Drive Parry can also be canceled into other abilities, such as Drive Reversal or Drive Rush. It’s good to keep in mind that they’re vulnerable to throws and can be easily read if you’re using them often. A parry is performed by pressing the medium punch and medium kick buttons at the same time.
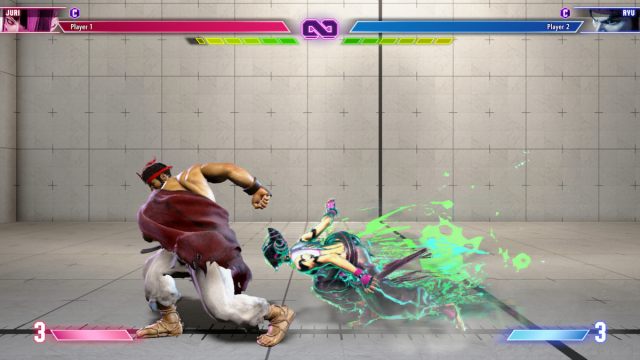
Drive Parry 2.0: The Perfect Parry
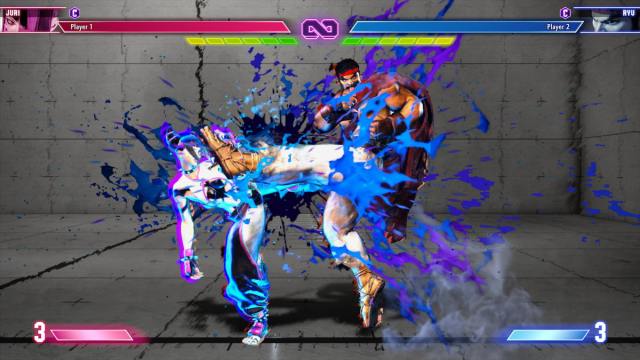
Performing one within two frames of an opponent’s attack will also result in a “Perfect Parry” which provides you with more time and invincibility to punish your opponent. You’ll know when it works if there’s a slow-down and a visual splatter effect. If you constantly find yourself at the receiving end of a certain move by a character, consider learning the timing and trying to respond with one of these. Don’t feel bad if you can’t get it consistently — two frames is a very short window, after all.
How to do a Drive Reversal
Another defensive ability that’s quite situational, the Street Fighter 6 Drive Reversal is a low-damage-dealing counterattack that can be used while you’re blocking. It’s not something you can throw out all the time since it costs two bars. That being said, it’s a wonderful tool to use when you’re feeling pressure or are stuck in a corner. Drive Reversal is performed by pressing forward with heavy punch and heavy kick. Again, it will only come out if you do this while blocking attacks.
How to do a Drive Rush
Out of every SF6 Drive System ability we’ve talked about, this could be the most important. Drive Rush is a quick dash that also buffs any normal attack used during it with a 4+ frame advantage. It might not sound like a lot, but that can easily be enough of a property changer to lead to new combo starters. Whether you’re trying to keep the pressure up or want to lengthen your combo string, Drive Rush is a fantastic offense tool to use for closing the gap between you and your opponent.
Something special about it is that there are two ways to activate it. Canceling into it from a normal move will cost a whopping three bars, while using it after a Drive Parry will only cost one bar. Either method is activated by simply double-tapping forward in their respective situation.
Both of them have their uses, so it’s hard to say whether one is better than the other, but I would strongly recommend you keep an eye on how many bars you have left before using the three-bar option. Using all of your bars can spell disaster because it means you’ll enter Burnout.
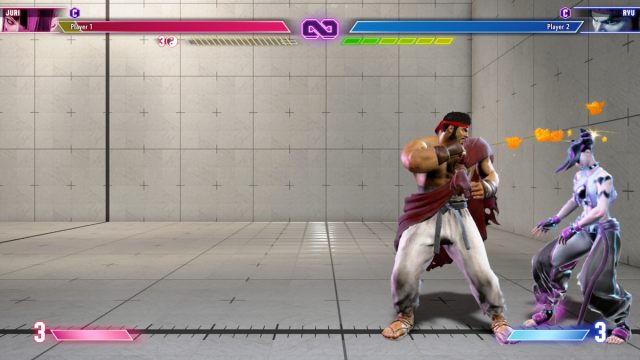
Street Fighter 6 Burnout State Explained
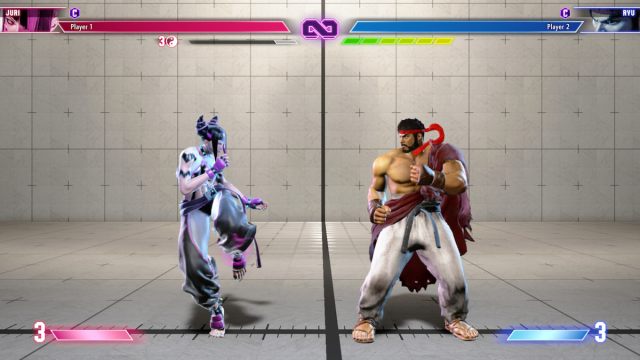
This isn’t an ability so much as a consequence of letting your Drive Gauge hit empty. Going into the Burnout state is characterized by your character glowing grey and looking tired. They’ll also suffer from the following until the Drive Gauge refills:
- Slower recovery
- Receive chip damage from opponent’s special moves and supers
- Lose access to any drive abilities
- Can be stunned if the opponent’s Drive Impact sends you into a wall
There’s no understating how detrimental it is to be in the Burnout state. Everything at your disposal is weak, and your only options are to wait until the gauge refills over time or take a risk to build it up faster by attacking. Unless you’re confident that you can win a round after using a drive ability and entering Burnout, it should always be a priority to avoid this situation.
That covers what you need to know about the Drive System in Street Fighter 6. These universal mechanics are important no matter which character(s) you use, although each one can certainly benefit from them in their own unique ways. To learn more about the characters and what’s possible in Capcom’s latest fighter, check out our Street Fighter 6 guides page.


Published: Jul 22, 2023 01:56 pm