If you’ve been searching for a comprehensive collection of gory finishers for every character and Kameo, you’ve come to the right place. While this might’ve been a Mortal Kombat 12 list in another timeline, that doesn’t mean these match-enders are any less brutal. Here’s how to do all Mortal Kombat 1 fatalities.
Mortal Kombat 1 Fatalities: Inputs and Spacings Detailed
Below, you’ll find the most up-to-date list of Mortal Kombat 1 fatalities for both the main roster and Kameo fighters, along with their inputs and any distance requirements. Every main roster fighter starts off with one fatality available and another that’s locked behind Character Mastery. We’ll be adding the gruesome finishers for the DLC characters as they become available, too, so feel free to return here if you need a refresher on how to do Omni-Man or Quan Chi fatalities.
All of these are also oriented when your character is facing right. Remember to switch the side inputs if you’re facing left. Feel free to use the links to jump to a specific fighter as well as our breakdown on spacing.
Main MK1 Roster
| Ashrah | Johnny Cage | Liu Kang | Scorpion | Reptile | Spacing breakdown |
| Baraka | Kenshi | Mileena | Sub-Zero | Shang Tsung | |
| General Shao | Kitana | Nitara | Raiden | Sindel | |
| Geras | Kung Lao | Omni-Man | Rain | Smoke | |
| Havik | Li Mei | Quan Chi | Reiko | Tanya |
Ashrah
- Heavenly Light (MID, FAR) — Down, Forward, Down, Triangle/Y
- Second Fatality (MID, FAR) — Down, Down, Back, Circle/B
Baraka
- Split Decision (CLOSE) — Back, Forward, Down, Square/X
- Second Fatality (CLOSE) — Forward, Back, Down, Circle/B
General Shao
- Spin Cycle (MID) — Back, Forward, Down, Square/X
- Second Fatality (MID) — Down, Forward, Back, Square/X
Geras
- Sand Storm (MID, FAR) — Forward, Down, Down, Circle/B
- Second Fatality (CLOSE) — Down, Forward, Back, Square/X
Havik
- Atomic Heart (CLOSE) — Down, Forward, Down, Circle/B
- Second Fatality (CLOSE) — Forward, Back, Down, Triangle/Y
Johnny Cage
- Hollywood Walk of Pain (CLOSE) — Forward, Back, Down, Triangle/Y
- Second Fatality (ANY) — Forward, Down, Back, Circle/B
Kenshi
- Blended (CLOSE) — Forward, Down, Down, Triangle/Y
- Second Fatality (MID, FAR) — Back, Down, Back, Square/X
Kitana
- Royal Blender (MID, FAR) — Down, Forward, Down, Circle/B
- Second Fatality (CLOSE) — Down, Down, Back, Circle/B
Kung Lao
- Lao’d And Clear (MID, FAR) — Back, Forward, Back, Circle/B
- Second Fatality (CLOSE) — Back, Down, Down, Cross/A
Li Mei
- Roman Candle (CLOSE, MID) — Forward, Back, Forward, Cross/A
- Second Fatality (CLOSE) — Back, Forward, Down, Circle/B
Liu Kang
- Double Dragon (CLOSE) — Down, Forward, Back, Circle/B
- Second Fatality (CLOSE) — Back, Forward, Back, Cross/A
Mileena
- Appetizer (CLOSE) — Back, Forward, Back, Square/X
- Second Fatality (CLOSE) — Down, Forward, Back, Cross/A
Nitara
- Vaeternus KomBAT (MID, FAR) — Down, Down, Back, Square/X
- Second Fatality (MID, FAR) — Back, Down, Back, Circle/B
Omni-Man
- Trained Killer (CLOSE) — Down, Down, Back, Circle/B
- Second Fatality (CLOSE) — Down, Forward, Back, Cross/A
Quan Chi
- Pentamagic Trick (MID, FAR) — Forward, Back, Forward, Back, Triangle/Y
- Second Fatality (ANY) — Down, Forward, Back, Circle/B
Raiden
- The Storm’s Arrival (CLOSE) — Back, Forward, Back, Triangle/Y
- Second Fatality (MID, FAR) — Down, Forward, Back, Square/X
Rain
- The Red Sea (CLOSE) — Down, Down, Back, Circle/B
- Second Fatality (MID) — Down, Forward, Back, Cross/A
Reiko
- The Impaler (MID) — Down, Down, Back, Triangle/Y
- Second Fatality (CLOSE) — Back, Down, Down, Circle/B
Reptile
- Indigestion (MID, FAR) — Forward, Back, Down, Circle/B
- Second Fatality (CLOSE) — Forward, Down, Back, Cross/A
Scorpion
- Eye-Palling Victory (MID, FAR) — Down, Forward, Back, R2/RT
- Second Fatality (ANY) — Back, Forward, Back, Triangle/Y
Shang Tsung
- Side Effects (CLOSE) — Back, Down, Down, Circle/B
- Second Fatality (MID) — Forward, Down, Back, Triangle/Y
Sindel
- Hair Comes Trouble (MID, FAR) — Down, Back, Down, Square/X
- Second Fatality (MID, FAR) — Back, Forward, Back, Triangle/Y
Smoke
- Hated and Infused (ANY) — Back, Forward, Down, Square/X
- Second Fatality (ANY) — Down, Forward, Back, Triangle/Y
Sub-Zero
- Hairline Fracture (ANY) — Forward, Down, Down, Triangle/Y
- Second Fatality (CLOSE) — Forward, Back, Down, Circle/B
Tanya
- Helping Hands (CLOSE) — Down, Back, Down, Cross/A
- Second Fatality (CLOSE, MID) — Back, Forward, Down, Triangle/Y
MK1 Kameos
| Cyrax | Jax | Sareena | Sonya | Spacing breakdown |
| Darius | Kano | Scorpion | Stryker | |
| Frost | Kung Lao | Sektor | Sub-Zero | |
| Goro | Motaro | Shujinko | Tremor |
Cyrax
- Annihilation (MID) — Forward, Back, Forward, R1/RB
Darius
- Armed & Dangerous (MID) — Down, Back, Forward, R1/RB
Frost
- Breaking Point (MID) — Back, Down, Back, R1/RB
Goro
- Prince of Pain (CLOSE) — Back, Forward, Down, R1/RB
Jax
- Big Boot (FAR) — Down, Forward, Down, R1/RB
Kano
- Heart Ripper (MID) — Back, Down, Forward, R1/RB
Kung Lao
- Klean Kut (MID) — Forward, Back, Forward, R1/RB
Motaro
- Brain Blast (MID, FAR) — Forward, Down, Down, R1/RB
Sareena
- Inner Demon (MID) — Back, Down, Down, R1/RB
Scorpion
- Toasty!!! (MID) — Down, Forward, Down, R1/RB
Sektor
- Kompactor (MID) — Back, Forward, Back, R1/RB
Shujinko
- Five Point Strike (MID) — Down, Back, Down, R1/RB
Sonya
- Kiss (MID) — Back, Forward, Down, R1/RB
Stryker
- Safety Vest (MID) — Forward, Down, Forward, R1/RB
Sub-Zero
- Spine-Rip (MID) — Forward, Down, Forward, R1/RB
Tremor
- Disembowling Ball (ANY) — Down, Forward, Back, R1/RB
Fatality Spacing in Mortal Kombat 1 Explained
We do want to talk about spacing requirements real quick in case you notice some differences. An important part of performing a Mortal Kombat 1 fatality is being a specific distance away from your opponent. Within each character’s move list, they categorize these finishers as Close, Mid, and Far. Unfortunately, the spacing is not universal.
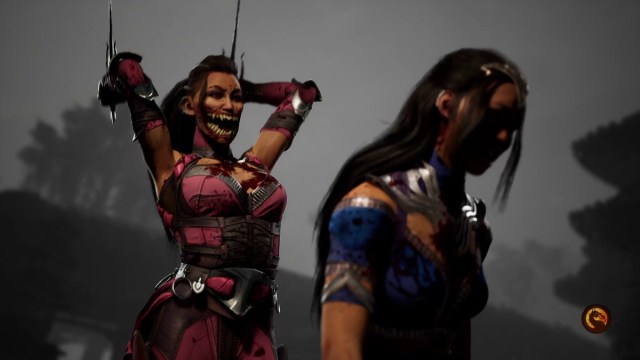
Mileena, Tanya, and Li Mei have Fatalities that are all considered Close, but each has an increasingly larger target space to perform the move. Li Mei’s is basically big enough to encroach into the Mid territory. There are many examples of this throughout the roster.
To provide a better frame of reference, we specified if any of these could be performed from more than the stated distance. We recommend coming back to this list if you have any trouble performing the finisher with what the move sets tell you.
That covers all the Mortal Kombat 1 fatalities and Kameo fight-enders so far. Check out our evolving MK1 Brutalities list while you’re waiting for more (which, honestly, is also pretty gruesome). We have more over at our Mortal Kombat 1 guides hub.


Published: Aug 18, 2023 06:13 pm