The Police HQ is the single most daunting area in Wanted: Dead regarding collectible hunting. New collectibles spawn at this hang out spot after every mission, but the Police HQ also acts as the fourth dedicated mission with its own set of collectibles like any other normal level. Because of the way Police HQ is structured, this guide will break apart the collectibles into different phases.
Where to Find all Police HQ Collectibles in Wanted: Dead
Claw Games
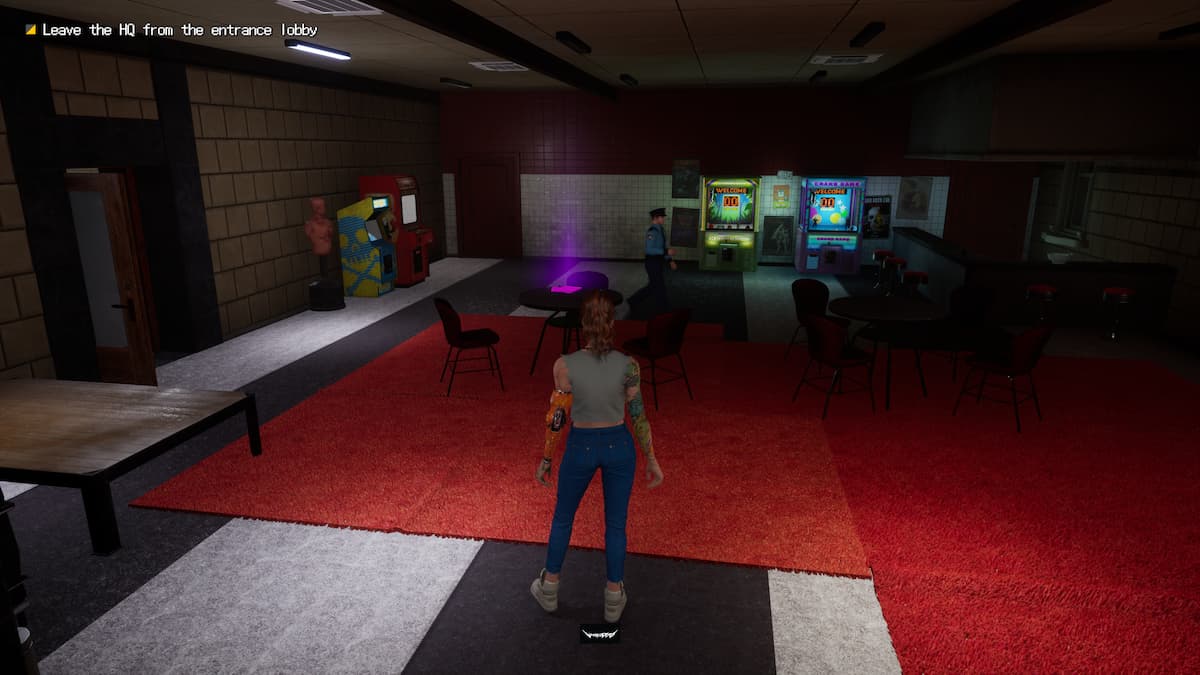
Wanted: Dead spawns you at Police HQ after every mission, but there is a point of no return. After Club Deaf Panther, the Police HQ becomes its own mission, rendering it inoperable after this point. Because of this, you’ll want to take advantage of the arcade before this point of no return.
The arcade is found on the fourth floor adjacent to the employee cafeteria. Here, you will find two different interactive claw machines. One houses only character figures. The other claw machine also houses other categories of collectibles such as music tracks.
You should collect everything from the claw machines before the fourth mission. There is no real strategy to it, relying on luck that the physics don’t glitch as they tend to do. You just have to keep trying until the machines only spawn duplicates. You won’t be able to get everything from the start. New collectibles such as figures are added to the possible claw machine rotation after each mission.
With the claw machines out of the way, it’s time to delve into the normal Police HQ collectibles by phase.
All Police HQ Phase One Collectibles
Police HQ Map Location
 Screenshot by GameSkinny
After finishing the first mission, the game spawns you in the fourth floor cafeteria. The Police HQ Map is found on the first table to your left, slightly behind you.
Apartment Report & Richter’s Profile Locations
 Screenshot by GameSkinny
Enter the doorway from the cafeteria into the arcade room. From here, exit through the only other doorway. After entering the hallway, enter the first door to your right. This is the Captain’s Office. Both the Apartment Report and Richter’s Profile are found in this room.
Dauer HQ Report Location
 Screenshot by GameSkinny
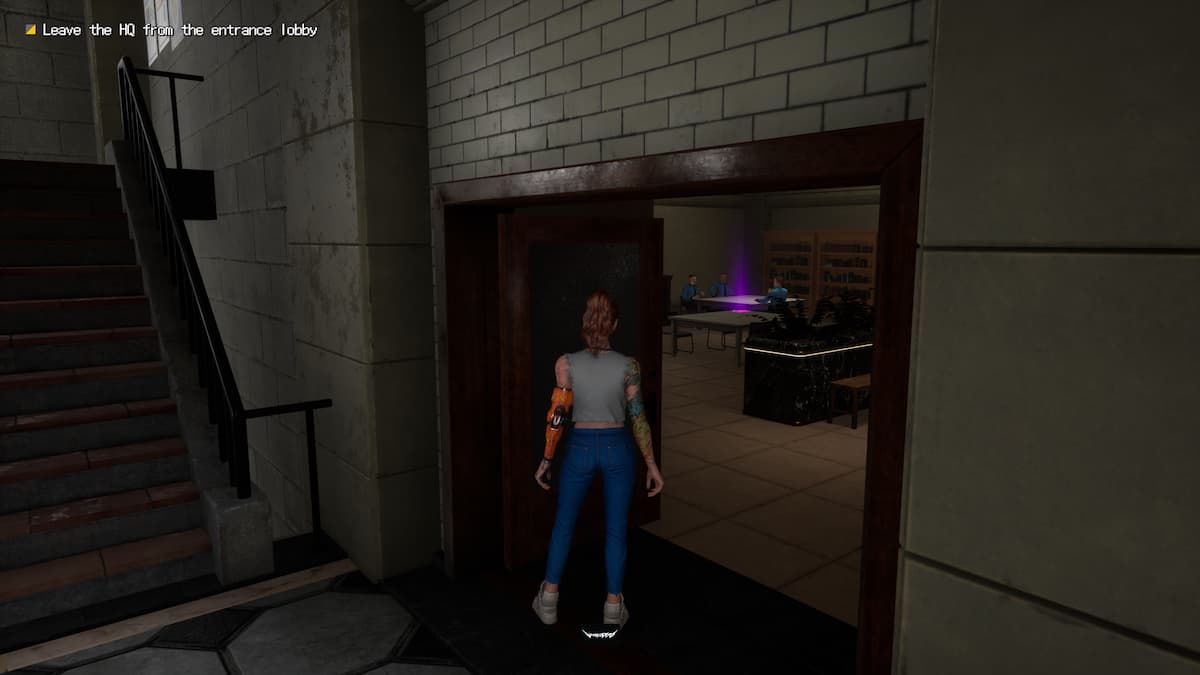
After leaving the Captain’s office, walk down the hallway to your right. Keep following the hall until you see the double doors in front of you pictured above.
 Screenshot by GameSkinny
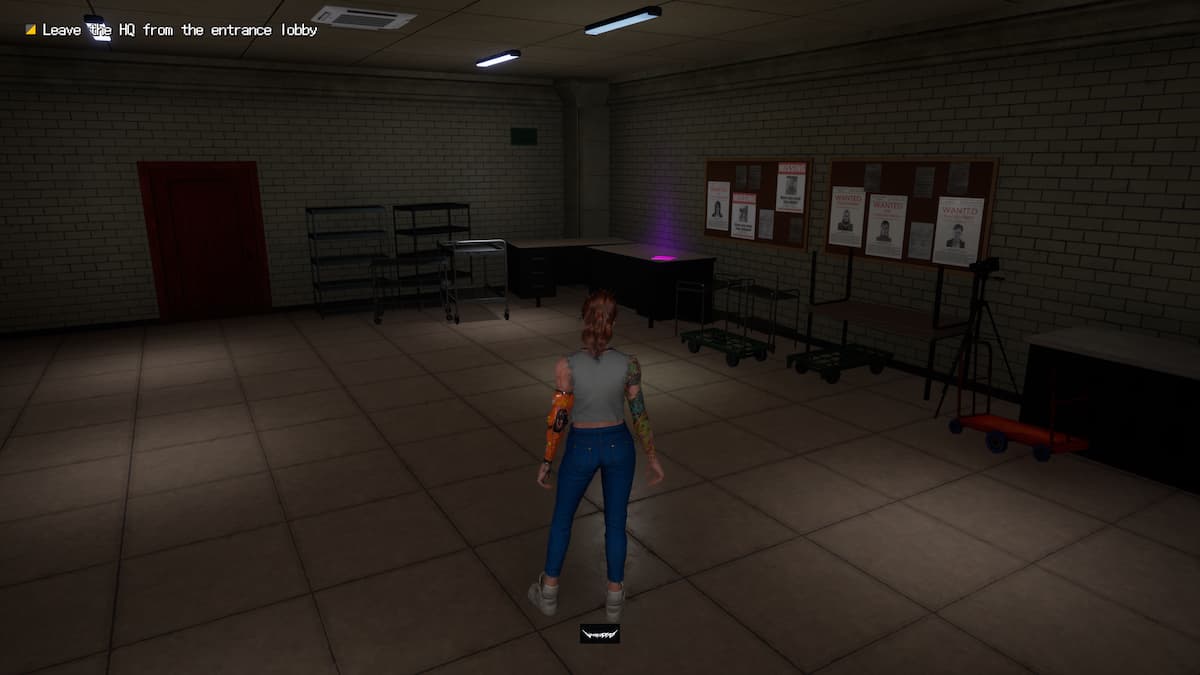
Enter this room and look to your right. The Dauer HQ Report is on the first desk toward the right half of the room.
Stone’s Profile Location
 Screenshot by GameSkinny
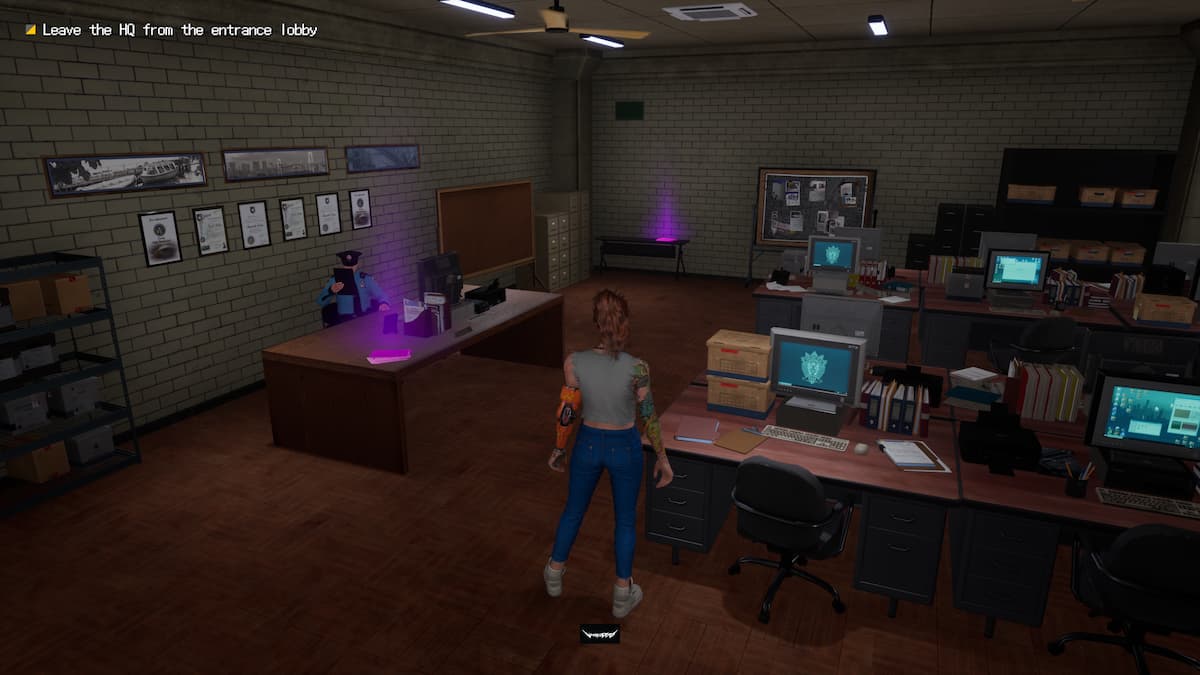
After leaving this office space, turn to your right and continue hugging the wall as you walk. The first room to your right has a sign out front that reads “Special Security Division”. Enter this room. Stone’s Profile is on the table at the back of the room next to the exercise equipment.
Apartment Incident Location
 Screenshot by GameSkinny
With that out of the way, head to the third floor either through the staircase or elevator. While on the third floor, make sure Hannah is facing the elevator doors in the center between both wings of the Police HQ. While facing the elevator doors, take the hallway to your right pictured above.
 Screenshot by GameSkinny
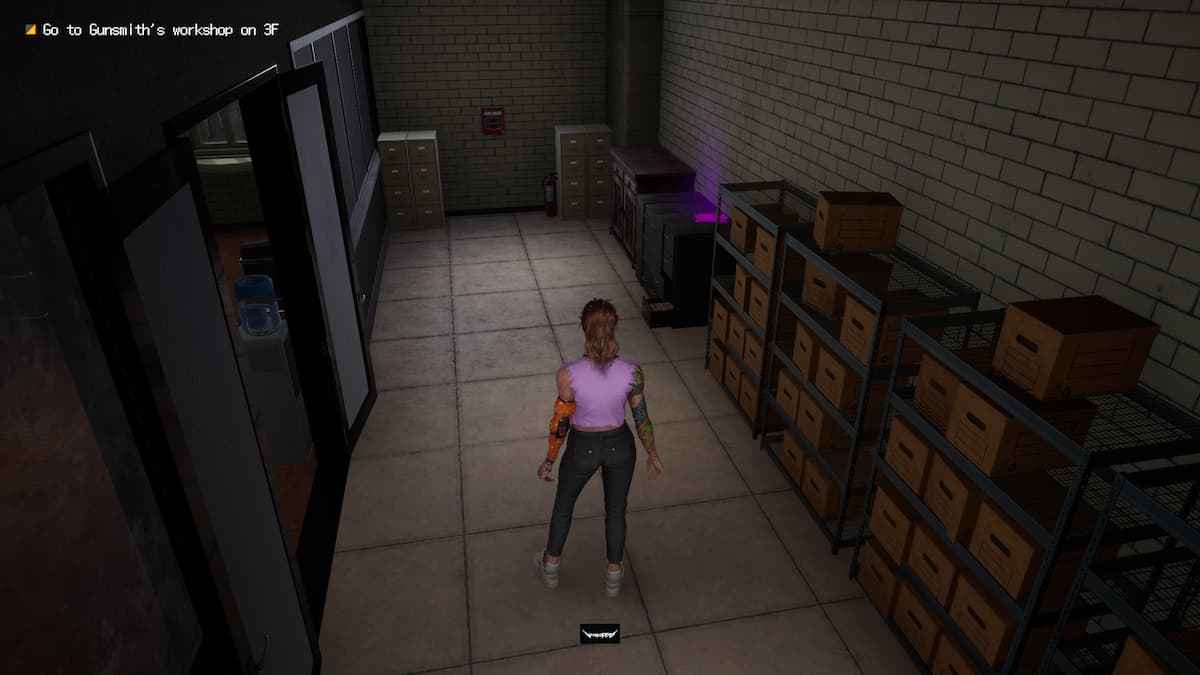
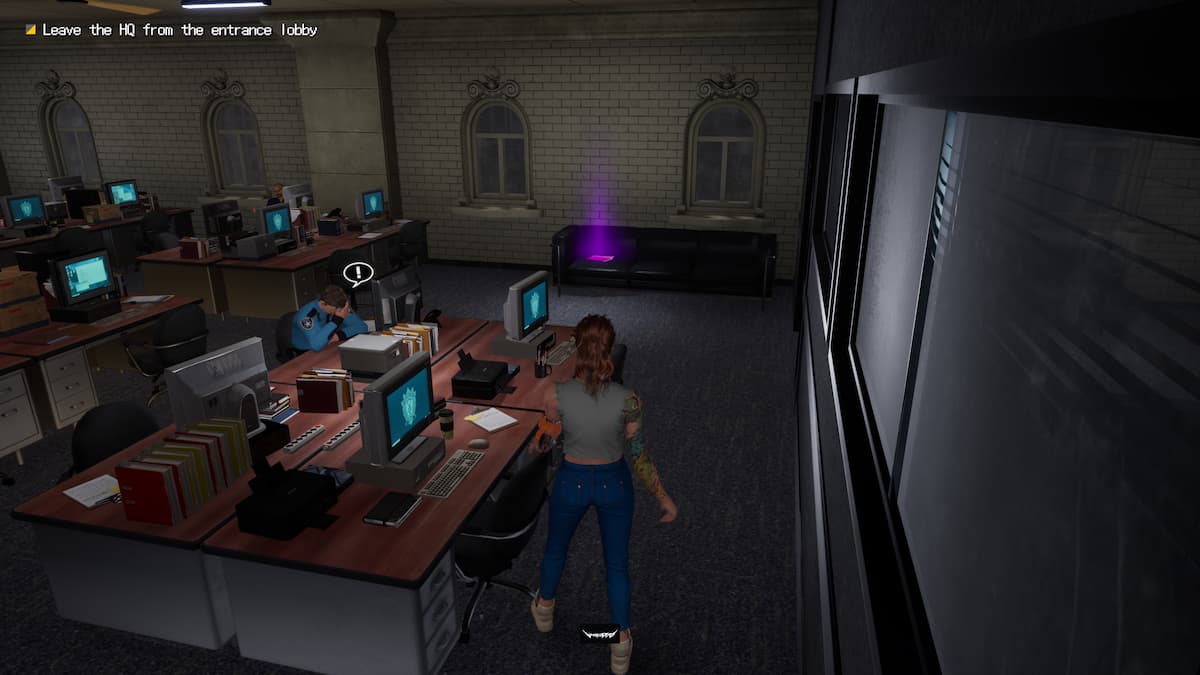
After moving past the set of double doors, take the first right you see. This takes you to a narrow hallway with an office space to the left. The Apartment Incident collectible is at the end of the hallway on top of some filing cabinets lining the wall to the right.
Cortez’s Profile Location
 Screenshot by GameSkinny
After nabbing the Apartment Incident, travel to the second floor. You’ll want to face the elevator doors again. However, this time, take the path behind the elevator toward the right. Enter the first room to your right next to the staircase. Cortez’s profile is on the first bench when you enter the room.
 Screenshot by GameSkinny
Spider Tanks Report Location
 Screenshot by GameSkinny
Head back around to the elevators on this second floor. Instead of taking the path behind the elevators, go through the immediate hallway to the right. If you keep following this path, you’ll end up coming across the small flight of steps pictured above.
 Screenshot by GameSkinny
Take these steps and walk past the office space until you enter another doorway into a smaller office. The Spider Tanks Report is in the corner of this room on top of some boxes.
Herzog’s Profile Location
 Screenshot by GameSkinny
Herzog’s Profile is on the reception desk on the first floor of Police HQ.
Captain’s Profile Location
 Screenshot by GameSkinny
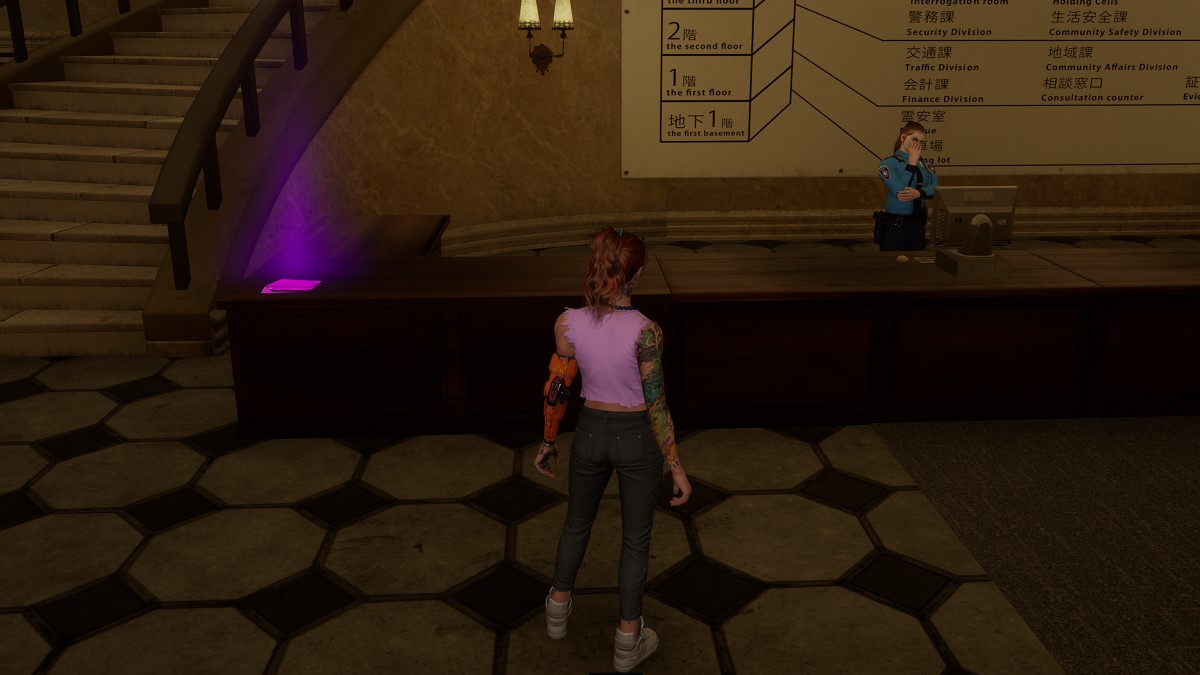
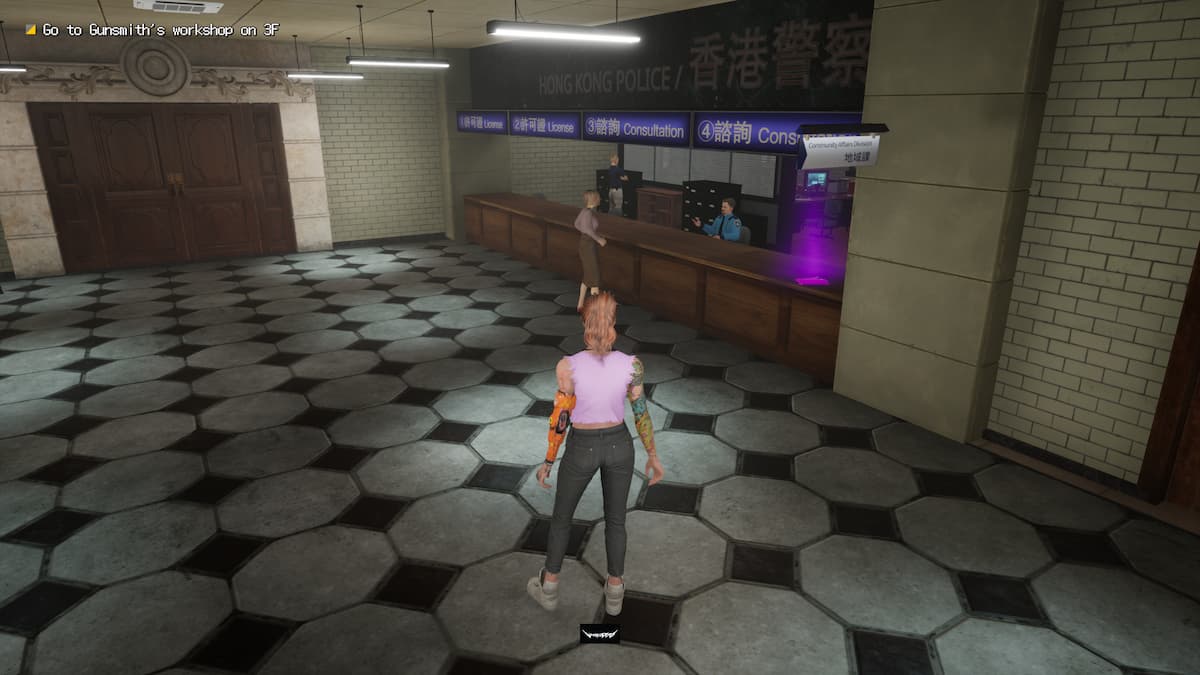
From the first floor reception desk, take the room to the left beside the staircase. Follow this large hallway until you reach the consultation desk at the end. This is where you’ll find Captain’s Profile.
All Police HQ Phase Two Collectibles
October’s Profile Location
 Screenshot by GameSkinny
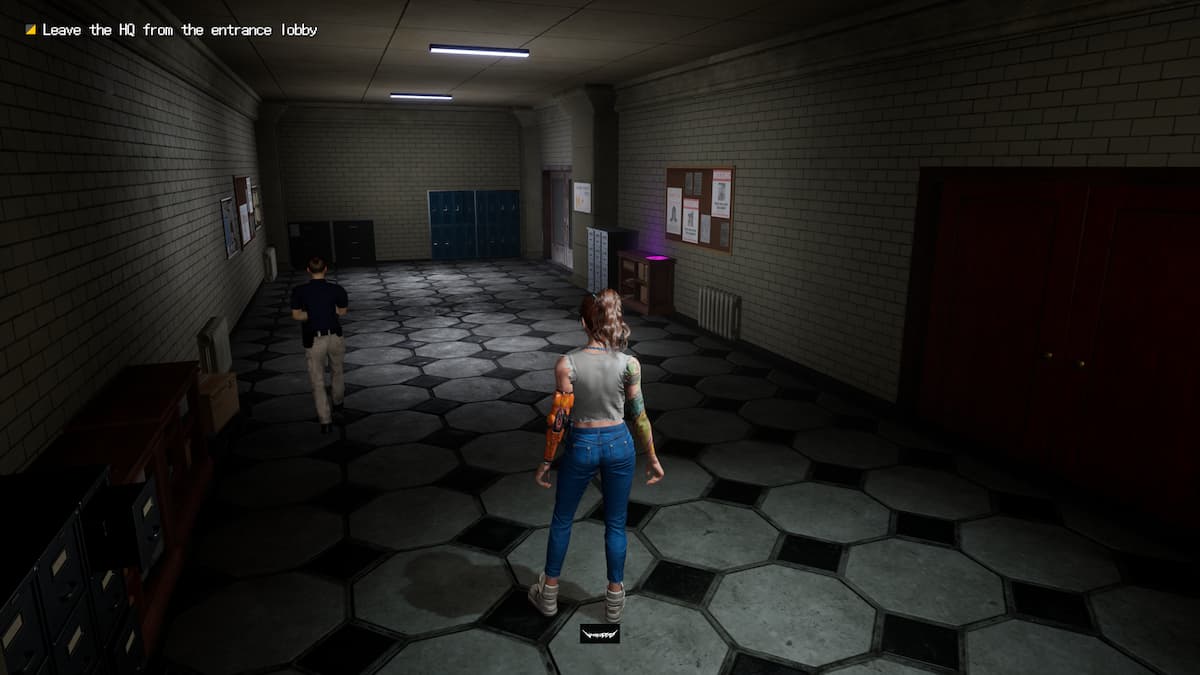
After the second mission, you spawn in the interrogation room on the second floor. Leave the room and exit past the doorway into the main hall, taking a left as you enter the main hall. October’s Profile is on top of a desk resting against a wall near the end of this hallway.
August’s Picture Location
 Screenshot by GameSkinny
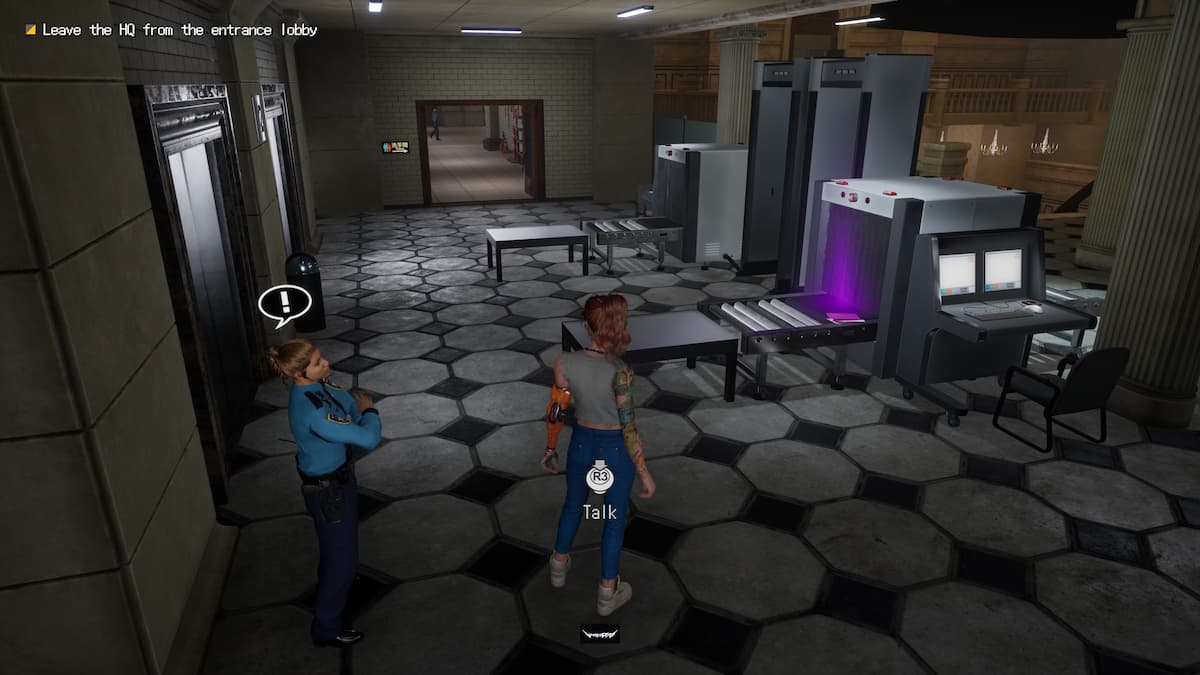
From October’s Profile, turn around and head toward the opposite end of the hall. Keep going until you reach the elevators. August’s Picture is chilling at the metal detectors in front of the second floor elevators.
Arcade Magazine Location
 Screenshot by GameSkinny
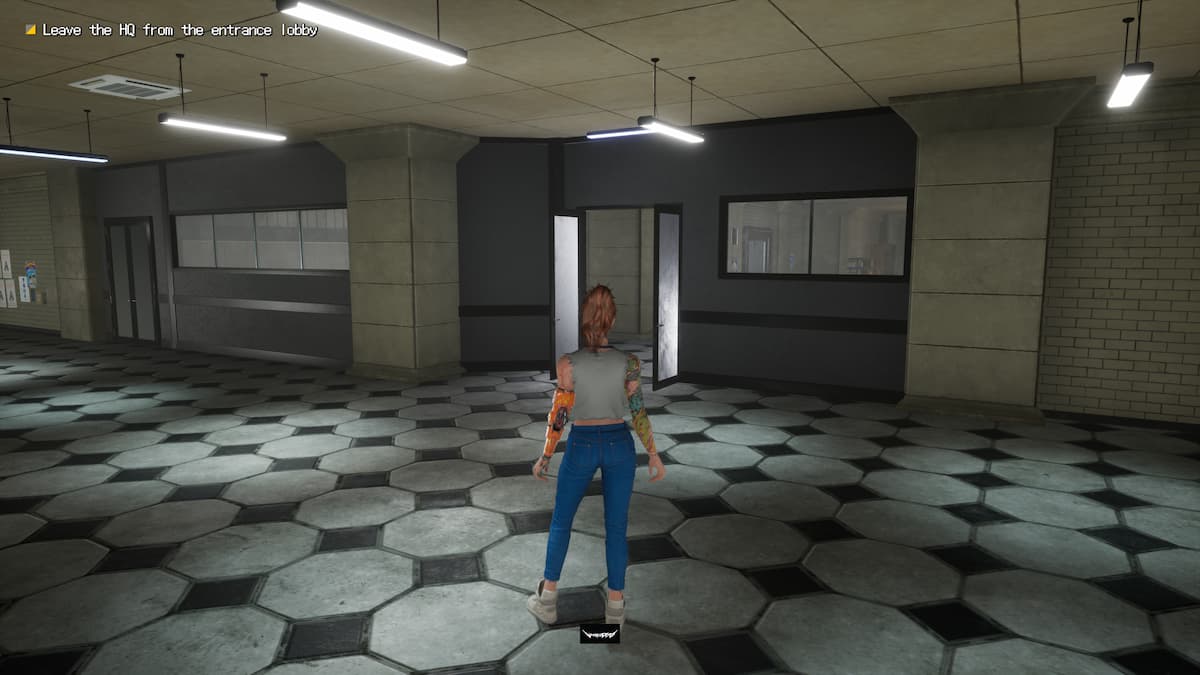
Move to the first floor and go through the hallway next to the reception desk and staircase. Instead of continuing straight ahead, turn right into the double doors pictured above. The Arcade Magazine is on top of the only desk at the end of the hallway.
Paws and Friends Location
 Screenshot by GameSkinny
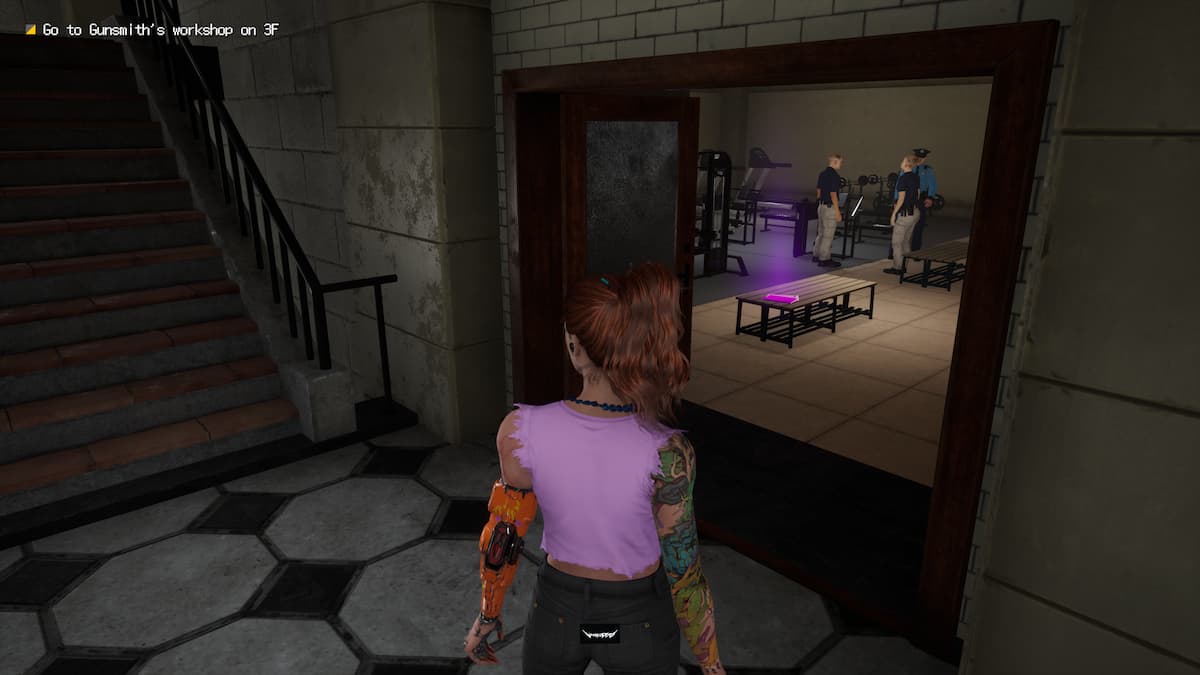
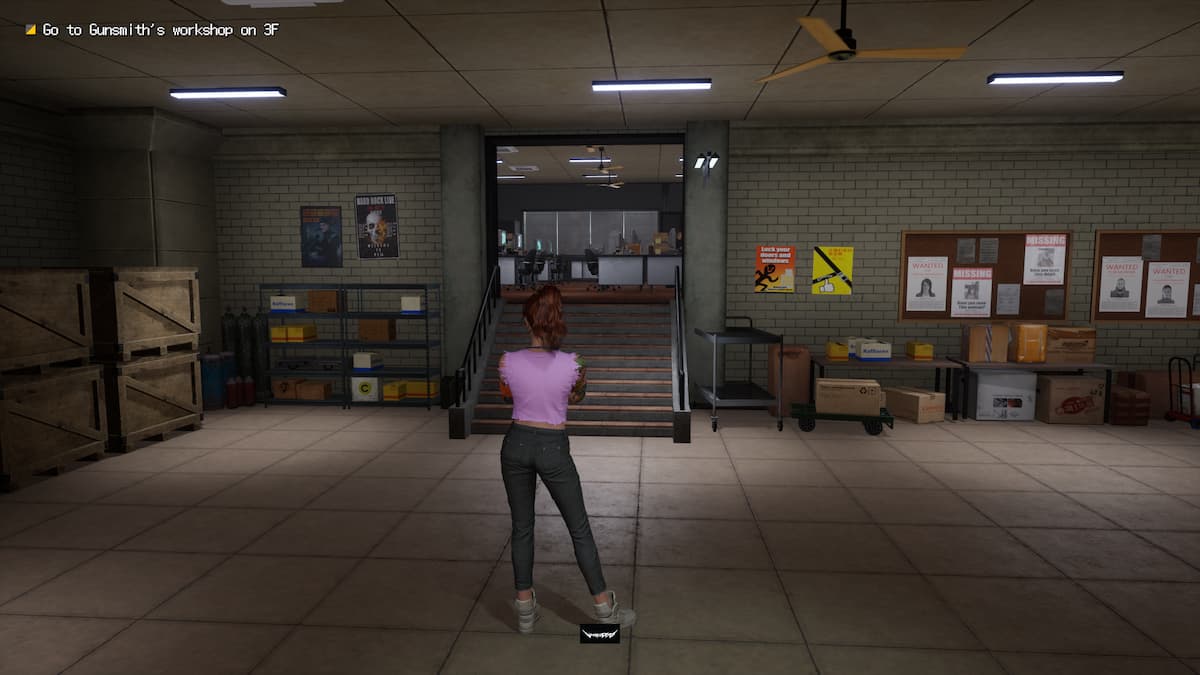
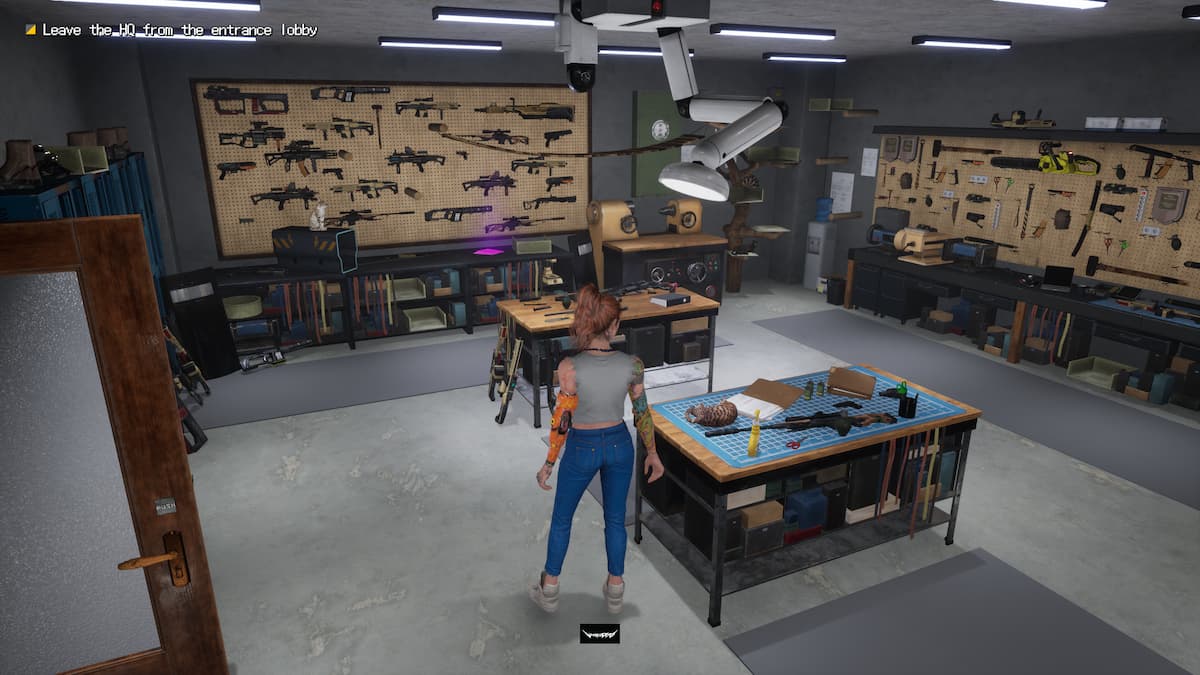
Now, travel to the third floor. While facing the elevator doors, take the wing toward your left side. There will be a shooting range at the end of the path along the left side of the hallway. Enter the workshop across from it to find the Paws and Friends collectible.
Ramen Shop Guidebook Location
 Screenshot by GameSkinny
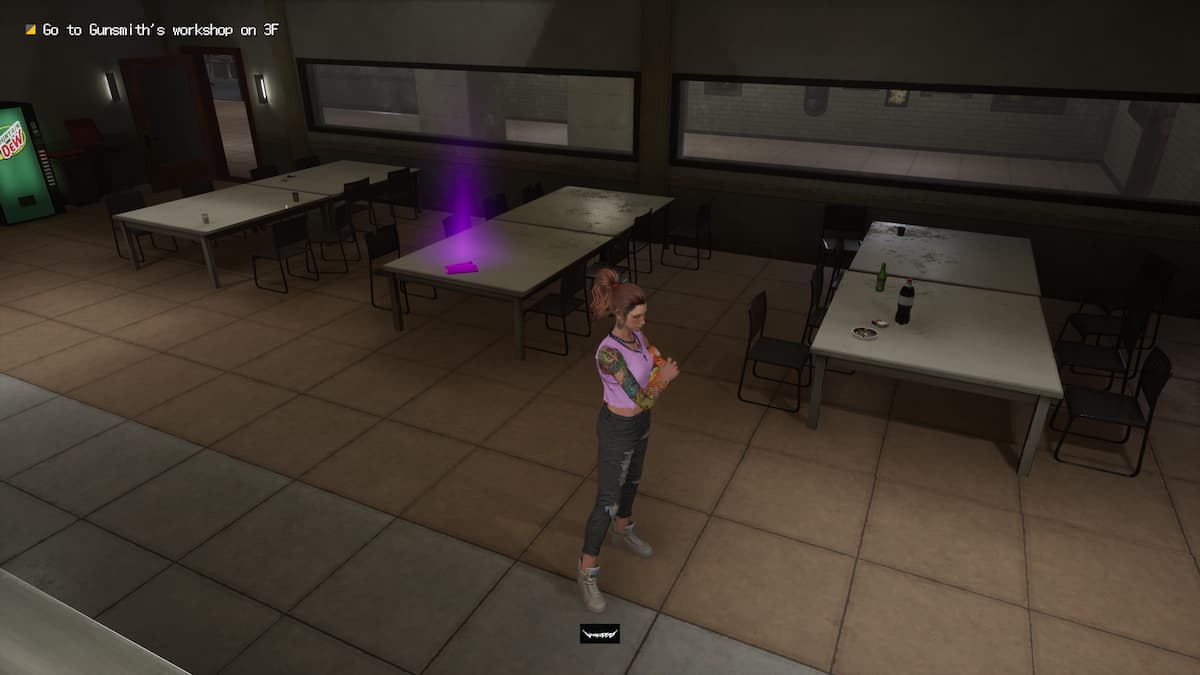
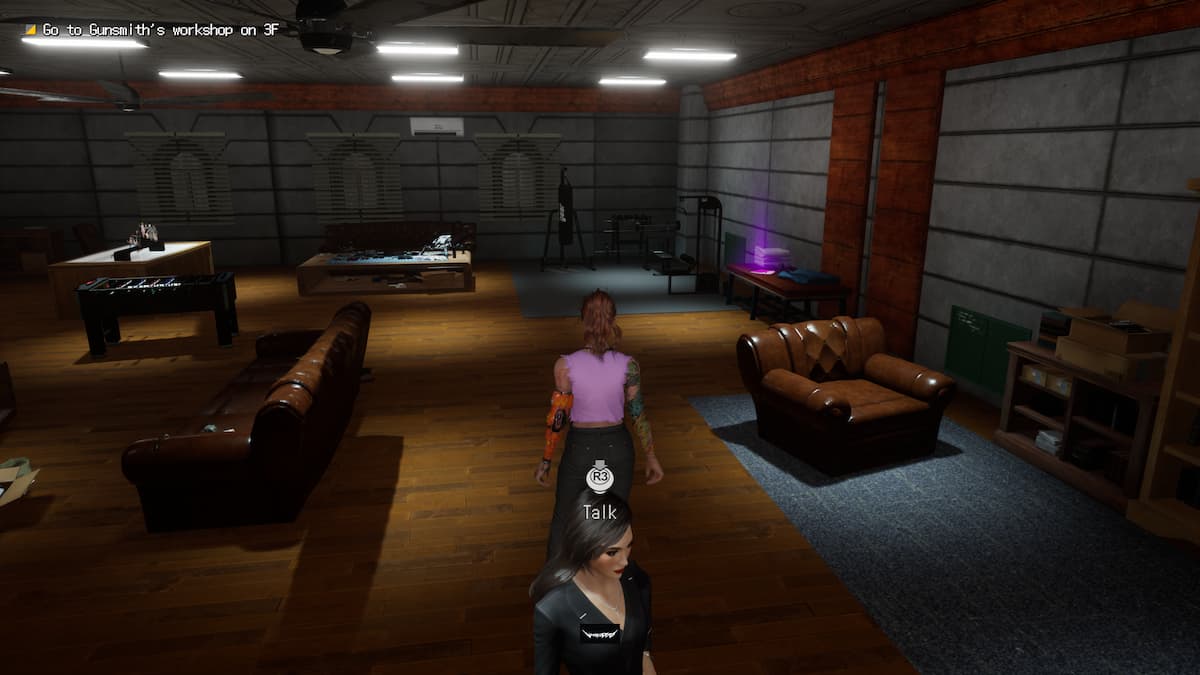
Return back to the third floor elevators. Instead of taking the opposite hallway from the previous collectible, take the path behind the elevators on the right side. Enter the room next to the staircase. The Ramen Shop Guidebook is sitting on one of the unoccupied tables.
Gunsmith’s Profile Location
 Screenshot by GameSkinny
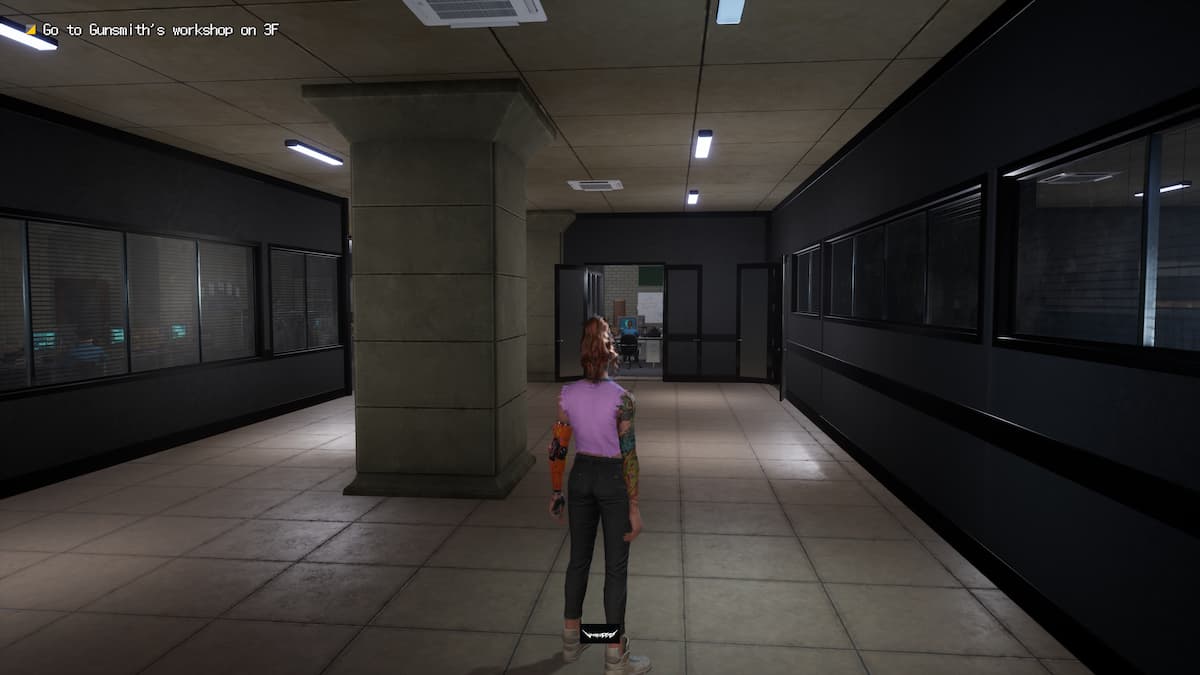
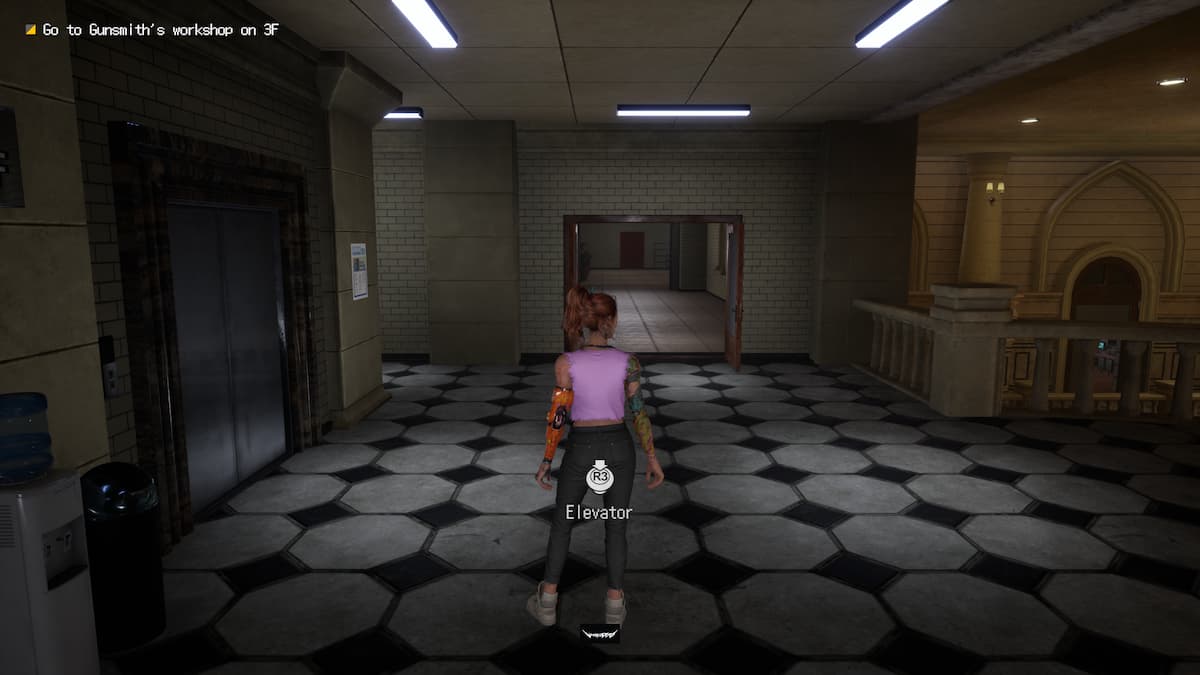
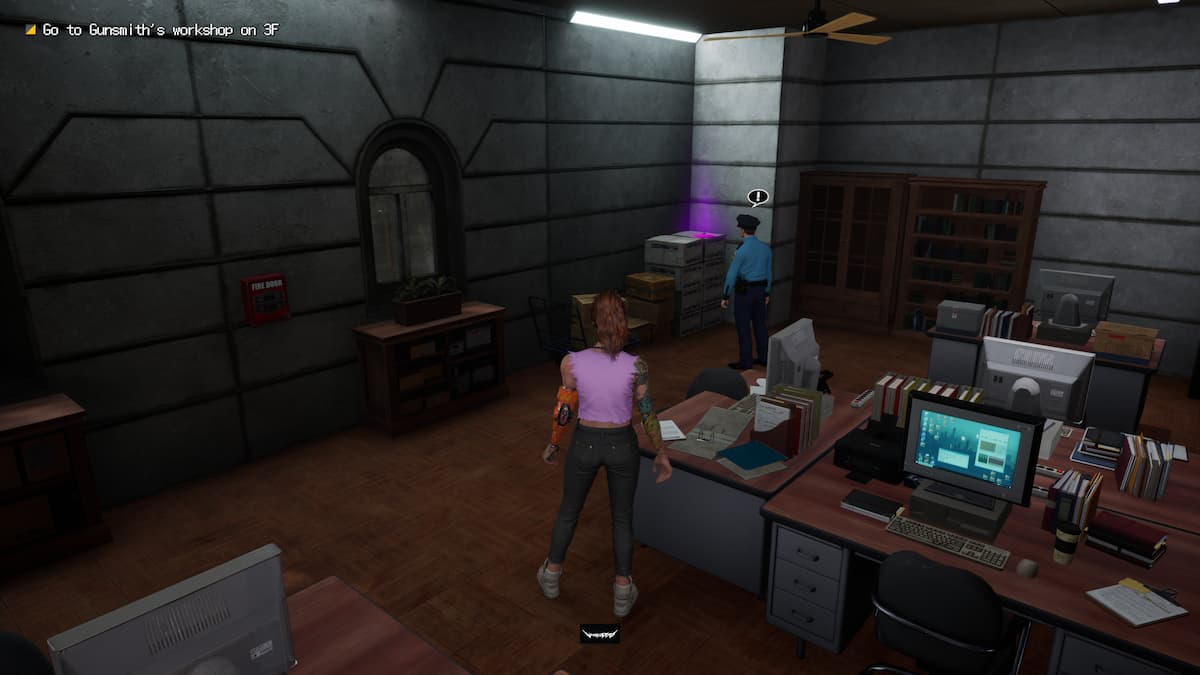
Exit the room you nabbed the Ramen Shop Guidebook from through the only other doorway. From this exit, take the hall to your left. You’ll find the Gunsmith’s Profile on top of the desk at the end of the hall next to the red door you can’t interact with.
Madame Wong’s Profile & Kowloon Park Incident Location
 Screenshot by GameSkinny
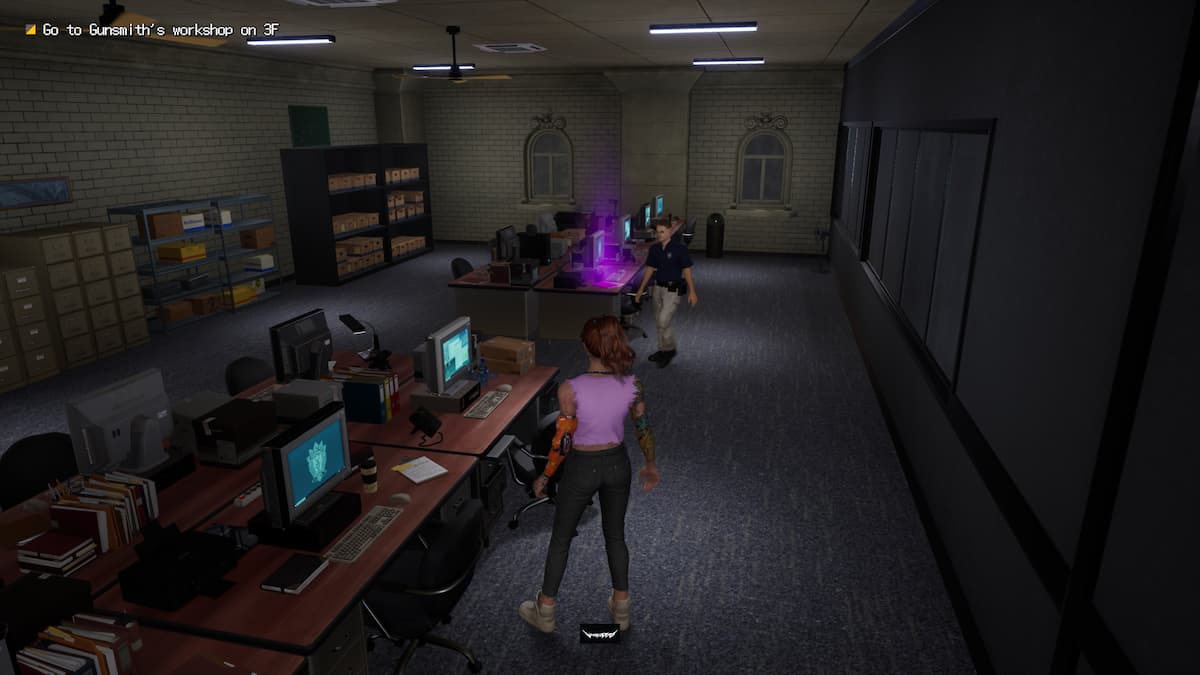
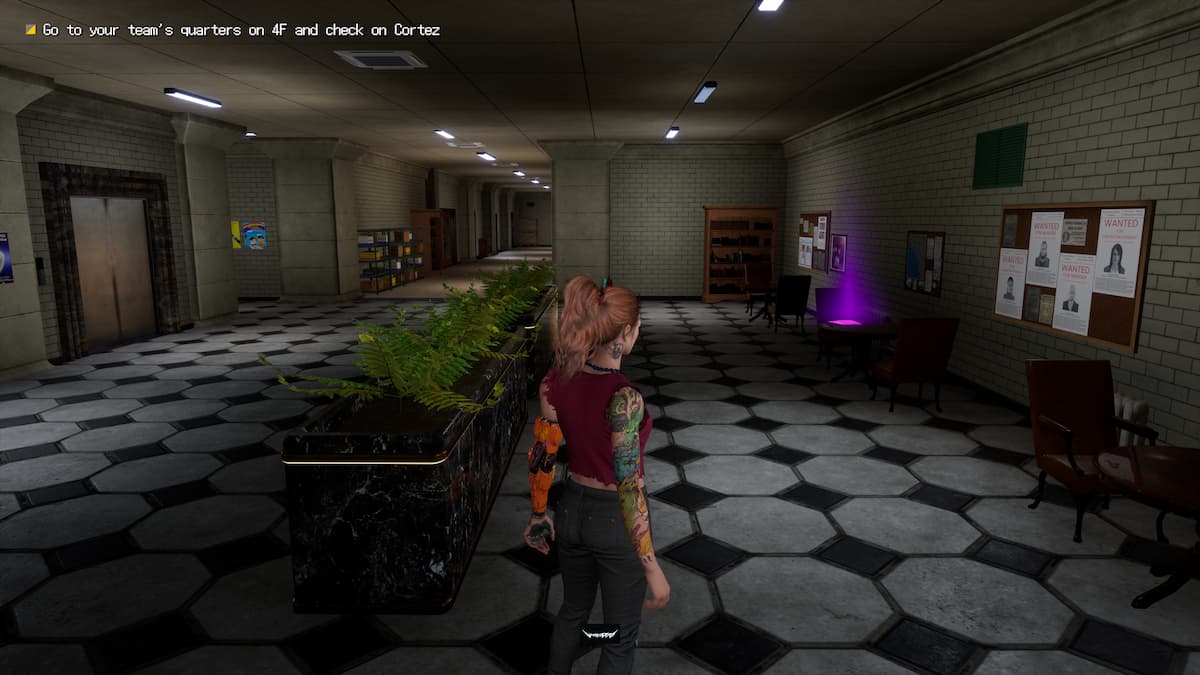
After grabbing the Gunsmith’s Profile, turn around. You’ll see the double doors leading back to the elevators. Ignore this path, taking the narrow hallway to the left instead. After walking through this hall, take your first left into the office space. Here, you’ll find Madame Wong’s Profile on the desk the NPC is sitting at overlooking the rest of the office space. The Kowloon Park Incident collectible is at a table at the corner of this end of the room.
Doc’s Profile Location
 Screenshot by GameSkinny
For this next collectible, travel to the fourth floor. While facing the elevators, take the hall toward the right wing of Police HQ. Hug the wall until you see the first open doorway to your left. There will be missing persons posters plastered on the wall just before the door. Enter this room and take an immediate left. From here, you’ll see a much tinier room past another small doorway. This is where you can nab Doc’s Profile.
Ramen Shop Location
 Screenshot by GameSkinny
The Ramen Shop collectible is on a table at the arcade room on the fourth floor, which is next to the cafeteria and nearby Captain’s office.
Mr. X’s Profile Location
 Screenshot by GameSkinny
After leaving the arcade room and heading into the fourth floor’s main hall, walk past Captain’s office. Enter the first open doorway to your right past his office. You’ll find Mr. X’s Profile on the sofa ahead of you.
Restrained Android Report Location
 Screenshot by GameSkinny
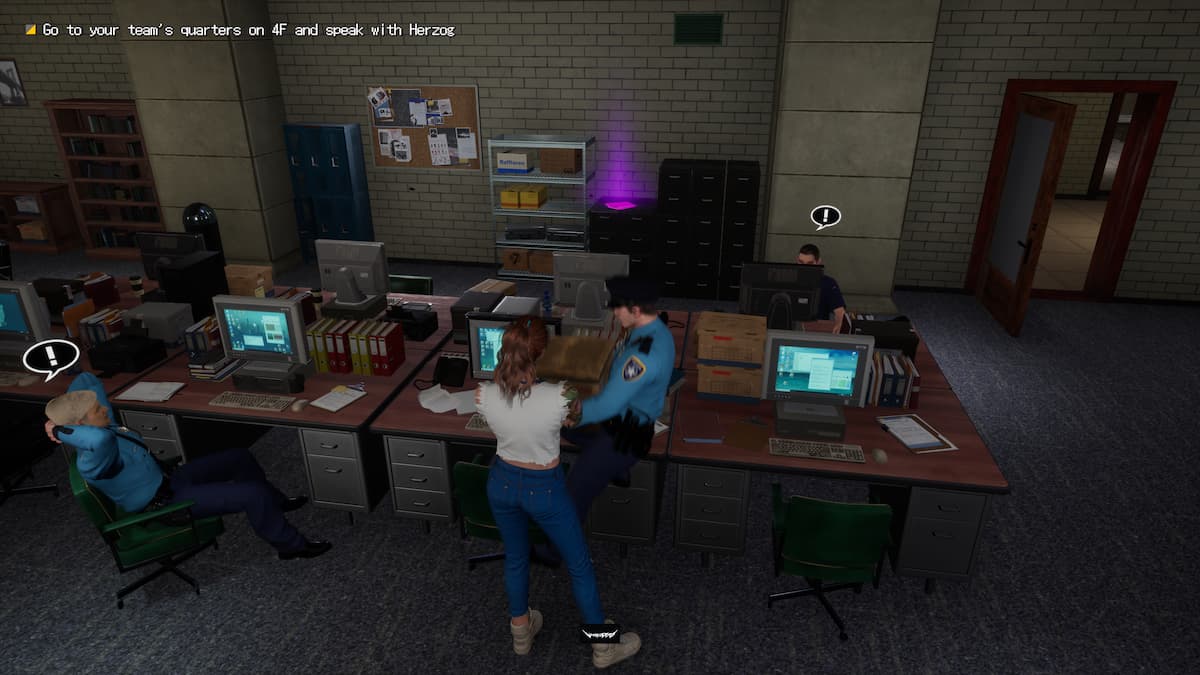
From the arcade room, head into the large hallway past the Captain’s office. Keep moving forward until you spot an open office space to the left. There will be a sign that reads, “Criminal Investigation Division”. Walk through to find the Restrained Android Report sitting atop filing cabinets at the wall near the center of the room.
August’s Profile & Dauer Incident Location
 Screenshot by GameSkinny
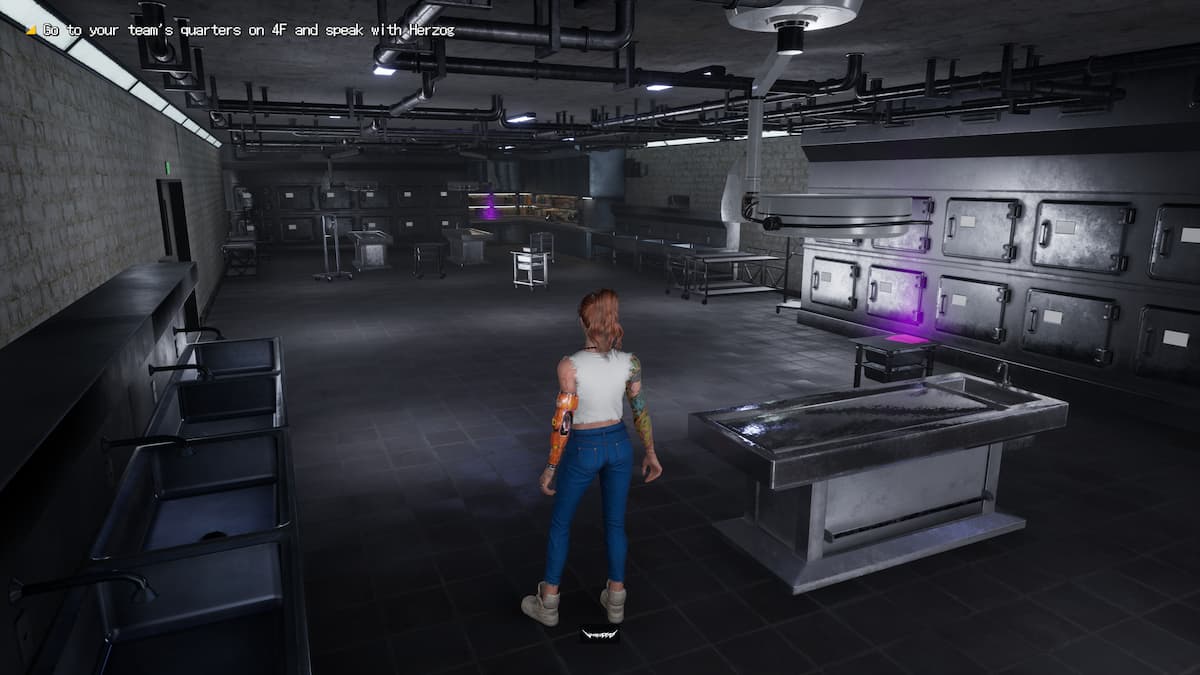
Before starting the third mission, take the elevators down to the morgue. This is where you’ll find both August’s Profile and the Dauer Incident collectible.
All Police HQ Phase Three Collectibles
Mustafa’s Profile Location
 Screenshot by GameSkinny
From the spawn point after finishing the Club Deaf Panther stage, take your first right into the hallway that leads to the interrogation rooms. Keep moving, then walk through the final doorway to your left. Mustafa’s Profile is on top of the interrogation room desk.
Club Incident Report Location
 Screenshot by GameSkinny
From the first floor reception desk, take the doorway to its left beside the staircase. Immediately afterward, walk through the double doors to your right. The Club Incident Report is on one of the tables opposite to the elevators on this floor.
ENGEL Shield’s Report Location
 Screenshot by GameSkinny
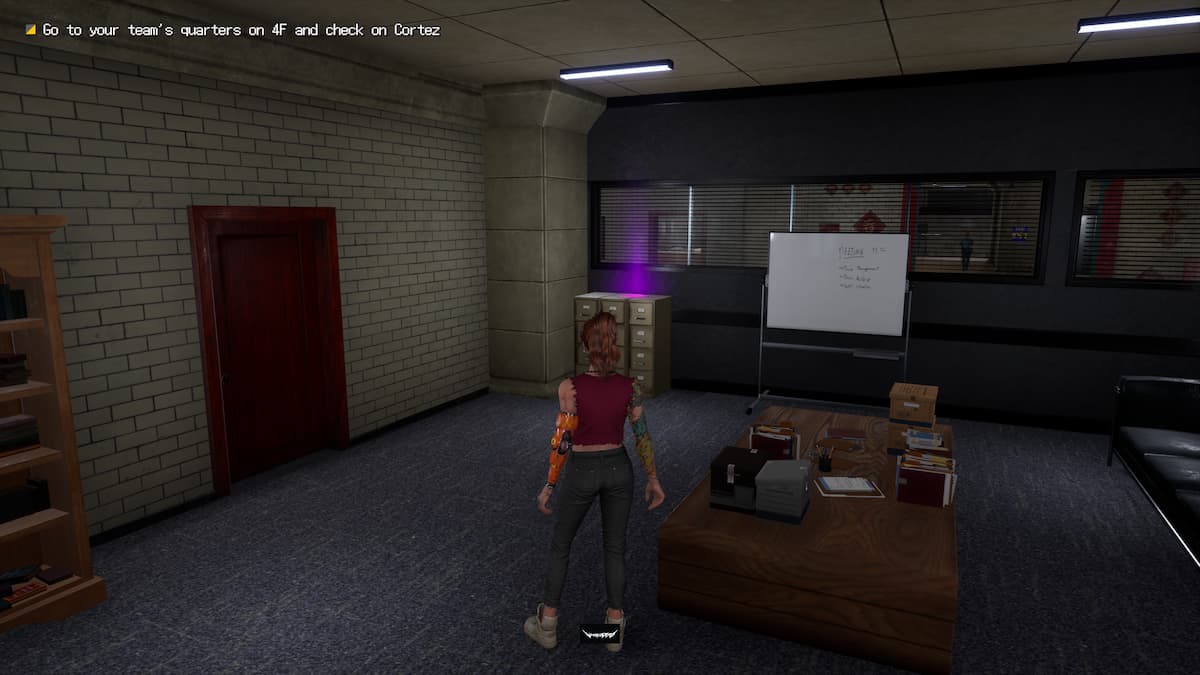
From the fourth floor arcade, take the first right past Captain’s office. You’ll see a sofa on the opposite end of the room from where you entered. Take the doorway next to the sofa to enter a smaller office. The ENGEL Shield’s Report is on top of the filing cabinets next to the white board.
Kowloon Park Incident Report Location
 Screenshot by GameSkinny
Leave this room to enter the much larger office space it connects to. Walk forward a bit and you’ll find the Kowloon Park Incident Report along the wall nearby the second entrance to the room.
Club Deaf Panther Location
 Screenshot by GameSkinny
Exit the previous room and enter the walk-in office space at the opposite end of the hall. You’ll find the Club Deaf Panther collectible in the far right corner of the room from where you entered.
Kolchak’s Profile Location
 Screenshot by GameSkinny
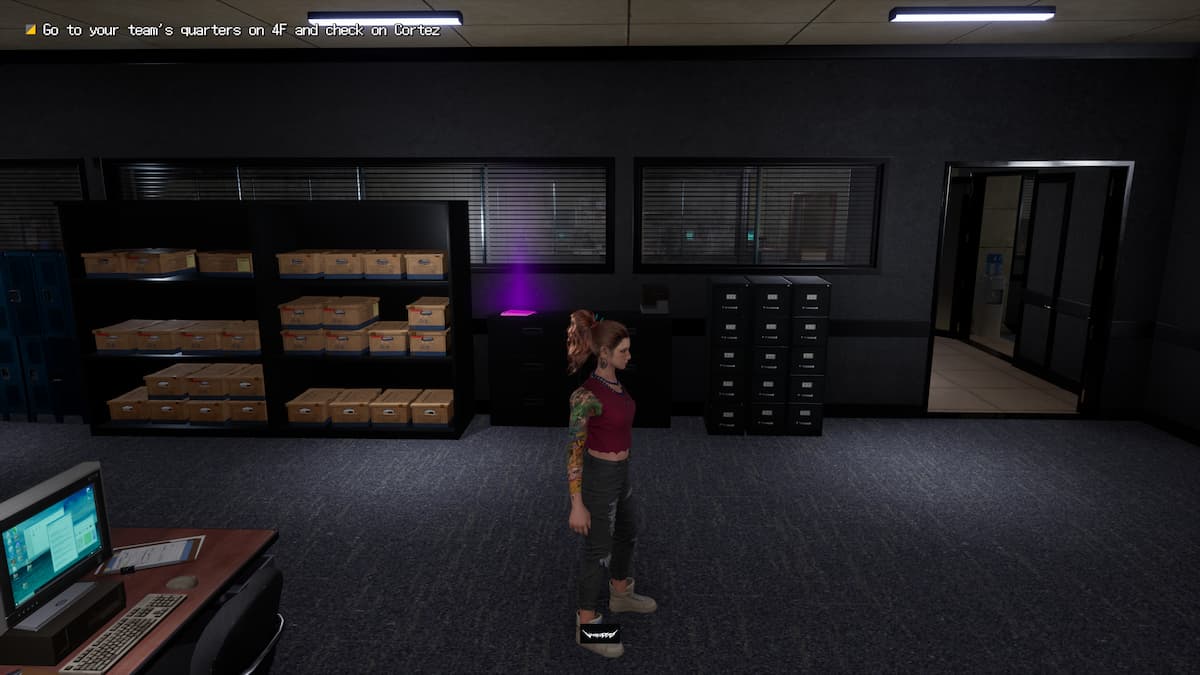
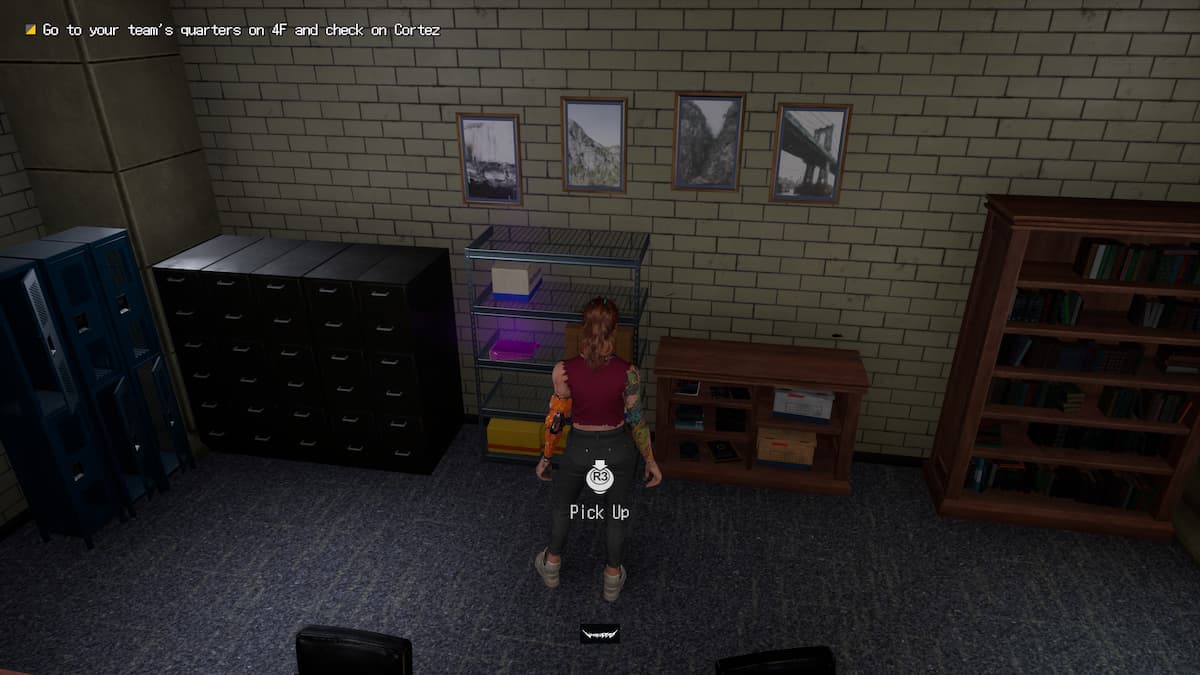
Kolchak’s Profile is next to the filing cabinets at the far end of the room on the other side. There are four framed pictures on the wall above the collectible.
All Police HQ Mission Collectibles
Anything you haven’t done yet at Police HQ, including the claw game collectibles, will no longer be accessible once you start the proper Police HQ mission. This comes right after the Club Deaf Panther mission, so be aware of this point of no return. The proper Police HQ mission turns the once cozy hang out spot into a traditional linear level with its own set of collectibles.
ENGEL Soldier’s Report Location
 Screenshot by GameSkinny
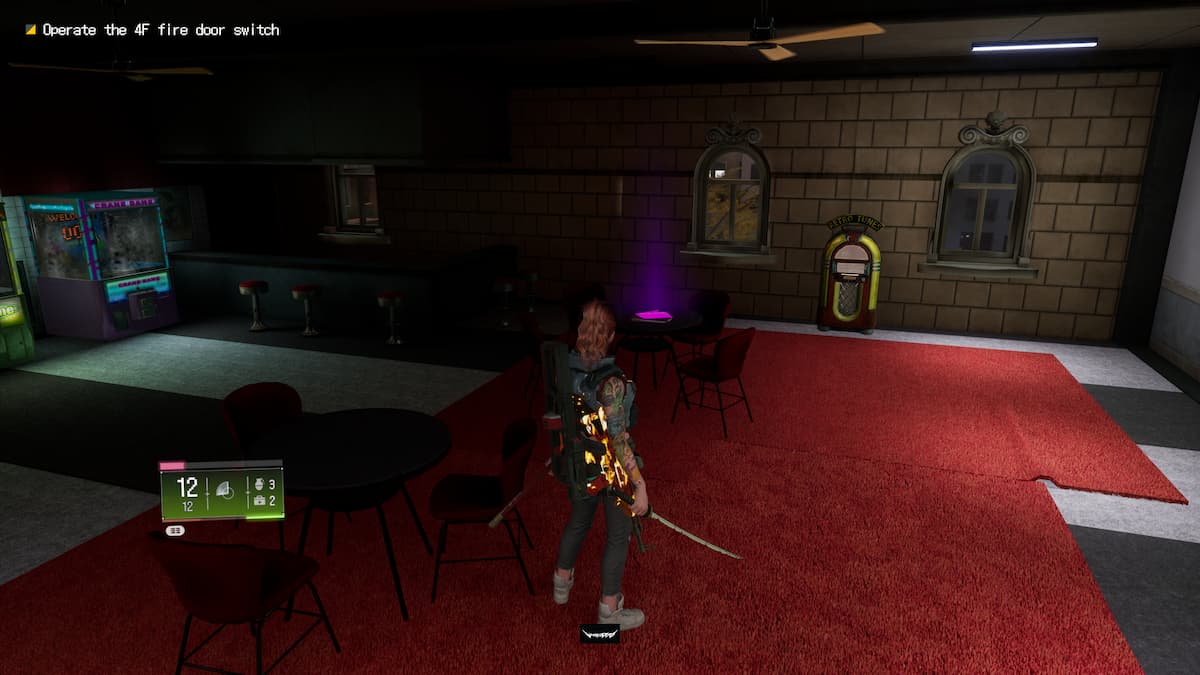
The mission’s critical path will ask you to activate a fire switch on the fourth floor in the cafeteria. Before doing so, don’t forget to grab the ENGEL Soldier’s Report from the table in the arcade room.
ENGEL Melee’s Report
 Screenshot by GameSkinny
Later on in the level, you’ll reach a checkpoint in front of a set of elevators with the following area looking like a training room. After clearing the enemies here, the sloped path downward is the only way forward.
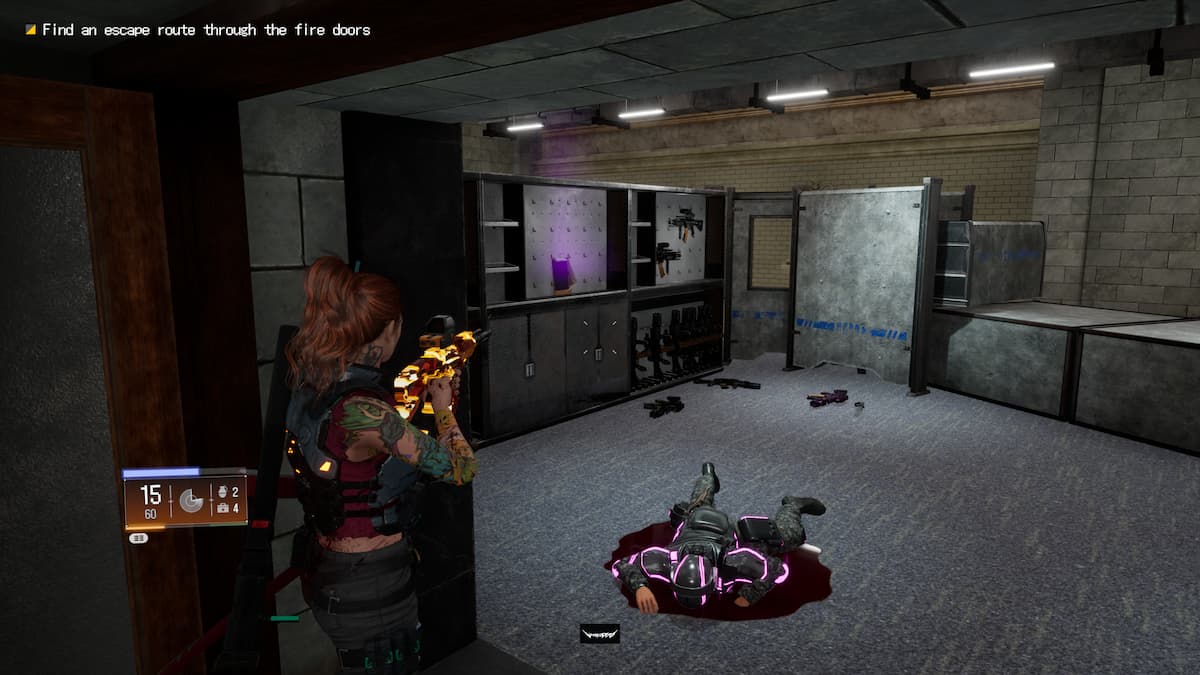
Once you’ve reached the room’s lower level, head through the double doors which enemies will have spawned out of. The ENGEL Melee’s Report is on the gun rack in this dead-end.
ENGEL Heavy’s Report
 Screenshot by GameSkinny
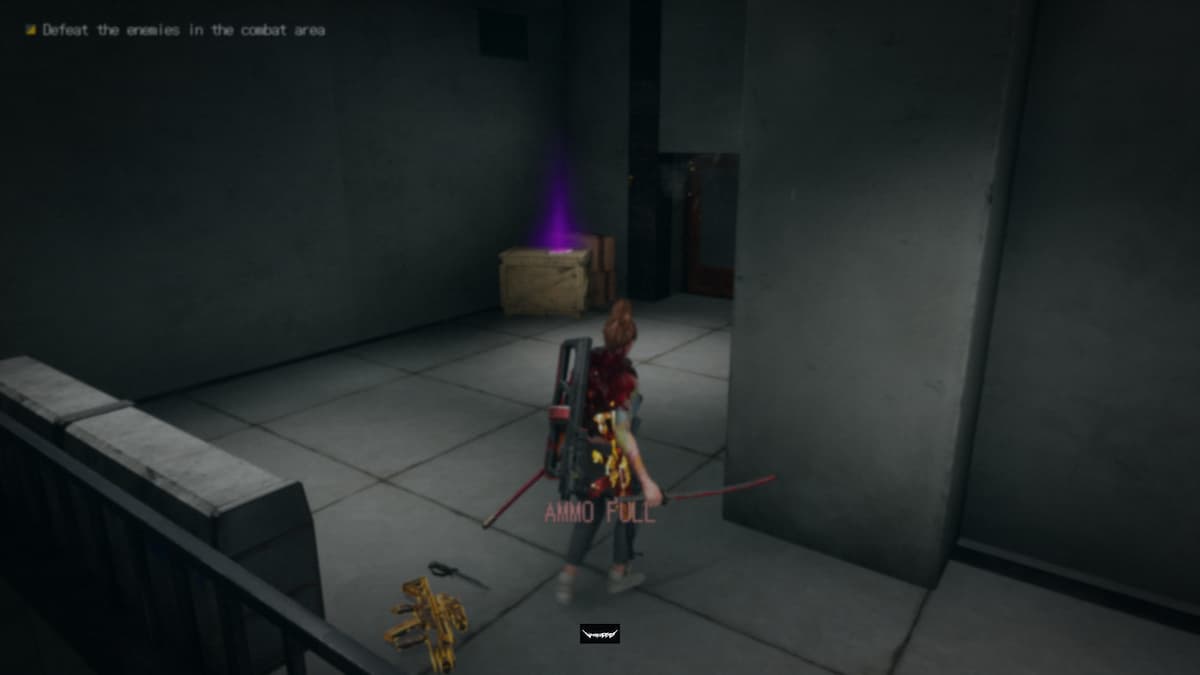
Shortly after this, you’ll enter a space that looks more like a hangar than a typical training room. Take the stairs to your immediate right, where you’ll find the ENGEL Heavy’s Report on top of a crate at the end of this path.
ENGEL Melee Elite’s Report
 Screenshot by GameSkinny
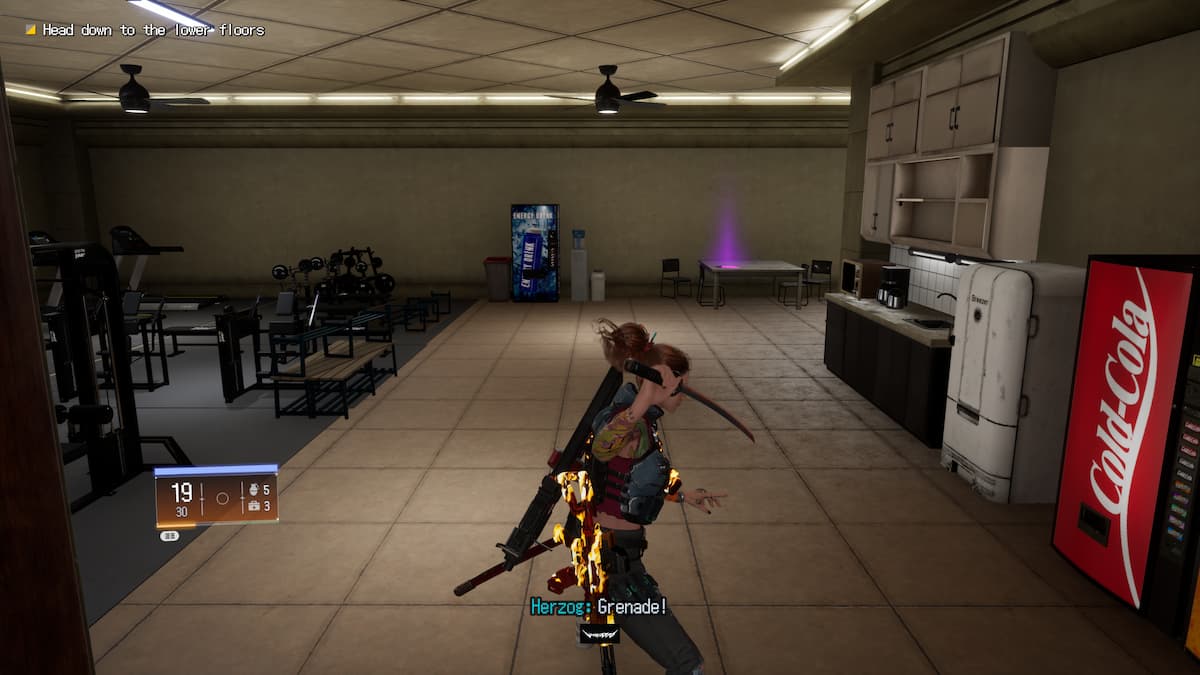
This next collectible is almost impossible to miss. The ENGEL Melee Elite’s Report is sitting on the table in the pictured room that you must travel through in order to progress. There’s a sink, fridge, and vending machine with exercise equipment taking up the other half of the room.
ENGEL Ninja’s Report
 Screenshot by GameSkinny
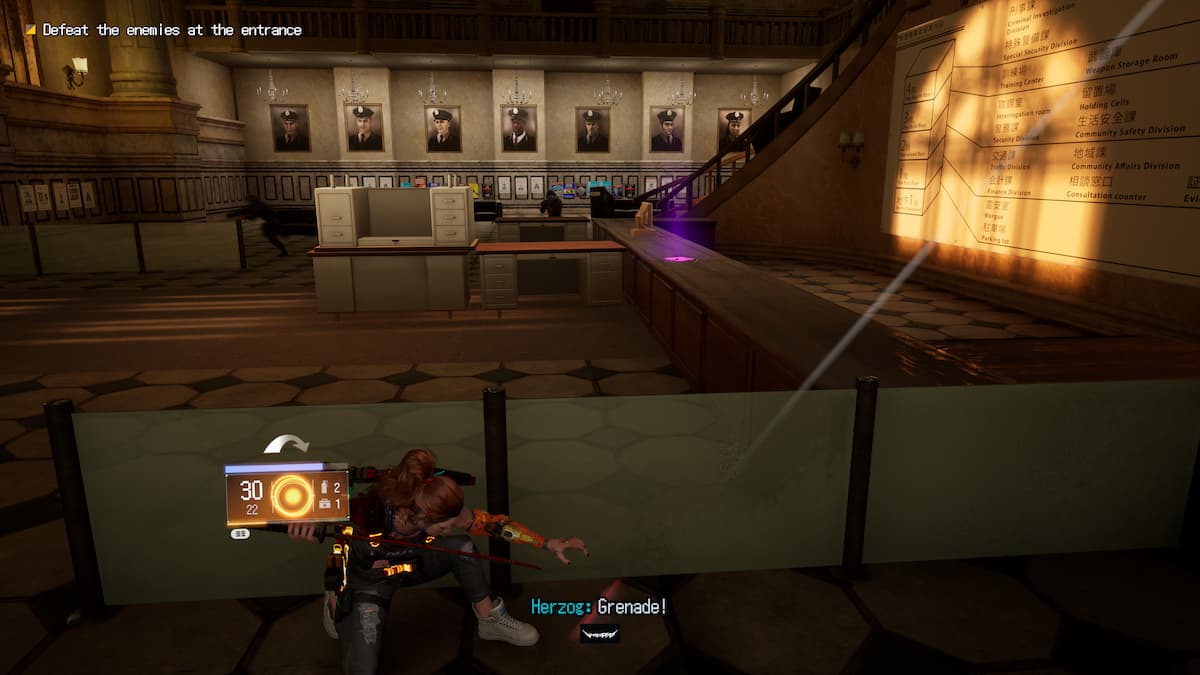
The final Police HQ collectible is another difficult one to miss. As you fight through the level, you’ll need to clear out the first floor. The ENGEL Ninja’s Report is on top of the reception desk.
Those are all the Police HQ collectibles. After making it through such a daunting list, have fun with the much less collectible intensive final mission, Kowloon Street. Additionally, you can also check out our Wanted: Dead review.
Featured image by GameSkinny


Published: Feb 4, 2023 11:43 am