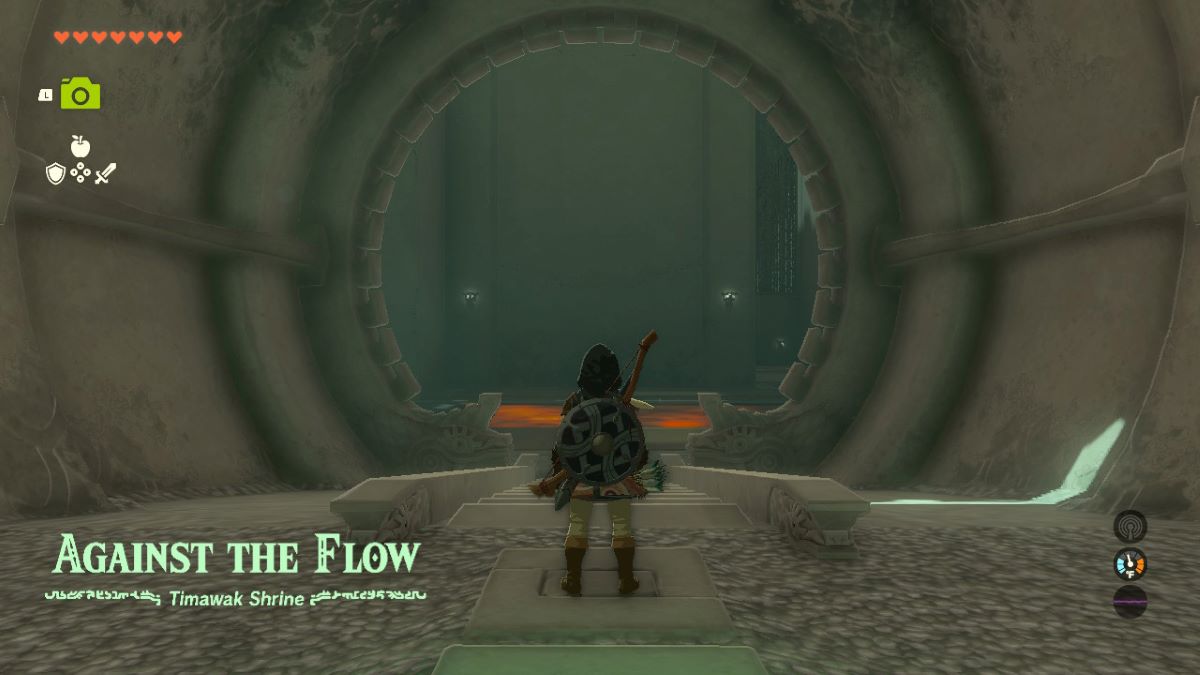
The Legend of Zelda: Tears of the Kingdom Against the Flow puzzle is located in the Timawak Shrine. You’ll be making liberal use of the Ultrahand and Ascend abilities to solve this shrine. It pays to be comfortable with both abilities before you enter. Here’s how to solve the Timawak Shrine Against the Flow Puzzle in TotK.
Timawak Shrine Against the Flow Puzzle Solution in Zelda: Tears of the Kingdom
TotK Timawak Shrine Location
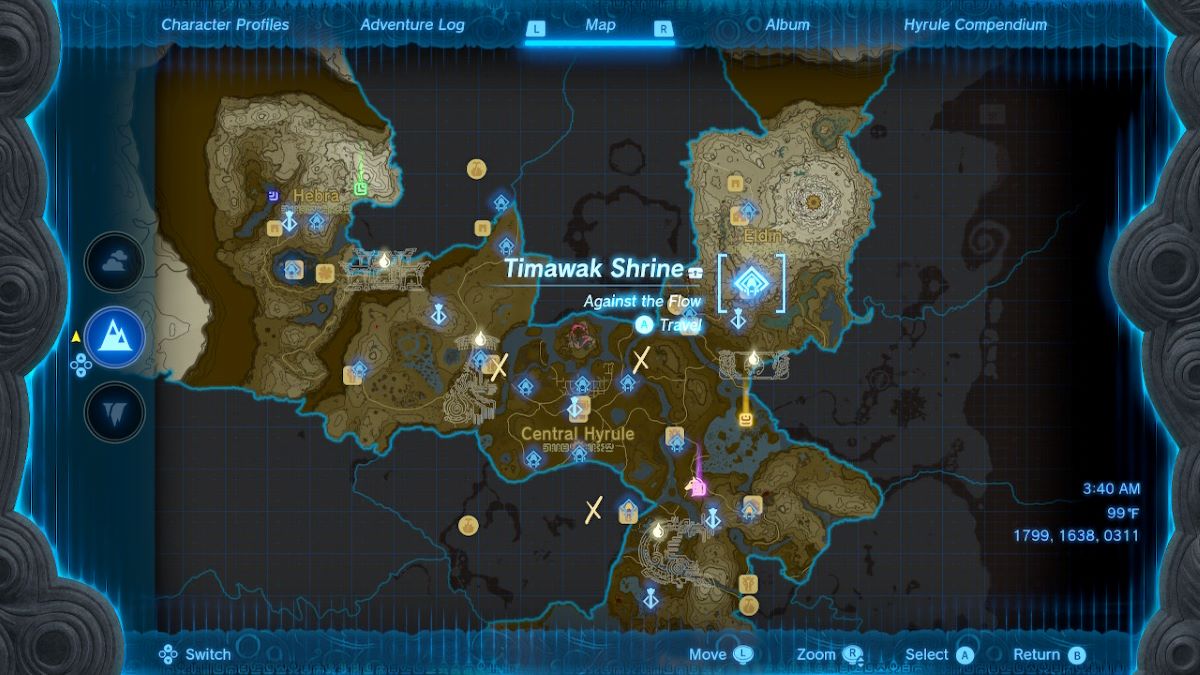
The TotK Timawak Shrine is located in the southern part of the Eldin Region, just northeast of Bedrock Bistro. It’s also directly northeast of the Eldin Canyon Skyview Tower. If you’re using map coordinates, you’ll find it at coordinates: (1799, 1638, 0311).
TotK Timawak Shrine Against the Flow Puzzle Walkthrough
Against the Flow is a three-stage puzzle spread across three rooms. I found this Shrine fairly straightforward, but like all things in TotK, there are a lot of solutions. Feel free to experiment.
First Against the Flow Puzzle Solution
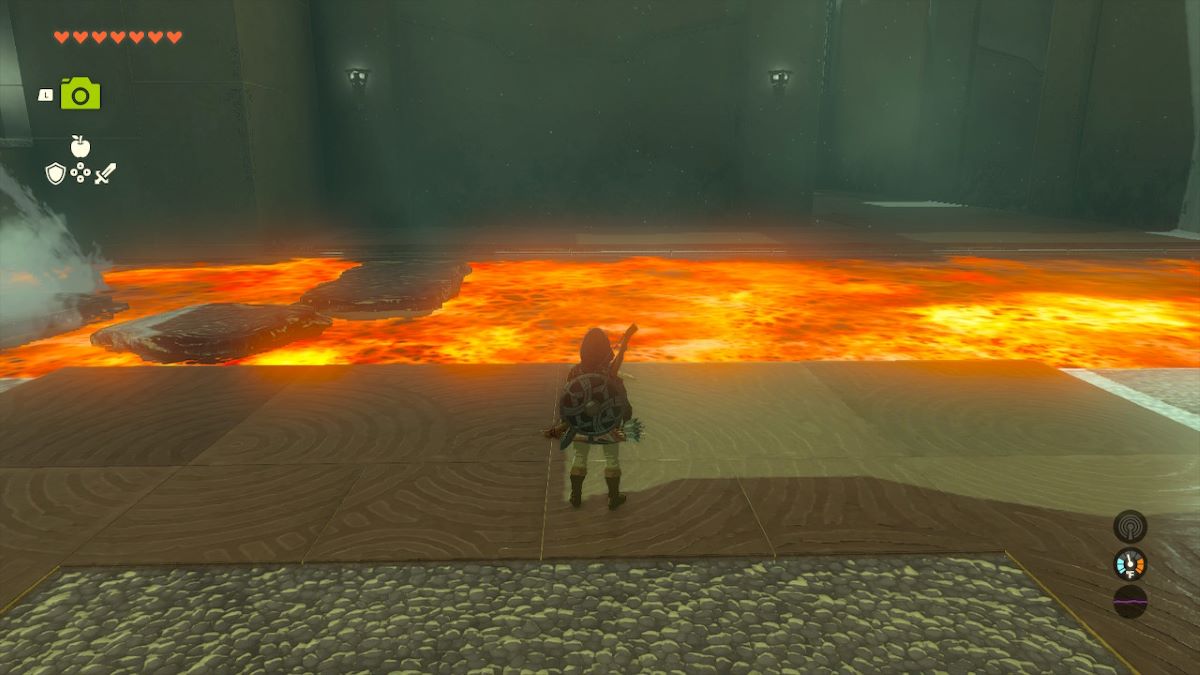
In the first room of Timawak Shrine in Tears of the Kingdom, you’ll see several stone slabs floating across a river of lava. This part is easy: just use the stone slabs to get across the river. You can jump from platform to platform, but if you choose the right set of slabs, you can just walk across.
Second Against the Flow Puzzle Solution
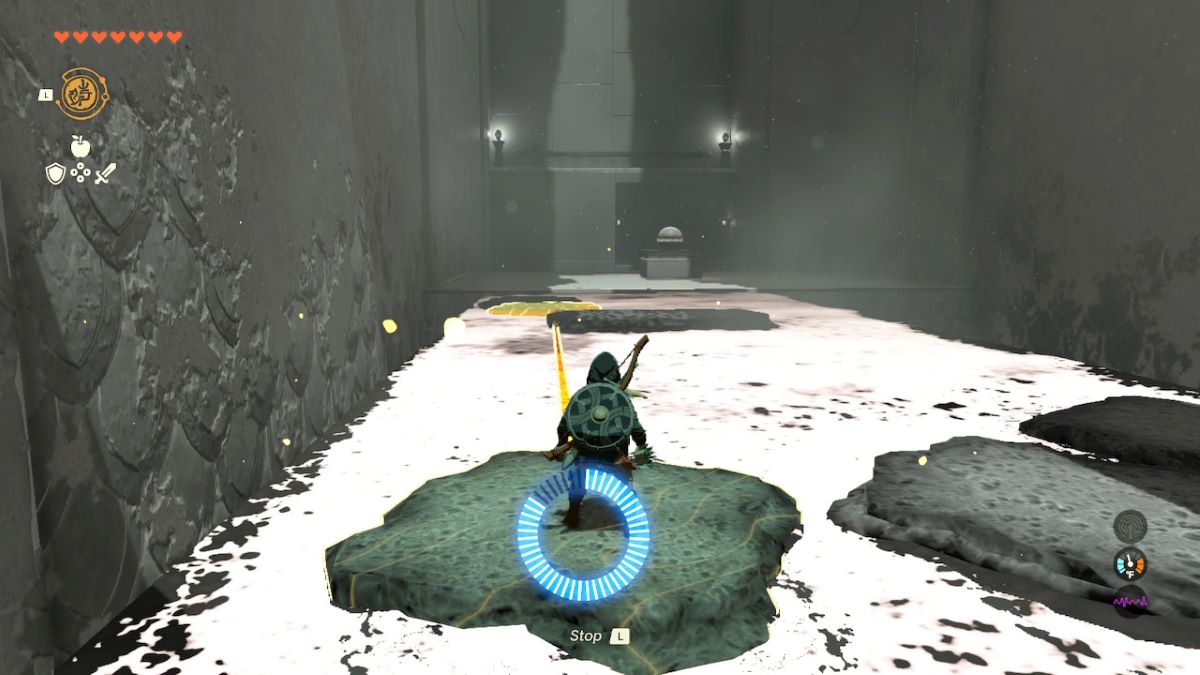
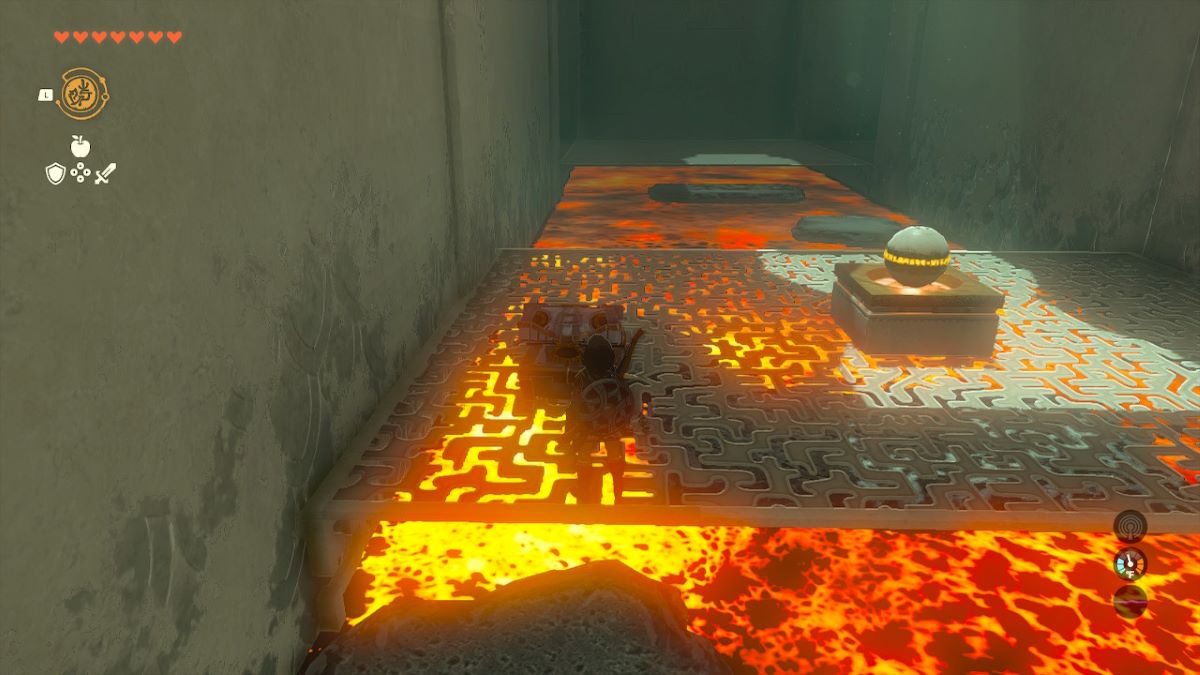
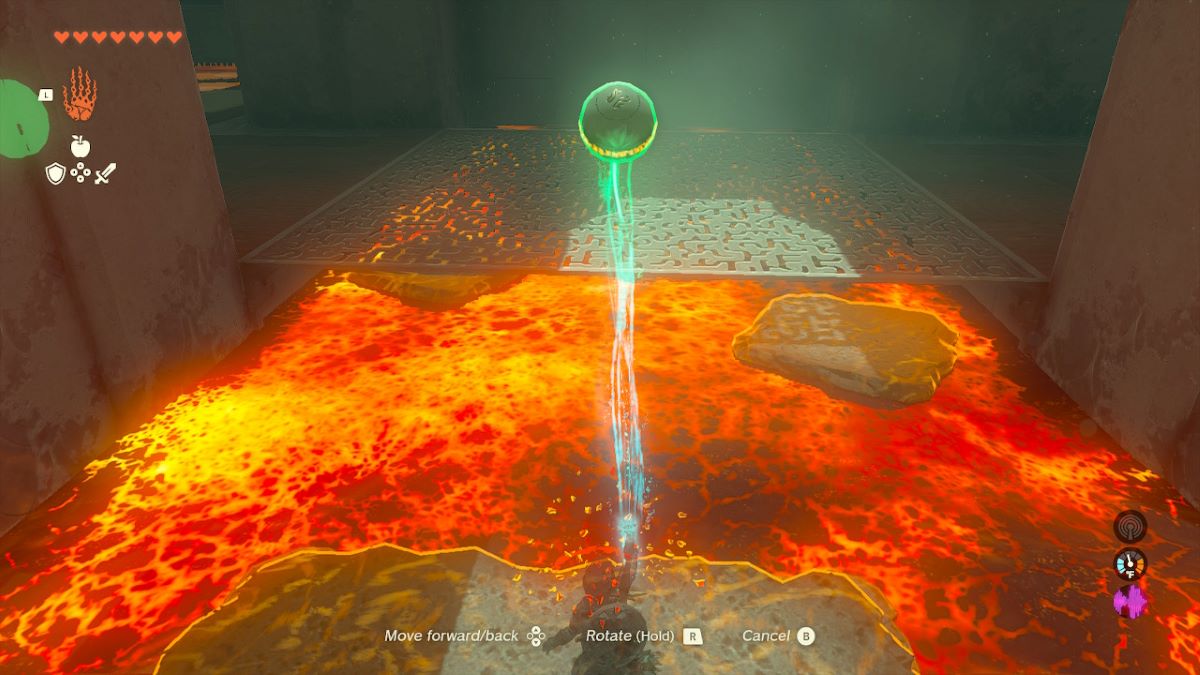
Once you’re across, things get a little more complicated. You’ll soon be on a bridge over another lava river. Another bridge with a small stone puzzle ball on top of it and a series of stone slabs floating under it is to your right. You need get those slabs to the bridge, but they’re going the wrong way. Here’s what I did:
- Equip the Recall ability.
- Jump on one of the stone slabs in the lava river. Any slab is fine, but smaller slabs are actually better for this puzzle.
- Use Recall on the slab and ride it back to the bridge with the small stone puzzle ball.
- Jump onto the bridge.
You could grab the ball and head back to the original, but we want to get the Shrine’s bonus treasure chest first. If you look carefully, you can see it in the alcove in front of you. Our solution is the same as last time:
- Jump on one of the stone slabs and use Recall on it to go towards the alcove with the treasure chest.
- Once you’re as close to the alcove as you can get, switch to the Ultrahand and grab the chest in the alcove.
- Place it on the bridge with the small stone puzzle ball.
- Ride the stone slab back to the bridge when Recall ends. Open the chest to receive a Strong Zonaite Shield.
Okay, now it’s time to get the small stone puzzle ball back to the first bridge. Luckily, this is pretty easy.
- Pick it up with the Ultrahand and jump onto one of the stone slabs.
- When you get close to the bridge, put the small stone puzzle ball on the bridge. Then jump to the bridge yourself.
- Drop the small stone puzzle ball into the hole in front of the locked gate to open it.
Third Against the Flow Puzzle Solution
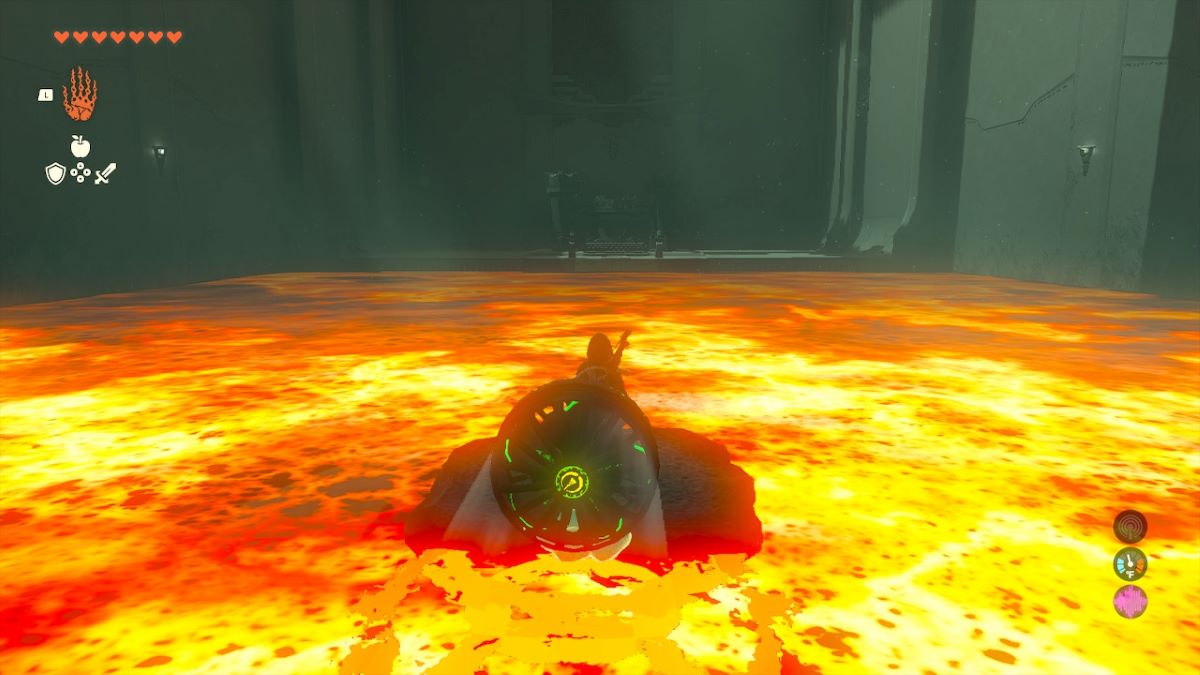
Okay, last room. This time, we’ve got another river of lava in front of us, as well as a raised platform to our right. We’ve also got a couple of fans: one to our left, another to our right. If you’ve read our A Windy Device Shrine Guide, you probably know what I’m thinking here. We’re gonna make a boat. Here’s how I did it:
- Whack the fan to your right and ride the updraft it creates up to the raised platform above you.
- Now that you’re up there, grab one of the hydrants with the Ultrahand and jump back down.
- Set the hydrant on the edge of the platform and wait until it makes a stone slab. Then grab the slab with the Ultrahand, and put it on the platform.
- Attach the fan to the back of the slab with the fan blades facing away from the lava river.
- Place your new stone boat into the lava, and jump on.
- Hit the fan with a weapon to start it, and ride the platform across the lava
- Examine the stone pedestal to claim your Blessing of Light!
And that’s how to complete the Zelda: Tears of the Kingdom Against the Flow puzzle in Timawak Shrine. For more tips, guides, and walkthroughs, visit our Zelda: TotK guides hub.


Published: Jun 9, 2023 04:34 pm