I’ve been playing modded Minecraft for a few years now — and I love the fact that thanks to a number of talented people, I can still do new and exciting things in the game. Lately, I’ve been playing in the DNS mod pack — Minecraft version 1.10.2 — and have been having a blast with one mod in particular. That mod, if you couldn’t guess by the title, is Immersive Engineering by BluSunrize and Mr_Hazard.
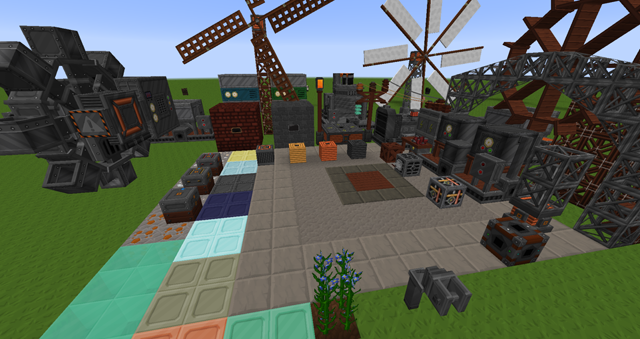
Immersive Engineering adds its own versions of power generation, ore doubling, automation, storage, and many more things that other mods out there offer but it does so in a very cool way with a number of spiffy-looking multiblock structures. My personal favorites are the conveyor belts and storage silos, but we’ll get to those later. First I’d like to go over a bit of the basics — the early game stuff to get you up and going — and if you’re playing on Minecraft 1.7.10 fret not! IE is available for that version as well, some of the recipes are just slightly different.
- Note: For the purposes of this guide, I’m going to assume that you’ve already started to stockpile materials prior or that you’re using creative mode to follow along.
Getting Started in Immersive Engineering for Minecraft
Build an Engineer’s Manual
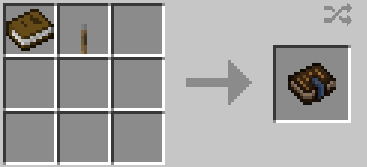
Getting started with IE is as easy as building an Engineer’s Manual. If you’re using a mod pack that has IE, chances are you can look up the recipe in NEI. But it’s relatively easy to craft — just a lever and a book side-by-side in shapeless crafting. The Engineer’s Manual is chock full of useful knowledge as well as crafting recipes for the many great multiblock structures we’ll be getting into now with the Coke Oven.
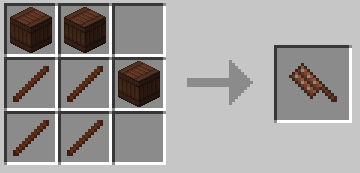
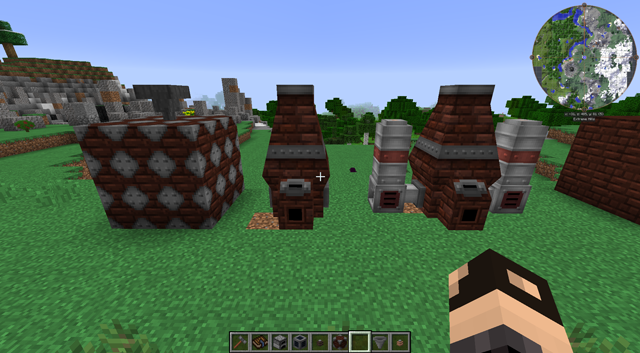
The Coke Oven is the gateway to bigger and better things in IE. In order to make steel, later on, you’ll need to use the Coke Oven to turn coal into coal coke. The byproduct of this process also gives you creosote oil which you’ll use to make treated wood planks — a staple item needed in a number of recipes. So, in order to make the oven, you’re going to need a fair amount of clay, sandstone, and bricks. The numbers break down to roughly:
- 56 Clay
- 56 Bricks
- 14 Sandstone
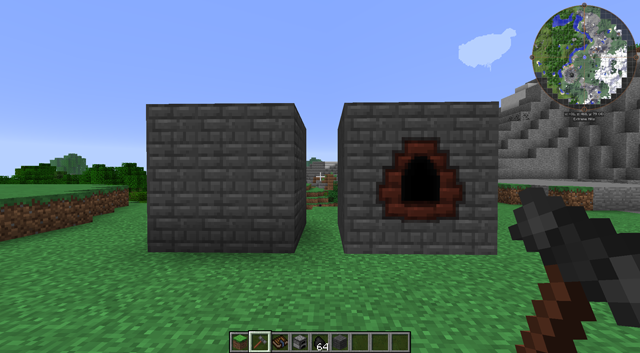
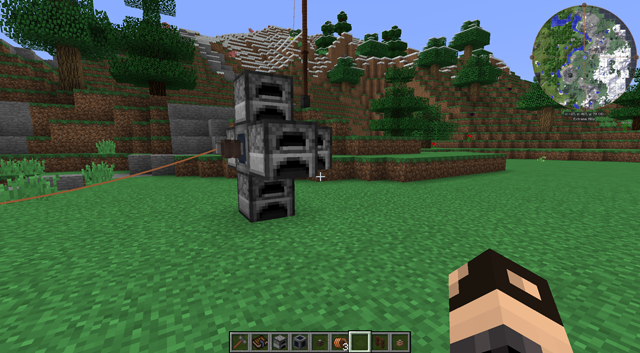
From there, you toss it on a crafting table to make coke bricks, which you’ll arrange in a 3x3x3 cube. You’re going to need an Engineer’s Hammer to finish the build by right-clicking on the center block with it. The end result will look like the structure on the right.
In order to start making coal coke, simply right click on the Coke Oven to open its interface. You can either manually put coal into the oven, or set up a hopper on the oven to drop coal in. The Coke Oven is a bit slow, so I would recommend for the early game to have at least 2-4 Ovens in order to stockpile coal coke. Coal coke burns for twice as long as normal coal and is the only fuel that can be used to make steel in the blast furnace.
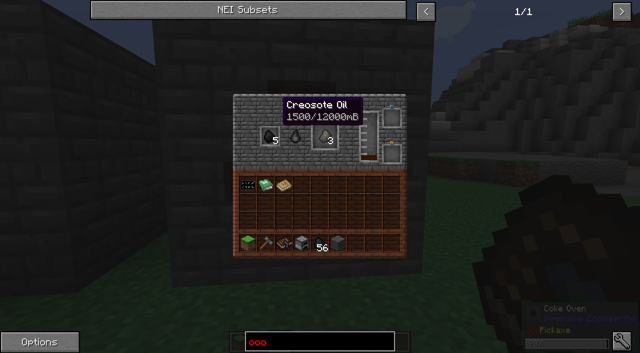
For every piece of coal converted into coal coke, it will produce 500mB of creosote oil that can be removed from the oven with a bucket or glass jars. Later on, you’ll likely want to pump it into some external storage as there is a limited reservoir in the oven and it will stop production if it becomes full. While this slowly builds up your stockpile let’s look at getting some early game electricity going.
Start Generating Power
There are a number of early game passive power generation options that we can make use of. My personal favorite to use is the Water Wheel, but that requires a bit of steel to make — so instead we look to the skies for early game power.
A windmill is a good option for some passive power generation, as it’s fairly cheap to make. The only real downside to it is that it doesn’t make much power at once. But the higher up you build it, the more power it will produce. Once you set up a hemp farm, you’ll be able to upgrade to an Improved Windmill which has double the output.
To make a basic Windmill, you’ll need to make use of the creosote that we’ve been producing thanks to the Coke Oven(s). We’ll need the following supplies per Windmill:
- 12 treated wood planks
- 16 treated sticks
- 1 iron ingot
- 1 lv Wire Connector
- 1 kinetic dynamo
The Kinetic Dynamo is the block that the Windmill is going to connect to in order to generate power, and is a relatively cheap item to produce.
Once we have everything we need we simply just build up a platform — or in my case, use fence posts to make a slim tower. Then put the Kinetic Dynamo on top, and attach the Windmill to the front of the Dynamo — the part with the square copper face. You’ll also want to put a lv Wire Connector on the back of the Dynamo so that you can connect a lv wire to it.
The Kinetic Dynamo doesn’t have power storage capacity, though. So you’re going to have to build a Capacitor to collect the energy that you’re now generating. The cheapest option in this regard is the lv Capacitor. You’ll need to place a lv Wire Connector on top of the capacitor and connect the 2 with a lv Wire Coil.
- 3 iron ingots
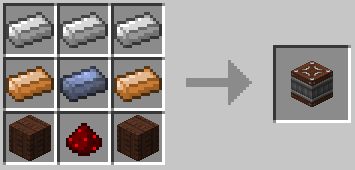
- 2 copper ingots
- 1 lead ingot
- 1 redstone
- 2 treated wood planks
Immersive Engineering makes use of 3 different levels of power connectors/cables — lv, mv, and hv (low/medium/high voltage) which can respectively handle 256 RF/t, 1024 RF/t, and 4096 RF/t. The Engineer’s Manual goes into more detail about the various voltage stages, so I highly recommend reading up on it. Generally, we’re going to be working with low voltage in the early game as most of the passive power generation methods produce less than the 256 RF/t cap.

Next Step? Get Things Heating Up!
We’re generating power now — not much, but it’s something. One of the first things that we can do with this power is build an External Heater. The External Heater can be used with the furnace so that we don’t have to burn solid fuels to operate it (which is good since we’re trying to stockpile coal to turn into coal coke).
The External Heater is pretty cheap to produce, and the best part about it is that you can use all the sides of the heater except for the power input side on furnaces — allowing you to power 5 furnaces off of 1 if you wanted to.
In order to progress further, we’re going to have to make our way into the nether, as we’re going to need some Blaze Powder and Nether Bricks in order to do our next multiblock structure — the Crude Blast Furnace. The Crude Blast Furnace is our ticket to purifying iron ingots into steel — the resource that opens up close to the rest of the mod for us.
In order to build 1 Crude Blast Furnace we’re going to need the following:
- 7 blaze rods (makes 14 blaze powder)
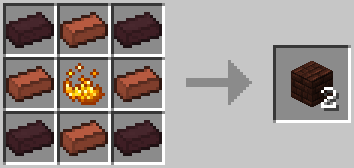
- 56 nether bricks
- 56 regular bricks
Just like the Coke Oven, the furnace is a 3x3x3 multiblock structure. In order for it to be completed, it must be right-clicked in the center with an Engineer’s Hammer. It takes an iron ingot in the top left input and only uses coal coke as fuel. Once it finishes processing it will make slag as a by-product. Slag is actually useful in that it can be used in the construction of concrete blocks which can give your buildings that factory look.
Once you get the Crude Blast Furnace going, you should shoot to use your first batch of steel to upgrade it into the Improved Blast Furnace. The Improved Furnace not only looks much cooler, but it also allows for iron and coal coke to be fed into it. Additionally, it can also make use of preheaters on either side — attachments that increase the speed at which the iron is refined into steel (though at the cost of the energy you’ve been generating).
Hopefully, this helps you on your way to using this amazing mod. If you like what you’ve read please make sure to let me know in the comments below so that I can write a more in-depth guide on some of the more advanced machines that require the steel we’re well on our way producing.
If you have any questions please feel free to post them below, and thanks for choosing GameSkinny for your Minecrafting needs!


Published: May 24, 2017 10:46 am