
Loop Hero is a great roguelike, but between all the cards, RPG stats, and auto-battling, FourQuarters’ old school adventure can be a lot to handle. Indeed, finding your way in the post-apocalypse can be tricky, minding the various chain reactions from your card combos and tile combos while keeping your hero alive.
Rest easy, though, because we’ve learned a thing or three in our time working to defeat the Lich and put the world to rights. Whether it be a class’ fundamentals, managing the stream of ghouls and goblins in your path, or some smart landscaping, we have some wisdom to impart.
Here are some tips, tricks, and good beginner’s information from our tenure as the Loop Hero.
Certain Tile Combos Create Specific Monsters
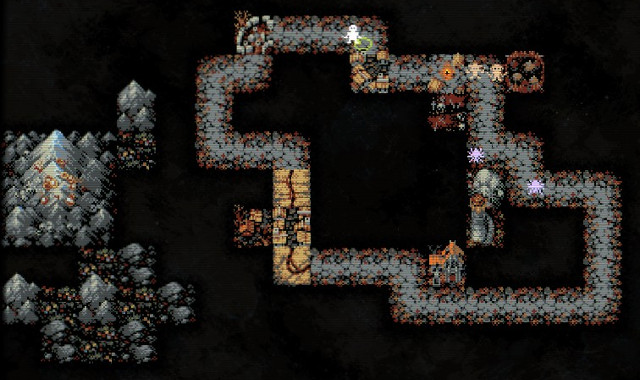
One of the great pleasures of Loop Hero is seeing what reacts with what among all the cards. But if you aren’t careful, you can end up flooding your path with creatures you never meant to put there, making survival that much trickier.
Nine mountains and rocks together creates a mountain range that spawns harpies, and every tenth of those cards gets you a goblin camp that creates goblins at what is, frankly, an obscenely fast rate.
Every second village brings with it an outpost for bandits, and if you put a vampire mansion beside a village, you get ghouls for three turns.
The list of every possible pairing would be long, but rest assured, this is far from an exhaustive list. The point is to always track what’s happening on your map and make sure you’re always prepared.
Tailor Your Approach to Your Class
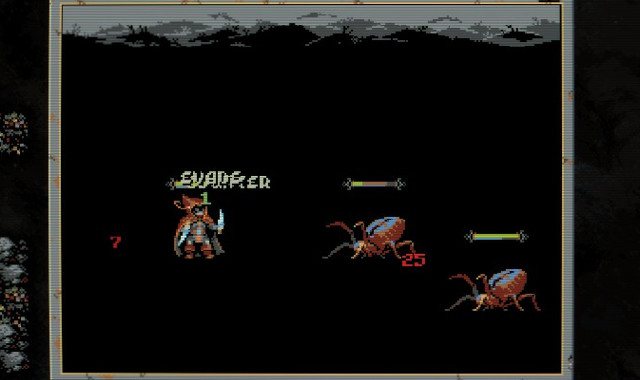
The first class, warrior, is straight-forward. Speed, HP, and strength are easy stats to juice up, and they pick up equipment after each loot-dropping kill. The rogue is significantly different, favoring speed and tipping the odds of big hits in your favor, and the necromancer is all about spawning those skeletons as much as possible.
You need to adjust your play-style for each, and to do that, you need to understand what stats matter to whom.
These are the general ways I built each:
Warrior
- Max HP
- Attack Speed
- Health Regen
- Strength
- Damage to All
Keeping the warrior’s healthbar at a high number is crucial for later laps, and health regeneration pays off massively in battles with three or four enemies. Damage to All is a good ability to use in the laps preceding the boss before replacing it ahead of that encounter.
Attack speed is helpful there too, and when combined with good strength bonuses, it will have you killing anything that dares challenge you.
Rogue
- Evasion
- Counter
- Attack Speed
- Critical Hit
- Damage to All
The rogue is all about hitting fast and making those hits count. Pumping up evasion, counter, and attack speed helps you slice through most enemies. Higher critical hit percentage becomes more helpful in later laps when you need to take chunks out of basic enemies, and damage to all is another crucial asset.
A lot of rogue armor offers a high HP boost without any other stat increase — don’t fall for the allure. Health won’t help you when you can’t get those hits in.
Necromancer
- Evasion
- Regeneration
- Summon Quality
- Summon Speed
The necromancer is the hardest class to use, and most of its stats are unique to its skeleton-summoning abilities. Evasion and regeneration help keep attacks spry, and summon quality and summon speed directly affect how fast you’re summoning and how good those summons are.
Skeletons have five tiers, and to get the best — archers and mages — you need four others already on the field. The best way to do that is to be quick and make sure what’s coming out of the ground is strong.
Oblivion Cards are Your Greatest Power — and Good for Farming

There is nothing in Loop Hero as powerful as the Oblivion card, which erases everything on a given tile. You can eliminate enemies if you’re too low on health and near the campfire, get rid of those dratted goblins, or have another go at a supplies bonus.
Wiping out a horde of goblins is always a good choice, but for certain placements, like the mountain range, using Oblivion on one of the tiles, then replacing said tile, gives you the same supply bonus as you got the first time. You can do this as many times as you like, as long as you feel capable enough without needing Oblivion for anything else.
Bunch Tiles in the Loop, Spread Them Out on the Landscape
As you get confident in laying down tiles and shaping your loops, a good rule of thumb can be to place certain enemies together for your hero and then doing the opposite elsewhere. This helps for farming resources and pacing encounters.
Putting anything beside a meadow gives you a blooming meadow, and zig-zagging rivers helps spread their double effects on more tiles. Mountain-ranges aside, you should place tiles one-by-one to maximize bonuses across meadows and rivers.
On your loop, then, putting graveyards in one section, groves in another, and swamps in another lets you clearly map what’s coming for your brave wanderer. It then lets you manage what’s going to happen. If you find your rogue is just mowing down skeletons in your corner of graveyards, you can speed up the spawning rate without affecting any other monsters.
The same goes for mosquitoes: putting a run of swamps in a line gives you space to decrease how many spawn without doing anything to your ratwolves, spiders, bandits, or what have you. This is definitely one for when you have all the basics down, but when you do, give it a try.
Know When to Quit — and do so at the Campfire If You Can
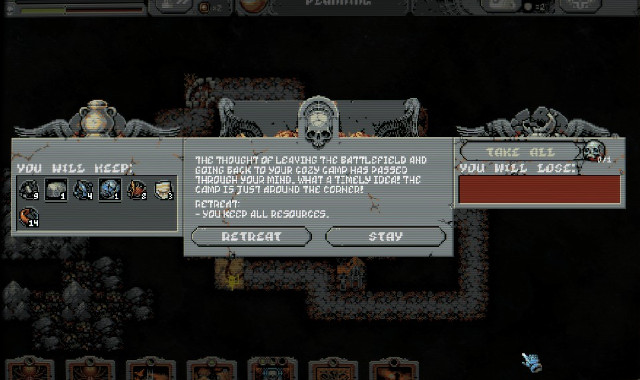
You will die many times in Loop Hero, and you’ll know the disappointment of losing 70% of your supplies all too well. Work on understanding when your hero is going to die. Sometimes it’s obvious; other times, you’ll need to do a quick read on what’s ahead.
Leaving of your own accord gives you 60% of your supplies, and doing that just before the boss is common practice. All the spoils of a good hearty run, without suffering a heinous death.
But the game doesn’t tell you this: if you retreat while on the campfire tile, you can keep 100% of your supplies. All of it. The campfire can be passed by in a jiffy, especially if you’re running at double speed, but if you know you’re not up for much more, getting out then and there is the way to go.
—
And those are some of our best Loop Hero beginner’s tips and tricks to keep in mind. Of course, there are plenty of other useful things to know and secrets to unlock, so if you’re looking for more, consider heading over to our Loop Hero guides hub.


Published: Mar 15, 2021 06:29 pm