Hello Neighbor 2 marks the return of the incredibly creepy and unsettling Theodore Peterson. To uncover the mysteries surrounding his clandestine activities, it’s your job in Act 1 to explore Peterson’s house, this time as a journalist, and figure out what’s going on. And if you’re wondering how to go about that, you may need a walkthrough to help.
Of course, Peterson’s secrets aren’t given up that easily, and there are plenty of puzzles to solve along the way. With that in mind, this walkthrough guide is here to help in your investigation, providing all of the solutions and answers to the roadblocks you’ll face in Act 1.
If you’re looking for other walkthroughs, check out our complete Act 2 guide, our complete Act 3 guide, or our guide to Act 4.
Hello Neighbor 2 Act 1 Walkthrough
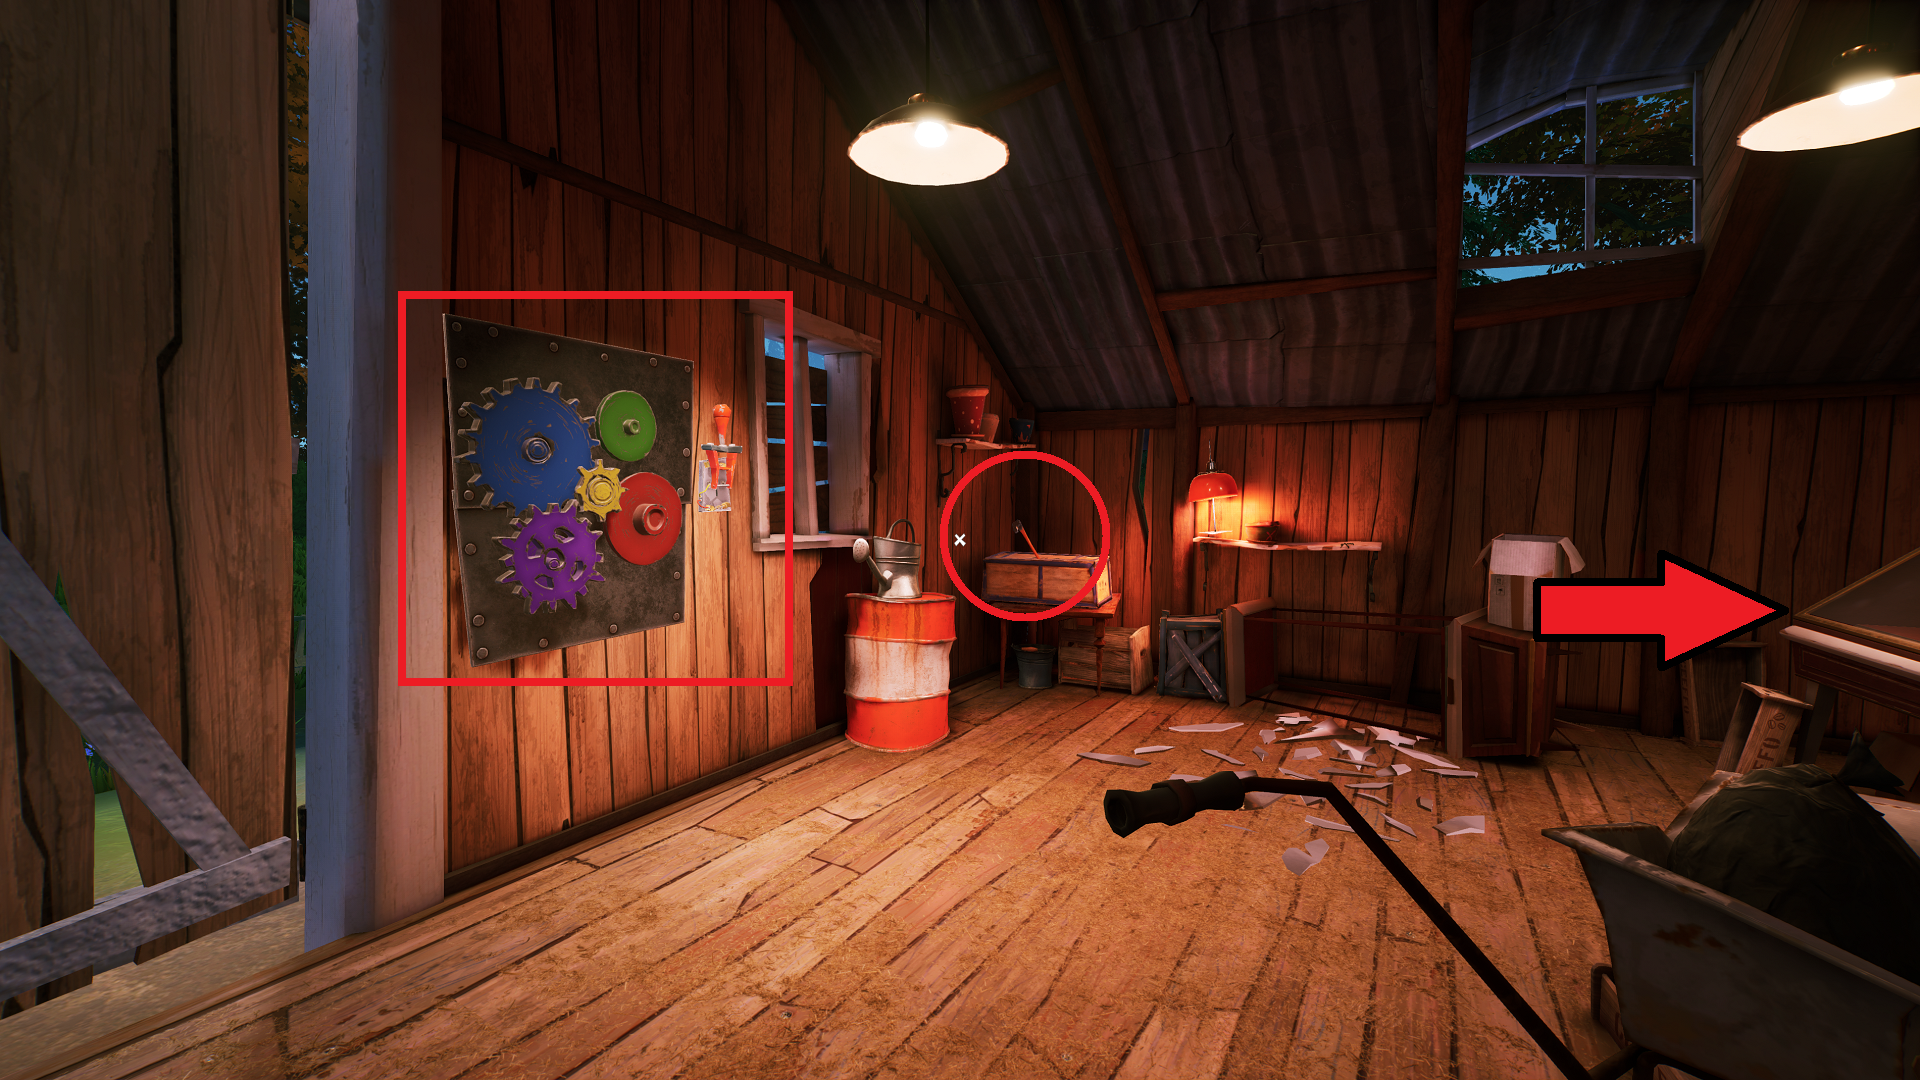
After crashing the car in the barn, flip the switch on the left side to open the door. Go through, and grab the key off of the wall on the left. Use it to unlock the padlock on the door to the right. Go inside and pick up the blur gear off of the table.
Exit that room. Look for the gear mechanism on the wall to the right of the main barn door. Place the blue gear in the blue slot, then pick up the crowbar in the crate behind the red barrel. Use the crowbar to smash the glass display case to the right of the red barrel and pick up the green gear. Place it in the green slot in the mechanism.
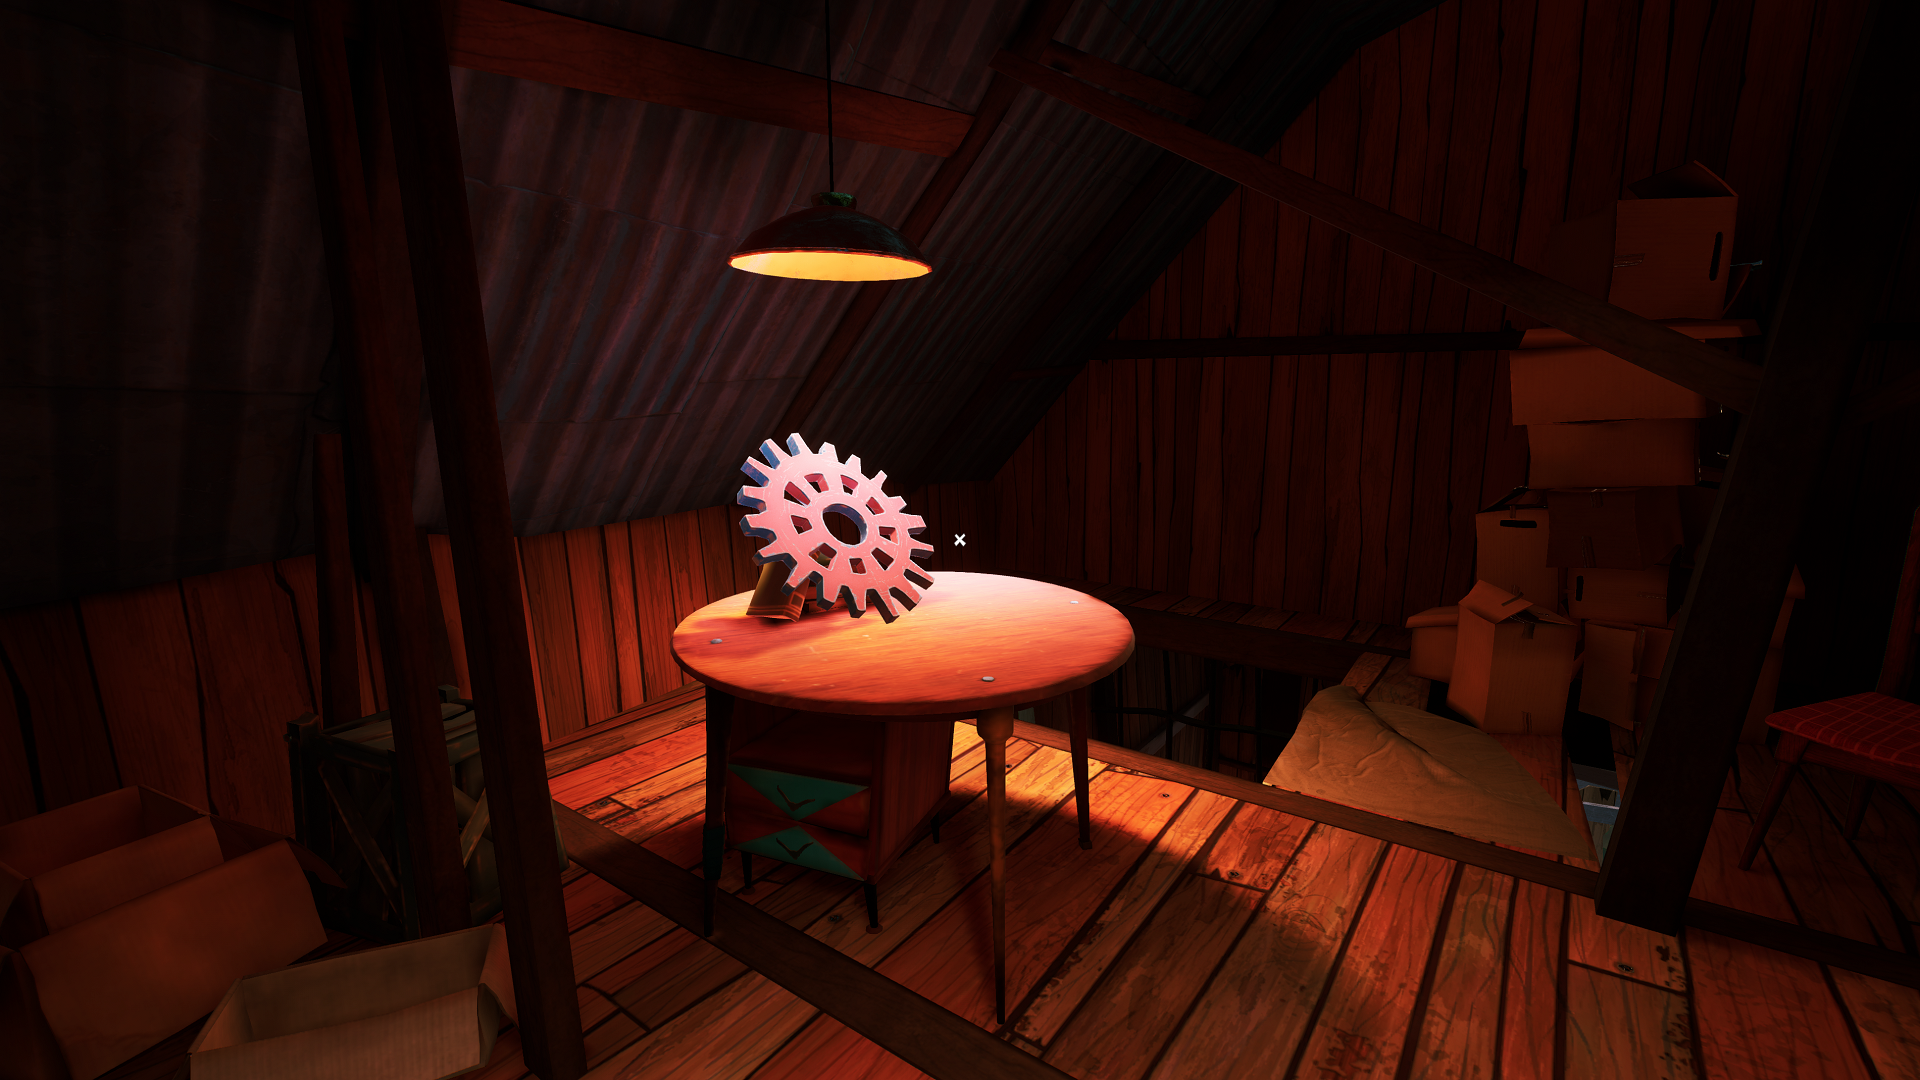
Go back to where you crashed the car, and use the crowbar to pull off the red board near the ground by the hay bale. Crawl through the space, and climb the ladder up. At the top, climb up the ledge, and pick up the red gear on the table. Jump back down through the nearby hole in the floor, and place the red gear in the red slot in the mechanism. Pull the switch by the mechanism to open the barn door.

After the cutscene, you’ll wake in a room with surveillance monitors. Exit the building, and follow the path down to the street. You’ll see Peterson’s blue house in front of you, behind the clump of stop signs. But don’t go there just yet. Instead, go behind the green house with the treehouse across the street.
How to Find the Scissors
The scissors are required to access the second story in Peterson’s house, and while you don’t have to get them right now, it’s best to get it out of the way now.
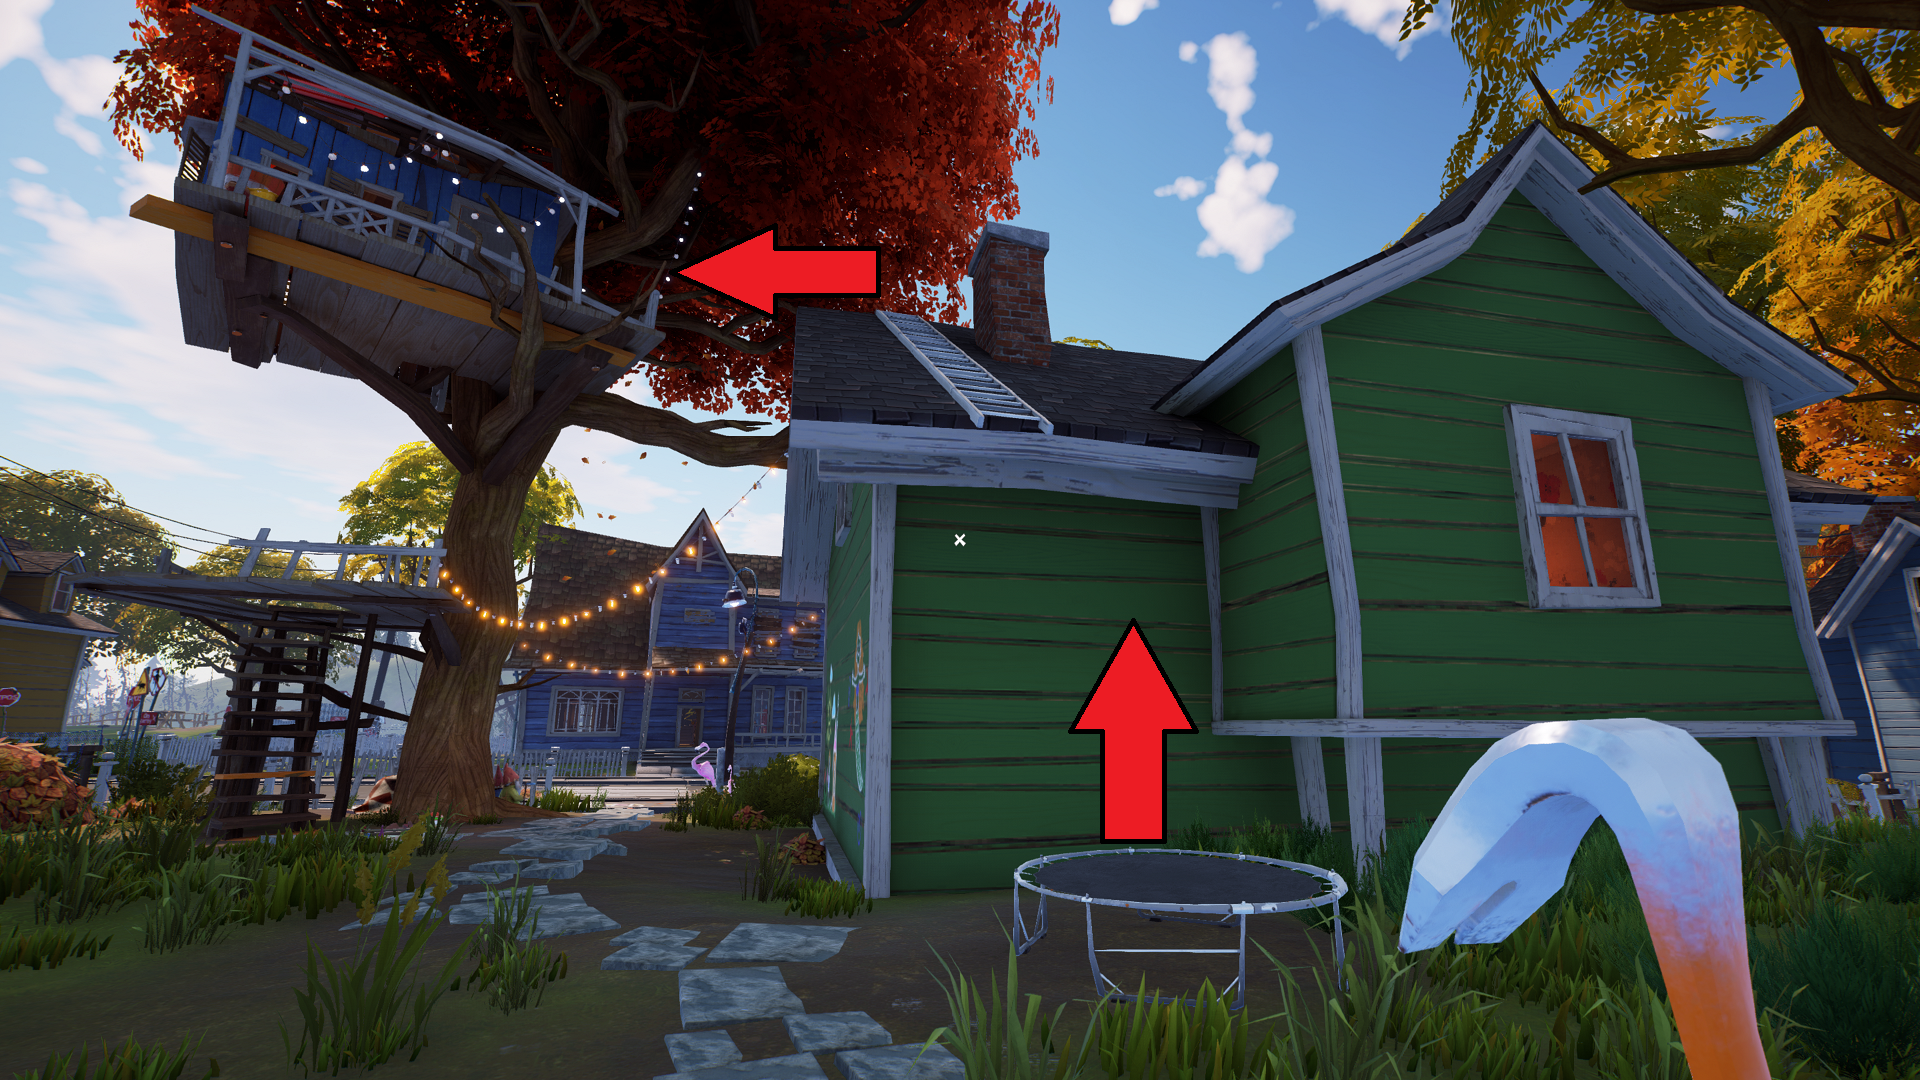
Behind the green house, you’ll find a trampoline you can use to reach the roof and then the upper level of the treehouse. Jump at least two times on the trampoline to get the height you need.
Jump over to the treehouse from the roof, and go through the door. Inside, you’ll see a train set on the left side with a track going around the room and a cardboard robot/knight on the right. The scissors are inside a cardboard depot on the same table as the train set, but you’ll need to solve a puzzle first.
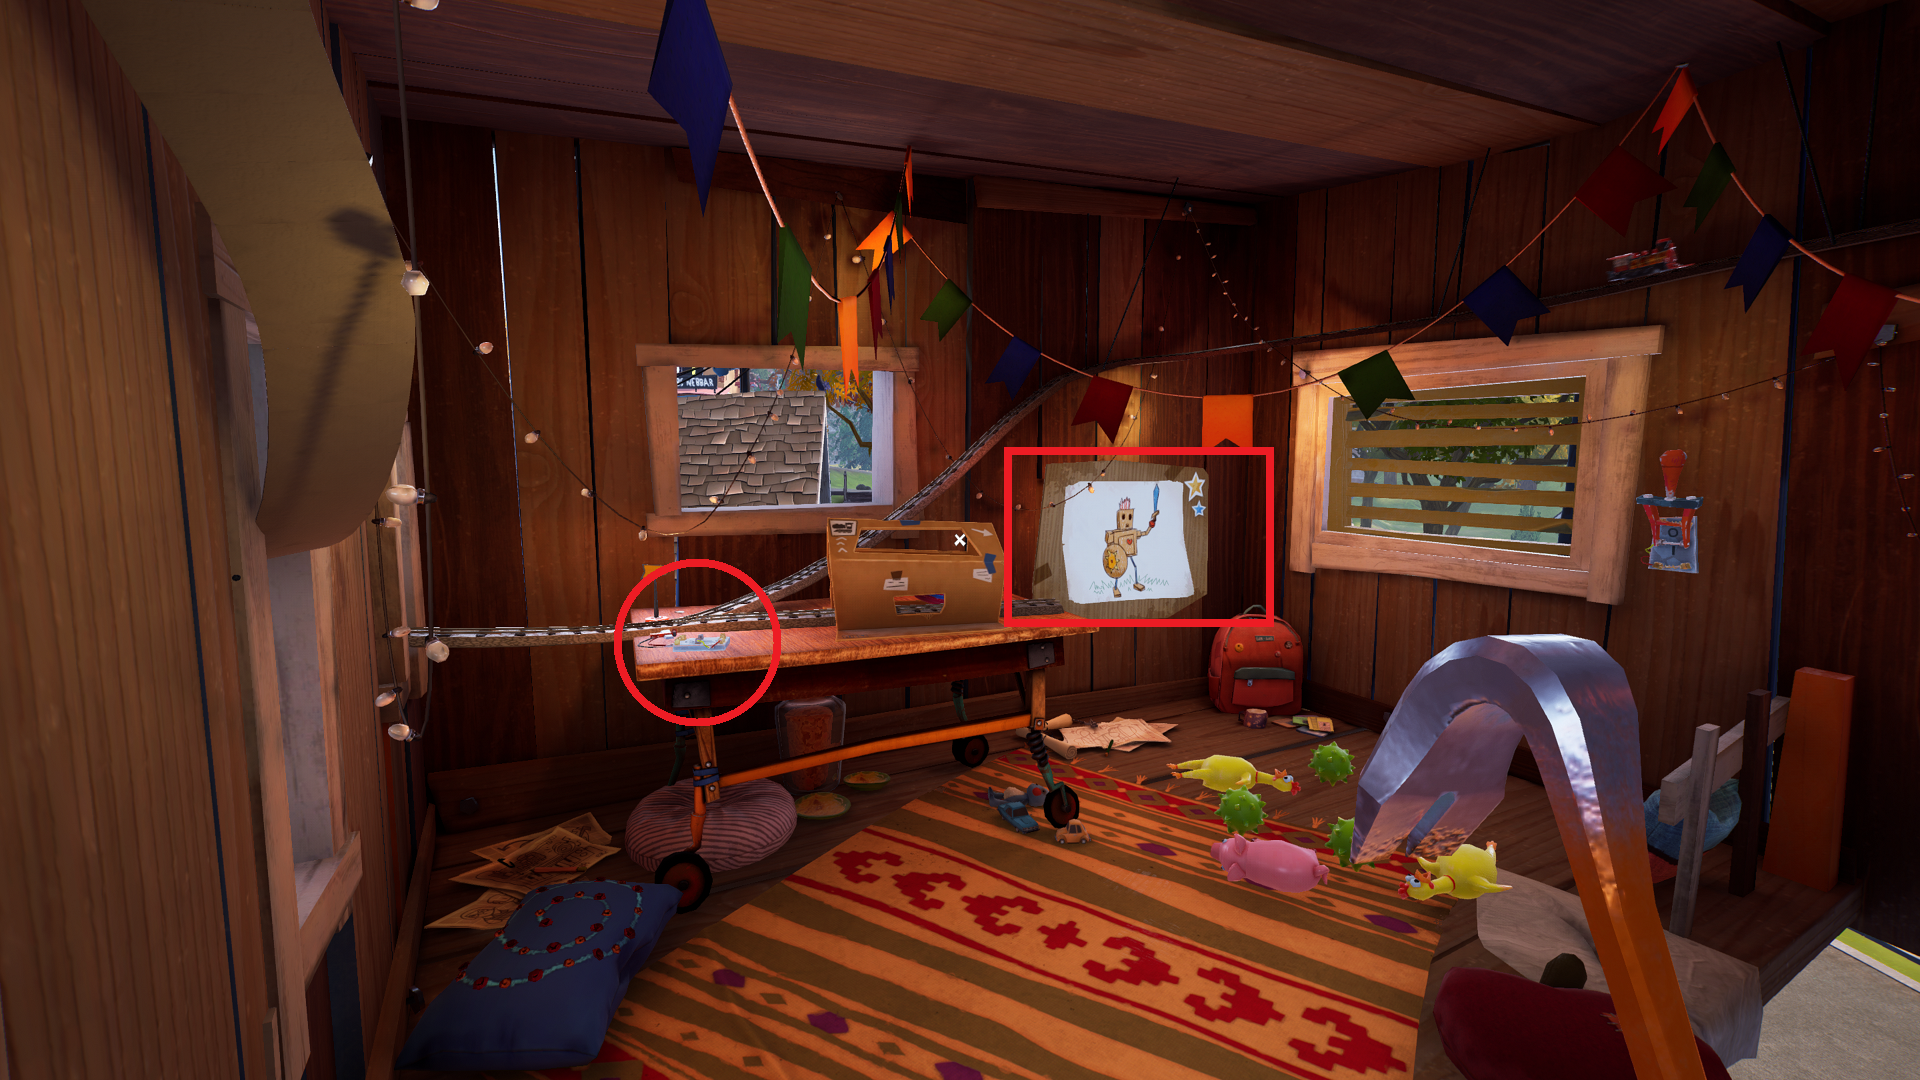
In the back left corner, you’ll see a drawing of the cardboard robot on the wall. Move it to get the cardboard robot’s sword arm. Replace the arm on the actual cardboard knight by the door. Now position both of the knight’s arms to reflect the positions in the drawing, which will open a compartment in the robot’s chest, revealing a switch handle.
Take the switch handle, and combine it with the switchboard to the left of the cardboard depot on the table with the train set. Flip the switch to change the track for the model train, which will push the scissors out of the cardboard depot.
Now go across the street to Peterson’s House, and enter through the unlocked door on the right side.
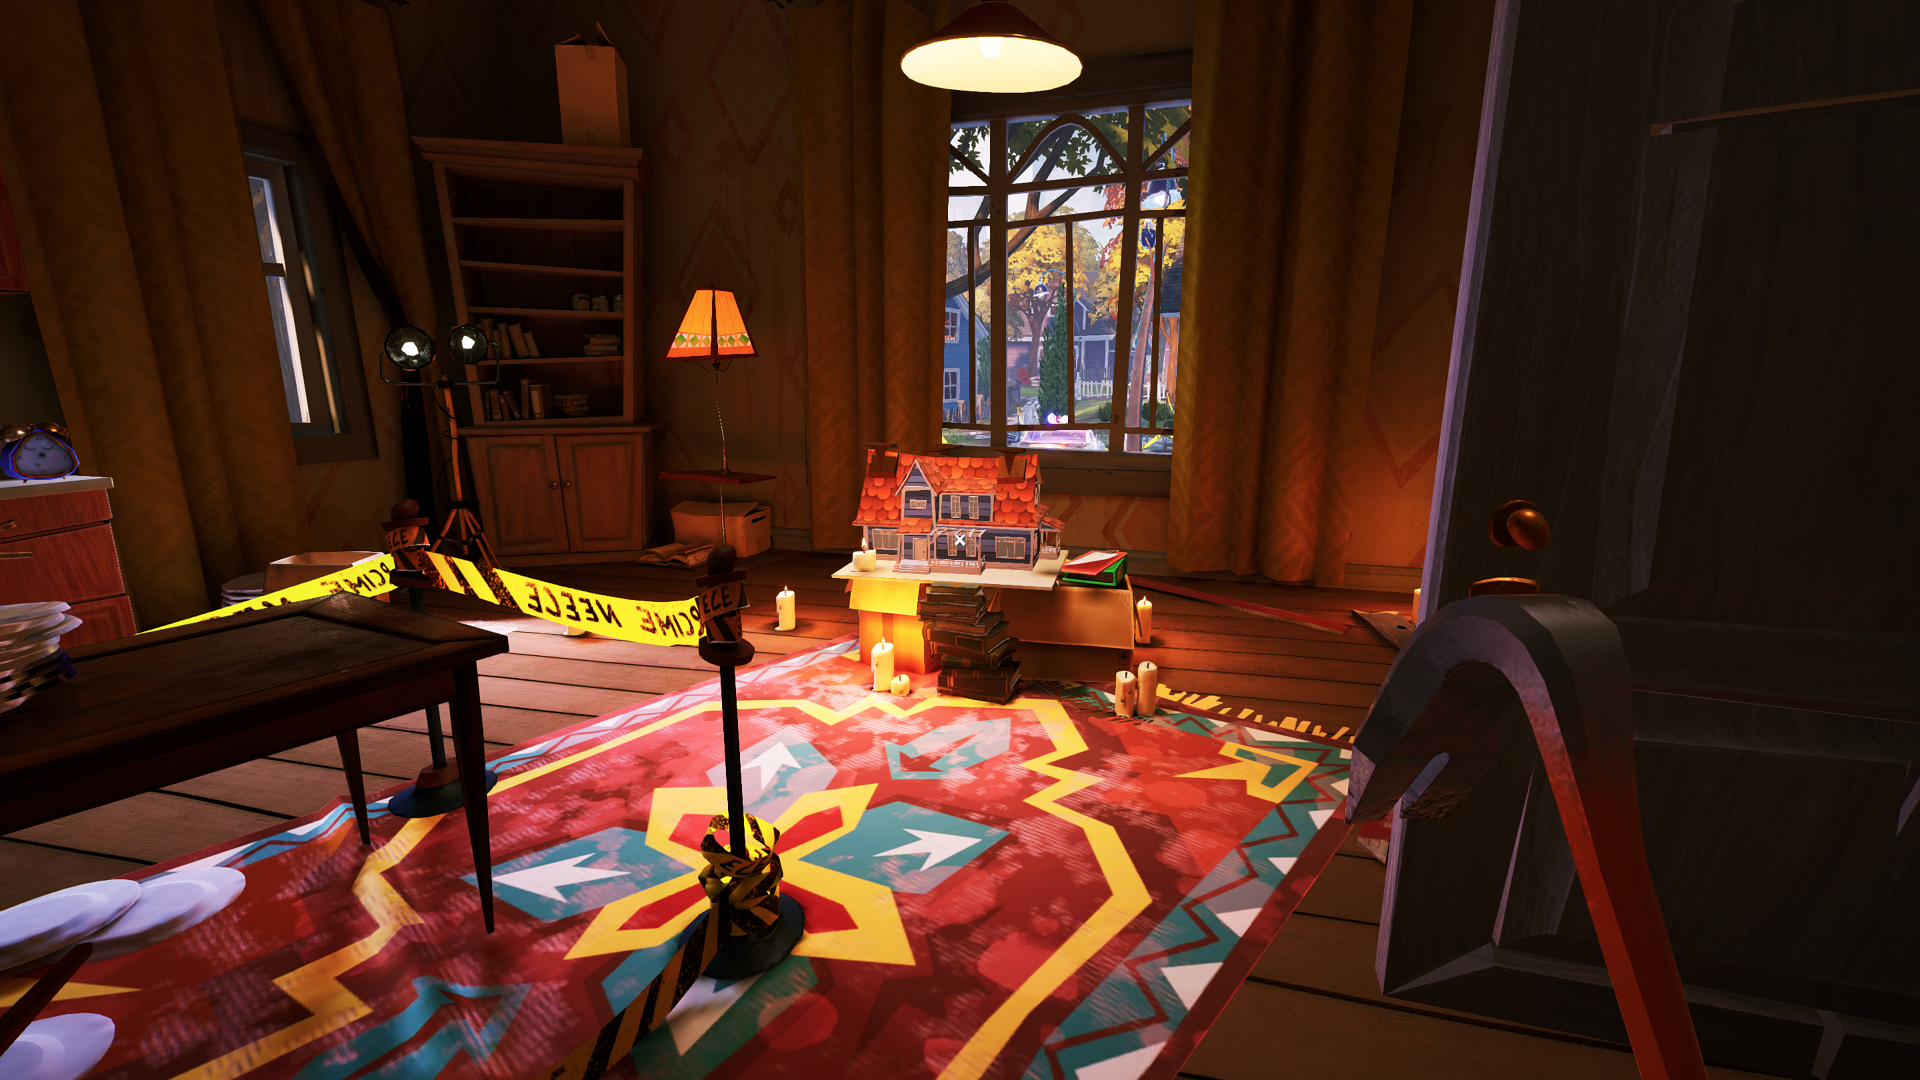
How to Get the Keys for the Red Basement Door
Much of Hello Neighbor 2 Act 1 follows the same basic conceit of Hello Neighbor: the ultimate objective is to unlock the red basement door and see what’s inside. There are four keys scattered throughout the house, locked behind four different puzzles of varying difficulty.
Dollhouse Puzzle Solution (Red Door Key 1)
In the kitchen, you’ll notice the same mystical dollhouse from Hello Neighbor on the left side by the windows. Solving this puzzle requires you to find three hidden dolls in various locations on the first floor of the house, then place them in the correct order on the stands on the dollhouse. You can find the correct order by looking at the picture on the refrigerator.
Where to Find the Girl Doll
Facing the dollhouse, turn right and look for the small red board nailed to the wall. Use the crowbar to remove the red board on the wall to reveal the girl doll.
Where to Find the Neighbor Doll
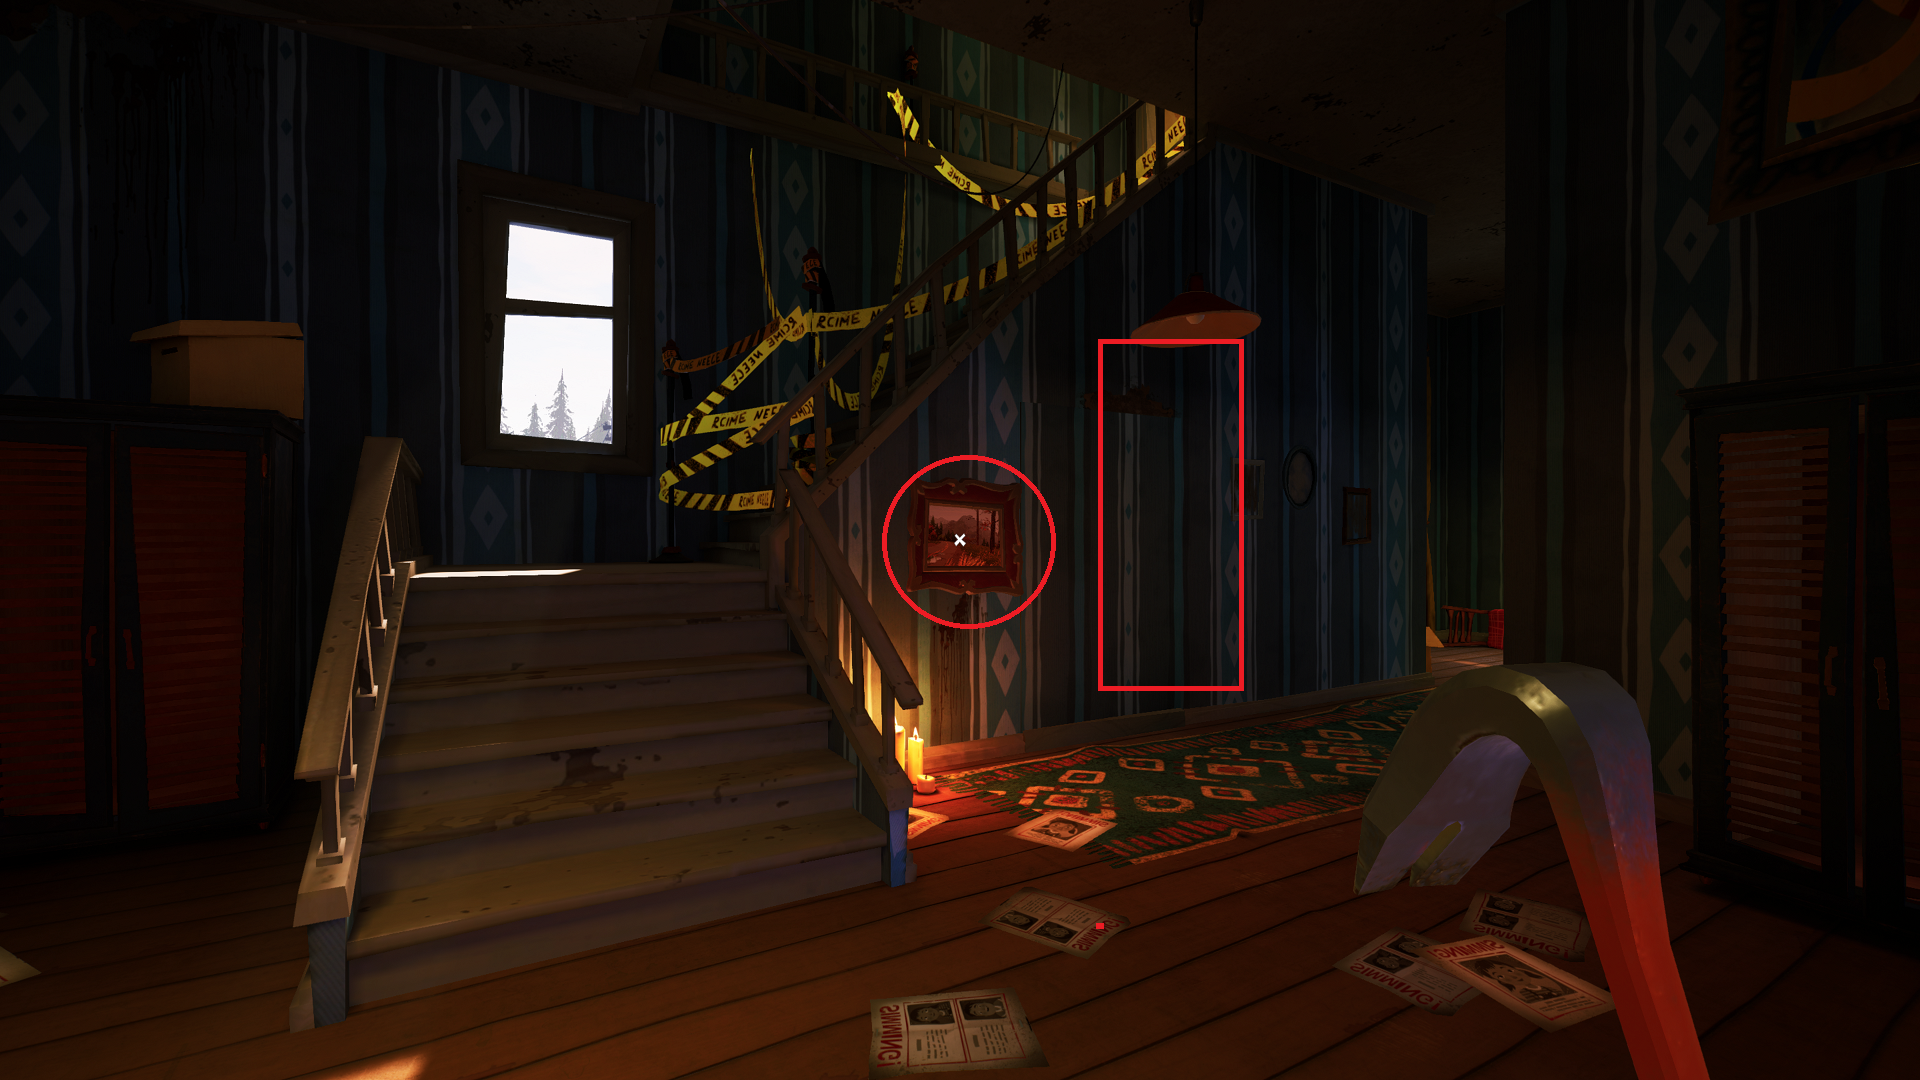
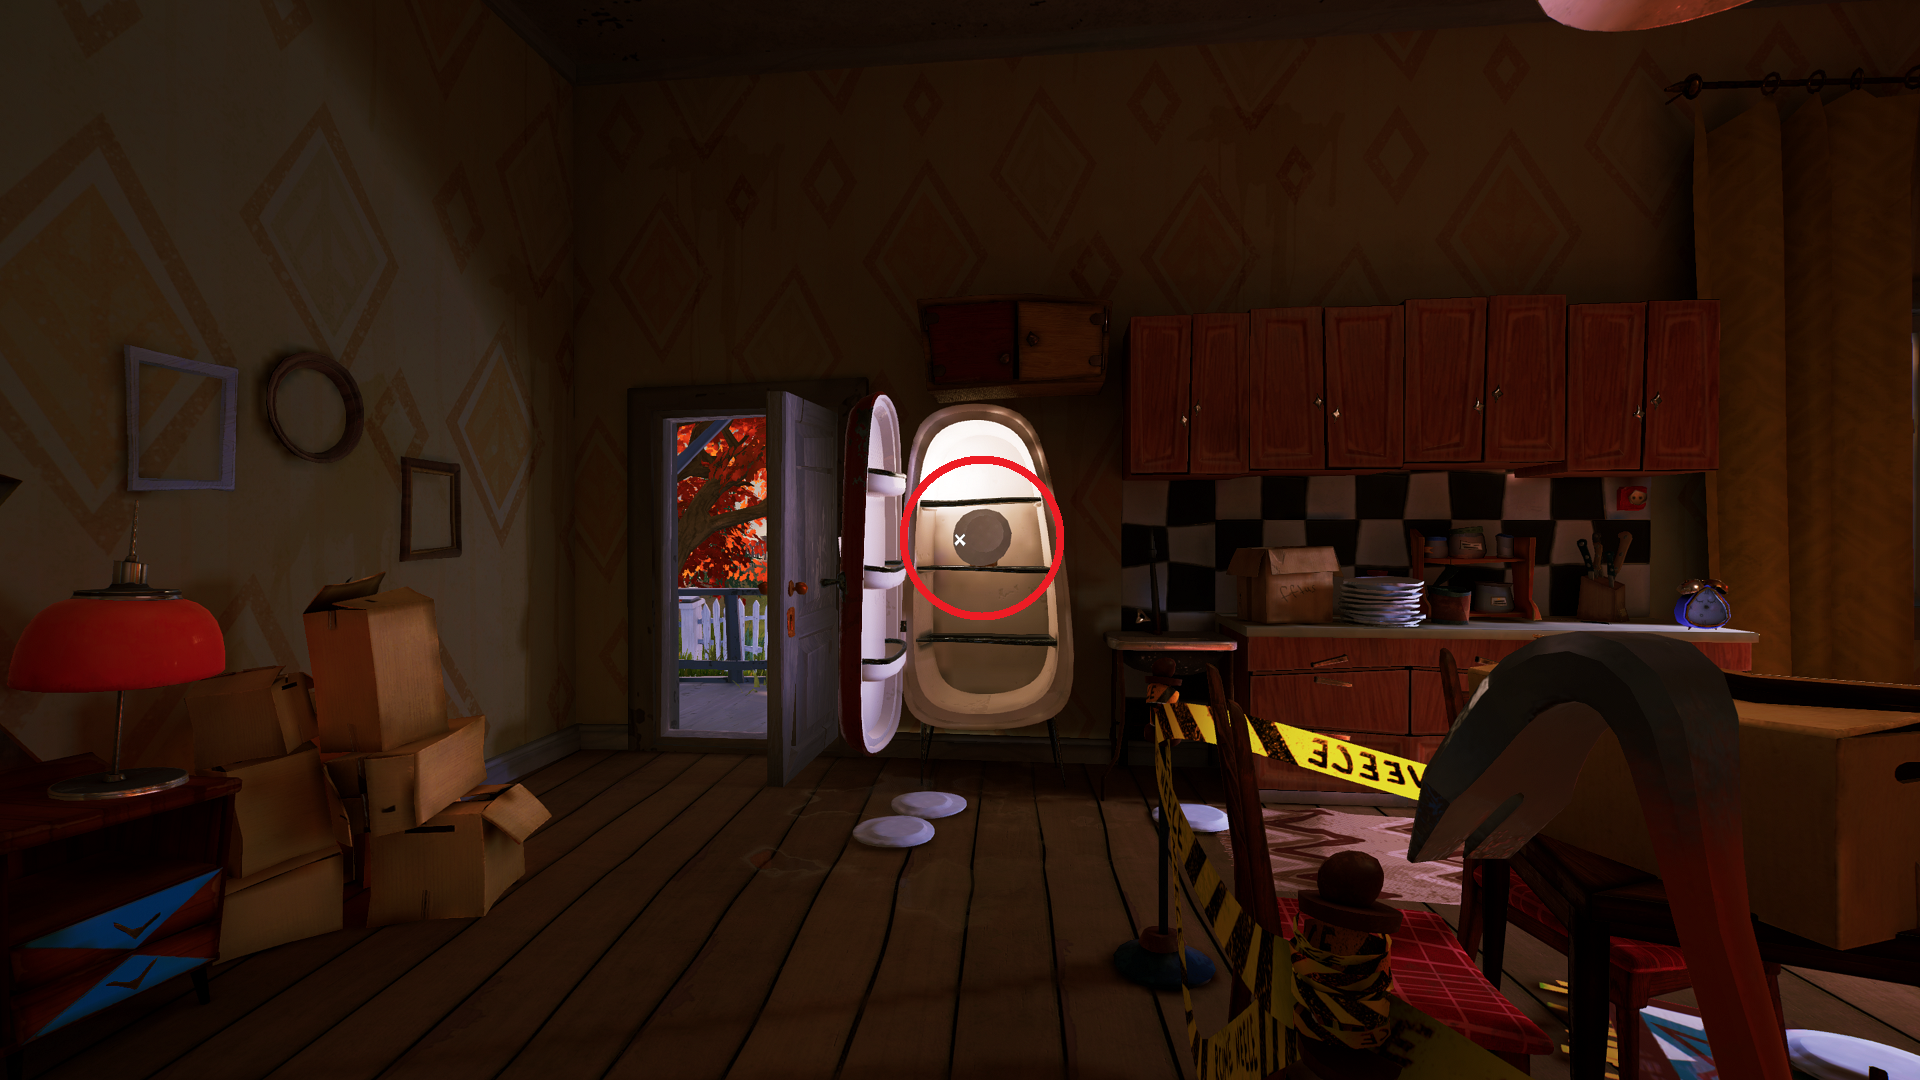
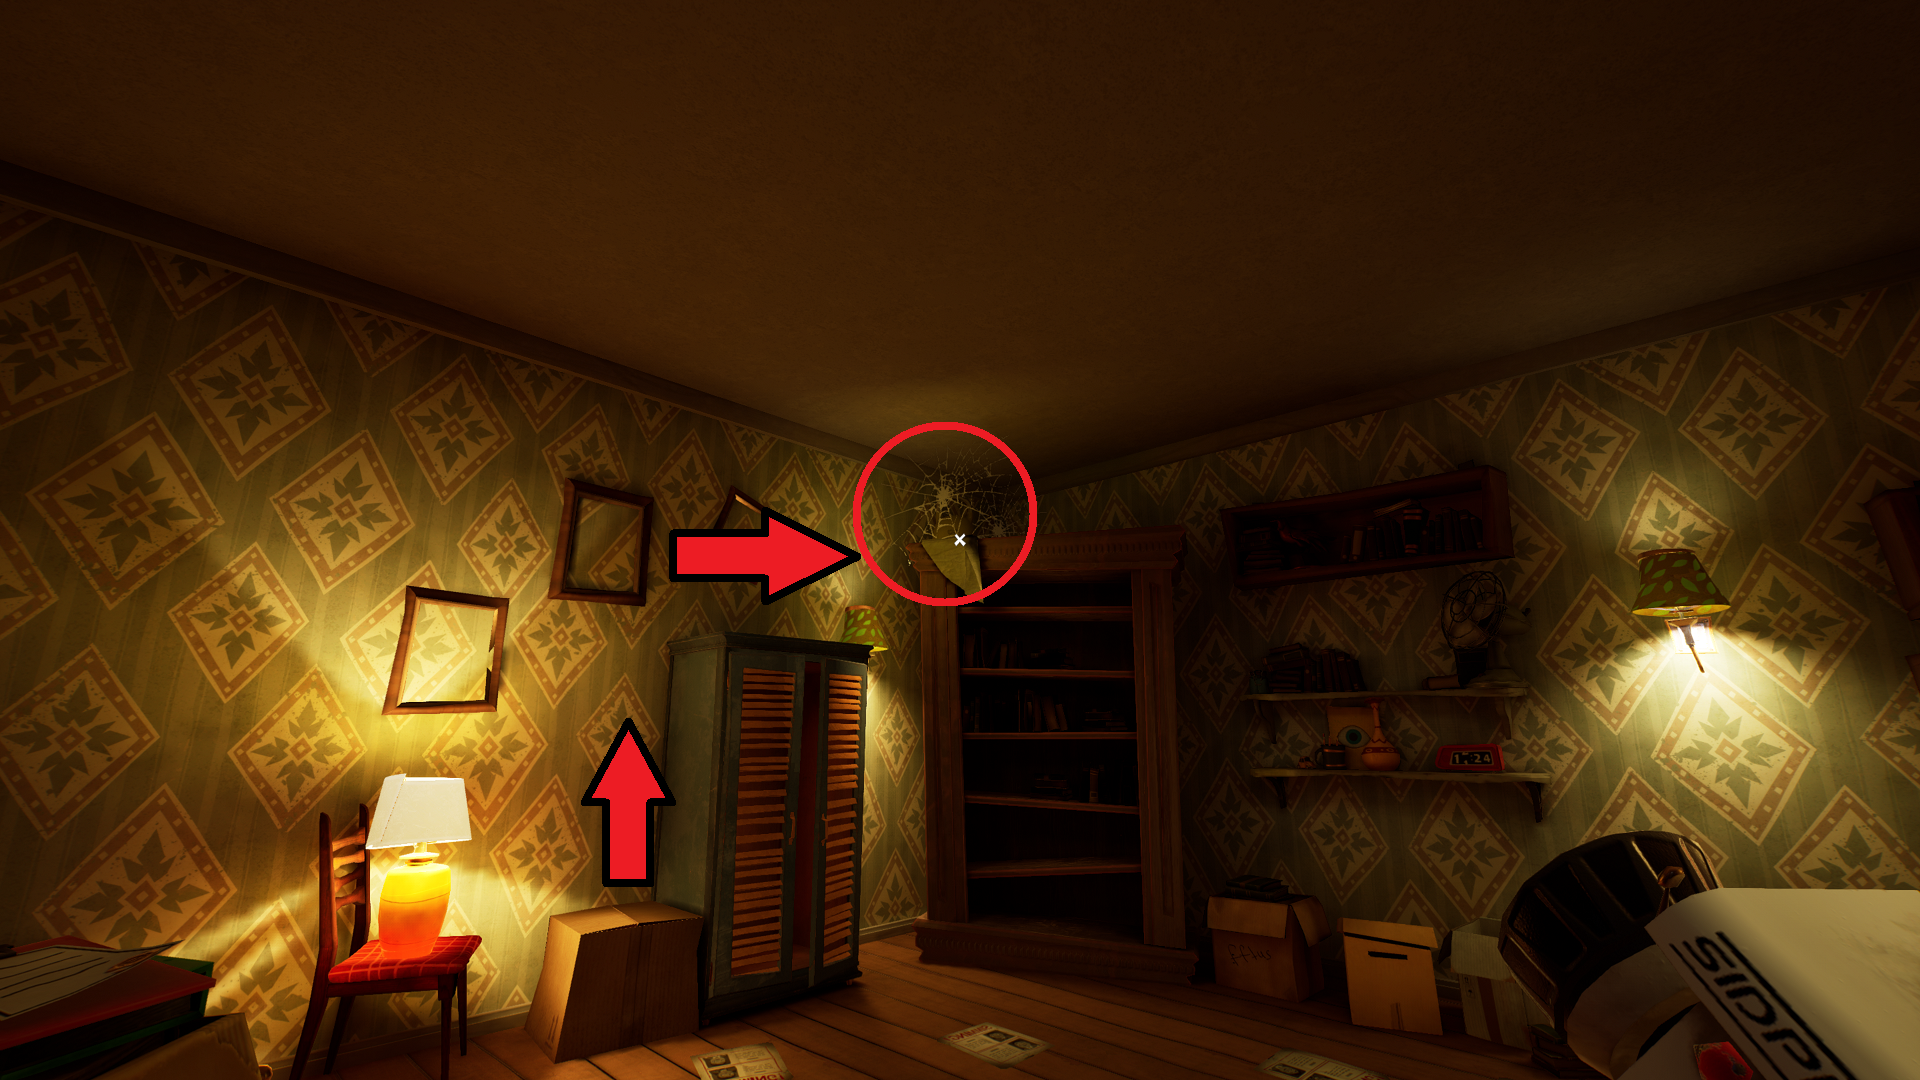
From there, go back to the stairwell leading upstairs. Facing the stairwell, turn right to face the bathroom at the end of the hall. There is a cabinet you can hide in on the right side of the hallway, diagonal to the stairwell, with a painting above it nearly touching the ceiling.
Climb up the cabinet, and interact with the painting to move it, revealing a small passageway that overlooks the kitchen. Pick up the neighbor doll inside.
Where to Find the Boy Doll
Painting Combination Lock Code
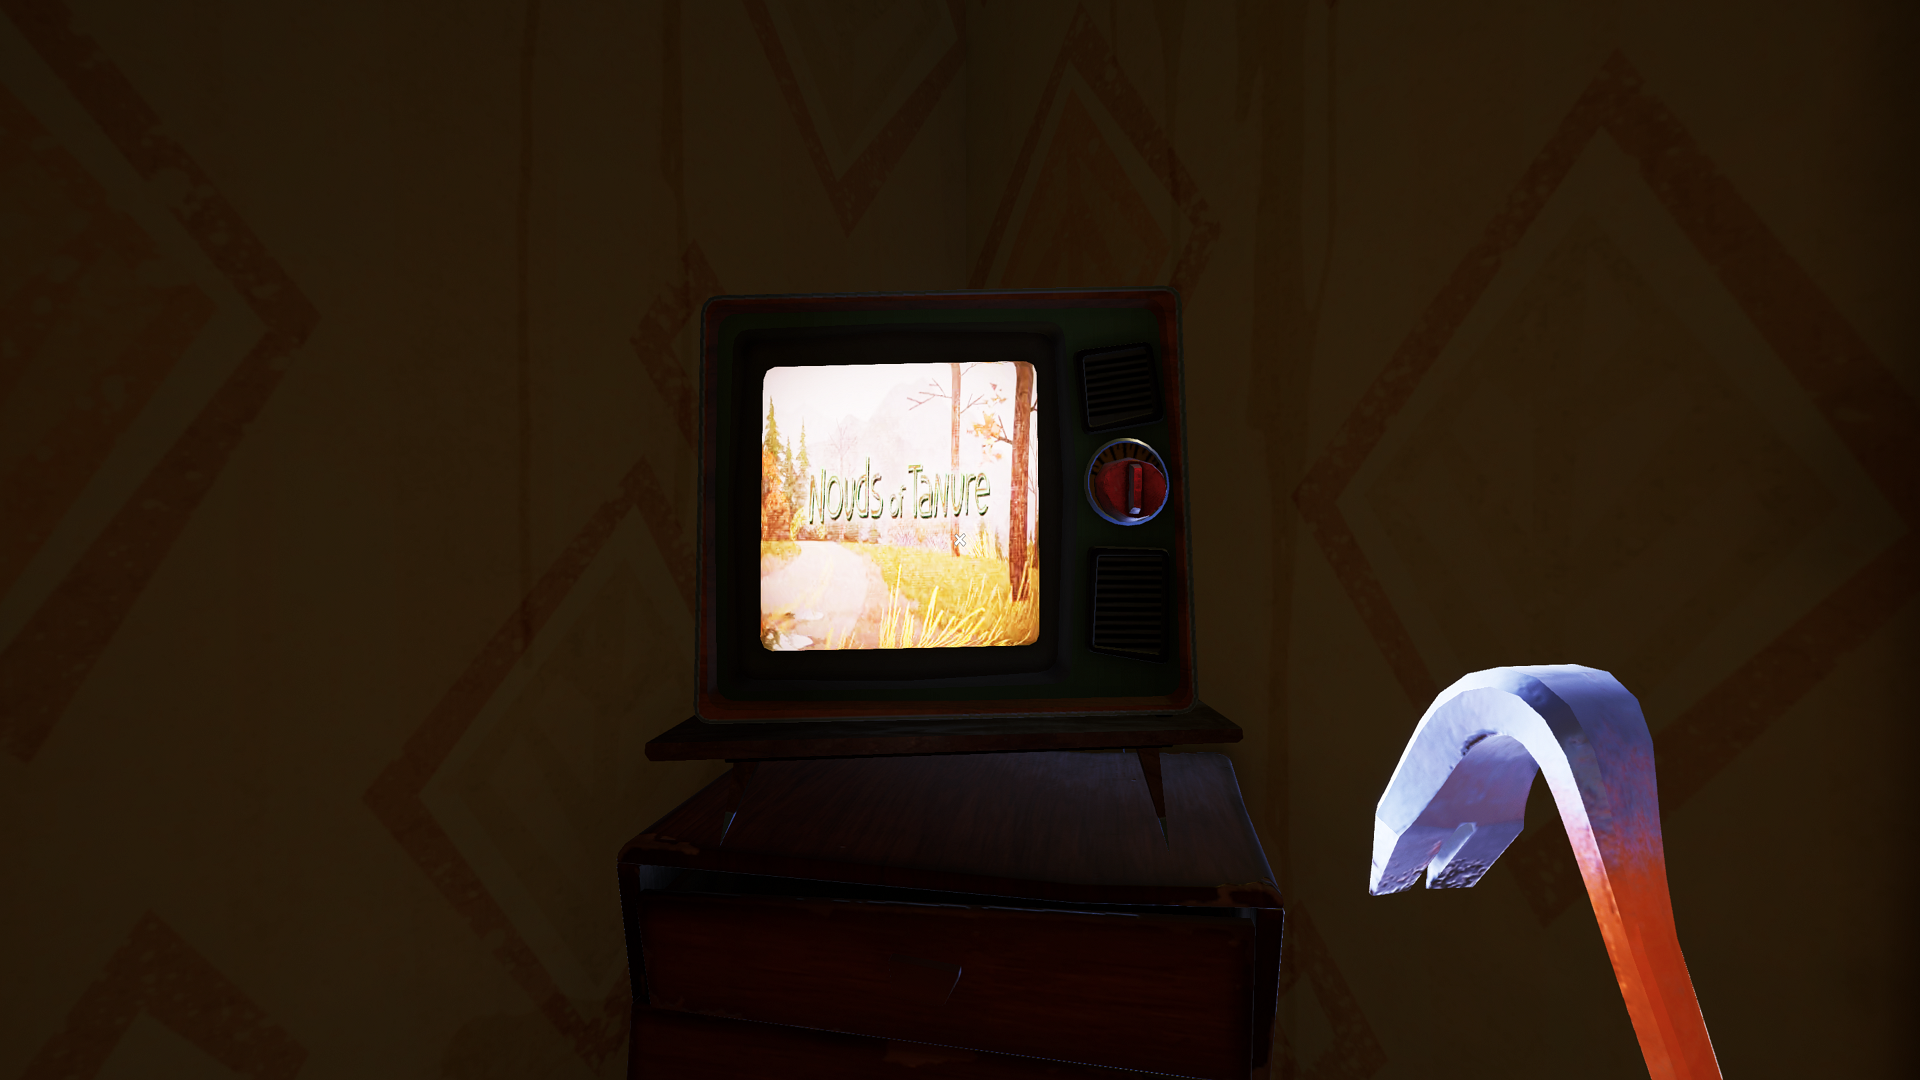
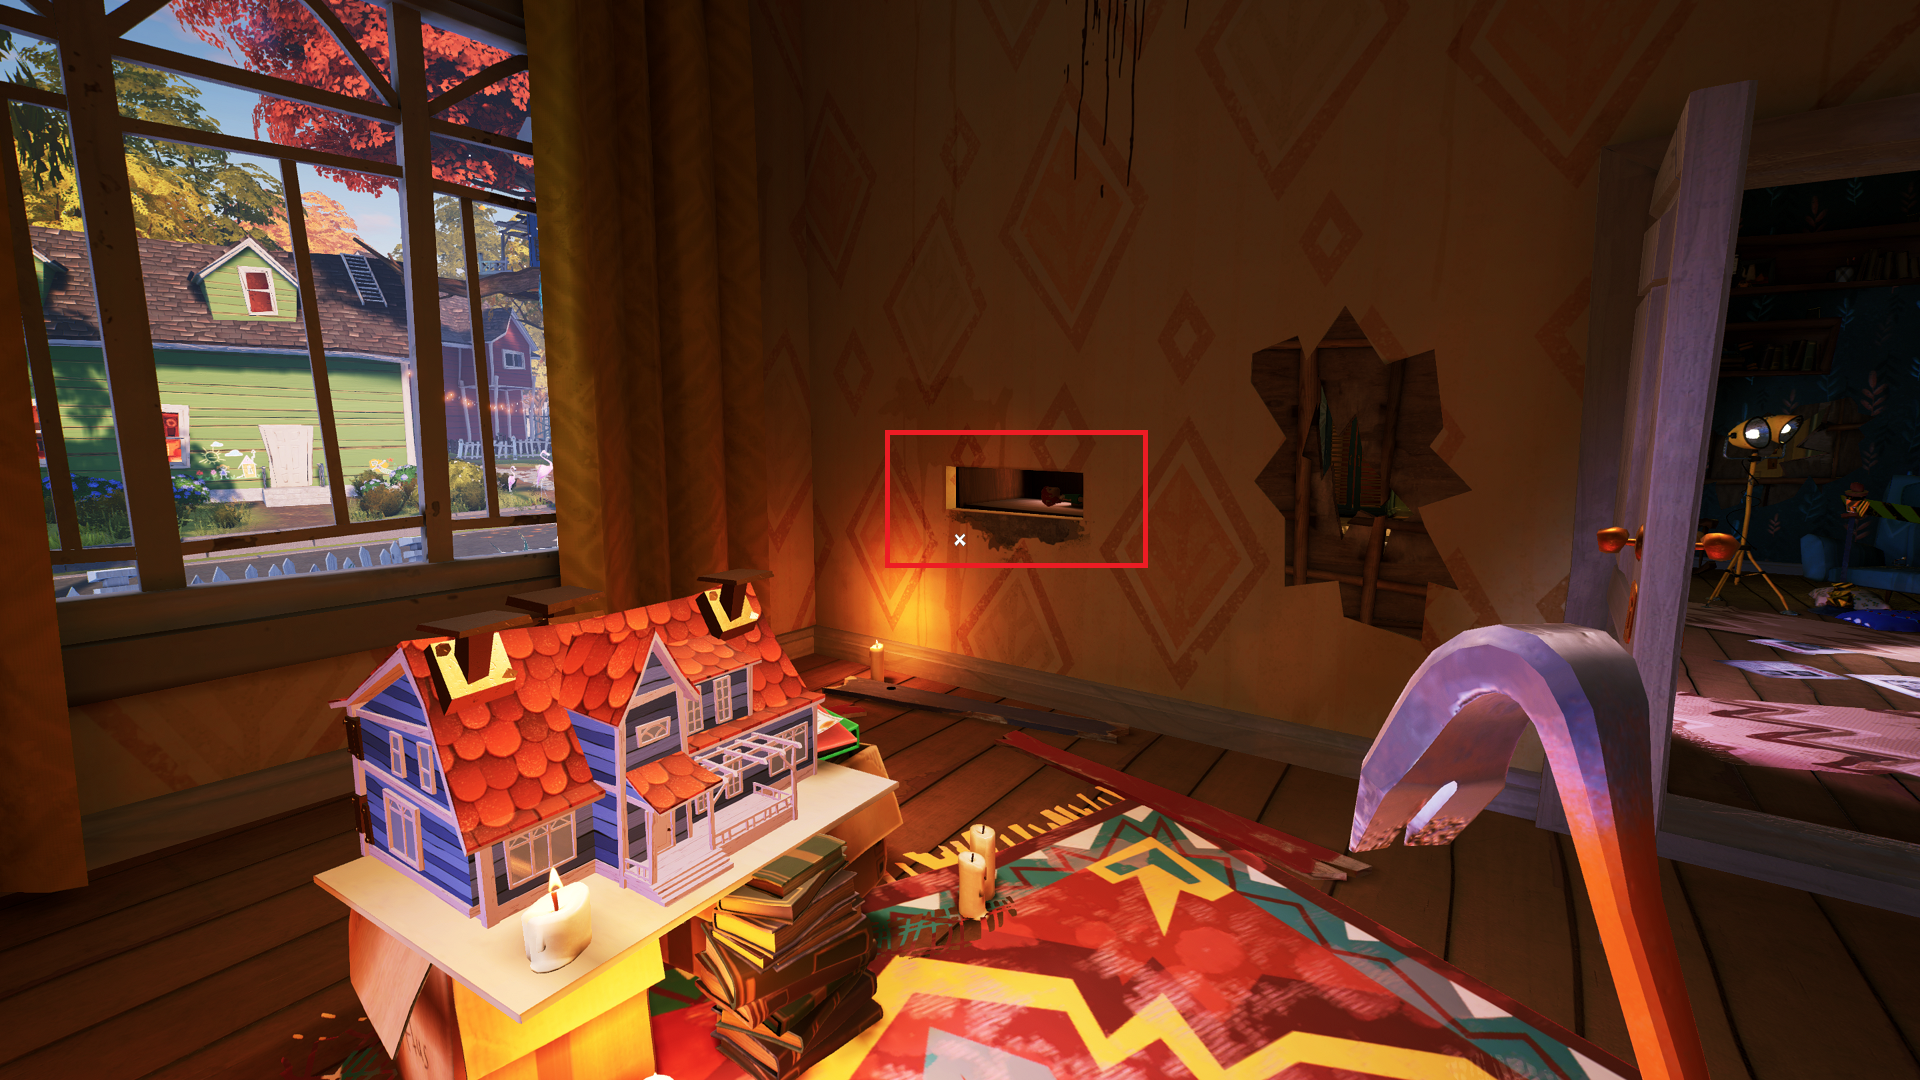
Now drop back down, and interact with the frame to the right of the stairwell, the one with the bucolic mountain road scene, and it will shift, revealing a combination lock with three lettered disks of seven letters each.
This one is a bit of a head-scratcher, as there’s not a discernable way to deduce the combination outright or by searching for word clues in a traditional sense. Instead of relying on trial and error, turn on the television in the room with the safe (to the left of the stairwell). Nouds of Tanure will appear on the TV screen.
With that information, go back to the combination lock, and turn the lettered disks to read NOT, opening a secret passageway in the wall. Go inside to pick up another crowbar (because why not?) and the boy doll off a shelf on the right side.
Return to the kitchen. Place the girl doll on the left, the boy doll in the middle, and the neighbor doll on the right. With them in place, a compartment will open on the left side of the dollhouse, giving you the first of four basement door keys.
Safe Code Solution (Red Door Key 2)
Now return to the room with the safe for the next key. The safe code is a four-number combination found on four numbered toy blocks found around the house. If you look above the safe itself, you’ll notice four colored flags illuminated by a lamp. These colors correspond to the colors on the four blocks and denote the block/number order for the safe code.
Toy Block 1 (Green, No.8)

The first block is the green block, number 8, to the left of the safe on the same table.
Toy Block 2 (Red, No.1)
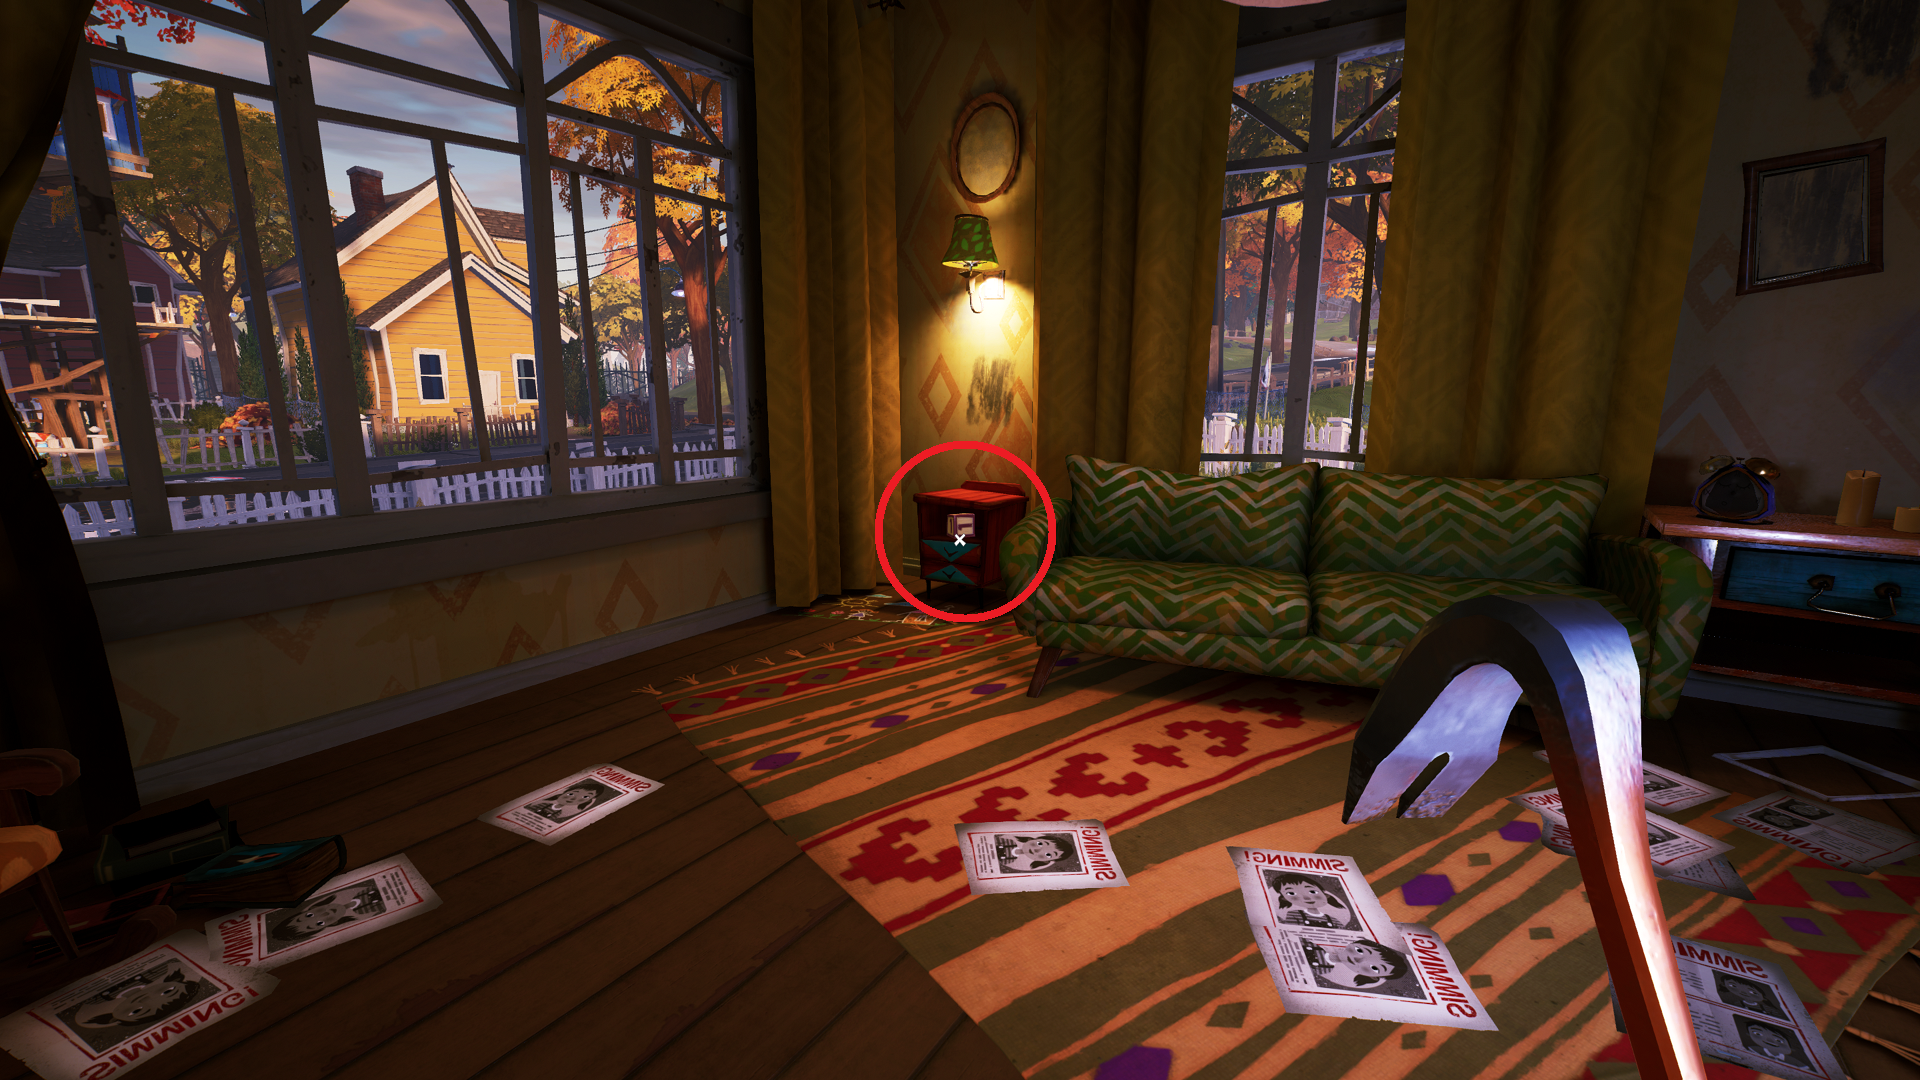
The second block is the red block, number 1. It can be found on the left side of the same room with the safe, in a desk by the window, to the left of the green couch.
Toy Block 3 (Blue, No.9)
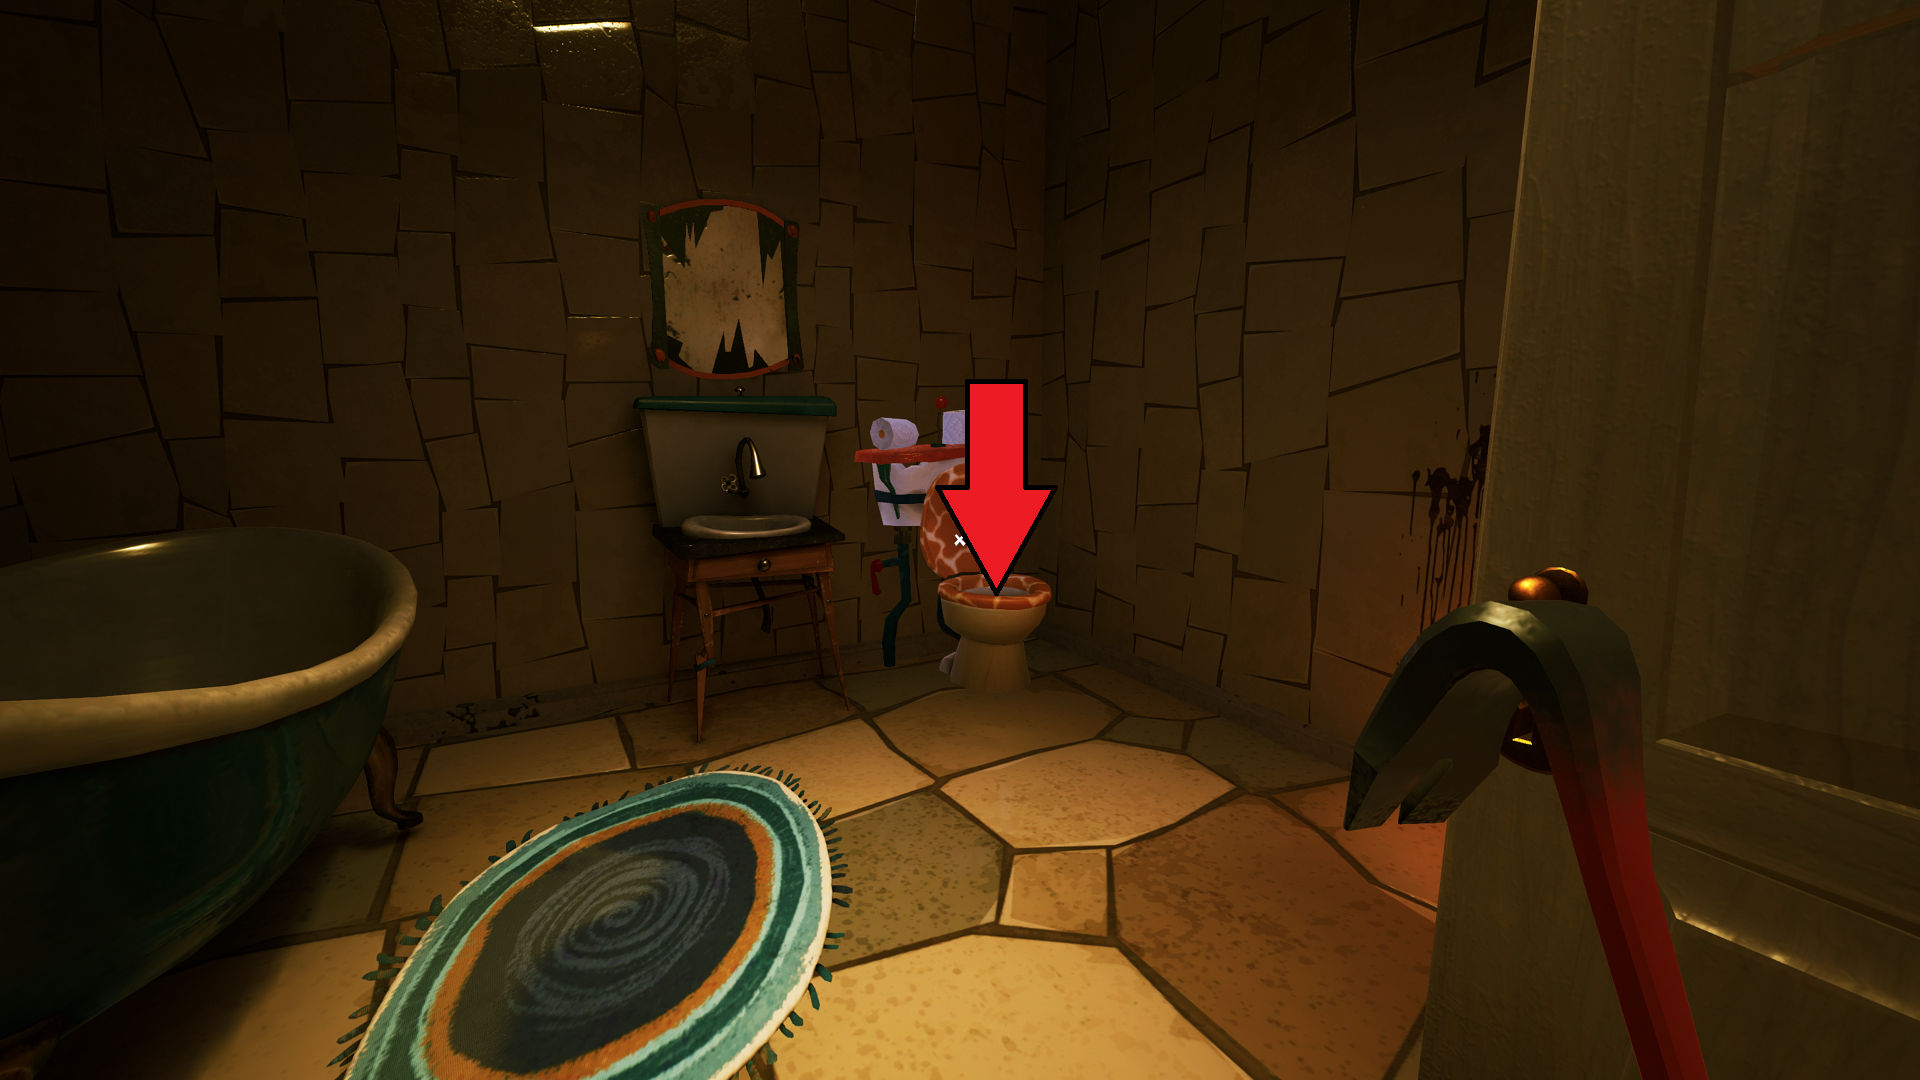
The third block is the blue block, number 9, and can be found in the toilet in the bathroom by the kitchen.
Toy Block 4 (Yellow/Orange, No. 4)
The fourth block is the yellow/orange block found behind a plate in the refrigerator in the kitchen.
Return to the safe room, and place the blocks in the following order:
- Red
- Blue
- Green
- Yellow
The safe code is 1984. Punch that into the safe, and grab the second red basement door key.
Toy Car Puzzle and Photo Frame Puzzle Solutions (Red Keys 3+4)
Now use the scissors to cut the police tape on the stairs. You’ll find two puzzles on the second story of Peterson’s house: the toy race car puzzle and the photo frame puzzle (which requires you to find four picture pieces). To minimize backtracking and pick up all of the items and picture pieces in the most efficient manner, we’ll cover both puzzle steps at the same time below.
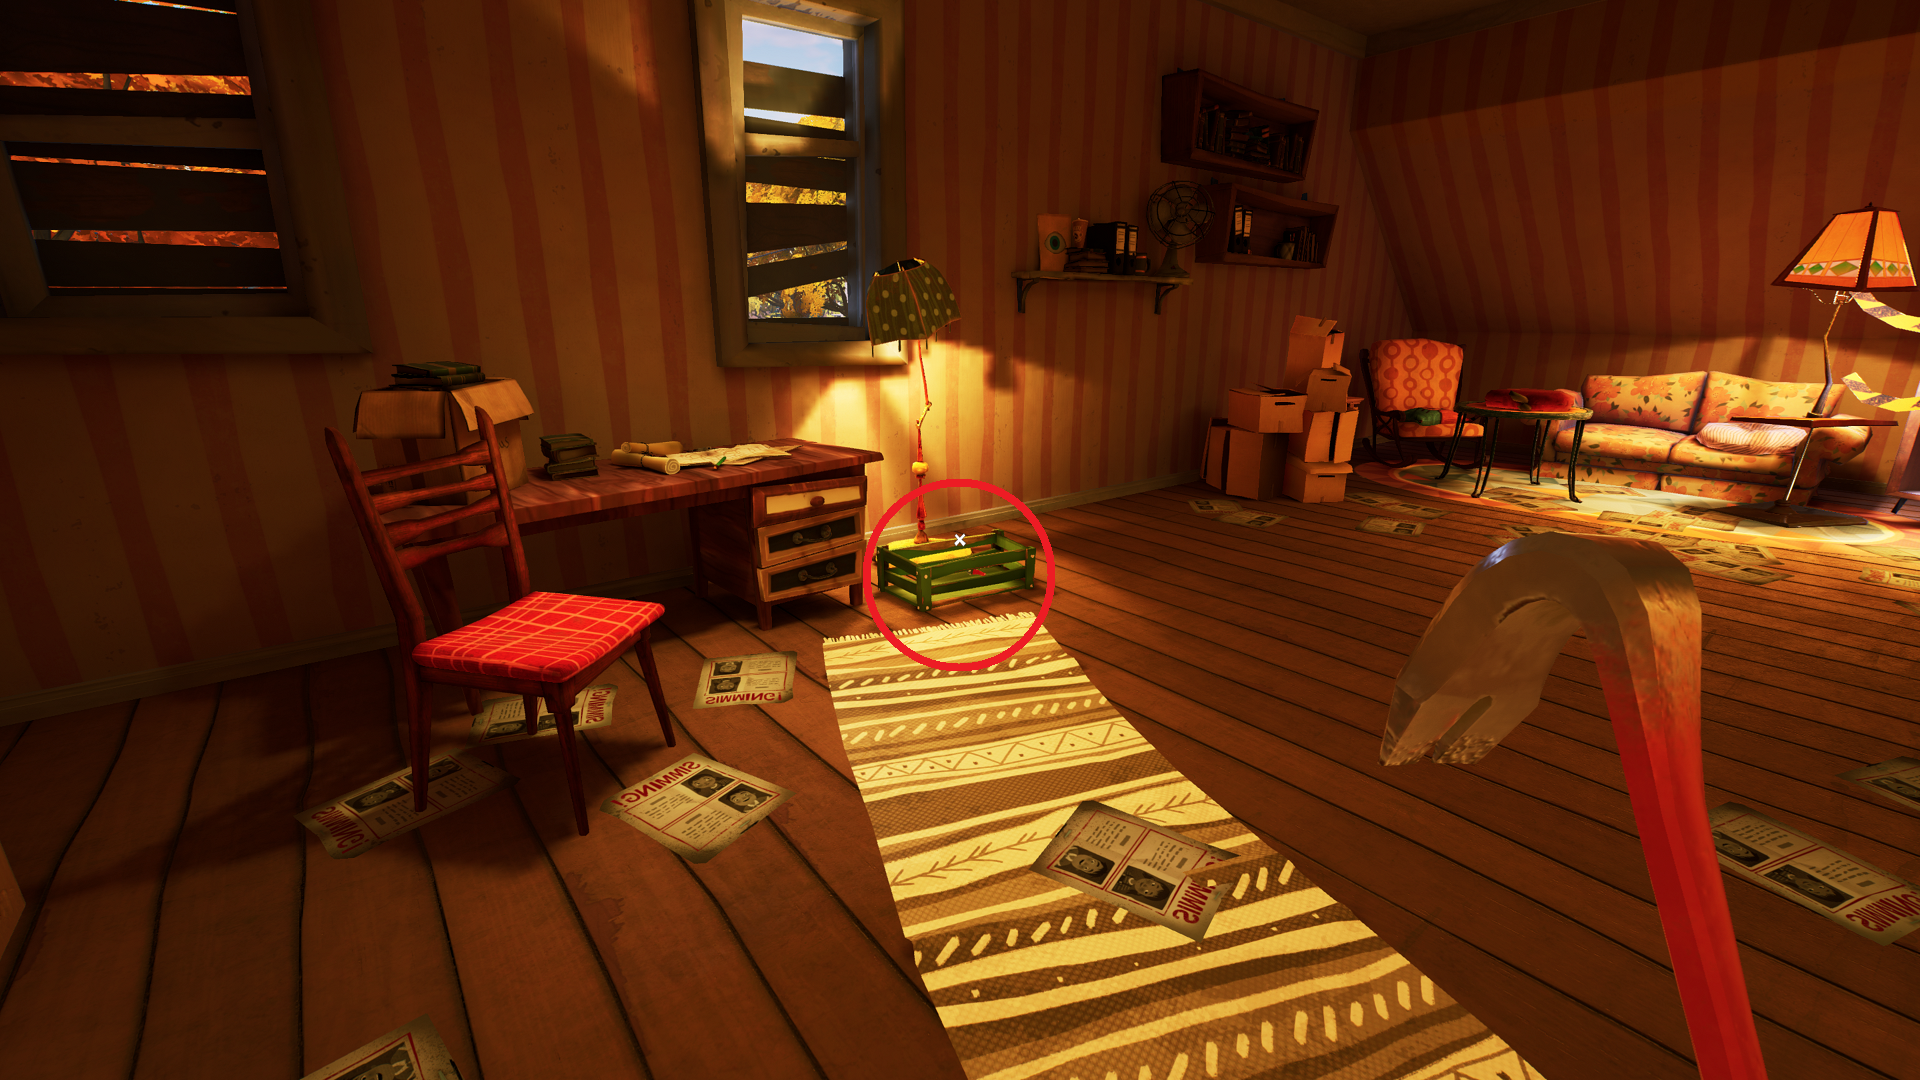
At the top of the stairs, go through the door in front of you (to the left, not the right). Inside the room, interact with the green box underneath the lamp by the desk and chair ahead to pick up a switch handle.
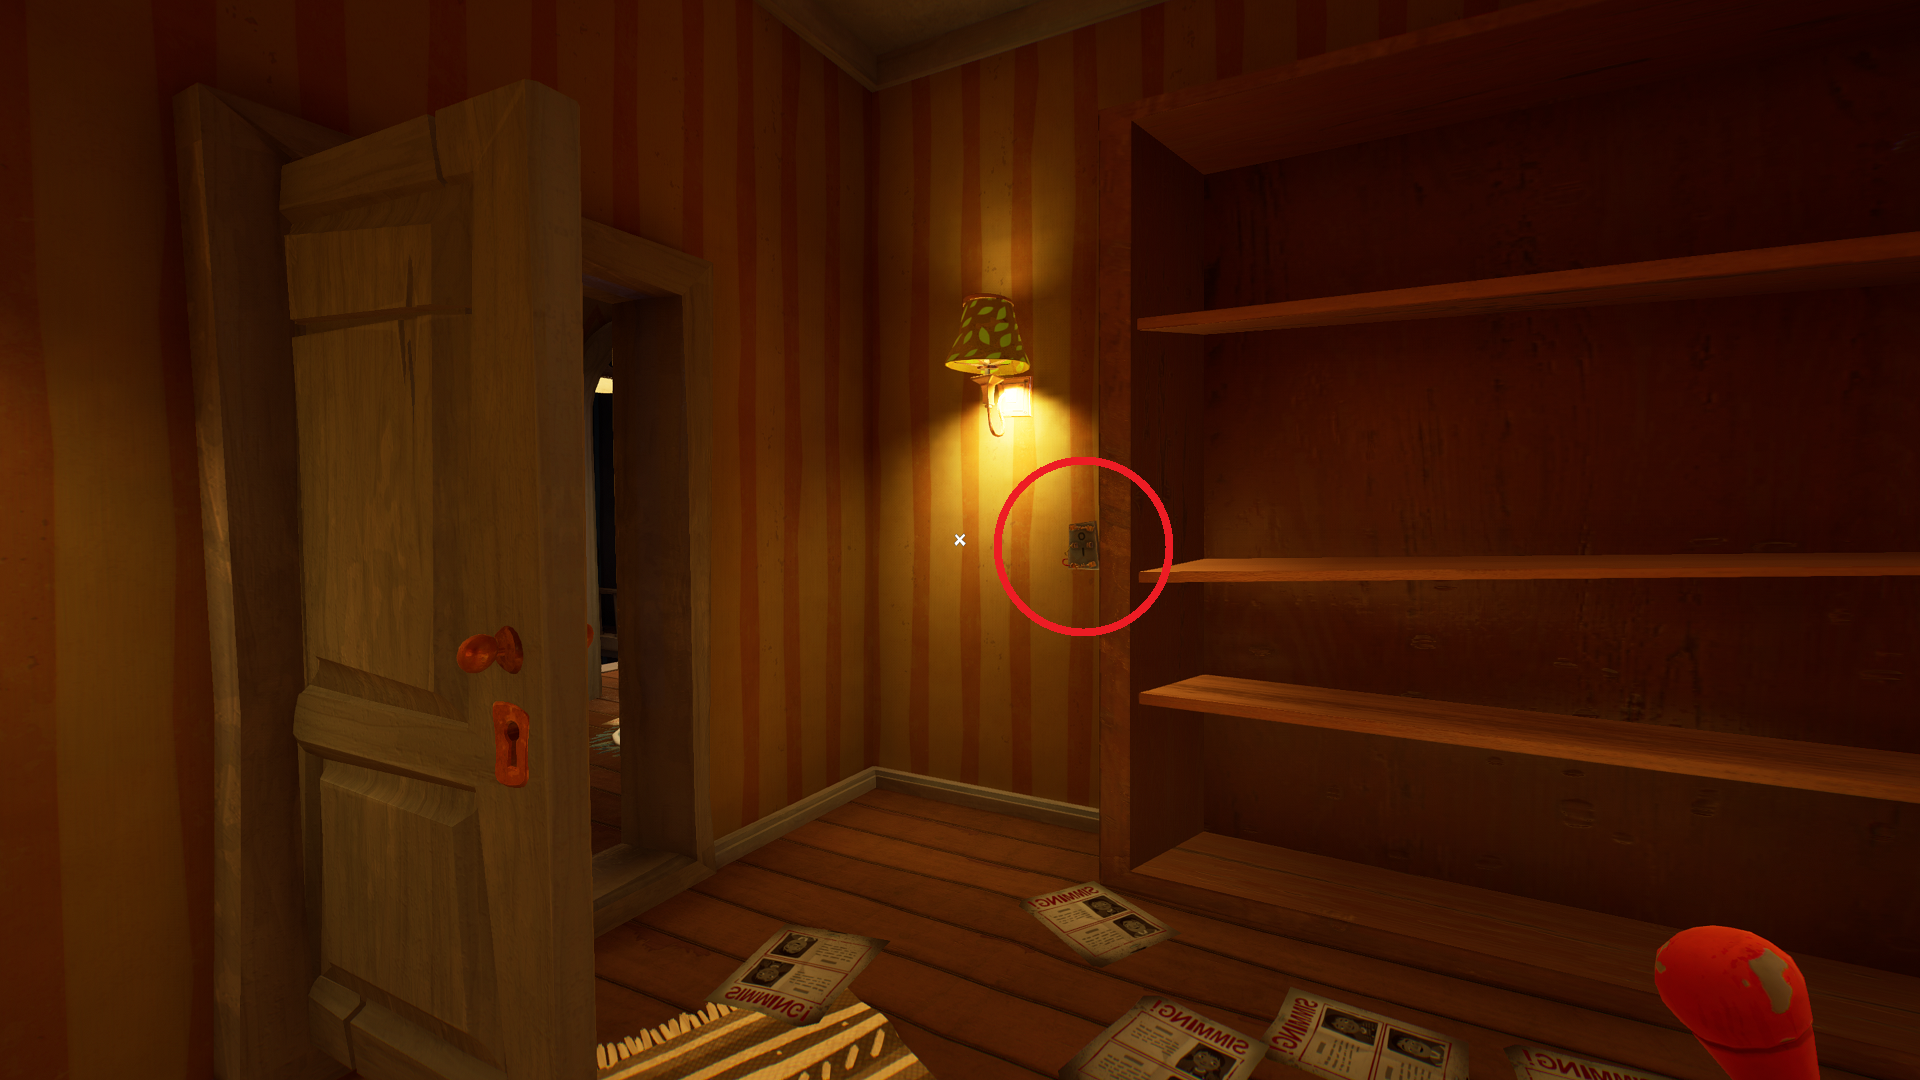
Turn left, back toward the entrance, and combine the switch handle with the switch plate on the wall by the bookshelf. Pulls the switch to move the bookcase and reveal a hidden room. Use the scissors to remove the spiderwebs from the green device on the table to the left, and remove the battery from the device for the toy car puzzle.
Picture Piece 1
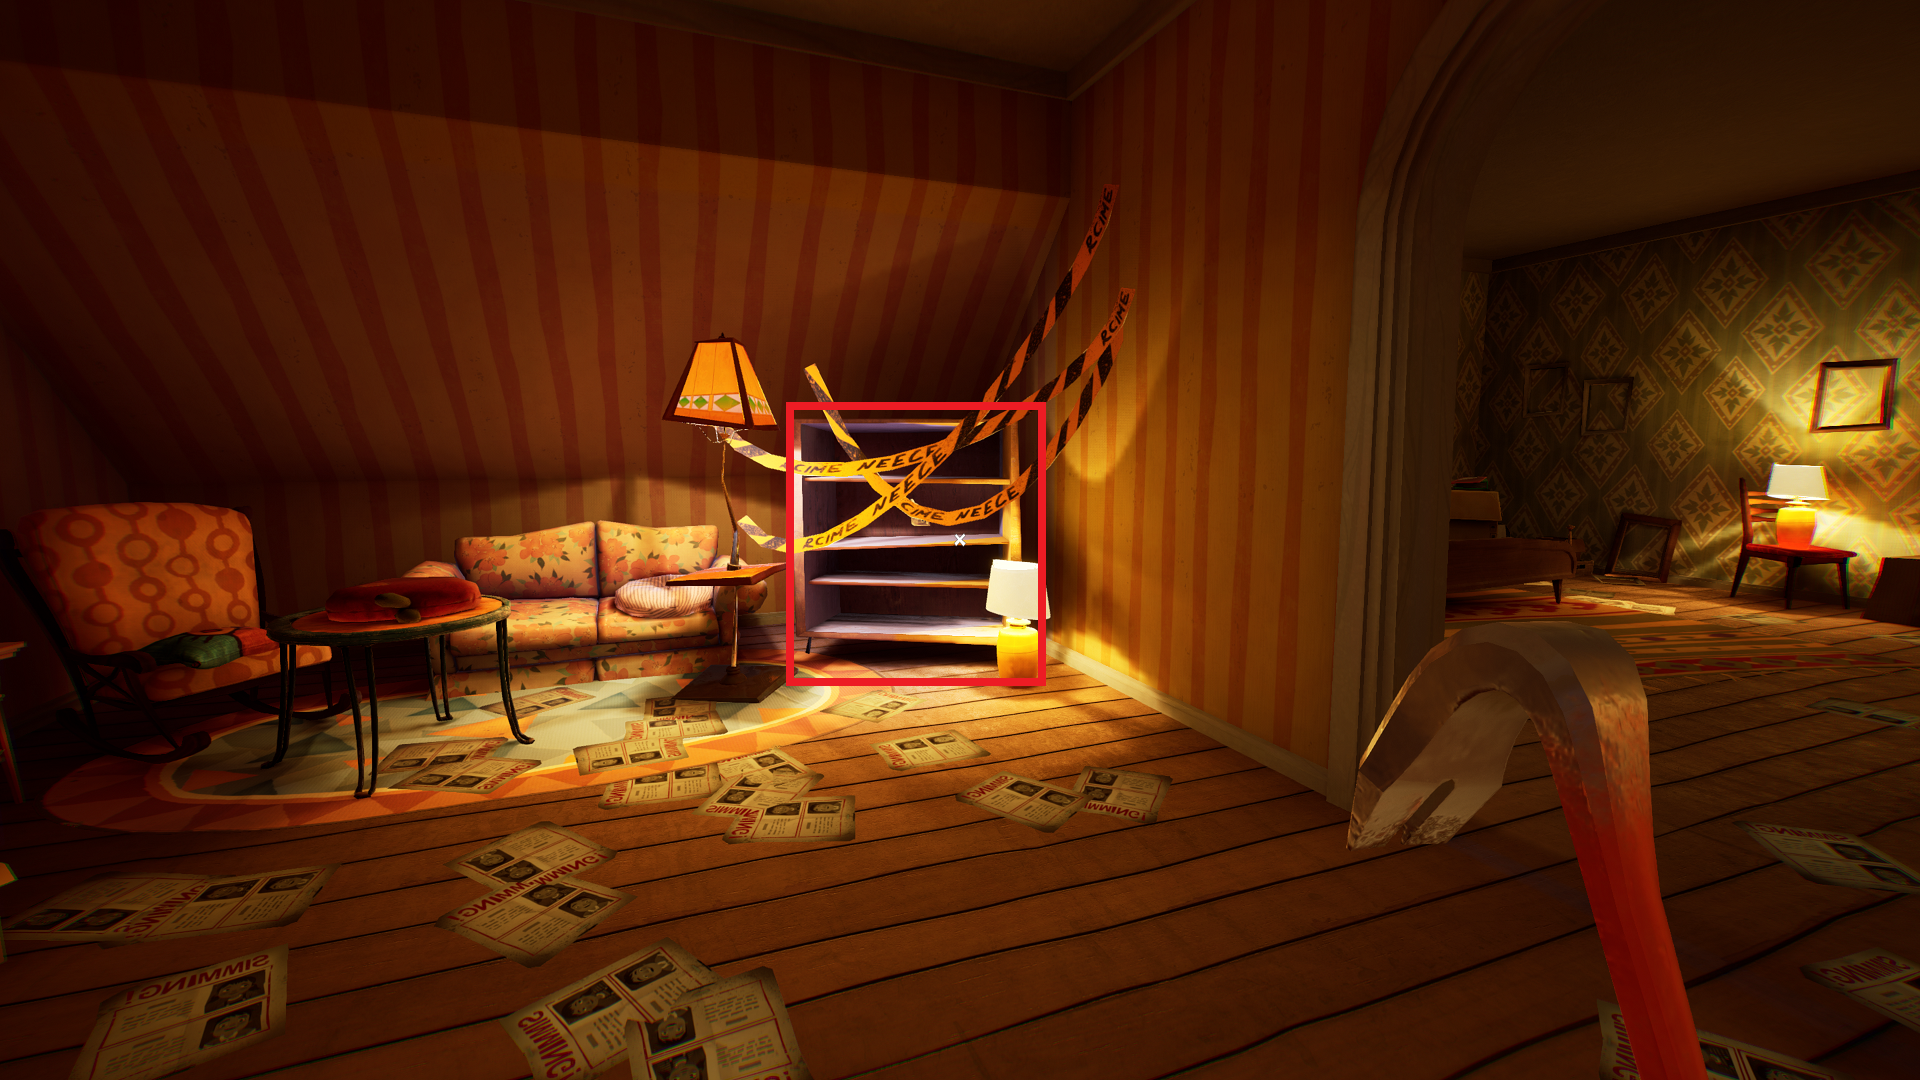
Exit the secret room, and cut the police tape on the bookshelf on the other side of the room near the sofa and chairs. Grab the first picture piece for the photo frame puzzle.
Where to Find the Pressure Plate Weight
Turn right, and go through the archway into the bedroom. Turn left immediately to find the photo frame; you can go ahead and place the first picture piece now or wait until later. Either way, you’ll notice a hiding cabinet near a lamp on the far side of the room, as well as a taller shelf in the back right corner with a spiderweb and an item on top of it. Climb the hiding cabinet, and cut the spiderweb to get the weight.
Picture Piece 2
Now exit this area, and go to the end of the second-floor hallway. Use the crowbar to open the crate at the end and pick up the second picture piece.
Picture Piece 3
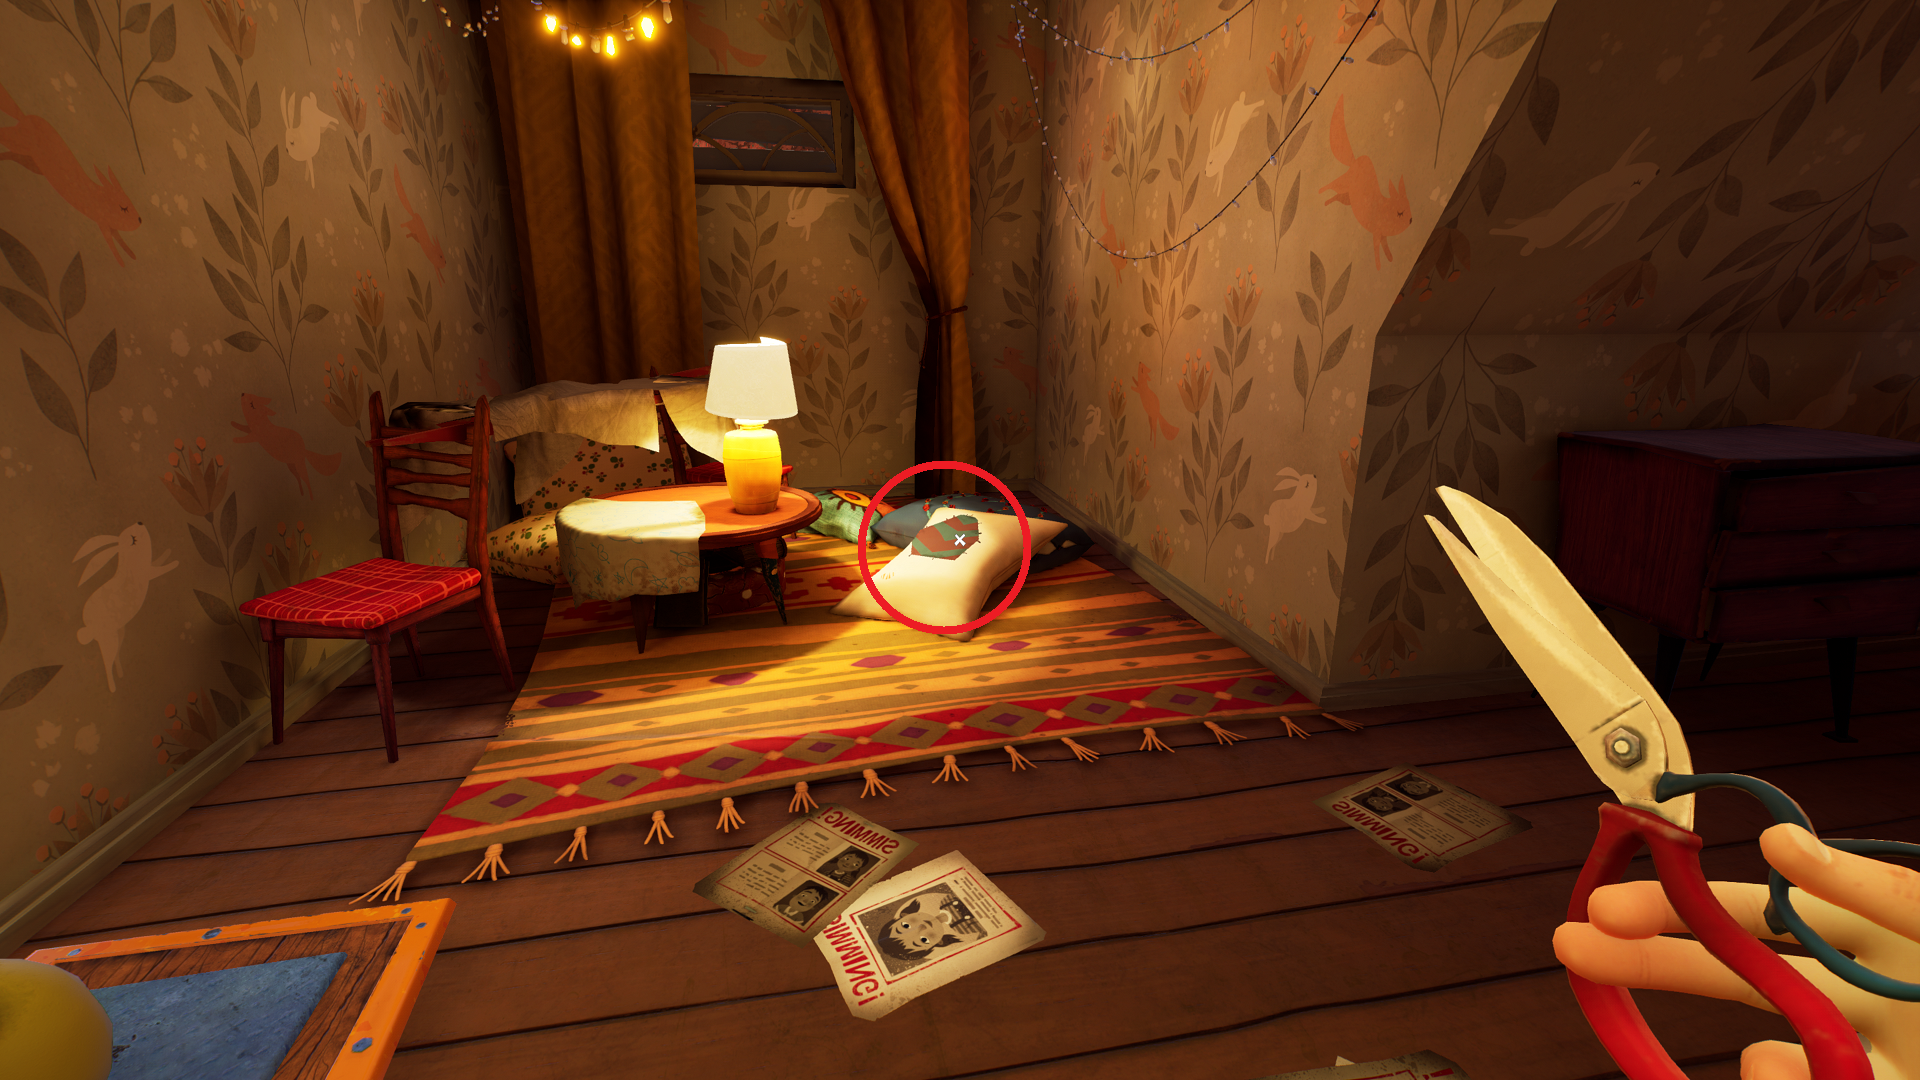
From there, go into the bedroom on your left. Straight ahead, you’ll see a pillow fort with some chairs. Use the scissors to cut open the white pillow with a grey and green patch for the third picture piece.
Picture Piece 4
To the left of the pillow fort is a pressure plate. Put the weight on the pressure plate to open a locked armoire on the opposite side of the room. Interact with the armoire for the fourth and final picture piece.
Remote Control Car Key
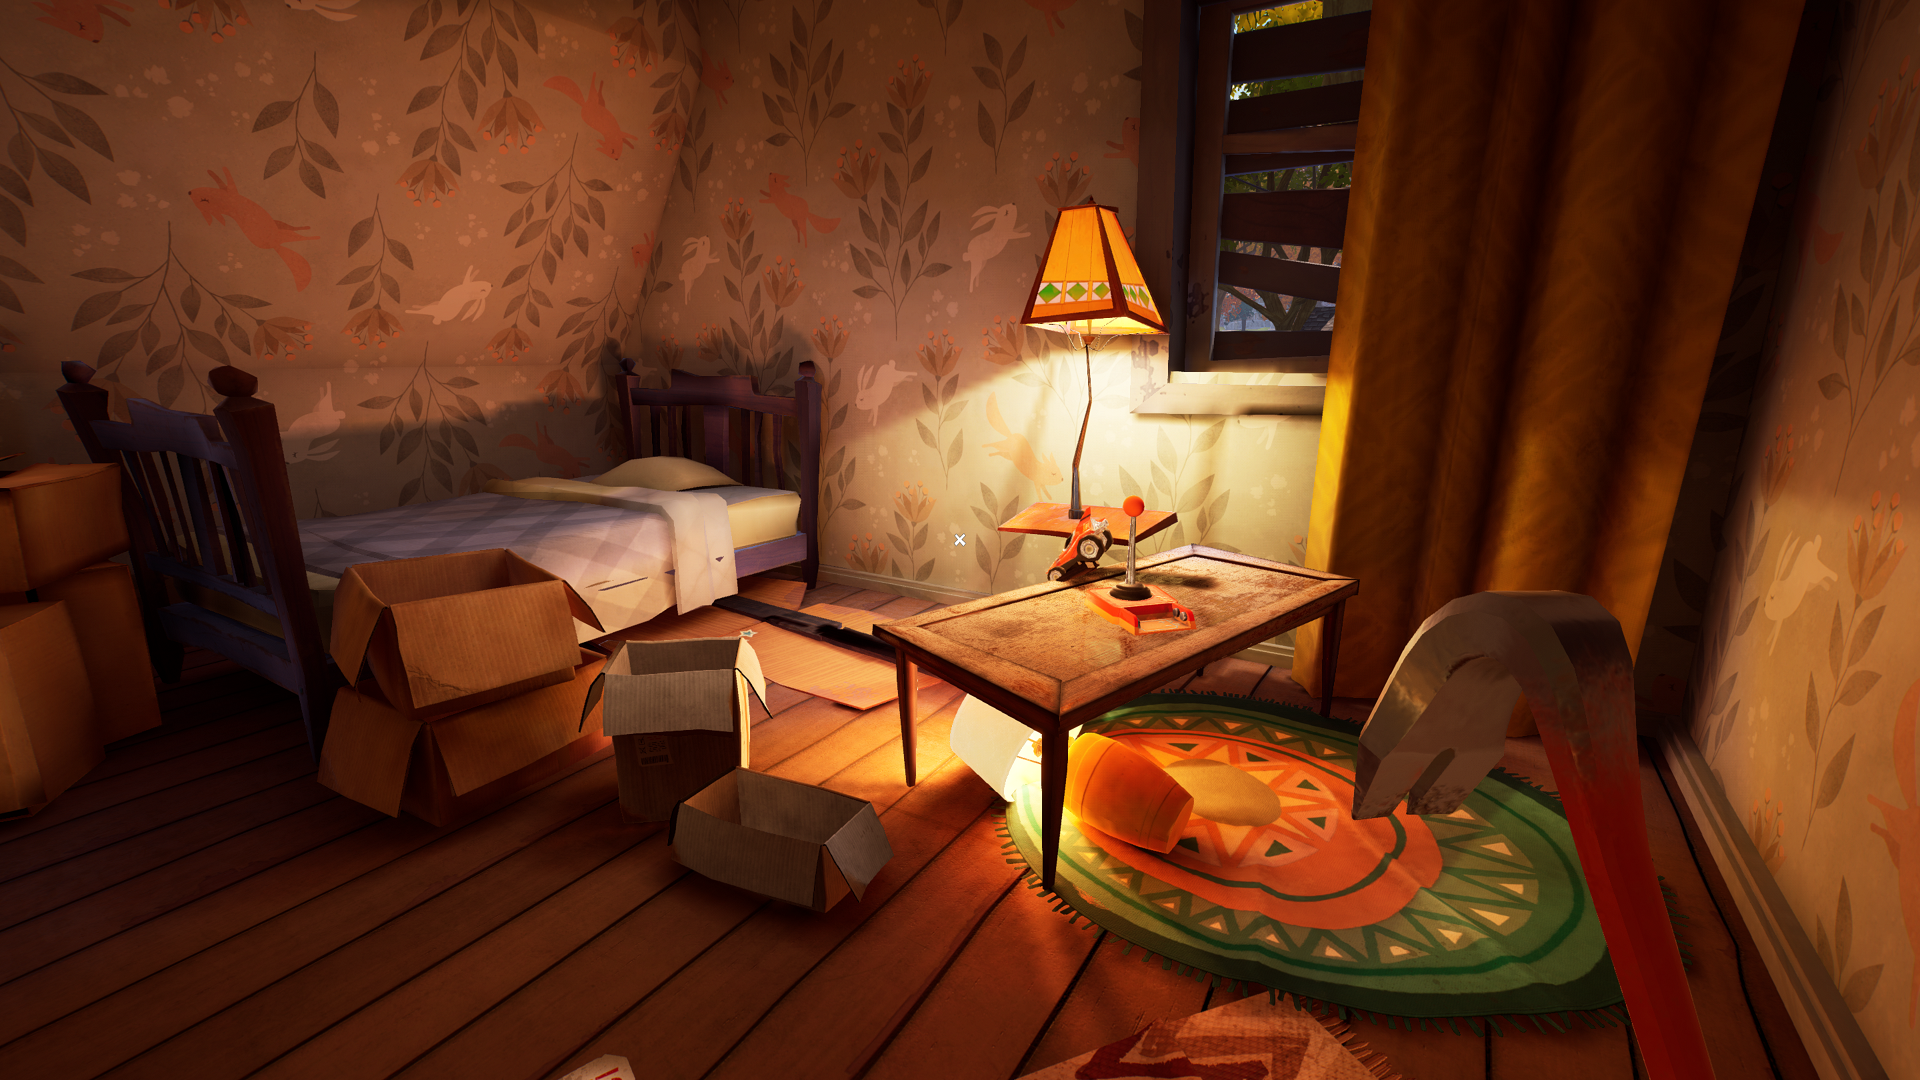
Don’t run back to the photo frame just yet, though! Place the battery you got from the green device in the secret room into the control stick by the bed to your left. Interact with the control stick to send the remote control car down the track and underneath the bed. Interact with it again to reverse the toy car up the track with the third red door key.

With that done, return to the photo frame, and place the four picture pieces (in no particular order). With the photo complete, a secret compartment will open in the shelf to the right of the frame. You may need to stand on the nearby cardboard boxes to look inside and grab the fourth and final red door key.
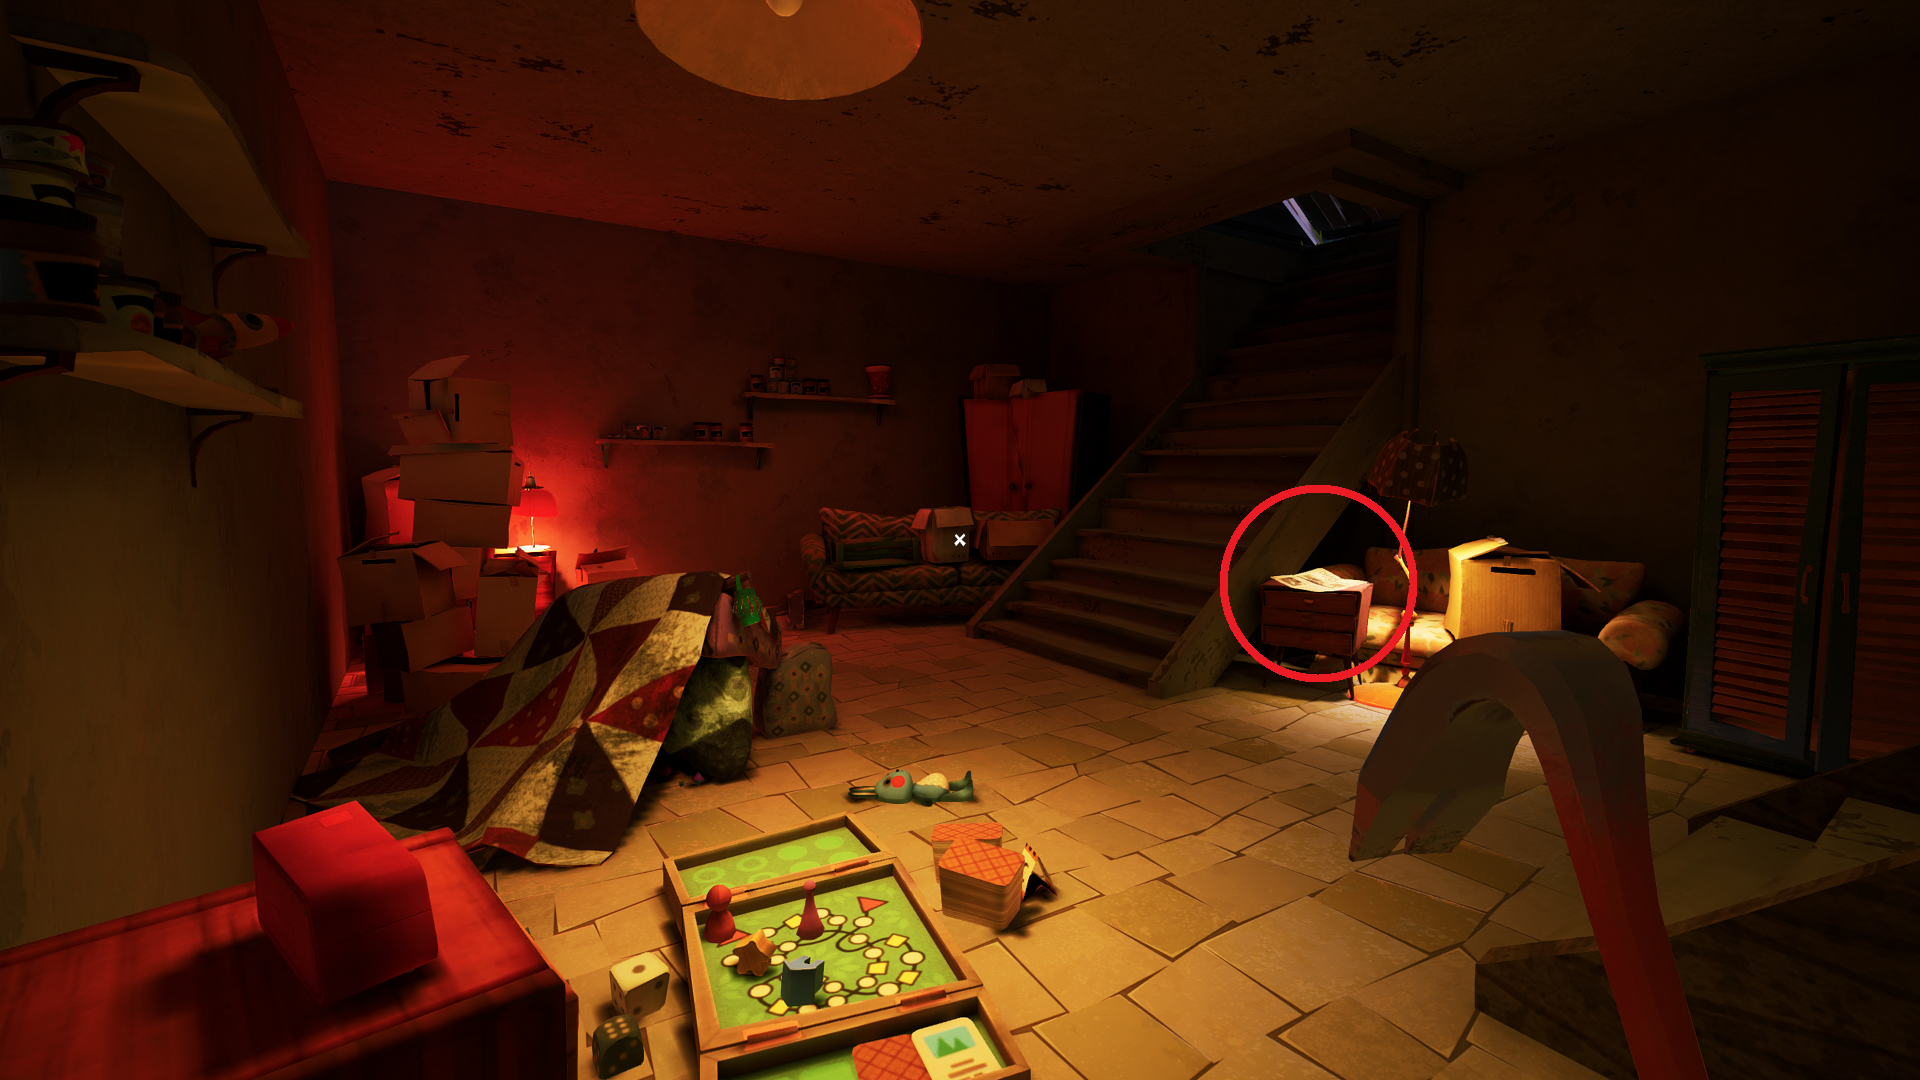
From there, go back downstairs, and use the keys to unlock the basement door. Go down the stairs, and interact with the newspaper on the set of drawers by the lamp on the right side. A cutscene will play, and the newspaper will be replaced by another key.
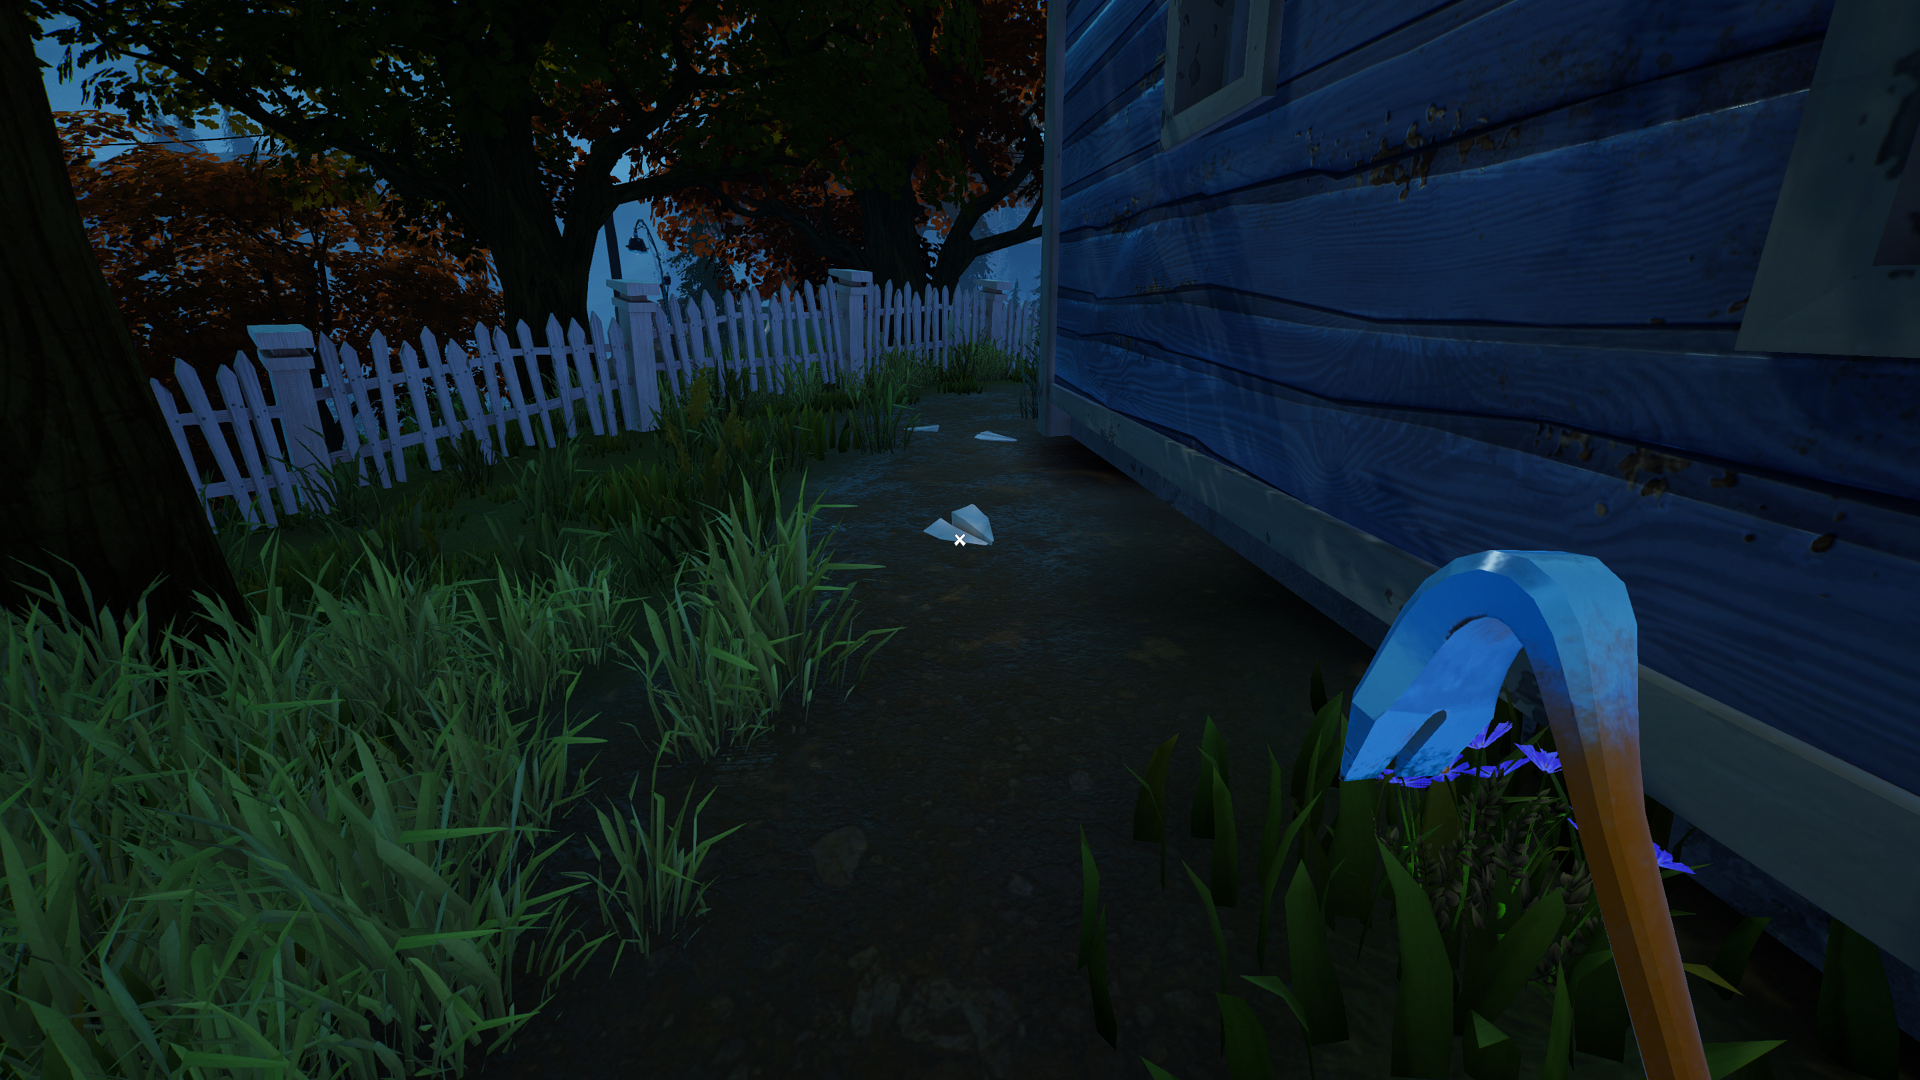
Use that key to open the basement storm doors leading outside. After another cutscene, follow the trail of paper airplanes out to the road, then across town. Follow them left at the bakery, which will take you up a few flights of wooden stairs and platforms to the Museum. Go up the stairs into the Museum’s foyer, and interact with the shovel on the right side by the locked door.
And that’s the end of our walkthrough guide for Hello Neighbor 2 Act 1. On to Act 2 and the Museum!


Published: Dec 9, 2022 01:31 pm