
Veterans of The Evil Within likely have a love-hate relationship with locker keys, but however they feel, they’ll have to contend with them again in The Evil Within 2. Each locker key is hidden inside a small, well-hidden white statue, which must be broken before you can pick up the key. You can break some statues with your melee attack, but other statues are located high above the ground and must be shot.
Locker keys can be found just about anywhere, and are made to be missed. They can be found in blind corners, high perches, against backgrounds that they blend into, and in one memorable instance, during the run-up to a boss fight when the last thing on your mind should be keeping your eyes open for collectibles. There is almost nothing fair about the locker keys’ locations, and every time you find one on your own, it should feel like a minor victory.
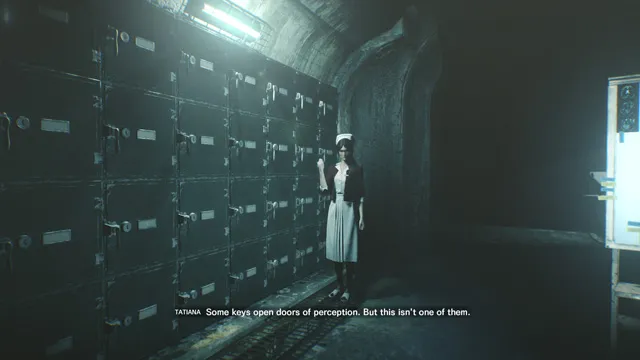
Your locker keys, once collected, can be used to unlock Tatiana’s stash of ammunition and supplies, which is accessible by sitting in the wheelchair in Sebastian’s Room. When you return there with your first locker key in hand, Tatiana will briefly introduce the concept to you, although you can see the lockers to the left the first time you go in for a green gel upgrade.
The supplies from lockers are randomized, though you tend to get more and better items as you collect and use more and more keys. As in the first game, the items you find in a locker don’t have to be collected on the spot; you can and should leave them in reserve in case you need them later.
Much like the other Evil Within 2 guides, this one deserves a spoiler warning: the locations of locker keys are difficult to discuss without at least touching on the events that take place throughout the game. This guide’s written to avoid as many spoilers as possible while still being specific enough to be useful, but there are still going to be a couple of mild hints as to the game’s events. Try not to use this guide at all unless you’ve already beaten the game.
The Locker Keys and Their Statues in The Evil Within 2
Collecting and using 16 locker keys will unlock the Half the Stash trophy/achievement, while finding and using all 32 keys in a single run is worth the Locksmith trophy/achievement.
Here’s where to find all the locker keys in The Evil Within 2.
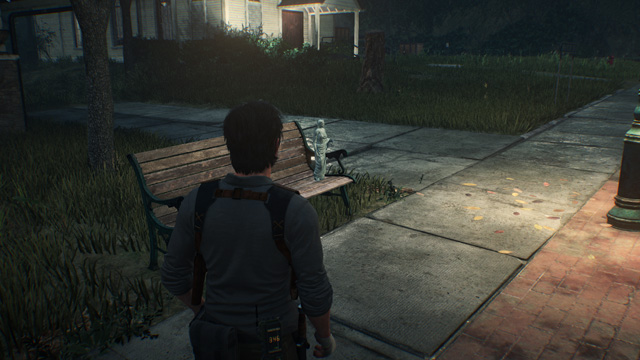
Locker Key #1: The first statue is in relatively plain sight on a bench near the church outside O’Neal’s safe house in Chapter 3.
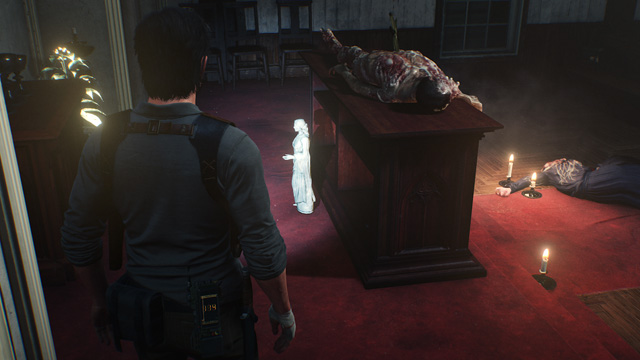
Locker Key #2: Check behind the altar in the church near O’Neal’s safe house in Chapter 3 to find this statue. Entering the church triggers an ambush, so don’t go in unprepared.
Locker Key #3: In the small house at 322 Cedar Street in Chapter 3 you can use a hidden computer in the basement to visit the Armory section of the Marrow — well before any point in the story in which anyone explains what the Marrow is to you. Here, you can dispatch a handful of enemies to find a valuable sawed-off shotgun.
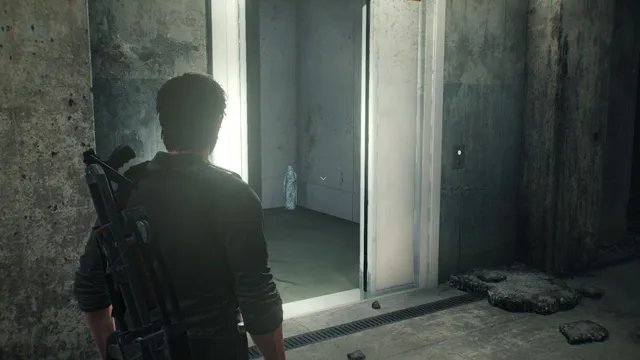
When you head back to the entrance with the shotgun in hand, two of the Lost force their way out of a formerly-shut elevator. Once they’re dealt with, you can find a statue inside the elevator car.
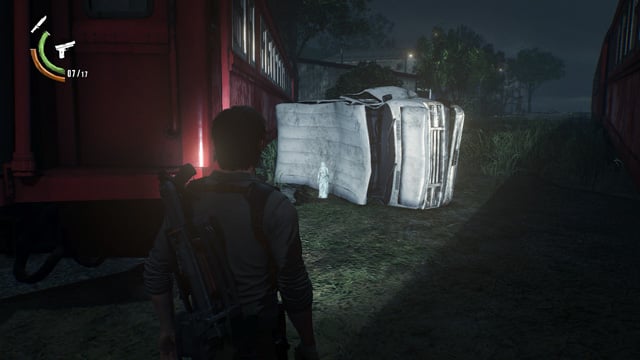
Locker Key #4: Check between one of the crashed trains and a wrecked white van on the west side of Union in Chapter 3 to find this sculpture.
Locker Key #5: This statue can be found in relatively plain sight on the porch of a house across the street to the east of Union Auto Repair in Chapter 3.

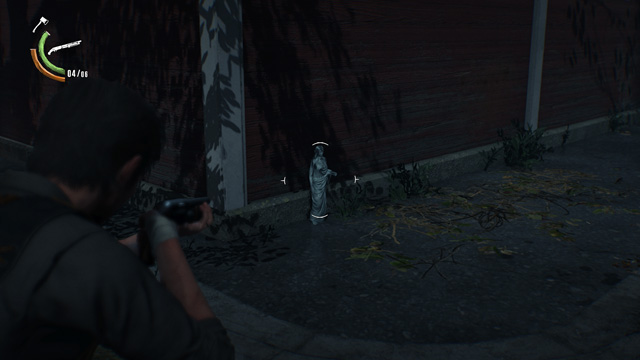
Locker Key #6: This sculpture is hidden against the northwest exterior corner of the workshed where you can find the parts to repair the sniper rifle in Chapter 3.
Locker Key #7: This statue is underneath the sign for the Pit Stop, east of the Union Power & Gas safe house. You have to pass right by it to complete Chapter 3.

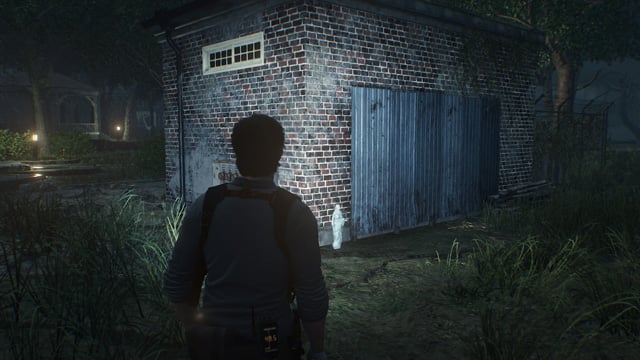
Locker Key #8: Go behind the Pit Stop, facing its dumpster, as you do during a mission in Chapter 3, and look to the right. A locker key statue is wedged into a nearby corner of the building, where you have to shoot it to break it.

Locker Key #9: Once the Shooting Range opens in Sebastian’s Room during Chapter 4, you can win this statue as a prize by scoring 2,500 points on Very Hard difficulty in Gallery Mode at the Shooting Range. This is as hard to do as the difficulty suggests, but the targets appear in a consistent, repeated pattern. It just takes a little practice.
Locker Key #10: Score 70,000 points in Chain Attack mode at the Shooting Range to nab this sculpture.
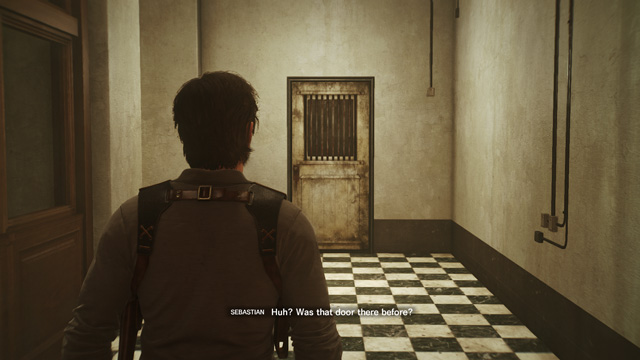
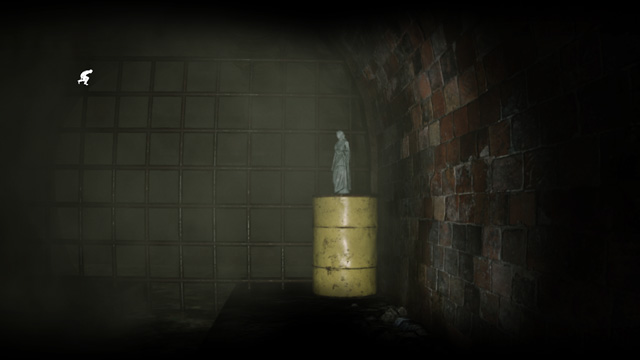
Locker Key #11: In Chapter 4, when you enter the part of the tunnels in the Marrow with the gas leak, proceed until you reach the door with the electric lock. Past it is a T-intersection with a monster to the right. Proceed left to its end and you can find the statue containing this locker key atop an oil drum.
Locker Key #12: When you get back into Union from the Marrow at the end of Chapter 4, leave the shed that contains the Marrow link and circle around to the back. The statue is between the chasm’s edge and the safe room’s southwest corner.
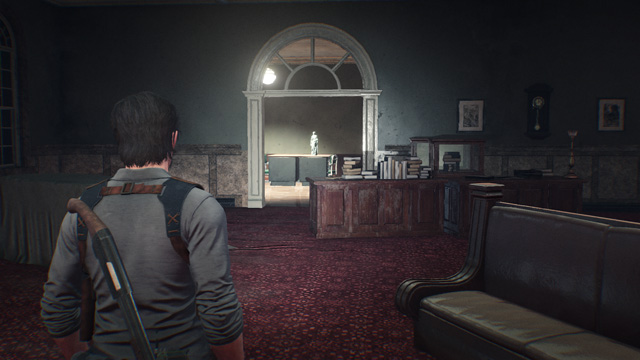
Locker Key #13: After you turn on the emitter at City Hall in Chapter 5, head back to the first floor of the building. Instead of leaving, go back through the double doors marked “Jonah Constant,” where Stefano’s “art” used to be. This time, the room is empty, but if you look to the right, there’s a locker key statue on a desk on the other side of the archway.
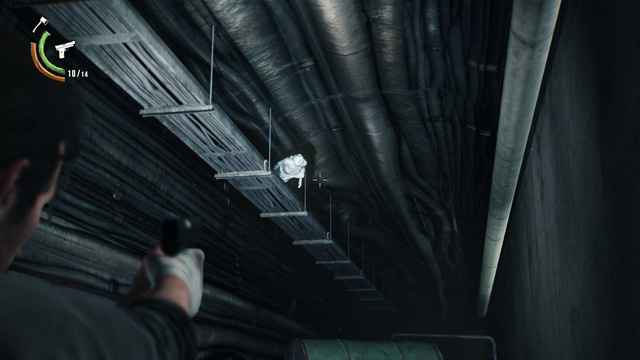
Locker Key #14: In the new stretch of the Marrow that opens at the start of Chapter 6, duck through the gap in the chain-link fence into the maintenance tunnel and go back in the direction you came. The key statue is stuck in the ceiling near the end of the tunnel.
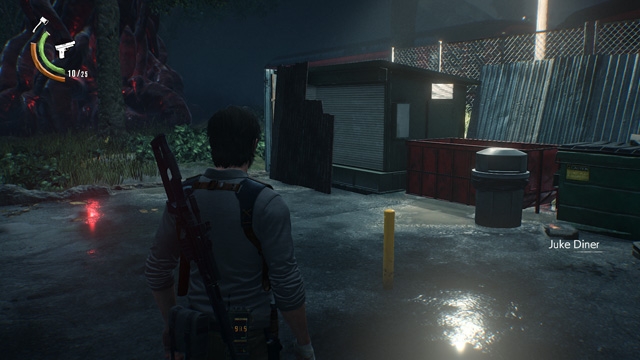
Locker Key #15: In Chapter 6, go out behind Juke’s Diner in the Business District and look next to the red dumpster. The statue is tucked in between the shed and a sheet of plywood.
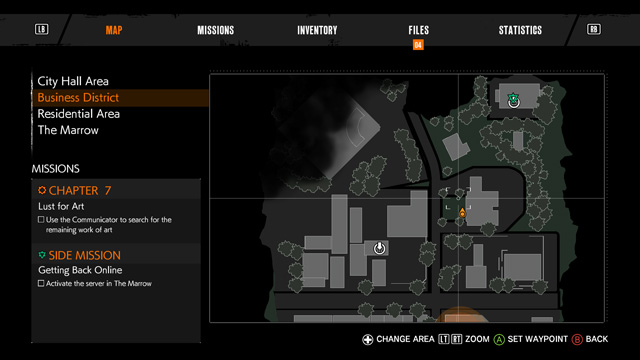
Locker Key #16: The statue sits atop one of the two ornamental columns on either side of the entrance of the credit union in the Business District. Since there’s absolutely no other reason to know where the credit union is, here’s its location on the in-game map.
Locker Key #17: Stand in front of Juke’s Diner in the Business District and look up at its sign. The sculpture is sitting to the sign’s right, and must be shot down.
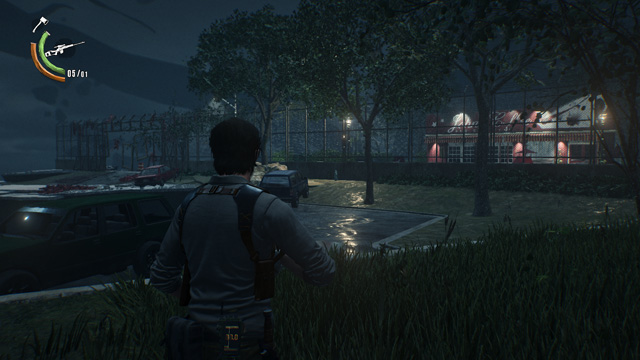
Locker Key #18: This statue is in front of a parked blue four-wheeler in the parking lot of the movie theater in the Business District in Chapter 6, on the south side of the chasm. You can get this well before you open the way to the Grand Theater, but you have to climb over the concrete barrier behind the Krimson Plaza to do so.
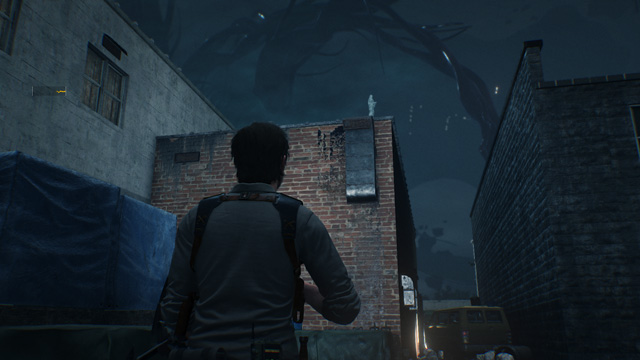
Locker Key #19: On the south side of the Business District in Chapter 6, there’s a big alley full of enemies and corpses. Look up and you’ll see a key statue overlooking the scene from the southwest corner of one of the nearby buildings.
Locker Key #20: When you’re dodging the spotlight in Chapter 8 (that’s vague, but you’ll get what I mean when you get there), keep an eye out for this key statue, hidden behind a raised chunk of wall near the end of the first stretch of the path. If you reach the part where you get the prompt to climb down, you’re past it, and can turn around to see the statue.
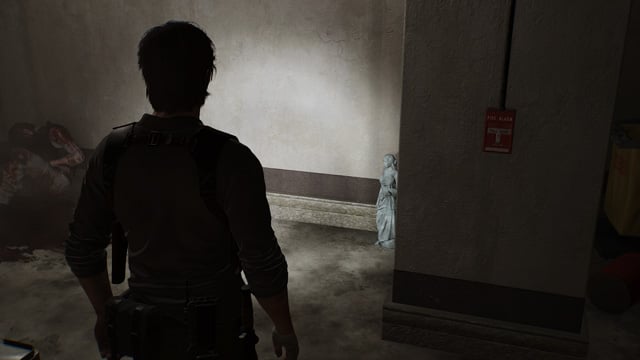
Locker Key #21: In Chapter 9, when you find the crank that needs a handle, look to your left. There’s a row of three closed cells in an alcove there, one of which is occupied by a single immobile zombie. The statue is in his cell, and can be accessed once you’ve taken the crank handle.

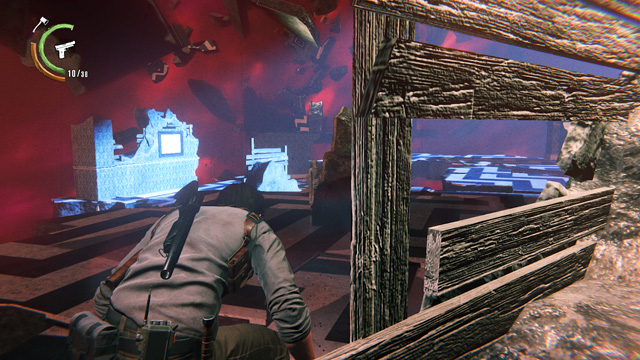
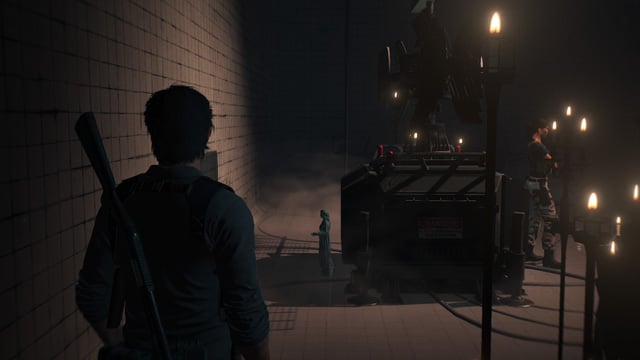
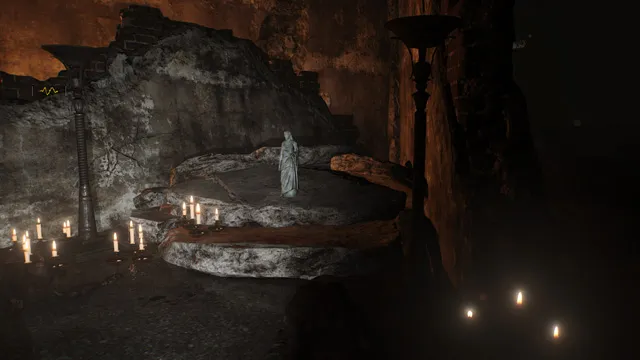
Locker Key #22: In the room with the big floor puzzle in Chapter 9, take a look around from ground level. One of the big statues that’s holding a candle in its hands is also holding a locker key statue; specifically, it’s the statue to the left of the exit gate. Shoot the statue down to get the key. It blends in very well with its surroundings, so don’t be ashamed if it takes you a second to spot it.

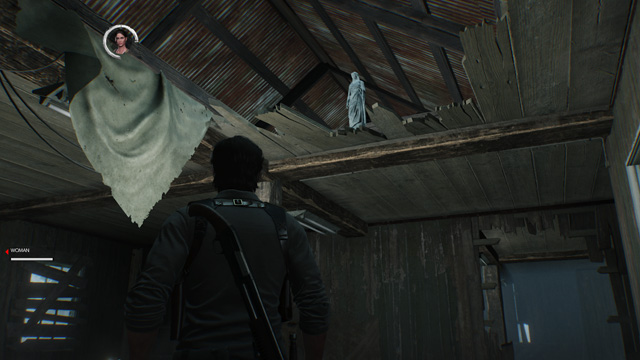
Locker Key #23: After you fight off the waves of enemies in the farm house at the start of Chapter 10, follow the woman into the next room and look up. The key statue is looking down on you from a hole in the ceiling. Which isn’t creepy at all.
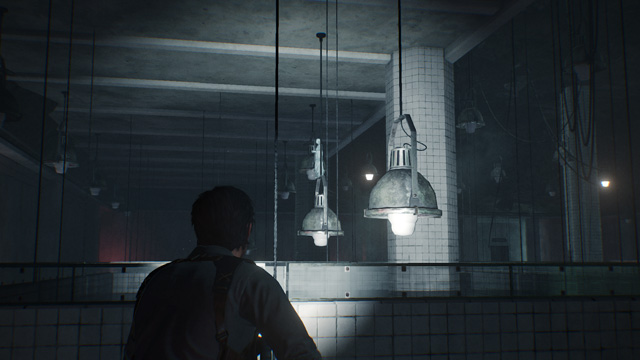
Locker Key #24: In Chapter 11, look at the ceiling lamps across from the entrance to Lab 3 on the second floor of the laboratory in the Marrow. When you shoot it down, the key lands in the small empty operating theater to the left of the locked security door.
Locker Key #25: Right at the end of Chapter 11, before you give Esmerelda the green light to proceed, check behind O’Neal’s gadget to find a sculpture.
Locker Key #26: Upon your return to the Business District in Chapter 13, you can leave the Post Plus safe house to discover that someone has dropped off a key statue right outside, next to the dead Mobius guard.
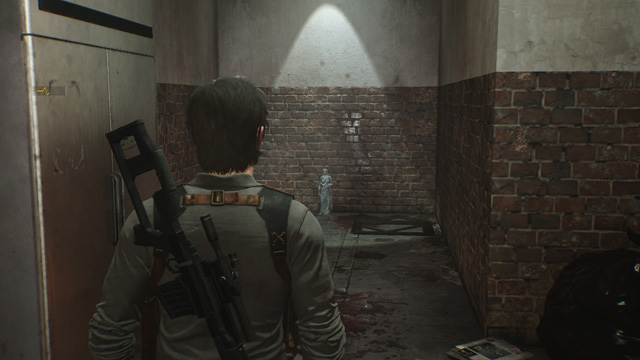
Locker Key #27: In Chapter 13, return to the Juke Diner to find a locker key statue in its restroom.
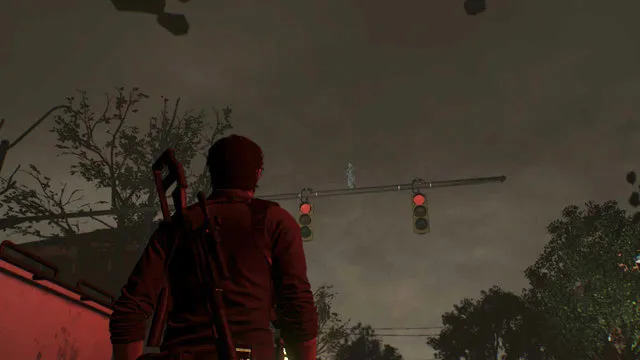
Locker Key #28: Go back to the Devil’s Own Taproom in Chapter 13 and look at the closest intersection. There’s a key statue on top of the stoplights. (We’ve tweaked the brightness in this screenshot to make it easier to see the statue.)
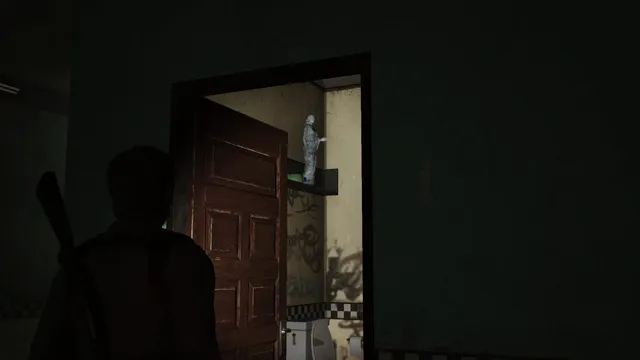
Locker Key #29: In Chapter 13, check the back room in the Devil’s Own Taproom where the painting used to be. You’ll find a key sculpture there.
Locker Key #30: There used to be a building directly south of Sykes’s safe house in the Business District, but in Chapter 13, that ceases to be the case. There’s a nut with a flamethrower patrolling the area, but if you can kill or evade him, there’s a key statue waiting for you in the rubble.
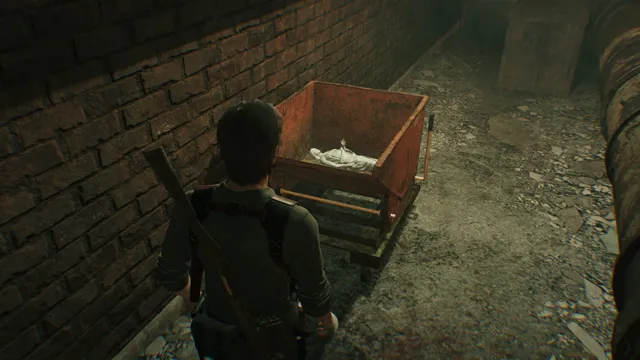
Locker Key #31: In Chapter 14, once you go upstairs from the lobby, you’re dumped into an arena full of enemies. You have to find a lever in the back room to open the exit gate. If you’re facing that lever, turn right and go down the hall. There’s an old mine cart here with the key statue hidden inside.
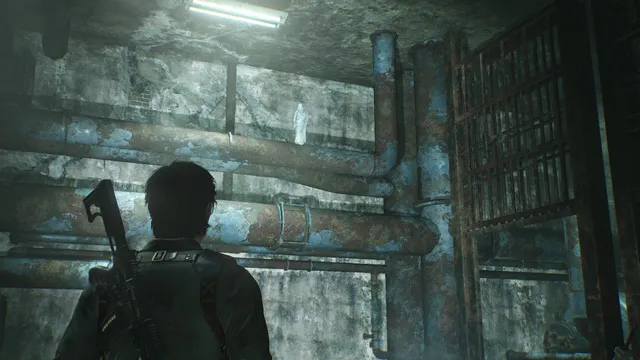
Locker Key #32: Finally, in Chapter 14, when you reach the retracted staircase that leads to the final confrontation, look up to find the last key statue hiding in the pipes to the left of the stairs.
Congratulations on completing one of the tougher achievements in the game. Whoever hid these things must have had a lot of fun with it.
If you’re looking for more tips, tricks, and strategies for The Evil Within 2, makes sure to check out our The Evil Within 2 guides page!


Published: Oct 13, 2017 09:30 pm