
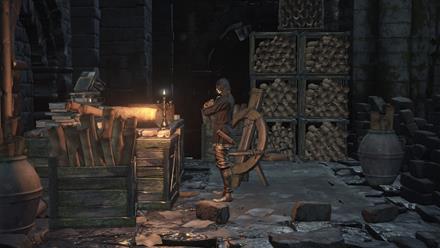
Firelink Shrine got a major upgrade since the original Dark Souls days. It’s more comparable to the Nexus from Demon’s Souls now than anything else. As such, there are a plethora of NPCs and shop vendors that come and go throughout the game. If you’ve got Souls to spend, you’re shopping at Firelink Shrine.
This guide covers every character found around Dark Souls 3‘s Firelink Shrine. I’ll walk you through where to find them and how to unlock the full potential of their shops and services. However, characters that don’t offer the player any services are covered in the Complete Guide to NPC Questlines.
If you haven’t finished Dark Souls 3, be wary — there may be spoilers ahead. I left out as much as I could so you might experience the stories for yourself, but there are character, item, boss and location names scattered all about. Consider yourself warned.
Dark Souls III: Firelink Shrine
If you take the time to explore Firelink Shrine, you’ll find plenty of goodies. There are 2 Homeward Bones and 2 Embers hidden about the surrounding graveyard.
If you hang a right when exiting the shrine, you can find a shield hiding in a tree. Further along the left path is a katana-wielding maniac who will attack you on sight. If you kill him, you can loot his equipment set. If he falls off the edge, just quit the game and log back in and his loot will show up.
If you purchase the Tower Key for 20,000 Souls from the Shrine Handmaid, Firelink Shrine will open up even further. Exploring past the tower will yield an armor set, two rings, an Estus Shard, and a key-item to give to the Fire Keeper. The Tower Key also unlocks access to Dark Souls 3‘s obligatory item-trading crow nest.
Shrine Handmaid
The Shrine Handmaid is Dark Souls 3‘s general merchant. Her shop inventory has humble beginnings, but giving her umbral ash found throughout the game will supply her shop with many new wares.
Umbral Ash Locations
- Mortician’s Ashes – From the Dilapidated Bridge bonfire in the Undead Settlement, head straight towards the area where giant arrows rain down from the sky. Head up into the graveyard section and pick up these ashes off one of the two corpses there.
- Paladin’s Ashes – From the Cathedral of the Deep bonfire, hang left. Head down the mini ravine and kill the rogue guarding a corpse at the end. On the corpse you’ll find the Paladin’s Ashes.
- Dreamchaser’s Ashes – From the Old Wolf of Farron bonfire in Farron Keep, go outside and take the stairs up. At the top of the stairs is a suspicious wall. Hit it to reveal a hidden passage leading to the umbral ash.
- Grave Warden Ashes – From the Catacombs of Carthus bonfire, go straight and take a left down the stairs, avoiding the rolling ball of skeletons. Kill the rats and head up another set of stairs in the area, smashing skeletons along the way. At the top you’ll find the ashes.
- Excrement-covered Ashes – From the Distant Manor bonfire in Irithyll of the Boreal Valley, head up the stairs and hug the right wall until you come to a sewer. Step inside and dance carefully around the spider ladies towards the staircase. In a doorway across from the stairs is a corpse with the ashes.
- Xanthous Ashes – Head to the room with a dozen jailors wielding branding irons pacing around a statue in Irithyll Dungeon. Entering the room from the elevator shortcut, veer left and hug the wall. Open the cell at the end with two corpses and pick up the Xanthous Ashes.
- Prisoner Chief Ashes – After grabbing the Jailor’s Key Ring past the toxic church hidden in the Profaned Capital, head back to the Irithyll Dungeon bonfire. Go straight down the hall and fall off the ledge onto the bottom floor below. Head right down the corridor until you come across a cell with two doors and a corpse sprawled out in a fancy chair. Unlock the door to claim the ashes.
- Easterner’s Ashes – From the Pontiff Sulyvahn bonfire in Irithyll of the Boreal Valley, head out the door and up the stairs to the left. Dash across the giant courtyard and up the stairs, into the building straight ahead. Head up another set of stairs and hang a right. Drop down onto the lower edge and run up the arch. Be wary of the archers, here. Head up the next arch and take a right, going down the set of stairs. At the bottom you’ll find the ashes.
- Hollow Ashes – From the Champion Gundyr bonfire in the Untended Graves, head straight inside the shrine. Head right down the stairs, and take another right on the landing. At the bottom of the staircase, veer left into a u-turn and head down the hall. The ashes are found on a corpse at the end.
Additionally, if important NPC vendors die for any reason, you can pick up their umbral ash and give it to the Shrine Handmaid. Doing this grants access to the wares they had available upon death.
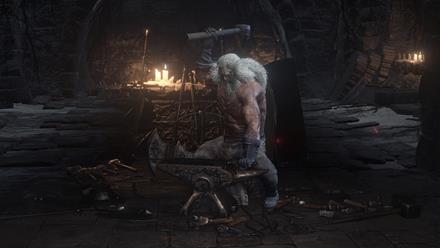
Blacksmith Andre
Andre is Dark Souls 3‘s go-to blacksmith. That is to say, there isn’t another (living) smith in the entire game. He will reinforce your weapons, bows, catalysts, chimes, talismans, and shields in exchange for titanite. You can get a better explanation if you talk with him yourself — along with the Hurrah! gesture.
Andre can also infuse most weapons with gems. Reinforced, Raw, and Fire are open from the start, but to unlock the 12 other infusions, you must seek out 4 coals.
Blacksmith Coal Locations
- Farron Coal – From the Halfway Fortress bonfire in the Road of Sacrifices, head straight out and down the path. Hug the right cliff until you come to a stone wall. Enter the door and hang left. On a corpse just past the knight lies the Farron Coal.
- Sage’s Coal – From the Farron Keep bonfire, head out into the swamp and hug the left wall. After a fashion, you’ll come across a tower guarded by a lone warrior cloaked in darkness. Deal with him and enter the tower to find the Sage’s Coal.
- Profaned Coal – In Ilithryll Dungeon, head down to the room with a dozen jailers all circling a stature. Coming from the elevator shortcut, duck into the first cell on the left where you’ll find the Profaned Coal sitting on a corpse.
- Giants Coal – From the Anor Londo bonfire, go up the staircase and head through the gate on the left. Take a right into the room and loot the Giant’s Coal off a corpse.
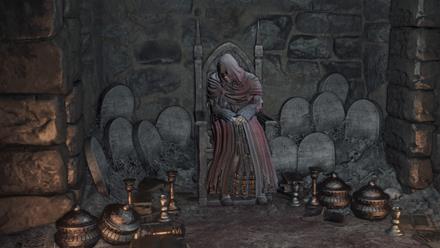
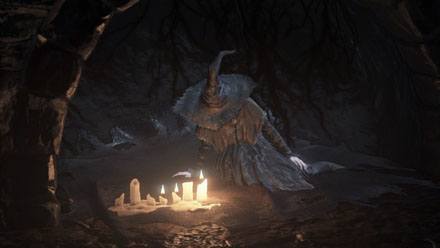
Fire Keeper
The Fire Keeper in Dark Souls 3 will level you up in exchange for Souls, but that’s not all she does. If you give her the Fire Keeper Soul found on the top of the bell tower in Firelink Shrine, she will be able to cure the Dark Sigil (see Yoel & Yuria of Londor).
There’s another key-item you can give her that unlocks one of Dark Souls 3‘s many endings. To find it, head inside the shrine from the Champion Gundyr bonfire in the Untended Graves and take two lefts down the large staircase. At the bottom, veer right into a u-turn and strike the suspicious-looking wall. The item is found on the corpse at the end.

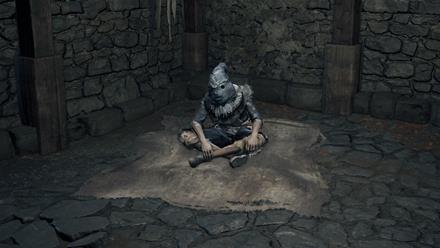
Ludleth of Courland
Ludleth the Exiled is the only Lord of Cinder to willingly sit upon his throne in Dark Souls 3. After recovering a Transposing Kiln from the Curse-Rotted Greatwood, Ludleth will transform unique and twisted souls into spells, weapons, and rings.
Each unique soul has at least two rewards, requiring multiple playthroughs to get everything.
Greirat of the Undead Settlement
Greirat is first encountered in a cell at the High Wall of Lothric. Find the Cell Key hidden in the same room as the Estus Shard and then warp to the Tower on the Wall bonfire. Make your way down to the basement of the tower and head down the corridor. Unlock the cell at the end and Greirat will warp to Firelink Shrine with your permission.
How to upgrade Greirat’s shop
Greirat acts as another general merchant, contrasting the Shrine Handmaid’s inventory by supplying goods unique only to him. Being a thief, Greirat will upgrade his shop after you allow him to plunder out in the world.
- 1st Upgrade – Find Loretta in the Undead Settlement between the 2nd and 3rd bonfires of the area. Give Greirat her trinket. After a fashion, Greirat will ask to leave the shrine and pillage. Let him and he will return after you beat the next boss.
- 2nd Upgrade – Once you reach Irithyll of the Boreal Valley, Greirat will get restless and request a good pillage again. Be wary of this and don’t talk to Greirat until you advance the Seigward and Patches questline to Boreal Valley. Once you send him out, he’ll return after you kill Pontiff Sulyvahn or the Old Demon King — unless you sent him out at the wrong time, in which case he’ll wind up dead.
Do not send Greirat out for a 3rd time. He will not return from his pillage on the roof of the Grand Archives. Luckily, this doesn’t cut us off from his inventory. Explore the area of his death until you find his body and bring the umbral ash back to the Shrine Handmaiden.
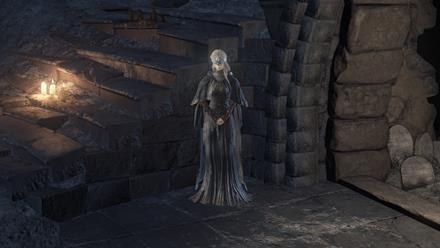
Yoel & Yuria of Londor
Yoel is encountered in the Undead Settlement at the base of the 1st bonfire, Foot of the High Wall. After accepting the pilgrim into your service, he will warp to Firelink Shrine. Speak with him there to get the Beckon gesture.
How to level using the Dark Sigil
Yoel offers a “free” leveling service through the creation and use of the Dark Sigil. After leveling up with him once, you receive the Dark Sigil, an item that eventually turns you hollow.
With the Dark Sigil, hollowing can be tracked on the status screen. After reaching certain hollowing milestones, you can speak to Yoel to level up again.
Once you either level up 5 times at Yoel or enter the Catacombs of Carthus, he will die.
If you leveled up with him 5 times, Yuria will be encountered near his body. She absorbs Yoel’s shop inventory and essentially take his place. She will even give you the Dignified Bow gesture.
If you cure the Dark Sigil at any point, Yuria will disappear. If you don’t follow the Dark Sigil questline with Anri of Astora, she will also disappear. Keep her around for the duration of the game and you will unlock an alternate ending.
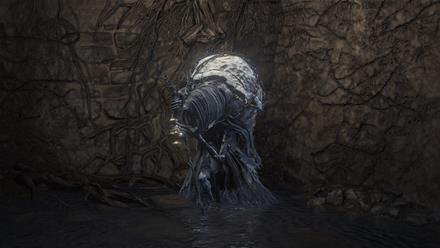
Cornyx of the Great Swamp
Cornyx is encountered dangling in a cage near the Cliff Underside bonfire at the Undead Settlement. He will warp to Firelink Shrine and become your Pyromancy master, should you accept.
Speak with him at Firelink to receive the Welcome gesture and a Pyromancy Flame. Corynx is the only character who can upgrade your Pyromancy Flame.
Pyromancy Tome Locations
Bringing Cornyx Pyromancy Tomes unlocks new Pyromancies for his shop.
- Great Swamp Pyromancy Tome – From the Crucifixion Woods bonfire, head across the water towards the building with two knights. Head right, hugging the outer wall until you get to a patch of deep water where this Pyromancy Tome is found.
- Carthus Pyromancy Tome – From the Abyss Watcher’s bonfire, head down into the Catacombs of Carthus and cross the bridge. Turn left and go up the stairs, then follow the left corridor and go down the ladder. Upon entering the larger room, turn right and strike the wall. Behind the illusion is the Carthus Pyromancy Tome.
- Izalith Pyromancy Tome – From the Old King’s Antechamber bonfire in Smouldering Lake, walk through the hallway to the left. You’ll come across the tome in a room at the end.
- Quelana Pyromancy Tome – From the Demon Ruins bonfire in Smouldering Lake, venture into the big room with a mob of enemies inside. Fight your way to the lowest level and take the hallway on the right. Take the first right and continue straight forward to reach an illusory wall. Roll through it to find the tome on the corpse of a spider.
- Grave Warden Pyromancy Tome – Found on a corpse during the High Lord Wolnir boss fight.
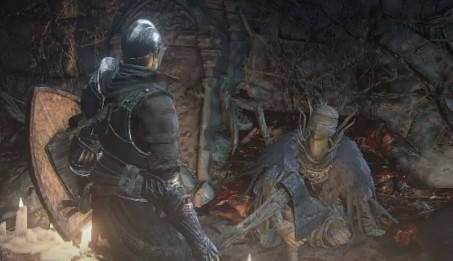
Irina of Carim
Irina is encountered in a cell by the tower in the Undead Settlement. After buying the Grave Key, head down to the sewer connecting the Cliff Underside and Dilapidated Bridge bonfires and unlock the door found there. Follow the path out into the ravine and head straight, turning into a room on your left. Ignore the rats and climb up the ladder. Here you’ll find Irina who will warp to Firelink Shrine upon accepting her into your service. Speaking with her there will net you the Prayer gesture.
Braille Divine Tome Locations
Since Irina is blind, you must find Divine Tomes written in braille to expand her Miracle selection. Luckily, every Divine Tome available in Dark Souls 3 is written in braille.
- Braille Divine Tome of Carim – From the Halfway Keep bonfire at Road of Sacrifices, backtrack up the stairs and cross the bridge. Carefully fall off the left edge onto the ground below and continue into a small cave where 2 dogs lie in ambush, protecting the Braille Divine Tome of Carim.
- Londor Braille Divine Tome – Purchasable for 50 Souls from Yuria of Londor.
- Deep Braille Divine Tome – Beyond the large room where you’re attacked by a giant for the first time in Cathedral of the Deep, you’ll run across a mimic (killer treasure chest). Obliterate the mimic and it will drop the Deep Braille Divine Tome.
- Braille Divine Tome of Lothric – From the Dragonslayer Armor bonfire, turn around and follow the railing on the right until you come across a gap. Walk past the hole in the fence and fall into a room with a corpse holding the Braille Divine Tome of Lothric.
Be wary of bringing the Deep Braille Divine Tome and the Londor Braille Divine Tome to Irina. If you buy any of the Dark Miracles from her, she will disappear from Firelink Shrine.
Should this happen in your game, head to the Iudex Gundyr boss room. Eygon of Carim will be there, hostile, with Irina nearby. Defeat him and she will return to Firelink Shrine to continue selling Miracles. If you buy all of the Dark Miracles from her, she will stop selling altogether.
Buy everything Irina sells after bringing her the Braille Divine Tome of Carim and Braille Divine Tome of Lothric and it will progress her storyline to its “good” ending.
Orbeck of Vinheim
Orbeck is encountered in the Road of Sacrifices by the Crystal Sage boss arena. From the Crucifixion Woods bonfire, head inside the building through the crack in the wall and go up the stairs. Cross the bridge and hang a left. Hug the right wall to keep from falling and make a right. At the top of another set of stairs is a doorway on the right.
Continue through the entryway to encounter Orbeck’s study on the left. If you have at least 10 Intelligence, he’ll offer to teach you Sorceries. Accept and he’ll warp to Firelink Shrine.
Sorcery Scroll Locations
Orbeck requires Sorcery Scrolls to expand his arsenal with powerful Sorceries.
- Sage’s Scroll – From the Keep Ruin’s bonfire in Farron Keep, go down the ramp and hang a left. Follow the wall around to an area with dead mushrooms. The scroll is found next to one of them.
- Golden Scroll – From the Keep Ruin’s bonfire, go down the ramp and turn right at the gate. Hug the cliff-side until you come across an area with basilisks (curse frogs). They are guarding a cave with the Golden Scroll trapped inside.
- Logan’s Scroll – From the Profaned Capital bonfire, slide down the ladder and drop down from the hole in the wall. Turn left and head up the ramp into the building. Make your way through to the church surrounded by a toxic swamp and climb up the ladder. On the roof of the church is a sorcerer who drops Logan’s Scroll.
- Crystal Scroll – Reward for killing the Crystal Sage in the Grand Archives
You must give Orbeck at least one scroll before killing the Abyss Watchers. If you do not, he will leave. Giving him one scroll and buying three of his spells will prompt him to give you the Young Dragon Ring. Buying Aural Decoy, Farron Flashsword, and Pestilent Mercury will net you the Slumbering Dragon Ring along with the Silent Ally gesture.
Once you bring Orbeck all 4 Sorcery Scrolls and buy all of his spells, he’ll tell you he’s departing. Once he does, you can summon him for the Twin Princes fight.
After the Twin Princes fight, you can find his body on the roof of the Grand Archives. If you recover his umbral ash, you can still access his inventory through the Shrine Handmaid. Though you might instead want to bring Orbeck’s Ashes back to Yuria for a unique weapon.
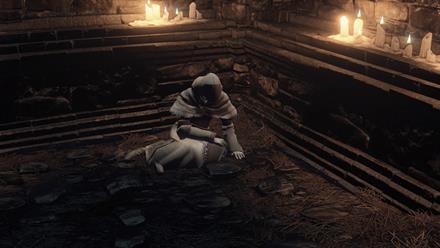
Karla
Karla is encountered in a locked cell in Irithyll Dungeon. Grab the Jailer’s Key Ring by climbing up the ladder on the toxic church in the Profaned Capital and heading up the stairs. The key ring can be found at the end of the hall. Afterwards, warp to the Irithyll Dungeon bonfire and head down the elevator shortcut to the room with dozens of jailers.
Head to the far end of the room and turn right up the steps. Turn right down the hallway and kill the jailer blocking your path. You’ll come across Karla’s cell. She will warp to Firelink Shrine upon bringing her into your service.
How to learn dark spells
Karla is a master of dark magic, and will take any tomes involving the dark arts. Bring her the Quelana Pyromancy Tome and the Grave Warden Pyromancy Tome, which Cornyx will refuse.
You may even convince her to teach you the contents of the Londor Braille Divine Tome and the Deep Braille Divine Tome if you don’t have the heart to corrupt Irina with their dark contents.
There you have it, everything you need to know to get the most out of Firelink Shrine. Check out the Complete Guide to NPC Questlines for the details on elusive characters like Hawkwood, Leonhard, and Sirris.
(Image Source: Fextralife Wiki)


Published: Apr 17, 2016 04:41 pm