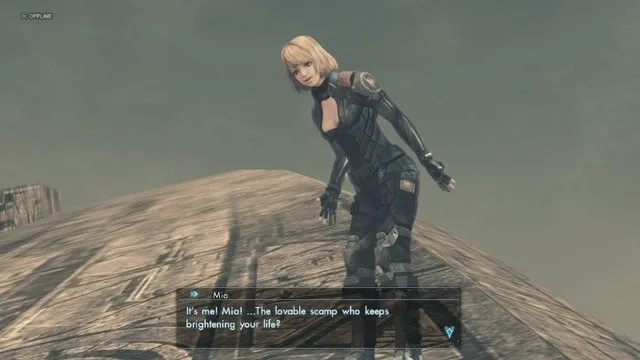
Many who decided to look around the Administrative District in Xenoblade Chronicles X likely remember meeting a young girl named Mia during their adventure. She gave players the quest “Mamma Mia!”, a simple purchase quest that sent them searching for a pair of Iron Blades, and a Combat Bodywear top. What few players know, however, is that Mia is actually a recruitable character.
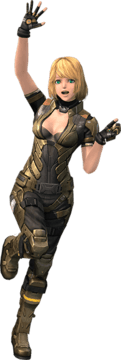
While Mia’s default Psycorruptor class is nothing particularly special, and the 5 missions required to unlock her are a bit of a chore, Mia is required to 100%-ing the survey rate for NLA, as well as unlocking the Beam Bomber and Clear Ray skills for the Raygun and Knife. If that’s not enough to grab your attention, then maybe you could take pity on the failure of a BLADE recruit. I mean, look how adorable she is! Of course, if you simply want to enjoy watching her fail at life then that is plenty of reason to help her out as well!
Now that I have your attention, here’s a simple guide on how to add the lovable scamp into your band of misfit BLADE members!
Part 1 – “Mamma Mia!”
When you first meet Mia, she’s currently employed as a general mechanic in New Los Angeles. Unsatisfied with this, she decided to become a BLADE member so she could explore the world, and experience everything she never could have on Earth. What’s stopping her? Well… she’s not exactly a fit recruit, and she has constantly failed her BLADE entrance exam.
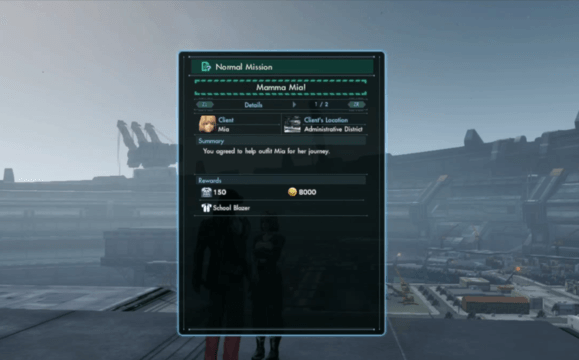
To compensate, Mia asks you to fetch her a pair of Iron Blades, and a Combat Bodywear so that she can set out on an adventure by herself. Accept her quest, then go to the BLADE armory to purchase the twin blades and body armor. Return with the items, and she will give you a small reward before setting off on her adventure.
Part 2 – “Adventure!”
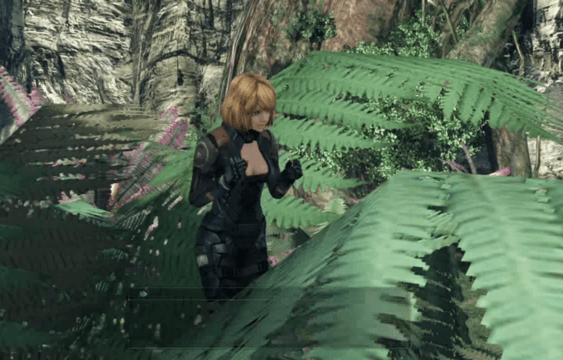
After you complete Chapter 5, the next part of the side-quest dubbed “Mia’s Adventure” can be started. It is triggered by talking to Mia who is found halfway down the Skybound Coil Tree in Noctilum. This is found in the upper part of Noctilum, just past the base camp that connects the smaller southern part to the larger northern area.
A failure of a BLADE recruit has no business being outside of the city walls, and as a result, Mia has wound up getting herself into some trouble. Having lost her comm device, Mia has no way of finding her way back home or calling for help. In a last ditch effort to find it, she scouts you as the BLADE member who will come to her aid once more.
This mission is quite simple. Set the primary target as the mission called “Adventure!” and follow the yellow arrow until you find a red crystal. Return to Mia, and she will proceed to run off in an attempt to avoid paying your reward. Unfortunately, karma quickly catches up to her, and you will have to rescue Mia from a Wood Tectinsula in Noctilum’s Canopied Nightwood area.
Once you do this, Mia will thank you… before promptly running off again without rewarding you.
Part 3 – Mighty Mia
To unlock the third mission in the Mia’s Adventure side-quest chain, you must complete Chapter 6. Once you have done this, Mia can be found near Oblivia’s Leaning Ring on the right-hand side (when the ring is leaning away from you). It’s pretty hard to miss, but don’t mistake it for the ring with a lot of holes in it.

The third mission – Mighty Mia – is much shorter than the previous one. Instead, this mission focuses more so on Mia’s backstory. While passing the right-hand side of the Leaning Ring, Mia will call out to you from the top of the massive ruin (which is totally not the Mechonis, and actually part of the High Entia City… am I the only one who thinks this?). Meet her at the top, and she’ll talk to you about herself for a while before falling off and getting kidnapped by a Falconine Jacul.
Head over to Oblivia’s Keegan Ridge to save your adorable little apprentice from becoming giant-bird feed, and you will complete this mission in no time. Just remember that the Falconine Jacul is level 29 and hangs out in an area with level 32+ enemies, so err on the side of caution.
Part 4 – It’s-a Mia!
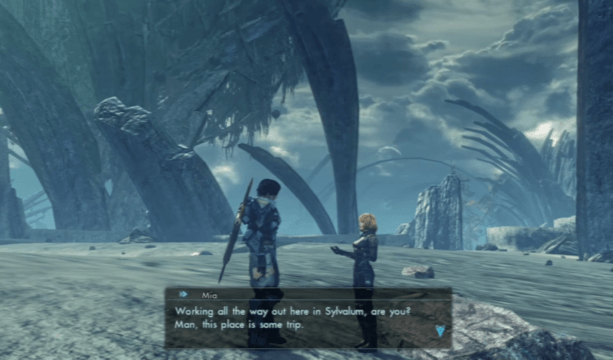
The next mission – It’s-a Mia! – can be started immediately after Mighty Mia. To begin, find Mia near Sylvalum’s Cleansing Spring, found on the south-east part of the map. Once you find her, she will explain that she stole a Skell in an attempt to better protect herself in the field. However, she was shot down by enemy turrets, and as such she needs you to help her find 2 New Cylinders from Pugliths in Noctilum, and 5 Missile Wirings from the northwestern parts of Sylvalum Waters.
Since both items are hard to collect on-foot, I suggest waiting until you have your Skell licence before attempting this part of the quest. Alternatively, New Cylinders can be purchased from the BLADE Barracks using Reward Tickets on the network console.
Once you repair her Skell, Mia will try to run off once more without rewarding you. However, she gets shot down, then asks you to help her destroy the turrets while she repairs. Travel to Needle Rock Sandsea to destroy the two Puglith Buoyants to see Mia fly off toward Cauldros upon your return – once again, without rewarding you.
Part 5 – Mia is Missing!
This quest is a bit more complicated to unlock than previous ones. First, the player must complete all of the previous Mia quests. Then, they must complete the Definian Downfall quest chain. This involves completing quite a number of side quests, ranging from alien rescue quests, to Nara Lara’s quest chain, and more. Once you accept the quest chain after the Definians are discovered in NLA (and complete them until Definian Downfall is finished) then you can finally find Mia once more in Cauldros.
While some guides claim that you need 65-80% of Cauldros surveyed, in reality you only need to complete the Definian Downfall questline.
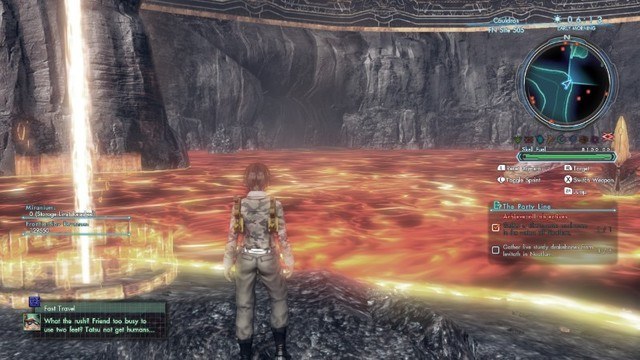
Mia’s next misadventure is started by traveling to the Ganglion Antropolis. This is the same area that you need to travel to for the Definian Downfall mission, and is found by traveling to FN Site 505 (above). Once there, just grab a Skell and go straight northeast across the lava pool until you reach a cave. Do not fly! This will take you to a building that is commonly mistaken for the destination! I know it looks like a wall in the picture, but it’s a cavern, I swear!

Once inside, go left instead of forward in the hallway that leads toward the Rexoskell boss. Make another left after the ball-looking robots and you should find a room with a single Definian and several Potamus. Whether you fight them or not is up to you, just remember that all enemies in the Ganglion Antropolis are level 50 and up.
Head to the prefabricated shelter in the back, then interact with the door. Mia will tell you that she has been held prisoner and that the Ganglion have performed probing tests on her that are “best left unmentioned” in her own words. What you interpret that as is completely your business, however, once you accept her quest you will need to find the key to the cell. Head back out to the main area of the Antropolis, then make a left until you find a Mia lookalike.
After a brief conversation you will discover that Mia has been impersonated by one of the Definians. Kill her imposter, then take the key to free the real Mia back at the first place you found her. Once you do that she will finally return to NLA. There, Mia will debrief her adventures to the man who constantly failed her. She will finally receive her BLADE title, working as a Curator, and will be recruitable from now on.
Mia is found on the Ma-non ship’s deck, just outside the entrance to the starboard side of the ship (south).
And there you have it!
Mia also has an affinity mission that unlocks after you gain 4 hearts of affinity. It’s a really charming quest, and it’s the only mission in the game that has voice-over dialogue for Mia. She can also be found in several spots around NLA for Heart-to-Hearts, and the results are as funny as her original misadventures so be sure to check them out!
Also, if you want to find out 14 features that you might not have discovered in Xenoblade Chronicles X, then you can find them here!


Published: Jan 11, 2016 03:32 pm