Welcome to Stormfall: Saga of Survival. Here, you are cast into exiled lands where you must scavenge the world, construct your base, and face all manner of adversaries, including the bloodshot eyes you’ll get from binge playing this addictive mobile survival game throughout the night.
Hours can be poured into this virtual world since it takes time, thought, and skill to stay alive while exploring various locations, a large majority of which will be labeled too dangerous.
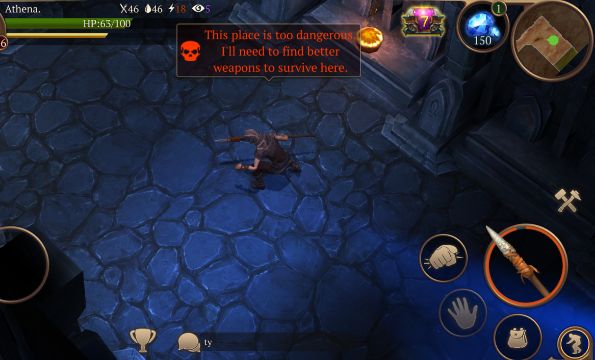
At first, you will want to avoid any location that has more than 2 skulls (danger ranking) when you begin playing, but you will eventually find the risk necessary. Warnings appear when you enter that suggest returning with better weapons and armor, but it is not a requirement to successfully plunder for treasure. If you don’t want to be limited to the same safe areas for weeks, you will need to venture out into unknown territory to collect better equipment.
The Benefits of Looting
Though there are plenty of ways to collect the four essentials: wood, stone, rush, and food, there are fewer opportunities to gather materials that do not automatically refresh in locations or come naturally from the earth.
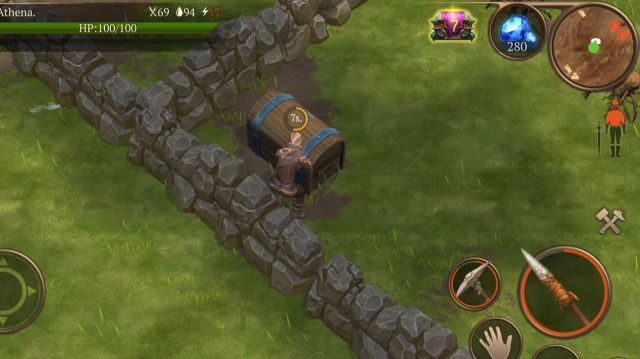
Some of the tools you will need for crafting only come from looting chests and barrels, few of which can be found at low-risk areas. You may also find tools that are difficult to craft or otherwise impossible for you to acquire at your current level. Though gathering materials from the stone ridge, pine grove, or a normal forest can yield basic resources necessary for survival, looting is essential for advancing your character and base.
There are two main types of loot, chests and barrels. Barrels often (not always) provide resources, some of which are rare and can only be found by looting. Chests, on the other hand, will sometimes contain crafted materials such as armor and weapons.
If you want to progress faster and craft more useful items, you’ll need to get used to sneaking through more dangerous zones to acquire these gems. The higher the danger, the more valuable and extensive the loot will be.
Locations
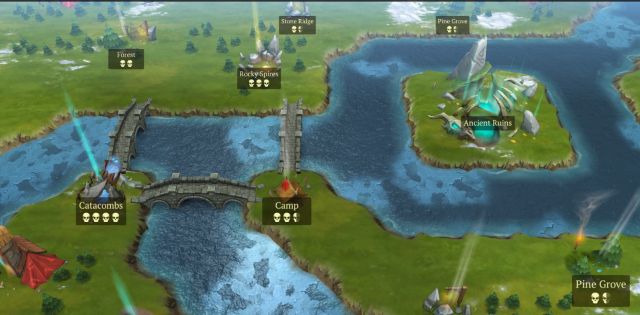
The following are high loot areas from least difficulty to greatest. This list does not include locations that require items to enter.
Camps
These locations are good starting points if it is your first time in dangerous territory. Lootable items can be found in and around housing, but be wary of traps.
Raiders Hideout
Another location seemingly developed by humans is the Raider Hideout. This area is similar to camps but has more loot and more difficulty.
Chieftain’s Stronghold
These often store away powerful weapons, armor, and crafting materials. This location is for those who have practiced at the previous locations and are ready for a significantly more intimidating challenge.
Catacombs
These dark halls lead to enemies who deal hefty amounts of damage,, but it is one of the highest concentrations of loot in the game.
Dark Woods
Dark woods typically provide a useful amount of loot and plenty of resources along with packs of enemies breathing down your neck as you try to snag it all.
Cursed Forest
Cursed forests tend to have more loot than dark woods and the same amount of danger, but they have less wood resources.
Prepping
Before wandering into the unknown, there are a few things to keep in mind as you gear up at your base.
1. Make a list and check it twice
Your character cannot carry infinite materials and is quite limited on the amount of resources he or she can gather at one time. Therefore, you should make a checklist of what you need before heading out and stick to it. Any extra space you have left over can be filled with any additional items you find.
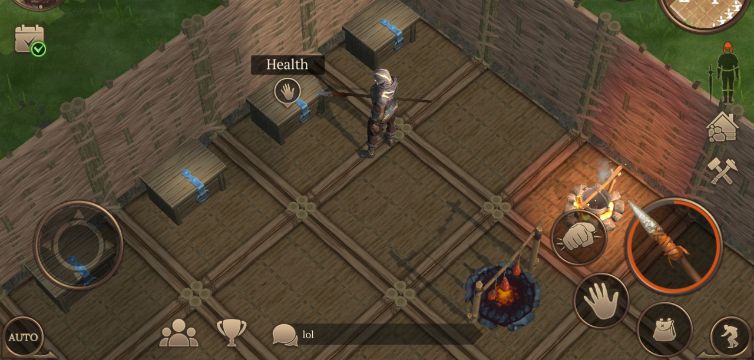
2. Organize your Chests
You’re going to find it a lot easier to make said checklist when you know what you already own. Build multiple chests for storage and label them to keep your materials organized and easy to find. You’ll be kicking yourself if you bring back items you already have stockpiled over other useful resources you could have stolen instead.
3. Only Bring the Necessities
Once you determine what you need, store your current inventory away. The only materials you should bring for treasure seeking are full health armor, weapons, and one or two large stacks of food to improve your health, hunger, and thirst while you’re away from home base.
All other resources, such as wood and stone, should be left behind. If you find yourself in a pinch and need to craft a tool, there are usually plenty of trees and stones at the majority of these locations for you to build on the fly.
Otherwise, you want to leave plenty of space open in your inventory for treasure.
4. Check Your Health and Home
It may seem simple, but it can easily slip your mind. Check your health, hunger, and thirst before you leave. Be sure that your curse is low as well to avoid attracting hordes of foes. Also, keep your crafting tables working on something while you are away to manage your time efficiently.
Surviving Unknown Territory
1. Be Stealthy
Slow and steady win the race. Stay crouched! It will take you more time to explore, but it will keep you alive.
2. Use your Map
Your map shows more than your character’s surroundings. Use it to spot enemies before they spot you. The map will show where they are roaming or facing and reveal cheats and barrels that aren’t in your line of sight.
3. Breaking In
Houses contain some of the best loot. Break down barriers from a safe distance and barge through doors, but be wary of traps, such as crossbows that can be destroyed.
4. One v. One
If there is no other way to avoid an encounter, try luring creatures to the edge of the map, away from other enemies. This way your fighting does not attract nearby opponents.
5. Use the Land
If you are injured or hungry, use the food on the land before eating up all the cooked food you brought with you. Cooked food takes time to prepare and should only be used when you truly need it. Try to keep your health up with berries, onions, and meat you find along the way. You may not even have to use the resources you brought from your base.
6. Run you Fools
Don’t be afraid to run if you are attracting too much attention. Running outside the barrier won’t negatively affect you, but staying to fight a battle you can’t win will most certainly lead to death. If you are forced to run, keep an exit root in mind. Cross the closest line to freedom rather than running through the map and adding a horde of enemies that will ultimately brutally kill you.
7. Creatures 101
You should know and understand the various enemies you could face on your adventures. If a creature is guarding loot, remember it’s qualities before jumping into a fight to collect treasure. The following is a list of each threat you may face in danger zones.
- Bone Breaker: He looks scary for a reason. This colossus enemy will chase you down with massive strides and deal as much as 25 damage. Avoid his line of sight unless you are heavily equipped with top notch gear.
- Undead: They’re not alone. These nasty opponents come in packs and can be a hassle to deal with if you can’t fight one at a time. They can deal 10 damage and each hit inflicts 5 curse.They are mostly stationary though, so unless you are in their view, they shouldn’t be disturbed.
- Bear: These predators often have a lot of health and drop more resources than other animals in the game. Similar to the undead, they tend to face one direction and move very little.
- Wolves: Wolves are a common danger in risky zones. They meander, so don’t be surprised if one wanders towards you. Observe their patterns and stay out of sight. They attack fast and may have pack members nearby. Keep your guard up, and run if you attract too many.
- Spiders: Spiders roam areas, so observe one’s patterns before sneaking past. If you are spotted, they will shoot venom from a long range, but you can usually outrun them. Don’t be caught in crowd of them though.
- Frogs: Frogs don’t deal a lot of damage, but they will add a curse to you. They also do not move unless they spot you.
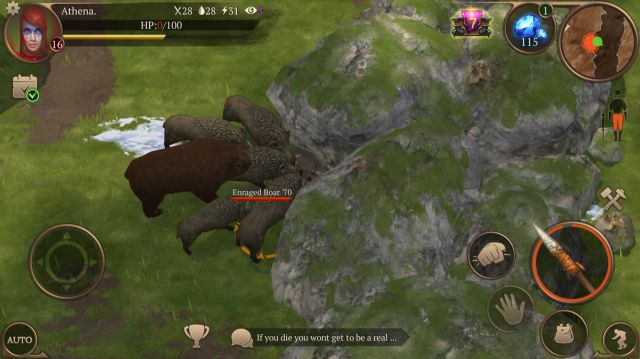
- Boars: The first opponent you may be introduced to are boars. They aren’t too challenging to defeat but will chase you down and create a ruckus, drawing in nearby wildlife.
Start Pillaging
If you navigate the loot filled zones with these strategies in mind and carefully think before taking actions, these locations will prove goldmines for tools and resources you would otherwise go without. Remember to…
- Plan your trip in advance.
- Use a stealthy approach
- Know when to seek safety.
Happy pillaging, and good luck surviving as you push into the treacherous wilds of Stormfall: Saga of Survival!


Published: Aug 28, 2018 02:13 pm