There are 43 data bios and audio logs to find throughout The Callisto Protocol‘s eight chapters. Finding all of these collectibles will give you more insight into Callisto’s lore and reward you with the Grim Reaper trophy/achievement.
It’s important to note the game’s save system can impact how you pick up these collectibles. Manual saves only mark progress up to the last autosave checkpoint, meaning you can pick up data bios and logs, manually save, quit, then reload later at a point before picking them up.
After picking up a collectible, always make it to a section where the circular auto-save icon appears in the bottom right corner before quitting — or you’ll have to pick them up again.
The Callisto Protocol Collectibles: Data Bios and Audio Log Locations
Chapter 1: Cargo
Jacob’s Job
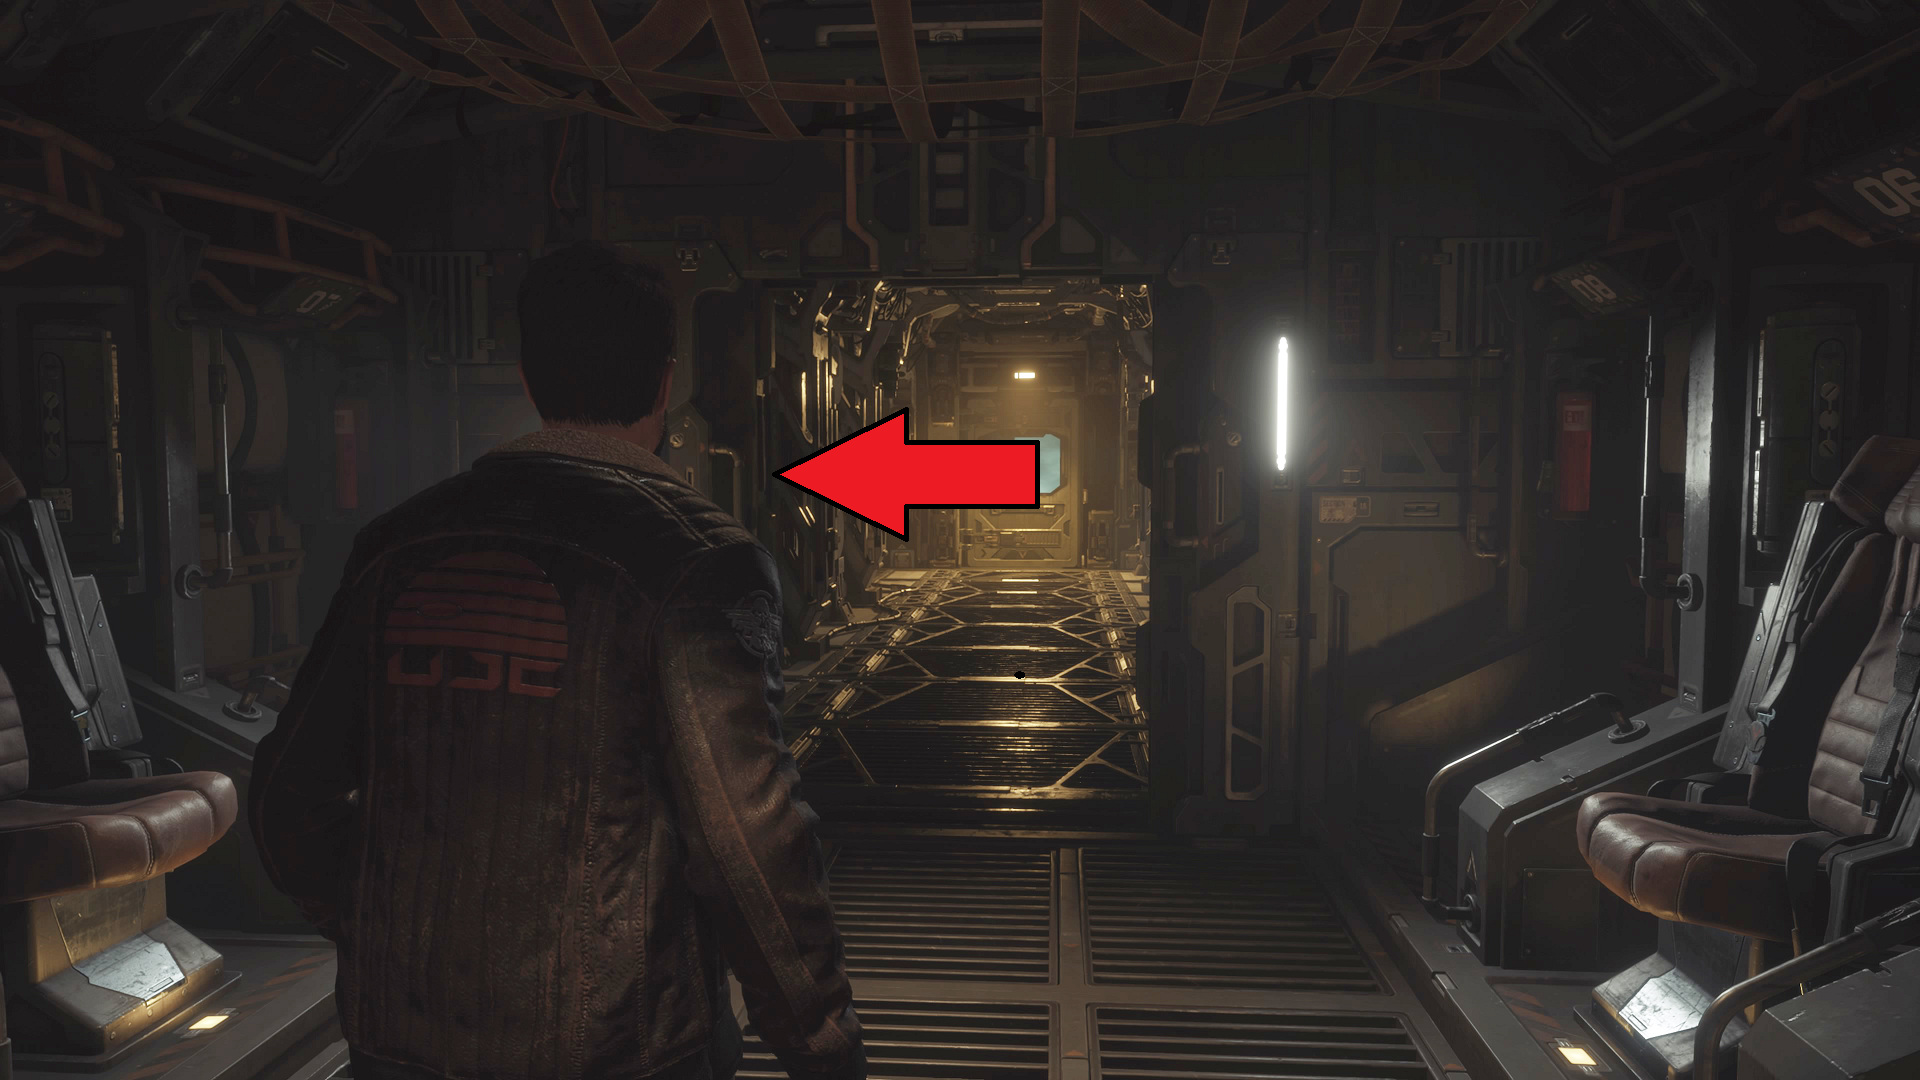
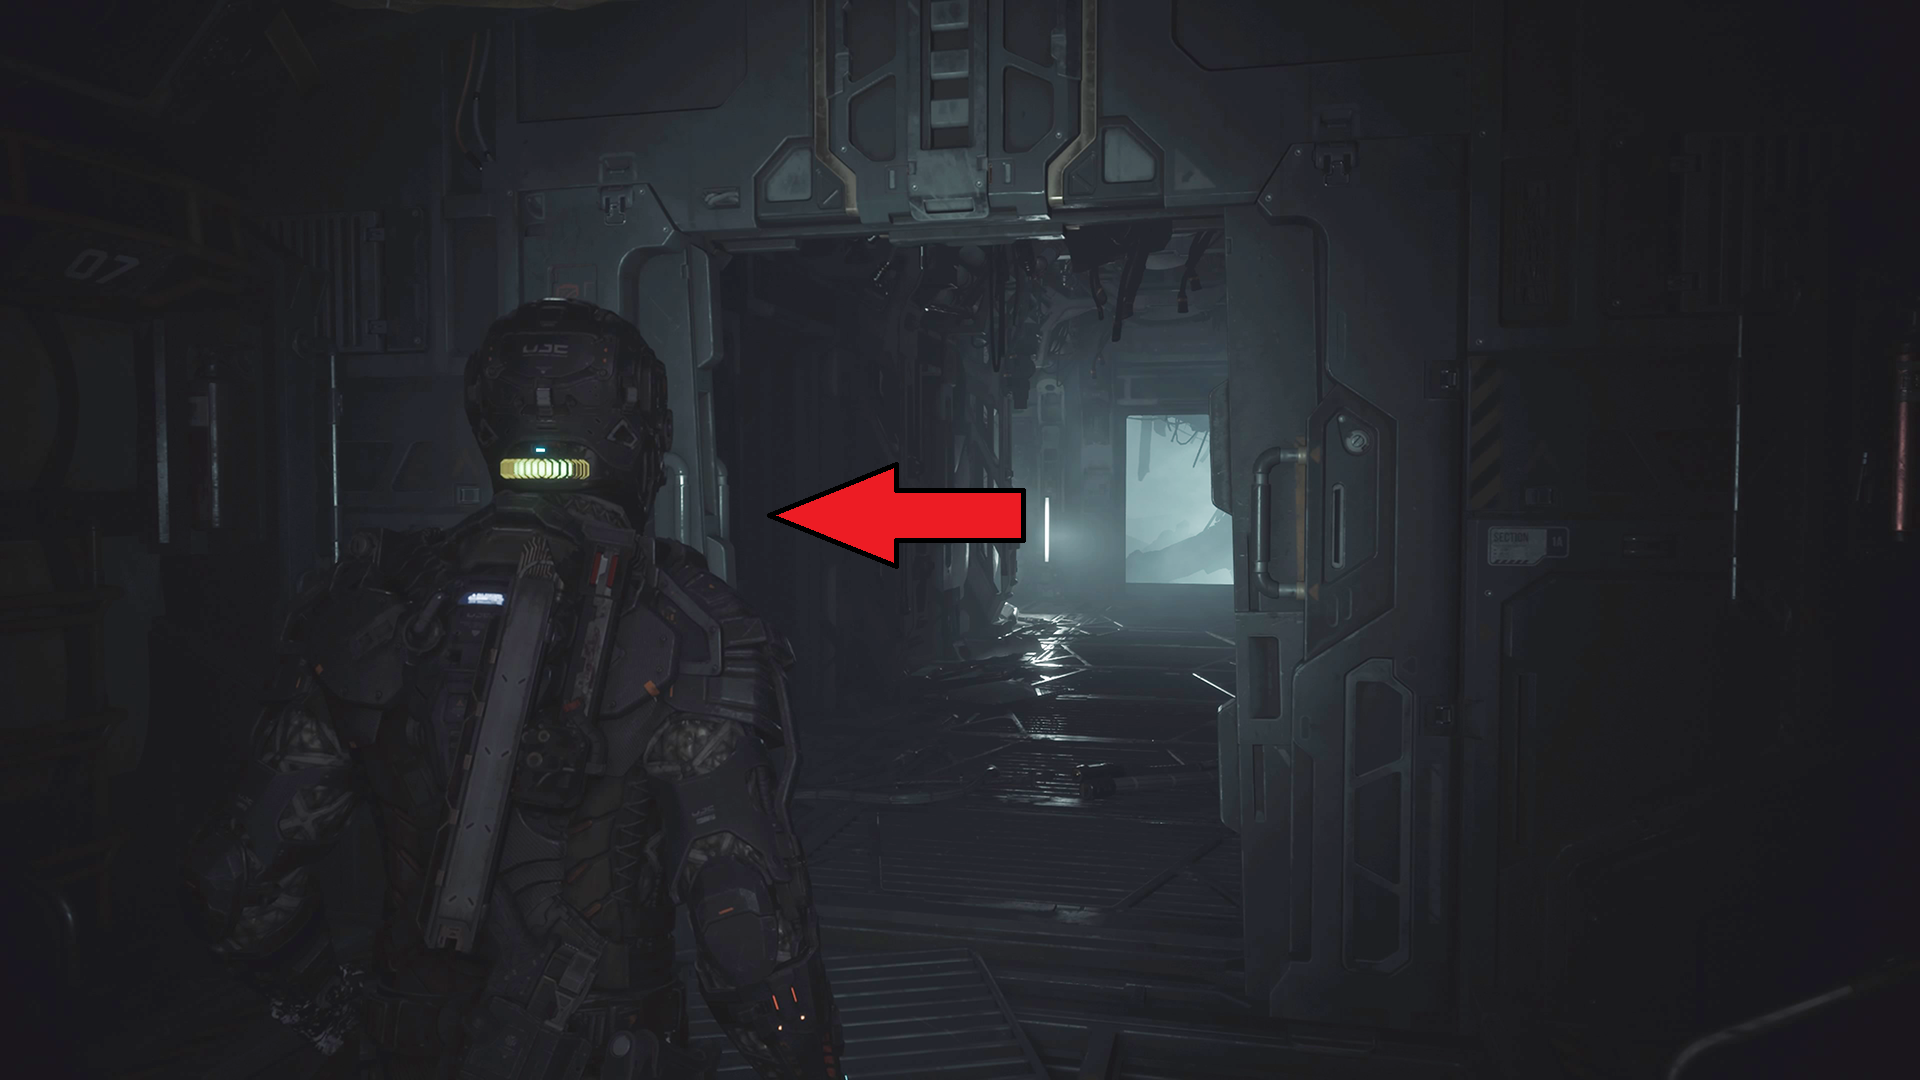
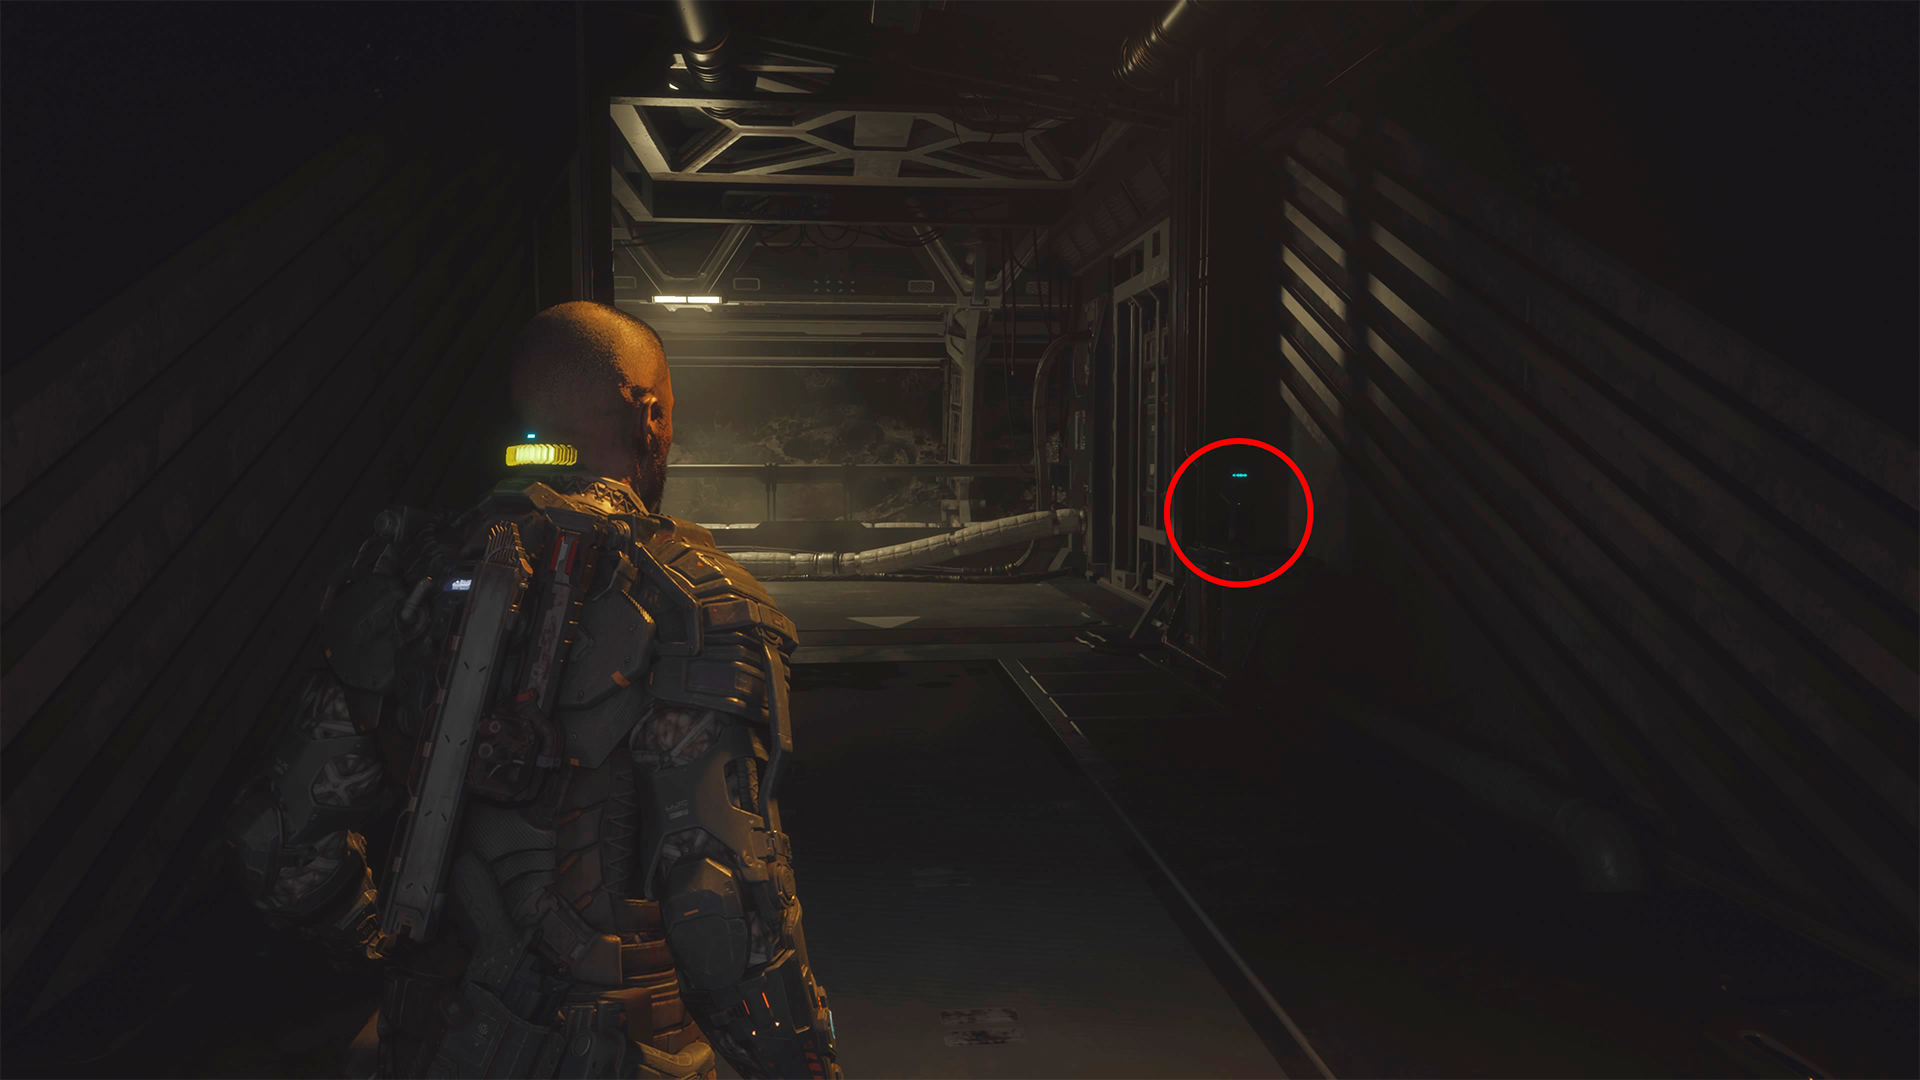
This audio log is at the beginning of the game when you gain control of Jacob exiting the cockpit. Go down the hallway from the cockpit, and immediately turn left at the end of the hallway. Go through the door into the small living quarters, then turn left and interact with the locker between the bunk beds and the table.
Chapter 2: Outbreak
Mahler’s Appointment
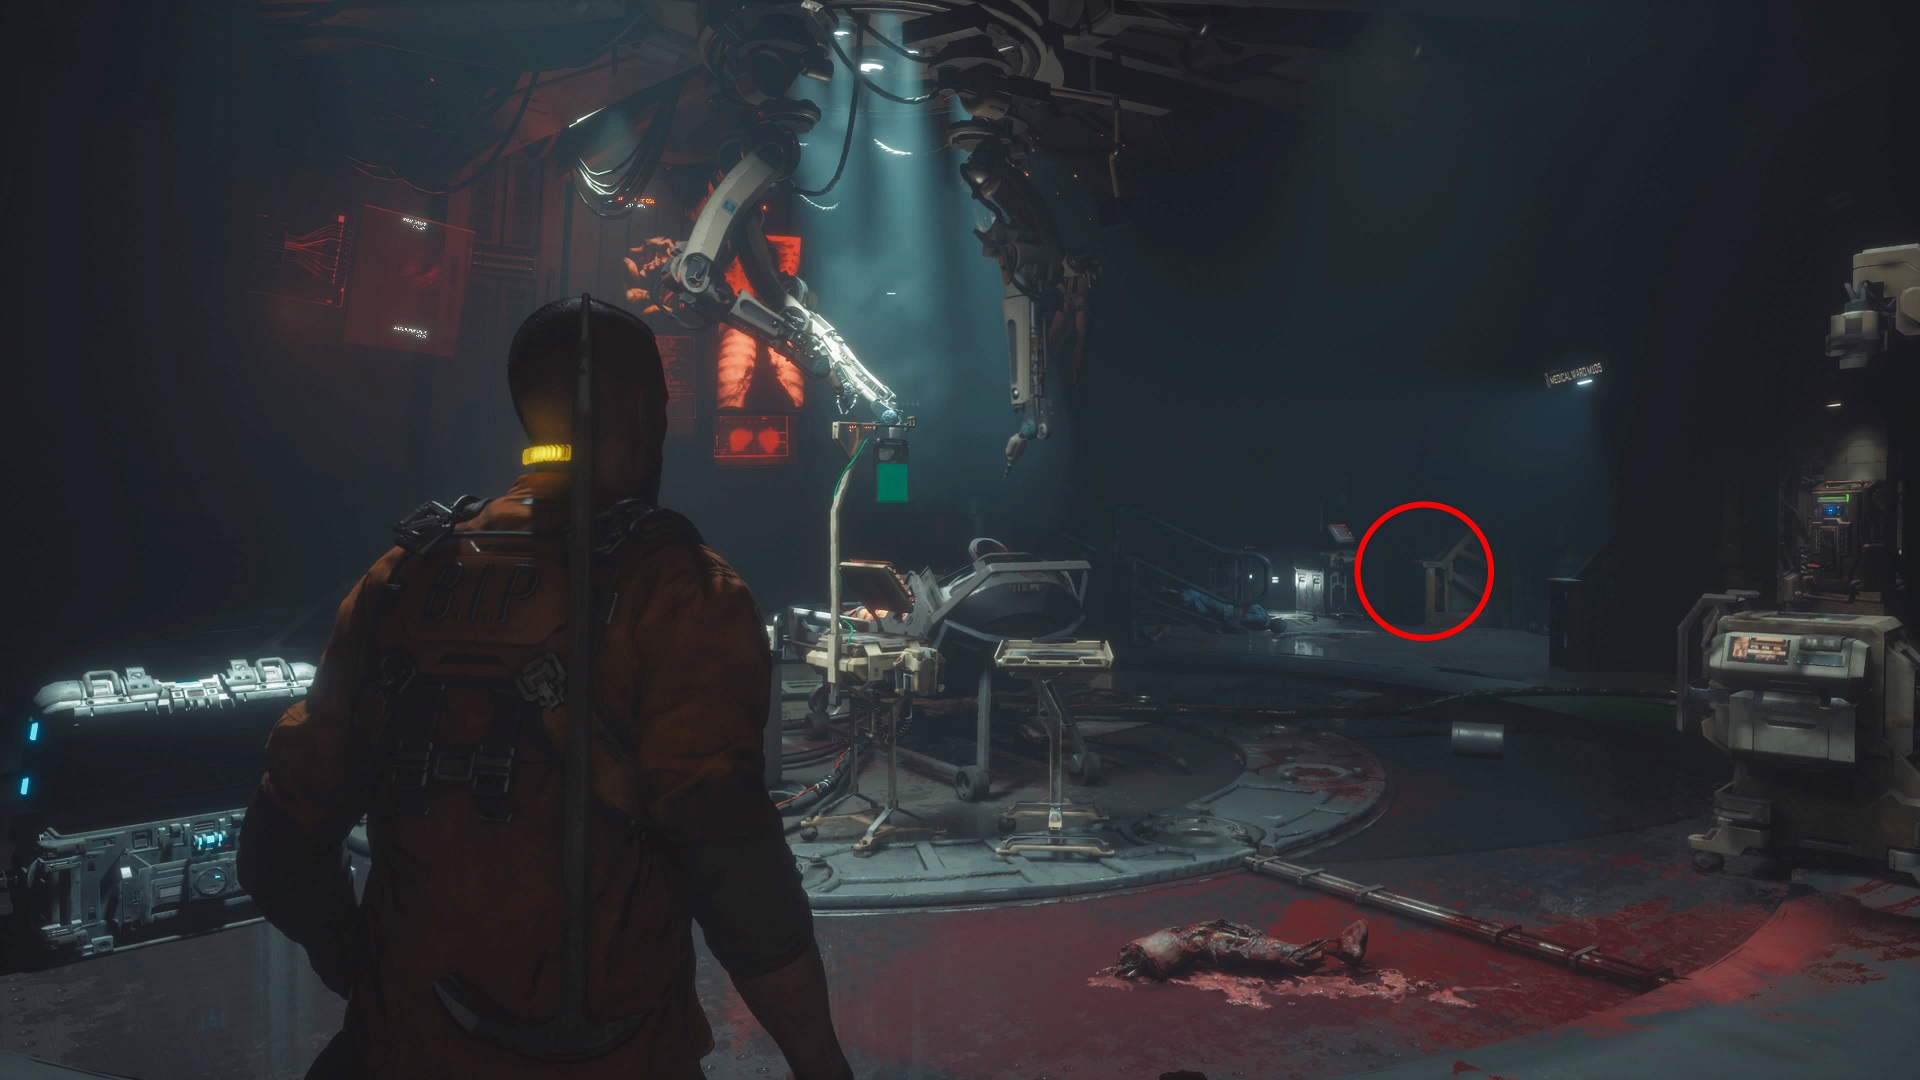
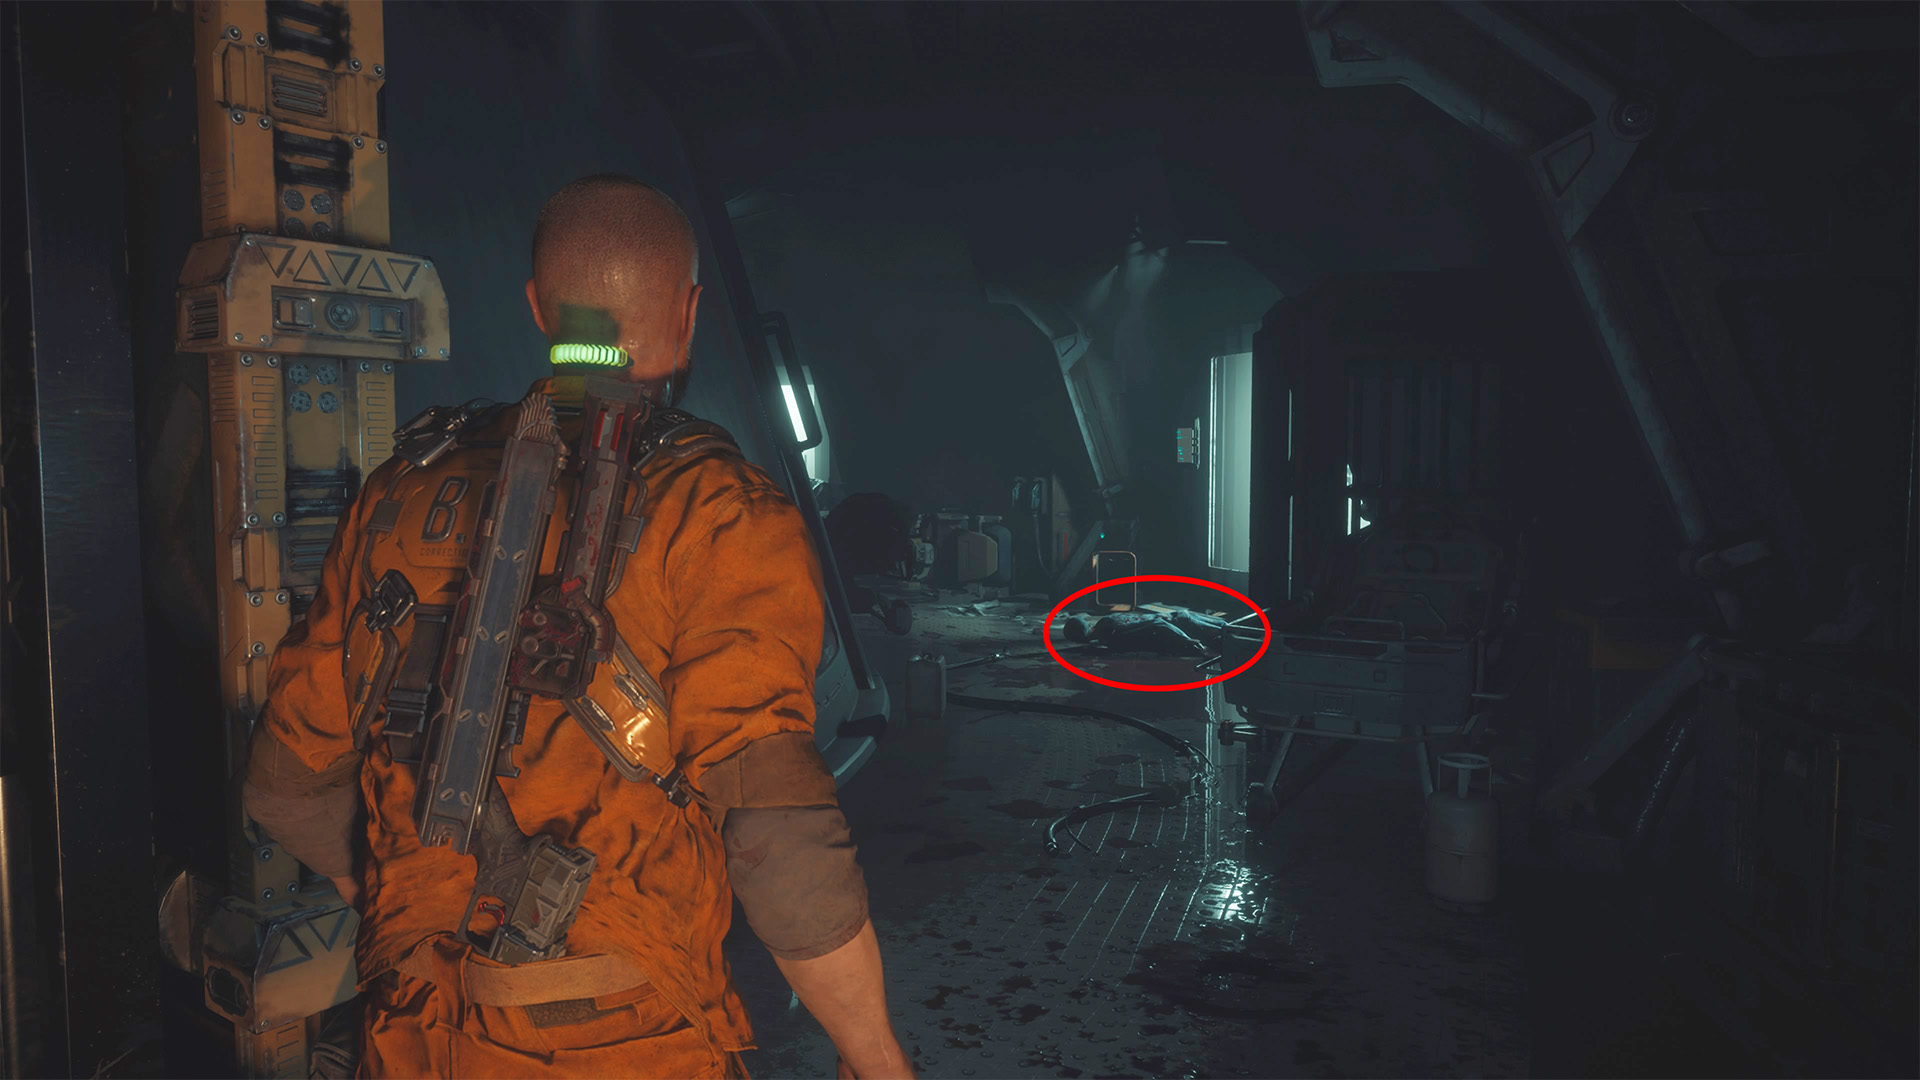
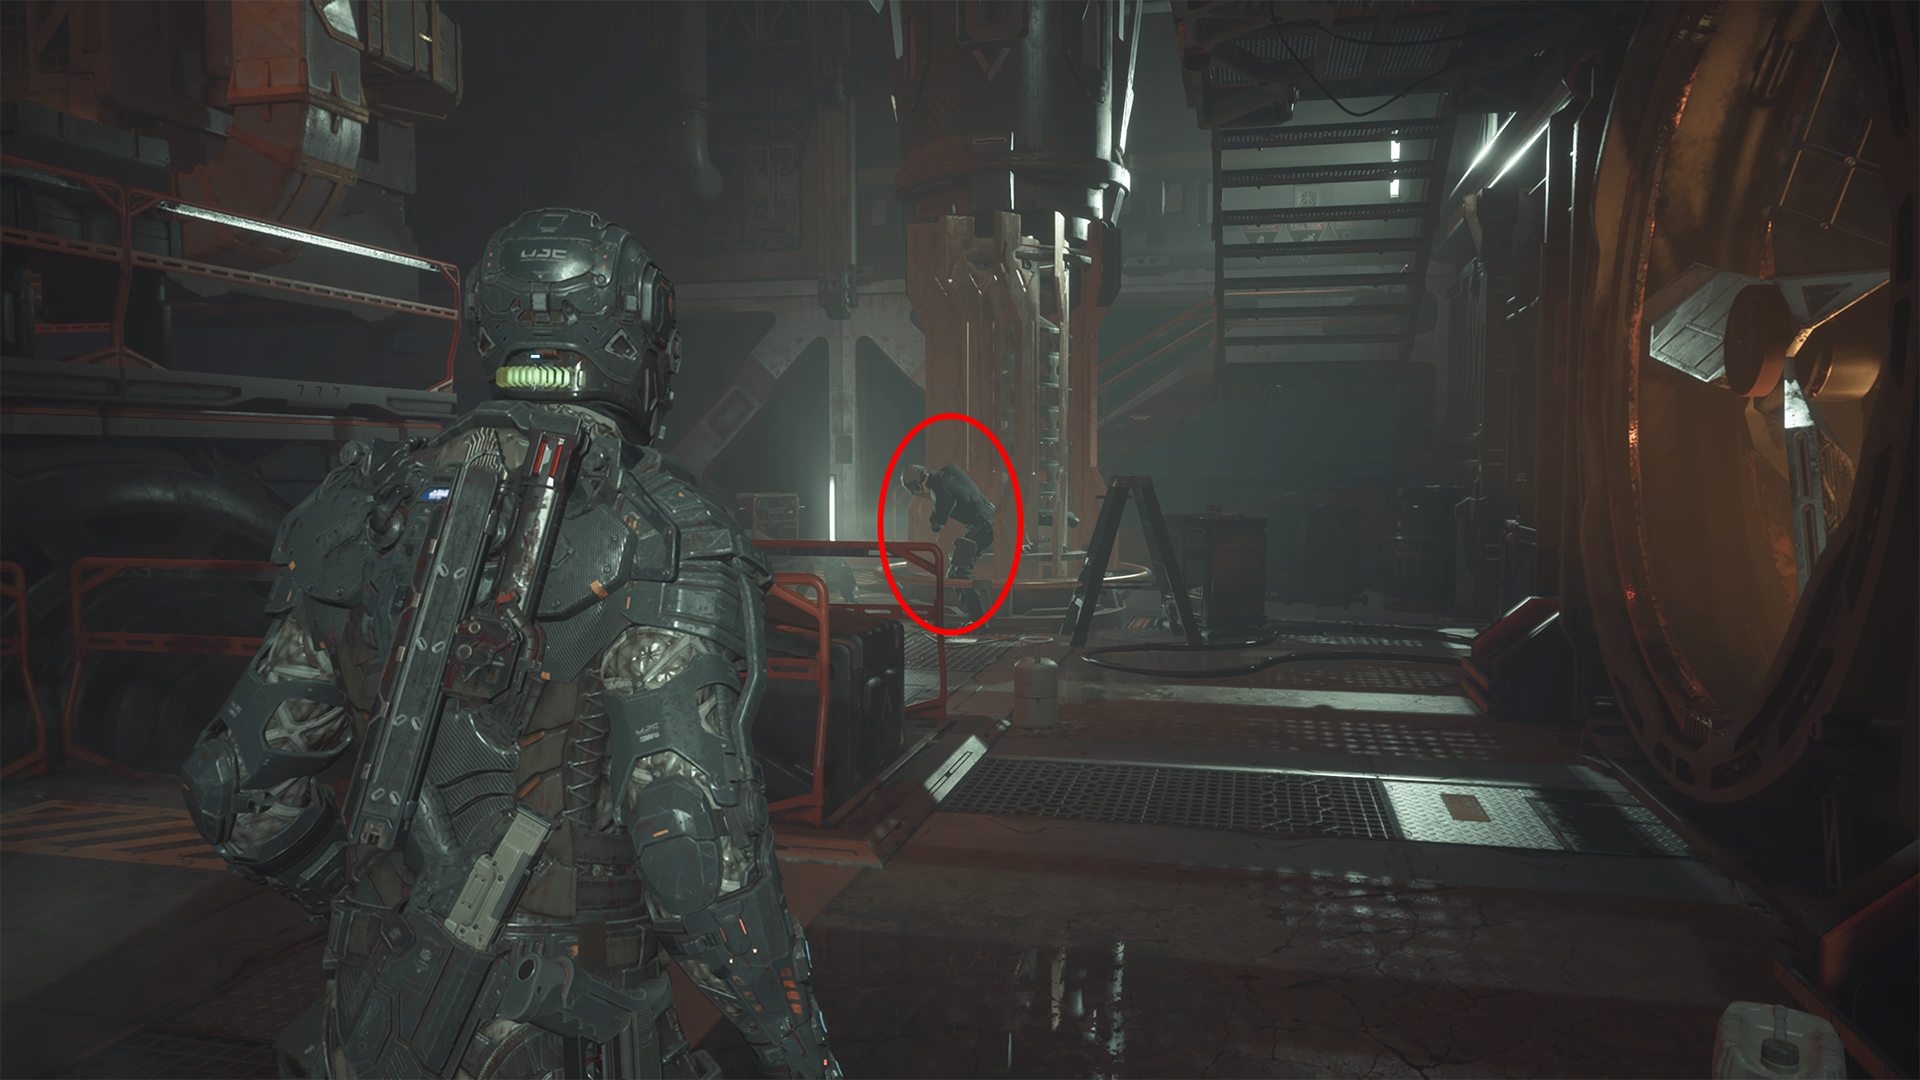
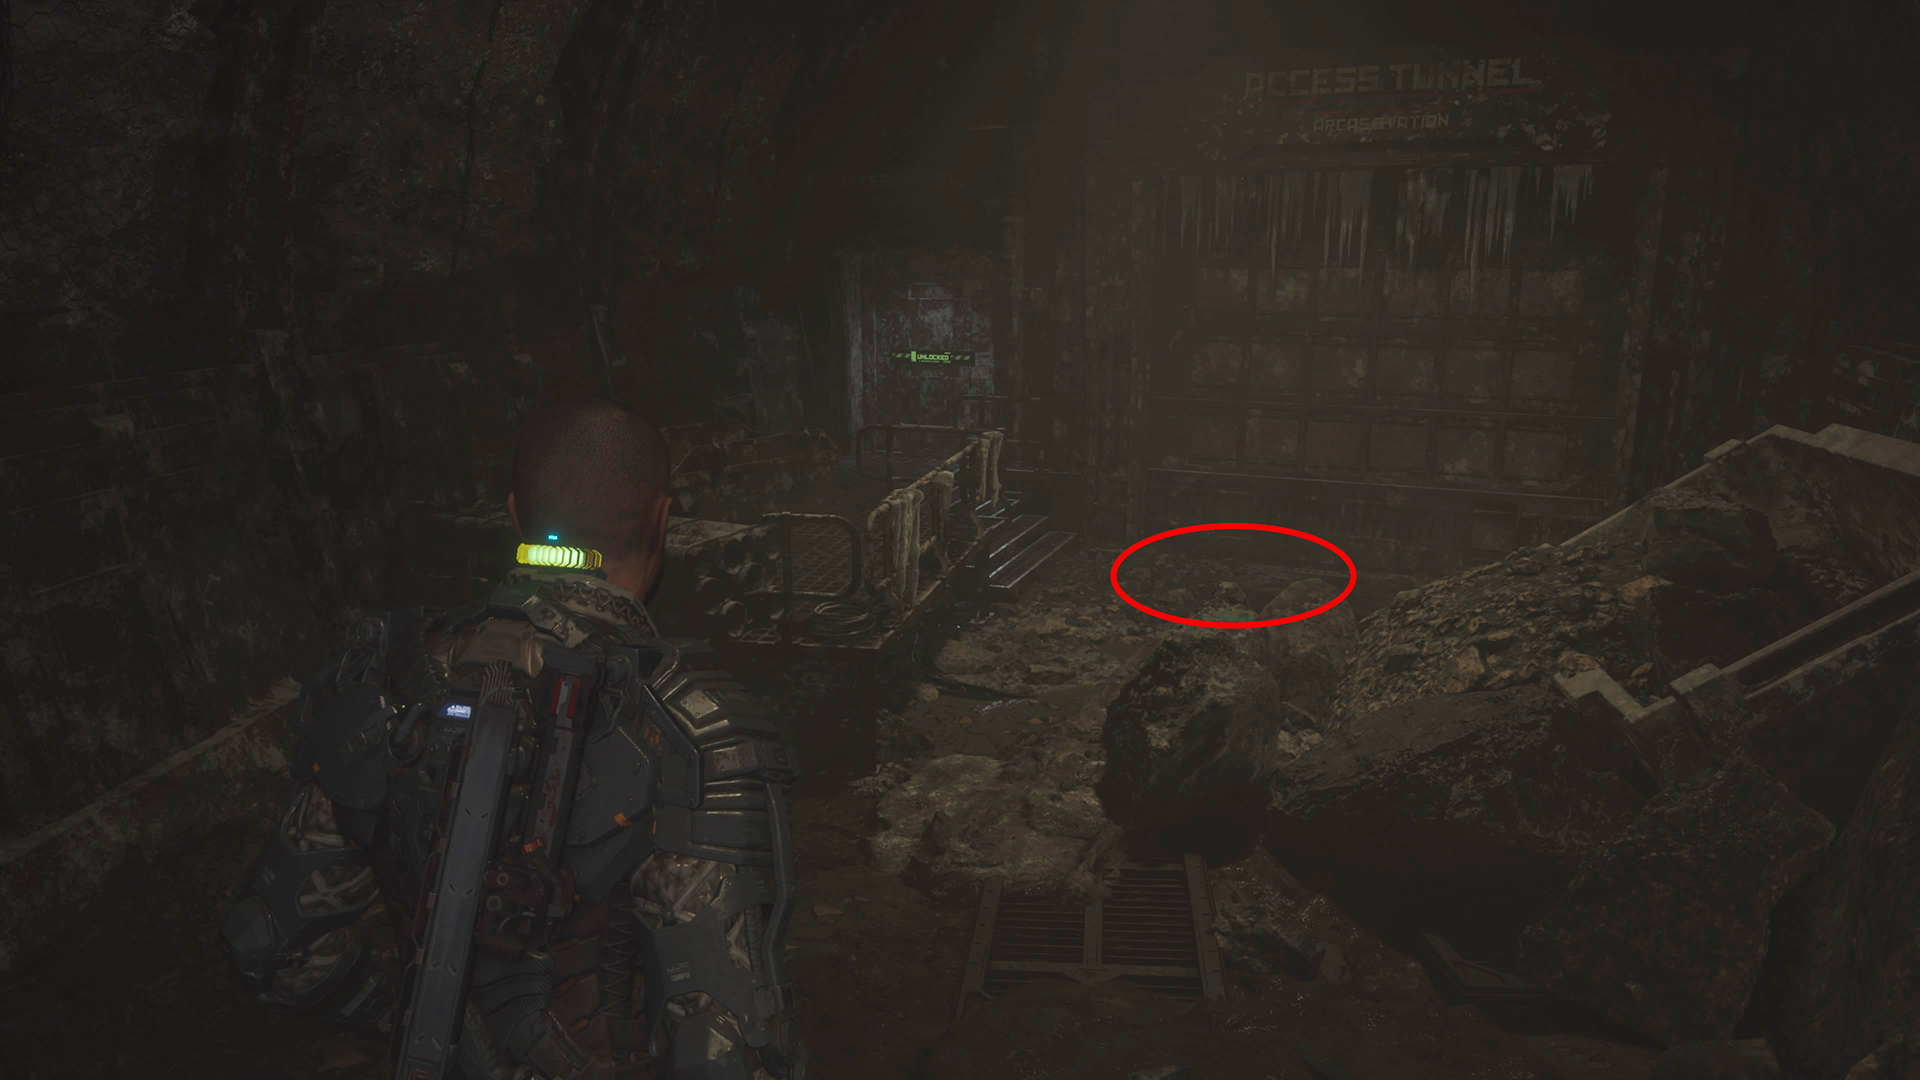
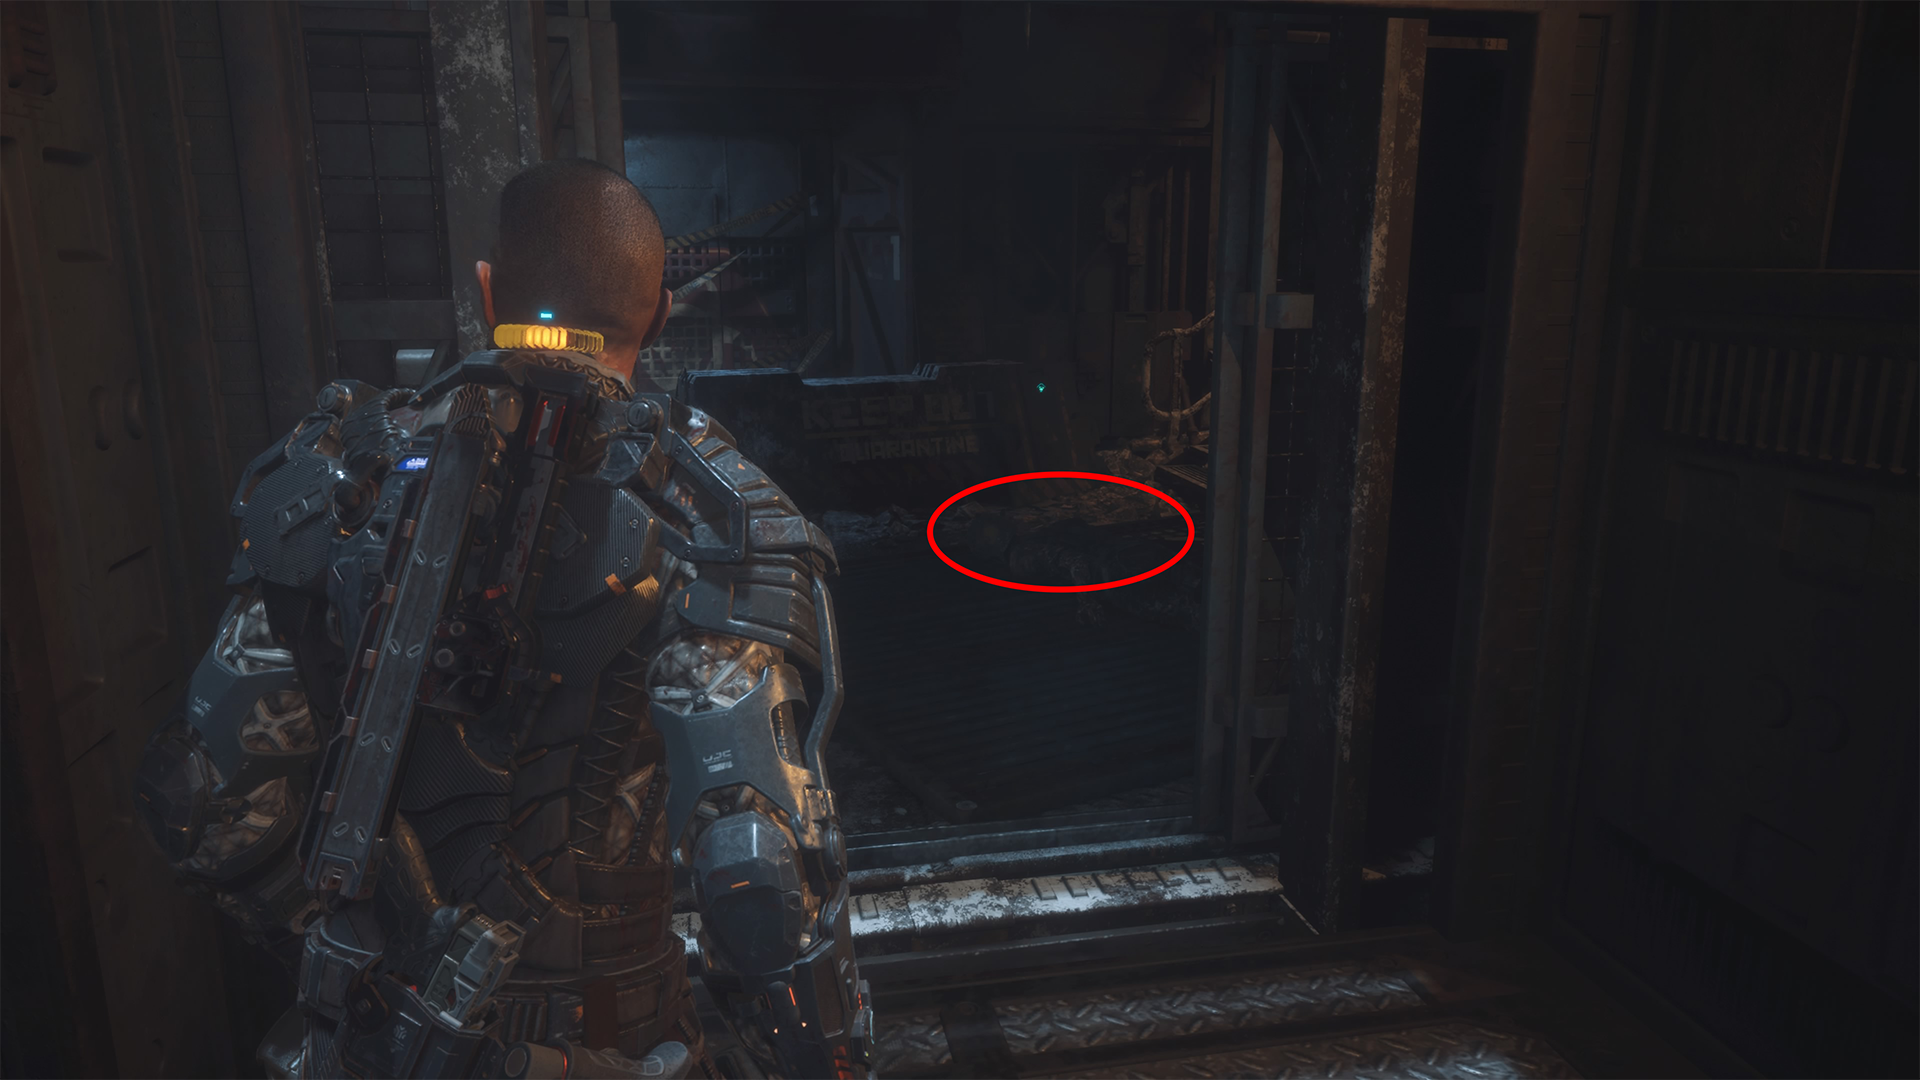
You’ll eventually come to a section where you have to sneak past security robots. Sneak past the first robot by climbing through the vents and crouch-walking through the area. Go through a door marked Medical Ward M105 to enter a new area, where you’ll see a second security robot.
Use the Shiv to open the red, locked door in front of you (Intensive Care M109). Follow the path and go through a green door (Medical Ward M105) by a dead body hanging over the low wall. On the other side, you’ll see yet another green door (Implant M110) across the hall that leads into a room with a large glass window and the same surgical device that put the implant in your neck earlier in the game.
Go into that room (Surgery M112), and look to the right of the stairs on the far side, near another door, for this log. This collectible is to the left of where you pick up the first gate fuse to unlock the Mezzanine.
Elias’s Anticipation
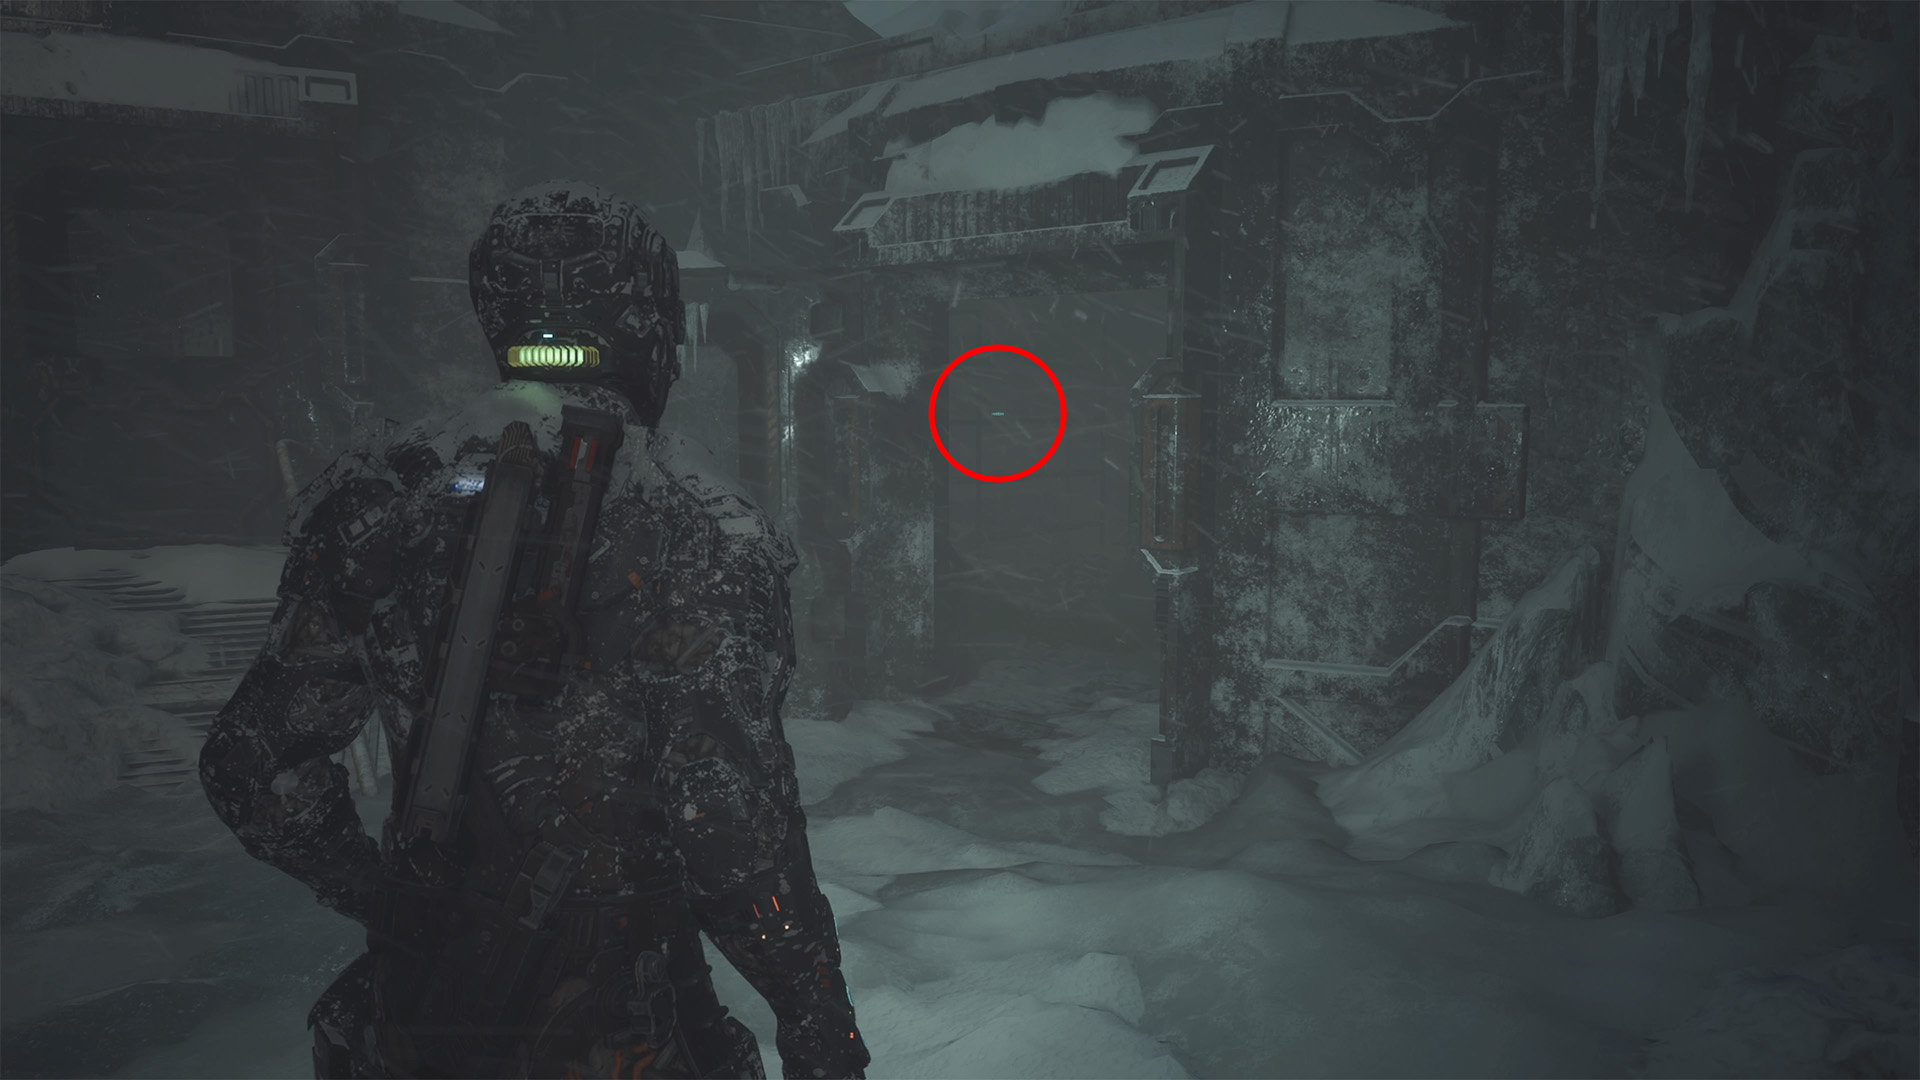
After leaving the Weapon’s Lockup and making your way back outside, follow the path past the bridge leading to the base of the Watchtower and go back to Elias’s now-open cell. Watch the enemies as you go through the archway by the bridge. Hop over the debris, and turn right to find the cell, the audio log on the table on the right side.
Ferris’s Lament
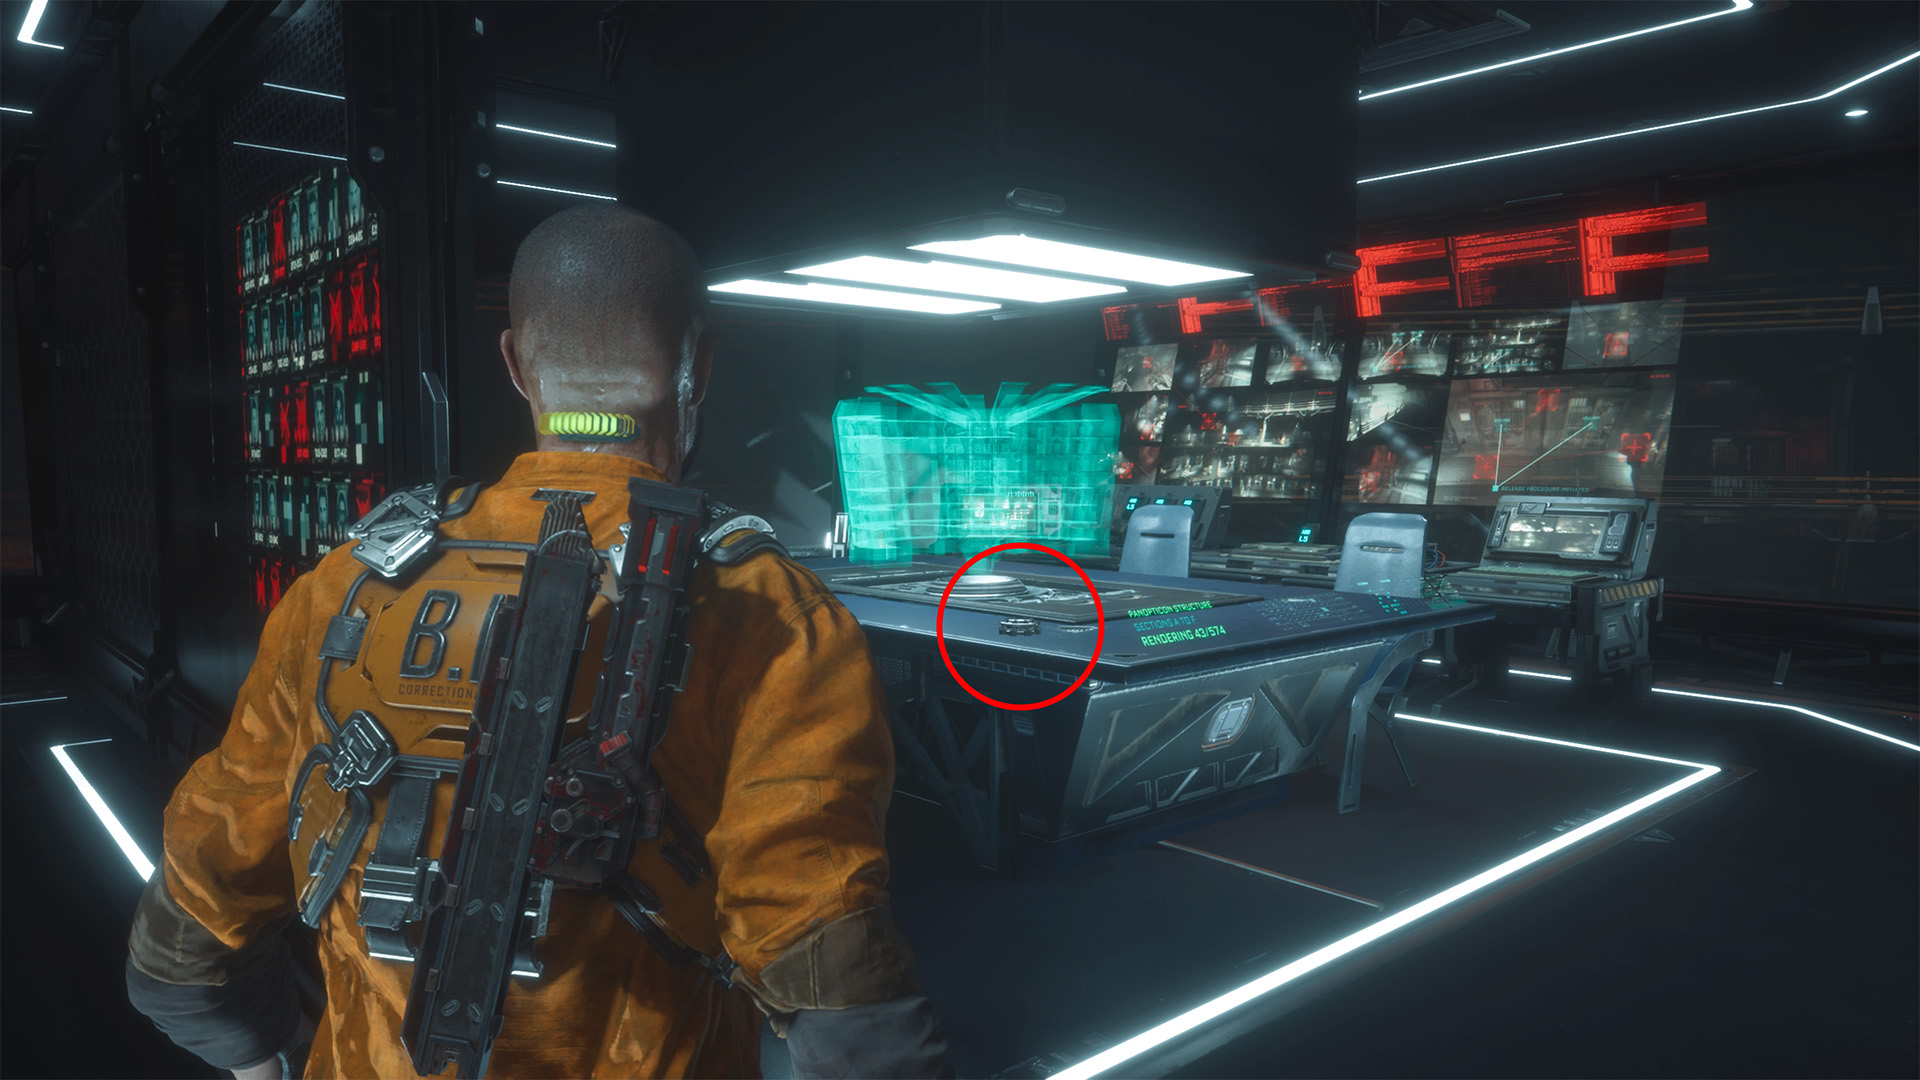
After the cutscene in Panopticon Control in the Watchtower, you’ll find this audio log collectible on the corner of the control room’s central table with the blue hologram of the prison.
Chapter 3: Aftermath
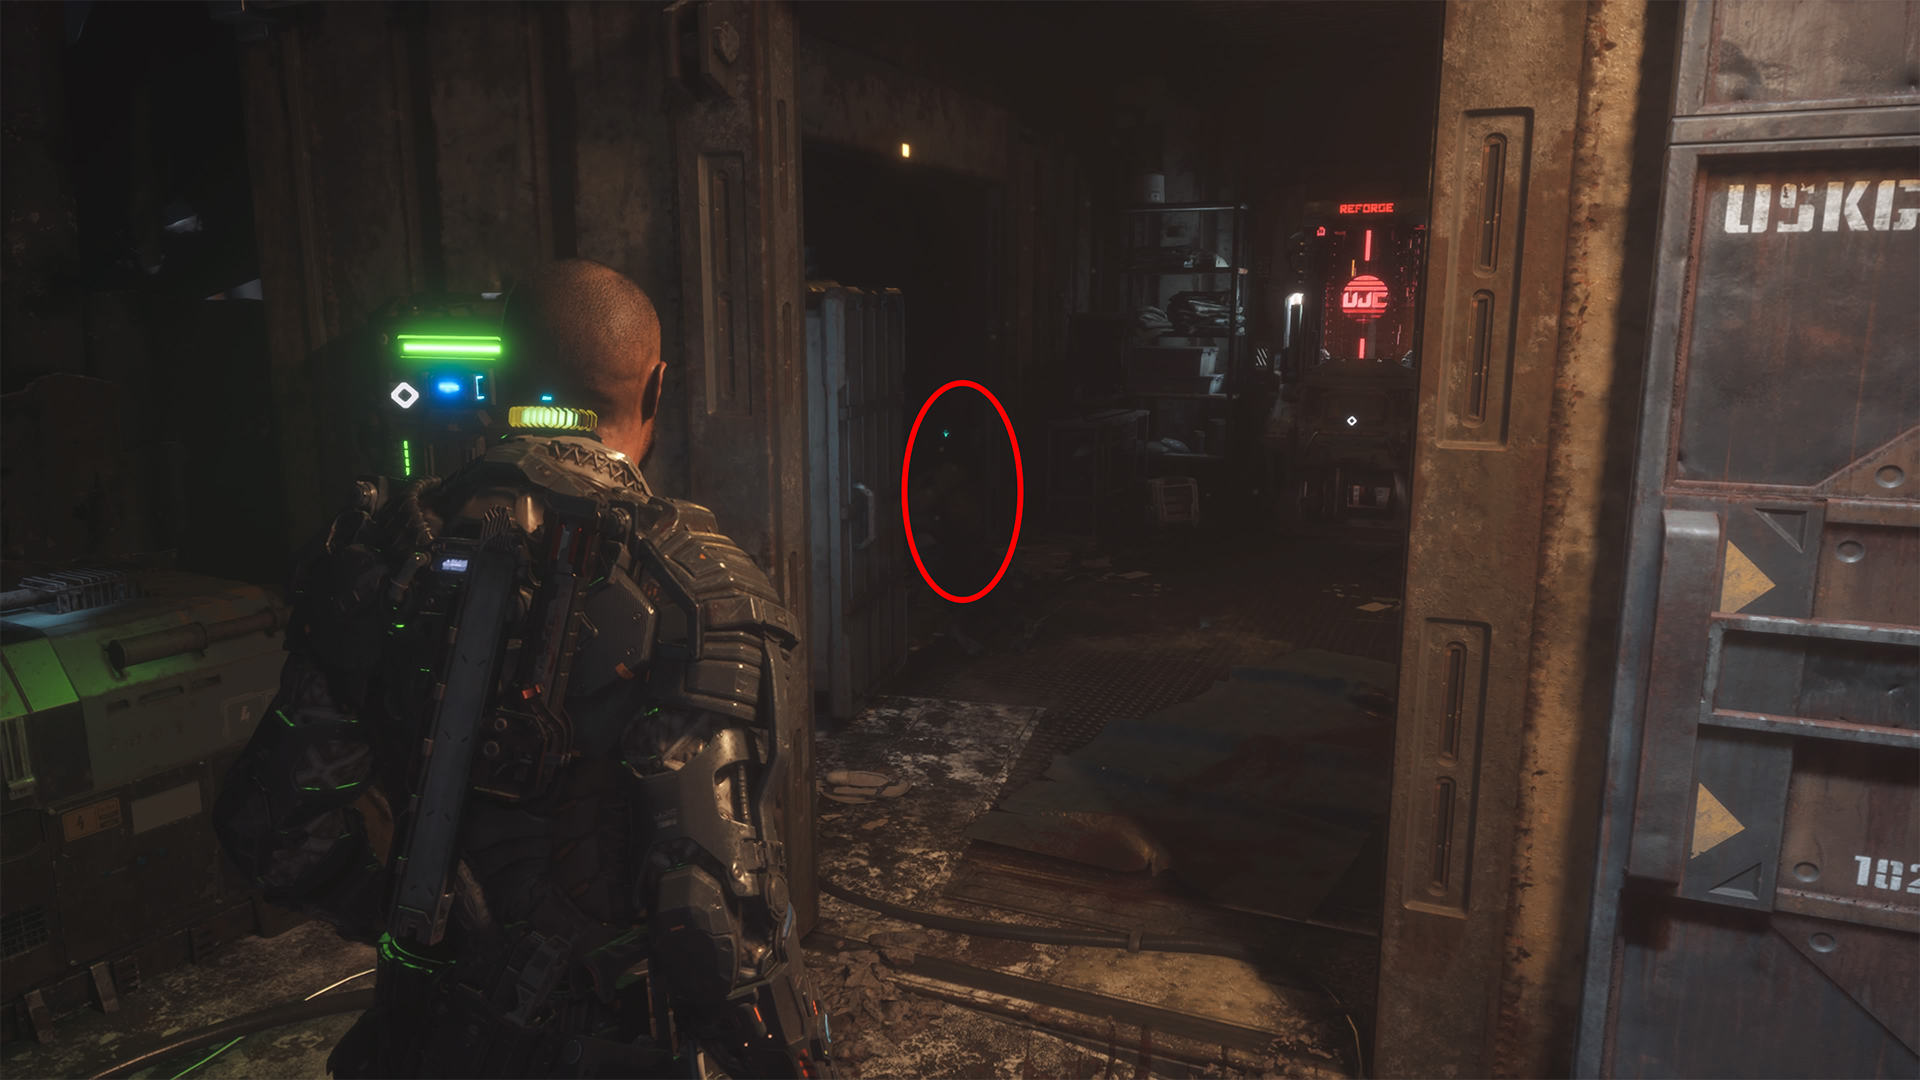
Sgt. Eric Jane: Locked Door
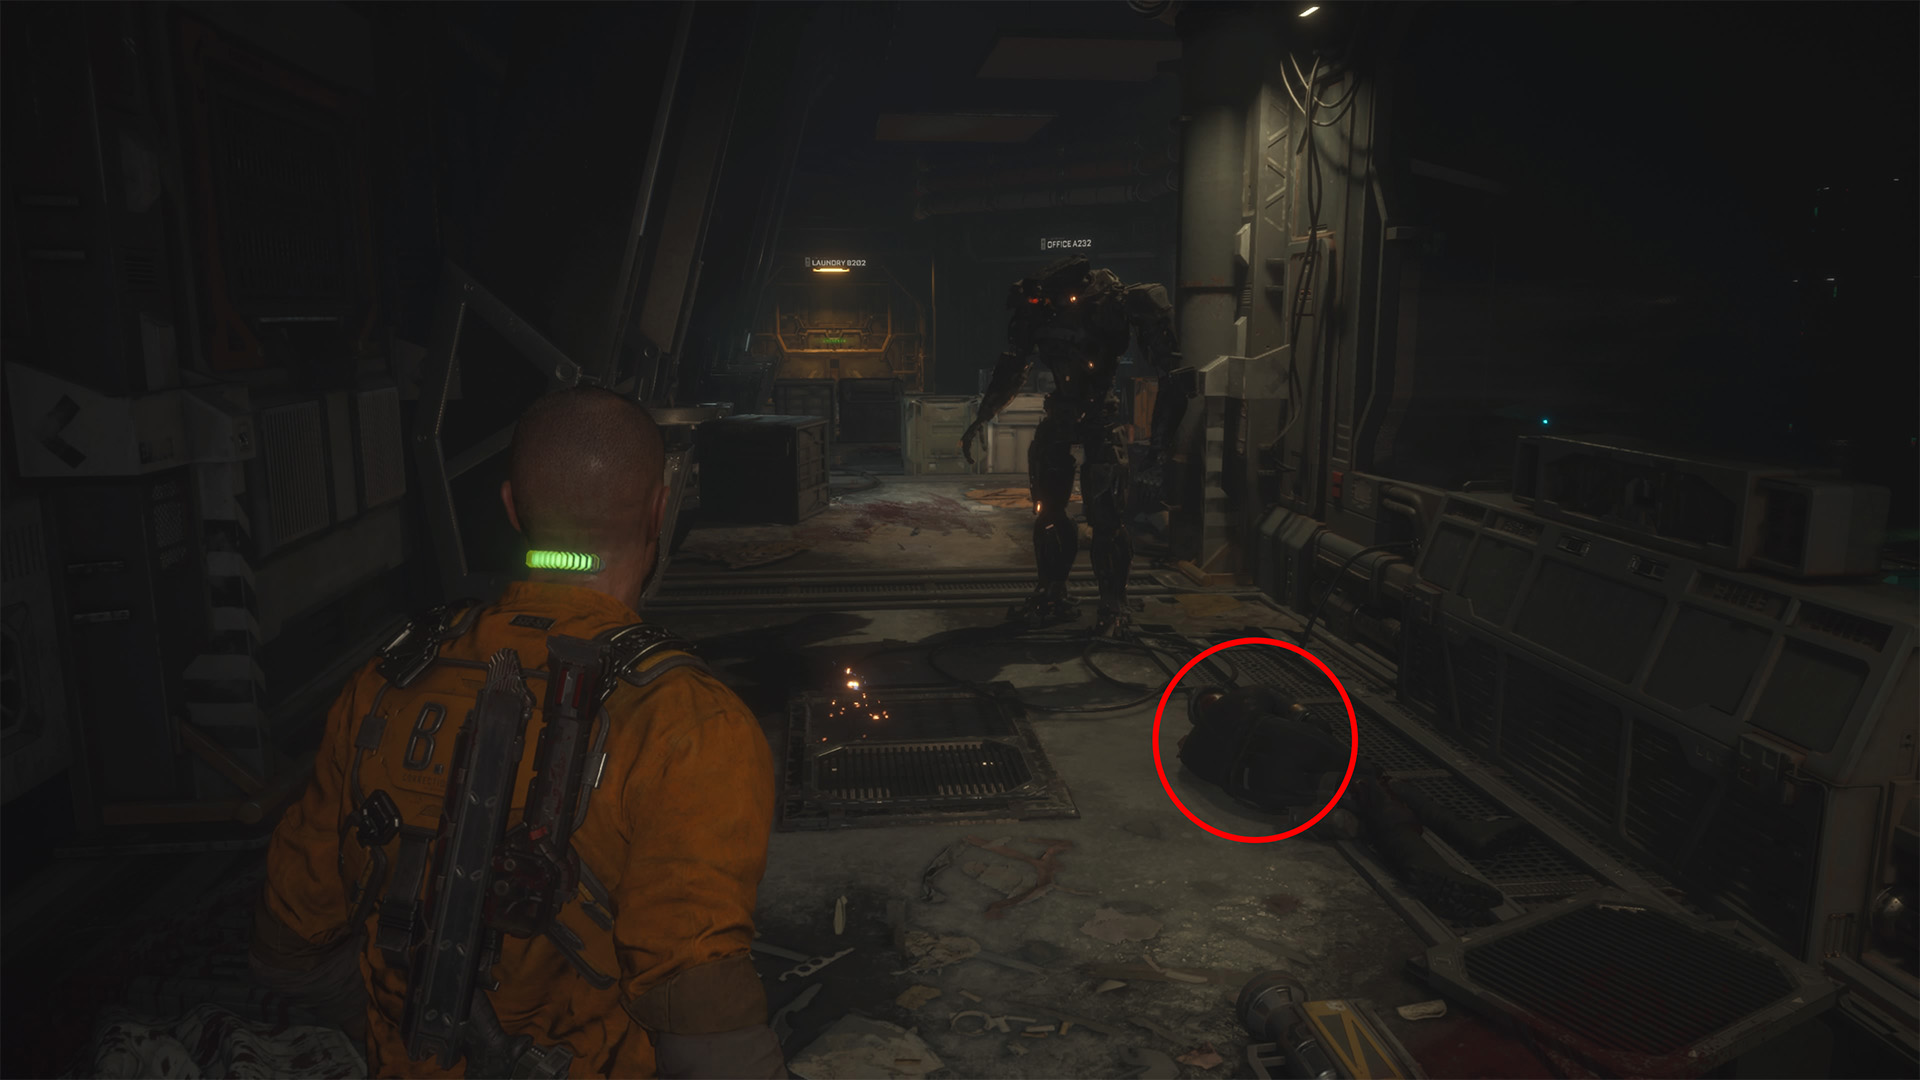
After fighting the first ranged enemy of the game, follow the path through the area before crawling through a vent and dropping into a room with a security robot and enemies. Clear the area and interact with the locked Laundry B202 door on the far side. Go back to the security robot and interact with the dead body.
Ofc. Pruitt Matos: Laundry
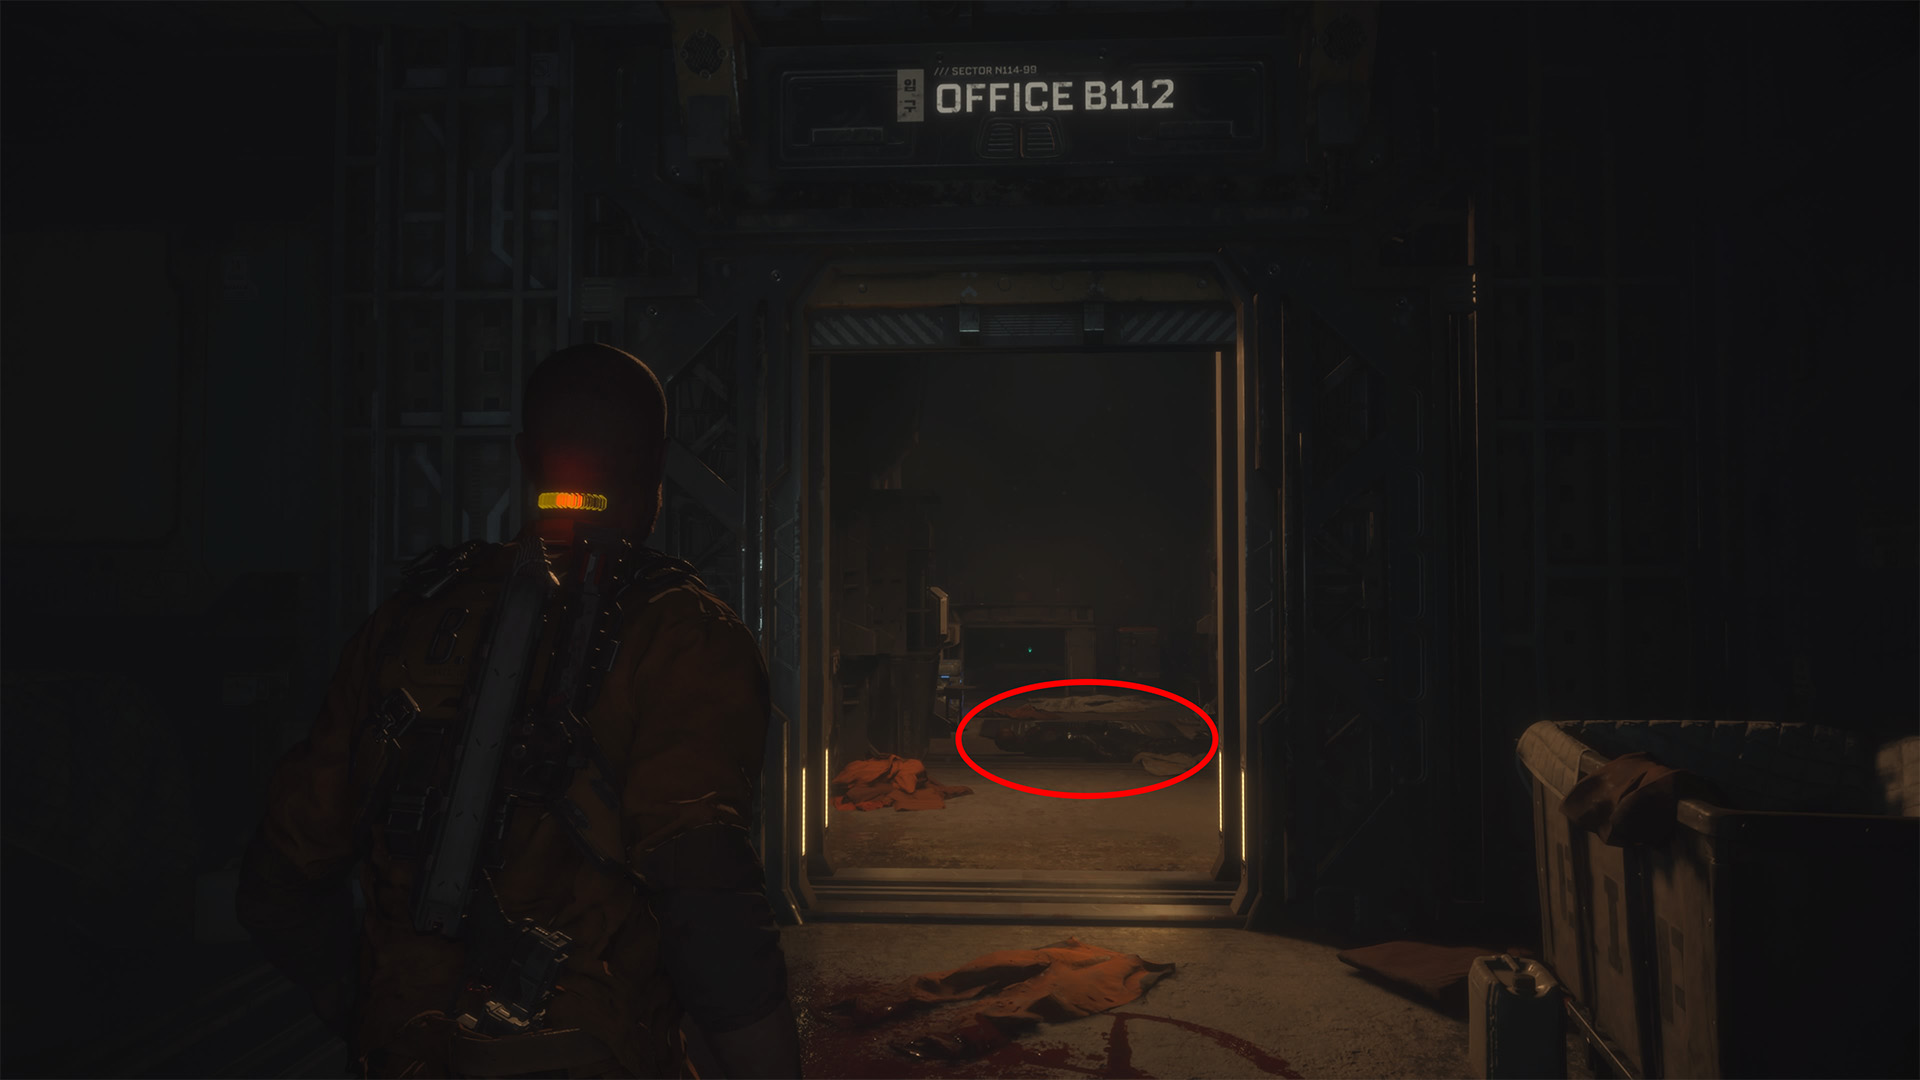
Now go through the locked laundry door, and follow the path ahead, down, and right. Continue ahead by the revolving, hanging bags and fight the surprise enemy. After, go through the door on the right. Turn right at the bottom of the ramp, and follow the path left through the washing machines. Go past the half-raised door to Office B112. Interact with the body on the ground inside.
Duncan Cole: Secret Room 1
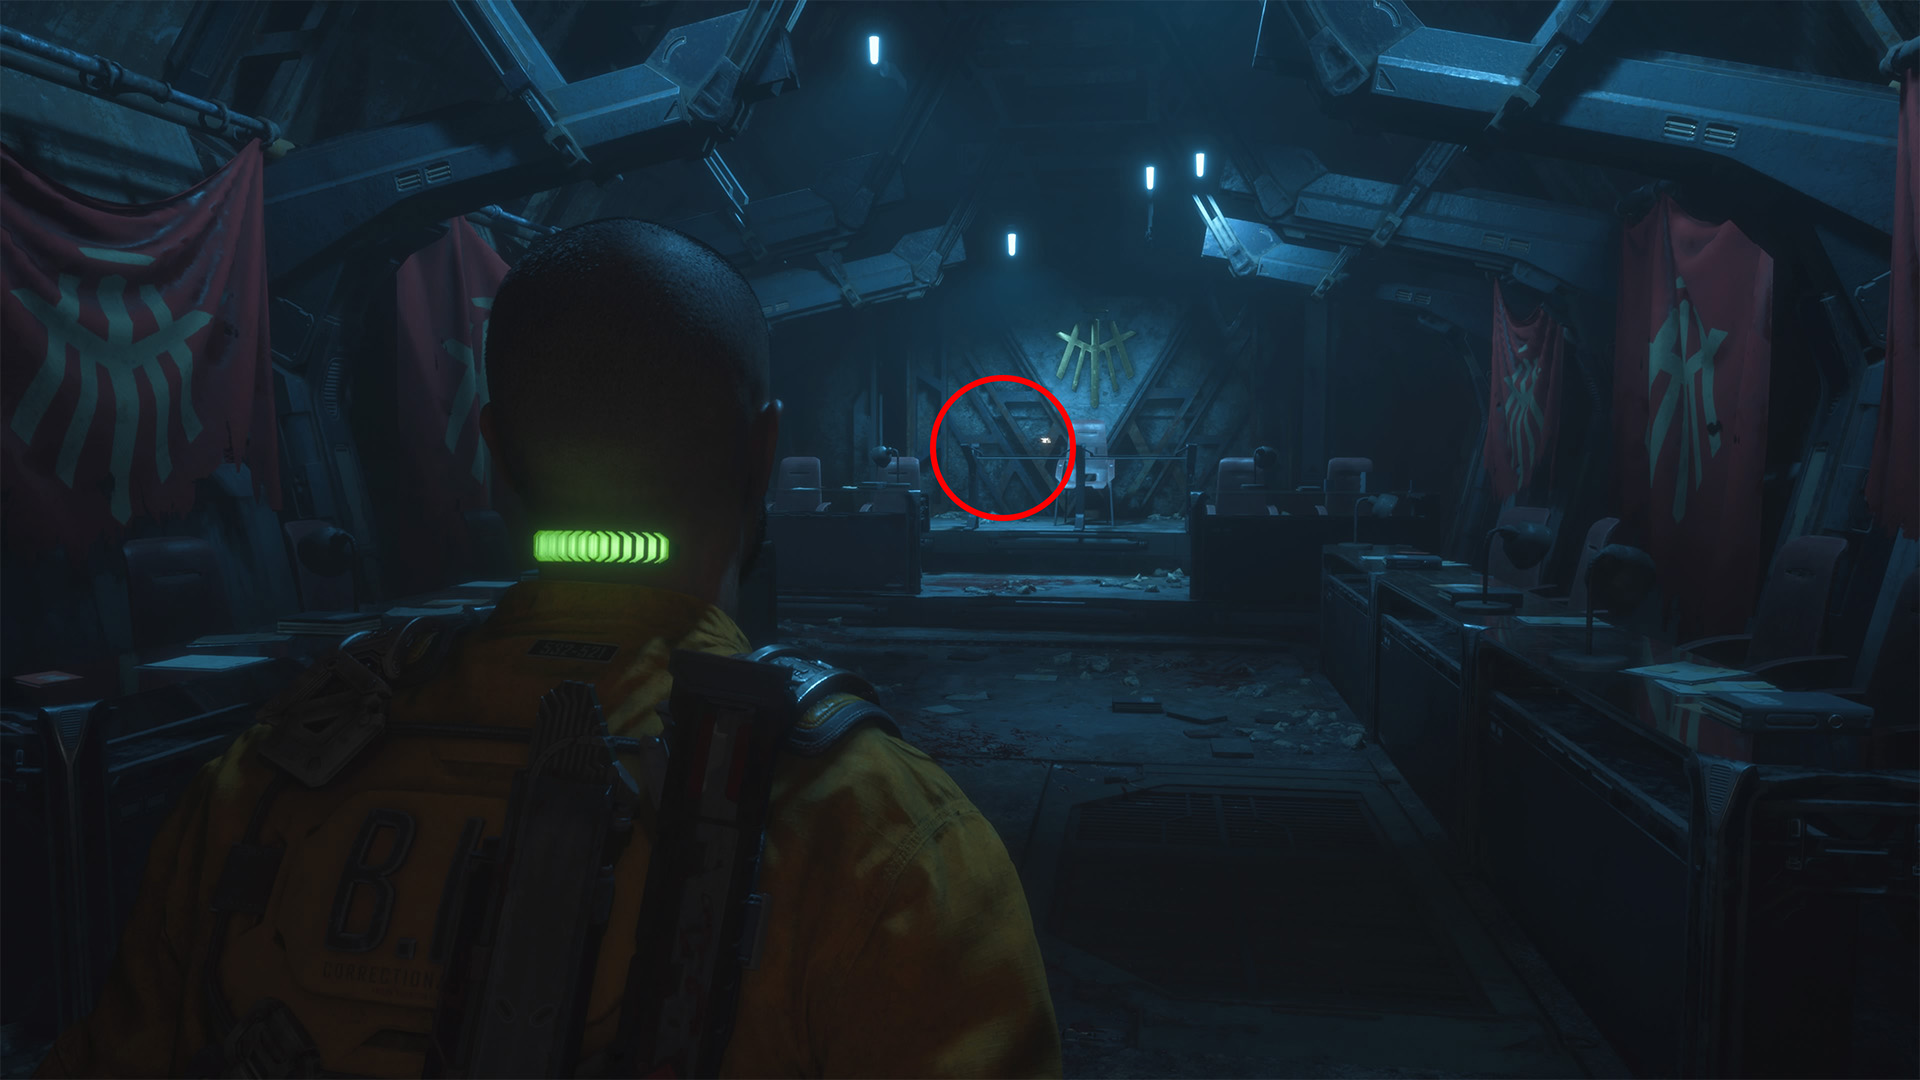
Go back to the main floor of the laundry and take the left door this time. Go down the ramp and straight ahead, where you’ll see a room with a large glass window. Open the door on the right side using the Shiv. Go through the low air duct to the right inside.
On the other side (which will take a little while), follow the stone path all the way down and drop through the hole in the floor. Turn left when you land, and go all the way to the end, squeezing through a door to enter a room with red flags on the walls. The audio log is on the table at the back of the room.
Dr. Ewan Hayes: MedLab Outbreak
Use the ladder near the secret room to find your way back up to the room with the air duct you just previously crawled through. Exit, and fight the two enemies. Then go back towards the ramp that led down from the Laundry door, and enter the Maintenance B414 door on the right. Follow the linear path, fight the enemy that crashes through the glass, and go through the Access Hall B433 gate.
Open the door at the end of the path to enter a MedLab with stretchers, flickering lights, and a path curving left. Interact with the dead body in the pool of blood in the path.
Ofc. Dachs Symmons: Hanged Guard
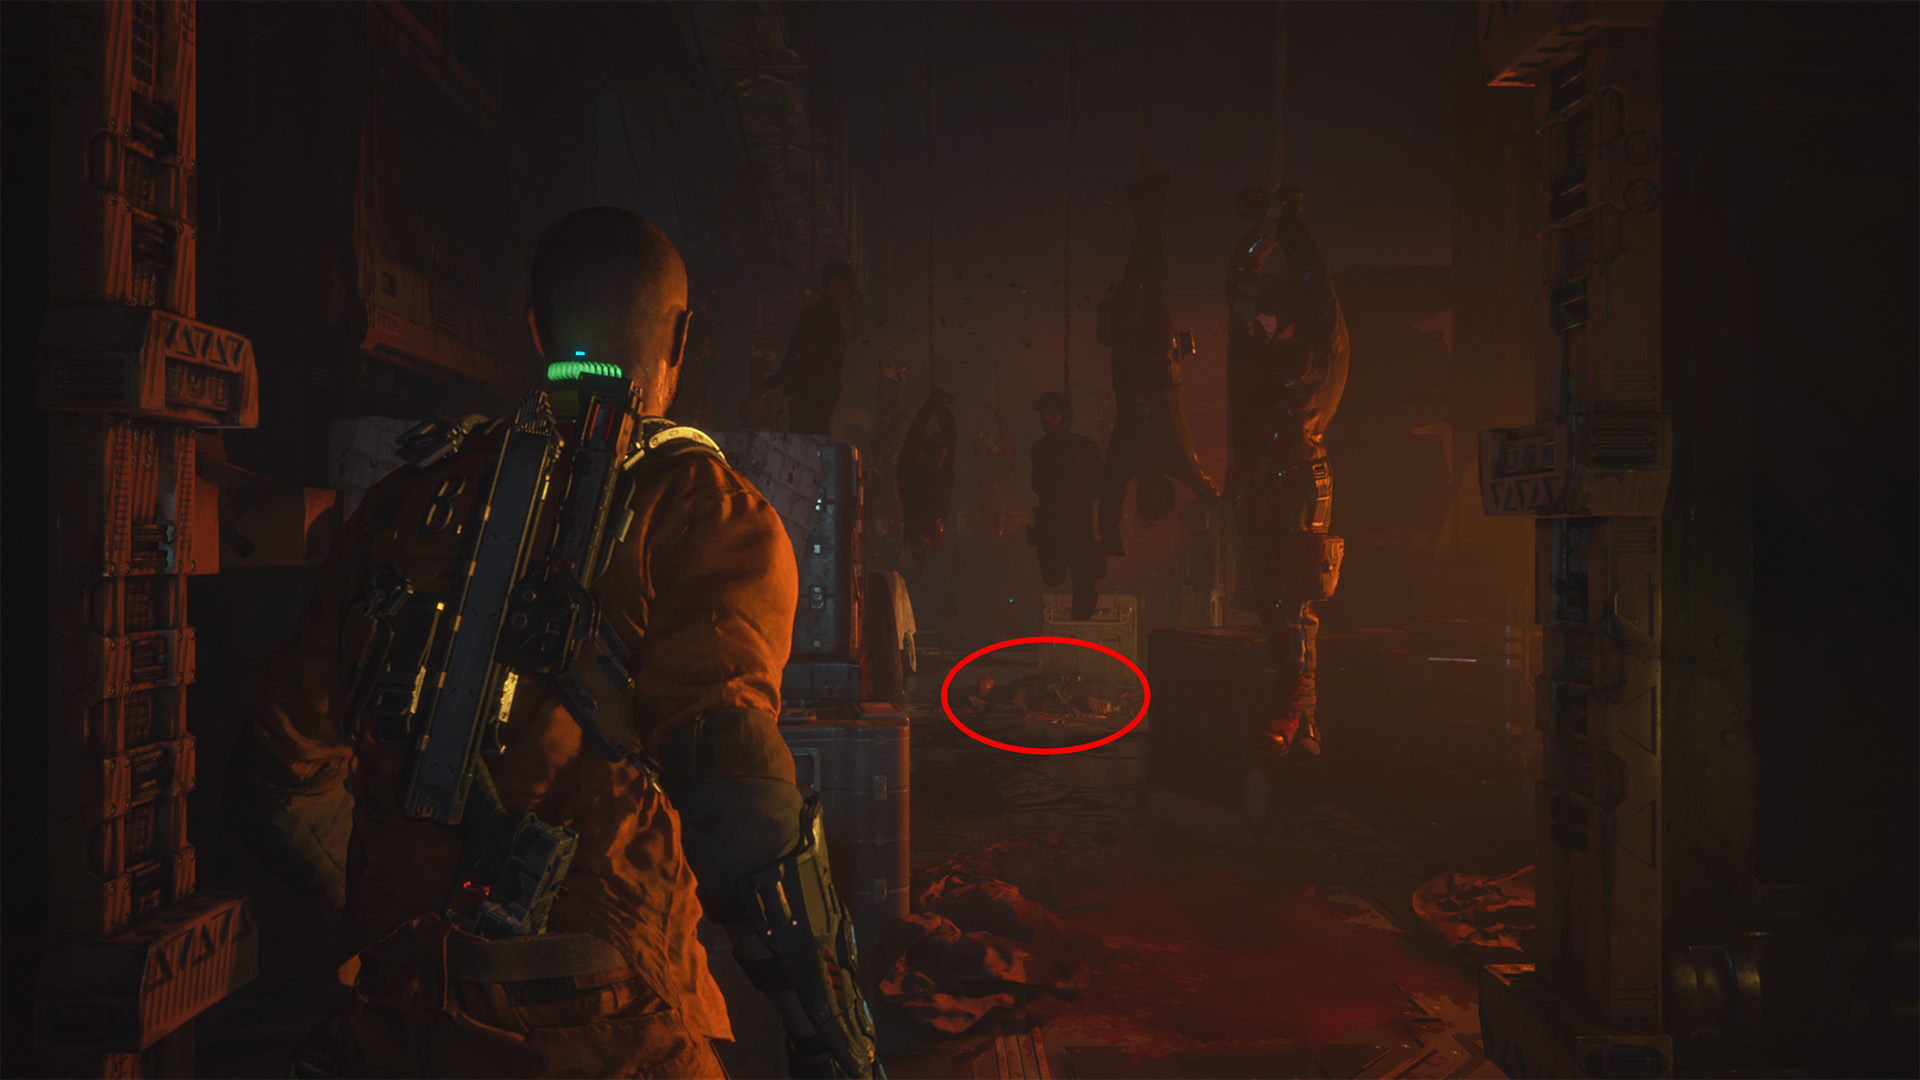
After making your way through the MedLab, you’ll come to a QTE door labeled Maintenance C110 as part of the critical path. You’ll find a gruesome scene of hanged, eviscerated guards on the other side. Interact with the body on the ground beneath them for this audio log collectible.
Ofc. Kerry Brown
From there, take the elevator down. At the bottom, following the QTE with the nightmare fuel monster, stay left and climb up the ledge. After the second nightmare tentacle monster, drop down. Follow the path left (minding another zombie)m then right at the fan.
Turn left and go ahead toward the fire, then take another left at the fire. Interact with second body, the one nearest the fan. A zombie will jump out of the ground vent when you get close, so be ready.
Tadhg Song
Use the gondola to reach the Shu. When you disembark on the other side, turn left and climb up the ledges to a catwalk above. Interact with the body on the ground near the switch.
Dani Nakamura
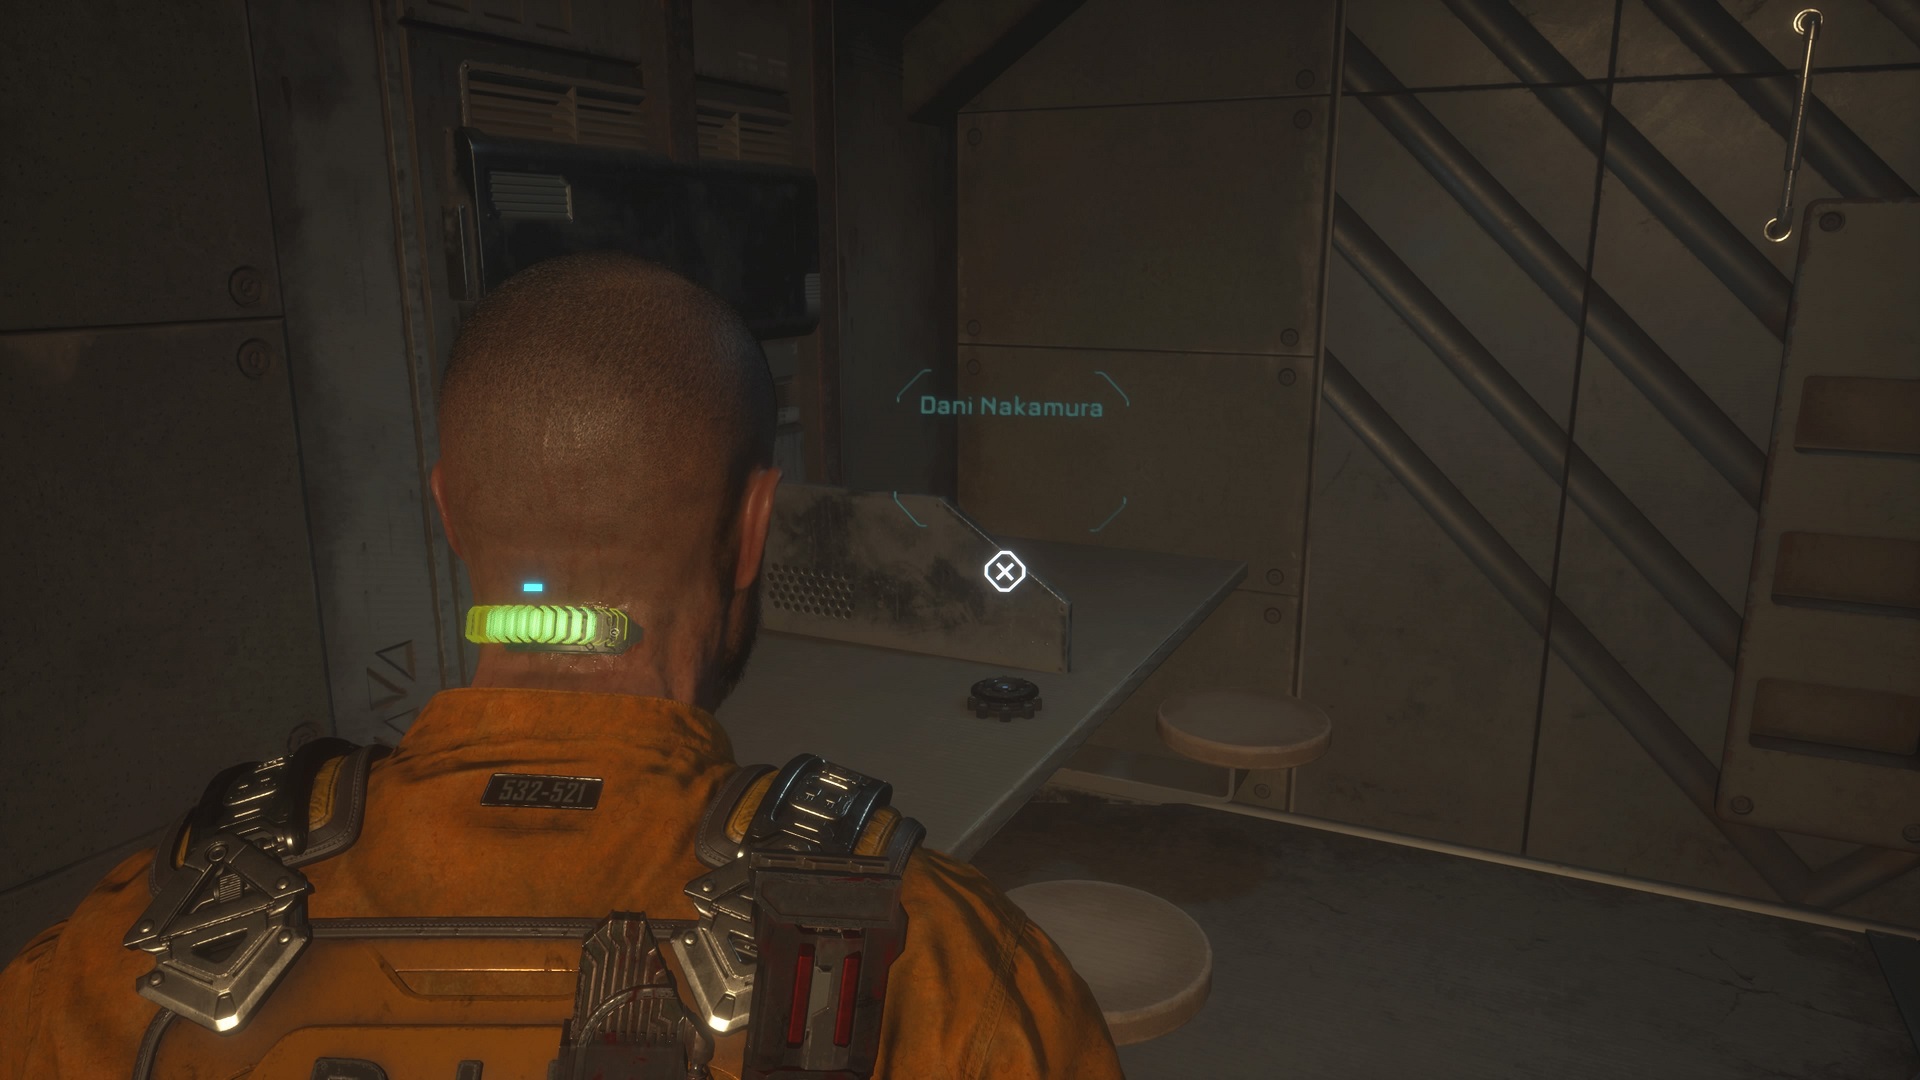
Take the elevator down from the Shu controls, kill the enemies outside, and interact with the middle set of cell controls on the right side. Interact with the table inside the cell after the cutscene.
Chapter 4: Habitat
Dr. Caitlyn Mahler: Corruptors
While following the red pipe, you’ll find yourself in a sewage area with a rotating mechanism. Fight the enemy, and turn the valve on the far side to open a pathway through another crawlspace.
Near the end, you’ll see a guard in the muck and a terrifying beast take them away. Continue forward and through the pipe ahead, and drop down. Turn left and another of Elias’ holograms will play. Climb the crate it stops in front of, then up to the small gantry. Inspect the boxes along the wall in front of you for the log.
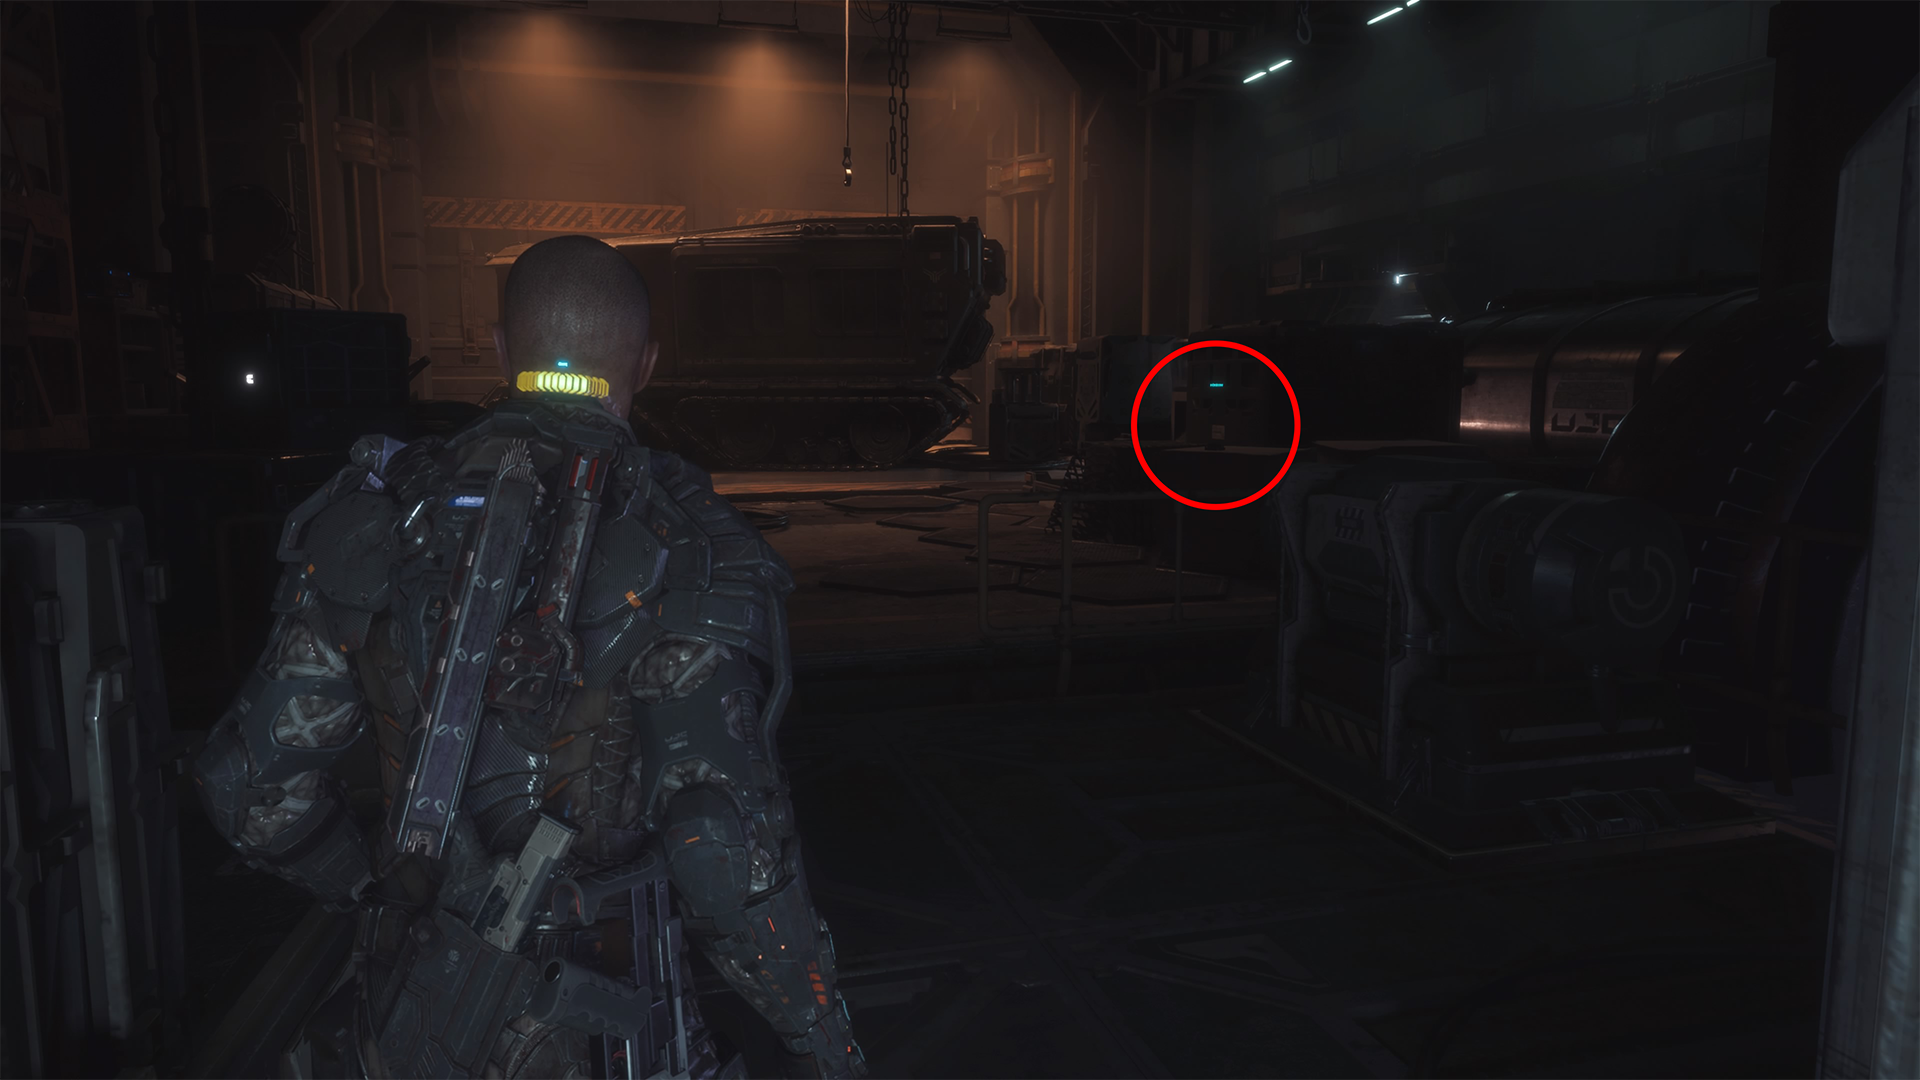
Ofc. Bruno Vorenus: Crosswired
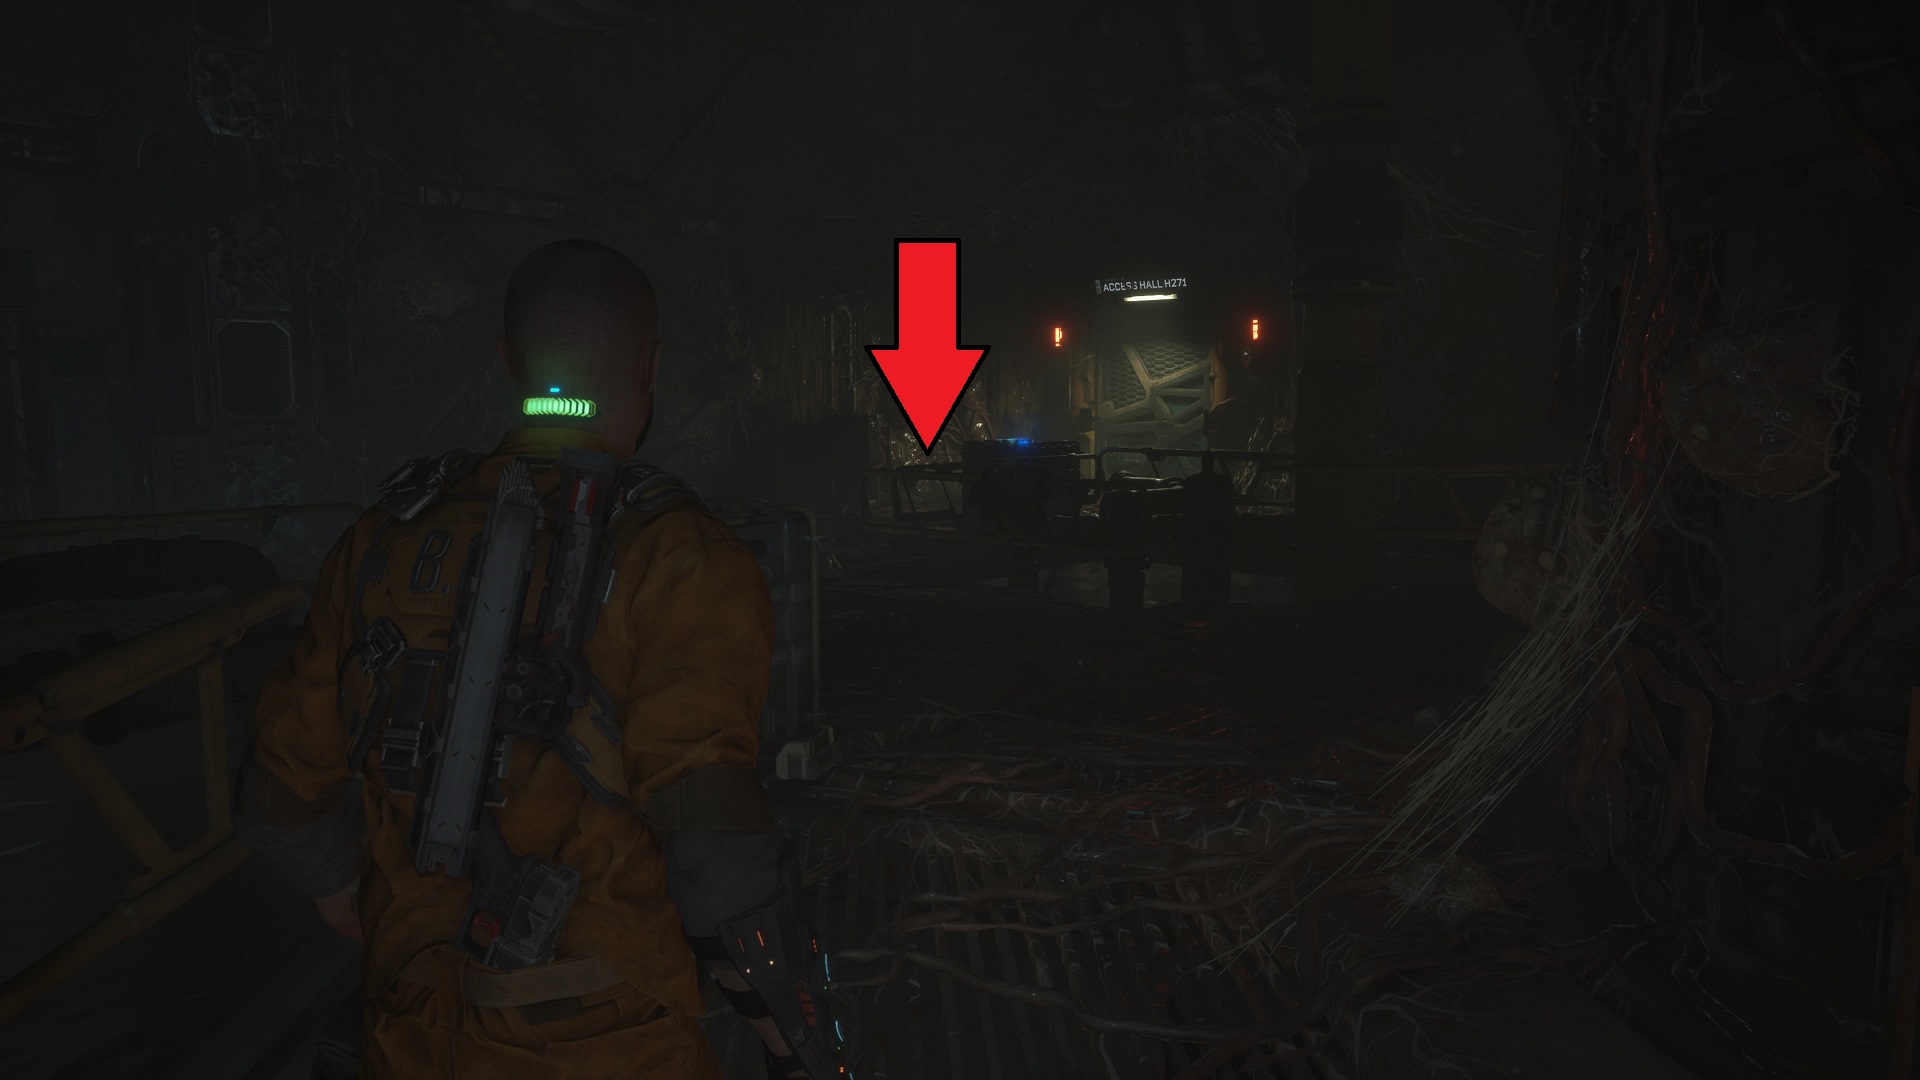
Follow the critical path by jumping down and going through the crawlspace by the door. When you enter the caves, continue into the next area and stay right to pick up the first blue fuse on the crate near the center of the area. The second fuse is in the back right corner on a crate, with a body on the ground nearby. Interact with the body near the door for Access Hall H271.
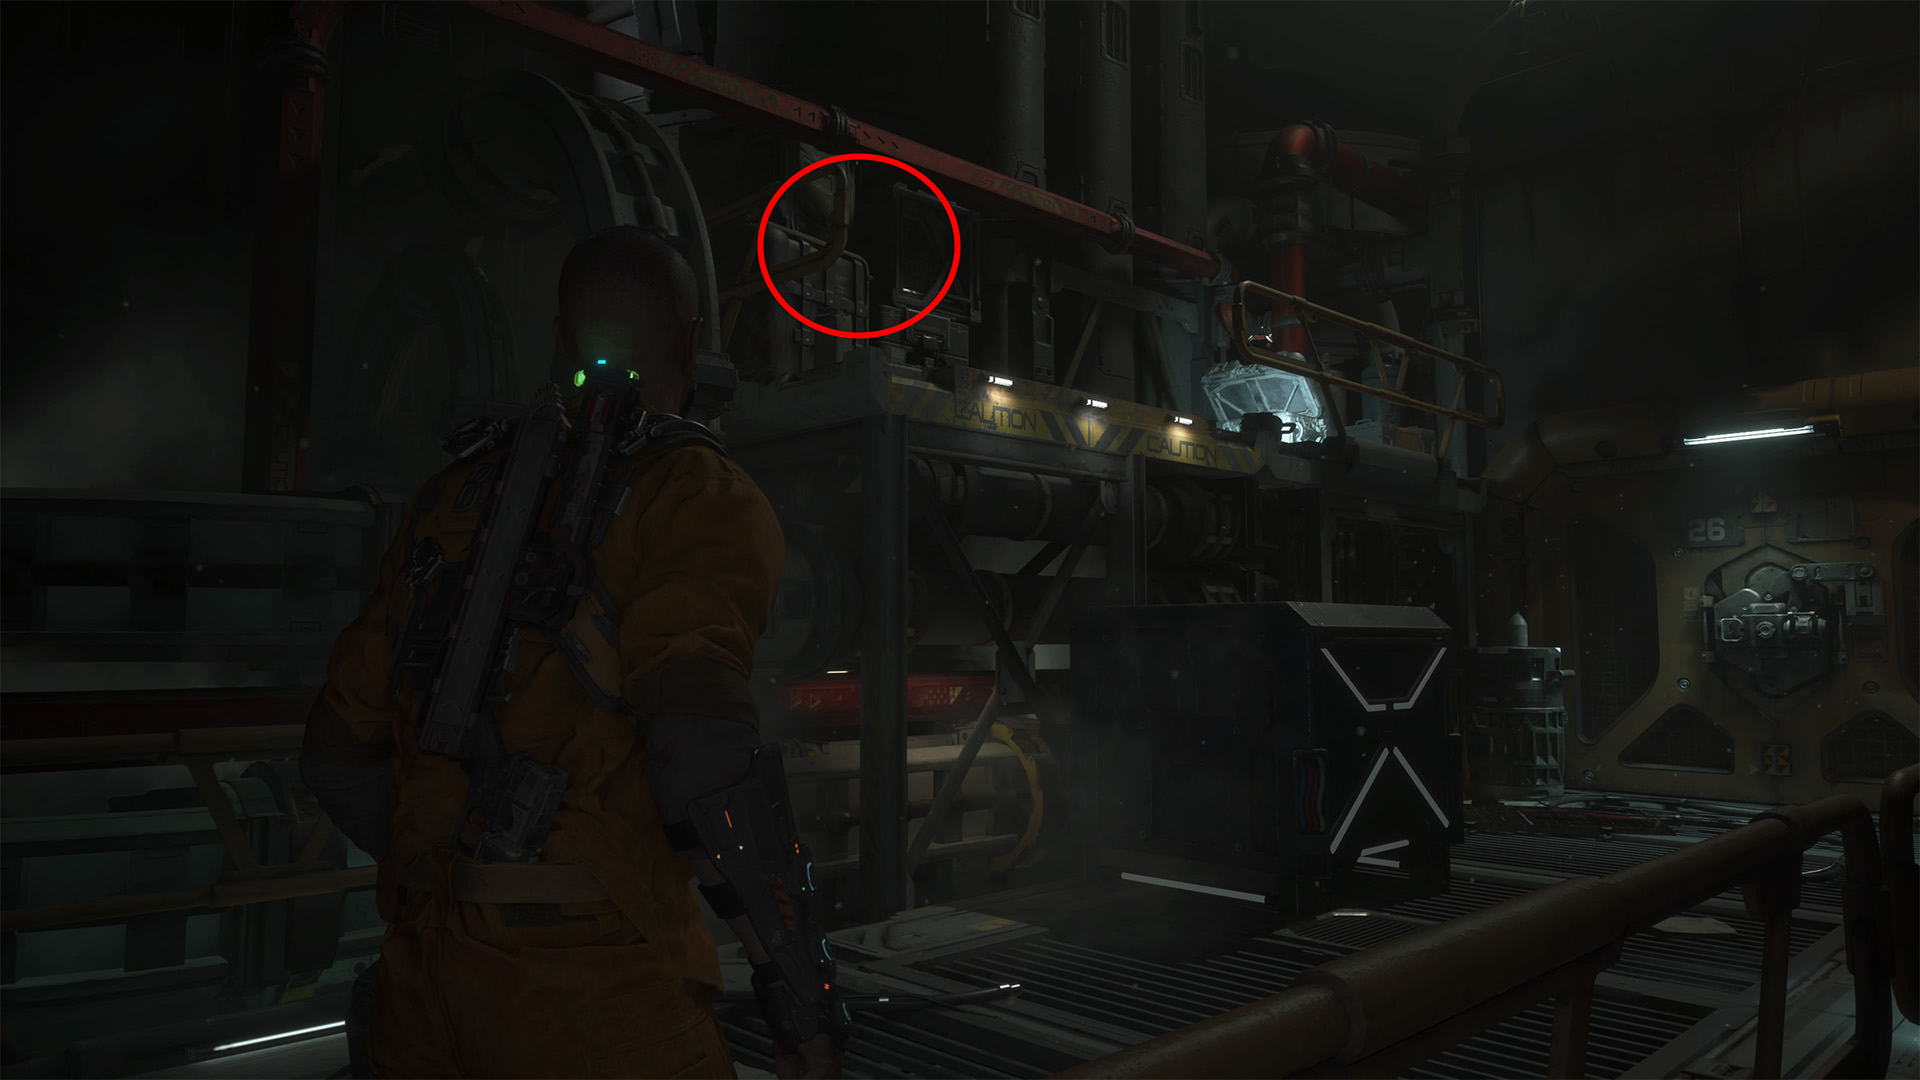
Dr. Jae Moon-Bell: Cocoons
After going through the underground water area with the swimming monster, you’ll find yourself in an expansive area with metal gangways, sprawling pipes, and huge square windows on the left side. Fight through the enemies and retrieve the gate fuse to open the door for Access Hall H206. Follow the path all the way to the end, and use the Shiv to open the door for Storage Hall H239.
Continue forward, and go through the next door. Grab the fuse on the right and use it on the door on the left. Go through decontamination, then into the back right corner. The log is underneath a dead body on a gurney.
Ofc James Reese
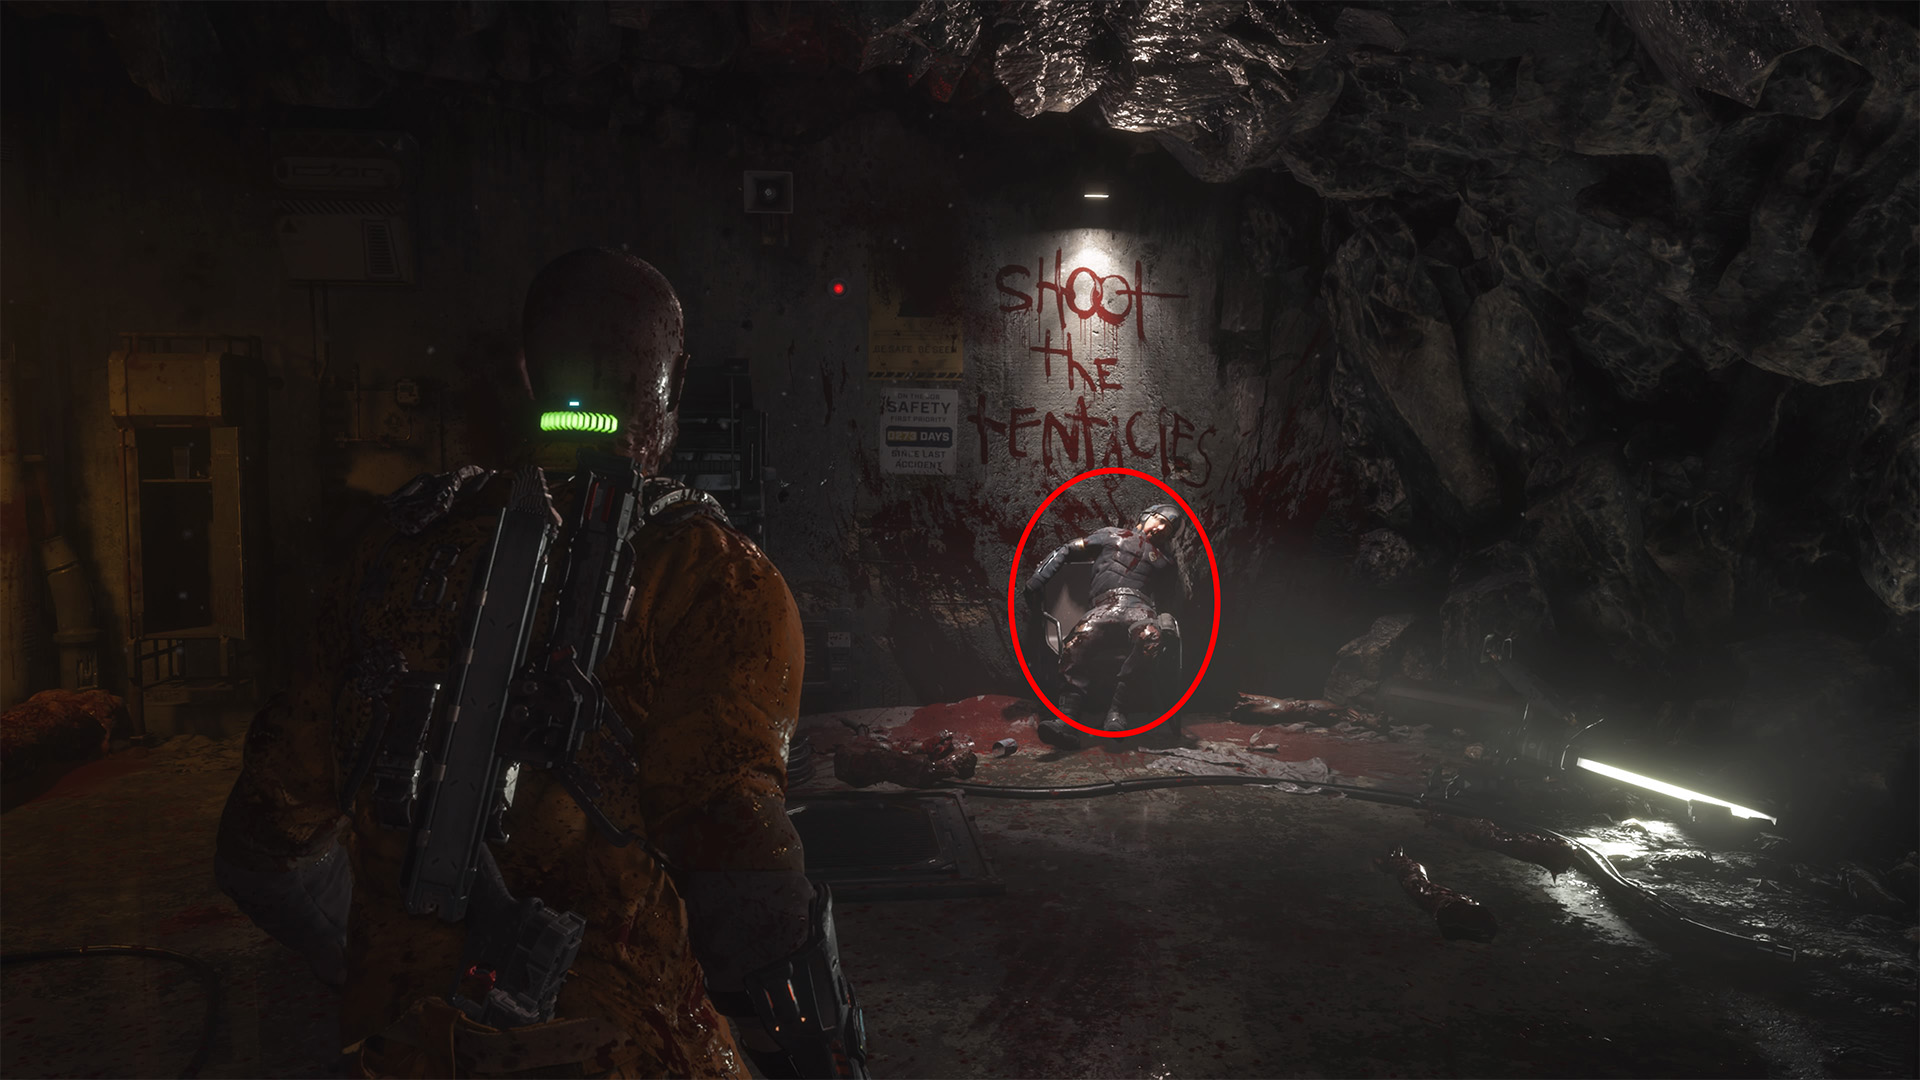
After you’ve learned about mutating enemies and shooting their tentacles for the first time, you’ll find yourself in a room that has “Shoot the Tentacles” written on the wall. Interact with the dead guard on the chair on the same wall to get the keycode and audio log.
Sgt. Bill Pekelo
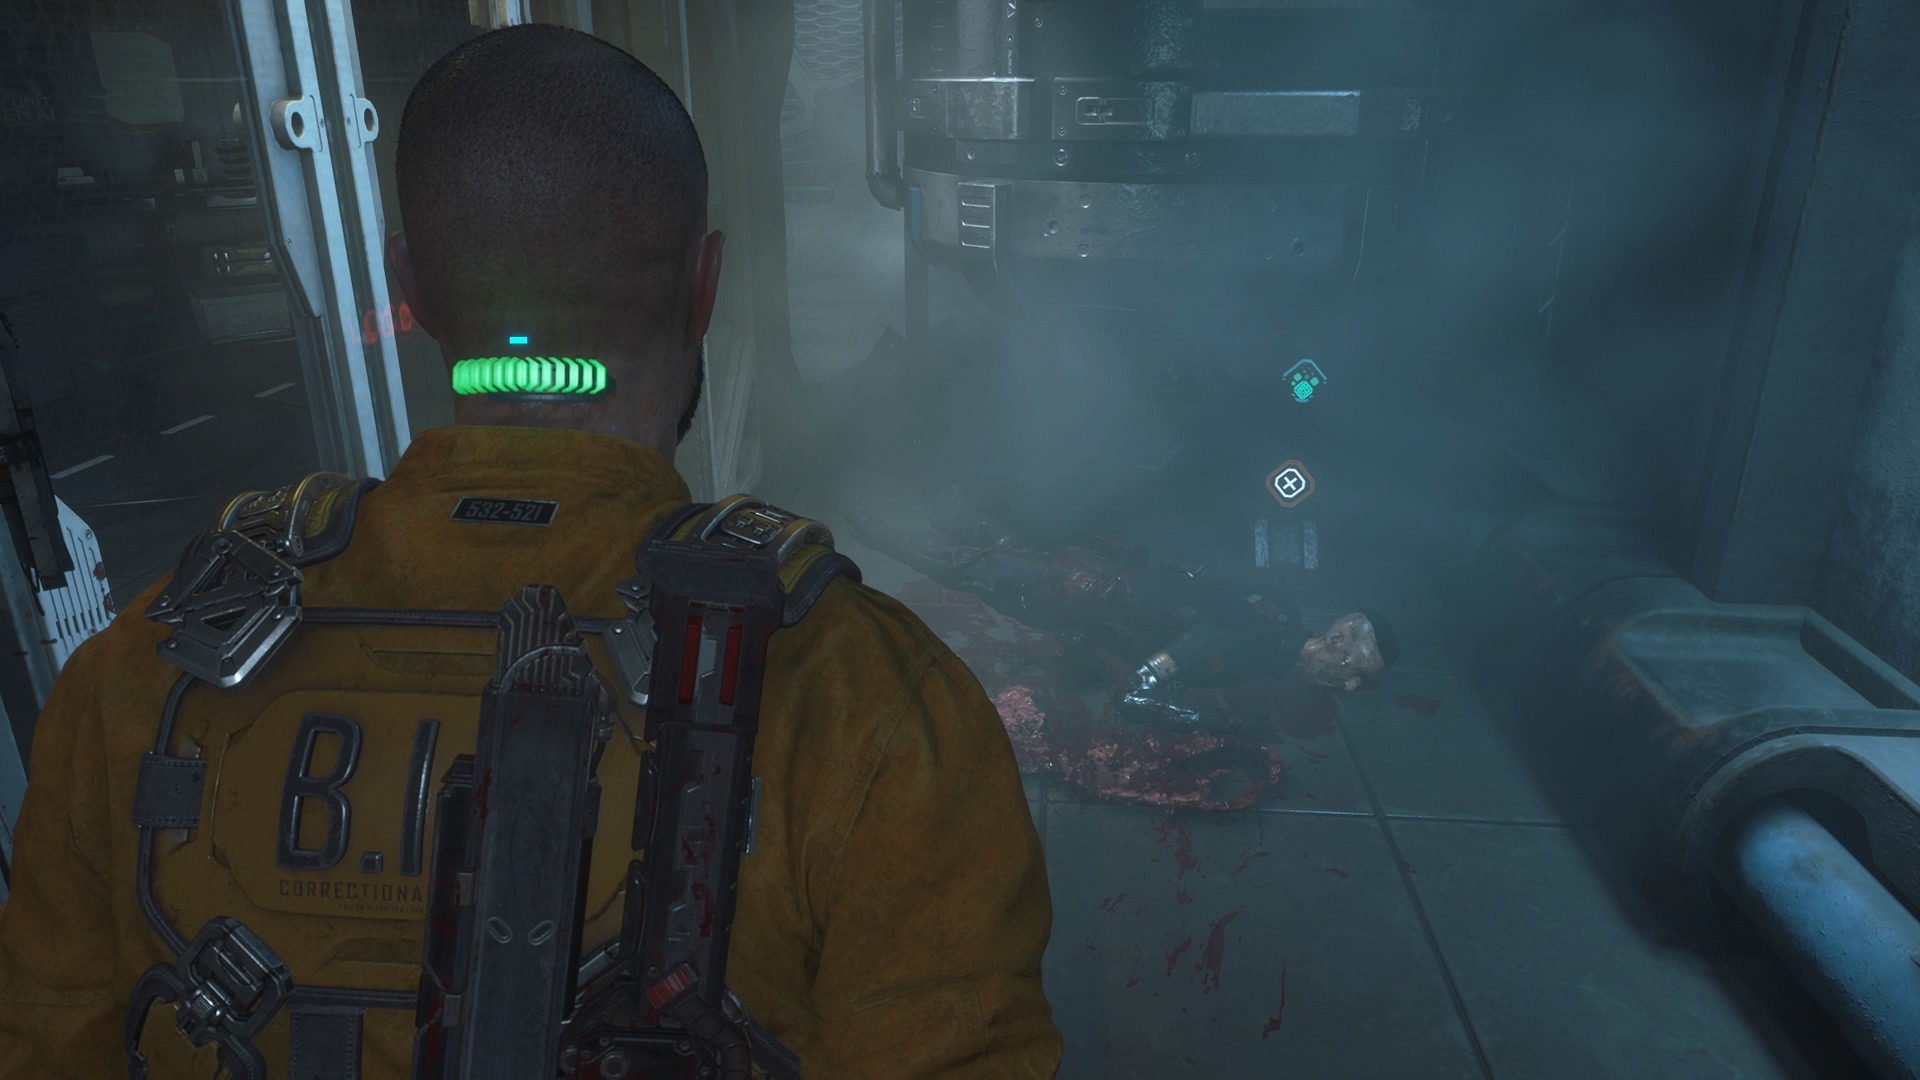
Reach Oxygen Processing inside the Habitat Dome, and go through the door on the right side, Oxygen Processing H625. Follow the path to the end, and go through the door on the left. Continue up and left, crawling through pipes into a large, open hall. A wall-crawling creature will appear at the far end of the hallway.
Defeat it, then use a crate at the end of the hallway to enter the air duct it emerged from. Follow the duct and drop down to find a body to your right with the keycode to progress and this bio data collectible.
Ofc. James Reese: Security
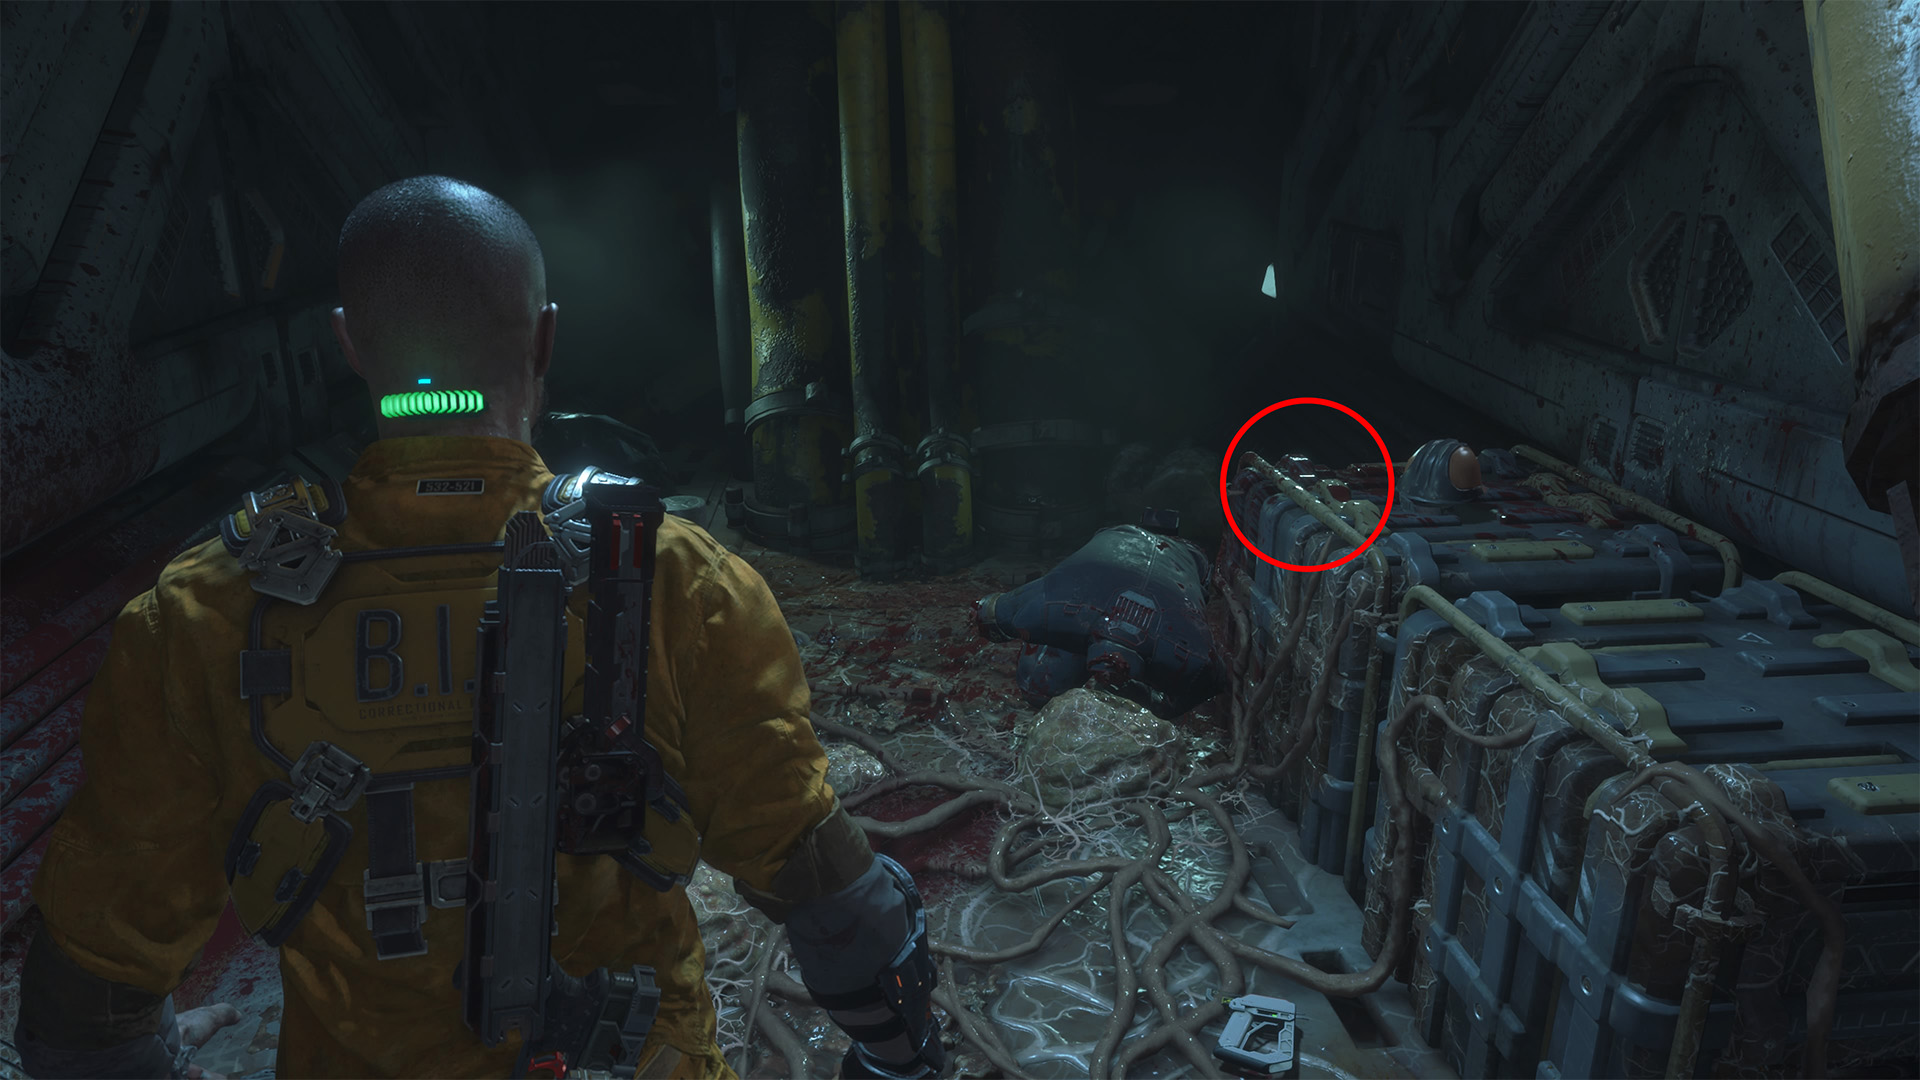
Now go through the nearby door labeled Botanical H624. Go to the end of the hall, and go into the door on the right labeled Utility Hall H626, by the 02 Botanical Recycling sign hanging from the ceiling. Go up some stairs, then right, and squeeze through a small space in the wall. Interact with the log on the crate on the right.
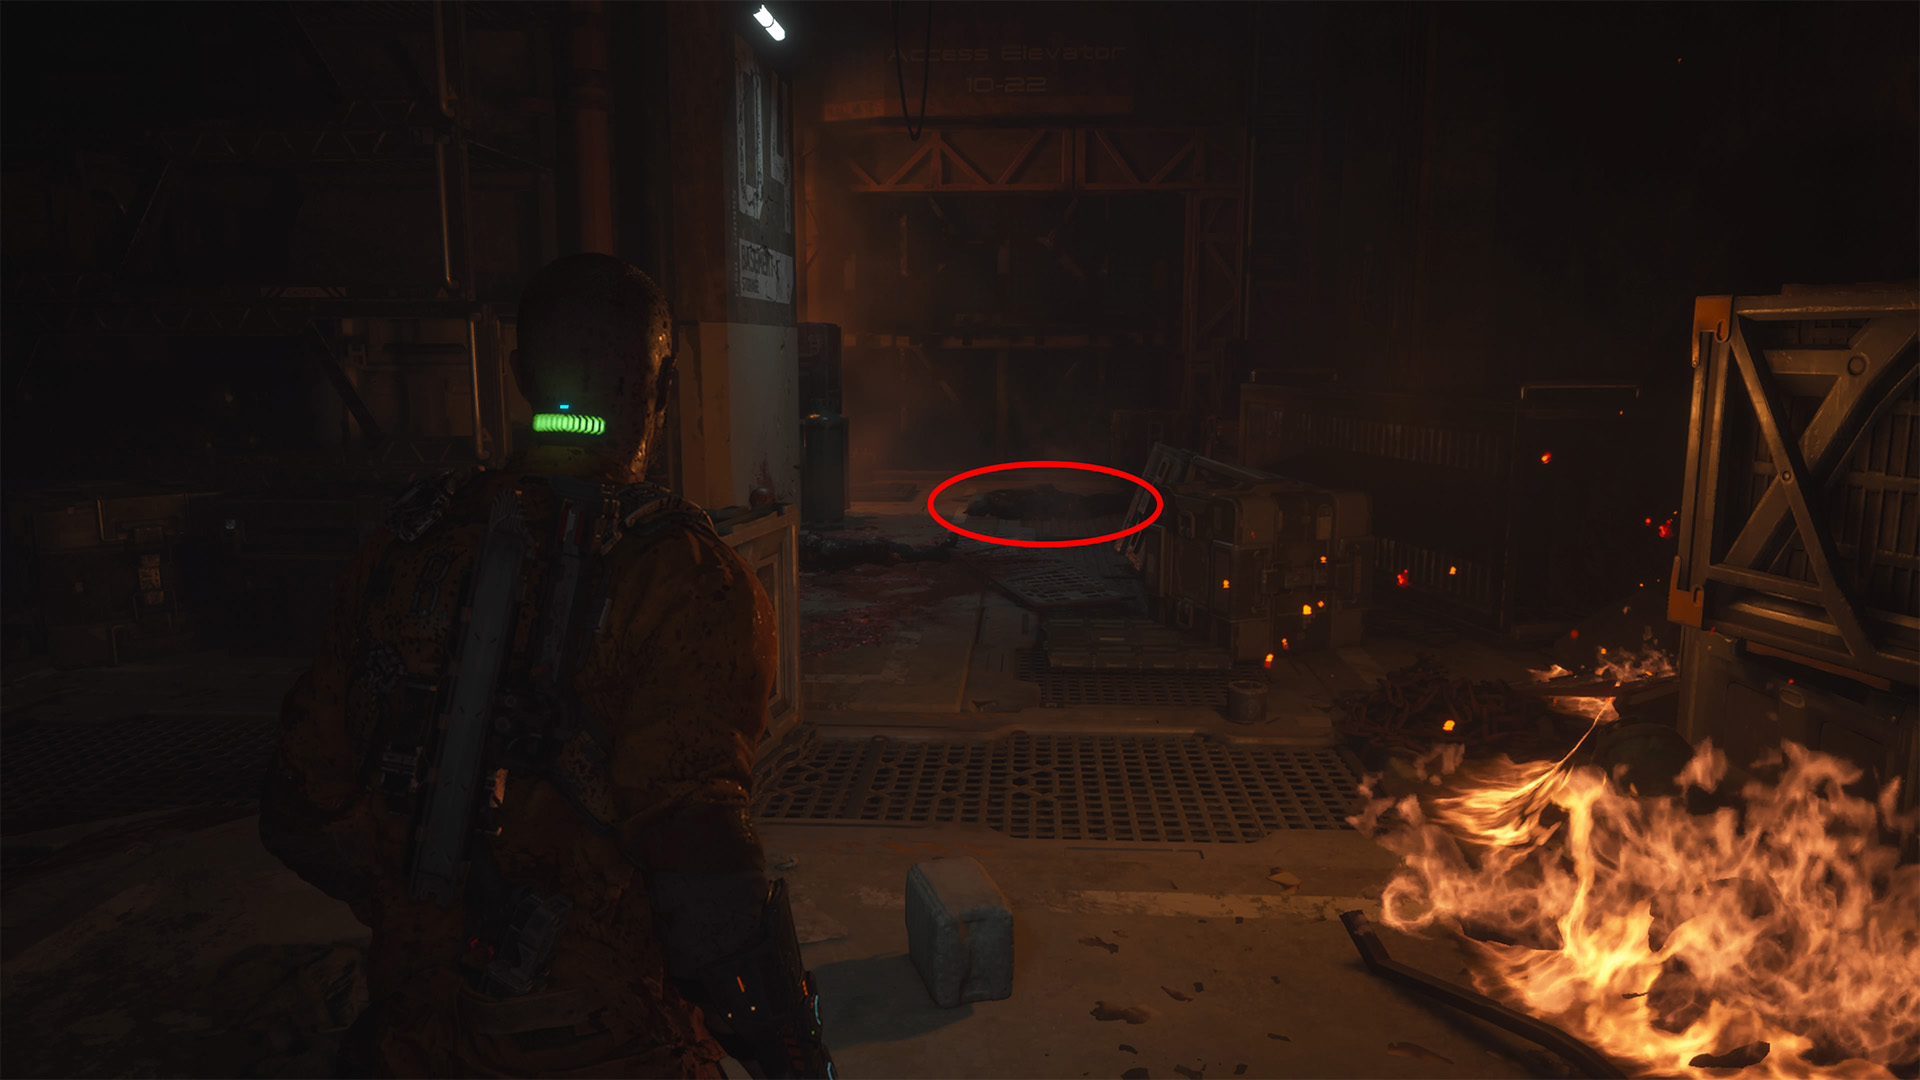
Ofc. Kyle Serra: Evacuation
From Oxygen Processing, head back outside and follow the markers to the Utility building; look for a door labeled Utility H630. Inside, use the Shiv to open the door on the left side. Go all the way to the end (the Tram Depot Entrance sign hanging from the ceiling), defeat the enemies, and inspect a crate on the left side for the data bios.
Chapter 5: Lost
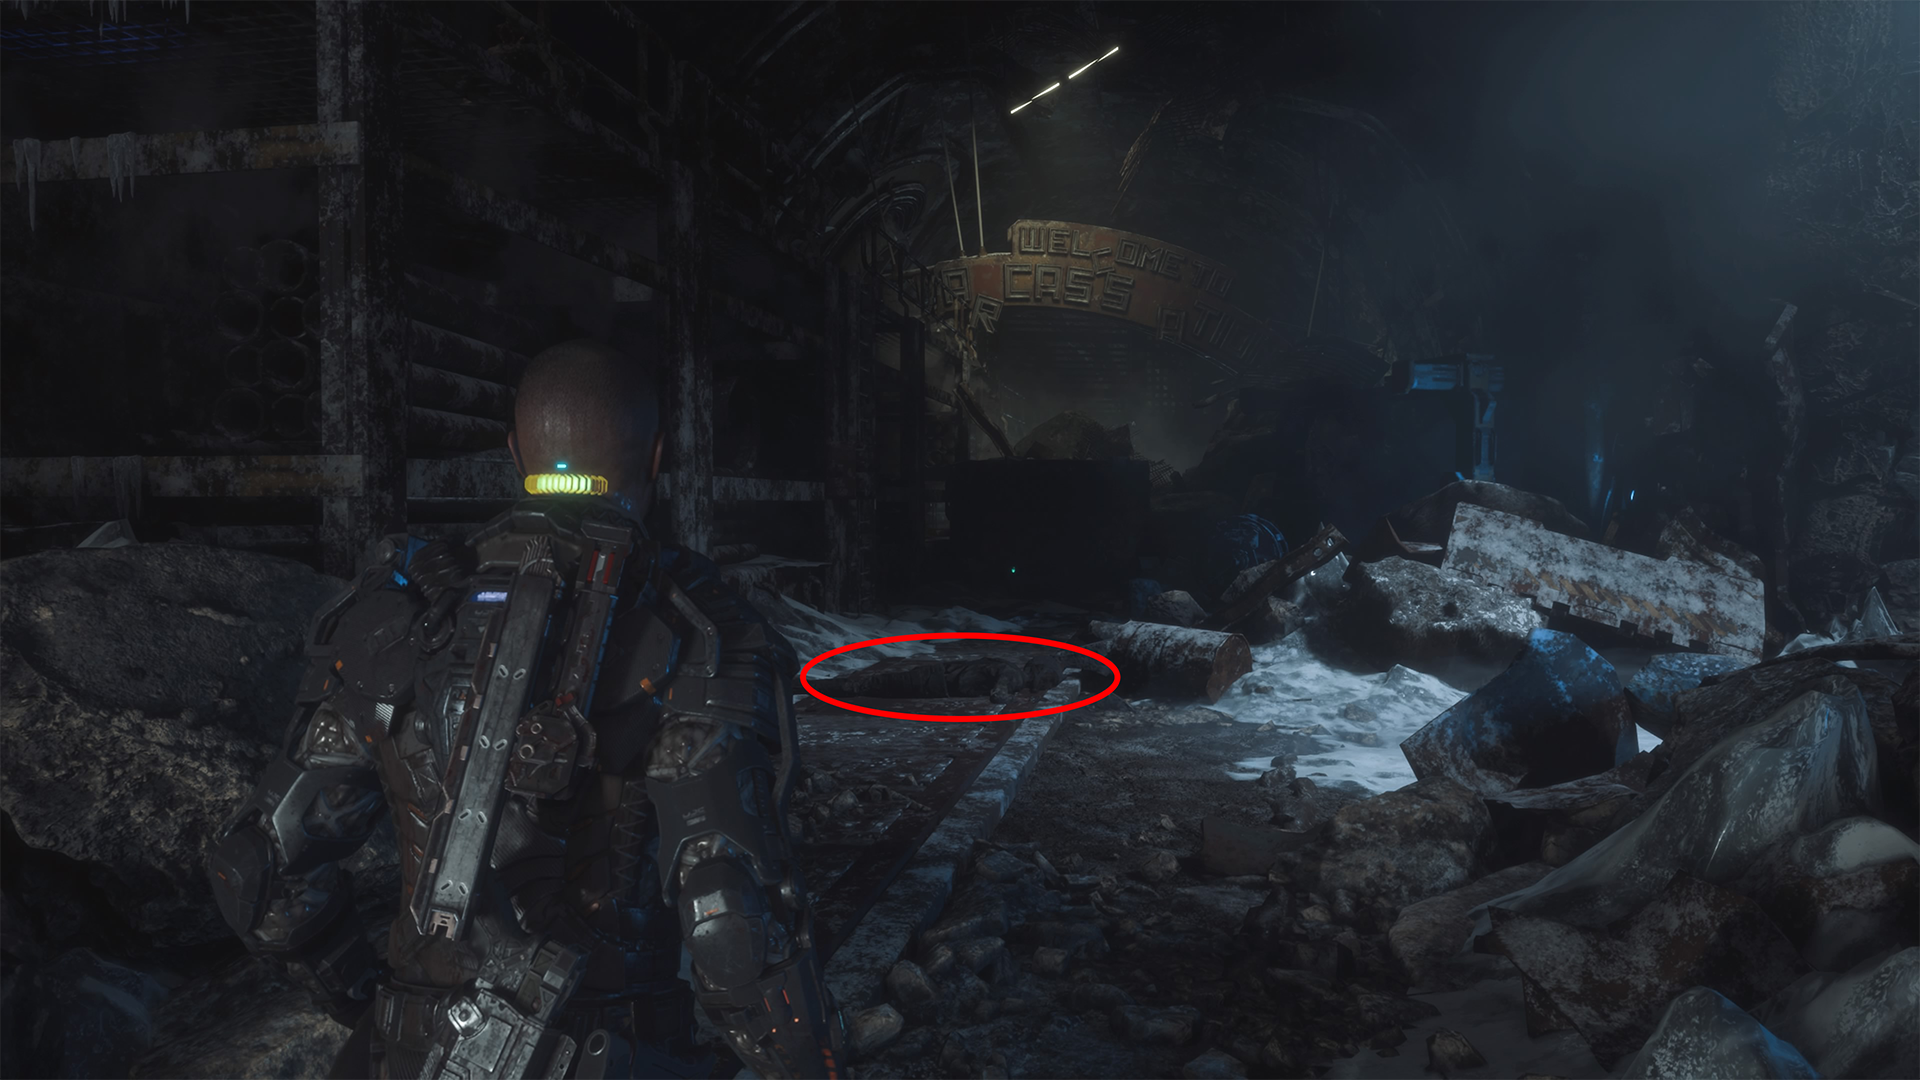
Miranda Kristofich: Terraforming
After the cutscene with the emergency beacon, open the gate leading to the hangar. Go through the gate, then straight to the back of the area and through the doorway directly in front of you. Inspect the shelves inside to the left for this audio log collectible.
Richard Cids
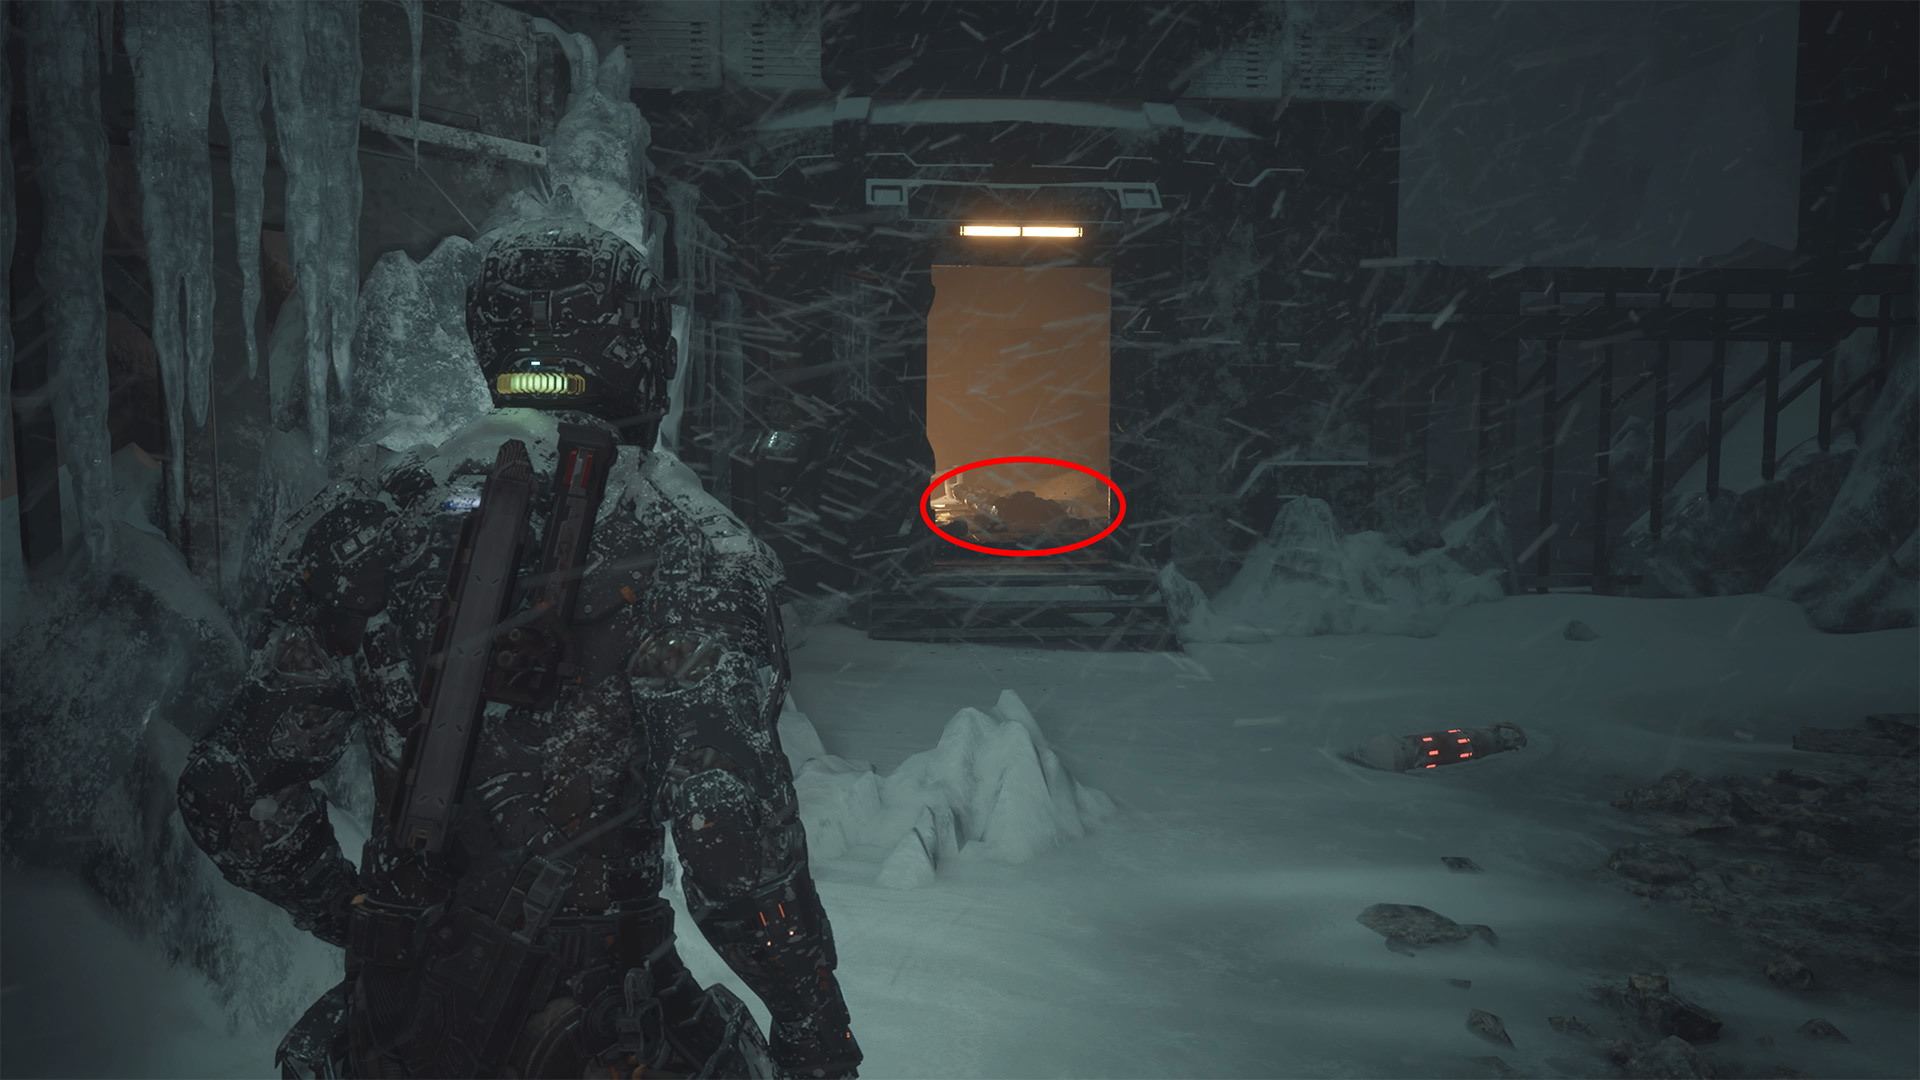
Make your way through the area, and you’ll eventually reach a second gate after crossing a crumbling bridge. Someone will ask for your help in this area. Stay on the right side by the Snowcat, and look for a lit doorway with a large 6-light industrial light tower above it. Get close, and the zombie inside will break down the door. Defeat them, then inspect the body on the floor inside.
Dr. Caitlyn Mahler: Combustors
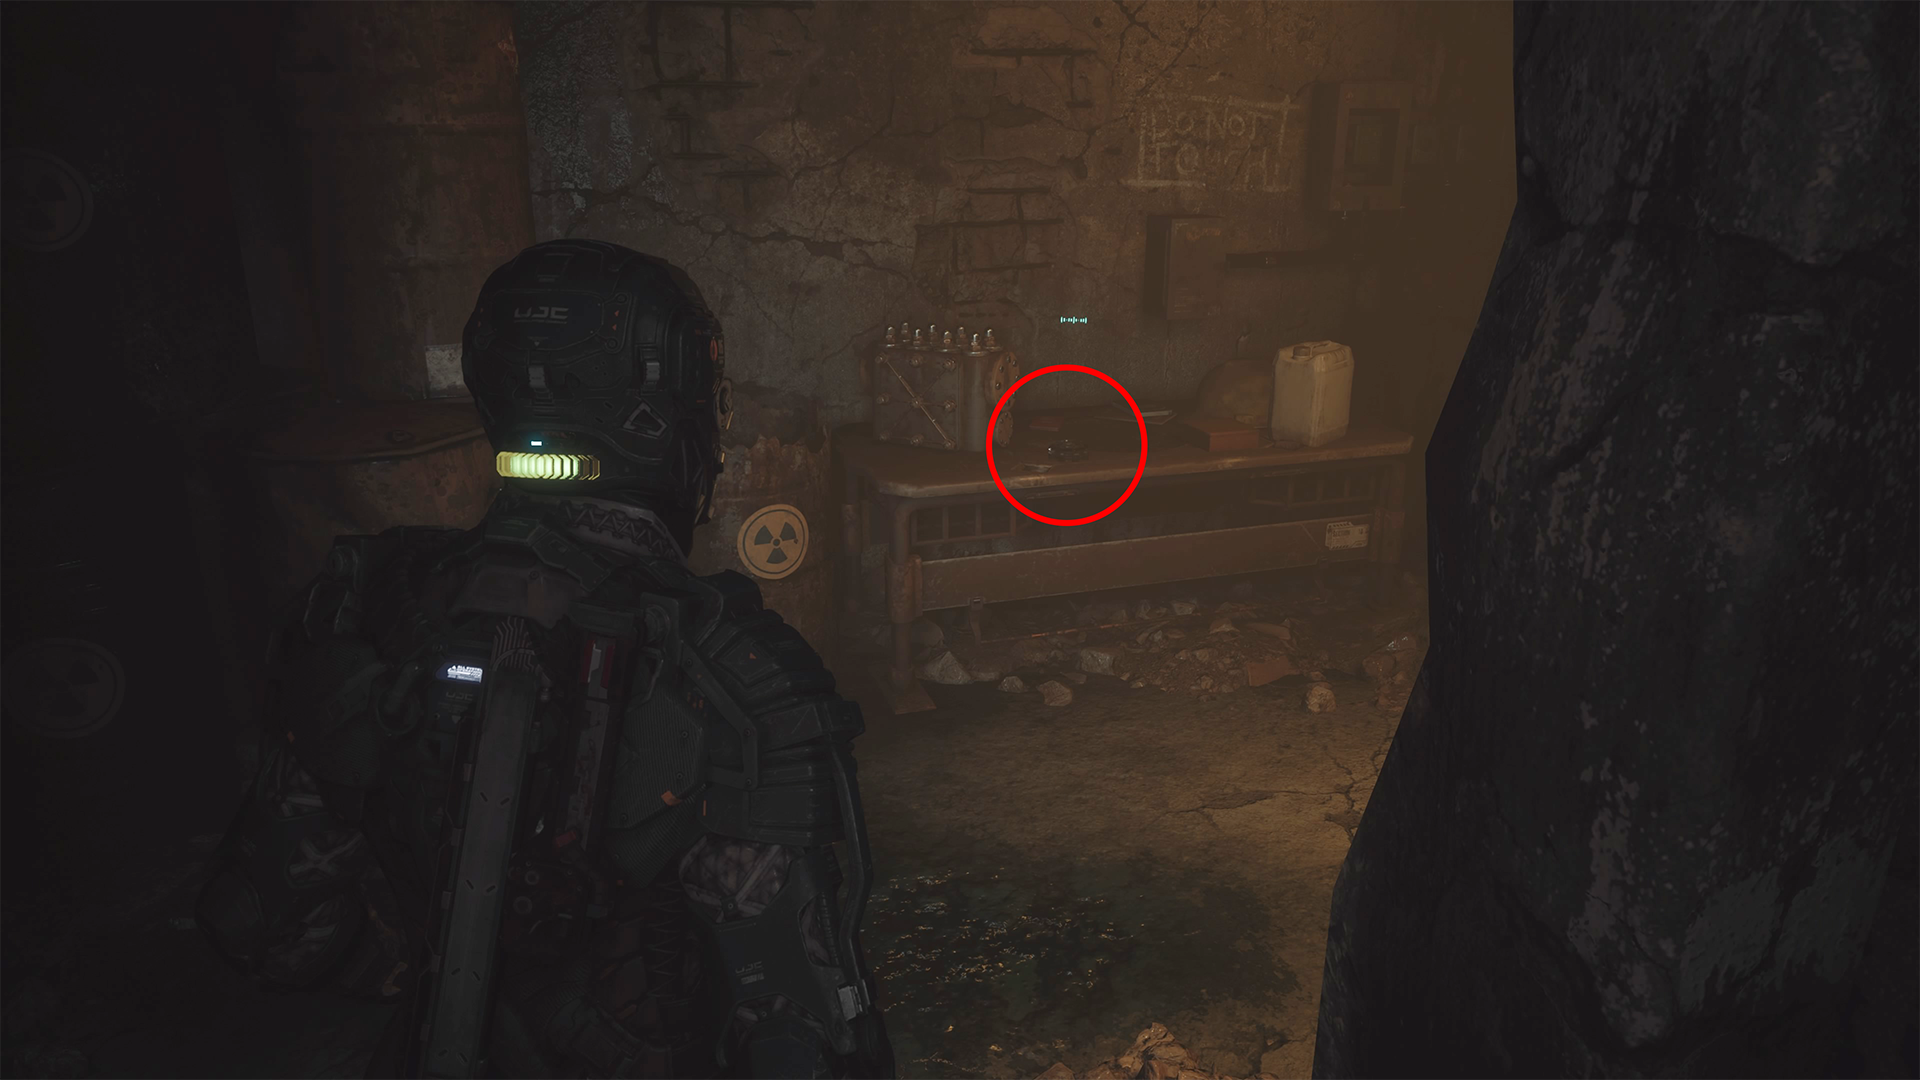
Now go into the tunnels. Follow the path, and you’ll crawl through some rubble. On the other side, turn left immediately to follow the short corridor into a room with radioactive barrels. This log is on the table to the right of the barrels.
Lt. Devon Wayne: Close the Gate
After meeting an ally at the garage and getting the Riot Shotgun, go up the stairs and through the door at the top. Inspect the body on the other side of the tables on the left side of the room.
Aaron Tycho
Once at the second power station, open the gates blocking your way (near the zombie in the cage), and go through the door into an area with a large fan in the right wall. There is a body stuck in a turbine near the fan. Interact with it for this collectible.
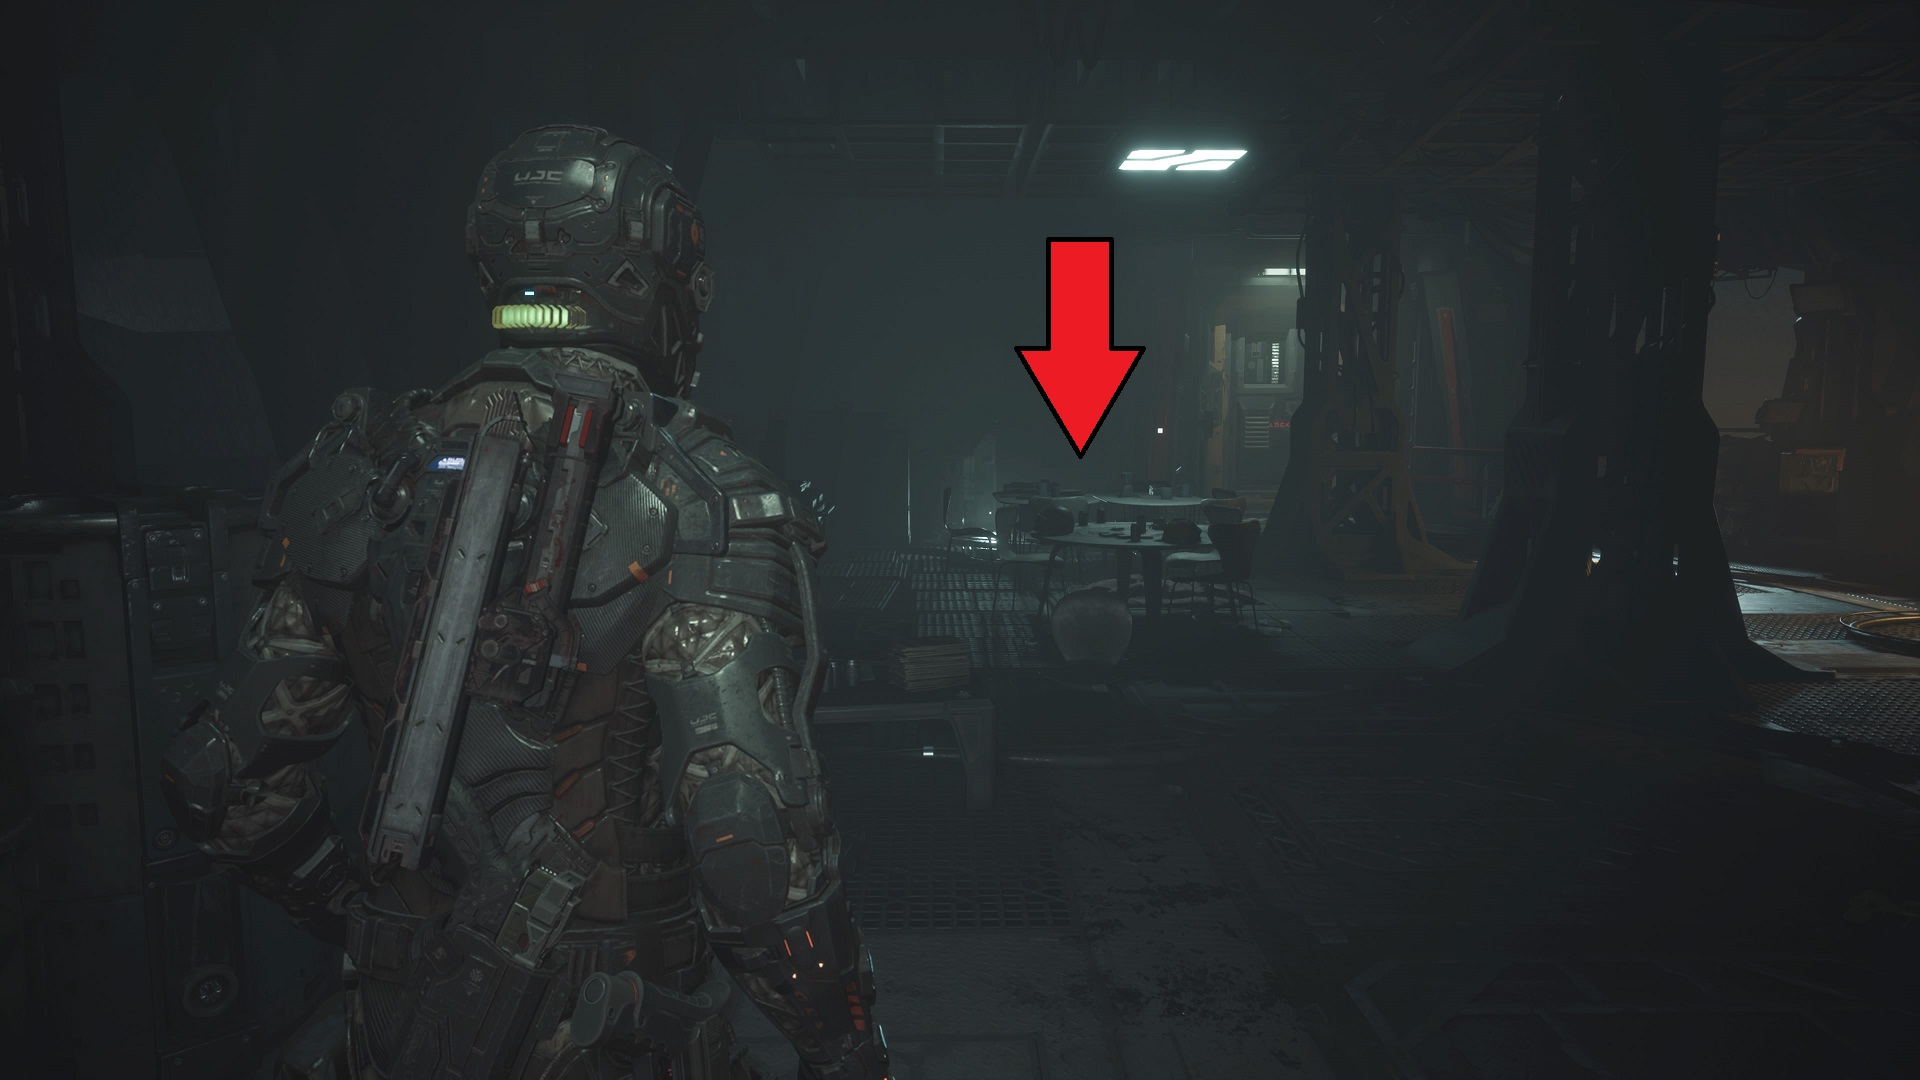
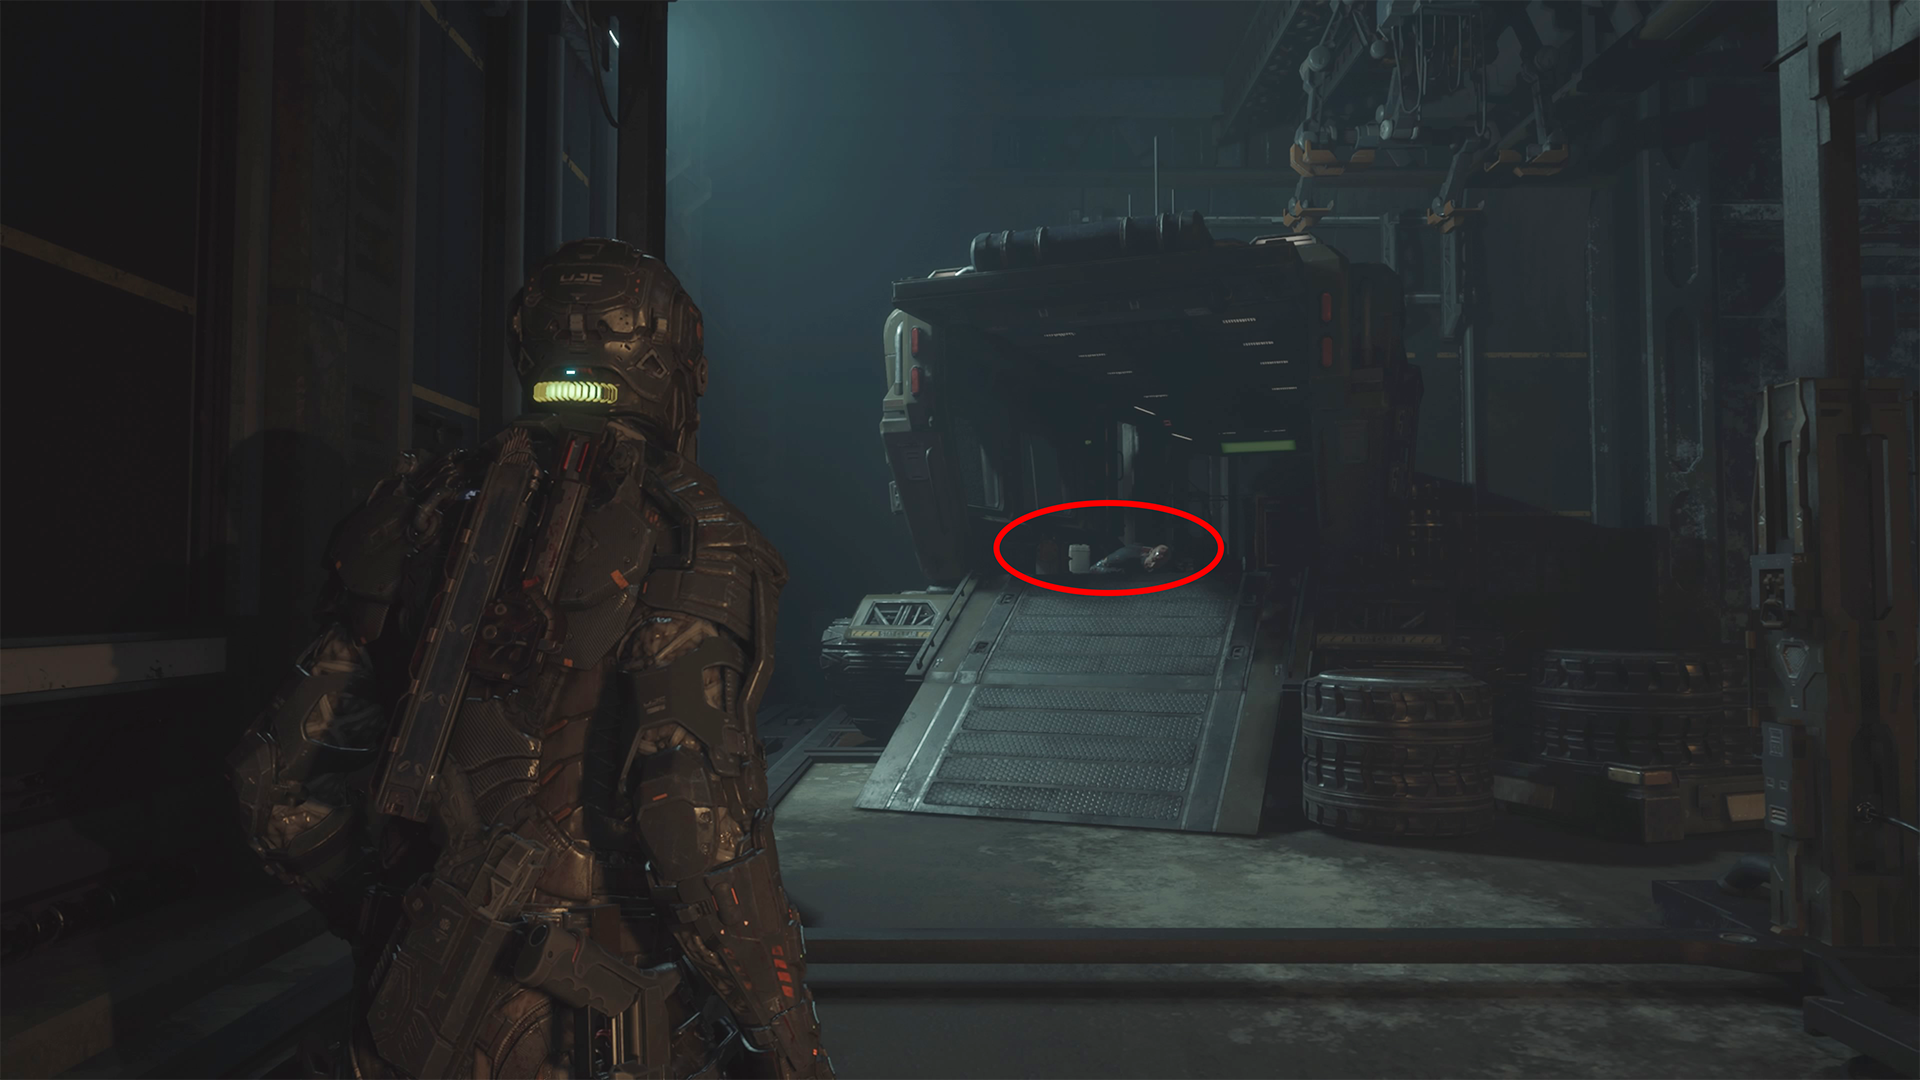
Max Barrow: Max’s Concern
After riding in the Snowcat, go into the ship and left once inside. Go through the crew compartment, then into the second doorway on the left. The data bios log is on a table on the right side.
Sgt. Scott Dvitny: Eradication
After the cutscene on the ship, follow Dani into the building by slipping through the crack in the door. Inside, go right and into the Snowcat. Interact with the body on the floor.
Dr. Caitlyn Mahler: Shipments
Continue, and you’ll eventually reach an area full of bodies and malfunctioning robots on the way to an elevator. This data bios log is on a crate by a body with no legs directly across from where you enter, right of the elevator, near a short stairwell.
Chapter 6: Below
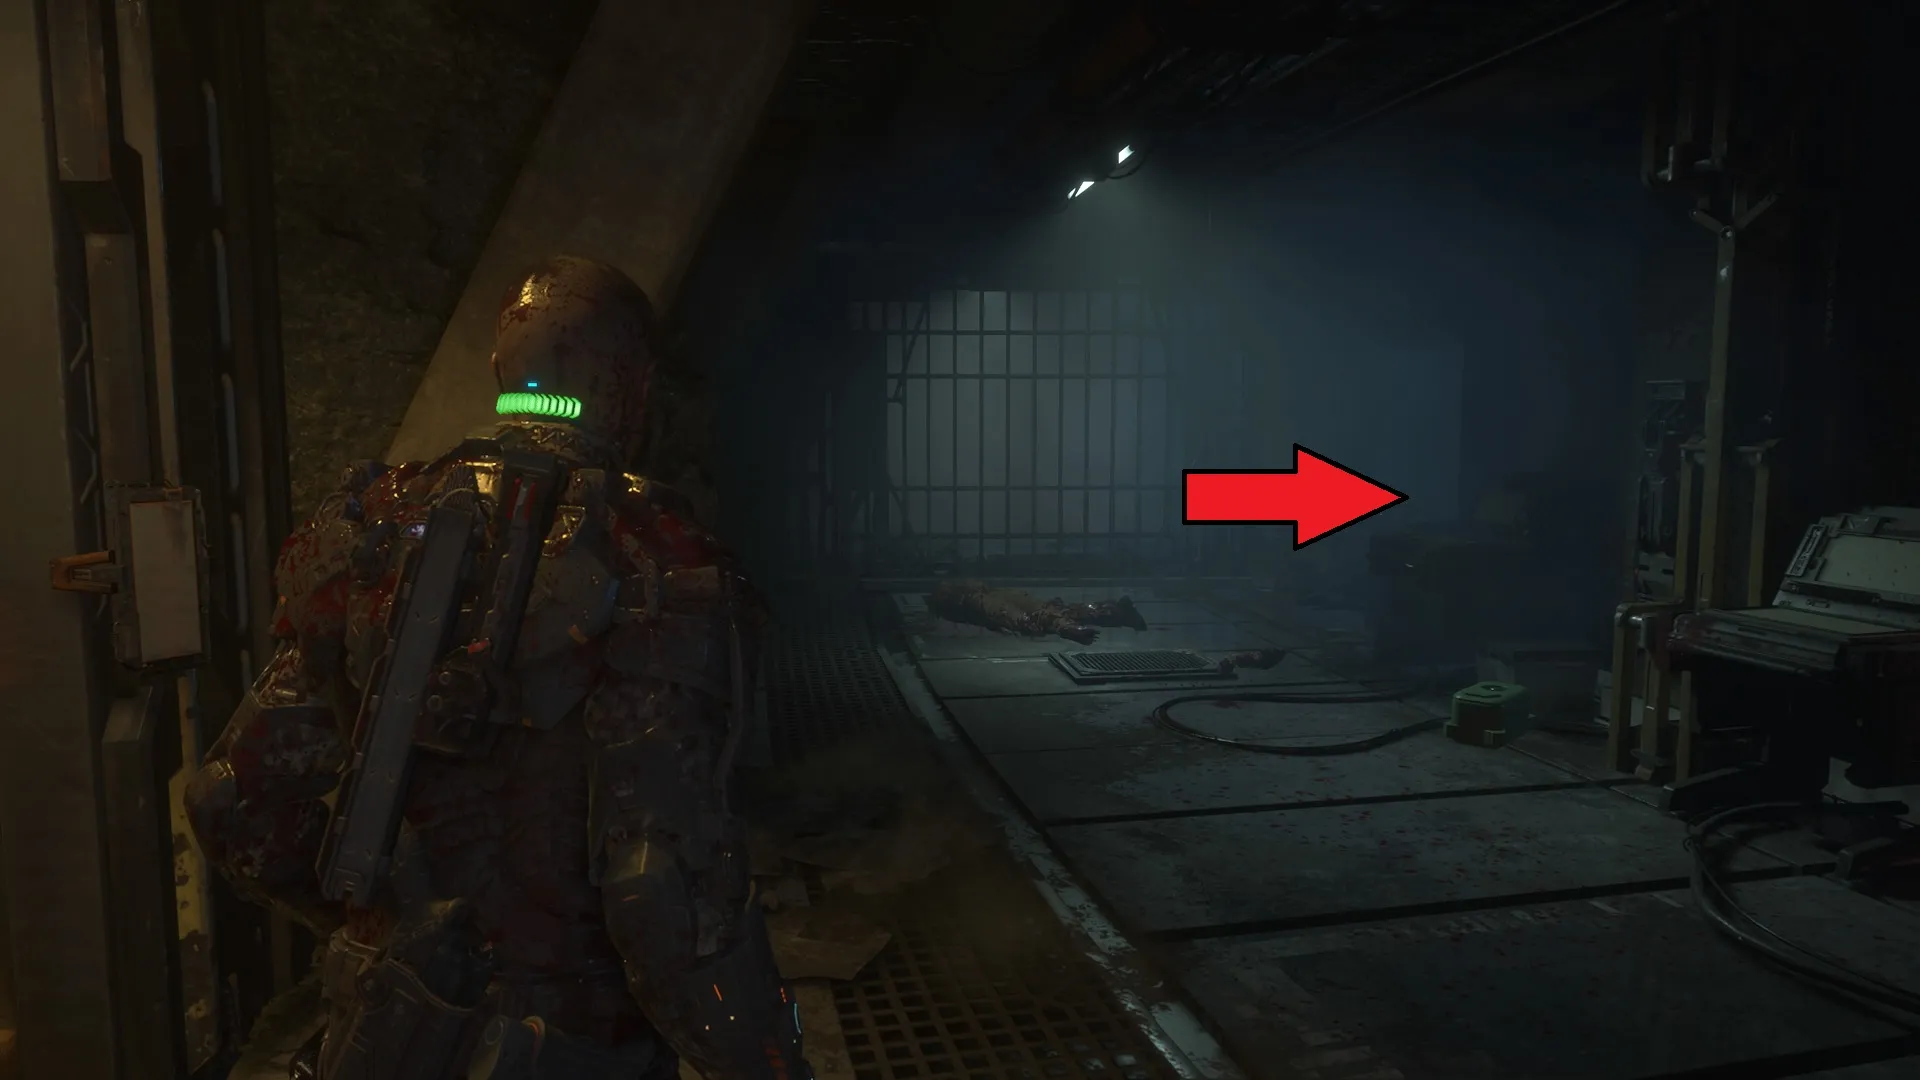
Dr. Sheehan Yune: Field Log 1
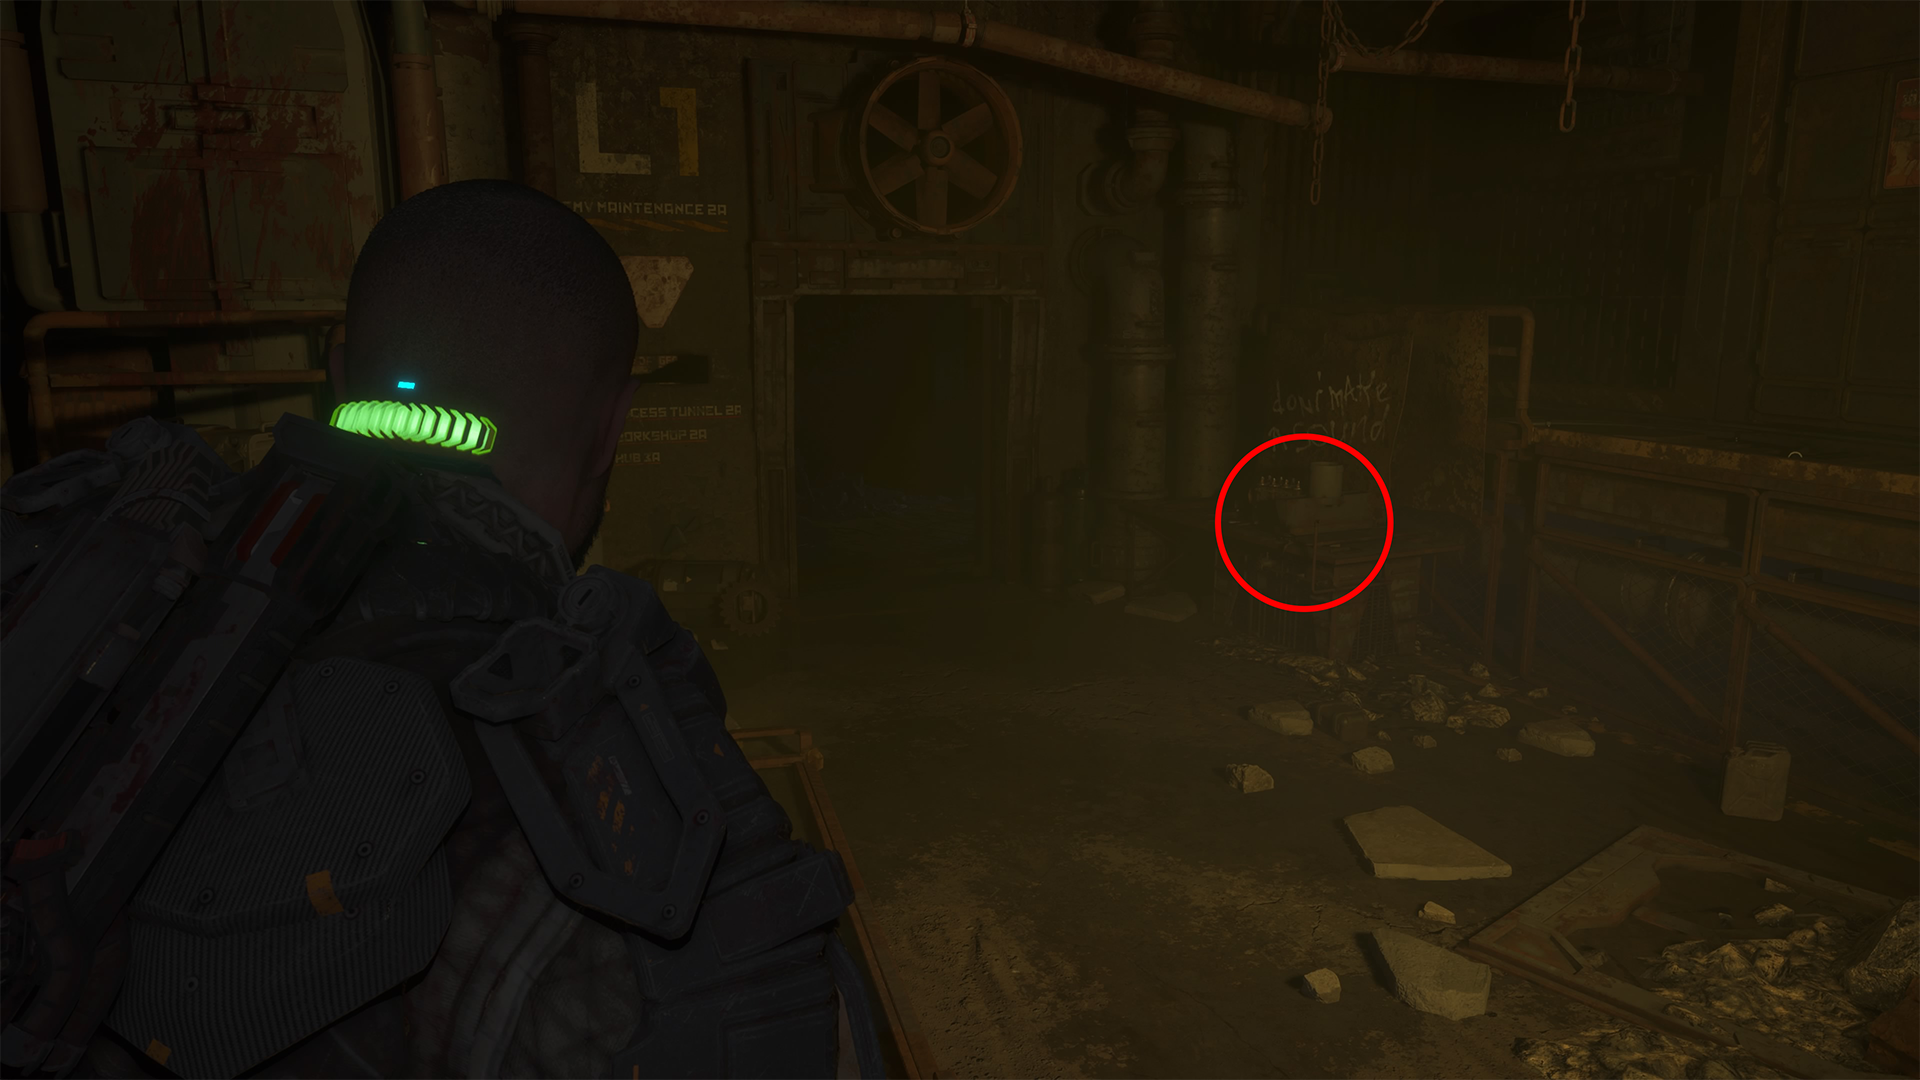
After falling down the elevator shaft and cutting yourself loose, defeat the blind zombie and follow the path around down the stairs. Go into the next room, and drop down. Inspect the table on the right side of the room for this collectible by the graffiti that says “Don’t Make a Sound.”
Dr. Sheehan Yune: Field Log 2
Eventually, you’ll crawl through a tunnel in a cave. On the other side, climb up the rock ledges and follow the path through an open area with an egg-sac tentacle monster and four blind zombies. Go through the door on the other side of the area, then turn left immediately. The log is on a crate at the end near a small blue item crate, opposite a broken path leading up.
Dr. Sheehan Yune: Field Log 3
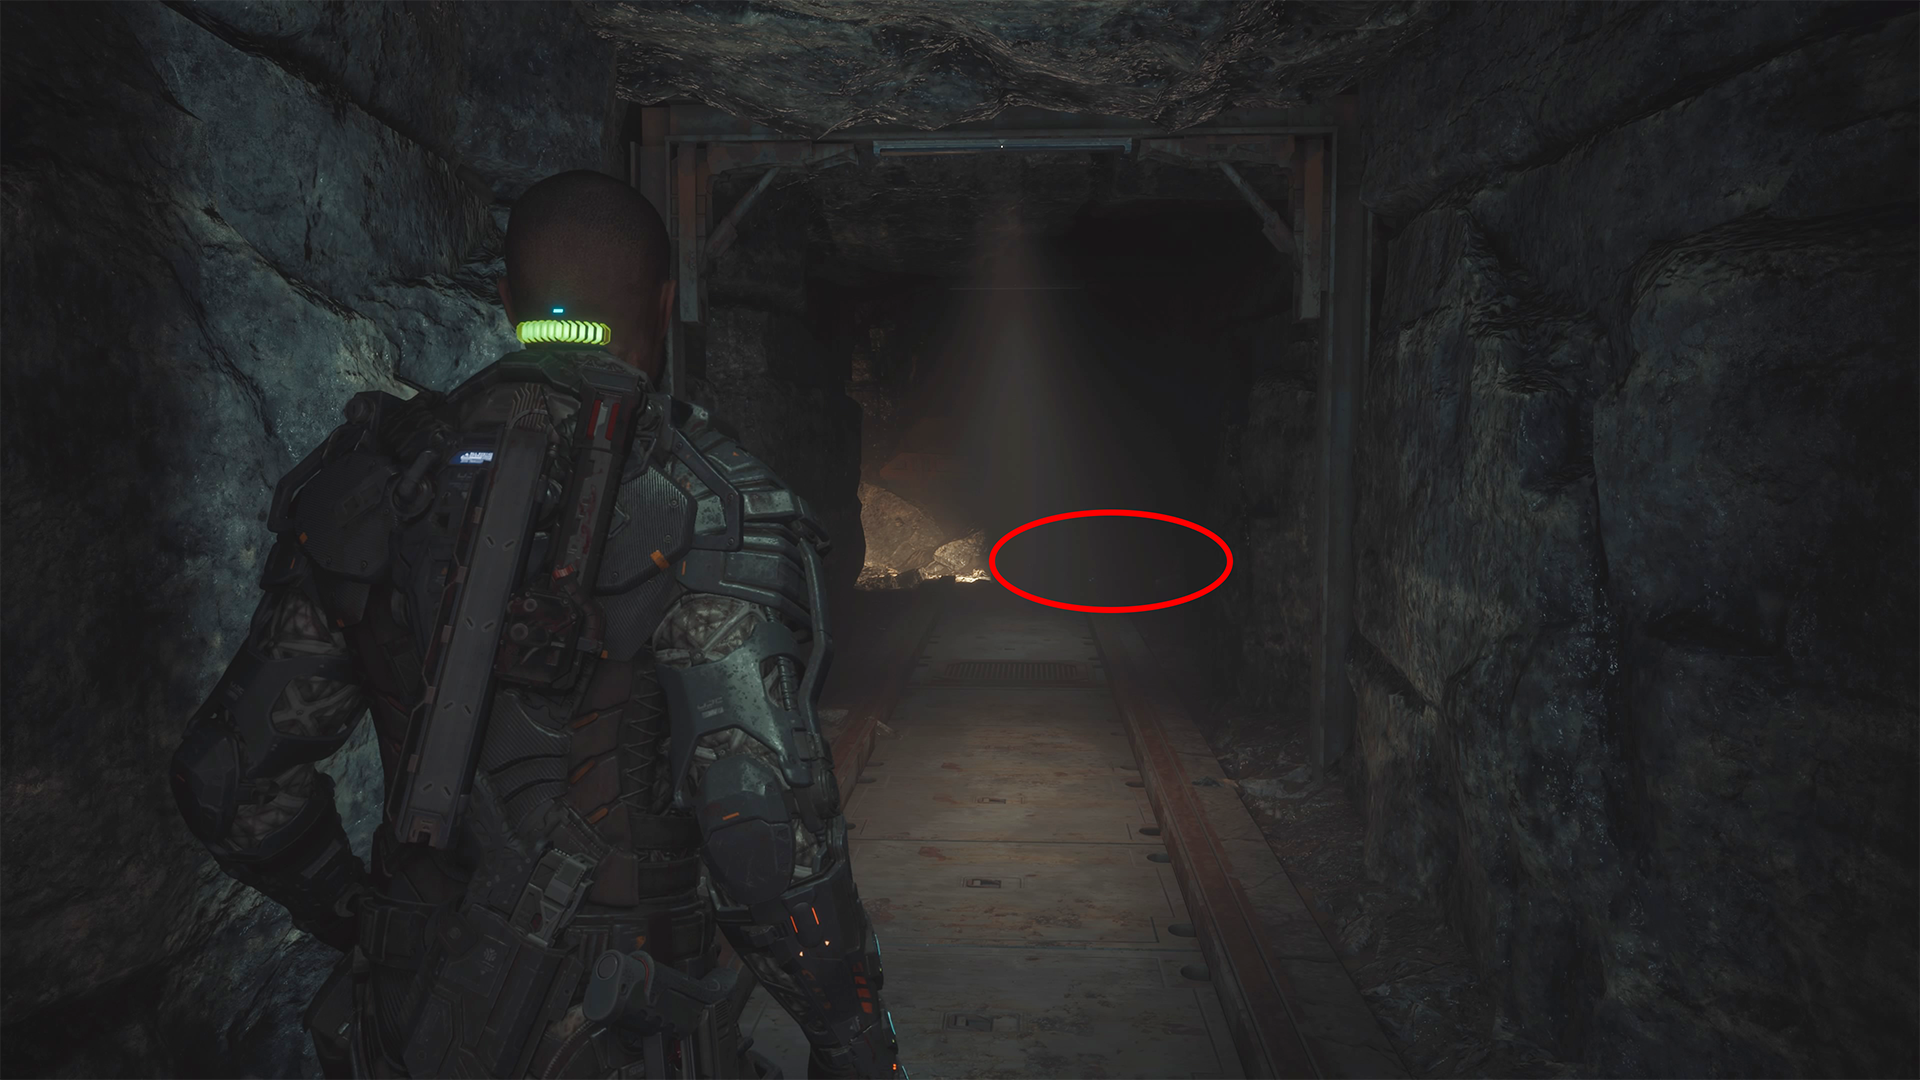
Enter the Access Junction Power Tunnels after getting the keycard from the lift. Follow the path around, and go through the right opening (not down). Interact with the body on the ground at the end of the tunnel, on the right side.
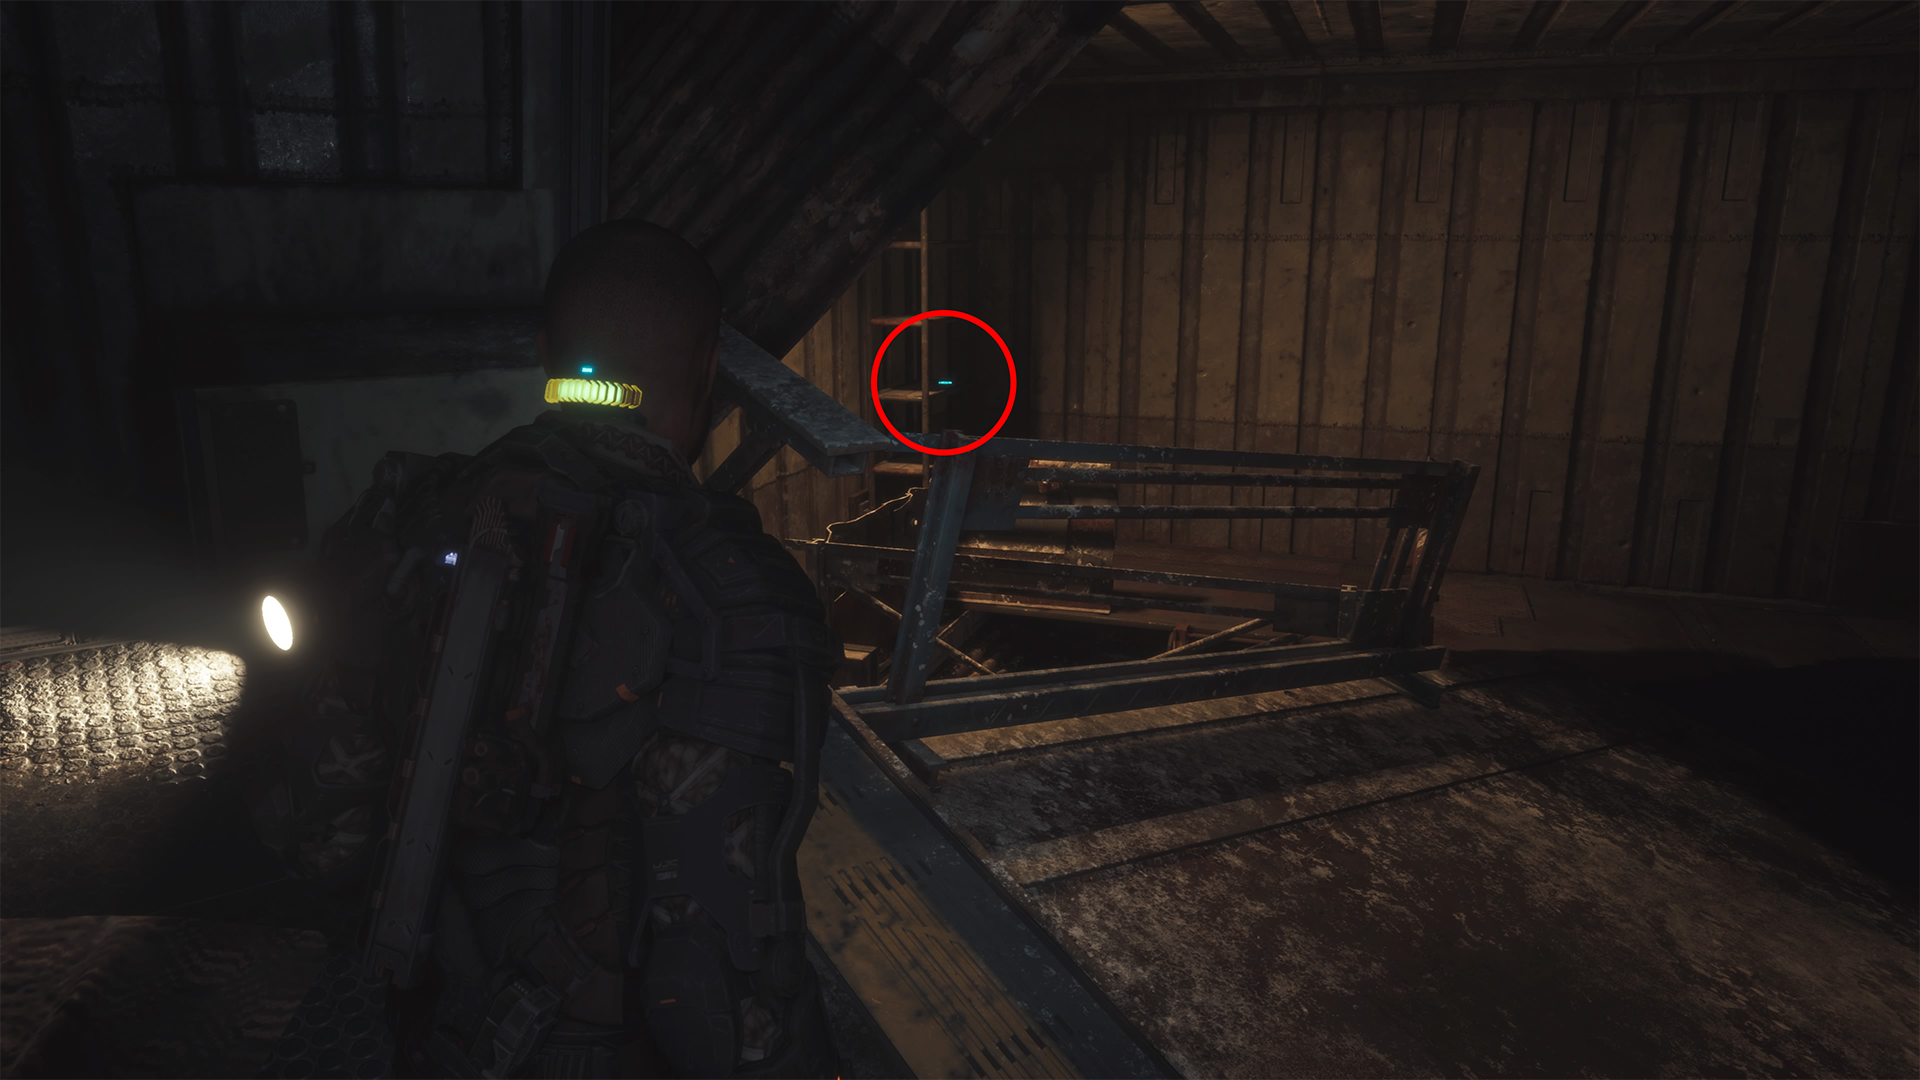
Yannick Sage: Secret Room 2
Eventually, after going through far too many rooms and areas with far too many blind zombies, you’ll reach a ladder leading up with a fan in the wall behind it. Go straight through the crack in the wall in front of you at the top. Follow the linear path down and through tight tunnels until you reach another secret room. The log is on the table in the back.
Arden Jeddha: Arcas Evacuation
Once the lift arrives at Arcas Station (after the objectively terrible boss fight), exit the lift and go toward the door against the far wall. Inspect the body just before the stairs leading up to the door for this data bios.
Chapter 7: Colony
Alex Wang: Miner Log 1
As soon as the chapter begins, go forward, and turn left. You’ll see a large, bronze Welcome sign hanging from the ceiling in the distance under a flickering light. There is a body in the pathway ahead of you. Inspect it for the collectible.
Derryn Barr: Mining Log 2
When you reach the Colony and Dani mentions the light tower, turn left to follow the path. You’ll come to a ladder leading down; this data bios log is on a shelf to the right of the ladder before descending.
Derryn Barr: Mining Log 3
Eventually, you’ll arrive in an area with stalking blind zombies. There is a locked elevator in the back of the area with a Lowtown Elevator Control sign above it. To the right of that is a building with a ladder and a Midtown sign. Take the ladder up. Go right at the top, then left into the door near the window with the red, pulsing light. Go to the back of the house to find a body on the floor with a blind zombie guarding it.
Yannick Sage: The Mole
Take the elevator up from the shanty town, and interact with the body on the ground just outside of the elevator when it stops.
Buidhe Reddwork: Hightown

Go up the stairs from the last collectible and through another small shanty. You’ll come to another set of stairs; take them up to Hightown. Turn right at the top, and go into the house in front of you, across from the building with the Bathroom and Roof Top signs on it.
Ji-Kwan Park: Miner Log 4
Continue left through the shanty to pick up the gate fuse, then backtrack toward the last collectible to continue forward. You’ll soon come to a door in need of a fuse. Open it. You’ll see a Reforger ahead of you and a body to the left. Interact with the body for this data bios.
Duncan Cole: Disagreement
Exit the Colony on the Funicular. When it stops after the cutscene, go toward the Snowcat, but stay right to find the log on a crate on the other side of the Funicular railing
Chapter 8: Tower
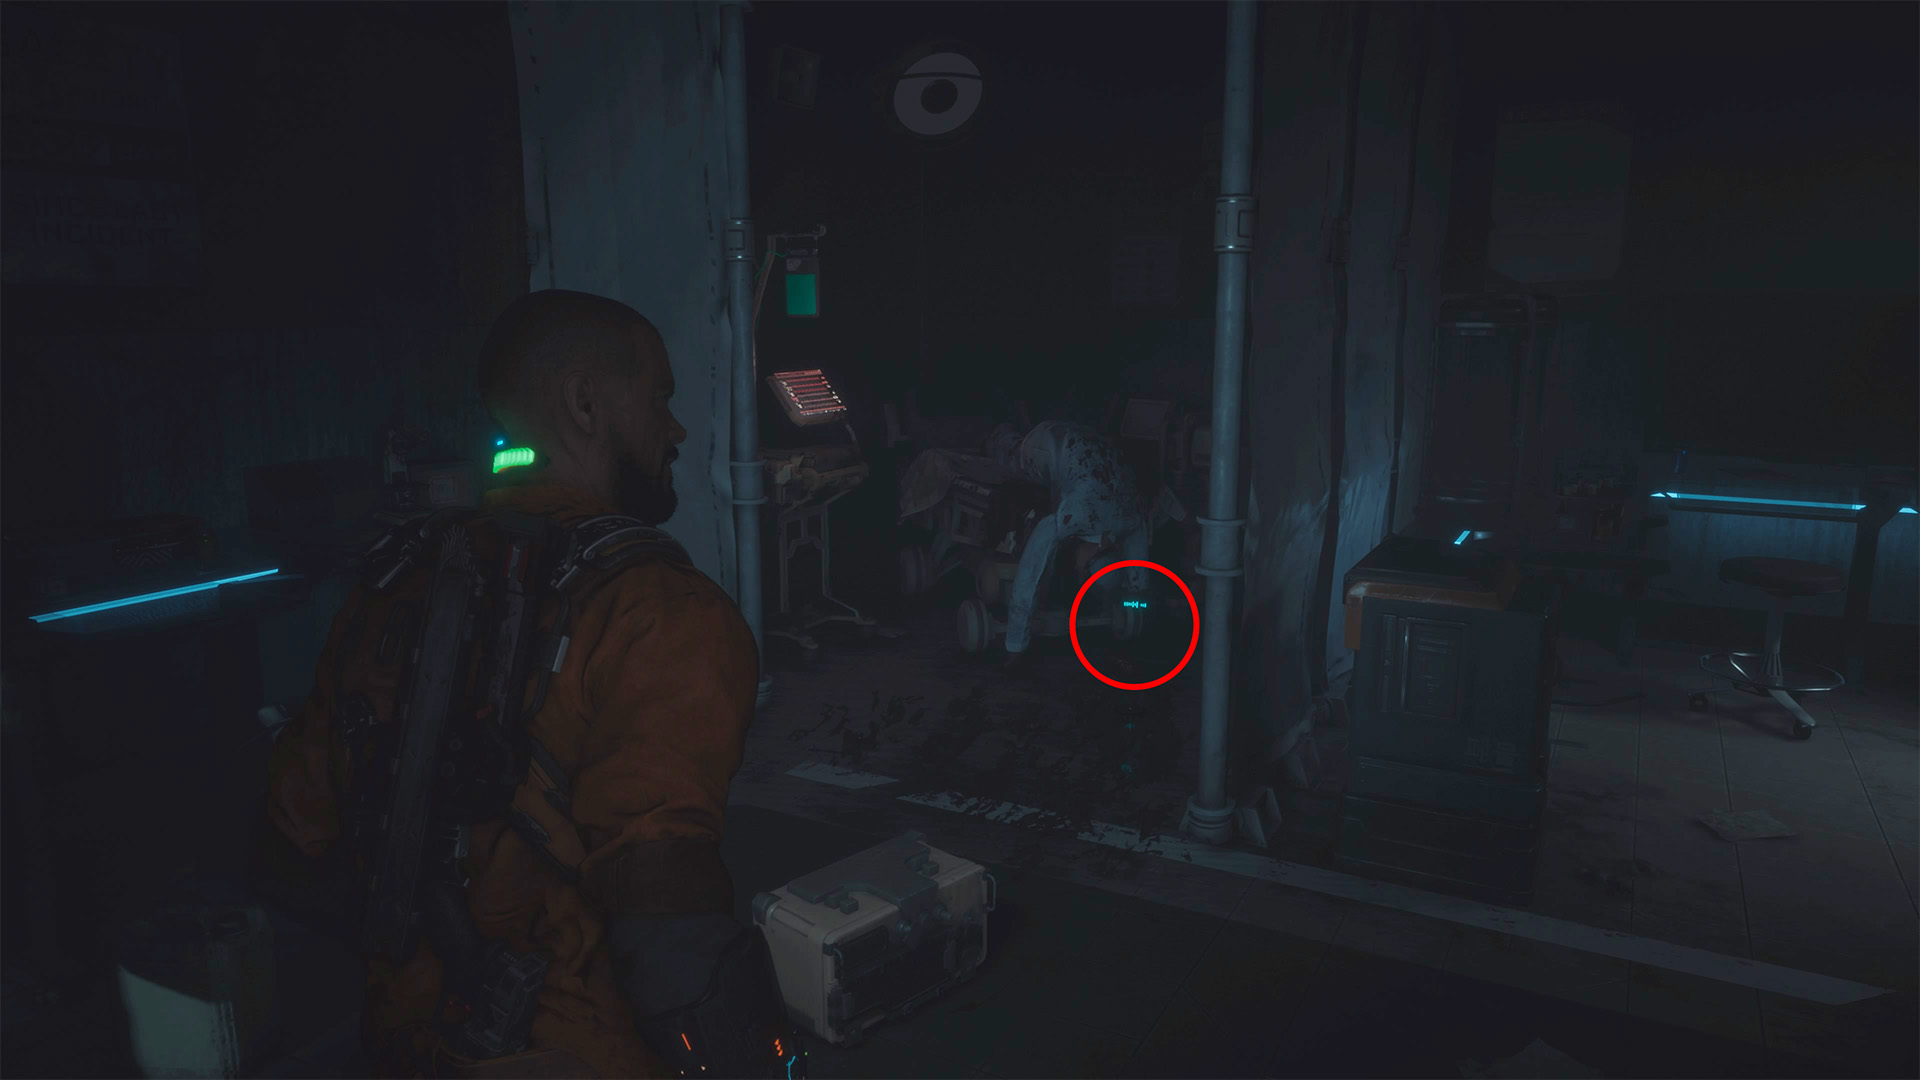
Dr. Tala Ismene: Observation
As you make your way through the facility, you’ll come to a control room with a locked door (Panopticon Surveillance B330) and a sparking breaker box. Find the fuse for this door in the nearby server room (be ready for a boss fight), then go through it. Turn left, and follow the path to the gate at the end (mind the two enemies that pop out here), and grab the data bios from the table on the right.
Dr. Tala Ismene: Taken

Go through the psych ward, and you’ll eventually climb down a ladder. At the bottom, exit the room, and turn left. You’ll see a door labeled Psyc Block 1 A140 at the end. Use the GRP to open the air duct to the right of the door (beware the two enemies that appear here). Crawl through the duct, and go right when you drop down. Grab the gate fuse from the room on the right, then go up the stairs and interact with the biohazard container at the top for this collectible.
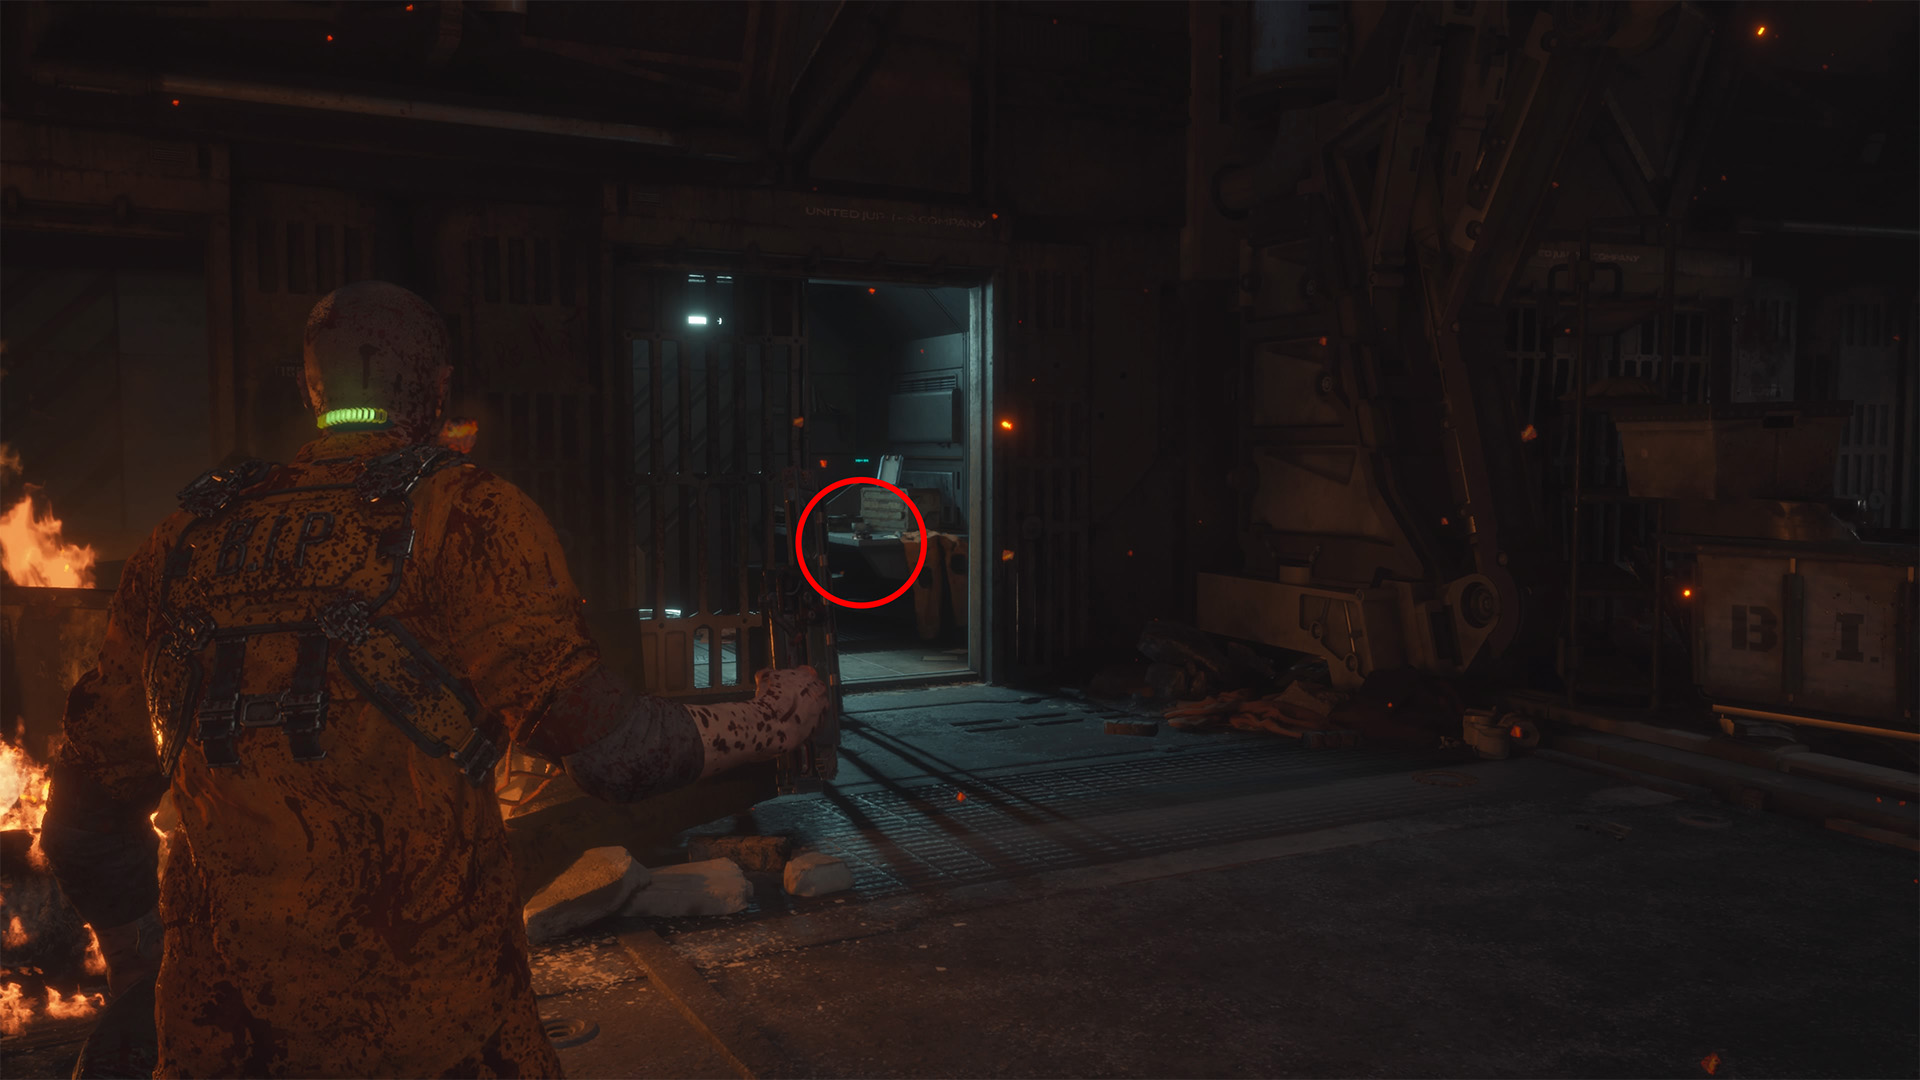
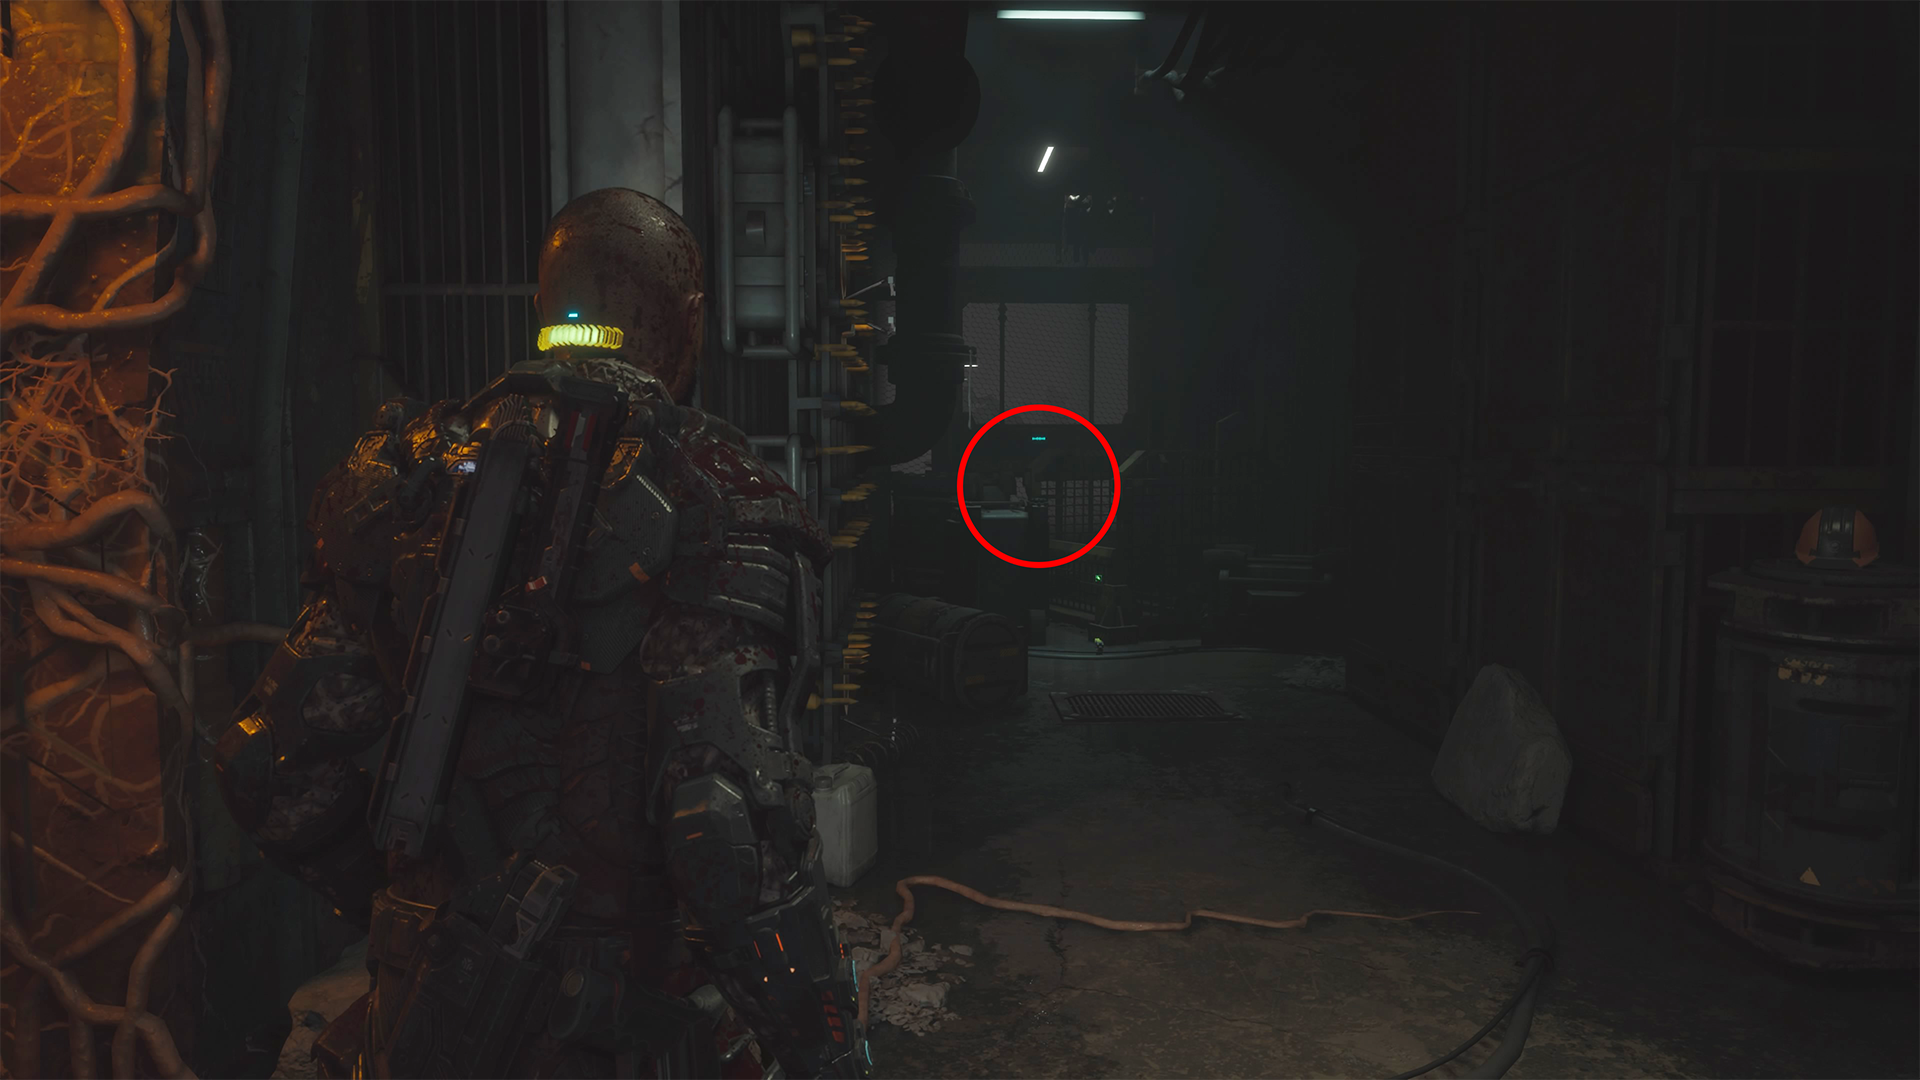
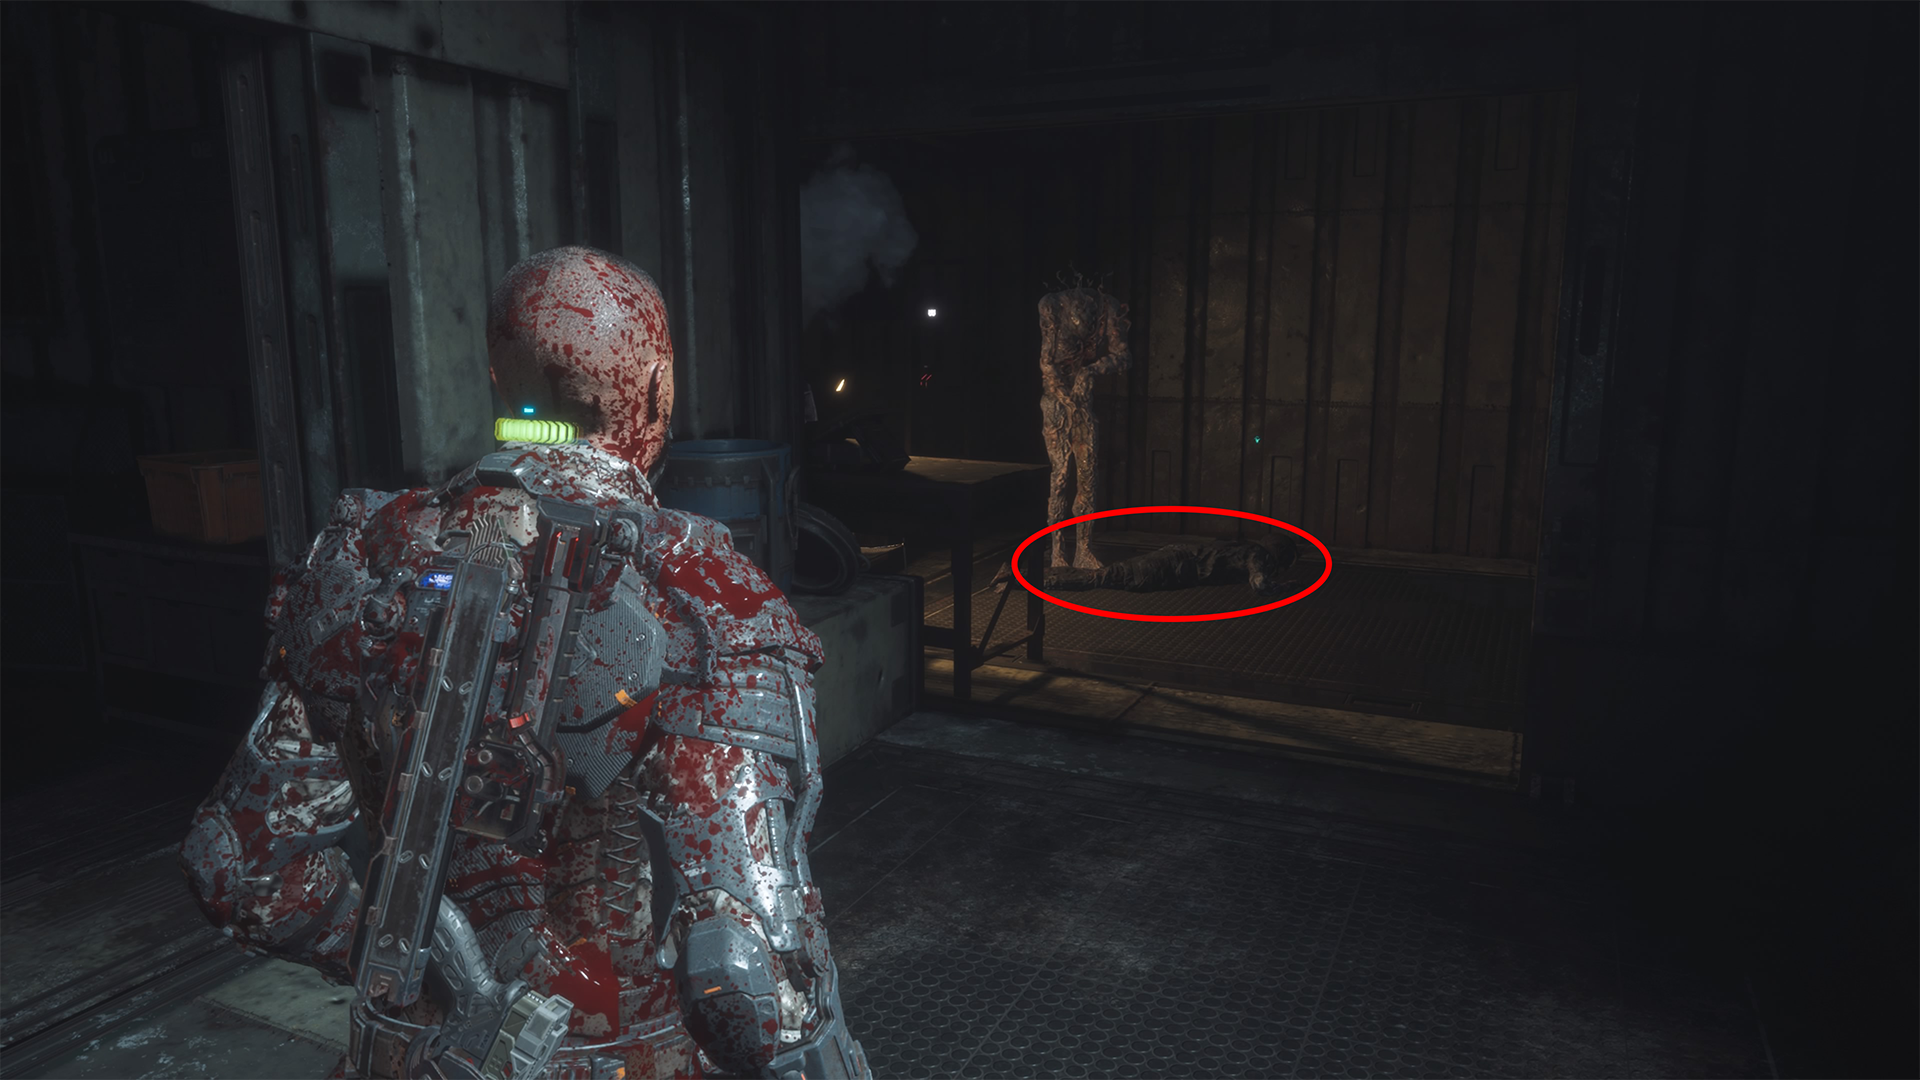
Edward Bates: Experimentation
Beat the boss in the Medical Ward, and go through the door labeled Research Checkpoint R001. Go through the next area, and grab this data bios off a metal object with pipes on the right side once through the security door. )This is where I got the Grim Reaper Trophy.)
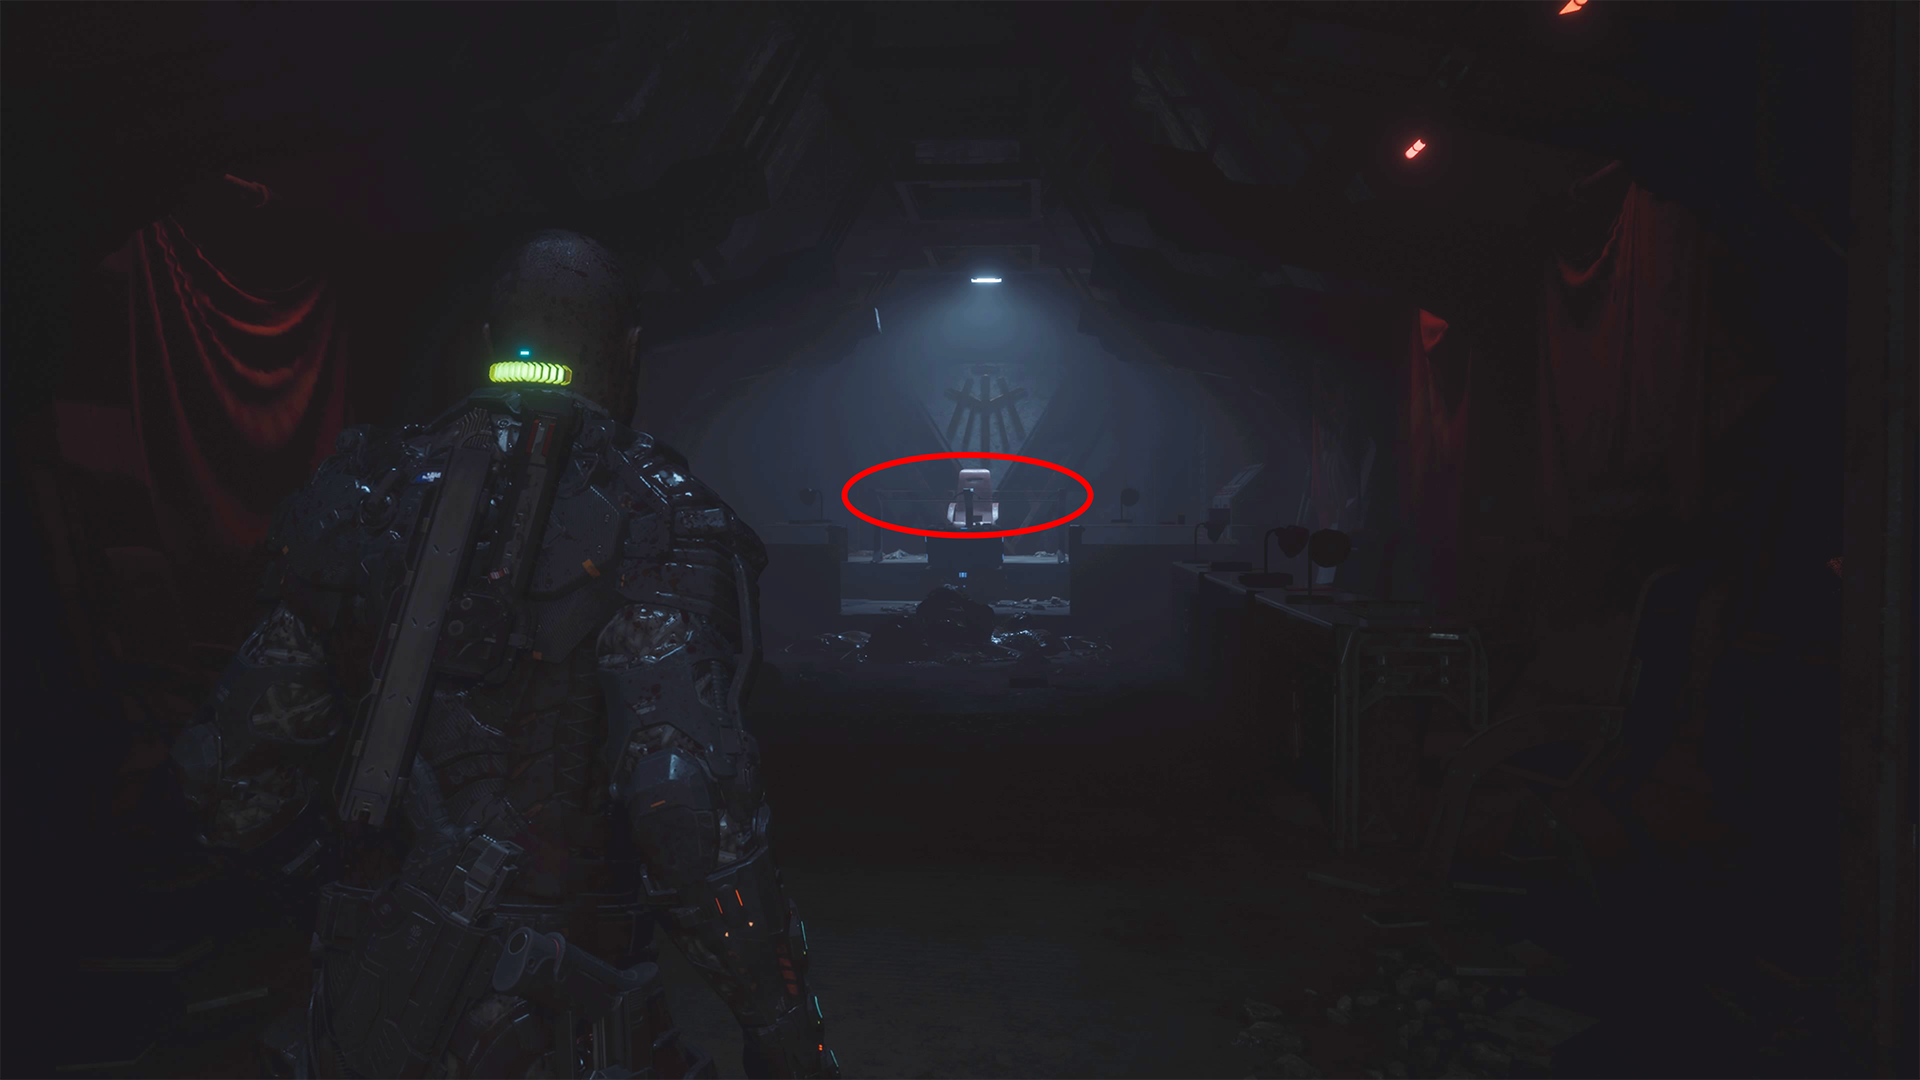
Duncan Cole: Cole’s Triumph
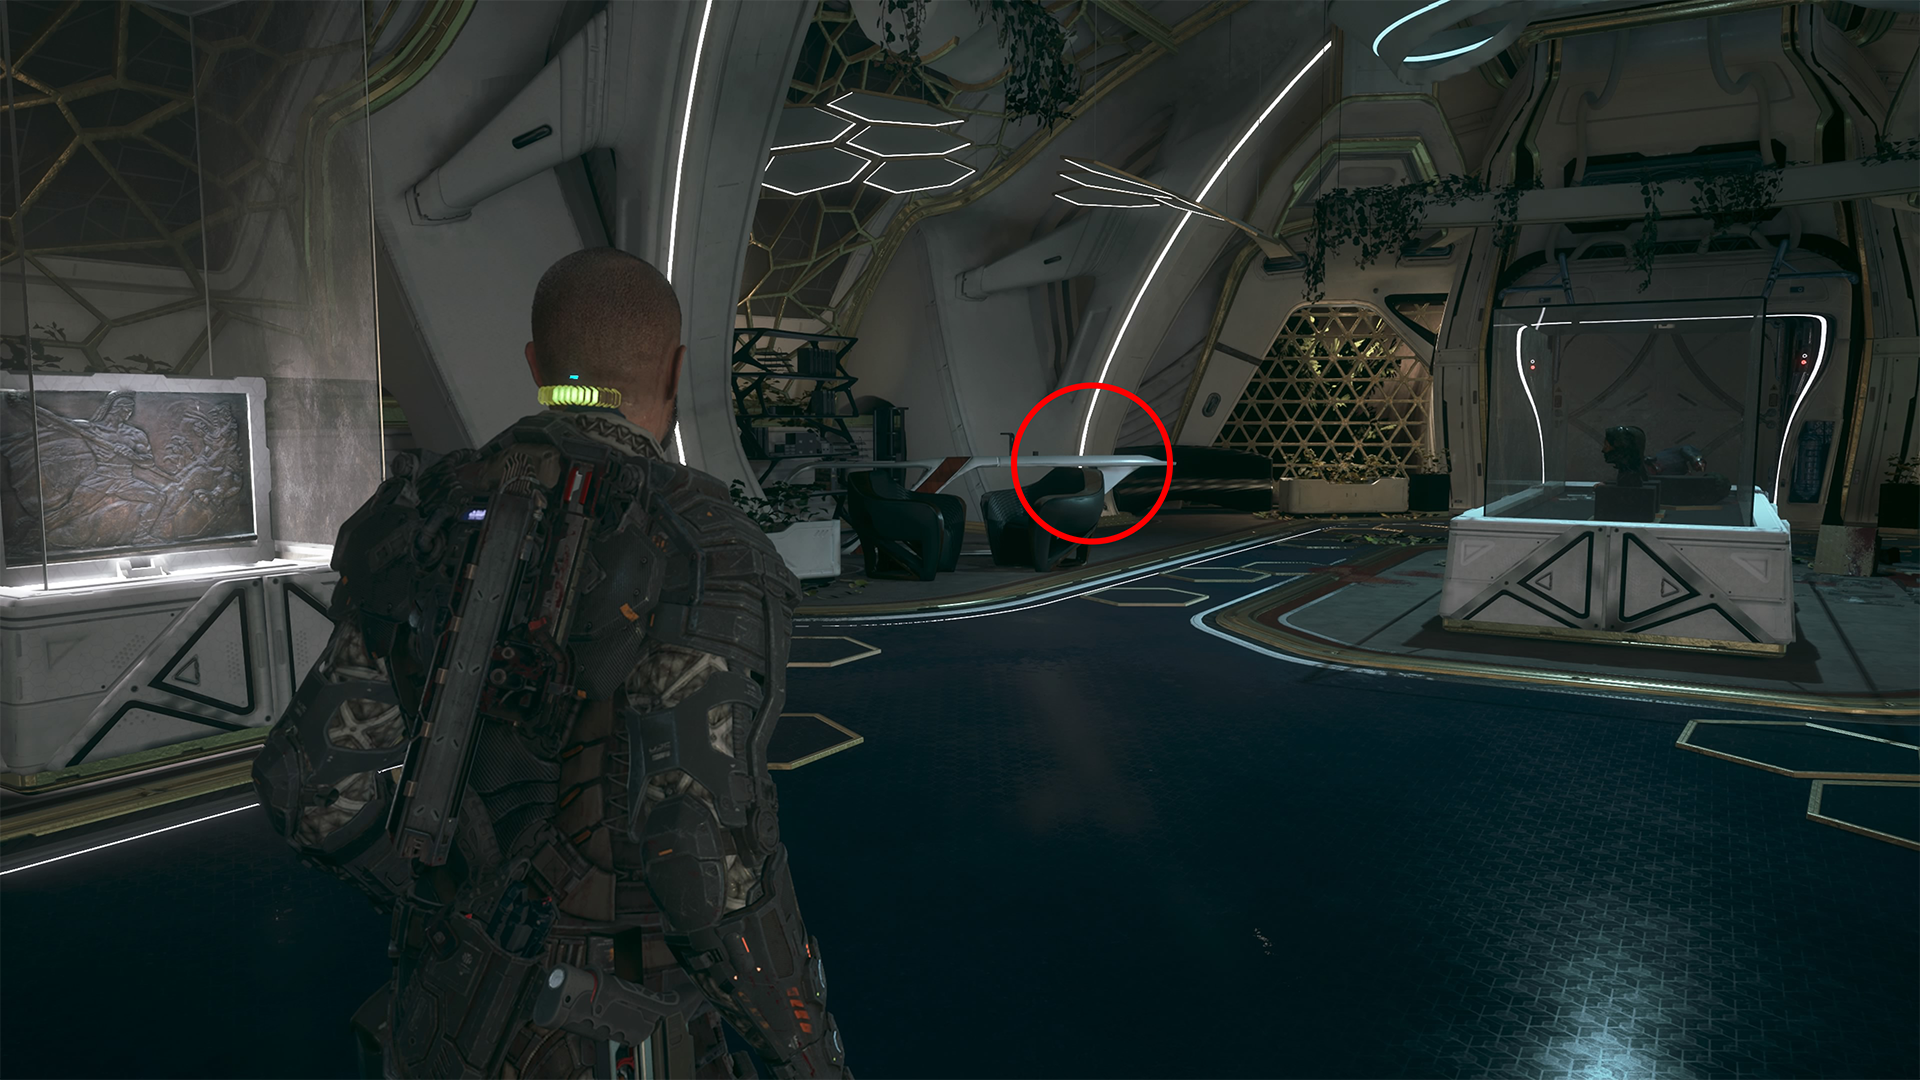
Take the elevator up the tower after the long cutscene explaining the Protocol. Exit the elevator at the top, and go through the door into a museum. The data log is on the table in the back left corner.
And that’s where to find all of the data bios and audio logs in The Callisto Protocol. Now you have the Grim Reaper trophy and achievement, putting you that much closer to 100%, should you dare to play the game on its highest difficulty. Either way, with all of the collectibles in hand, you now know more about the events leading up to the game’s story.


Published: Dec 3, 2022 03:37 pm