Heroes of the Storm is the newest Blizzard title to hit PCs and takes pride in being much more objective-based than its fellow MOBA counterparts.
The game consists of 7 different maps, all containing a different set of missions that competitors will have to team up with other players to take on.
Strategizing with the random map you’ve been assigned to play on is the key to victory in Heroes of the Storm. Here we will explore the Blackheart’s Bay map, including general tips and tricks, then diving further into specific champions, builds, and strategies to wipe the floor with your opponents.
Step 1: A General Understanding of the Map
Map Layout

Blackheart’s Bay consists of 3 lanes on a medium-to-large sized map. The top 2 lanes are relatively close together, while the bottom is off on its own, much further away.
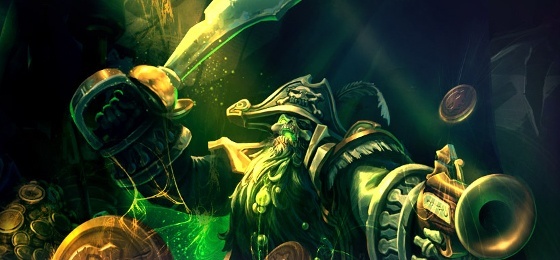
In the middle of the map is Black Beard the pirate, who’s waiting to take all the gold your team collects, in exchange for his ship shooting cannonballs at your enemy’s structures.
Currently, this is one of the only maps with many little objectives to control quickly instead of one large objective to plan for. Blackheart’s Bay is a continuous, never-ending dance around the map that requires all of your teammates to be in sync with one another.
Map Objective
The main objective in Blackheart’s Bay is to collect coins via the minion camps, the coin camps, picking up your enemy’s coins when you kill them, and 2 treasure chests that appear throughout the game. The amount of coins dropped for each is listed below:
- 1 Minion Camp – 2
- 1 Coin Camp – 2
- 1 Treasure Chest – 5
Once you gather coins, you must turn them in to Black Beard by right clicking the NPC in the middle of the map by the pirate ship. Once you have the requested amount, he will shoot that many cannonballs at the enemy’s towers, starting with the middle, outer layer and making his way inward.
Current Team Structure Meta
Currently, the most played structure for this map is 4-1.
Since the bottom lane is the shortest, with the least amount of map pressure or objectives, the current meta is to only send 1 member of your team bottom. This person should be able to wave clear efficiently and effectively control the bottom chest.
The top two lanes are very close together, plus there’s a lot happening on the top half of the map, such as the Boss, the Watch Tower, and many more opportunities for coins. Because of this, teams should send the other 4 players to roam around the top half of the map, focusing on objectives.
Step 2: Playing the Map Correctly
Early Game
At the beginning of game, you’ll want to send your solo lane to the bottom immediately in order to start pushing the lane and soak up all the bot lane experience.
Like every HoTS map, lane XP is incredibly important so that your team doesn’t fall behind in levels, so any time not spent in lane is generally frowned upon, unless you’re trading it for a better objective.
Your other 4 teammates should be heading to the Watch Tower in the top center of the map to gain vision control. This is where the other team will be headed as well, so prepare yourself for a team fight.
If the other team brought all 5 members of their team top, go ahead and back off. If they didn’t try to out-fight your opponents, but if it’s taking too long it’s better to give it up and head to the middle lane because the chests will be spawning soon.

Pushing down the mid tower should be your primary objective at this point, as it is unintelligent to turn in any coins before doing so. If you turn in all 10 coins, and the cannonballs take down the middle outer tower, you’ll be just short of taking down the fort. However, especially since it’s the easiest tower to take, it’s better to take the gate and/or tower first so that the cannonballs take the fort, which grants double the amount of XP as the rest of the structures (800 for the fort, 400 for everything else).
Mid Game
Now, your team should be focused mainly on control, which includes 1 person in each lane to soak up XP, and pushing down structures whenever possible. It’s also important to set up for each chest spawn, and collecting the coins from the minion camps when your team is together.
It’s important to note that whichever team has control will maintain control, as Blackheart’s Bay isn’t a map that you can generally make a comeback on. Therefore, establishing control early is essential to winning, and will require your team to be in constant communication.

A general rule is if you have coins to lose, don’t fight, because it’s very easy to be ganked on this map. With a million places to hide and many twists and turns, there could be enemies anywhere, and thus it’s only smart to engage in a fight if you’re with your team.
If you’re behind, it’s important to not focus too hard on minion waves that are pushing towards you, because that will further the gap between you and the enemy team. Your best bet is to continue rotating with your team for objectives, while making quick pit stops to wave clear when necessary.
If you’re in the lead then your mission is to collect every coin and minion camp possible. With the Boss and Black Beard’s cannonballs attacking at the same time, the XP gains will be strong with you.
Late Game
When the game is nearing its end, there will generally be one team much further ahead, which is 9 times out of 10 going to be the team that wins. It’s nearly impossible to bridge the gap if your team is behind in a huge deficit on Blackheart’s Bay because of the way the map is set up, so it’s important to maintain control.
With all 3 lanes pushing, the team that’s behind won’t have the resources or the time to capture objectives, much less fight for them, so making sure your team is the one dominating is the key.
If your team is the one crushing, then continue your lead by capturing the Boss at the top of the map which will crush the enemy’s top lane. That way the cannonballs can focus down an other target, leaving your opponent defenseless.

If you’re the team that’s behind then it’s better to try and catch an opponent out than to try and teamfight outright. Capitalize on little victories, and try not to let your opponents capture objectives by either taking them first or poking them down from afar.
If neither you nor your opponents have that vast of a lead, and the game is close, any move could cost you the game, so you absolutely have to be paying attention. Moving with your team to collect objectives and turn in coins is the safest approach, since teamfights can end in either team gaining the other’s coins.
Step 3: Turning in Dubloons Safely

When turning in your coins (or dubloons) there’s a few second channel time before Black Beard will take them, which leaves you and your teammates susceptible to interrupts, ganks, or even an ambush.
With this in mind, turning in dubloons should never be a solo effort, and (if you’re part of the 4 roaming people on your team) you should go together to turn in your coins.
If you’re the solo lane on the bottom, you should always wait until your teammates are going to turn in before you do, so that you can have backup.
Step 4: Choosing Your Hero Effectively
Like all Heroes of the Storm maps, there are certain compositions that work well with Blackheart’s Bay. If you’re a premade 5, you should always aim to correlate your hero picks, so that you have the best shot at victory.
Team Composition and Powerful Heroes
You should aim to have a team composition with a lot of survivability, sustain, and the power to push lanes.
In the bottom lane, you’ll need to place a solo laner with large amounts of wave clear and the ability to stay in lane a long time so that there is no loss in XP. Examples of heroes for this lane are heroes such as Valla, Tassadar, Zagara, etc.
The other 4 members of your team should be 2 damage dealers, a tank with a lot of CC, and a healer of some sort. This way you’ll be able to have balanced teamfights if necessary, or your tank with CC can catch heroes out of position.
Tanks should be heroes like Arthas, Stitches, Uther, etc. The healer can be Brightwing, Tyrande, etc. The DPS should be someone who deals a lot of damage but is also mobile, so someone like Jaina, Valla, Tychus, etc.
Let the Battle Begin!

Now that you’re a Blackheart’s Bay expert, it’s time to decimate your opponents on the field of battle. If there’s anything this Blackheart’s Bay Guide is missing, feel free to let us know and we’ll be happy to expand.
Players looking for further HoTS content can find more guides, tips, news and more in the Heroes of the Storm section of GameSkinny here.


Published: Jul 9, 2015 01:08 pm