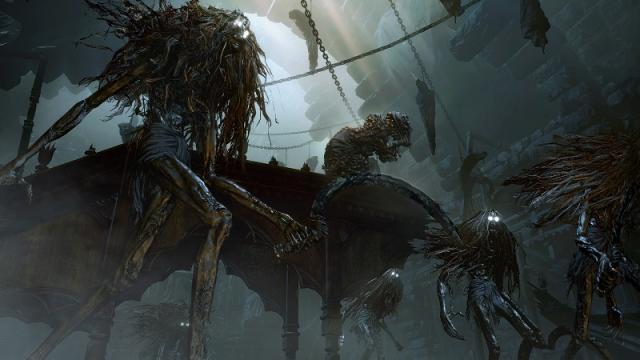
Hello, good hunter. Blood has prepared you for your fourth boss encounter in Bloodborne. You must now make your way to face the Witch of Hemwick and she is a tricky one. She will not make this an easy battle, no.
If you’re in need, make sure to look here for tips and guides on your journey.
Preparation first
Head back to the Hunter’s Dream to repair your weapons and fully stock up on needed supplies. Be sure to have Blood Echoes handy for repairs and to purchase these:
- (20) Blood Vials
- (10) Antidotes
You’ll also need these:
- Hand Lantern (Purchase in the Hunter’s Dream – 2,000 Blood Echoes; unlimited use)
- Equip this in your Quick Item Slot
- Select on the D-pad and hit the Square button to turn on
- Then select another item, such as Antidotes, in the Quick Item Slot
Note: The Hand Lantern will light your way through the darkness, while allowing you to still dual-wield two weapons. Pretty sweet, right?
- Powerful weapon (suggestion: Hunter’s Axe transformed & fortified as much as possible)
This is only my suggestion, feel free to use whatever you have.
Getting to the Witch
- Upon defeating Vicar Amelia upon exiting the room, head down the first set of stairs
- Make an immediate right
- Head along walkway until you reach a wooded path
- There will be a cave ahead of you
- Proceed ahead
- Within this wooded area, you’ll encounter armed gunman, dogs, and the Witch’s minions
- If you look on the ground the path will not lead you astray
- Be sure to look around for highlighted corpses
- You’ll finally reach a gate, open it
Welcome to Hemwick Charnel Lane
Be sure upon entering to look around and light the lamp. This will also be the area to achieve your next trophy for the Lake Rune.
Take a look at the Lake Rune in detail below.
The path continues and will lead you to the Witch. Keep your eye out for highlighted corpses in this new area and inside the building. Her minions are everywhere, so take them down swiftly, and without prejudice!
Battle Tactics
Note: Make sure to equip your Antidotes in your Quick Item Slots.
- Concentrate on the each corner of the room; she is the boil-covered creature
- Move in with your weapon to make your powerful R1 and R2 button attacks with your Hunter’s Axe or preferred weapon of choice
- Concentrate hitting her when she reappears in each corner
- Try to avoid her other minions if possible or you can kill them
- If she gets too close, quickly backaway by using the Circle button
- Remember to keep moving at all times to avoid getting grabbed
- Never stand still or this will result in your ultimate demise
- Use the Square button to use your Antidotes when you see the Poison indicator bar up fill up; if the bar is filled, it will result in your demise
- Again move in with your weapon to make your powerful R1 and R2 button attacks; remembering to keep moving at all times
- Don’t forget to keep a close eye on your health
- Use your Blood Vials to restore your HP by using the Triangle button
- Use your powerful R1 and R2 button attacks to avoid being grabbed until her health is gone
- Once it looks as if she is defeated; you’ll see two bars appear
- Move in with your weapon to make your powerful R1 and R2 button attacks; remembering to keep moving at all times
- Use the Square button to use your Antidotes when you see the Poison indicator bar up fill up; if the bar is filled, it will result in your demise
- Use your Blood Vials to restore your HP by using the Triangle button
- Continue your powerful attacks until both bars are depleted
Victory is mine
Once you’ve defeated the Witch of Hemwick, you’ll unlock:
- Your next checkpoint
- The Witch of Hemwick Trophy
- (4) Bloodshot Eyeballs
- 11,800 Blood Echoes
- And you can progress to the next stage of the game
Don’t forget to look here for tips and guides on your journey. Good luck and happy hunting.


Published: Mar 28, 2015 09:35 pm