It’s a scenario many have encountered:
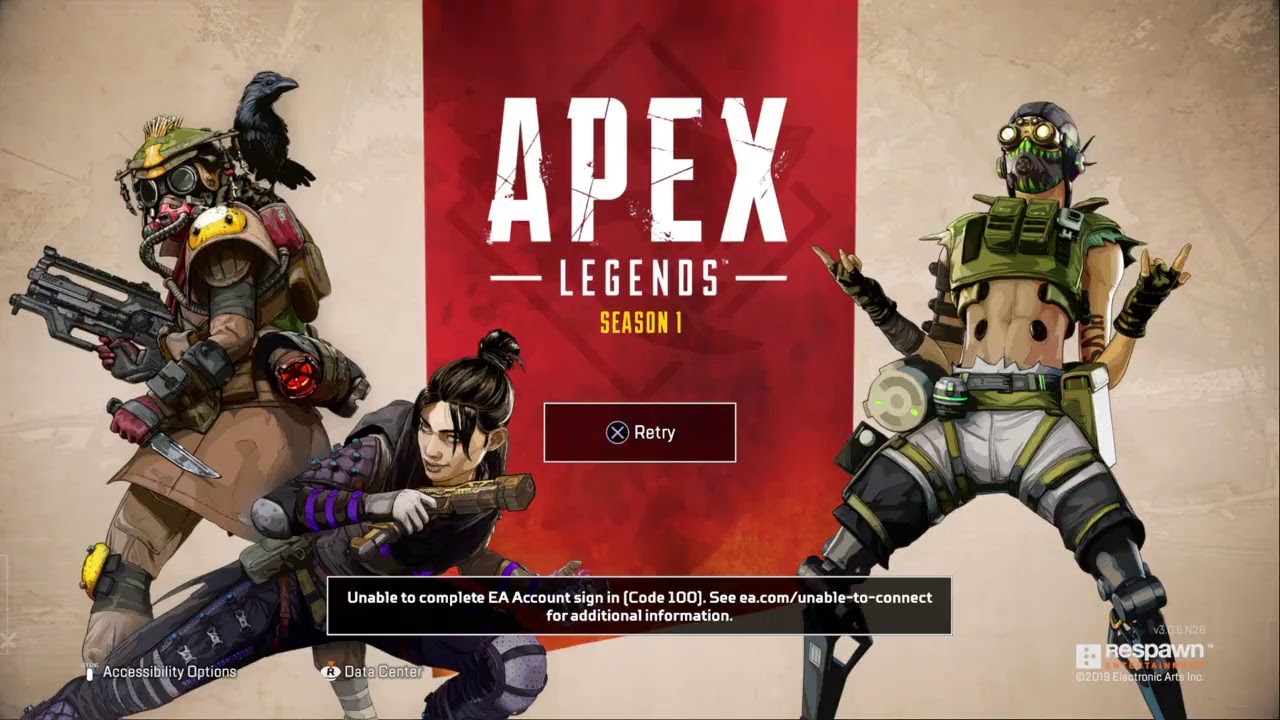
You’re trying to play Apex Legends, and when you try to sign into your PlayApex account, you can’t. Instead, you get this weird 100 error. Or you might see something like “Unable to connect” or “Unable to complete EA account sign in”.
Here’s what it means and something you can do to potentially work around it.
Apex Legends Error Code 100
The servers for Respawn’s Apex Legends hosts a tremendous number of players on a daily basis. As one would expect from that kind of strain, the servers occasionally suffer from outages as well, as was the case this past week and again in March.
When the servers and Origin in general are down is when you’ll see the code 100 error message. Code 100 is a server outage error. That’s why the “Unable to complete EA account sign in” message may show up and also why you can’t access any of EA’s online games at the time.
How to Fix Error Code 100
The simplest way to fix the issue is just to wait until the servers are back online, and you can sign into your account again.
However, if you know for a fact Origin’s servers are up and that it’s an issue on your end, there is a workaround you can try that might resolve the issue. It involves changing your system’s Domain Name System (DNS) setting.
Changing Your PS4, Xbox One, or PC DNS
The DNS is essentially how a device converts URLs to their IPS addresses, and the default on your system is whatever DNS your service provider uses.
There’s a primary DNS, which handles the framework and processing, along with a secondary one that acts as a backup should the first fail and deals with data retrieval as well. You have to change both when you alter your system DNS.
If you’re going to change your DNS setting, the generally recommended alternative from your provider’s default DNS is Google’s DNS.
- Google’s primary DNS: 8.8.8.8
- Google’s secondary DNS: 8.8.4.4
Here’s how to change the DNS for PlayStation 4, Xbox One, and PC.
It should go without saying that you’d want to write your IP’s default address down, in case you want or need to revert the DNS back to its original address later because there’s no “default” option.
How to Change PS4 DNS
Changing the PlayStation 4’s DNS requires following a few specific steps.
First, go to your network settings. To do that,
- Navigate to settings
- Choose “Network”
- Choose “Set up internet connection”
- Pick the type of connection you’ll use (the steps for changing the DNS are the same for each)
- Select “custom”
After that, you’ll adjust the settings as follows.
- Set IP address to “Automatic”
- Put “Do Not Specify” for DCHP Host Name
- Set the DNS settings to “Manual”
- Enter the primary DNS (8.8.8.8)
- Enter the secondary DNS (8.8.4.4)
- Put “Automatic” for the MTU settings
- Under Proxy Server, select “Do Not Use”
Save the settings, and return to your home screen. If you had the game application running during this, you’ll need to close it, then launch it again.
How to Change XB1 DNS
Changing the Xbox One’s DNS is a bit simpler and involves fewer steps.
- Go to “Settings”
- Choose “Network”
- Select “Advanced Settings”
- Pick “DNS Settings”
Then, just enter the primary DNS (8.8.8.8) followed by the secondary DNS (8.8.4.4). Save the settings, and, like with the PS4, close the application if you had it running.
How to Change PC DNS
Changing your PC’s DNS is rather more complicated, in that it requires more steps.
- Press the Windows key and R to open the command box
- Type ncpa.cpl, which will bring up the “Network Connections” Control Panel menu
- Locate your internet connection, and right click it
- Choose “Properties.” A box will open with a list displaying under “This connection uses the following items.”
- Find Internet Protocol version 4 (TCP/IPv4), and click it.
- The “Properties” button to the bottom right will become available. Click it.
- Select “Use the following DNS server addresses,” and type the DNS addresses
- Preferred DNS server: 8.8.8.8
- Alternate DNS server: 8.8.4.4
- Choose “Okay”
- Restart your PC
—
Again, there’s no guarantee altering your DNS will absolutely, without fail work around Apex Legends‘ Error Code 100, but some have found success with it. If you’d rather not mess with it, rest assured the error isn’t permanent, and you’ll be back in the game soon.
And while you’re waiting, check out our other Apex Legends guides for some tips and tricks to get you to the top of the pile.


Published: May 6, 2019 02:15 pm