So you beat Fire Emblem: Fates on normal mode, and now you’ve decided to play on hard. The first thing you notice is that your once trustworthy characters have started dying as early as Chapter 7 in the Conquest route, and the character you wanted to make your waifu is now lying 6 feet underground. You think to yourself: “RR-sama gave me such great tips for my first run! Why can I no longer defeat enemies by simply following the weapons triangle?”
The answer is simple. It’s time for another lesson, and this time for some real strategy!
Positioning is more than paying attention to tiles!
In harder difficulties, AI units will be less inclined to attack whatever is closest, and more likely to target the easier kill. While they will still automatically attack whatever is within range, there are certain precautions you can take to ensure your allies are safe at all times. Here are some examples:
The Classic “Turtle” Strategy
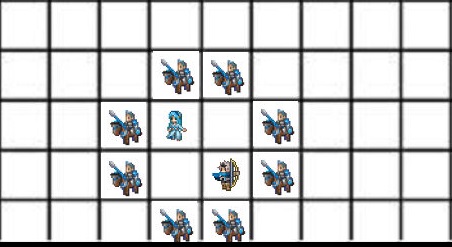
While I couldn’t find enough sprites from Fire Emblem: Fates to make this more accurate (prepare for a lot of pictures involving cavaliers), this crude image is a classic example of a turtle strategy that works great against an onslaught of melee units. In this example, the healer can reach any unit that is injured, while the archer can safely pick off weaker units or aid in taking out stronger ones.
This strategy can be adapted in many ways depending on the situation, including:
- Placing vulnerable units in the corner of the map with at least 2 spaces distance from the vanguard to ensure ranged units cannot hit them.
- Placing units with higher defense on the sides with more hostile units.
- Pairing up ranged units with vanguard units to maximize damage, and reduce damage taken.
- Make an advancing ‘L’ shape with healer units just out of range of the enemy.
The “Bottleneck” Defence!
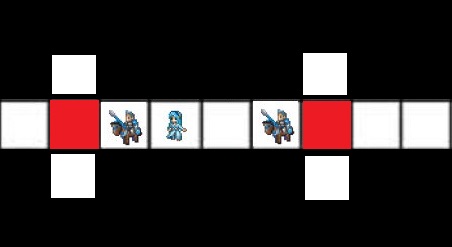
While this situation is rare in Fire Emblem, sometimes you will find yourself in a situation where you are cornered between two enemy groups in a hallway. Similar in concept to the ‘Turtle’ method, the Bottleneck Defence is a great way to defend a weaker or ranged units when besieged by enemies on both sides (red squares). Depending on the enemies you face, however, you may want to use units with a little more hardiness than cavaliers.
The Bottleneck Defense can be adapted for several situations, such as:
- Wider corridors that require two units side-by-side.
- Longer corridors can use two ranged units on either side.
- Placing a tankier character on one side that has more units.
- Rotating melee units on one side if the enemy is coming from one side only.
Double Advancing
Fire Emblem veterans likely remember the Rescue ability in older games. This allowed players to pick up a character to prevent them from getting harmed. While that feature is no longer in the game, the Pair Up function works in a similar fashion as the ‘carried’ unit is no longer able to be harmed. The Pair Up ability also allows us to do something I like to call ‘double advancing’.

In Fire Emblem: Fates there are some missions where the objective is to escape. To do so, a certain unit must reach the escape point, else face a never ending swarm of enemies. This is where Double Advancing (or DA) makes its utility clear. By pairing up with any unit with high mobility, one character with low movement ratings can reach the other side of the map in no time at all.
The ability can also be used for offensive or defensive purposes. take for example the image below:
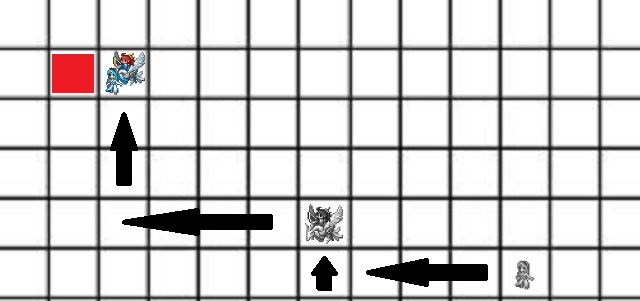
For a moment, let’s pretend Azura was re-classed into an offensive class, and that the enemy (red square) has a weapon that the Sky Knight is weak against. By pairing up with the Sky Knight, Azura can fight the enemy by first moving the pair to the enemy, then selecting Switch before selecting Attack. This way, the Sky Knight is now the supporting unit, and Azura can attack the enemy without fear of being at a disadvantage.
This can also be used with healers, dancers, and more. When used carefully, some missions can be completed in seconds, such as in this video below:
Pretty neat, huh? (Video courtesy of Nick Robinson via Youtube)
General tips for higher difficulty playing
While there are a number of things you shouldn’t do during a casual run of the game, some are arguably useful in harder difficulties. Here are some of the more… controversial strategies.
Promoting units before they reach level 20
This is often considered one of the big no-nos of Fire Emblem. Promoting your units before they reach level 20 causes them to miss out on a lot of stat points that they could be using once they reclass or get promoted. However, as any Fire Emblem 7 player who has gone through Hector’s Hard Mode will attest, sometimes you just need that extra firepower a bit early.
Promoting to an advanced class before level 20 means getting some better skills earlier than you would. It also grants you some early game advantage as some weaker units gain considerable stats during their promotion. That said, units who are promoted early can suffer later on in the game due to their lower general stats. As such, consider promoting a handful of units, and using those units as a proxy for training your weaker units who have higher potential in the late game.
Play safer than you would normally
Hard and Lunatic mode are no place for people who don’t want to properly strategize. While it may be tempting to throw your warriors at any enemy they can take down in one turn, sometimes this can lead to their deaths. Remember to use the X button and highlight nearby enemies before making a move. This can ensure that there are no opponents that will flank your lone soldier and turn them into worm food.
That said…
Don’t be afraid to lose one or two units…
One of the hardest things to do in Fire Emblem is letting go of your allies. It can be sad to see some of your friends go, but don’t be afraid to stay your hand from soft-resetting the game. Sometimes the death of a unit can mean the rise of another, and as such it might be necessary (especially in later levels of Conquest) to let the odd warrior die honorably on the battlefield.
However, if you are still losing units on Normal difficulty, I am obligated to state how disappointed I am in your strategic abilities. Please return to the Fire Emblem: Fates beginners guide.
Upgrade your weapons!
Fire Emblem: Fates no longer has weapon durability; their main focus is now on upgrades. Without upgrading weapons, you can expect the battles to quickly grow more difficult. This is especially true in Conquest where the lack of the ability to grind levels will leave you desperate for another means of increasing your damage output.
Be sure to fight in the arena from time to time. While you may not get experience or gold in this game, it will allow you to gather resources that are essential for crafting.
Take advantage of unit types
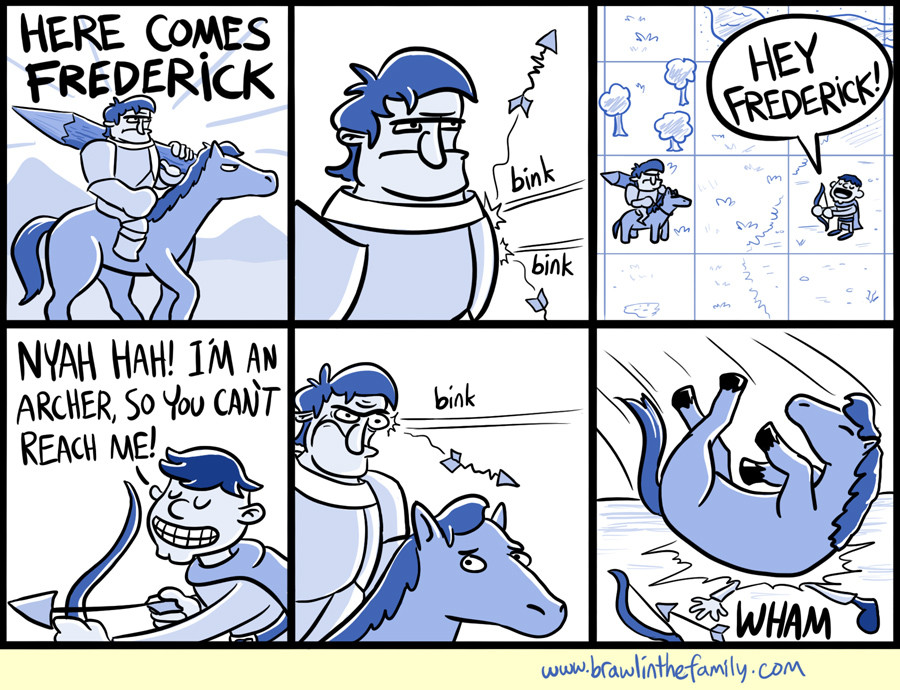
Image courtesy of Matthew Taranto via Brawl in the Family
Okay, so the comic above is in reference to the Fire Emblem: Awakening character, Fredrick. Nevertheless, the concept still rings true in Fire Emblem: Fates, and the greater Fire Emblem series as a whole.
To truly spare yourself the trouble of constantly restarting your game because one unit died, you must learn to effectively use each unit’s strengths and weaknesses. For example:
- Knights, and Great Knights are all really great at taking physical damage.
- Trueblades, Weapon Masters, Shura/Oni Savages, Revenant Knights, and Berserkers are the highest damage dealers in the game.
- Heroes, Paladins, and Holy Lancers are balanced between the two.
- Spellcasters, Dark Mages, and Archers are best at picking off enemies at a distance.
As long as you make sure to use these units to their strengths, and avoid their weaknesses, you can seize victory in no time flat! However, remember that there are always exceptions to the rule, and some weapons in the game are specifically designed to both counteract a unit’s weaknesses, as well as counter some unit types.
That is all I can teach you!
As with any strategy game, practice (and a bit of luck) is key. There is little more I can offer you, pupils, other than my wishes of good fortune upon the battlefield! From this point forward, everything that there is left to learn about combat is up to trial and error.
As always, have fun with Fire Emblem: Fates, and I’ll see you on the battlefield! RR-sama, signing out!
Other Guides:
- Basic Strategy
- Advanced Strategy and Tips
- Support, Marriage, and Children
- Boons, Banes, and Talents
- Weapons and Smithing


Published: Feb 12, 2016 06:58 am