
There are multiple times in Star Wars: Squadrons where you’ll need to take down a Star Destroyer, whether in the game’s campaign mode or Fleet Battles. Squadrons never really outright tells you how to beat the Imperial flagships, though it does give you tips on what systems to prioritize and kill first.
You’ll eventually get the hang of destroying Star Destroyers as you play more of Star Wars: Squadrons, but from personal experience, taking them on can be a bit frustrating in your initial sorties.
First, Take Down a Star Destroyer’s Shields

As with other flagships, Star Destroyers are protected by thick shields. You’ll need to take these down before you can start dealing damage to the Destroyer’s hull, subsystems, or pesky turbolasers.
Understanding the shield and hull integrity indicator
Unless you turn it off in the main menu, all capital ships and flagships have circular shield and hull integrity (health) indicators. A ship’s shields are denoted by the green half-moon bar at the top of the indicator, while a ship’s overall health is denoted by the white half-moon bar at the bottom of the indicator.
Attack the hull first
To bring a Destroyer’s shields down initially, you will need to attack the hull. The best place to attack the hull is underneath the Star Destroyer, because there are fewer turbolasers on the ship’s underside.
Reroute your power to your weapons systems when attacking the shield. Not only are your attacks more powerful, but you will be able to:
- Overcharge your weapon
- Increase your shot capacity
Use any high-damage auxiliary weapon you may have equipped, such as an ion missile or torpedo, beam cannon, or proton torpedo. Homing missiles, such as the multi-lock missile, are the easiest to use early on because you can lock on with them while shooting your lasers to assure a hit.
Once the green half-moon is depleted, the ship will be exposed to attack. Typically, your allies will comment that the shield is down, so you don’t have to keep an eye on the indicator at all times.
Target all subsystems
Once the shield is down, pull up the targeting wheel by holding “LT/L2” on controller or “5” (default) on keyboard. Choose “Flagship Systems.” This will highlight all of the Star Destroyer’s subsystems, helping you better identify them in the heat of battle.
Attack the shield generators
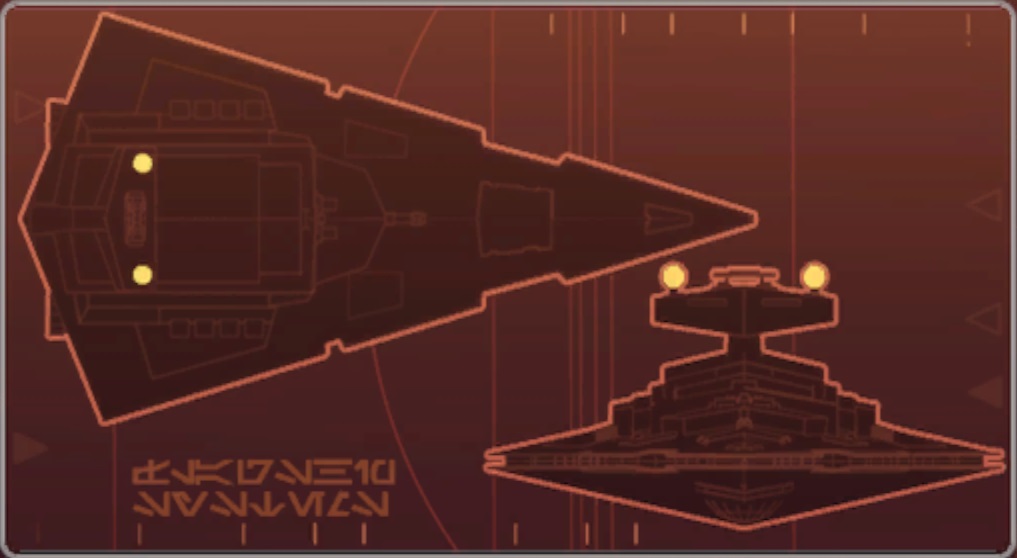
Star Destroyers can replenish their shields once they are depleted. To keep that from happening, take out the shield generators, which are the spheres located above the bridge.
If you can see the shield generators once the shield goes down, signal to your teammates to focus fire on the shield generators by pressing “Y/Triangle” on controller or “H” (default) on keyboard.
As with the hull, it’s worth rerouting power to your weapons systems as much as you can. Again, missiles are good here as well. Lock on to the shield generators and let a volley fly.
It’s likely that you won’t be able to take out the shield generators on your first pass, and the Destroyer’s shields will replenish at least one time. Repeat the process to take them out for good.
Take Down the Targeting System and/or the Power System
Attack the targeting system
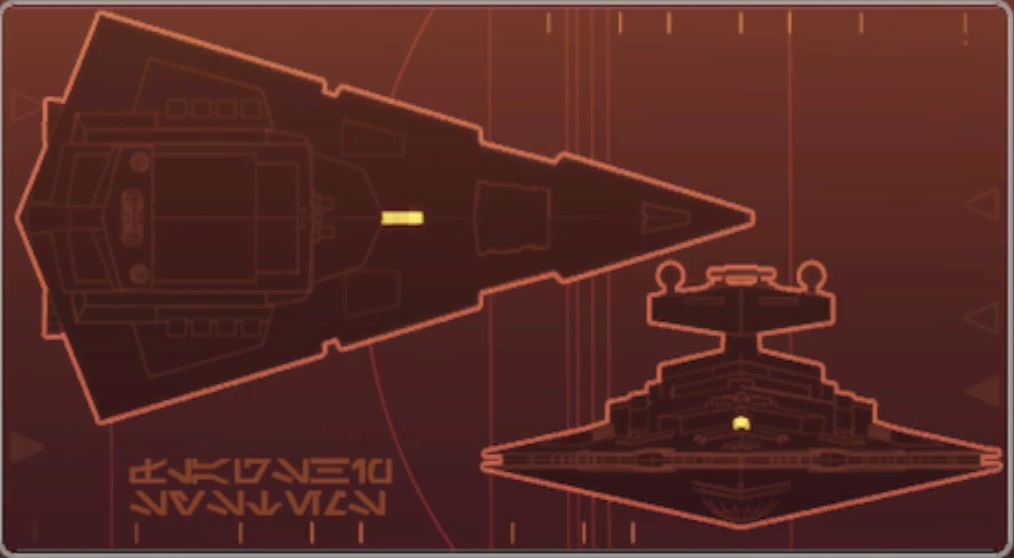
The targeting system is the next to go. Take it out, and the Destroyer’s turbolasers are far less effective. Instead of zeroing in on you constantly, the turbolasers will miss a majority of their shots, meaning you’ll take far less damage.
The targeting system is on top of the Star Destroyer in the middle. It’s a narrow rectangular structure on top of the Destroyer’s main body, directly in the middle.
Attack the power system
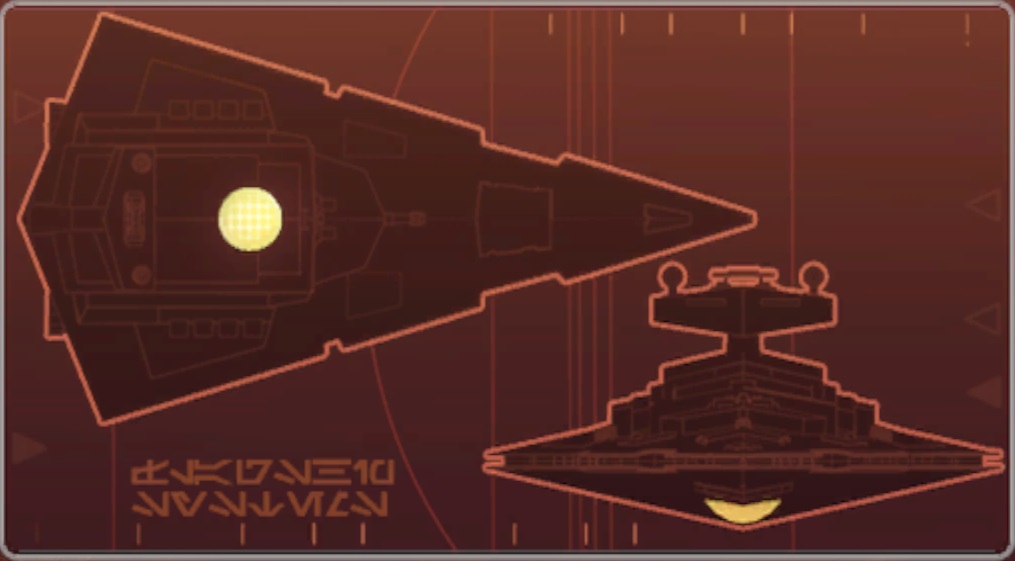
Alternatively, you can attack the power system next, which is the dome-shaped structure underneath the Star Destroyer. It is located behind the hangar going toward the ship’s thrusters.
Destroying the power system creates weak points all over the Star Destroyer. These are small open sections with electricity pulsing through them. Attack these weak points to deal massive amounts of damage to the flagship and beat it.
Basic Tactics
Attack a different section of the hull on each run
As the Star Destroyer gets weaker, the smooth grey portions of its hull will turn black and catch on fire. These sections of the hull cannot receive any more damage. You must attack another portion of the Star Destroyer to deal further damage.
Reroute power to shields
Until you destroy the flagship’s targeting system, you’ll want to make good use of your ship’s shields.
You can reroute power to your shields in general by pressing “right” on the D-pad or the top number keys (by default) on keyboard. You can also change the direction of your deflector shield by holding “X/Square” on controller or using the mouse wheel on PC.
- When approaching the ship, divert all power to your forward deflector shield
- When on top of the ship, balance your shields
- When moving away from the ship, divert all power to your rear deflector shield
Drop proton bombs with a Y-Wing

If you’ve ever watched or played anything Star Wars, you already know that proton weapons are high-damage payloads used against an array of installations and ships in a galaxy far, far away. The proton bomb is one of them.
Y-Wings are the best ships to use against Star Destroyers because they come equipped with proton bombs that can kill the subsystems and hull. They also have strong hulls, are heavily shielded, and have an array of powerful weaponry aside from their heavy payloads. And that’s before you install any modules you unlock with requisition.
Proton bombs can help bring down a Star Destroyer’s shield, but they’re most useful once that shield goes down. Even more so if the power system has been destroyed and weak points have been revealed.
Cull enemy fighter squadrons
This may seem obvious, but it’s much harder to take down a Star Destroyer if there’s a squadron of Tie Fighters and Tie Interceptors buzzing all over you.
In Fleet Battles, it’s pretty clear that you need to cull the enemy fighters first to increase morale and turn the tide of battle. However, campaign mode is very bad about pointing this out.
As a general tip, focus on enemy fighters first in any Star Destroyer encounter. Ties and turboslasers don’t mix if you’re playing as the New Republic, especially an A-Wing pilot.
Wait for Corvette capital ships in Fleet Battles
As you gain more morale in Fleet Battles, the tide of battle will turn. Every time you push the Empire back and begin to go on the offensive, a Corellian Corvette will spawn.
If you’re in anything but a Y-Wing, hang back and take out enemy fighters while the Corvette and allied bombers take down the shield. Once the shield is down, swoop in.
You can also hover in the Corvette’s shields for cover. Fly in, idle your engine to the Corvette’s speed, and fire off your primary and secondary weapons.
Take out turbolasers to make way for bombers
After the shields are down, Y-Wings are susceptible to turbolaser fire. Despite their hull strength, their slow engines can make them easy targets. No matter what ship you’re in, you can always swoop in and take out a Star Destroyer’s turbolasers in a quick strafing run.
Since attacks on Star Destroyers are multi-phased, it’s worth focusing on these if you can’t deal damage to the flagship’s subsystems. They’ll be gone for the next phase, making things easier.
X-Wing fighters can provide more sustained fire, but A-Wing pilots are especially susceptible to the Destroyer’s turbolasers and should quickly strafe and get out.
Practice against Star Destroyers
If you’re having trouble, you can go to the main menu and choose training. There are a number of options, including the option to practice your tactics against a Star Destroyer. Plus, you can try different ships and loadouts. It never hurts to make a few runs this way, especially to try different ships and loadouts.
There’s more moment-to-moment strategy when taking on one of the Imperial Navy’s most fearsome ships, but now you know the basics of how to destroy a Star Destroyer and kill the Empire’s chances of success. Just remember to be patient when going up against this fearsome flagship, and you’ll eventually beat it, flying away with a decisive victory.


Published: Oct 3, 2020 07:51 pm