
There are plenty of lethal machines you’ll go up against in Horizon Forbidden West, and one of the earliest well above your level will be the Slitherfang in the story quest Reach for the Stars. It’s a miniboss of sorts you’ll need to beat to finish out the mission.
If you’re wondering how to beat the Slitherfang in Horizon Forbidden West, here are some tips and tricks for doing so quickly.
How to Beat the Slitherfang in Horizon Forbidden West

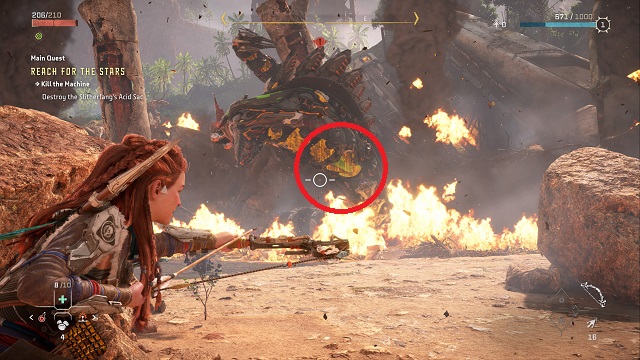
The Slitherfang is in a relatively small arena, where you’re hemmed in on both sides and the back, with the machine blocking your way forward. The fight begins with Aloy hiding behind one of the three rock outcroppings in the area. Use your Focus to scan the Slitherfang and find its “weak” point: the metalbite sac located on its abdomen below the earthgrinders on its neck.
It’s worth noting that the Notebook entry doesn’t designate this area as the Slitherfang’s weak point, but it’s where you’ll need to focus for this fight.
Before you do anything else, be sure to grab the healing potion and crafting parts in the crate behind the rock outcropping on the right.
Slitherfang Phase 1

During the first phase, the Slitherfang has two attacks. It rears back and spits acid in an arc, starting at its base and moving outward toward you. Aside from causing damage if it hits you, the attack also leaves little pools of residual acid for a short time that can cause damage.
It also has a lunge attack, where it thrusts forward from its position to the back of the area. This attack can break the rock outcroppings in the arena if you’re hiding behind them.
Between attacks, the Slitherfang will hover low above the ground. Aim your bow at its abdomen and slow down time. Look for the shield-shaped area beneath the earthgrinders. Shoot this twice.
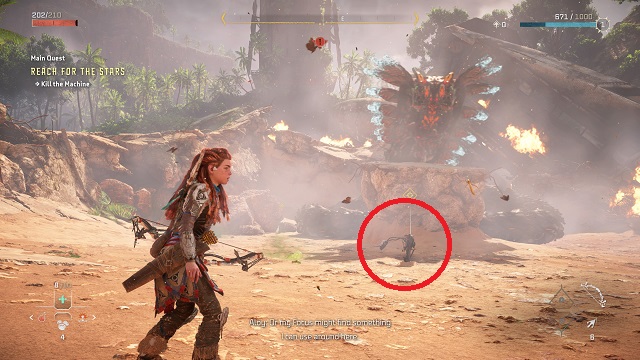
The Slitherfang will fall to the ground, with its body pointing toward the right side of the area, leaving its underbelly exposed on the left side. There will now be three canisters where the metalbite sac once was. Destroy these three canisters as quickly as possible.
If you don’t destroy all three here, the Sliltherfang will rise again, wrapping itself around a column on the left side of the arena, making it harder to hit the canisters on its belly.
It will also add a sweeping attack to its repertoire that reaches from one side of the arena to the other, smashing any of the rock outcroppings that are left. If this happens, stay in the back when the Slitherfang rises on the left side of the area. However, its own sweeping attack will stun it for a brief time, again leaving the canisters exposed.
Sometimes, the Slitherfang will lunge, again giving you an opportunity to shoot the canisters. Even less frequently (it only happened to me once in three fights), it will also use a sonic attack that causes Aloy to cover her ears and slow down, though you can easily walk away and roll out of this.
If you’re having trouble in this section, remember that the Slitherfang is weak to Frost damage. Use your Frost Blastsling to lob Frost Bombs at the machine’s head and chest to inflict Brittle, which will also stun it, allowing you to get some shots in and break off some valuable components.
Slitherfang Phase 2
Eventually, you’ll do enough damage to the Slitherfang and a short cutscene will play. The machine will then smash all of the rock outcroppings and enter the arena. Several Coil Blasters will appear as debris in the area; the closest is to you will likely be the one in the middle on the left side.
These are heavy ranged weapons (similar to a mini-gun in size and heft) that can cause substantial damage to the Slitherfang’s earthgrinders, drastically lowering the length of this part of the fight. There is also at least one other Coil Blaster behind the Slitherfang if you run out of ammo in the first.
The Slitherfang has two primary attacks in phase 2: an electrified tail smash and a belly flop (at least in my battles with it). Its tail will point straight up and wiggle before it shoots forward and smashes into the ground, releasing electricity in a relatively small area. At some points, the Slitherfang will burrow into the ground and reappear before slamming its body onto the ground. Both of these can be avoided with a well-timed roll.
What’s more, you can shoot the tail to remove the weapon, making it obsolete.
Keep whittling away at its health (which should be very low at this point), and that’s how you beat the Slitherfang miniboss in Horizon Forbidden West during Reach for the Stars. You’ll reach Level 2 and get a skill point after the confrontation.


Published: Feb 17, 2022 06:02 pm