When it comes to collectibles, Cliffside Ruins is perhaps the most confounding location in all of God of War: Ragnarok. To get everything here, you’ll need to leave the area completely, venture (very) briefly through another, and completely explore a third. Luckily, this sub-region, Goddess Falls, and The Veiled Passage are all close to one another. If you’re here wondering how to get the Cliffside Ruins chest, which is a bit pesky, we’ve got you covered below.
Once all is said and done, here are the collectibles you can expect to find in Cliffside Ruins:
- x1 Nornir Chest
- x1 Favor (Conscience for the Dead)
- x1 Lore Marker
- x1 Legendary Chest
- x1 Lunda’s Broken Bracers
Vanaheim: Cliffside Ruins Collectibles Locations
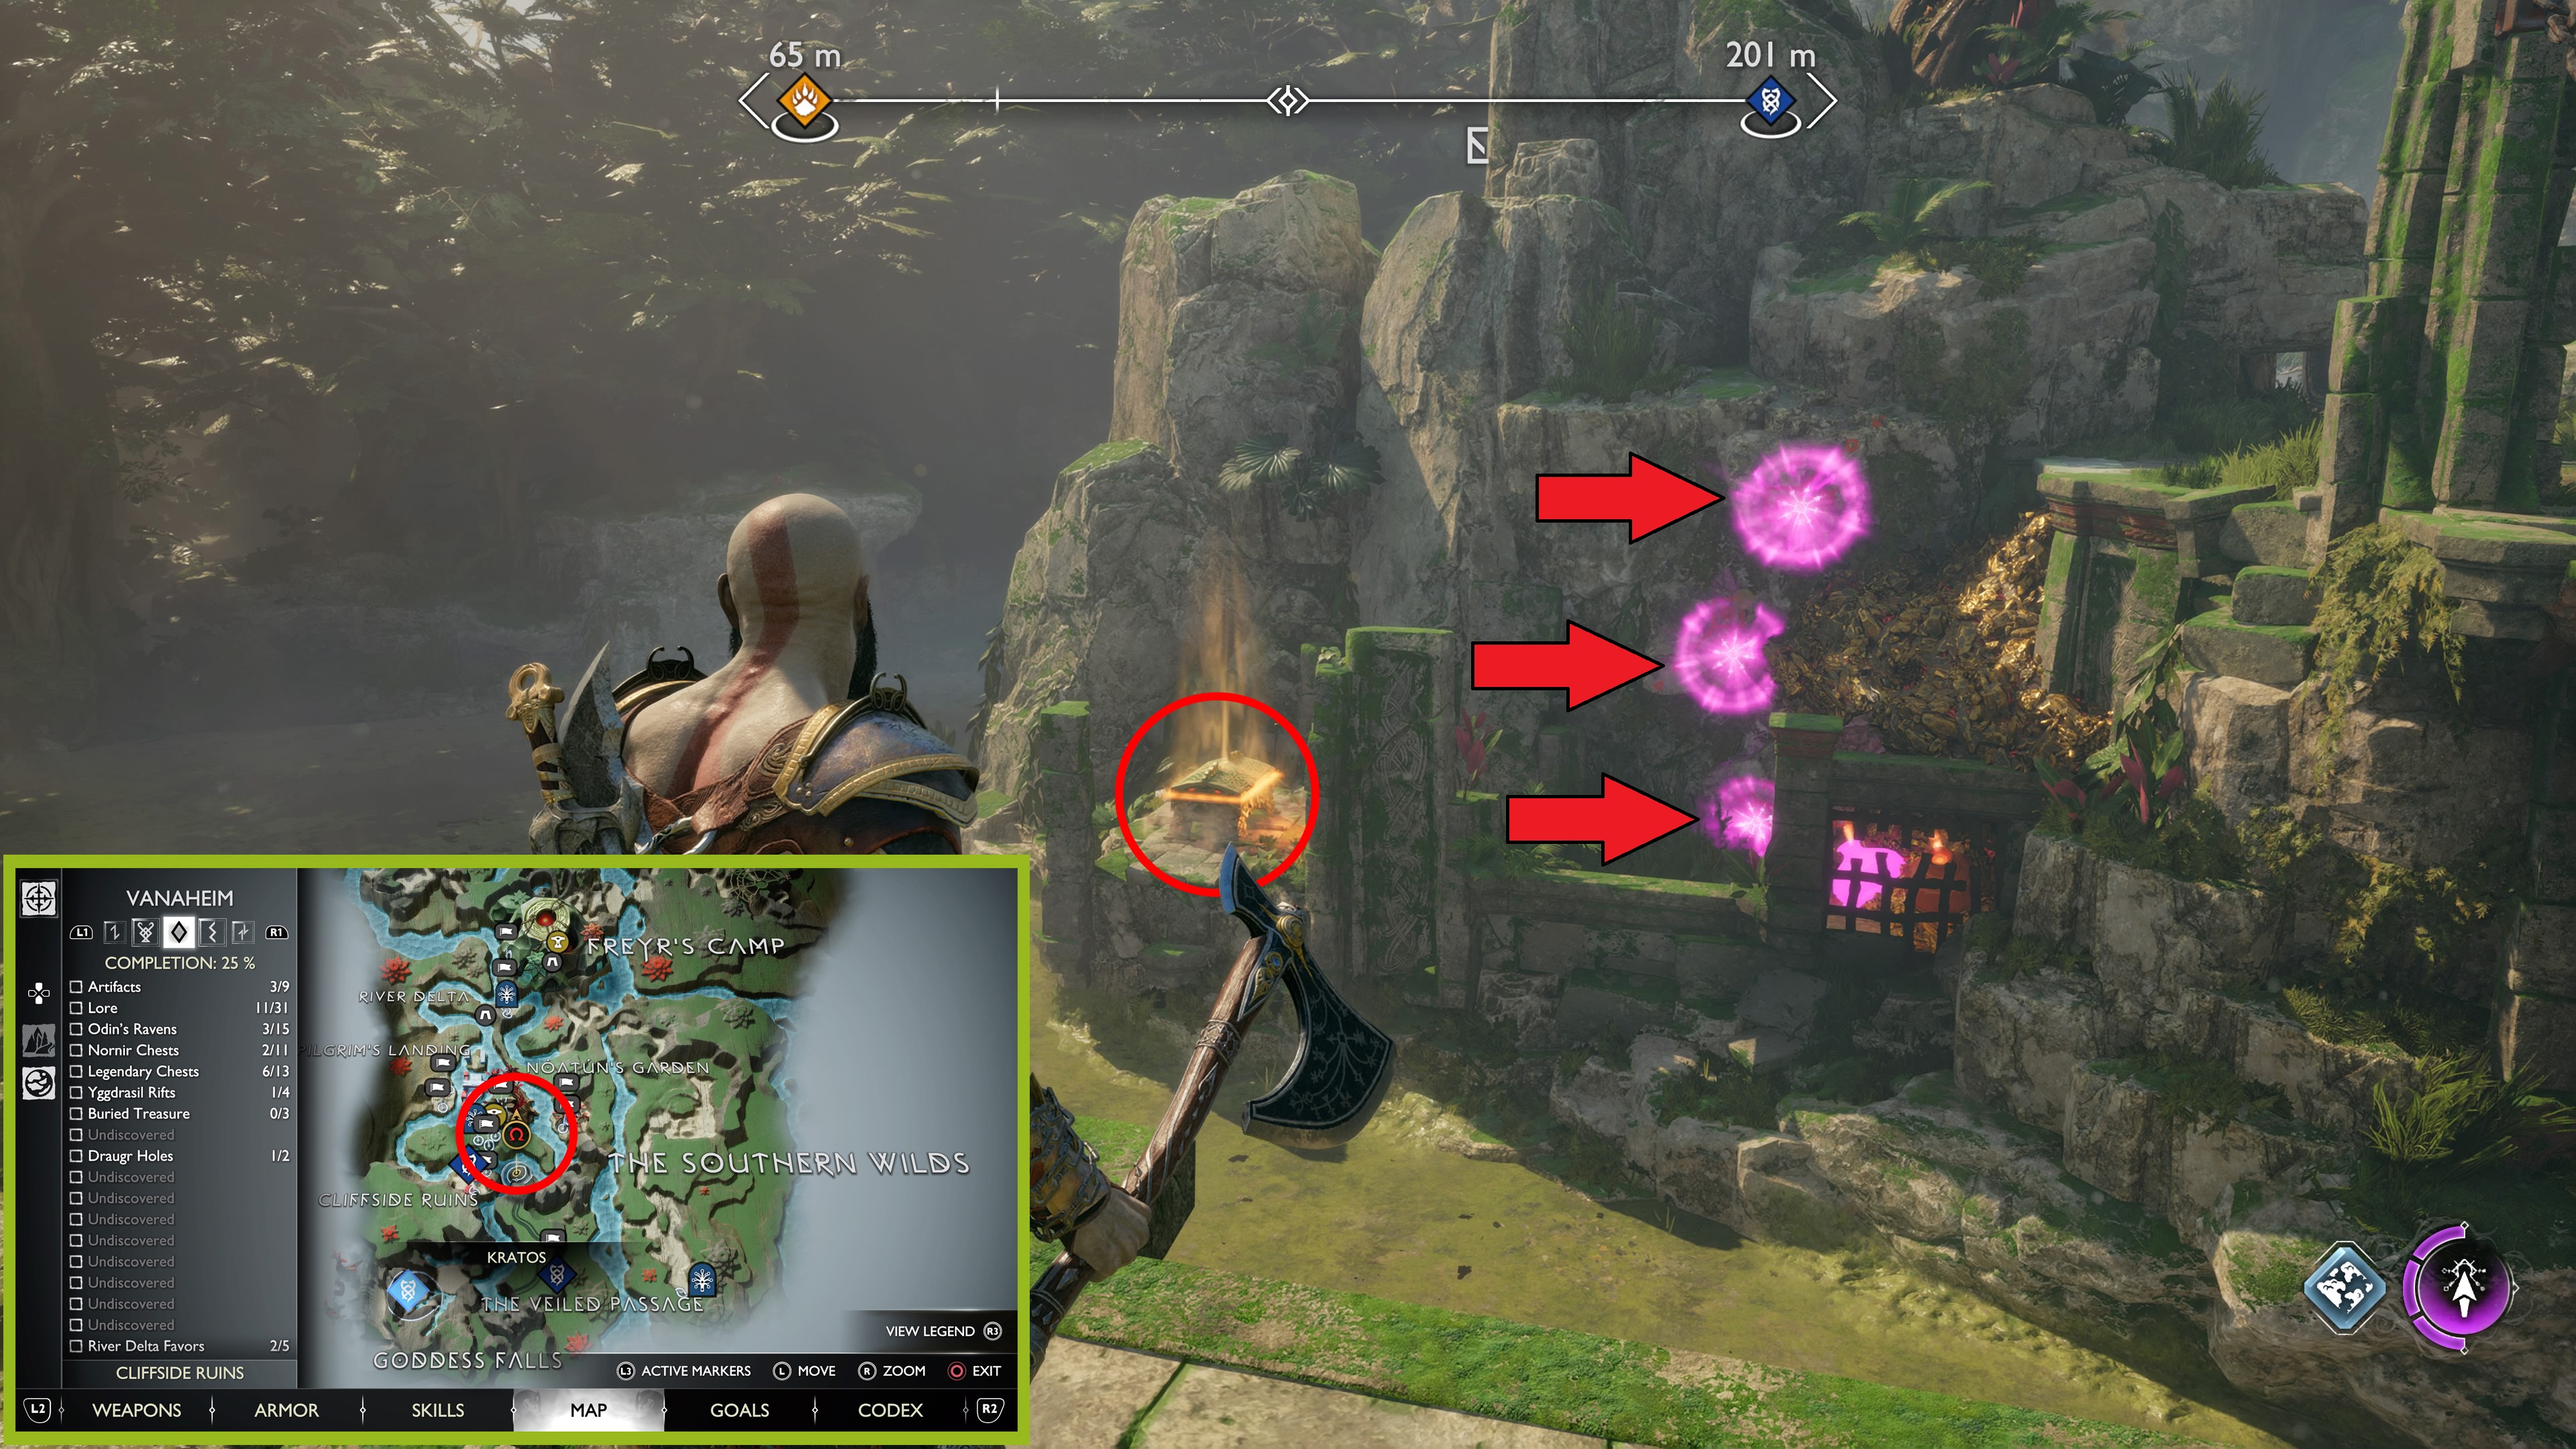
Nornir Chest
- Reward: Horn of Blood Mead Rage Increase.
Land on the beach across from Brok, and exit the canoe. Defeat the enemies, and go to the back (southwest) portion of the area. The Nornir Chest will be beneath two ruined columns in the cliffs.
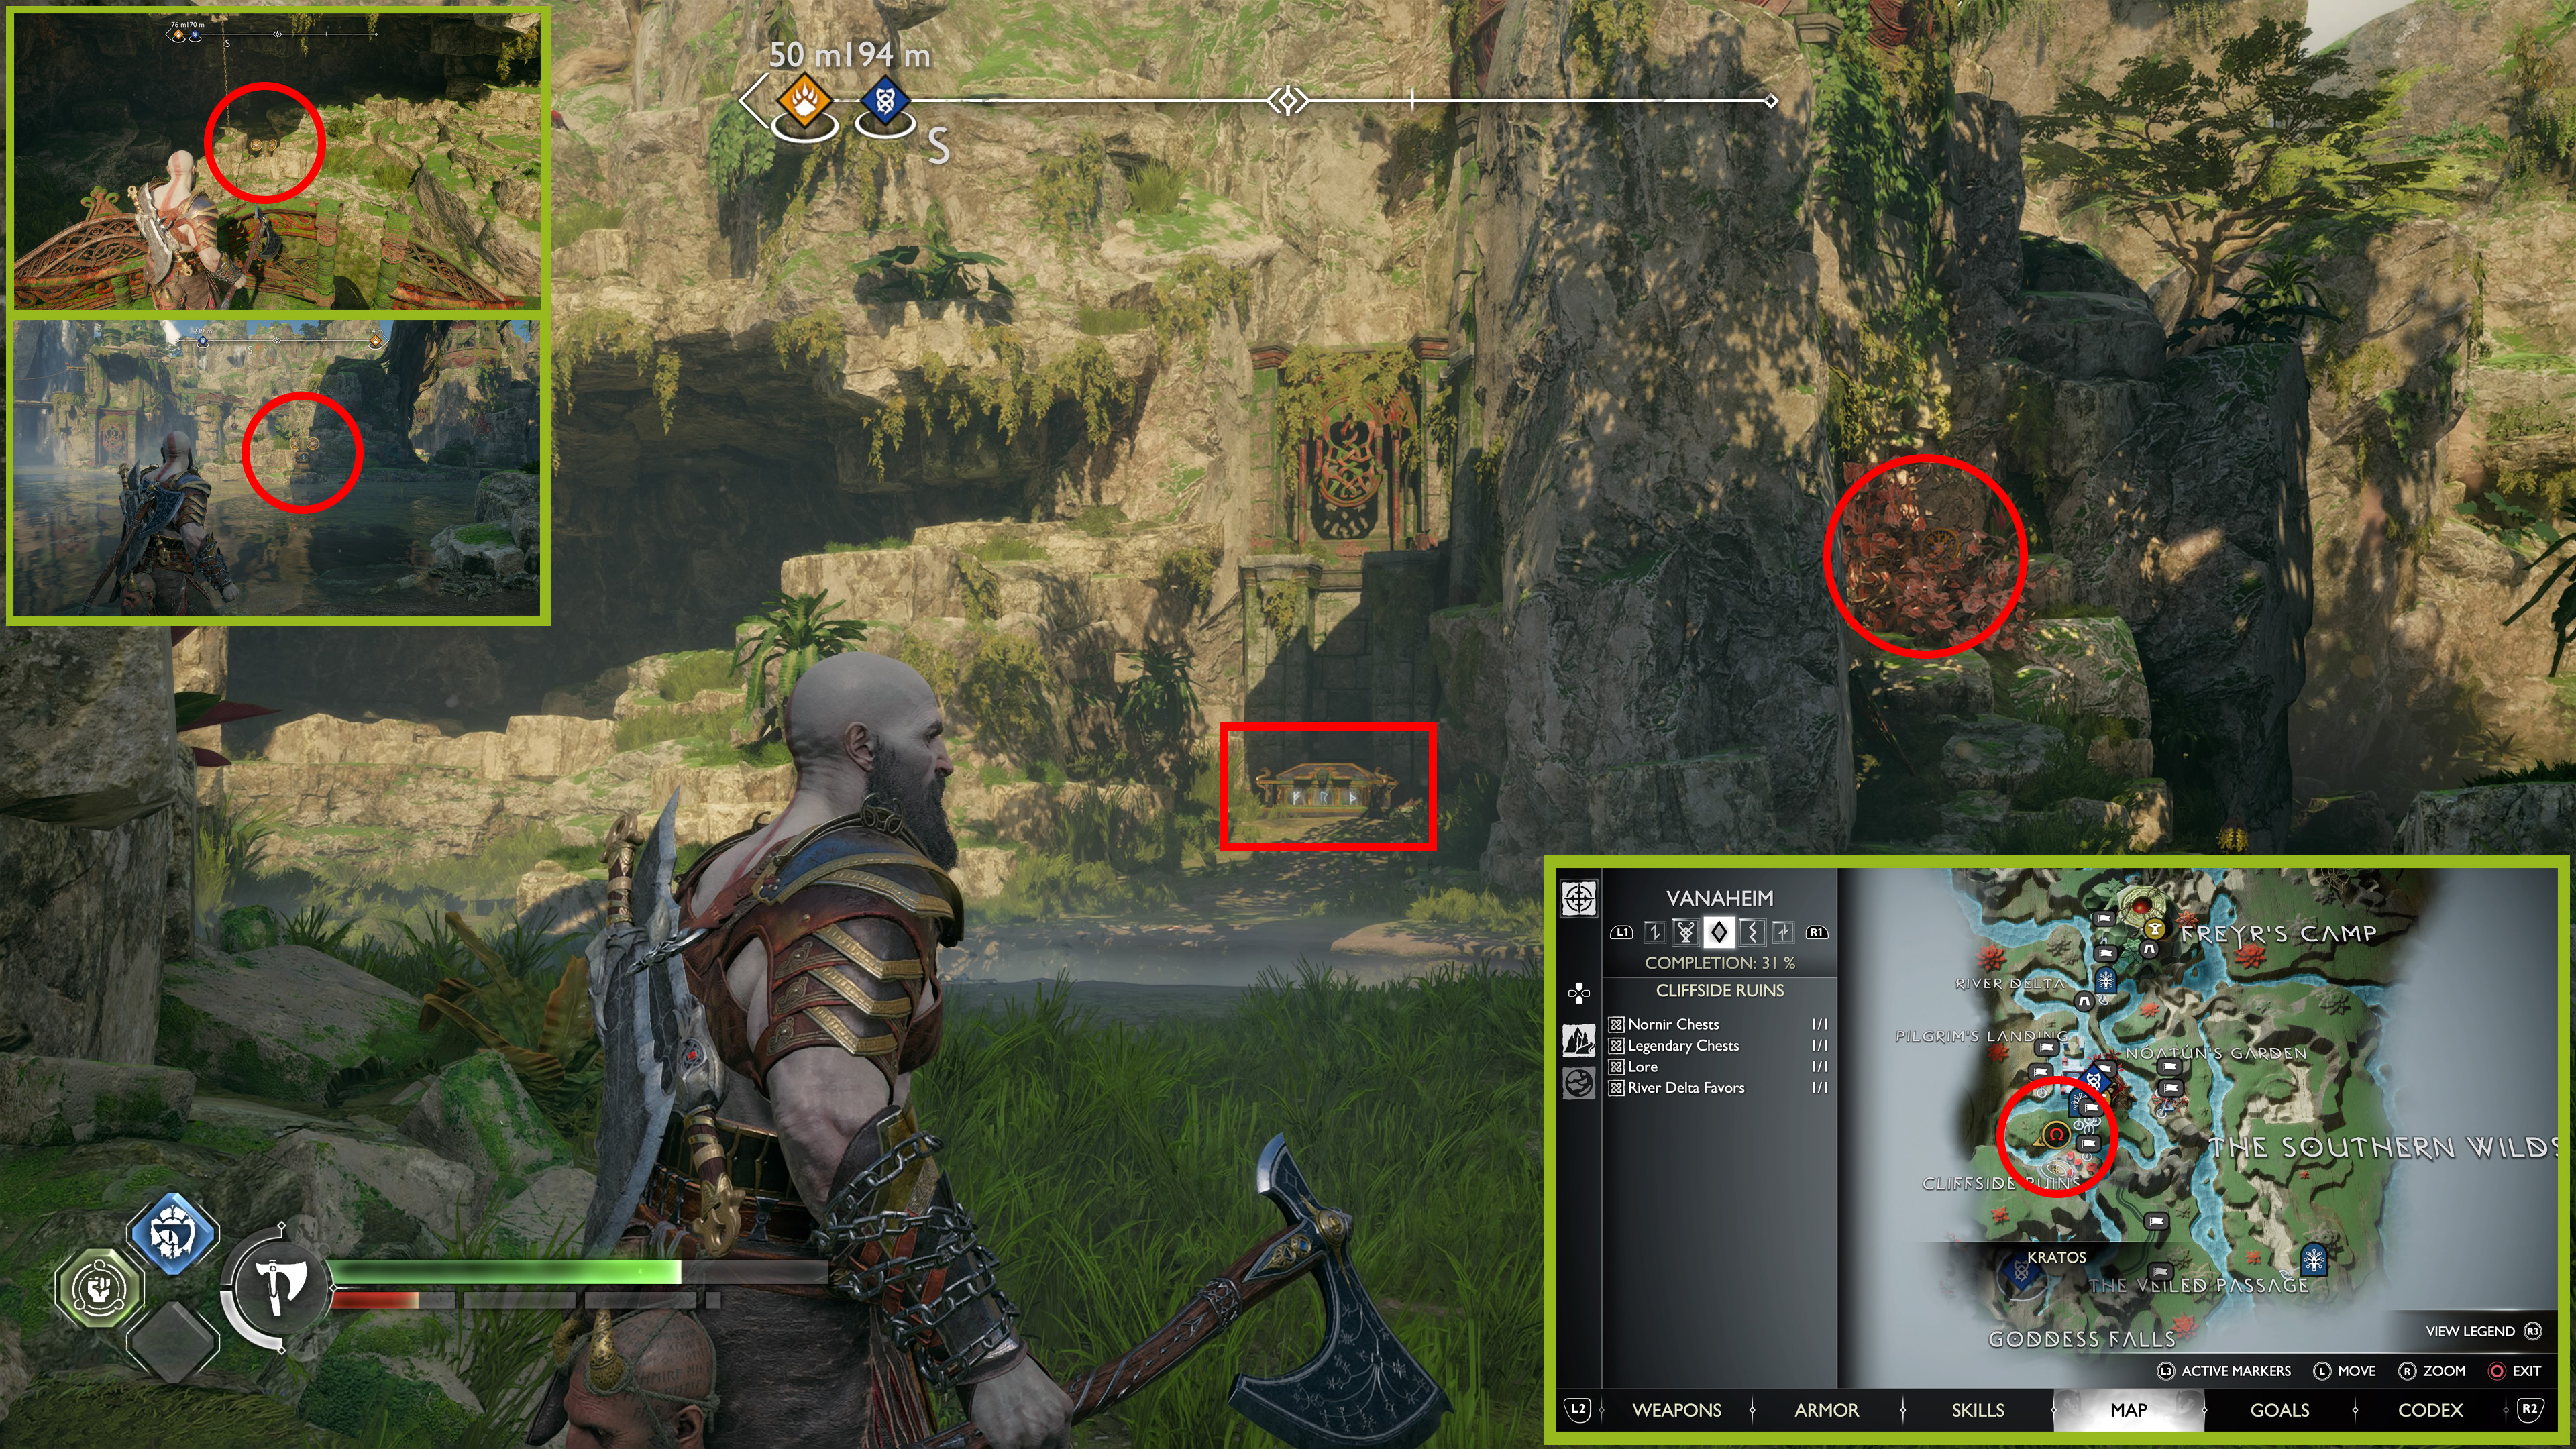
- Rune Turnstile 1: The first Rune Turnstile is to the right of the Nornir Chest, on the other side of the thick cliff wall. It’s covered in vines, and placing Fraya’s Sigil Arrows can be a pain, but it can be done with three. Try to position one at the base of the vines, then one in the middle of the rock directly underneath, then the last arrow near the base of the rock directly underneath that. Once you’ve cleared the vines, hit the Turnstile on the right once.
- Rune Turnstile 2: The second Rune Turnstile is hidden in the rocks behind the rocks to the left of the Chest. Look up, and you’ll see vines covering a chain near the spirit that gives you the Favor (detailed below). Climb up the wall to the left of the spirit, then go left and jump to the platform. Jump another gap, then go left to jump a third. Go ahead and knock the chain down, then look down into the rocks. Hit the Turnstile on the right once. (Also, go ahead and grab Lunda’s Broken Bracers while you’re up here; more below).
- Rune Turnstile 3: Get in the canoe, and go to the beach with Brok and Lunda. Turn around and face the Cliffside Ruins, and you’ll see the final Turnstile on the right amongst some rocks. Hit it once on the right.
Favor (Conscience for the Dead)
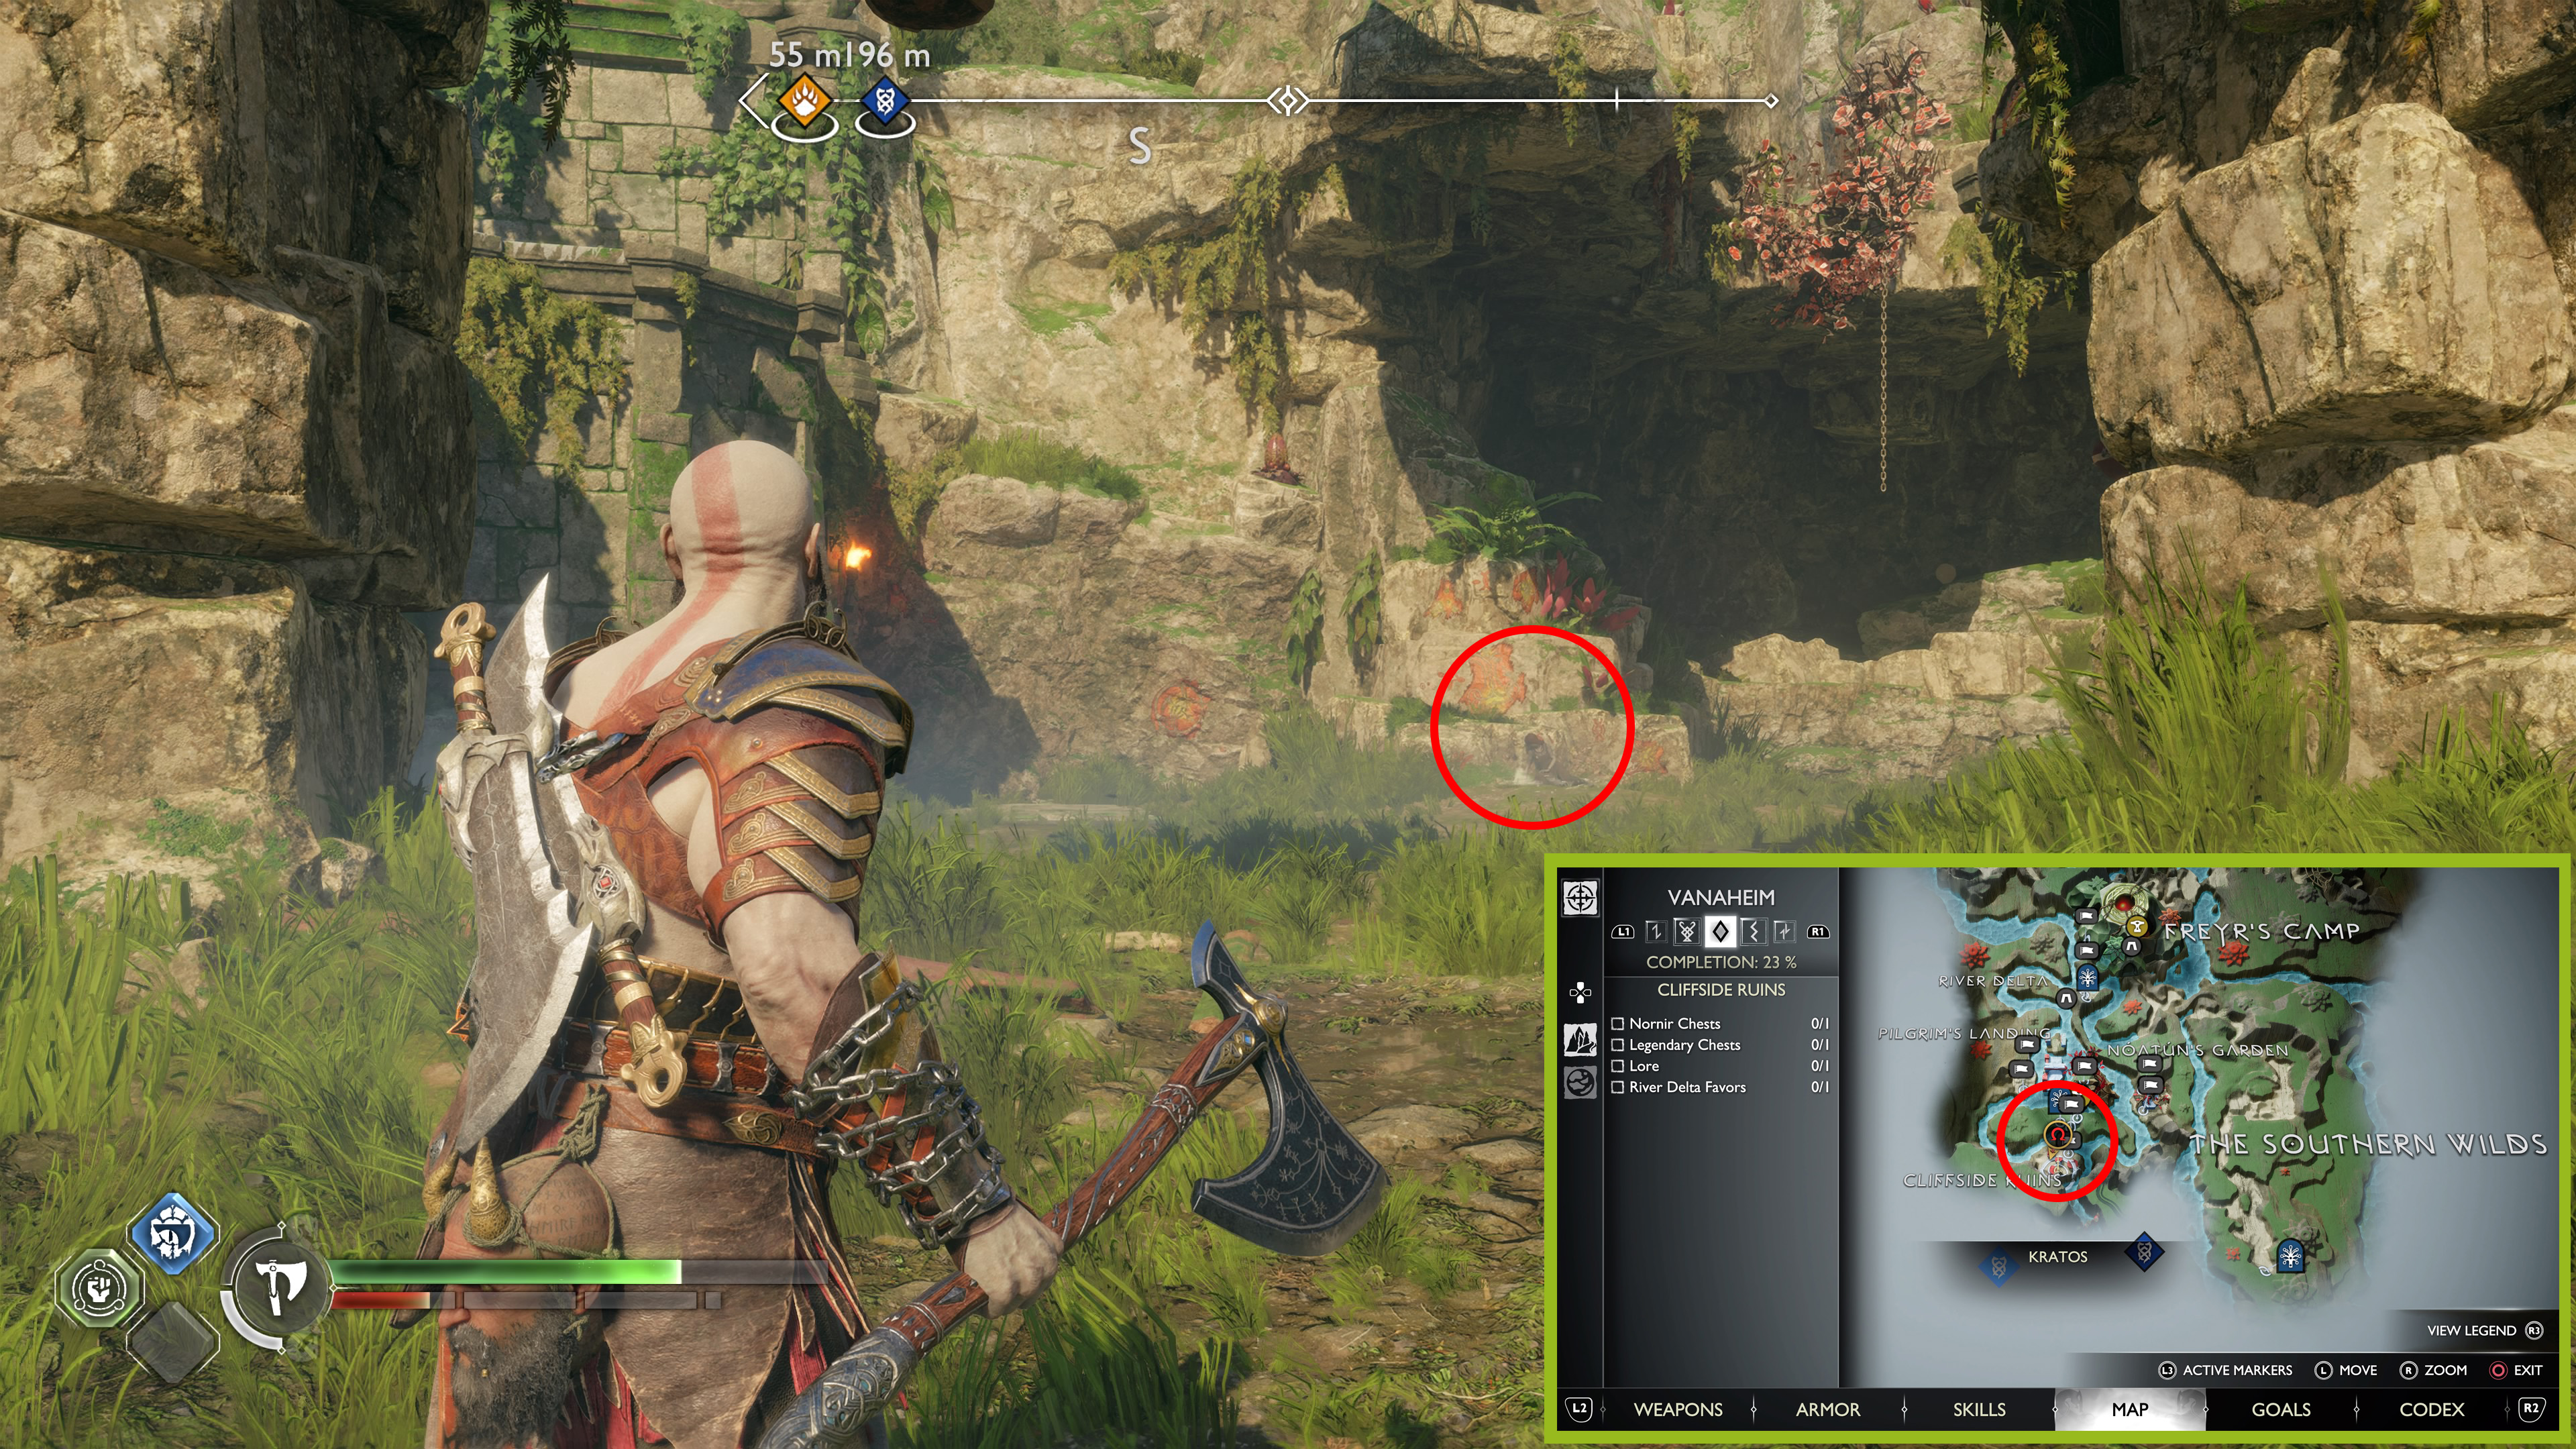
- Reward: Svartalfheim’s Honor Amulet Enhancement.
Speak to the spirit along the painted cliffs in the southeastern portion of the area, to the left of the Nornir Chest. You’ll need to defeat enemies in The Veiled Passage to complete this Favor.
Lunda’s Broken Bracers

Climb the wall to the left of the spirit that gives you the Favor, and follow the path left a short distance. Go into the opening in the wall on the left when the path turns right, and open the red loot chest for Lunda’s Broken Bracers.
Lore Marker (Call to Arms)
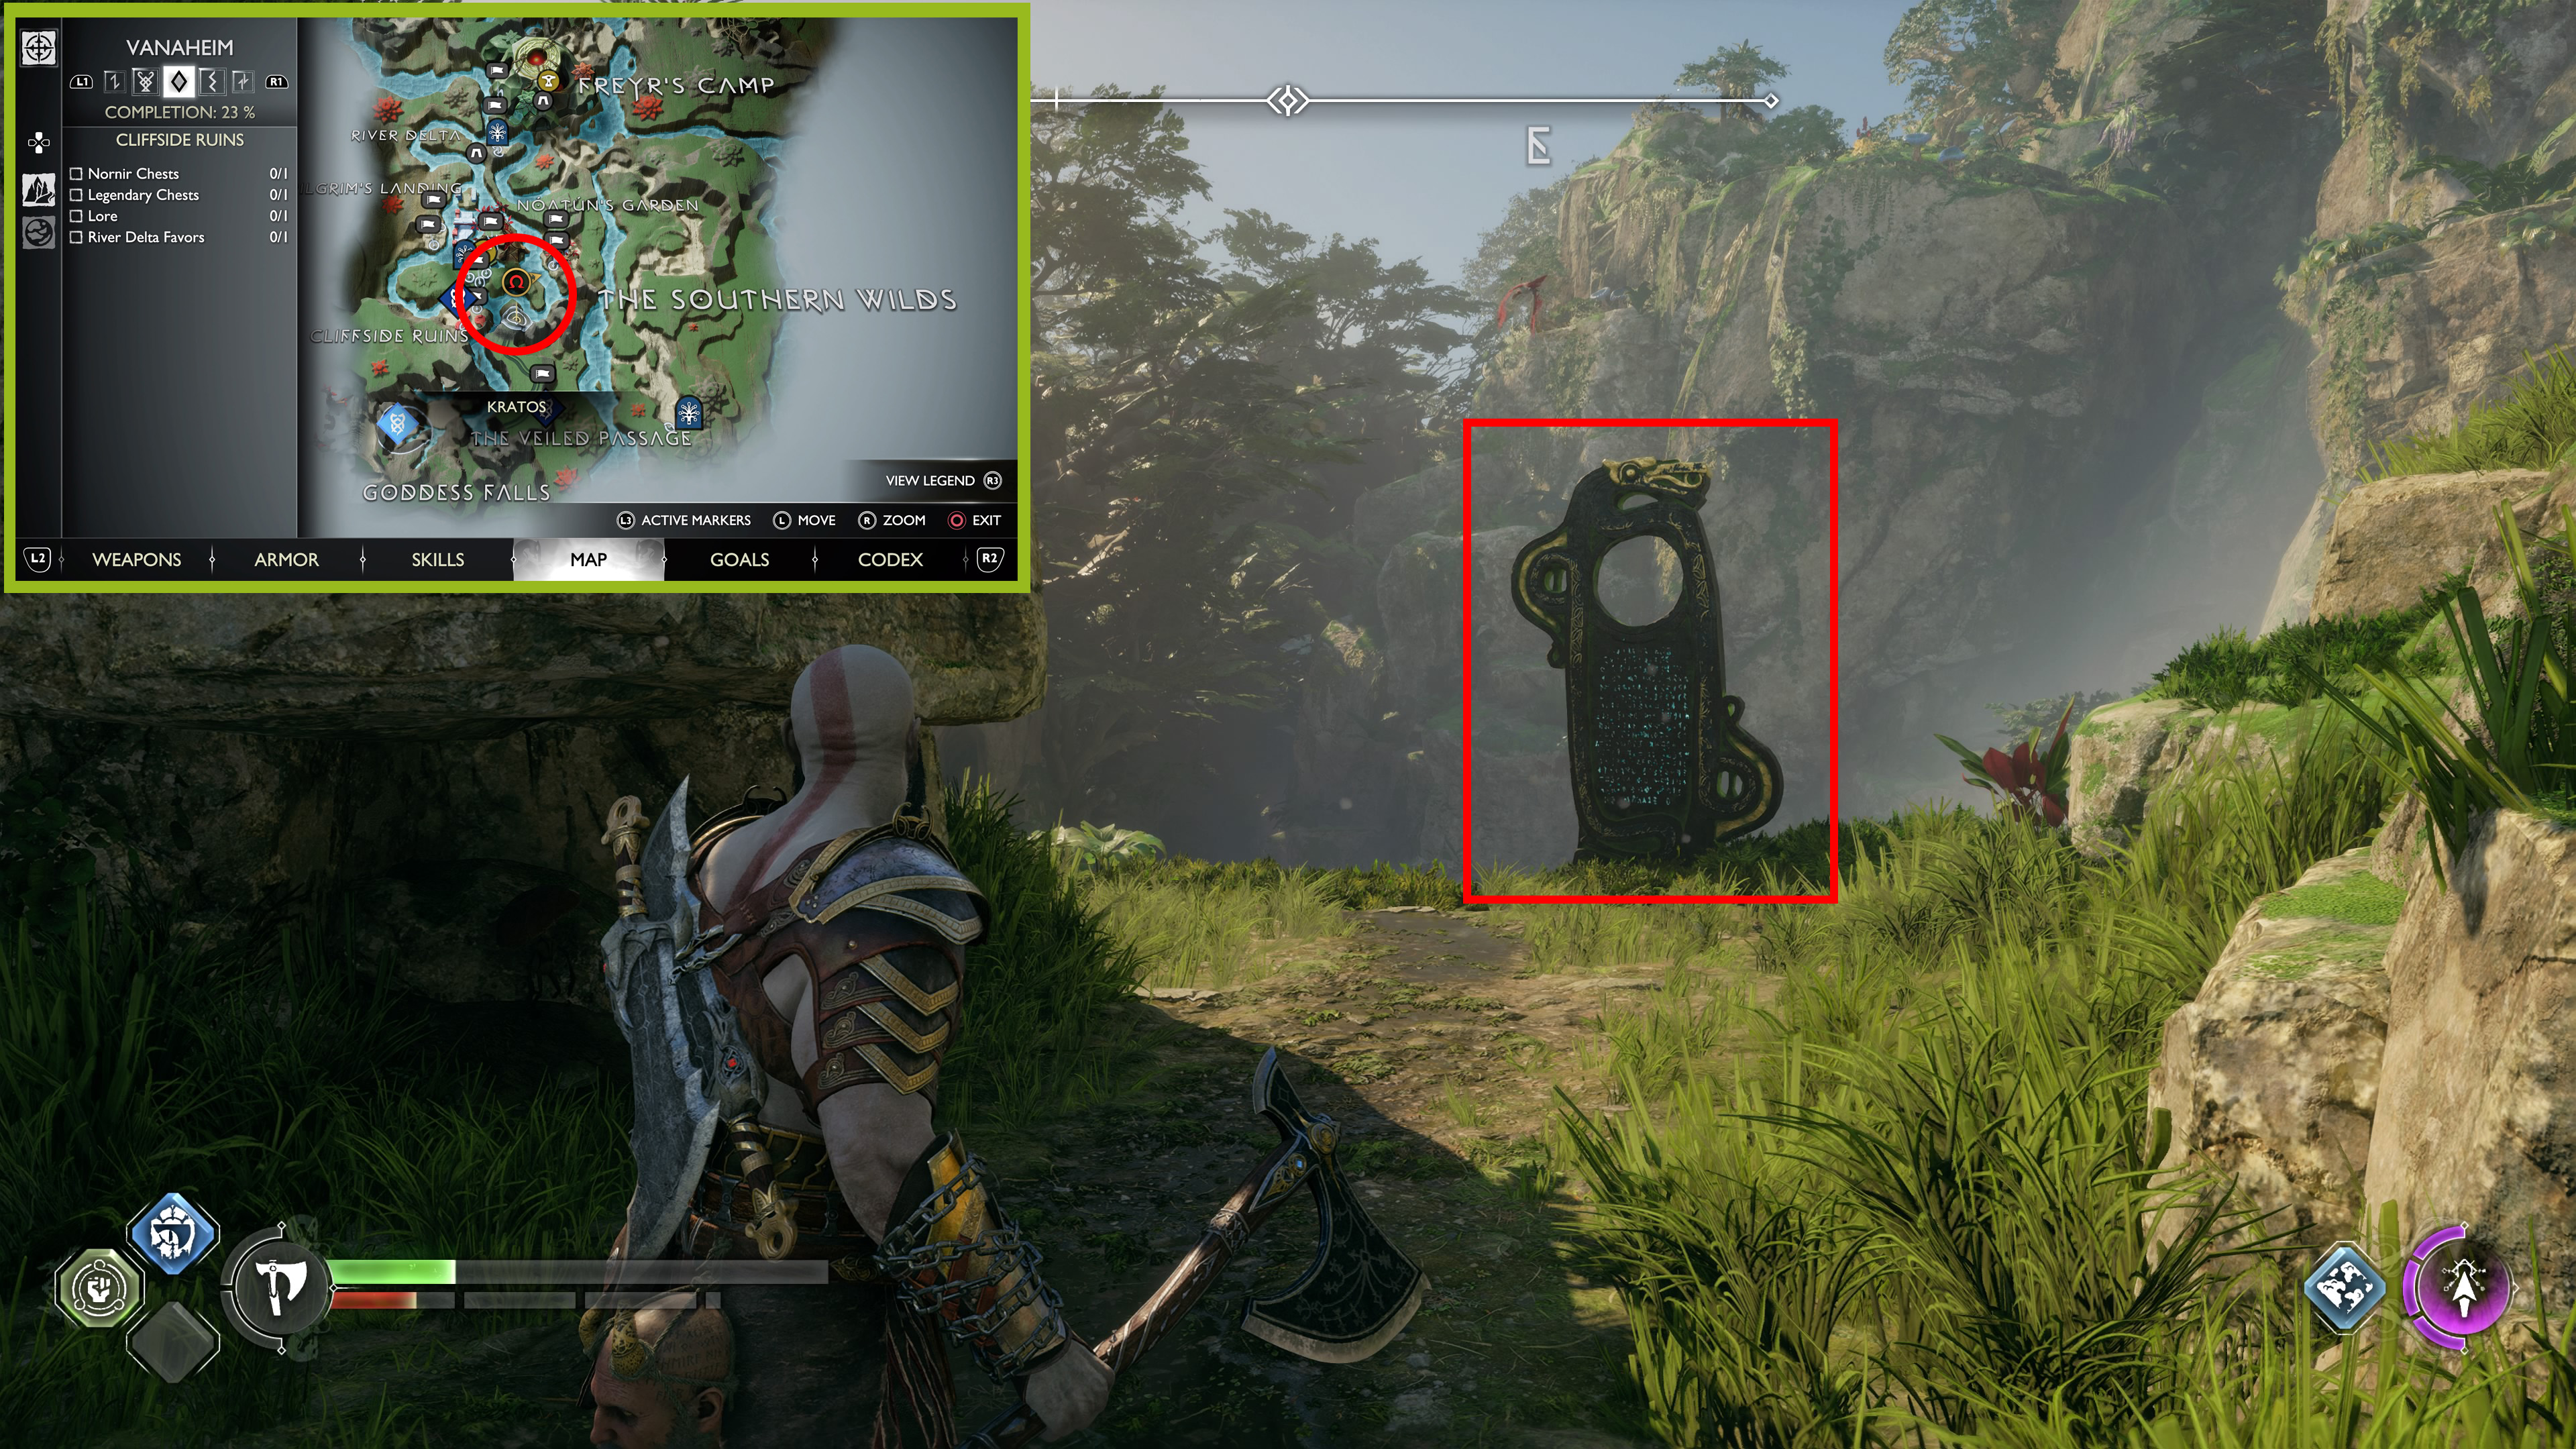
From the red loot chest, drop back down, then climb the chain you knocked down after interacting with the Nornir Chest Turnstile. Go left at the top, then interact with the Blue Rune plate at the end of the path; Freya will open a new waterway on the river.
Get back in the canoe, and go south (double back from the beach along the right side) to find it. When you enter Goddess Falls, and the text appears on-screen, turn left immediately to go through a passage that leads back under the rocks (you’ll see ruins and columns in the painted rock on the right side as you go into the cave). This is The Veiled Passage, and we have a full walkthrough collectibles guide for this region, as well. Read that as you go.
Go past the first beach for the area’s Nornir Chest, and get out of the boat at the second beach further in. Break through the palisade wall on the left side, destroy the poisonous plants, and climb the wall up. Follow the path all the way around until you climb down a chain. Turn left at the bottom for the Lore Marker.
Legendary Chest
- Reward: Mists of Helheim Heavy Runic Attack
From the Lore Marker, turn around, and go back to the chain. To the right and down, you’ll find the Legendary Chest, but you’ll need to remove the gold barrier blocking the ledge to get to it. Lower the bridge, and defeat the enemies, then go to the other side and right toward the zip line leading down to Brok and Lunda at the beach.
Don’t use the zip line; instead, turn right to face the Chest. Place one Sigil arrow each on the red markings on the rocks. Then go back to the ledge overlooking the Chest and use the Blades of Chaos to ignite the Sigil arrows to blast away the barrier. Jump down and open the chest.
And with that, you finally have all of the collectibles in Vanaheim’s Cliffside Ruins — even the pesky Legendary Chest. We have plenty of more God of War: Ragnarok walkthroughs over on our tips and tricks page for the game.


Published: Nov 16, 2022 02:15 am