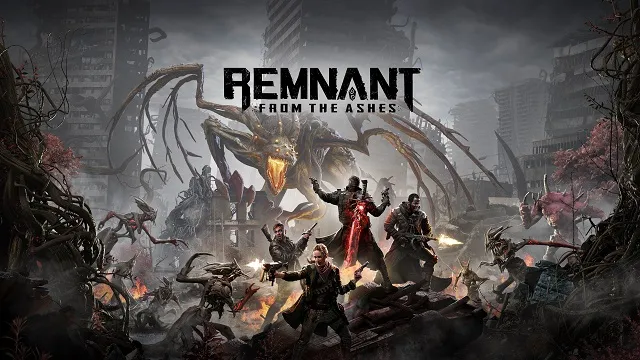
You never know which boss or bosses you’ll encounter in a solo or multiplayer playthrough of Remnant: From the Ashes. This game randomizes the mobs and bosses you encounter. No matter what nightmare you square off with, though, knowing how to beat each boss gives you a head start.
If you need a little help in taking down these foes, you’ve come to the right place. This is a complete list of all the bosses you can encounter in Remnant, and its DLCS, as well as a few tips for taking them on alone or in co-op.
Earth Bosses
Gorefist
A melee-only boss, you’ll need good dodging and situational awareness to help in this fight. Gorefist’s attacks are fairly easy to dodge, but all it takes is one misstep and you’ll be starting at the beginning.
Try to keep a mental timer in your head, as exploding minions spawn at fairly random intervals. If you blow them up next to Gorefist, they’ll stagger it, giving you an opportunity to get some free shots in.
Shroud
The Shroud boss has two main attacks: launching high-speed projectiles at you and summoning explosive clouds near you. For that reason, the key to this fight is to never stop moving. Be watching for the red cloud to signal his teleportation, and never stop running around. Kill Shroud’s minions and aim for its head.
Mangler
Fast weapon changes are the key to this boss. You’ll want to use your melee attacks and pistol to take out Mangler’s minions, all while dodging its attacks and using your long arm for heavy damage against the boss itself.
About halfway through the fight, Mangler transforms into a bigger… Mangler. The same strategy applies: keep a lookout whenever it flies around the arena and keep plugging away whenever you have an opening.
Brabus
Brabus looks like he’d be right at home in Mad Max, and he’s a pretty tough nut to crack. Learn the timing on this boss’s reloads, and make sure you can always see him — his shotgun does a ton of damage if you don’t time you dodge correctly.
Try to take out his minions and exploit his constant cover-seeking. You can sometimes get Brabus to crouch behind a trash can while you empty clip after clip into him.
You can avoid the fight altogether if you’ve found Mud Tooth’s pocket watch. Brabus will trade you the Bandit’s Armor set if you give him the pocket watch (although you may not want to, as the pocket watch is very strong).
Singe
Keep mid-distance from Singe and bring an ammo box or two into the fight. Dodge sideways to avoid fireballs, and dodge backward to get out of range of their melee and the wide, sweeping flame attack. Don’t dodge blindly, as the oil slicks around the arena go up in flames and will set you on fire.
Take out Singe’s minions when they appear, always keeping the beast in your sight so you can dodge its fireballs. Hit Singe’s chest when it rears up — it deals a ton of damage.
You will receive a bonus item if you target Singe’s tail and destroy it before you kill the boss himself.
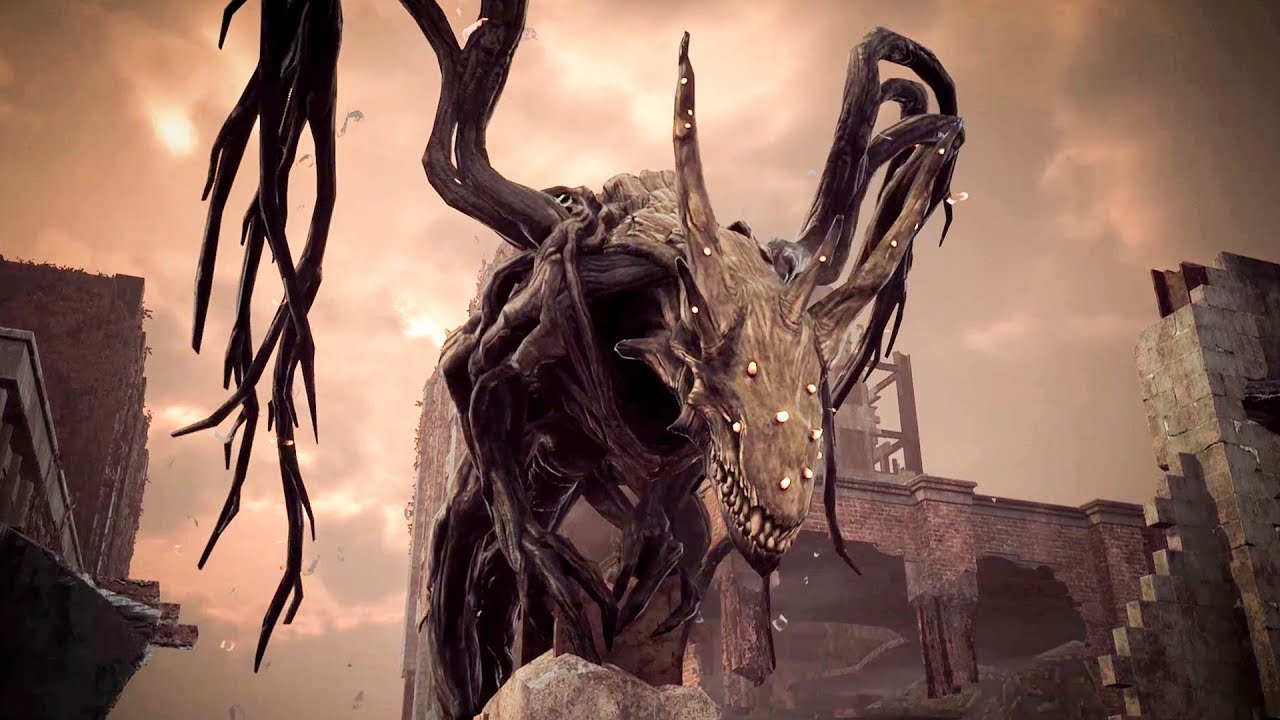
The Ent
This massive tree beast boss is extremely slow but powerful. Dodge its shockwave attacks and keep your distance. Try to angle yourself so that you can hit its back when it throws shockwaves at you. If it fires projectiles in the air, run straight sideways to avoid the attack. Deal with its minions and keep an eye on the Ent at all times — one hit at the wrong time can be enough to do you in.
You can also target the Ent’s leg until it is destroyed, crippling the boss. It will still shoot missiles at you, but its back will be exposed and you should be able to get plenty of strong shots in a hurry. You’ll unlock a bonus item if you take the Ent’s legs out.
Riphide
This annoying little tree seems like an easy fight, but if you don’t come properly equipped, you are going to be in for a world of hurt. By the end of the fight, Riphide splits multiple times, and there are eight of the same enemy running around the arena at once. Come equipped with a strong weapon with good range.
Riphide’s two main attacks are a javelin toss and an energy pulse. However, each Riphide in the fight will perform the attack in succession. You’re going to need supreme awareness to do your best damage.
Don’t dodge backwards when the energy pulse hits, as you won’t move far enough to avoid the next. Try to burst down one after another to give yourself more breathing room, and interrupt Riphide’s healing by shooting it in the central part of its mass.
Rather than studying animations, you’ll want to memorize the audio cues for this fight. Since there are so many enemies, you won’t often see what’s coming, but you’ll always hear it.
Rhom Bosses
Raze
Try to use the cover in the arena as best as you can while you fight this boss. Raze shoots a lot of fireballs that cause the burning status effect. Sometimes, Raze will focus on one player and attempt to chase them down. Keep moving and try to use the pillars to block his attacks.
Take out Raze’s minions when it disappears, and target the spots on its body that glow yellow. Raze isn’t that hearty, so be patient and pick your spots.
Scourge
The key to the battle with Scourge is trying to avoid shooting the boss in the head. Every time you target Scourge’s head, it fires a hive out at you. Aim for the body, and try to use heavier damage weapons instead of heavier rate of fire weapons in case you cant retrain yourself from headshotting your foes.
Otherwise, learn Scourge’s animations (its attacks have a long setup) and be prepared to run if it starts launching several hives in a row.
Maul
There are two ways to take out this boss.
- For the first, you’ll want a gun with a high rate of fire. There are a lot of weak minions, so being able to quickly switch between targets is essential. Dodge the pack leader’s charge attacks and take shots at it when it howls. Kill the minions and keep out of corners. You can get stun-locked if you aren’t careful.
- Alternatively, you can use a high damage weapon like a shotgun to headshot the Houndmaster a few times. This will break his control over the beasts, who will turn against him and kill him. You’ll receive a different item reward for defeating Maul this way.
Shade and Shatter
A boss double feature! Shade will hit you from afar with projectile attacks, while Shatter will chase you around and attack with powerful melee strikes. You’ll want to concentrate on taking one foe down at a time.
Shade is usually the better option, as Shatter’s attacks are generally easier to watch for and avoid. When the two create a force field and summon minions, keep moving and take the minions out, then concentrate your weapons on destroying the shield. If you have a weapon with a decent spread, you can hit both bosses at once when the shield goes down.
Ancient Construct
The Ancient Construct is only found if you completed the Maul boss by attacking the Houndmaster and obtaining the control rod. If you have the item in your inventory, head to Wud’s workshop and use it there to activate the boss.
You’ll want items that can stop radiation damage in this fight. Identifying the Ancient Construct’s attacks is key:
- Dodge the radiation ball and charging attacks sideways
- Dodge the attack from below backward
- Try to take out the minions he summons as quickly as possible
Ancient Construct’s minions are the real terror in this fight. If you don’t take them out quickly, they will drain your health in a hurry.
The Harrow
This boss is not quite as difficult as it seems if you remember a few key pieces of information.
- Do not leave the main room. It seems counter-intuitive, but there are a ton of minions that swarm this fight, and the narrow hallways can get you surrounded and killed.
- Dodge toward The Harrow. Its attacks are fairly easy to spot, and its animation takes a long time to go through. Dodge toward and past it, then shoot it in the back. Use a weapon with a high rate of fire when the minions start spawning and get damage in when you can.
You can shoot The Harrow in the legs a few times to knock it down, then run behind it and grab an uncraftable melee weapon called the Lost Harpoon.
Claviger
Another boss that isn’t too difficult once you get a sense of the strategy. Claviger’s projectile attacks are fairly slow, meaning you can essentially just sidestep while firing on the two shield generators off to its sides. Try to keep Claviger’s minions between you and it. It will kill several of them with its projectile attacks.
In Claviger’s second stage, try to use any cover still in the arena when it unleashes its beam attack. Keep a middle distance, take out its shield generators whenever they return, and use high-damage weapons.
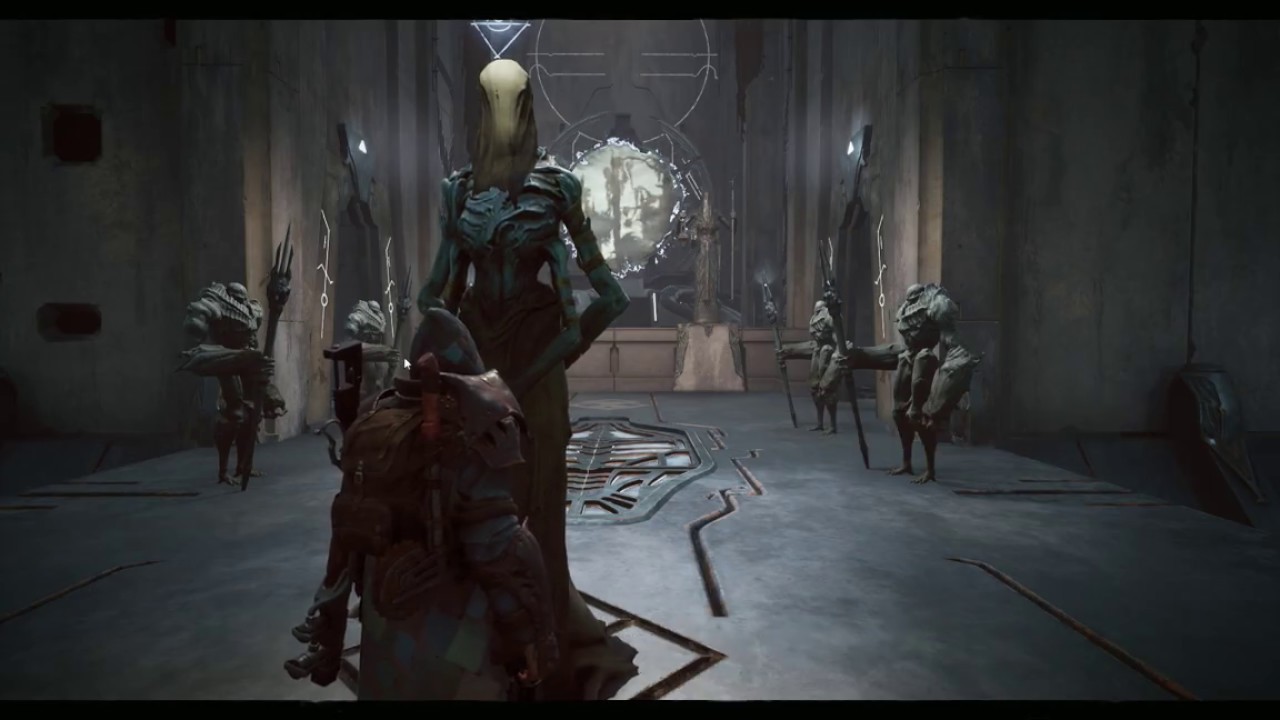
The Undying King
You don’t have to fight the Undying King; speak with him and give him the Guardian’s Heart to avoid the fight. Just know that you then will not be able to give the Guardian’s Heart to a different NPC who has some strong goodies for you.
When the fight begins, if you so choose, prioritize the boss’s four guards. Keep your distance, as you’ve encountered these foes before and they are deadly at close range. After the guards are dead, focus on the King.
When the King attacks with his sickles, try to roll toward and past him. Take out his allies and keep shooting him whenever you can. When his health hits zero, he’ll regenerate a bit and summon one last group of allies. Make sure you’ve healed up as best you can and are prepared for the final onslaught. This is one of the tougher fights in the game.
Yaesha Bosses

The Warden
The Warden can do damage from almost any distance, so keep your eyes on it at all times. Dodge its spear throws, and either try to kill it quickly before its minions add up, or take out the minions as they appear and play it a little more patiently.
Status effect mods, like radiation, work wonders on this boss. You can also target the bells that summon minions after it throws them. If you’re quick, destroying the bell will hurt the Warden’s defense and you can deal massive damage against it.
Stormcaller
This boss has a ton of ranged attacks, but it is still probably easier to fight if you keep your distance. The lightning orbs it throws at you are fairly slow and can be sidestepped while you continue your barrage if you have a decent distance between the two of you. Stop aiming down the sights when Stormcaller summons lightning above your head: you’ll need to move fast to keep from being stunned and possibly overrun by minions.
Stormcaller fights in a massive arena, so keeping on the move can kite minions while you concentrate on the big bad.
Scald and Sear
Another double trouble boss! Scald is the flyer, and you’ll probably want to defeat it first. Move to the upper level and move sideways whenever Scald summons fire below you. Keep moving and take out minions as they approach. Especially with two bosses to deal with, it’s easy to get cornered and overwhelmed.
Once Scald is down, head to the lower area to battle Sear. Try to get to a close-mid range and dodge sideways repeatedly whenever Sear starts launching fire attacks. Dodge enough and you’ll have several openings to pump damage into it.
Onslaught
Onslaught’s teleportation can make it difficult to keep track of. Try to keep a relatively close distance, as it doesn’t teleport as much if you do.
You’ll want to dodge backward from most of Onslaught’s attacks unless he takes to the air. When he does, move sideways to dodge the leaping strike. Onslaught’s normal attacks are fairly slow, so try to goad it into swinging at you. Kill Onslaught’s flying minions and keep on the move.
Totem Father
This boss is actually not too bad if you know when to attack and when to play defense.
In his first phase, he will launch boulders or other projectiles from his columns. When he is up top, that is the best time to damage him. Aim for the head for critical hits. When Totem Father jumps down, he will summon a totem. Destroy the totem as quickly as possible to stop its barrage. If he comes at you, dodge forward and past him to avoid the explosive damage when he lands.
In his second phase, the Totem Father will focus more on attacking you directly. Try to dodge backward when he starts up his combo attacks. They should leave some cooldown openings for you to score some headshots. You can also change the drop you receive by shooting the totem outside the boss arena.
The Ravager
This giant wolf can be a nasty boss, as you will need to be extremely patient. It hits hard and fast, and it has a wide variety of attacks. Most can be dodged sideways, but keeping your stamina up and knowing when to pick your spots is difficult.
Take out any ranged attackers that appear on the Ravager, and use your heaviest damage weapons to focus fire when you find openings.
If you want to skip this fight, you can also ring the bells in a certain order to play the lullaby. There are five bells in the Ravager’s arena. Before the fight begins, you can shoot them in a certain order. Let’s assign each bell a value:
- Close to where you enter, on your right: 1
- Close to where you enter, on your left: 2
- Middle: 3
- Far from where you enter, on your left: 4
- Far from where you enter, on your right: 5
The order you need to shoot them is 5 1 5 1 2 3 4 1.
Blink Thief
This one’s a bit of a weird one. If you encounter a dungeon containing a Ricochet Rifle, when you try to grab it, this Blink Thief appears and steals it from you.
You’ll have three different fights with it, where it will teleport around and throw javelins at you. Each of these fights only lasts about 10 seconds. You will have to do all your damage in these small windows to claim the weapon.
As such, you won’t really have to worry about dying like you would against most bosses. Do your best to ignore the random enemies and unload as much damage as you can into the Blink Thief. Shoot its head for the most damage. If you don’t kill the boss after its third round, it will disappear with the rifle.
Root Horror
The Root Horror is a pretty simple boss. You’ll just have to weather some attrition while fighting it.
Aim for the head and memorize its attack animations, and you’ll make quick work of it. There are three attacks to worry about, and you’ll probably want to come equipped with items to defend against Root Rot.
Kill any minions it summons, dodge the bombs, and run from the ground explosions. If it gets in melee range, it will unleash a three-hit combo. Dodge backwards for the first two attacks, then sidewise on the last. It will be open for damage after this.
Root Horror has two phases and regains all its health between them. Otherwise, things won’t change much. Just keep aiming for the head.
Corsus Bosses
The Thrall
Try to keep as close to this boss as you can. The Thrall’s power lies in its ranged attacks. Watch for the glowing areas around the arena, as those indicate either where the radiation cloud it is summoning will appear or where it is teleporting next.
When it drops multiple projectiles from the sky, keep running in a straight line to keep ahead of them. Bring items to help with radiation, and pick a high damage weapon.
Canker
Try not to take your time here. Canker’s arena fills with water, making its attacks deadlier and harder to dodge as the fight goes on.
At first, hide on the sides of the room when Canker summons waves. Eventually, you’ll need to keep some distance and dodge sideways to avoid them.
Be deliberate about where you move as you dodge Canker’s bombs, and try to avoid spots it has run through. Bombs disappear after a short amount of time, so if you don’t panic, you can keep the arena open and play defense.
Ixillis
This boss can be avoided if you kill the Undying King instead. Honestly, it’s a toss-up to which one is tougher.
Learn the attacks this boss throws at you in phase one, as a second one will join the fight after you deal enough damage. When the two Ixillises (Ixilli?) use their tandem scream attack, try to blow up the orbs in front of them before the attack fires. These shots do critical damage and can stop the attack if you blow up the orbs.
If you don’t kill them at the same time, the living one will enrage and become faster and more powerful. It still uses the same attacks, however.
Make sure to bring ammo boxes into this fight. With no minions to kill for ammo drops, running out of bullets means almost certain death.
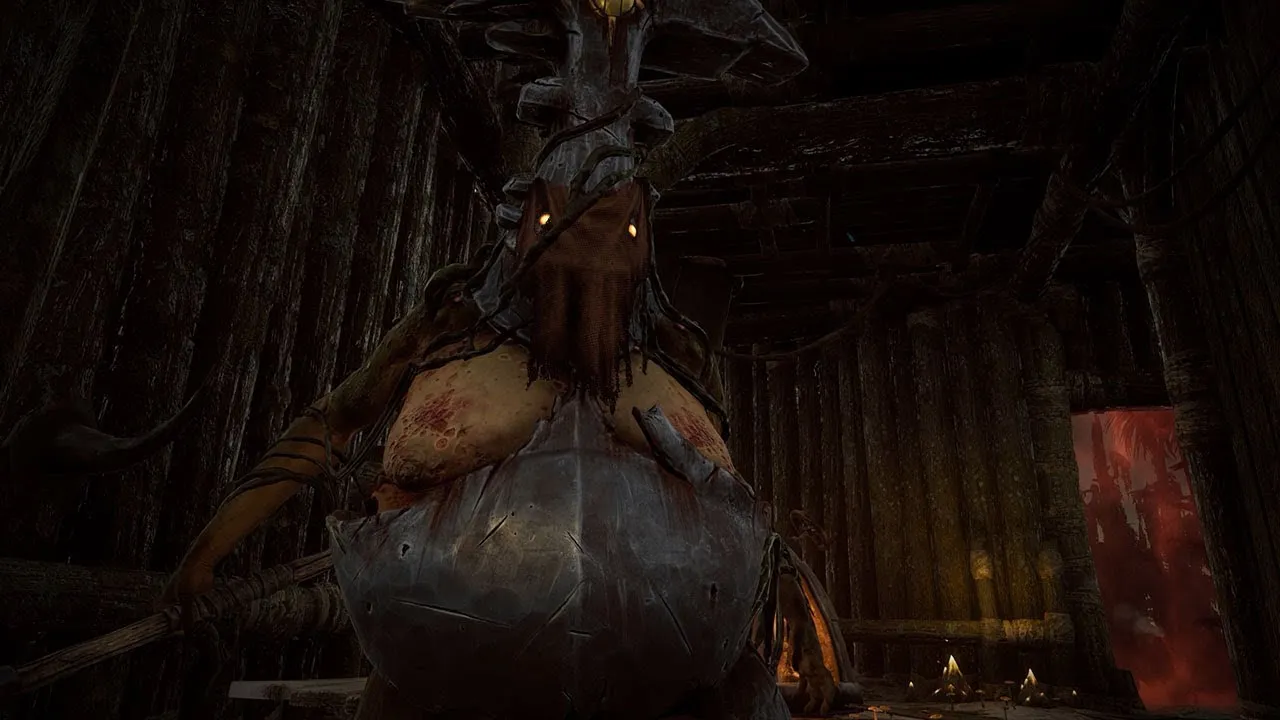
The Unclean One
Do not get close to this boss! The Unclean One can kill you very quickly if you try to tangle up close. Maintain a medium distance, take out minions as the approach, and aim for the head.
If it leaps at you with its weapon, dodge forward to get behind the boss and take some free shots. Otherwise, take headshots where you can and keep that distance. Keep your eyes on the arena to take out minions.
Barbed Terror
No minions. No huge spaces to maneuver. Just you and the Barbed Terror.
Its attacks do a ton of damage, and you’ll have no real chances to back off and heal, so mastering your dodge timing is key to success in this battle.
Don’t get right next to the Barbed Terror, as it has a nasty little push attack that comes out really quick if you do. Instead, try to stay mid-range and aim for its ugly face.
For both of its striking attacks, dodging sidewise at the right time will stave off the damage. When the Barbed Terror calls spikes out of the wall, watch for a glow to indicate where they will come from and dodge the opposite direction.
If you get enough crits on its face, you’ll stagger the monster. Use this time to deal even more damage or quickly heal if you’ve taken a few hits. The Barbed Terror only has a few attacks, so learn them and you’ll be golden.
Dream Eater
Luckily, you’ll have a bit of practice against the Dream Eater before you dive into this boss fight. It is similar to the illusory enemies you’ll encounter throughout the world of Corsus.
Listen for the audio cue to indicate that it is about to appear next to you, then dodge out of the way. When you can, aim for the glowing spot where its head should be for extra damage.
When Dream Eater starts summoning several illusions at once, do your best to keep eyes on the actual boss. Illusions are easy to kill, but they launch projectiles when they die that can be difficult to avoid. You can also roll through illusions to kill them and avoid the ranged attack in one fell swoop.
When Dream Eater floats, you’ll need to find the real one. Whenever you take an illusion down, the real Dream Eater is briefly visible. Focus fire on it to interrupt its explosion attack, and keep aiming for its weak point.
Iskal Queen
Iskal Queen won’t get up at the beginning of the fight, but the bugs she summons will start a chain reaction if they are close enough, so try to kill all of them at once in this way.
Stay in the middle of the room in case she brings in poison from the side of the room, and learn the audio cues for her different attacks so you know how best to avoid them. Work her health down, and she’ll eventually decide to bring the fight to you.
When she first gets up from the throne and lands nearby, shoot her in the head repeatedly. If you don’t, she will kill you instantly. After that, the best way to deal with her melee form is to dodge past and behind her whenever she starts an attack animation.
She will eventually take to the sky, where you can get some good damage in after each attack. When she’s flying, if you notice her charging an attack, just run in the opposite direction. She will soon be back on the ground, trying to melee you.
There is an alternative kill method for the Iskal Queen. Look for a pillar dripping water on the floor. Stand with it between you and the Queen, and then drop her health low enough to where she rises from her throne. When she lands by you, shoot her in the head to stun her, then shoot the pillar. It will fall on her and crush her.
Reisum Bosses
Brudvaak, the Rider and Vargr, the Warg
This duo is actually much easier to fight than they first seem. During the first phase of the fight, you’ll want to dodge sideways to avoid most attacks. The only one to note is when Brudvaak starts calling in projectiles from above. Then you’ll want to keep running until the attack stops.
Once you’ve done enough damage to one of the two, they will split up. Vargr will go underground and occasionally pop up at your feet to attack. Keep your distance from Brudvaak and land headshots whenever you get respite, and Vargr’s weakspot is on its tail.
Whichever you kill first will cause the other one to bulk up, but things get even easier once one of them is off the board. The main thing to worry about is the frostbite damage that gets added once you defeat one of the two.
You’ll get a different item depending on who you defeat first. If it’s Vargr, you’ll get a Steel of Agony. If it’s Brudvaak, you’ll receive a Cold Cell.
Tian, the Assassin
Tian is fast and dangerous, but nearly all its attacks can be dodged with proper timing. Aim for its head and shoulders, and try to find cover as often as possible. You can use one of the pillars in the arena for cover and high ground to easily track and deal damage to Tian.
The strategy for Tian is similar to what you do with most bosses. Deal with summons quickly so you don’t get outgunned, and learn its visual and audio cues. Sidewise dodges are the name of the game against this boss. If Tian throws the slow, homing daggers at you, try to grab cover quickly. Otherwise, you can dodge at the last second to negate the damage.
Obryk, the Shield Warden
Come packing spiceroot to make this fight a lot easier. Try to maintain your distance from Obryk, peppering it with shots from afar. Eventually, this boss will get close to you; don’t worry about dealing damage when it does. Focus on avoiding its attacks and putting distance between you two.
The main time you can do damage in this fight is when Obryk charges you. When it approaches, dodge forward to get behind it and open up your strongest attacks. Aim for the head to destroy its helmet and start landing critical hits. Without spiceroot, be very careful when Obryk enrages – you can die very quickly if it freezes you too much.
Ikro, the Ice Conjurer
There are a lot of nasty attacks going on in this fight, but there are some ways to tip the scales in your favor. As soon as you enter the arena, Ikro will summon a ball that will fire projectiles at you. You can blast away at it without retaliation before having to worry about dodging.
Avoid the circling storms overhead, as you will be damaged if they are above you. Use the buildings around the arena as cover, but know that they will be destroyed as they take more damage. Shoot any minions he summons or the aforementioned ball to destroy it.
Finally, when Ikro channels to summon the huge ice spear, unload into its head. If you deal enough damage, the attack will cancel as it staggers.
Erfor, the Jackal
Erfor’s been skipping leg day, so aim for these to deal crits. Bring spiceroot into the fight to avoid the negative freeze effects, and try to stay close to the center of the platform as much as you can.
Some of Erfor’s attacks can push you around, and instant death over the sides is never fun.
Dodge Erfor’s attacks and blast his legs until he takes to the platforms surrounding the arena. Switch to your best long-range weapon while it’s up there to continue dealing damage, but make sure to take down the enemies that it summons so you don’t get overwhelmed. If you’re really skilled, the massive boulders that Erfor throws will take out several of these weaker foes.
Ward Prime Bosses
Harsgaard
Harsgaard is the first boss waiting at the end of Ward Prime. Shoot it in the mouth for bonus damage, but just make sure to pack plenty of bullets for this fight. You often don’t have a huge window to score damage, so take what you can!
Harsgaard’s first phase isn’t too bad if you stick close to the walls of the arena. Use a long-range weapon to get in as much damage as you can, and roll forward if a projectile is about to hit you. Harsgaard’s beam attack is an instant kill if it hits you, but it’s only dangerous if you aren’t keeping an eye out.
Harsgaard’s second phase is tougher. You’ll still want to roll forward to avoid projectiles, and the timing on his homing shockwave attack is really tricky. Start moving sideways as soon as Harsgaard starts lifting its arms. You may still need to roll sidewise to avoid damage.
Try to keep out of melee range, as Harsgaard’s combos hit really hard and are tough to dodge. Once you beat Harsgaard, you’ll receive a weapon and face a second boss: Harsgaard, Root Harbinger.
Harsgaard, Root Harbinger
Good news: Harsgaard’s mouth gets a lot bigger in this fight! Bad news: Harsgaard gets a lot bigger in this fight.
Prepare for a ton of dodging in this battle, as Harsgaard, Root Harbinger has a ton of beam attacks that do extremely high damage. You’ll start the fight with the rifle you get from winning the previous boss fight, but you can equip something different if you have a better weapon.
You’ll need to memorize its attack animations to put up a fight here. The best time to get in damage is when Harsgaard floods an entire side of the arena with beams. Try to get to the opposite side and fire away.
When the stones float to fire beams, watch which ones glow: those are the ones that are about to shoot. Finally, when beams fire multiple times out of Harsgaard’s hands, try to dodge to the spot where the last beam hit. Try to stay alive long enough to get Harsgaard’s timing down, and pick your windows to deal damage. It’s a tough battle!
The Dreamer and Nightmare

For the fight against the Dreamer, aim for the head and try to end the fight as quickly as possible.
Minions spawn faster and faster as the fight goes on, so it can be easy to get overwhelmed if you aren’t fast. Try to keep minions between you and the Dreamer, as the boss’s powerful attacks will take care of many of them.
For Nightmare, save your ammo when you first enter the fight. Dodge Nightmare’s attacks and wait until you are transported. When you are in the other realm, every kill you rack up will amplify your damage against Nightmare. Stay close to the portal so you can escape. You take constant damage in this other realm.
When you come back through the portal, fire at Nightmare until the Dreamer is exposed. Focus attacks on the Dreamer to deal critical damage. You may be transported back and forth multiple times during this fight and, in multiplayer, only one player will be transported.
It’s a tough battle. Max out your best weapons and plan your mods carefully!
There you have it — all the bosses in Remnant: From the Ashes, including its DLCs, Swamps of Corsus and Subject 2923. Hopefully, by using this guide, you’ve learned how to beat all of the game’s bosses, and picked up the “Ready for Action,” “Like a Boss,” and Untouchable trophies/achievements along the way. Check out our full review of the game, and our other guides if you’re looking for more tips and tricks.


Published: Aug 24, 2019 02:57 pm