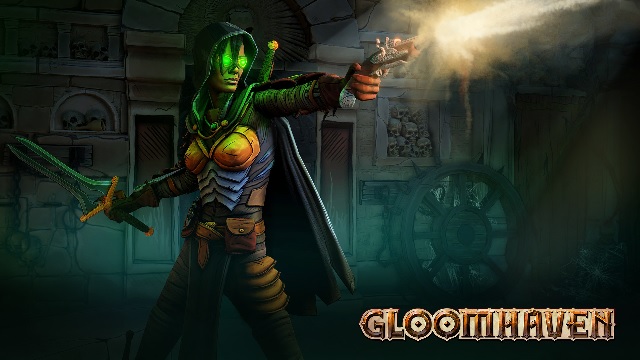
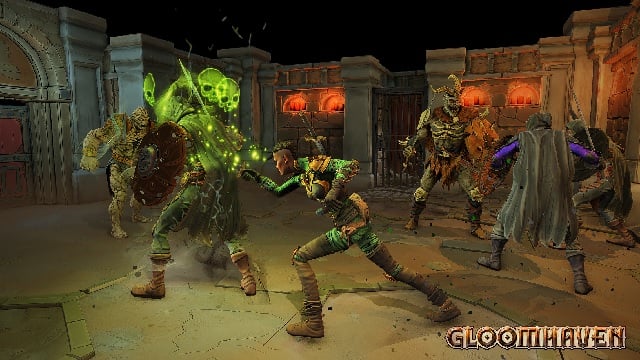
Gloomhaven, the digitized version of the number one best board game of all time (according to Board Game Geek), is finally out in Steam Early Access — you can check out our initial impressions right here. It is still extremely early in development, so it can be tough to wrap your brain around the complex systems that the game has in place.
If you want to dive into Gloomhaven, but don’t have the experience playing the tabletop version, you’ve come to the right place.
Here are the basics of how everything works so you can start killing monsters straight away. As Gloomhaven continues to progress through Early Access, it is likely that these elements will become more apparent and intuitive. For now, here’s what you need to know.
How Combat and Initiative Work
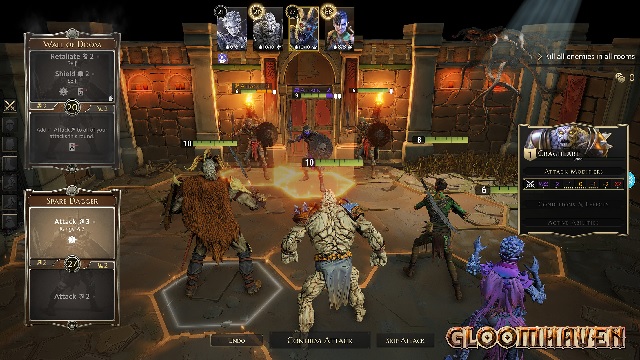
Every round of Gloomhaven will require you to pick two cards from your entire deck for each character in your party. Of these picked cards, you will perform one top action (which are usually offensive skills) and one bottom action (which are usually movement based) when that character’s turn rolls around.
Most cards are discarded after they are played, meaning you will be able to get them back with a short rest. However, more powerful effects will often have a small icon in the lower right, indicating that card will be lost if you use that particular ability.
If you can no longer pick two cards because a character has too many lost cards, that character will be exhausted and eliminated from the round.
Cards are fairly self explanatory: Attack 3 indicates you will attack an enemy for three hit points (+/- modifiers, which we’ll get to), and so on. If the ability is ranged, it will indicate how many hexes the ability has in its range.
Be careful with ranged attacks against an adjacent foe – you will be forced to attack at disadvantage, meaning you draw two modifiers and pick the worse one. Anything outside the ordinary is usually spelled out exactly on the card.
The first card you pick each round will be your initiative score — the general rule of thumb is that you will want to pick your lower card first to go earlier in the turn order. If that isn’t the case, however, you can pick the card with the higher initiative order first to delay your action a bit.
You won’t have to pick actions until the round order is determined, so your plans can change if enemy attacks mess up your strategy.
Enemy initiatives are always revealed after you’ve locked in your picks, but before any character acts. You can hover over enemy profiles to see what they will do when their turn arrives — elites of a given type will move before regular enemies.
When a character’s turn arrives, they will perform one entire top action, then one entire bottom action. You can also use items by clicking them. Most equipped items can only be used during that specific character’s turn.
One last thing: if you prefer, you can always sub an Attack 2 action for any top action and a Move 2 for any bottom action. This is useful if your plans change before a late initiative gets a chance, or if you just need to punch a little more damage through. Simply click the small icon near the middle of the card to use this alternative.
Damage and Modifiers
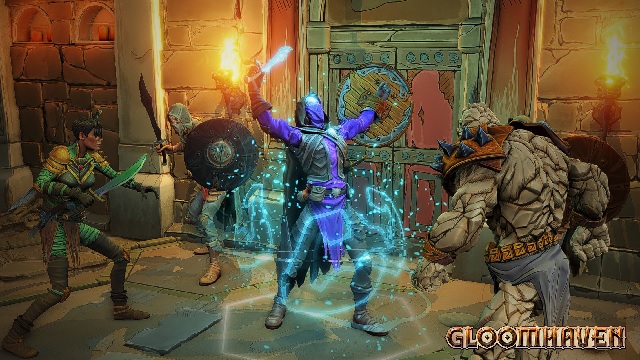
Damage is spelled out on the card, either by the Attack keyword or through other means. However, every attack is affected by your modifier deck. Hover over a character’s profile picture to reveal their modifier deck.
Modifiers are numbers that range from -2 to +2 (at the moment), and there is also a x0 and a x2 card in each modifier deck.
Each modifier left in the deck is indicated by the number of pips below it when you look at the panel, and each card can only be used once until the deck is reshuffled. Your modifier deck will be shuffled when you reveal either your x0 or x2 multiplier card.
Your damage plus your modifier is how much damage a given attack will do to a character, with any additional status effects. Let’s talk about those next.
Status Effects
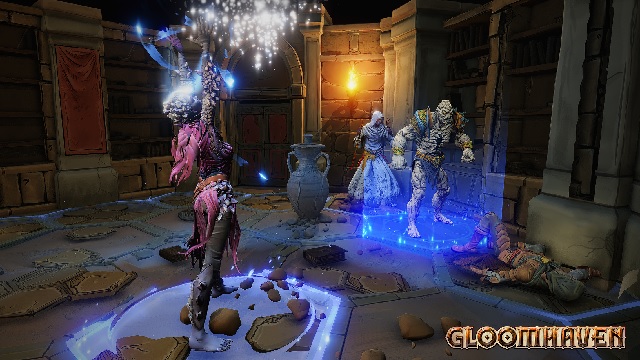
A variety of attacks and abilities can effect a character’s status, and understanding these effects can make or break a campaign. These effects are broken into a few other categories:
Attack Effects
These change the way attacks behave, and are indicated on the card as you use it.
- Push x: Move an enemy X hexes away from you. They won’t have to travel the entire distance.
- Pull x: Move an enemy X hexes closer to you.
- Pierce x: Ignore X units of Shield on an enemy when you attack.
- Add Target: Make the selected ability affect more than one target (each target must meet the required criteria of the ability)
Negative Effects
These cause problems for whoever is affected by them.
- Poison: Whenever an enemy attacks a poisoned character, that enemy adds +1 to their attack rolls. Poison lasts until something heals the affected character (the heal will only cure the poison, and the normal HP restoration will not happen).
- Wound: Any wounded character takes 1 damage at the start of their turn. The wound effect lasts until something heals the affected character (healing the wound will replace the normal HP restoration).
- Immobilize: This effect only lasts a single round, but the affected character can use no move actions for that round.
- Disarm: Exactly like immobilize, but the affected character cannot use attack actions.
- Stun: The affected character can do nothing. However, you still must pick two cards, which are discarded like normal after the round. Stun only lasts a single round.
- Muddle: All attacks are taken at disadvantage, meaning you draw two modifiers and pick the worse one. Muddle lasts a single round.
- Curse: Shuffle an extra x0 modifier into the character’s deck. This card is discarded when drawn, rather than causing the modifier deck to be shuffled.
Positive Effects and Special Traits
- Strengthen: Every attack ability is taken at advantage, meaning the character draws two modifiers and chooses the better one.
- Invisible: The character cannot be targeted by enemies with any ability. Allies can still target them.
- Shield x: This will negate X damage from every attack as long as the shield is active.
- Retaliate x: The character will deal X damage to any character that hits them with a melee attack.
- Bless: Add an extra x2 modifier to the modifier deck. It will be discarded when drawn, rather than causing the modifier deck to be shuffled.
- Jump: Allows a character to move through enemies, obstacles, or traps without taking damage.
- Flying: The character is never effected by enemy figures, traps, or obstacles. However, they must still end their turn on a space without another character on it.
Experience and Gold
Finally, the loot! You gain a bit of these things through completing missions, but you’ll get the vast majority of your gold and XP during fights. However, they aren’t gained in the typical manner.
Gold is dropped by enemies whenever they are killed. You can pick it up in a few ways.
If you end your turn on a square with gold (or a treasure chest), your character will grab it. Walking over it is not good enough, you have to actually end your turn on the loot!
You can also use a Loot X action, which will loot every hex within X spaces of that character. It can be very useful if there are several tiles with loot surrounding a character.
Experience is also gained in combat, but you won’t get it just from killing monsters. Abilities will tell you if and how much experience the character will gain if it is used – look for the little XP icon with a +x indicator to see how much your character will gain. Once a character levels up, they will gain access to more powerful and complex abilities.
There’s more to Gloomhaven besides all that, but this is a solid primer that will get you started. Stay tuned to our Gloomhaven guides hub for more info on the game as it moves through Early Access.


Published: Jul 24, 2019 05:59 pm