There are three green cubes in Journey to the Savage Planet. Each of them contains one Alien Alloy, which you’ll need to grab to unlock all of the game’s upgrades and get The $600 Man trophy and achievement. Thing is, it isn’t exactly clear how to kill a green cube.
After several hours of trial and error — shooting it with my pistol, ground-pounding it, slapping it off cliffs, and peppering it with bombegranates — I finally figured it out.
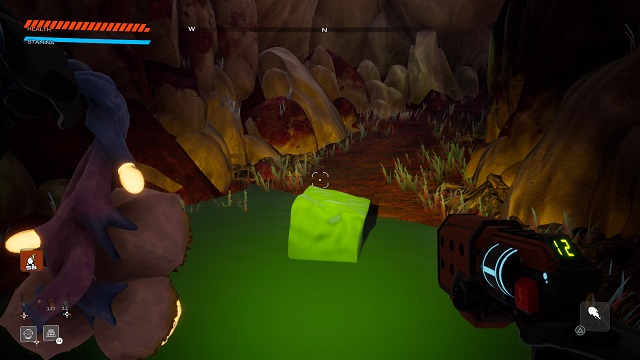
How do you kill/open/blow up a green osmotic cube in Journey to the Savage Planet? By making it eat too much.
Slap the green cube to a location with a bunch of fauna. It doesn’t matter what type, though killing Pufferbird is obviously easier than killing Kapyena. Once you kill the fauna around the green blob, it will eat the carbon and silicone the fauna drops.
The green cube will sometimes try to slowly crawl back to where you originally found it. Just slap it toward the resources dropped by the fauna, and it will gobble them up. Do this a few times (three to four) and the green cube will explode, giving you the resources it consumed as well as any Alien Alloy.
Green Cube Locations
There are three osmotic green cubes in Savage Planet. Below are the areas and biomes in which you can find them.
Cliffs of Mt. Gazarfyn
Fast travel to The Cliffs of Mt. Gazarfyn in The Landing Zone biome. Go diagonal and right toward the edge of the cliff. You will pass through the herd(?) of Pufferbird and a few roaming Jellywaft.
Go off the side of the mountain and land on a small cliff below. You won’t likely see the cliff before you jump, but be ready to move backward once you start falling to catch it.
Look down again to see the green cube on another cliff below. Slap the cube off the cliff to area below.
Fungi of Si’ned VII
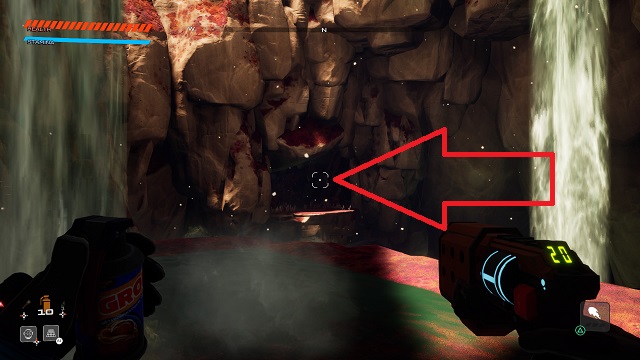
Fast travel to the Fungi of Si’ned VII in The Itching Fields. When you spawn, go straight ahead and through the rock archway. Drop down into the pit and land on the first platform (the one with the Vitality Plant).
There is an opening in the cave wall opposite the Vitality Plant. Jump across the small gap and go inside. The green cube is in the back of the cave.
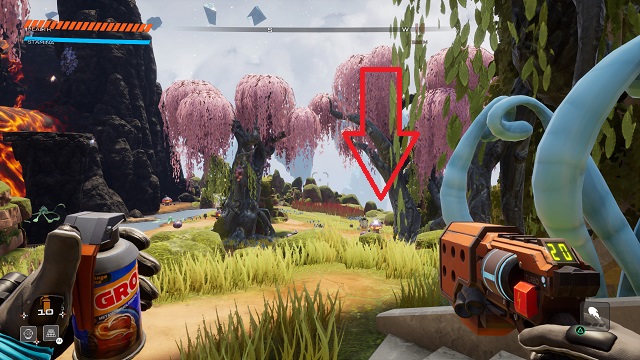
Pillars of Xzorgana

Fast travel to the Pillars of Xzorgana in The Elevated Realm. At spawn turn right and go past the stone archway. Jump over to the island across from you; it’s the one with the two Skipper on it.
Once you land, stay to the right and pass a small cave opening on your left. Jump over the rocks to the right of the cave opening to find the green cube.
You can slap it down to the area below and hope enough Floopsnoot spawn, but you may have to push it down one more level to the area with Pufferbirf and Schonozo.
—
That’s all you need to know about how to kill/open/blow up the green cubes in Journey to the Savage Planet. For more on the tongue-in-cheek exploration game from Typhoon Studios, be sure to read our official review.
For more tips and tricks, head over to our Journey to the Savage Planet guides page. Here are a few to get you started:


Published: Jan 28, 2020 06:55 pm