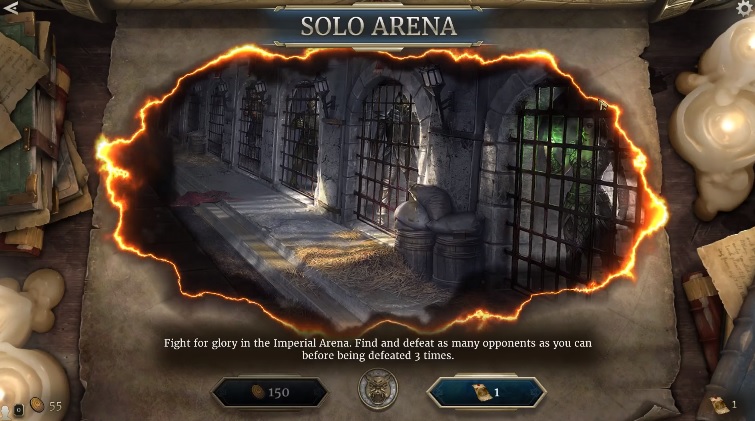
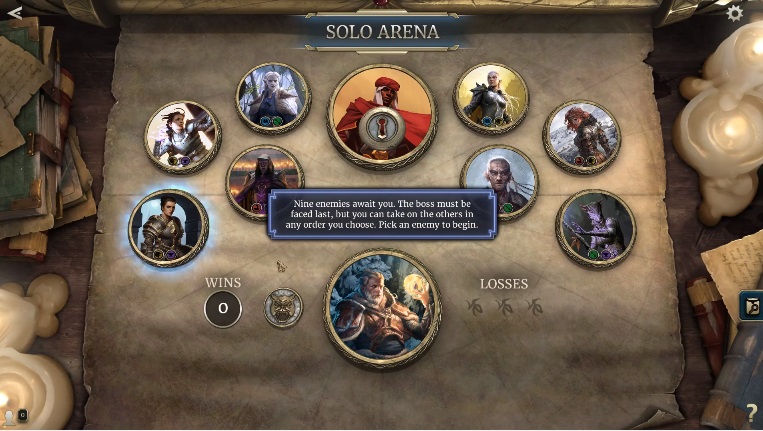
For players who have a solid grasp on the strategy behind Elder Scrolls Legends, the solo Arena mode can be a perpetual motion machine that continuously gives more rewards than it costs to play.
At the expense of 150 gold (or $1.99 for those not willing to put in the time to earn in-game currency), the Arena has you fighting up to 9 different matches against all the different Attribute combinations. The more matches you win, the bigger the rewards, but after three losses you get booted out and have to pay to get back in again.
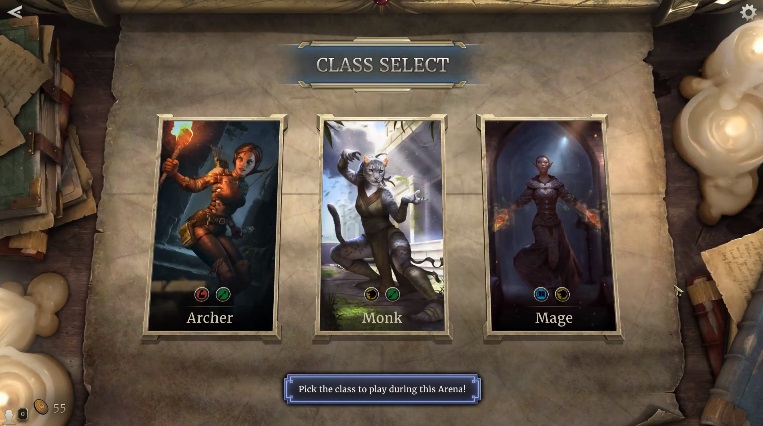
While each enemy will have varying builds and tactics, you only have one deck to work with, so it has to be well rounded and work in all situations. Although you have some control over the class of your deck, the actual card distribution is more randomized, as you have to choose one card between an array of three options repeatedly until building a full deck.
 Ready to face the Arena?
Those choices you make will determine whether you have a well-rounded library of cards able to take on all the opponents or whether you just wasted your gold and will get sent packing back to Practice mode. Below we cover the best strategies for making it further into the Arena.
If you need help with Story or Versus modes, be sure to instead check out our basic deck building strategies.
Selecting Arena Cards
Due to the randomized nature of the Arena and the fact that you will be fighting every other class combo, there are some classes that are better picks than others because of their ability to control the board by removing enemy creatures or getting your own creatures out faster.
 Pick a class you know in and out that is more well-rounded and less focused
Unless you are supremely confident in your ability to play an Endurance-based deck, those cards generally aren’t as versatile, useful, or fast as Intelligence or Agility cards.
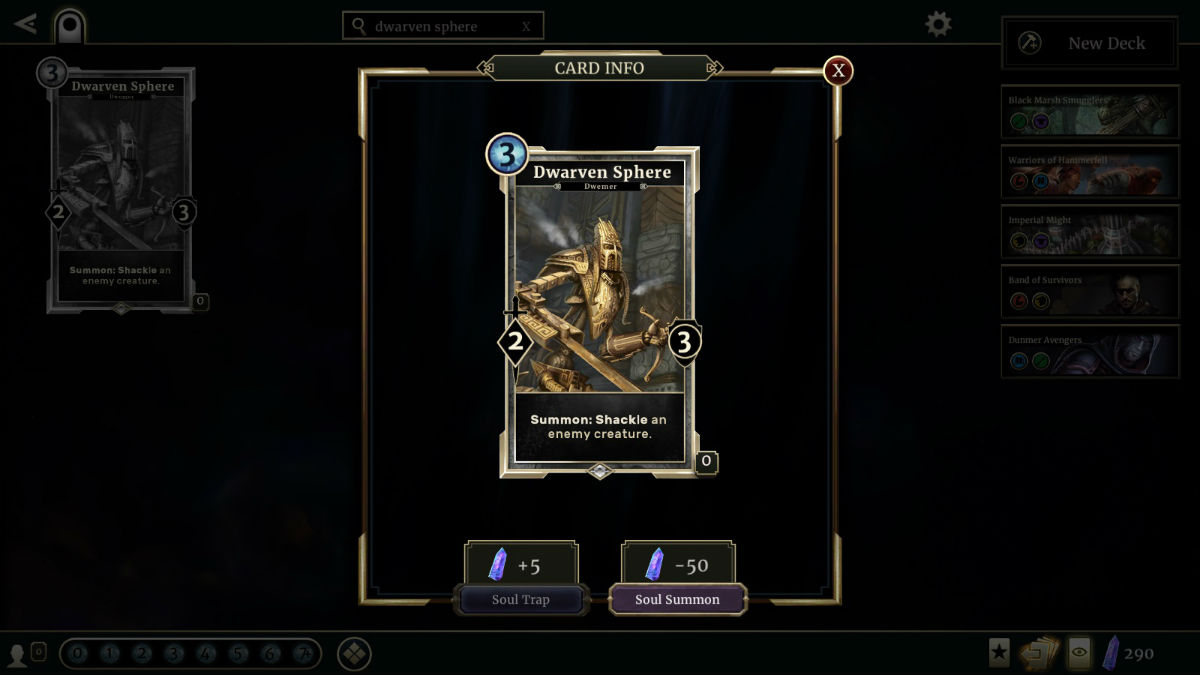
While Neutral cards aren’t usually as helpful in straight Versus matches, don’t overlook them in the Arena for their all around utility, especially if the other two picks available are dependent on a specific synergy.
Rather than picking a card you might not be able to fully utilize, it may be better to pick an all-around solid Neutral card (even though it has less combo possibility) like Dwarven Sphere. A decent attacker with the ability to Shackle a strong creature is better than an out-of-this-world combo you won’t ever get to pull off.
 Keep Neutral cards in mind if the other two picks don’t have good synergy
While Story mode and multiplayer Versus bouts are all about constructing cascading combos as cards work together, the solo Arena is more about reliability when you can’t perform perfect combos.
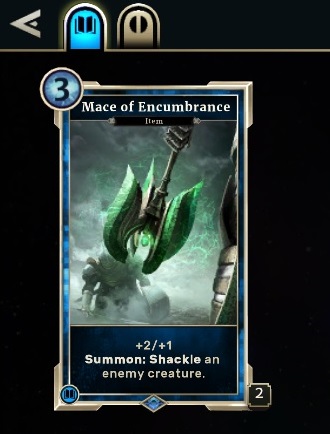
Cards that do multiple things decently are generally better than cards that only do one thing or only work in conjunction with other cards. For example, the Mace Of Encumbrance not only gives your creature a bonus to attack and defense, but also Shackles an enemy, making it more versatile and an excellent pick.
 Whenever possible, pick the card with multiple applications
If you can pick a creature with Pilfer, absolutely go for it, as the AI in the solo Arena is more aggressive and generally focuses on attacking you directly over destroying your creatures unless you have a strong spread of creatures in both lanes. Without the threat of being immediately destroyed, you can quickly beef up a Pilfer creature so long as the enemy doesn’t have anything with Guard in the lane.
Prophecy cards are a tricky beast in Arena mode. If a card is better with Prophecy but still solid on its own, then you should obviously pick it during deck selection. If a card is only viable when used with Prophecy, drop it in favor of something with more all-around utility. It’s better to have something solid but unremarkable than something that could be awesome but may never come into play.
Finally, pay attention to the magicka cost distribution at the bottom of the screen while selecting your base 30 cards. While a few higher cost cards are worth throwing in for battles that go on longer, in general you want most of your cards around the 2 or 3 magicka level so you can gain board control early and not rely on being defensive until your big cards are ready to play.
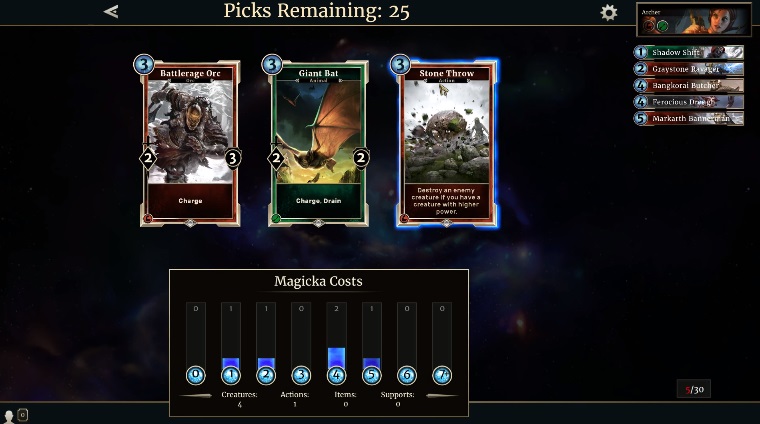 Examining the magicka cost spread
Employing Strategies In The Arena
Since you will have significantly less control over your strategy when going into the Arena, you need to know how to use any given card in varying situations.
For example, take a feature like Guard. While at first it seems only useful to give to your own creatures for defensive reasons, cards that bestow the Guard ability can be used in unexpected ways.
Consider a scenario where the opponent has a large creature with Guard you can’t take down, like the 0/5 Oldgate Warden or the 0/9 Portcullis, while a non-Guard creature is busy pinging you for damage every turn in the same lane. The answer in this scenario isn’t to try to work on the Guard over several turns.
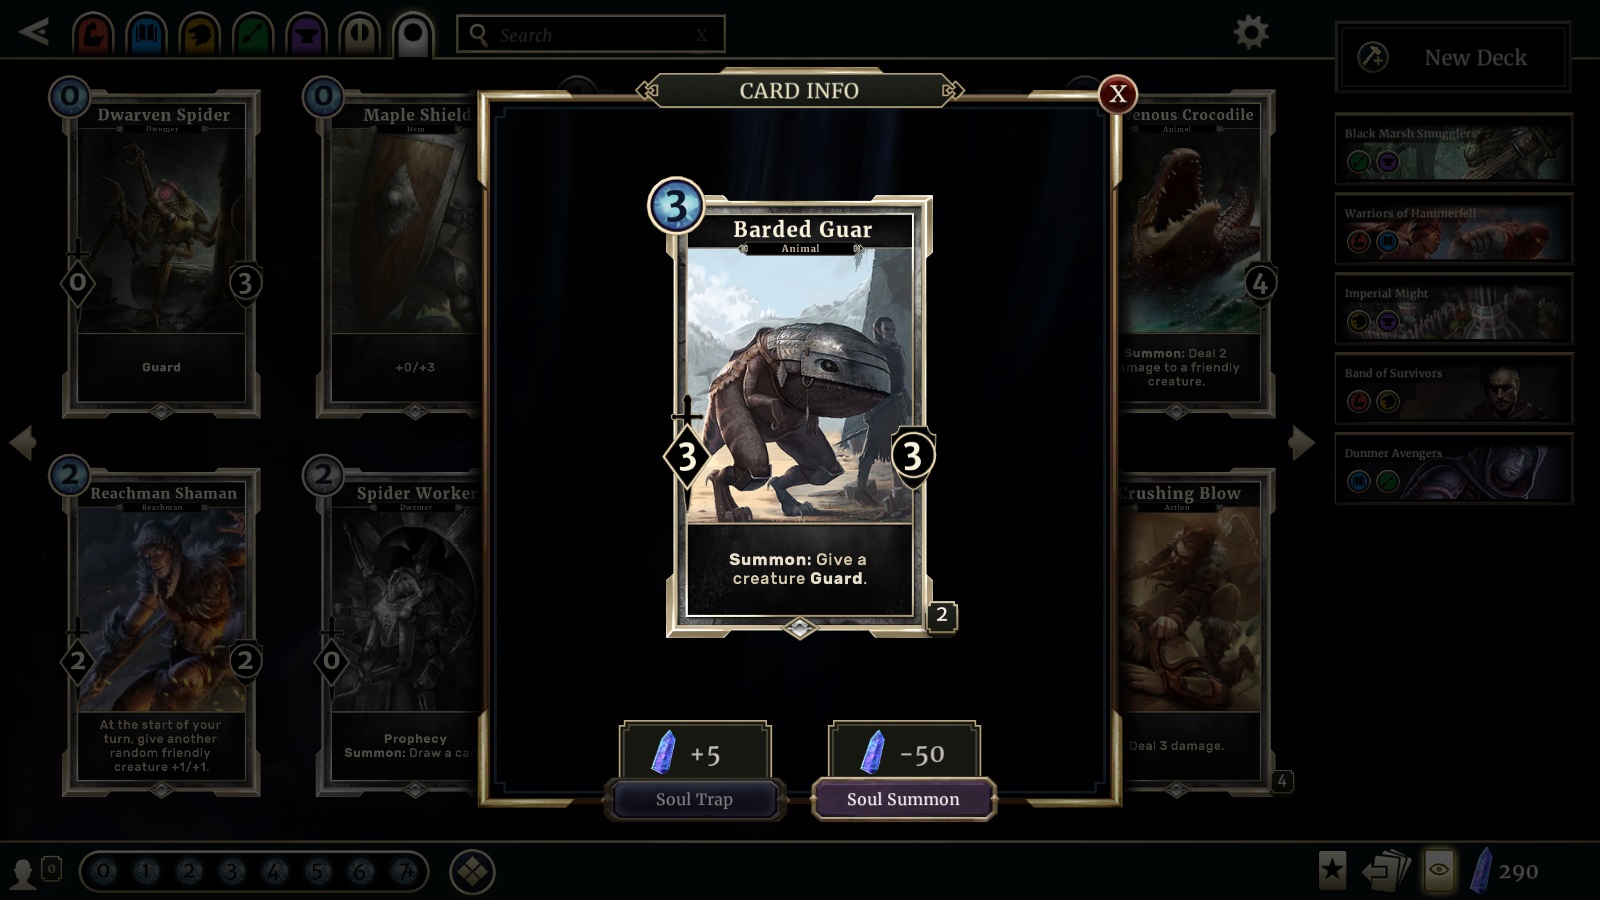
It can actually be a better strategy to give Guard to the pinging creature by summoning a creature like Barded Guar. When two or more creatures have Guard, you can attack any of them in any order – effectively removing the point of Guard from the bigger creature with a higher defense.
 Guard is useful in many situations
Don’t forget that Guard can also be applied to creatures who have acquired Cover from the Shadow Lane, thereby removing their Cover and making them vulnerable to being attacked that turn.
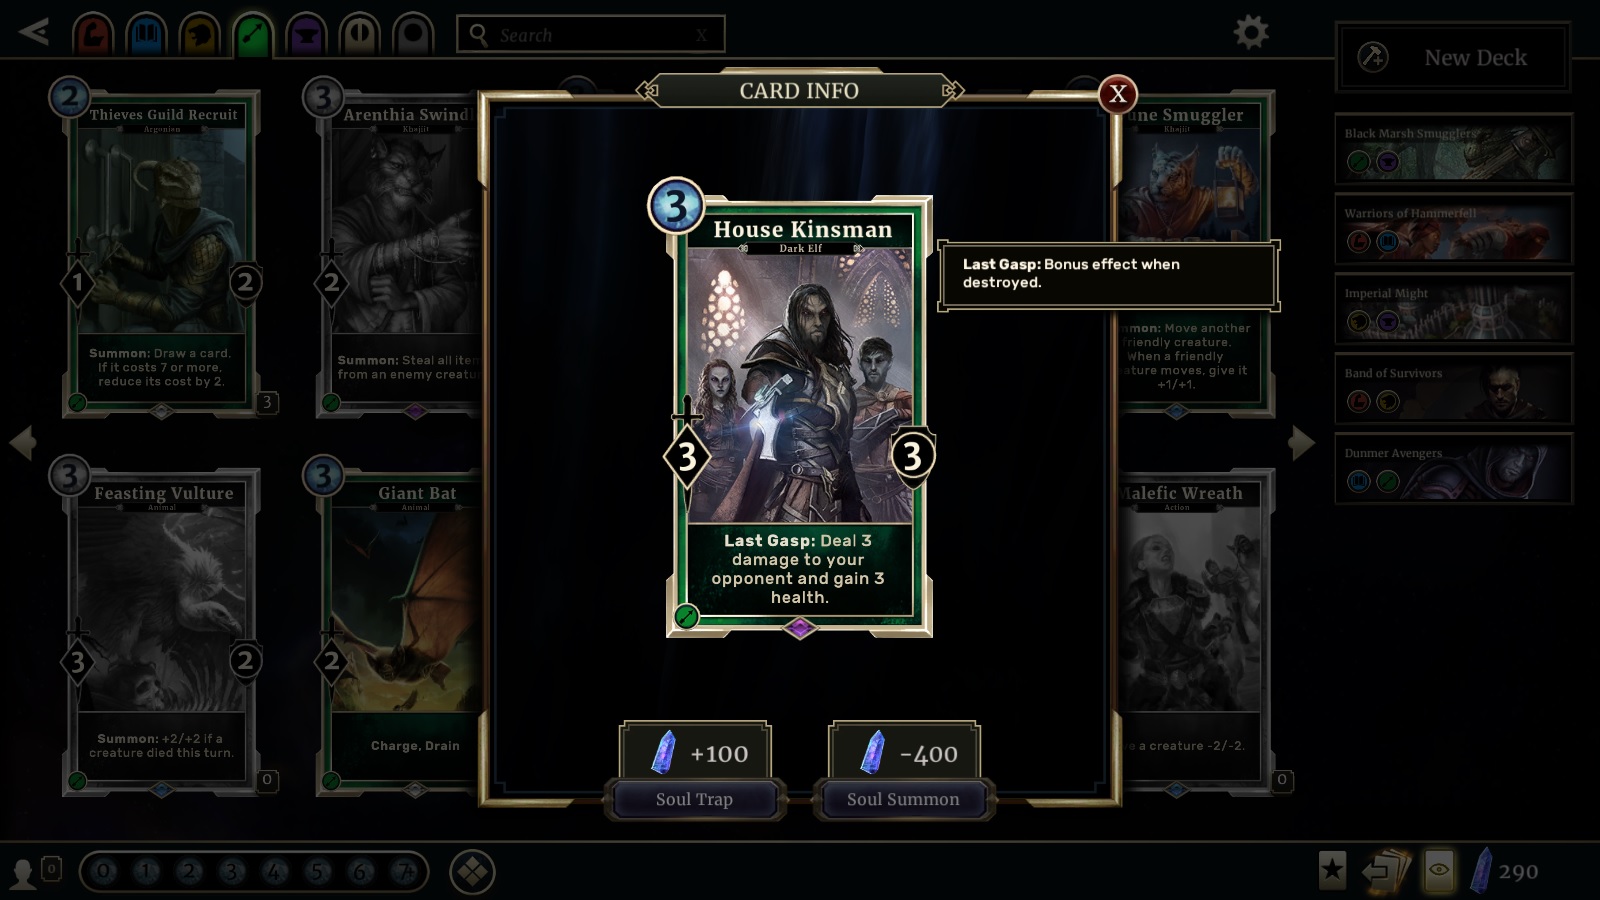
Last Gasp is another ability that is more versatile than it seems, as you don’t have to wait for it to trigger when the opponent kills your creature. Instead, always consider the possibility of killing your own creatures to trigger their Last Gasp text.
Straight damage spells of course are an option, but an even better strategy is to summon an extra creature over the lane’s maximum and then choose the creature with Last Gasp to be sacrificed.
A card like House Kinsman is excellent for getting an unexpected victory when your opponent has his lane clogged with Guard defenders. Why waste time trying to break through when you could just kill your own creature and deal damage straight to the enemy?
 Last Gasp doesn’t have to be triggered by the enemy
Attack Order
Because of the rune mechanic that gives free cards to a player taking damage, the attack order should always be carefully weighed every turn. If you do enough damage with an attack to break a rune, the opponent may get a free card with Prophecy, potentially ruining whatever combo you were going for.
It’s usually better to attack with your bigger creature first in case that creature ends up getting killed or Shackled by a Prophecy card. This is NOT the case, however, if you can hit the opponent with multiple creatures before breaking a rune.
For example, if the opponent is 5 health from losing a rune, hit ’em with your 4 attack creature first and your 8 attack creature second to get the most damage through before the rune is broken and a free card is potentially triggered.
 Good luck against the Arena!
By picking well-rounded cards, learning how to use cards in multiple ways, and focusing on your classes’ strengths, you can turn the Arena into a consistent way to earn gold without having to face unpredictable players in Versus mode. Be sure to let us know how far you get in the Arena and what card selection strategies you find most useful!


Published: Aug 16, 2016 03:26 pm