
Jurassic World: Evolution is upon us, and as you load up the game, you may sensibly wonder to yourself where to begin.
The short answer is “see the movie”; a measure of familiarity with 2015’s Jurassic World isn’t required, but it will smooth out the learning curve big-time.
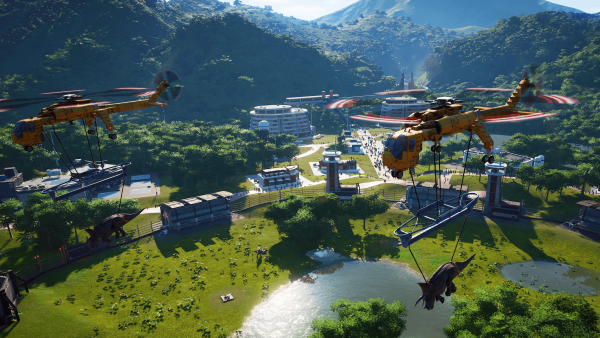
But after that, follow these simple guidelines and you’ll be working your way from Isla Matanceros to Isla Nublar in no time, satisfying all the factions at InGen and building better dinos along the way.
Step 1: Remember the Laws of Nature
You will save yourself a lot of grief if you remember a simple principle; lions do not lie down with lambs.
Meaning there are two types of dinosaurs in Jurassic World: the ones that eat meat and the ones that ARE meat. Put them in the same enclosure and you’re gonna have a bad time.
Or at least the herbivores are.
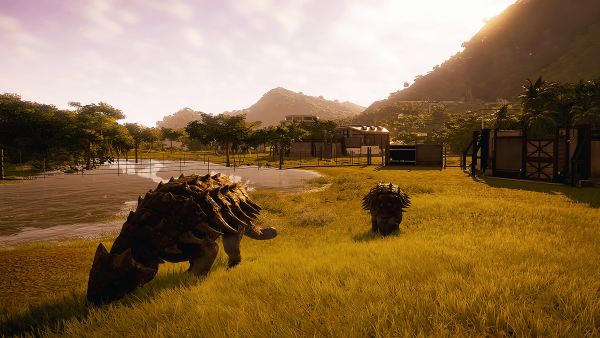
There’s a fairly simple reason for this. Herbivore dinosaurs won’t fight each other. They will peacefully coexist in an enclosure, and as long as you watch both the overall population size and the food supply while monitoring the amount of grassland and forest in the enclosure, the dinosaurs will stay happy.
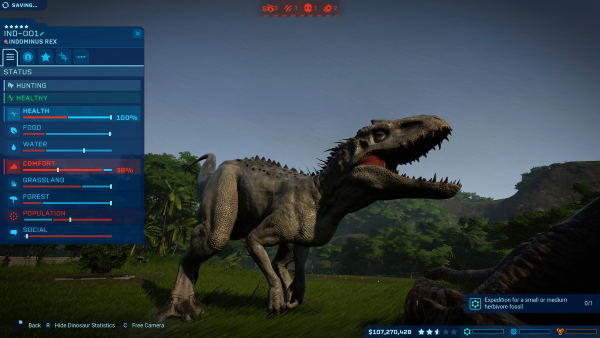
Every dinosaur has a series of meters that can be accessed simply by clicking on it in the game world; this will tell you about the dinosaur’s overall health, including whether it is hungry or thirsty, and will show all of its comfort factors.
A dinosaur needs a certain amount of grassland to roam around in, forest to provide cover, others of its own kind to socialize with, and not too much overcrowding from its own or other species.
On the other hand, there is the simple fact that meat-eating dinosaurs are hunters. They will try to kill and eat anything that is not of their kind. Like in nature in the real, non-dinosaur-populated world, there are predators and prey, and all mixing them accomplishes is to get the prey animals eaten.
This is complicated just a bit by the fact that a carnosaur will make decisions based on whether it thinks it has a chance against its foe. Furthermore, eusocial carnivores, like Velociraptor, will hunt in packs in herbivore enclosures and band together to keep other meat-eaters at bay. It makes for a bit of a metagame in their enclosures.
Just remember that as long as you keep the meat side hot and the veggie side cool like an old-school McDLT hamburger, you’ll have most of this battle won.
Step 2: A Contract Is A Contract Is A Contract, But Only Between Ferengi
The 17th Rule of Acquisition governs the faction system in this game. In order to make progress through the missions that unlock everything in the game’s world, you need to do contracts for the three factions, Science, Entertainment, and Security.
Trouble is, as Dr. Ian Malcolm would no doubt remind you, actions have consequences. Specifically, what pleases one faction is sure to anger the other two.
More specifically than that, the game will tell you before you take a contract exactly what effect each contract will have on faction reputation.
Some contracts are a win-win; they raise the reputation with the faction giving the quest and sometimes one or both of the other factions as well. You’ll want to take contracts that satisfy more than one faction every time and prioritize them because they are downside-free progress boosters.
Other contracts pit one faction’s interest against the others. In the movie, the science and entertainment divisions were at odds with each other; it was one of the central themes that drove a lot of the conflict. Science wants pure-strain dinosaurs, paleontological accuracy, and healthy, thriving dinosaurs.
Entertainment, meanwhile, wants to do genetic modification that would make Monsanto blush. Complicating matters, these GMO dinosaurs, with DNA from frogs and sharks and any other animal under the sun clogging up their genomes, tend to have better stats for the park at the expense of being in poorer health and far more dangerous if they break out of their pens.
Most of Entertainment’s missions, then, will annoy both Science (who want pure-strain dinosaurs) and Security (who don’t like it when park guests get eaten like the lawyer in the porta-potty from the original 1993 Jurassic Park film.)
Security, meanwhile, represents the faction in Jurassic World that had a stake in militarizing the dinosaurs and using them as weapons. Most of their missions involve dinosaur combat. You’ll be asked to find carnosaur fossils, and when dinosaurs fight each other (but not the guests) it tends to make Security very happy.
So you can’t just go taking jobs willy-nilly or all you’ll end up with is everyone mad at you. And when factions get mad at you, they start doing things like sabotaging the power grid, causing merry mayhem just like way back in the first movie.
The best strategy is to avoid whenever possible playing one faction against another. It’s unavoidable on some level; as your reputation with factions rise, you get both monetary rewards and extra missions, so sometimes it’s worth risking the wrath of the other two factions to prop up your preferred faction’s interests.
Plus, there’s nothing in the game rules explicitly stopping you from picking a side. If you agree with a faction’s ideology, adopting a ride-or-die mentality or even just role-playing a little is a perfectly viable way to play the game. Min-maxing your reputation and being hyper-selective with which missions you take just makes the game a whole lot easier at the expense of rapid, directed progress.
You will need to eventually please everyone, but trying to do it by just doing everything you’re asked is a recipe for constant infighting. Learn how to say no.
Step 3: Guests Are Easy to Please
There is no particularly choice-based strategy to guest satisfaction. Click on the star rating in the main HUD and it will tell you exactly what your guests want. Specifically, the guest needs are divided into food, drink, fun, and shopping, and every guest building in the tab marked with a little burger icon will tell you exactly what needs that building fulfills. The star rating display will then spit out a result that tells you on a scale of 100% how well the need is being fulfilled.
You can decide what is being sold, how much it’s being sold for, and how many staff, from one to five, operate the stall.

Choosing a low-price item attracts more guests, but the per-item profit on each sale is fairly low. A higher-priced, higher-margin item sells fewer units, but generally the margins are high enough to offset the lack of brute force sales volume.
And the game gives instant feedback when you change the price to let you know almost to the moment when you’ve edged the prices just a tick too high. There’s a hidden pricing curve that’s fairly easy to tease out through trial and error.
Staff size governs the number of guests who can use each facility; as your park gains more guests, you’ll have to hire more staff. When your building is maxed out at capacity, build a new shop.
There’s also a hidden-at-first attribute for overcrowding; when you build your first hotel, clicking on it will let you know how much of a drag crowds are placing on happiness.
In other words, it’s a paint-by-numbers tycoon game with plenty of hand-holding.
Step 4: Dig, Research, Do Science
No matter which faction you’re favoring, it always helps to send your expedition teams out to dig for fossils. The degree of completion of any given dino’s genome governs its base viability (50% fossils is minimum to be able to clone one, 100% is as “accurate” as the game and the film universe allow. There aren’t any feathered dinosaurs here; the film franchise has decided to go with “classic” dinosaurs and the game follows its license here.)
Actually digging and prepping the fossils is paint-by-numbers. Go to the expedition center and choose a dig site that contains the dinosaur fossils you want, then go to the fossil center and extract the DNA, and finally use that DNA in the cloning center both to make more viable dinosaurs and to unlock more slots for genetic modification.
Meanwhile, in the Research Center, there are a variety of visual tech trees; spend the money you earn here to unlock both dinosaur modifications and building upgrades. Time and patience are all that is required to know everything, and choosing what to prioritize depends largely on your mission or game goals.
Step 5: Disaster Preparedness
From the second island on, you’ll get storms that temporarily knock out the park and break stuff. The game gives you a storm tutorial at the beginning of the second mission; as long as you follow it, you’ll have the nuts and bolts of it.
What the tutorial doesn’t tell you is that you should always be watchful. Press R to bring up the Ranger Station and you can either go into a third-person driving mode for the ranger jeep or otherwise simply automate it by using the task selector.
It also doesn’t tell you that in order to have your island protected from storms, you need to complete the Entertainment division’s mission in the first level.
This mission unlocks the storm-warning building, which casts an area-of-effect that prevents the worst damage to anything that building covers. You’ll need those on islands with regular storms, and you will especially need them near power plants as an insurance policy against the worst-case scenario of having the power go out and knock out things like electric fences to keep the dinosaurs at bay and all your guest facilities in the park itself.
So to summarize; Do the first level’s entertainment mission before leaving the first island, follow the tutorial in the second level, and stay vigilant by occasionally using the view offered by the ranger station to make sure the park stays in good repair and the dinos’ feeders are supplied.
Step 6: Win the Levels
Keeping the guests happy is half the battle. Getting the dino rating up is the hard part.
Besides following all the rules in Step 1 of this guide, the keys to getting a good dino rating are as follows.
First, make sure your dinosaurs are healthy, well-fed, and have access to water. This will keep them both from dropping dead and from trying to break out and kill your guests.
Second, strike a balance between authenticity and genetic modification; more DNA accumulated through fossil research gives your dinosaurs a higher base rating, while genetic modification applies modifiers to that base rating to in some cases goose it quite high.
Third, give your carnosaurs something to kill from time to time. Every carnosaur that wins a fight gains “combat infamy” equal to half the rating of the dinosaur it killed. This can get expensive—dinosaur cloning is not free—but can, over time, lead to great champion dinosaurs that drive people to want to watch them fight.
Fourth, build viewing areas into the fences and, if you can, put feeders and water sources within the radius of the viewing area. That will increase the value of the dinos to your park’s rating and also satisfy the guests’ “dinosaur visibility” rating.
And fifth, there’s a “variety penalty”; the more different species of dinosaur you have in your park, the more this penalty is mitigated until it reaches zero. Every island has different rules governing this, so click on the star rating and it will tell you how you’re doing.
Of course, you’ll also have to remember that some dinosaurs are social while others hate crowded enclosures; a dinosaur that feels packed in will try to bust out, while one that doesn’t have enough friends around will also break fences in hopes of finding others of its kind beyond the walls.
Once you’ve got the basics down, the game will move you on to bigger things, and you can also come back to those old islands with new knowledge and unlocks to get secondary objectives for each island that bring their own additional unlocks and new horizons.
In Summary
Jurassic World: Evolution is, in its heart of hearts, a relatively simple resource management game. As such, once you learn how to manage your resources, there is nothing the game can throw at you that you won’t be able to master.


Published: Jun 11, 2018 06:44 am