You’ll need some Outriders tips and tricks if you’re going to survive your stay on Enoch and make the most of it. The third-person shooter from Square Enix and People Can Fly has more actionable in-game guides than most shooters and games in general, offering a large library inside in the pause menu.
We’ll go over some of those tips and tricks below because they’re worth singling out and looking at in more depth. But there are also some things that the game glosses over that will help you live longer and improve your quality of life.
As this guide’s headline suggests, the tips below won’t be for the Outriders late-game or its end-game expeditions. While they can be used across every portion of the game, they’re very much meant to get you up and running on Enoch, helping you make the most of your first 8-10 hours.
With that in mind, let’s jump in.
Read the In-Game Guides

Square and People Can Fly have taken a small bite out of our pie here with the number of in-game guides they’ve written up for Outriders. But while they may make our job a little harder, they’ll make your life a whole lot easier.
You can find the Guides section in the pause menu, just underneath the options sub-menu.
Guides go over everything from effect resistances like ash, freeze, and slow to general crafting tips and how shields work. There are some things they skip over or don’t fully explain, but they’re well worth reading when you first start.
Try Every Class Early
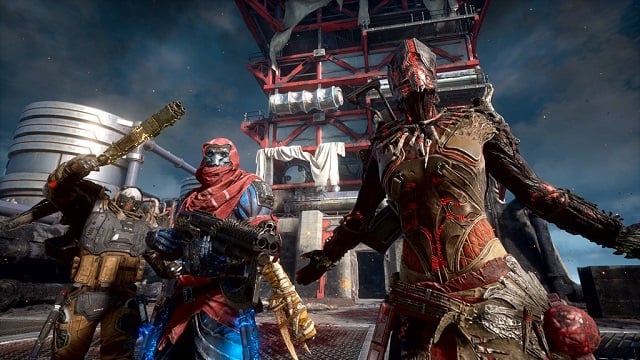
There are four Outriders classes: the Technomancer, the Pyromancer, the Trickster, and the Devastator. Each has a unique skillset and requires a distinctive playstyle.
- Technomancer: Specializes in crowd-control and long-range attacks; can heal allies.
- Pyromancer: Specializes in medium-range attacks and fire
- Trickster: Specializes in close-quarters attacks, traps, and time manipulation
- Devastator: Specializes in close-quarters attacks and defense; the tank of the group
Once you create a character, you are asked to choose one of the above classes. Once you do so and begin a playthrough, that character is locked to that specific class. However, you can create up to six characters at a single time assigned to any of the classes.
It’s worth testing out all four classes early on to get a feel for each of them and see which one might fit your playstyle the best.
Once you playthrough the prologue once, you can skip it with each subsequent character. Items stored in your stash are shared across characters, but story progression, character level, and World Tier level are not.
Know How Your Class Heals
There are no health packs to pick up in Outriders. Neither does health regenerate to maximum like in Call of Duty (though it will regenerate some). Each class has its own healing mechanic, and you must know how each of them works.
- Trickster heals and gains shields through close-proximity kills
- Pyromancer heals by marking and then killing marked enemies
- Devastator heals through close-proximity kills
- Technomancer heals by dealing damage
Remember that some item mods and attributes will also allow you to generate health under various circumstances, such as when reloading or on each shot.
Trickster is the only class that can organically generate shields. All other classes must receive it from other sources.
Check Everywhere for Chests

Outriders is a linear game; there’s no open world here. But that doesn’t mean there isn’t room for exploration.
For the most part, Enoch’s destinations are self-contained areas on a larger world map. You can fast travel between each region, and each of those regions has smaller sub-areas within them that you can hop between.
Most of these sub-areas and locations are connected by linear pathways. As you defeat enemies and move forward, you’ll come across chests that glow in a faint blue hue. Wooden chests contain loot; steel chests contain ammo (denoted by a white ammo icon on the mini-map).
Restock chests are always easy to find and can be found in three places:
- Next to an explorer banner (fast travel location)
- Just before a combat encounter
- Inside most combat encounters
Wooden chests can be found in combat encounters, too, but they’re primarily found on the pathways leading up to combat encounters and in little nooks off to the sides of those paths. Look for sections of the map that branch off of the primary route: behind rocks, inside burned-down buildings, etc.
Explore as you make your way down these linear pathways to nab extra loot for scrap and crafting materials. Who knows, you may even snag an epic weapon or armor piece worth keeping.
Look Everywhere for Mining Nodes
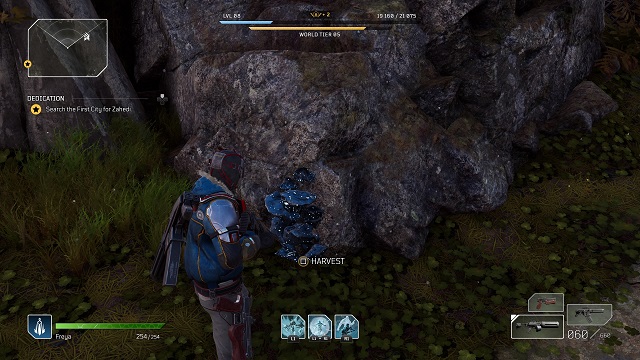
Just like chests, mining nodes can be found anywhere on Enoch. Most are, as you might expect, found on cliffs and alongside other rocky outcroppings. They are almost always found on the edges of an area or pathway, and they stand out with their bluish glittery coating.
Mine these for iron to supplement the iron received from weapon dismantling. You’ll need that crafting material to upgrade weapons.
Don’t Be Afraid to Spam Your Skills
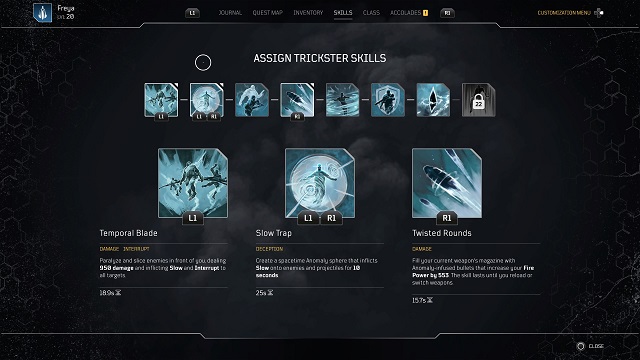
Each Outriders class can equip three unique skills at any given time. These fall into specific categories, such as Deception for the Trickster, and they all provide special benefits, allowing players to slow or weaken enemies, improve damage output, deflect bullets, and even teleport.
Do. Not. Be. Afraid. To. Use. Them. Seriously.
Outriders wants you to play aggressively. Unless you are playing a very specific build or using a very specific sniper/long rifle, Outriders punishes you for playing back and/or defensively 90% of the time.
That means, among other things, spamming your skills and their associated abilities. Skills already have relatively short cooldowns (most are under 20 seconds at most), and some mods and attributes can shorten the default cooldowns even more.
As you reach higher World Tiers, it’s imperative to use skills as much as possible to not only deal damage but to debuff enemies, create traps, and heal. Skills will save your skin, whether you’re playing solo or in multiplayer co op.
Don’t be Afraid to Retreat or Reposition
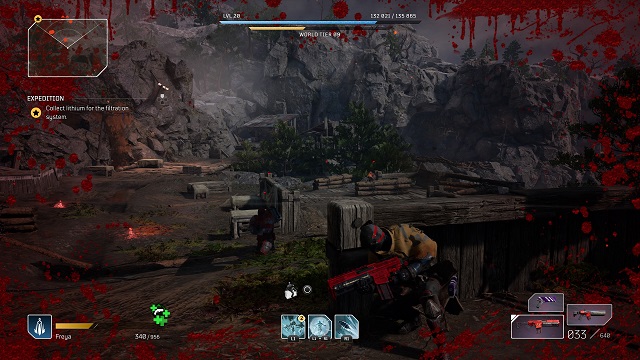
Sure, “Play Aggressive” is the unofficial subtitle of Outriders, but it’s just as useful to know when to retreat and reposition, kiting enemies from a disadvantageous location to an advantageous one.
Once a creature wave is triggered, enemies funnel to you no matter how far away you are from them. As long as they can get to you, they will. Kite adds into kill zones and set traps for slowing and weakening them.
Human adversaries are a bit different and tend to hunker down while shooting at you. However, there are hyper-aggro melee humanoids that spawn in some areas that can easily overwhelm you; reposition to pull them away from the main force and make them easier to deal with.
Always be aware of your surroundings, too. Position yourself so that captains can’t easily get to you or pin you against the environment. Put obstacles between you and the enemy, and use elevation to get the drop on enemies below — or use it as indestructible cover from attacks from above.
Pay Attention to Weapon and Armor Mods, Attributes
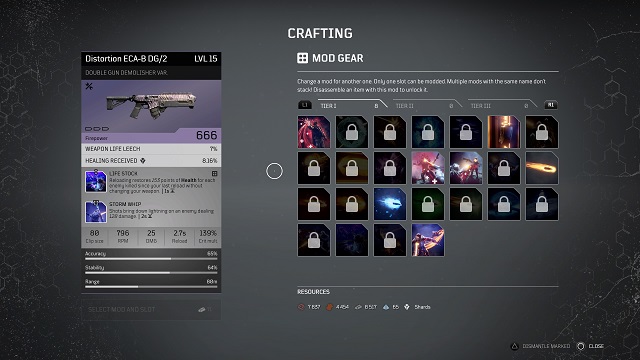
It’s easy to pick up a new weapon or piece of armor, see it has a higher baseline damage or armor rating than your currently-equipped gear, and put it on. While it’s important to look at those baseline ratings as you acquire new gear in Outriders, and some of the best early- to mid-game weapons have more powerful base stats, it’s equally important to pay attention to the mods and attributes attached to each new item you pick up.
Just because an item’s baseline stat is “better” than the gear you currently have on, a certain mod or attribute may make it less useful for your build or playstyle.
For example, Essence Thief is a great mod that allows you to regenerate health for each shot you land on an enemy. I have it on an 1165 firepower assault rifle, but I picked up a 1333 firepower assault rifle with Striga, a mod that returns 30% of any crit damage inflicted back to me as health. It would seem that the 1333 rifle is better because of its increased raw firepower.
But perhaps not. Maybe.
While the Outriders crafting system mostly allows you to switch weapon and armor mods on the fly, there are instances where you can’t do so; some slots lock after changing out a mod. Since I play very aggressively with the Trickster and suck at getting crits in general, the increased firepower doesn’t mesh well with my playstyle. I may actually get killed more trying to get criticals for health regen than I would by simply getting body shots for a similar effect.
This goes double for other weapon and armor attributes, such as weapon life leech, anomaly power, cooldown reduction, and more. If you use your skills a lot, a higher anomaly power level or cooldown reduction percentage is sometimes more useful than a higher armor rating or increased baseline firepower.
Turn Off Camera Shake and Motion Blur (If You Want)

Outriders cutscenes and dialog sections feature a good amount of camera shake by default. Some players won’t mind and will embrace the unique cinematographic method, but others will want to turn it off. The same goes for the motion blur that appears around your character in-game when running.
You can turn both of these off in the options menu.
For camera shake, go to Options -> Gameplay Options -> Cinematic Camera Smoothing. Turn the value to 1.00 to eliminate camera shake in cutscenes and dialog sections.
For motion blur, go to Options -> Display -> Motion Blur. Set it to off, and motion blur is a thing of the past.
Mass Sell and Mass Dismantle Weapons and Armor
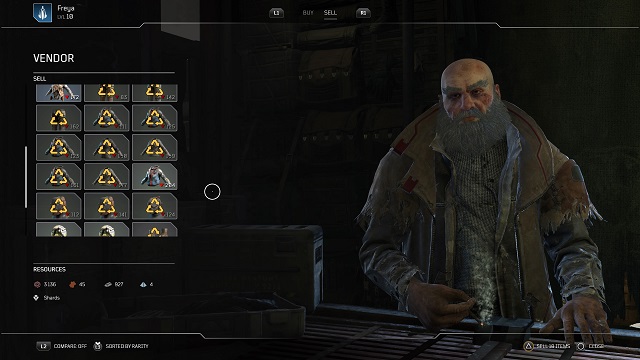
When you first visit one of the vendors in Rift Town or Trench Town, you’ll likely have a large inventory of items. Likewise when you first unlock crafting after playing through the First City destination.
You could sell or dismantle all of your common (white), unusual (green), and rare (blue) weapons and armor pieces separately, but it’s faster to do it in bulk.
In the vendor sell menu, crafting menu, and inventory menu, highlight an item and press R3 (default on consoles) or right-click (default on PC). This marks each of the items with a recycle icon.
Once you’ve marked everything you want to sell or dismantle, press Triangle (PS4), Y (Xbox), or Delete (PC) to mass sell or dismantle items.
You can also mark all items of a specific rarity for dismantling in the inventory menu, but not in the crafting menu or sell menu. Click the colored rectangles in the bottom right of the menu to select all commons, rares, etc.
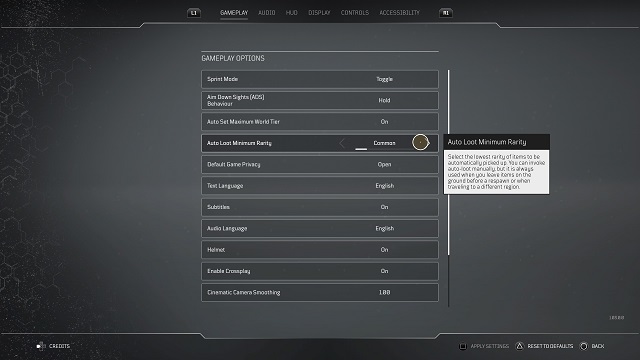
Use Auto Loot
Outriders’ auto loot system doesn’t automatically loot items when they drop from defeated enemies, pop out of a chest, or otherwise drop on the ground. Instead, it auto loots items when you die or leave an area if those items are already on the ground.
More usefully, though, it also lets you pick up items in an area at anytime once they’ve dropped — without having to run around to each of them and pick them up manually.
This not only makes looting combat areas much easier, but it also means if you’re playing multiplayer with friends, one player can mine an iron node while another loots a chest — and you can pick up all of the items without having to follow those players around.
To auto loot manually, press down on the D-pad (consoles) or H (PC). You can go into Options -> Gameplay -> Auto Loot Minimum Rarity to choose the lowest rarity the auto loot function will allow you to pick up. Choose “Common” to loot everything that drops. If you don’t want lower-rarity items, tweak it to only pick up epics and legendaries.
Change Your World Tier If Things Get Too Hard
Outriders uses a dynamic difficulty system called World Tiers. As you progress through the game, the difficulty increases as you play better and kill more enemies. Get killed facing a particularly tough enemy, boss, or encounter, though, and the difficulty decreases slightly.
You can tell what World Tier you’re in and how far along you are to the next World Tier by looking at the yellow bar at the top of the in-game screen. It’s found just underneath the blue bar for your current class level.
The dark yellow portion of the bar indicates where you are in World Tier progression. The light yellow bar that may be extending from that indicates how far your World Tier will increase following an encounter/area.
Some encounters may prove particularly difficult, even in multiplayer co op. If you want to decrease the difficulty and return to a lower World Tier, you can do so at any time. Most of the time, you’ll get lower-grade weapons and armor at lower World Tiers, but don’t worry; you can return to your current maximum World Tier whenever you want.
To change your World Tier, open the Quest Map and press left on the D-pad (default on consoles) or Z (default on PC). This brings up the World Tier menu, allowing you to move up or down through the tiers you’ve already unlocked.
Remember that the higher the World Tier, the better the loot. Don’t be shy about lowering the difficulty, but remember to turn it back up if you want the best gear you can find.
Lastly, remember that each new World Tier unlock comes with gear rewards, so be sure to visit this screen each time it increases to collect new loot.
—
That’s it for our Outriders beginner’s tips and tricks guide. There’s a ton of information in the game’s in-game guides, so be sure to check those out. If you’re looking for other advice not found there, such as which class is the best to start as when playing solo or how to use the fast travel system, consider taking a look at our other Outriders articles here.


Published: Apr 4, 2021 08:45 pm