
Fire Emblem: Three Houses is unique in the franchise for letting you customize how each unit in your class-turned-army grows. It’s all done via an initially overwhelming instruction mechanic, where you make good use of your professorial skills to teach your students.
It takes some getting used to at first, and it’s easy to feel completely out of your depth with the enormous amount of freedom involved. However, this guide is here to help you understand how to instruct your students.
Your house leader gives you a short introduction to the instruct mechanic, but it’s worth going over some of the finer details.
Goals Are Vital
Your students will gain skill points in Goals during the week, regardless of how you instruct them during the lecture day. Goals are the best way to level up the skills you want to prioritize the most.
They’re also an easy way to significantly boost prowess in a given area without using up valuable instruction points. That means you can spend those points on training specific students in certain directions while also still getting weekly goal points.
As a refresher:
- Blue arrows pointing up denote an area of strength
- Red arrows pointing down signify weakness
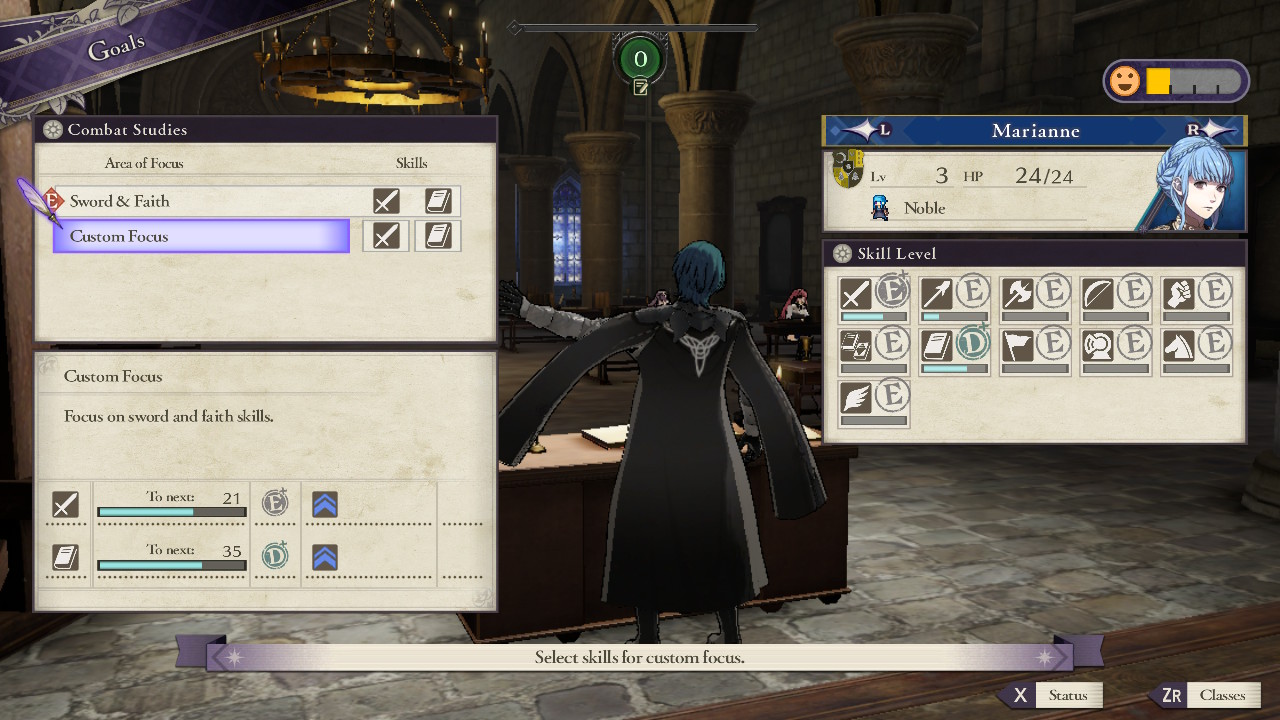
Each student comes with two pre-set goals. For instance, Claude’s default goals are Bow and Authority. These serve as a helpful guide for the areas a student will excel in the most, but they aren’t set in stone by any means.
You’re free to change them, and frequently if you want, although it’s obviously not advantageous to set goals in areas in which students are naturally weak.
Organize Growth
However, it is a good idea to figure out how you want units to grow so you can plan for the longterm, because students earn skill points at rather a slow pace.
Even though you can change goals each week, you’d be better off organizing the growth of your party. You don’t want to be left with lots of low-level skills and no areas of mastery when the real war starts.
If you still feel stumped trying to figure out what goals are best for which student, take a look at the strengths and weaknesses. Each student’s natural abilities give you a pretty good idea of the paths they could take.
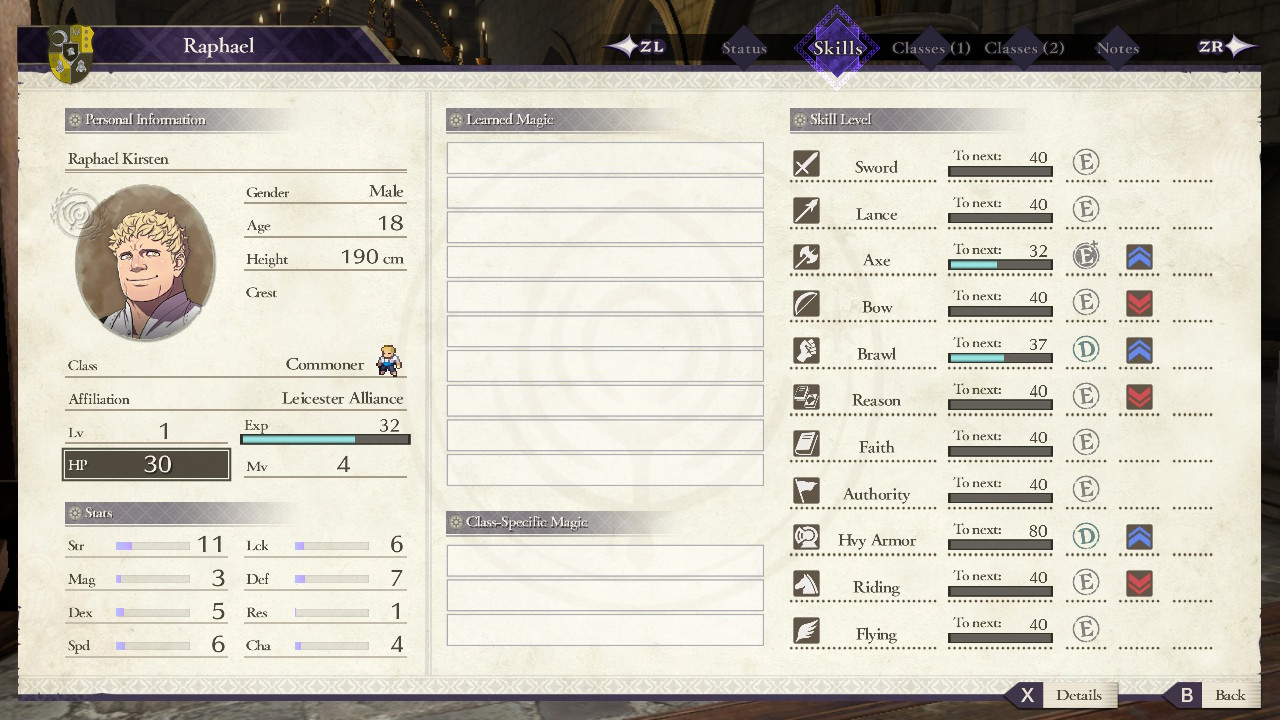
Raphael, for example, is strong in Axe, Brawl, and Hvy Armor and could automatically pass the Fighter exam. He could be a Brigand later on by focusing on his Axe skill, or, if you prioritized Axe and Hvy Armor, he could take the Armored Knight route.
That being said, if you’re intimidated by setting a custom focus, leaving them on default is completely fine until you get the hang of things. Units will still develop — just in a more traditional way.
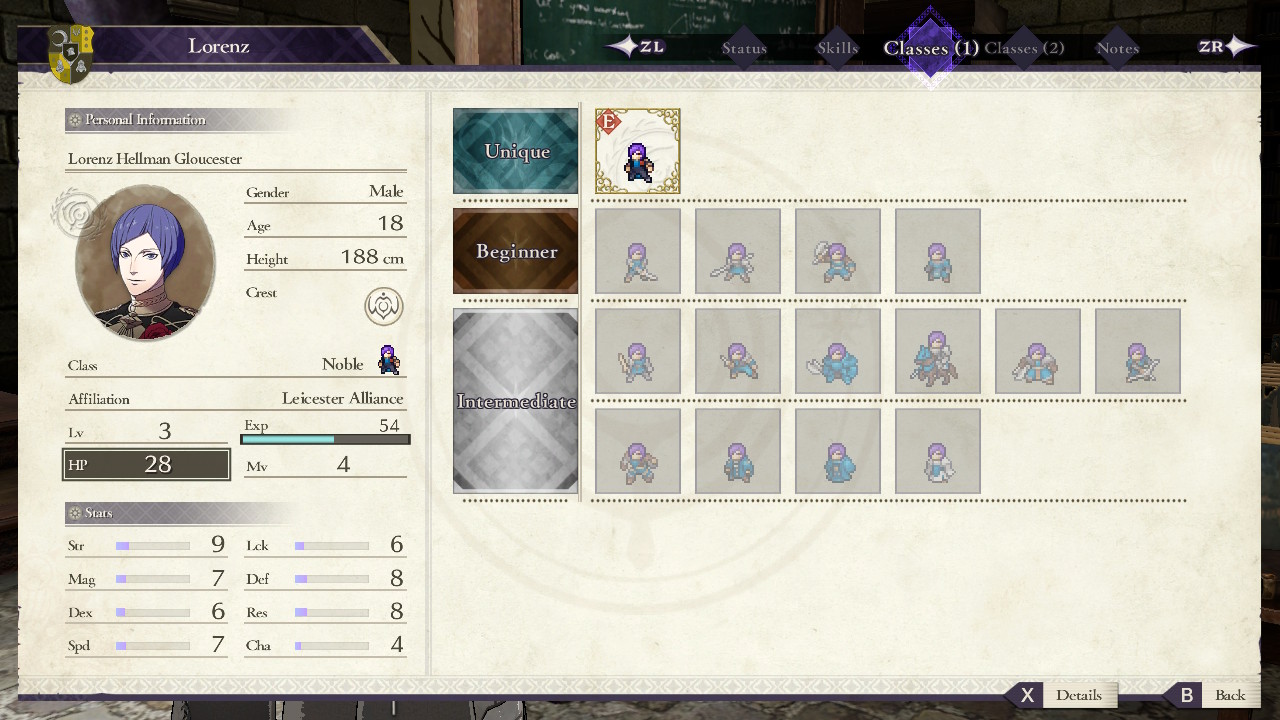
Plan for Certification Exams
If you are going to customize goal sets, take some time to look over the classes available to a student to get an idea of what skills might be useful later on. You can do that after selecting Instruction from the menu.
- Press ZR to open a list displaying your students
- Select a student to see the classes eventually open to them
- You can also see the requirements for passing that class’s exam
Finally, you don’t have to choose two separate skills for a custom focus. A character will sometimes approach you with a specific goal in mind, where they want to emphasize one skill over all others. You can choose to set it for both of the custom slots, and it’ll grow even faster.
The short term is equally important for magic users. Remember that in Three Houses, you don’t buy spells and staves. Healing and offensive magics power up through improving their respective skills of Faith and Reason.
Whatever your long-term goals for magic users, don’t neglect their magic-related skills, or you’ll be in big trouble pretty fast.
Another area not to ignore is Authority. While it might not be required for any specific classes, it’s an important stat because it determines which Battalions you can recruit; it also grants Rally skills over time, like Rally Speed.
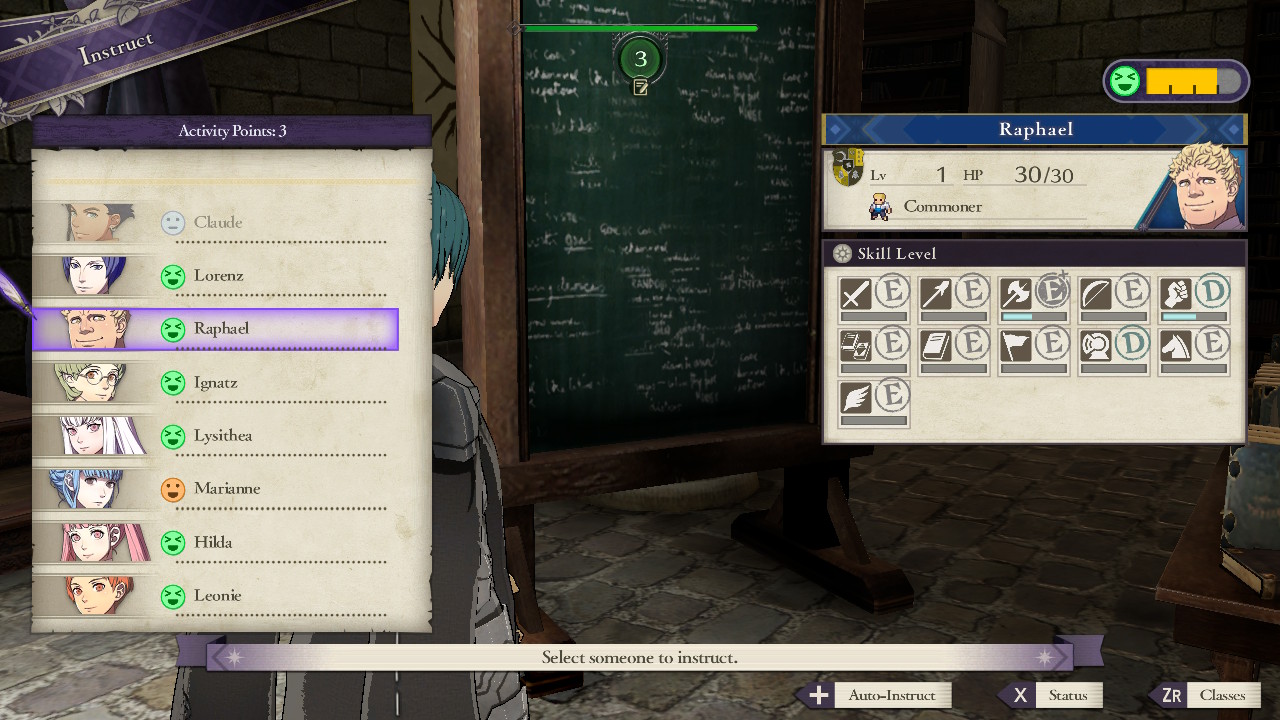
Class Is in Session: Individual Instruction Guide
Each month has a few lecture days, marked on the calendar with the quill and paper symbol. These are where you get a set number of activity points for instruction you can spend on boosting student stats of your choosing.
Instruction has a few primary uses:
- Developing goal skills at an even greater rate
- Working on non-goal skills so they don’t get left behind
- Improving bonds between yourself and students
How much you can instruct depends on the student’s motivation level, with a full motivation meter being equivalent to four lessons.
You can fill the motivation meter by spending time with students during exploration days — dining with them, participating in the choir, and so on — or by attending seminars, among other things.
Whether you choose to use all of a student’s sessions in one go is up to you. It would be a good idea to check the calendar to see if there’s an upcoming exploration day so you can boost motivation again, though.
There’s one minor but important thing to note: when you’re instructing a specific student, don’t exit the menu where you choose a skill until you’re completely finished or you’ve exhausted their motivation. Otherwise, choosing that student again will use up another available point.
Weapon Proficiency
A few factors determine which skills you’ll want to focus on during your tutoring time.
Characters are proficient in certain weapons. Using those weapons when working on related skills provides a +2 boost. It might not always be useful, but it’s good to keep in mind how your main character’s development could help boost other party members’ growth too.
Students’ natural strengths and weaknesses play a highly important role as well. Being naturally gifted provides a +2 point bonus, while weakness takes two points off.
Tutoring
Tutoring sessions have four possible outcomes, with strengths and weaknesses influencing them too:
- Failure: No boost; can critique or console, with the right choice improving your relationship with a student.
- Good: No boost
- Great: Increases skill points earned and improves student bond
- Perfect: Increases skill points, improves bond, grants motivation boost the first time in a session, allowing for more instruction.
You’re more likely to get a great or perfect if you tutor in strong areas. Obviously, unless you have a very good master plan in mind or want a hidden talent in a weak area, it’s not worth the time to spend points on weak skills.
Hidden Talents
Almost every character has a hidden talent skill area, denoted by a set of three stars next to a skill. These might not be spots in which characters are strong in, however, which means you might get failures more often than not.
However, leveling up those skills will eventually unlock a new strength or ability, so it’s well worth the risk of failure and the time spent.
Activity Points
You start with three and gain one additional activity point every time your Professor Level ranks up. Here’s how to raise your Professor level and get more Activity Points
- Perform minor activities like fishing and growing plants; growing plants nets up to 300 points for your professor level
- Complete bonding activities
- Participate in Seminars
- Engage in (and win) tournaments — only available starting in White Clouds Chapter 4
Group Tasks Improve Support
Group tasks are a bit different. These let you pair two students on a specific task, like monitoring the skies or weeding the monastery. Completing the task earns you a cutscene between those characters, improves their support level, and enhances a specific skill like Flying or Riding.
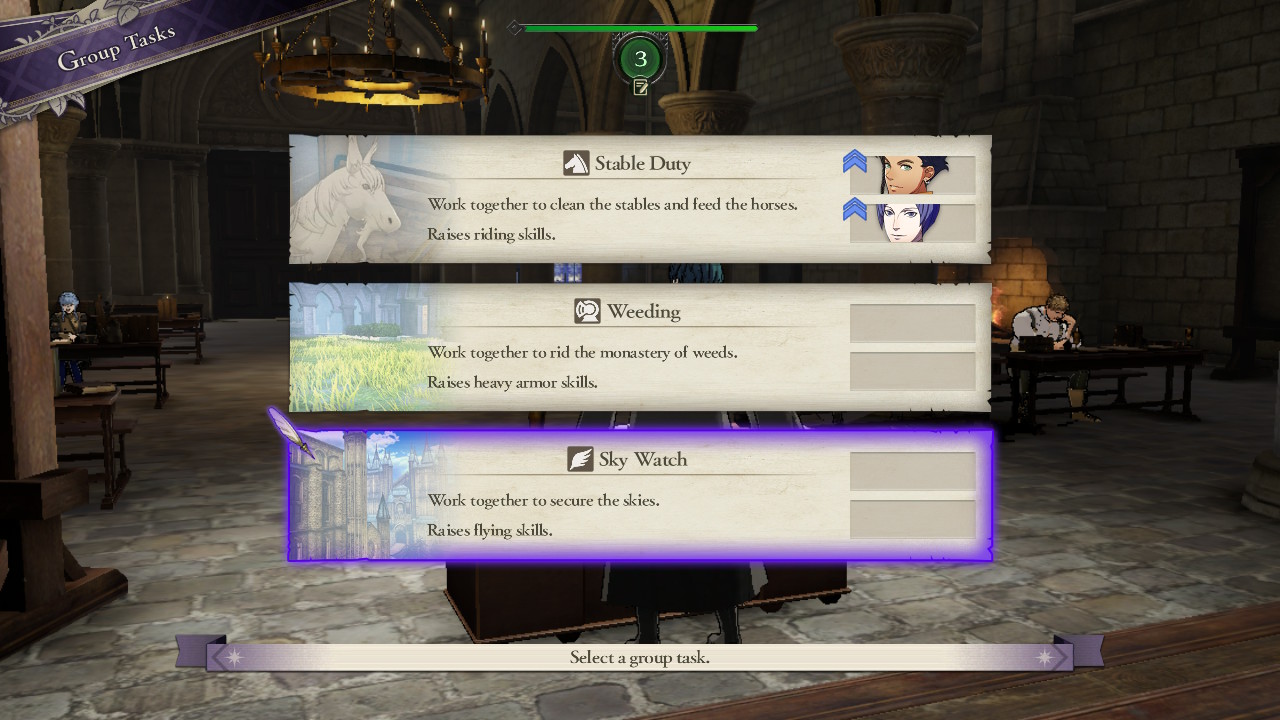
Naturally, the more focused nature of these tasks means they aren’t useful for all your students. These are best for students you have other plans for, like if you wanted to turn your brawler into an armored unit or there was an extra skill you didn’t improve during instruction.
Even if you didn’t have set skills in mind, the support bonus alone makes these worthwhile to include in your lesson plan every week, since higher support levels between units give stat bonuses when they’re near each other on the battlefield.
Automatic Instruction
Three Houses also gives you the option to choose automatic instruction before every class day. Auto-instruction just runs with the default goals and chooses students and skills closest to leveling up for individual instruction.
If you’re happy with how things are going and don’t need to make any changes for a few weeks, automatic instruction is a big time-saver, but it’s also perfect if you just want a more traditional Fire Emblem game without all this fancy customization.
If you’re playing on Hard mode, though, going with automatic instruction every time isn’t necessarily recommended. You’ll want to get rid of superfluous goals and focus on shoring up your party’s weaker areas to ensure you can face the battles to come.
—
That’s all for this Fire Emblem: Three Houses instruction guide, but check out or other Fire Emblem: Three Houses guides for help surviving your school days.


Published: Jul 27, 2019 12:54 pm