
If your design philosophy in Animal Crossing: New Horizons is anything like mine, you want control over visitors’ experiences on your island to a certain degree. I enjoy playing with visitors’ perceptions of an area via perspective and the use of sound, particularly background music.
The normal background music in Animal Crossing: New Horizons is decent enough, but it doesn’t have that “it” factor many K.K. Slider tracks have that make them fun to listen to — which is why I like to set background music for each key area on my island.
For some island decorators, just plopping one of the many stereos down and turning it on is enough. For others more interested in keeping up the aesthetic and sound of an area or the entire island, setting down stereos becomes a whole project.
If you get serious about laying some sound around your island, you need to know which stereos you should be using for the best effects and how to place them discreetly but effectively.
Stereos and Sound Quality
Not all stereos are created equal, both in real life and in Animal Crossing. There are over 15 stereo items in New Horizons, between them are (from what I can tell) three distinctive audio fidelity levels with a single outlier (Portable Radio).
Audio fidelity in this context means how clear the sound is, how loud it gets, and how much bass the stereo outputs.
I’ve separated the game’s stereo options into three categories: high, medium, and low fidelity. I’ll be going into what this means for you as an island designer.
(The plain stereo images were taken from Nookpedia.)
High Fidelity Stereos
 There are only two high fidelity audio players in New Horizons, one of which is available to you very early on.
These two stereos stand above the rest because they are louder than the rest when positioned properly, they have great sound quality, and they output the most bass.
- Wooden-block Stereo
- Hi-fi Stereo
In my extensive testing between these two, both sounded identical from all angles, volumes, and from a distance. The only difference is how they look, and how much they cost.
The Hi-fi Stereo is a whopping 82,000 Bells! Meanwhile, you can just make a bunch of Wooden-block Stereos for free and have just as high of audio fidelity.
I like to use the Hi-fi Stereo when I have no choice but to let visitors see the music player, and still want it to sound great. Otherwise, the Wooden-block Stereo does a fantastic job even compared to medium fidelity stereos that cost a handful of Bells.
Medium Fidelity Stereos
The two high fidelity stereos are a little obvious even without testing them, but the same cannot be said for the game’s medium fidelity stereos.
 The main visual difference between most medium and low fidelity sound systems in Animal Crossing is that the low fidelity stereos tend to be smaller, which is a feature that has its uses (more on that later).
Medium fidelity stereos tend to sound just all right, but their quality isn’t up to the same level as the two high fidelity stereos, and all three of them have extra feedback noise from the speakers and/or the turntable. None of these have the bass of the two high fidelity options.
I’ll be listing them below, with notes on their notable aspects.
- Jukebox (minor crackling from the speakers, but 1×1 tile)
- High-end Stereo (base audio quality similar to high fidelity, but lower bass and a perpetual low speaker crackle)
- Retro Stereo (major crackling from the speakers)
Low Fidelity Stereos
And here we are, at the largest category of audio systems in the game.
 Low fidelity stereos are always three things: they are 1×1 tile, they have relatively low maximum volumes, and they have a tinny quality to their audio.
In short, these stereos will work in a pinch but aren’t suitable to setting the tone to an area of your island unless you specifically want the music to be muffled, tinny, or not travel far.
I like to use these when I am trying to adhere to decor and want to hide my stereos, or to create a fading impression to the music when entering or leaving an area. Anyway, we’ll get to that in a bit. For now, here is the low fidelity stereo list.
- Cherry Speakers
- Shell Speaker
- Cute Music Player
- Portable Record Player
- Bamboo Speaker
- Cassette Player
- Tape Deck
- Throwback Skull Radio
- Portable Radio (plays random music at a very low volume)
Using Stereos to Create Background Music in New Horizons
When the game initially released, you could not set stereos across your island to play different music tracks. It was my biggest disappointment in New Horizons at the time, and luckily, it has been patched to allow your auditory creativity to roam free.
Now you can place as many stereos as you like across your island, playing any music track you want at each one. Which is great, because it takes a few to ensure an area plays the music you want without being interrupted by the game’s default music.
There are a number of aspects to bear in mind when trying to create background music for an area:
- Music will only travel up to five tiles away from the stereo and be clear, though you can stand several tiles away and hear the music in the distance.
- The closer you are to a stereo, the louder it is.
- Every stereo is loudest when pointed south — toward the screen, to be precise.
- Your villagers will sing a playing song regardless of whether they’re nearby the stereo or not.
- Music from stereos does not blend together much at all, meaning if you have two stereos playing different music next to each other, you will only hear the song coming out of the closest one.
- Fences and buildings muffle audio if you are on the other side.
The last point can be a big hurdle if you have a neighborhood you’re trying to create a single BGM for, but it can be a boon if you are just trying to give individual islanders yards and only want to hear the music in the yard.
The above all apply no matter the stereo you’re using, from Hi-fi Stereo to Tape Deck, so you can use this information to your advantage.
Maybe you want to obscure a stereo completely, maybe you just want it to fit in. Whatever you’re aiming for, you can probably figure out a solution.
I’m going to use a few parts of my island as examples, as I’ve used a number of tricks to force music in different areas without being a detriment their aesthetic.
Example #1
This one’s going to be a little weird but stick with me. I have two songs playing in this restaurant, but I can easily have three totally separate ones.
At my snapping turtle bun restaurant, Tonde’s Torts, I have two stereos within the dining area as well as one within the snapping turtle enclosure behind the kitchen.
The first stereo is right next to me, a Wooden-block Stereo, and you can see the Jukebox at the back. These are both playing the same song.

There is a pastel Wooden-block Stereo on the ledge way at the back, that’s there to turn on at my leisure and play the piano in that area. However, it can be used to grant Tonde’s Torts’ kitchen area its own song, which won’t be heard in the rest of the restaurant.
With this setup, I have the same song on the front Wooden-block Stereo and the Jukebox. This fills the entire dining area with the song I choose. Not only that, but the cutesy “outdoor sitting area” I have set up gets the Wooden-block Stereo’s music at a high enough volume for me to play the violin to the music.
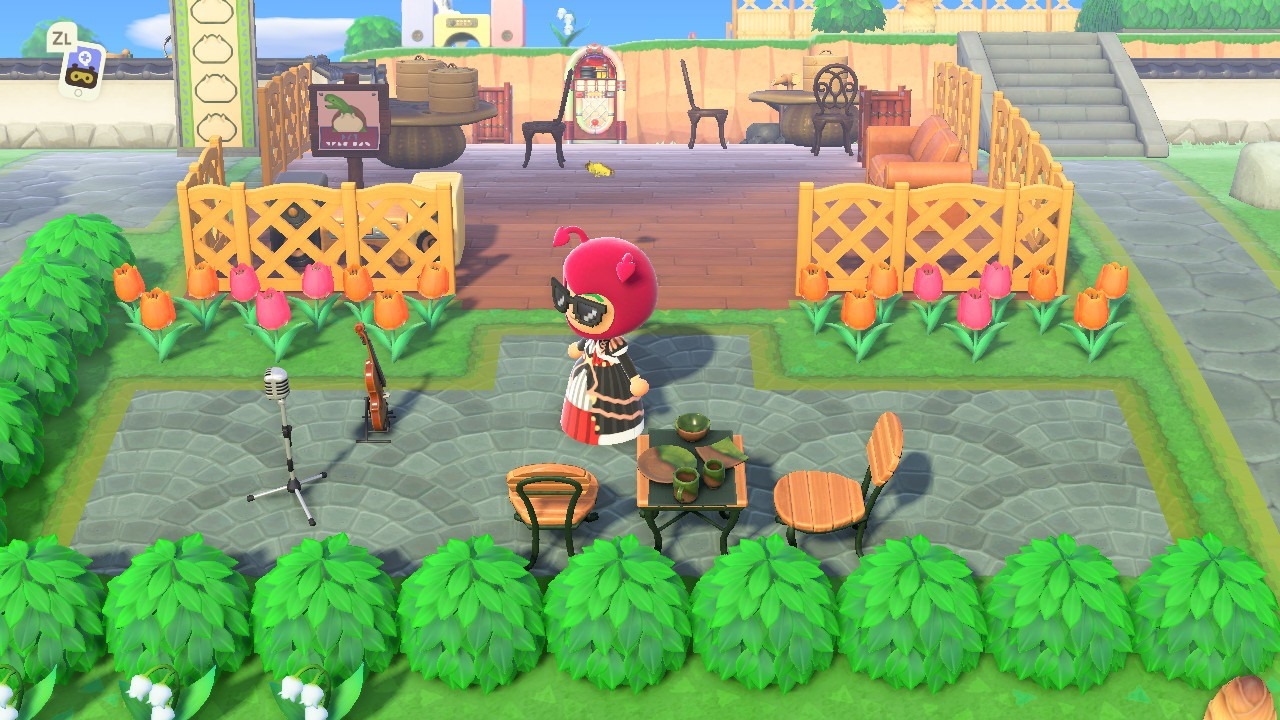
The Cassette Player in the snapping turtle enclosure can only be heard at the entrance to the enclosure, or if you’re standing outside of the fence closing it off. The sound does not travel well, which I want.

From this, there are a few key points to remember:
- The sound in the snapping turtle enclosure is muffled because it’s turned to the west, rather than the south.
- The restaurant’s Jukebox and Wooden-block Stereo are close enough to one another that the music does not fade within the restaurant whatsoever.
- The pastel-painted Wooden-block Stereo on the ledge is placed facing north and close to the Jukebox, so that its music does not play over the restaurant’s music, but it does play solely within the kitchen because it is sandwiched between the Jukebox and the Cassette Player.
Example #2
My boardwalk area was a pain to get up and running and still isn’t complete, but it uses some tricks to either obscure the stereos or attempts to integrate them into the aesthetic. All of these are playing the same song.
Looking at the image below, how many music players do you see? Two, right? The Wooden-block Stereo at the bottom, which has been colored to blend in, and I honestly barely notice day to day, and the Jukebox at the back right.
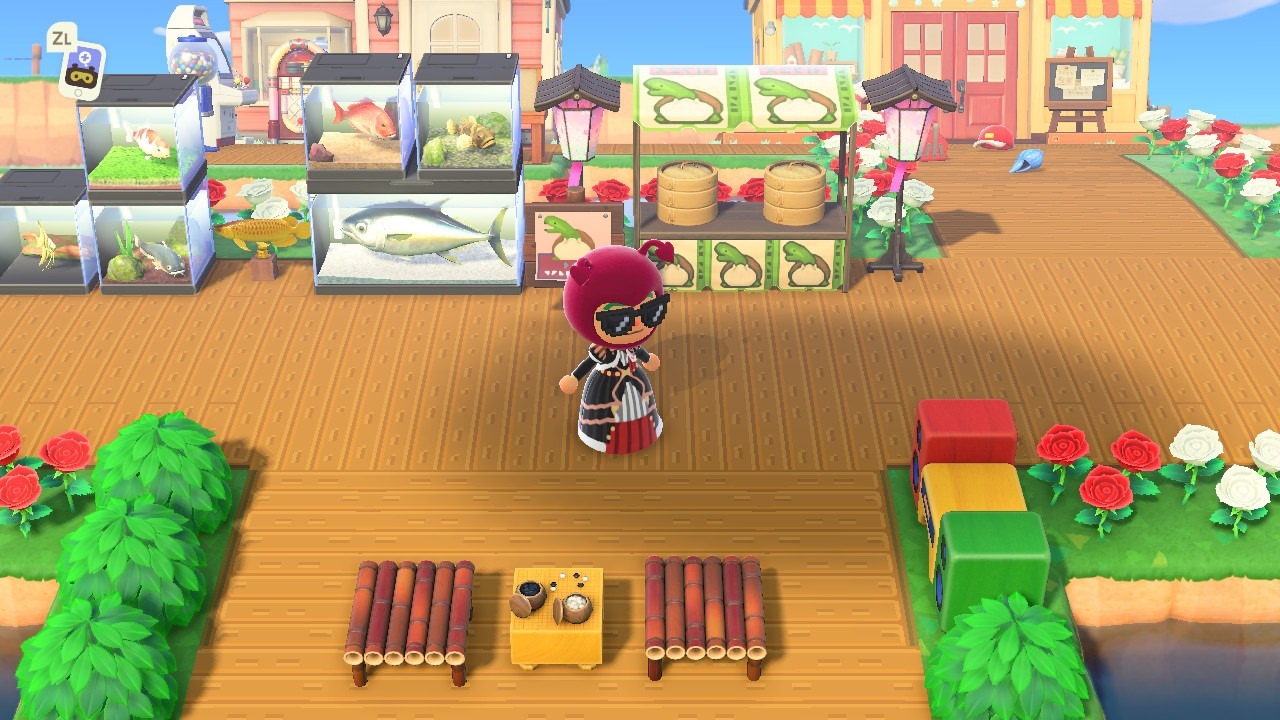
There are actually two hidden stereos in the above image. One is behind the tuna, and the other is behind Nook’s Cranny.
That’s not all here, though. My boardwalk has one more hidden stereo. You’ll notice it behind the popcorn maker.

Things to know about how this works:
- Behind the tuna is a Wooden-block Stereo, and it is facing south for maximum volume.
- Behind Nook’s Cranny is a Retro Stereo, and it can really only be heard when you stand next to the store or come out of it.
- The tinny din of the Shell Speaker serves to fade the music in or out depending on whether you’re coming into the area or leaving; it is also at max volume.
- There is a slight audio gap between Nook’s Cranny and the Jukebox, because the Retro Stereo is behind the building and hence a few tiles back.
Example #3
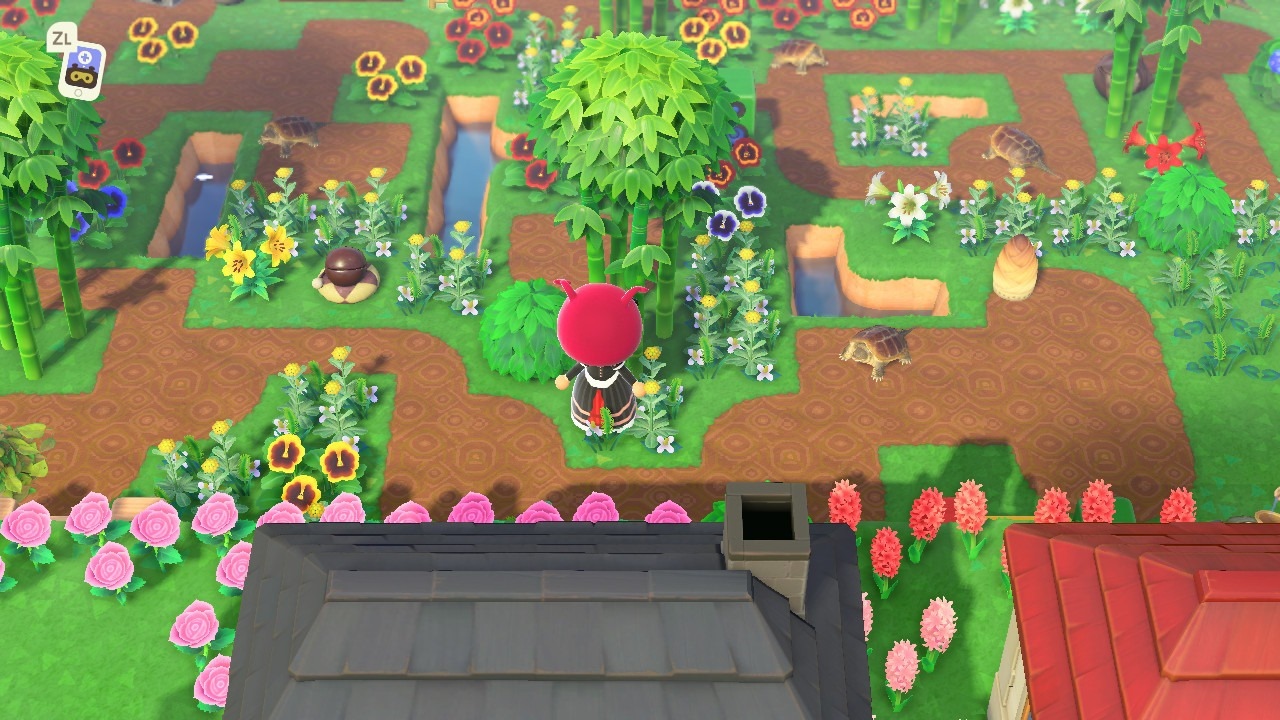
The swamp is one area I had to cobble together sound-wise because I don’t have any Bamboo Speakers. Otherwise, I’d just slap those all over the area.
Just to note, all these stereos are playing the same song.
Since I had to get a little creative with it, it serves as a reasonable example and will hopefully, give you some ideas. Though I do admit the back area has no music and needs to be finished. That section of the swamp is not featured here.
In the image below, you’ll likely notice two stereos right away: the Tape Deck in front of the house, and the Wooden-block Stereo to the right behind the bamboo.
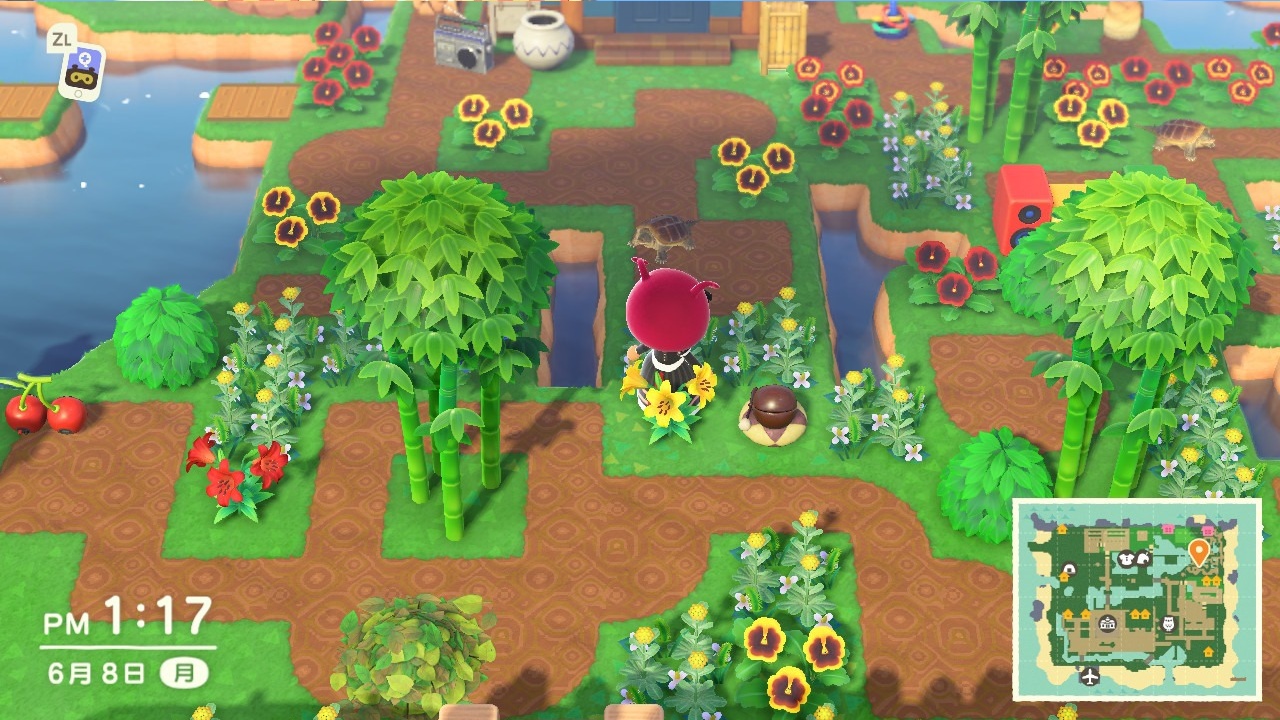
There is also an unpainted Wooden-block Stereo at the bottom, and it is up against a cliff but still pointing south. That’s not all, though! There are Cherry Speakers to the left, facing north to obscure the fact they are speakers.
If we walk a little to the right…
Two more speakers appear! Another Wooden-block Stereo near the bottom against the cliff to the right, and a painted Shell Speaker behind the bamboo at the top right. These are to help ensure audio coverage.
And of course, some things to note:
- All three Wooden-block Stereos are pointed south for maximum volume, and ideally, all three would be painted to match the area (I keep forgetting to paint the last one).
- A stereo was set behind the house, but the music can’t carry far because the building is in the way; hence the Tape Deck in the front yard.
- To force the music to properly carry further north, I would have to place another Wooden-block Stereo north of the brown Shell Speaker.
- The Cherry Speakers function the same as the Shell Speaker on the boardwalk, in that it serves to make the music sound as if it’s fading in or out when coming or going.
I’ve spent a lot of time playing with the game’s stereo systems attempting to get the music perfect throughout key areas on my island, and I hope all those hours of having the TV volume up way too high helps you become an even better island designer.
Decorating for sound just as much as aesthetic is hard, but getting K.K. Condor or whatever your favorite K.K. track is to play consistently in your favorite areas is well-worth the extra effort and mulling over furniture positions.
Related Content
- How to Change Roof and Mailbox Colors
- How to Get Iron Nuggets
- How to Make Bells Fast
- How to Get the Pole Vault
- Flower Breeding and Hybrids Guide
- How to Get a Mirror
- How to Catch Fish
- How to Plant Fruit and Pricing Guide
- How to Time Travel
- Turnip Guide to Success
- ACNH Review
That’s it on our background music tutorial. Check out our other tips in the links above, or head over to our Animal Crossing: New Horizons guides for even more.


Published: Jun 8, 2020 02:46 pm