Northgard is a smooth and mechanically robust real-time strategy game that subverts expectations with fresh and inventive features. There are a lot of moving parts in this RTS from Evoland and Evoland II developer, Shiro Games. There’s no pausing to strategize, either, so you need to hit the ground running if you’re going to rule this Viking continent – whether that be through conquest, trade, or lore.
To get you started on the right boot, we’ve put together this beginner’s guide full of tips, tricks, and strategies for starting your first settlement in Northgard, which will set you up for victory in the mid-to-late game.
Here, we’ll cover:
- Early Base Construction
- Land Colonization
- Villager Management
- Resource Management
Let’s get started.
Tips for Building Your Base in Northgard’s Early Game
Each map in Northgard is procedurally generated, which means you’ll theoretically never play the same map twice. It also means that you’ll never really know where resources will be or what type of terrain you’ll be faced with when first starting out.
However, you’ll always start with a Town Hall and three villagers.
As you can’t strategize or create buildings or units when pausing the game (Northgard’s pause feature straight up “stops” gameplay), you’ll want to start building your base right away. First, you’ll want to pay attention to how many buildings your current section of the map can hold at any one time.
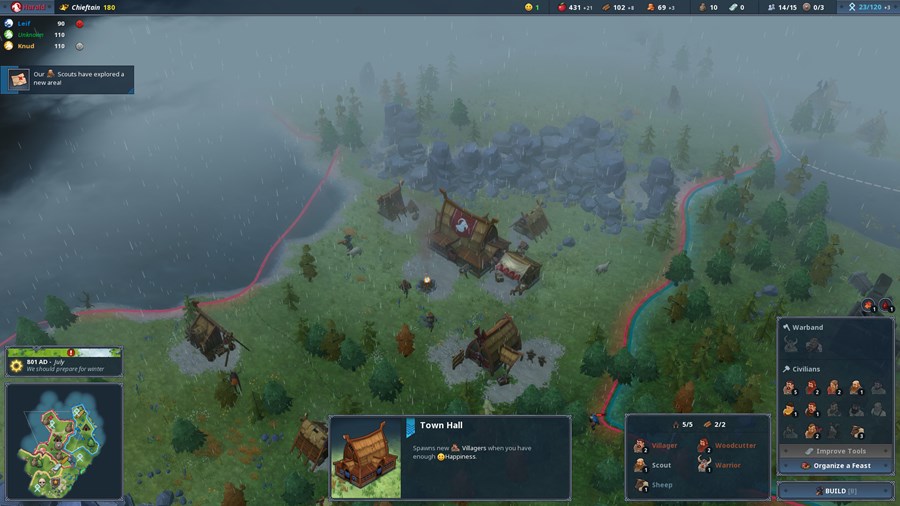
As this is the beginning of the game for you, you should currently only have one territory in your kingdom. Click anywhere in your territory and look at the build and villager menu on the right-hand side of the screen. To the left of that, you’ll see a rectangular box with a house symbol at the top and a number to the right of that symbol (which should say 1/5). This is the number of buildings (5) you can build in that specific territory. Keep this number in mind as you construct your base.
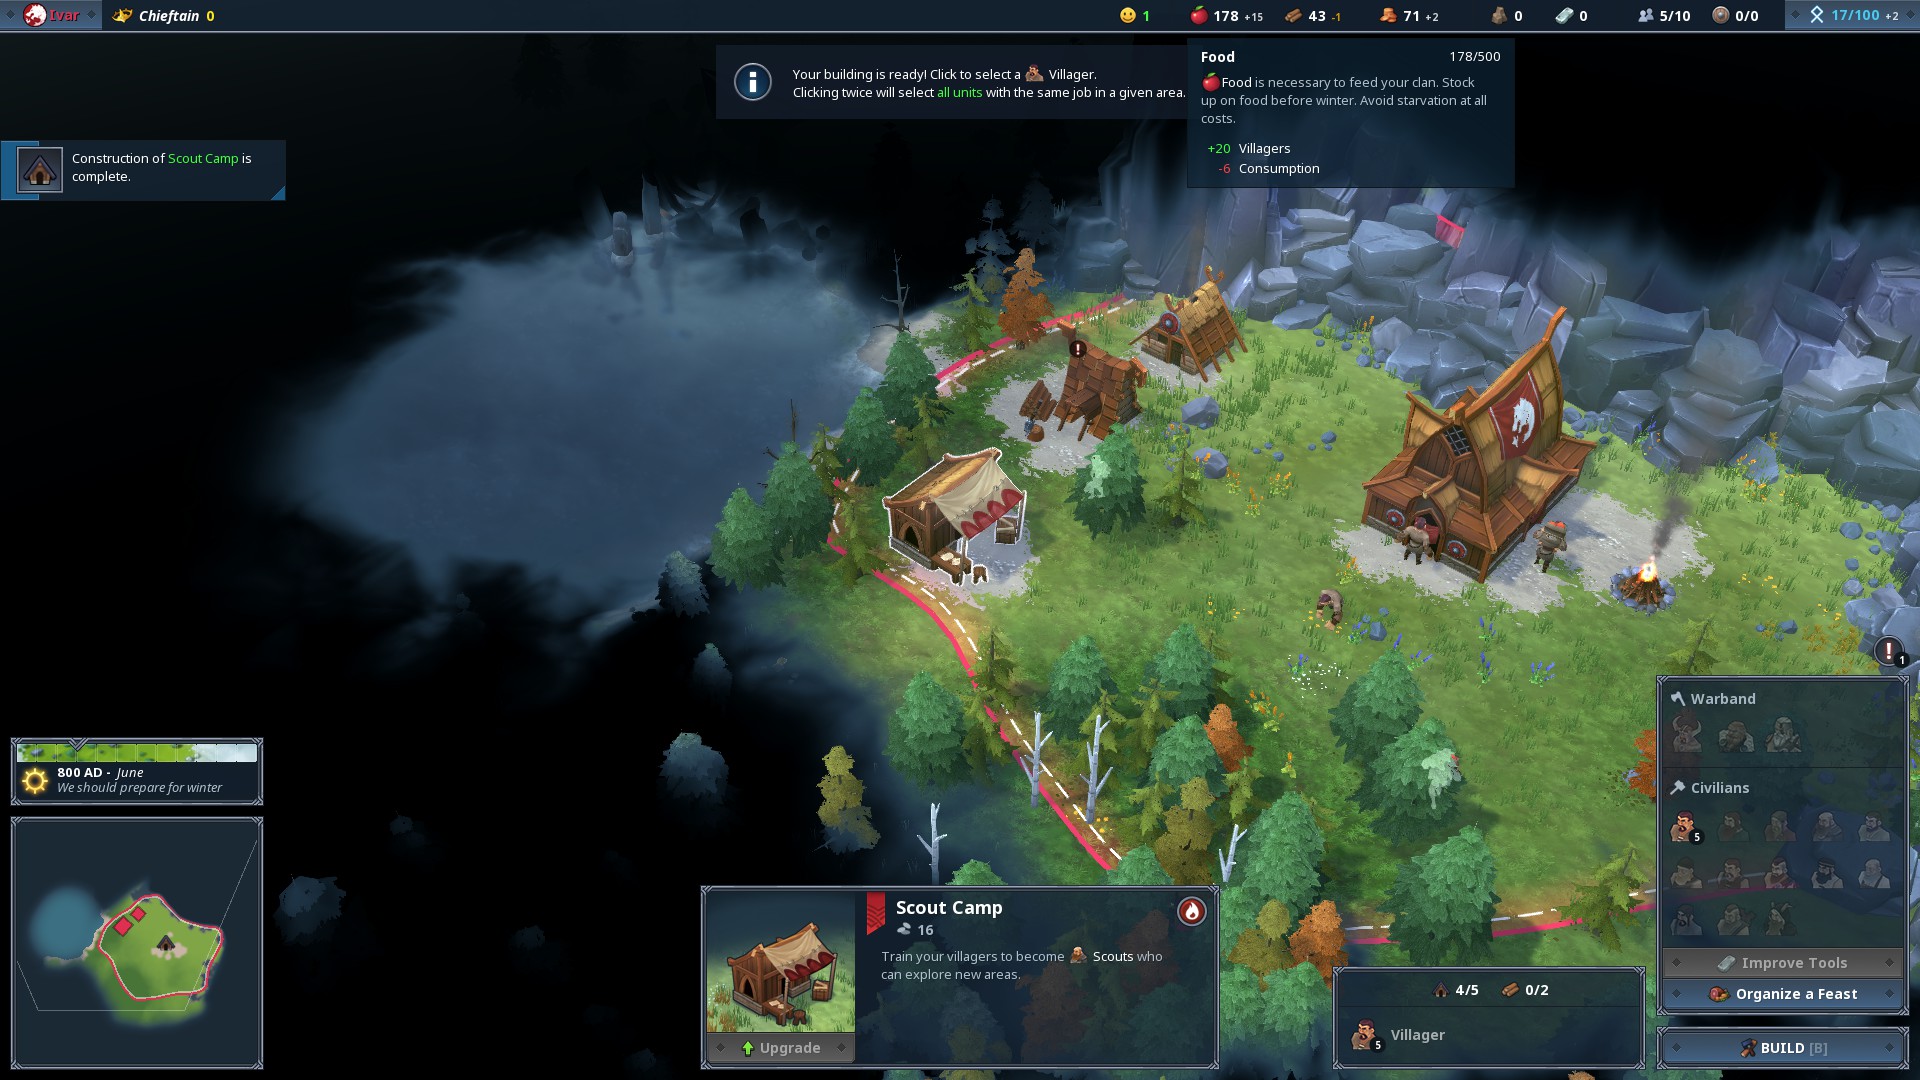
But first, you’ll want to build a House so that your Town Hall can keep pumping out villagers at a steady pace. Each house adds 5 to your population.
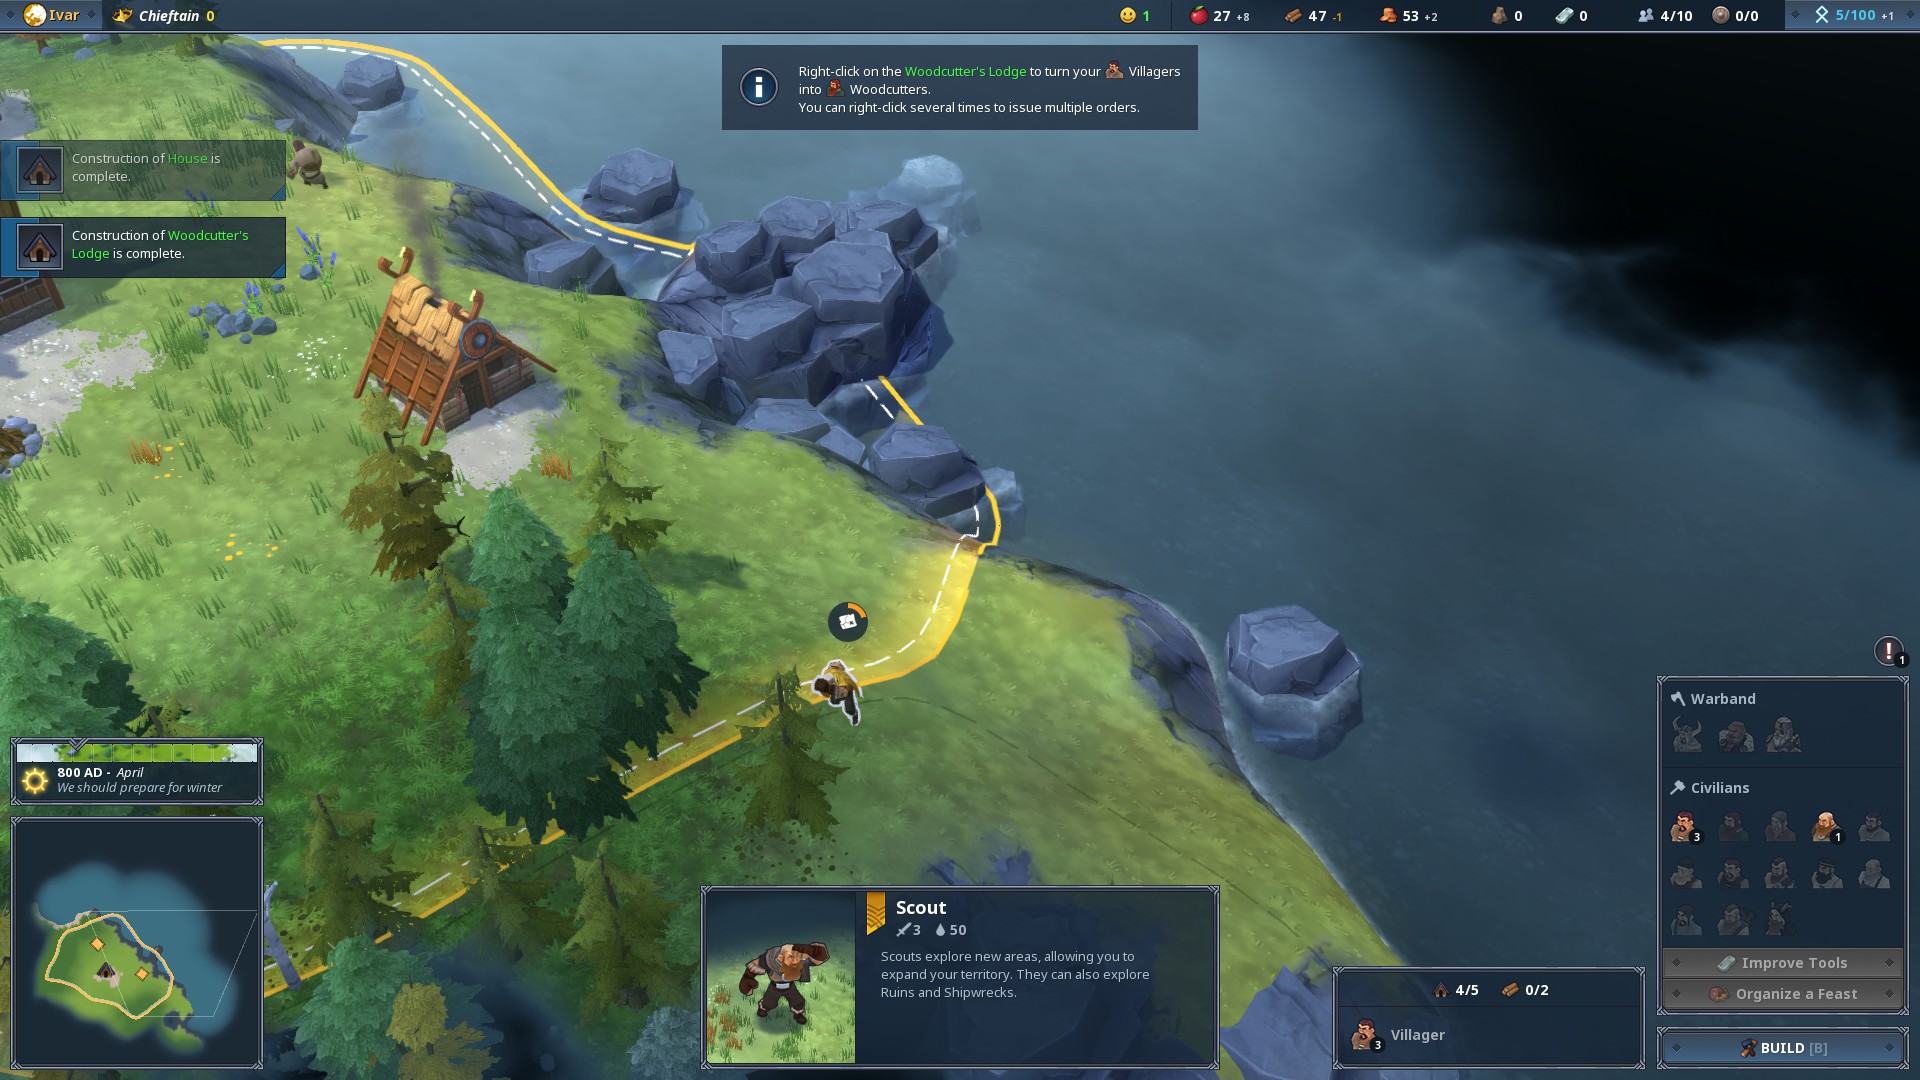
Next, you’ll want to build a Scout Camp, which will allow you to convert your villagers to scouts. Vitally important to expanding your empire, scouts are the only means by which you’ll be able to explore the map and colonize new territories.
After you build a Scout Camp, you’ll want to immediately build a Woodcutter’s Lodge. Optimally, you’ll want to build the Woodcutter’s Lodge close to a forest within your starting territory (you’ll get a 20 percent bonus to production for doing so). However, if you begin within a region that does not have a forest – or only a very small outcropping of trees – it may be worthwhile to wait until your scout has charted the immediate territories surrounding your starting position and found a more suitable location for your lodge.
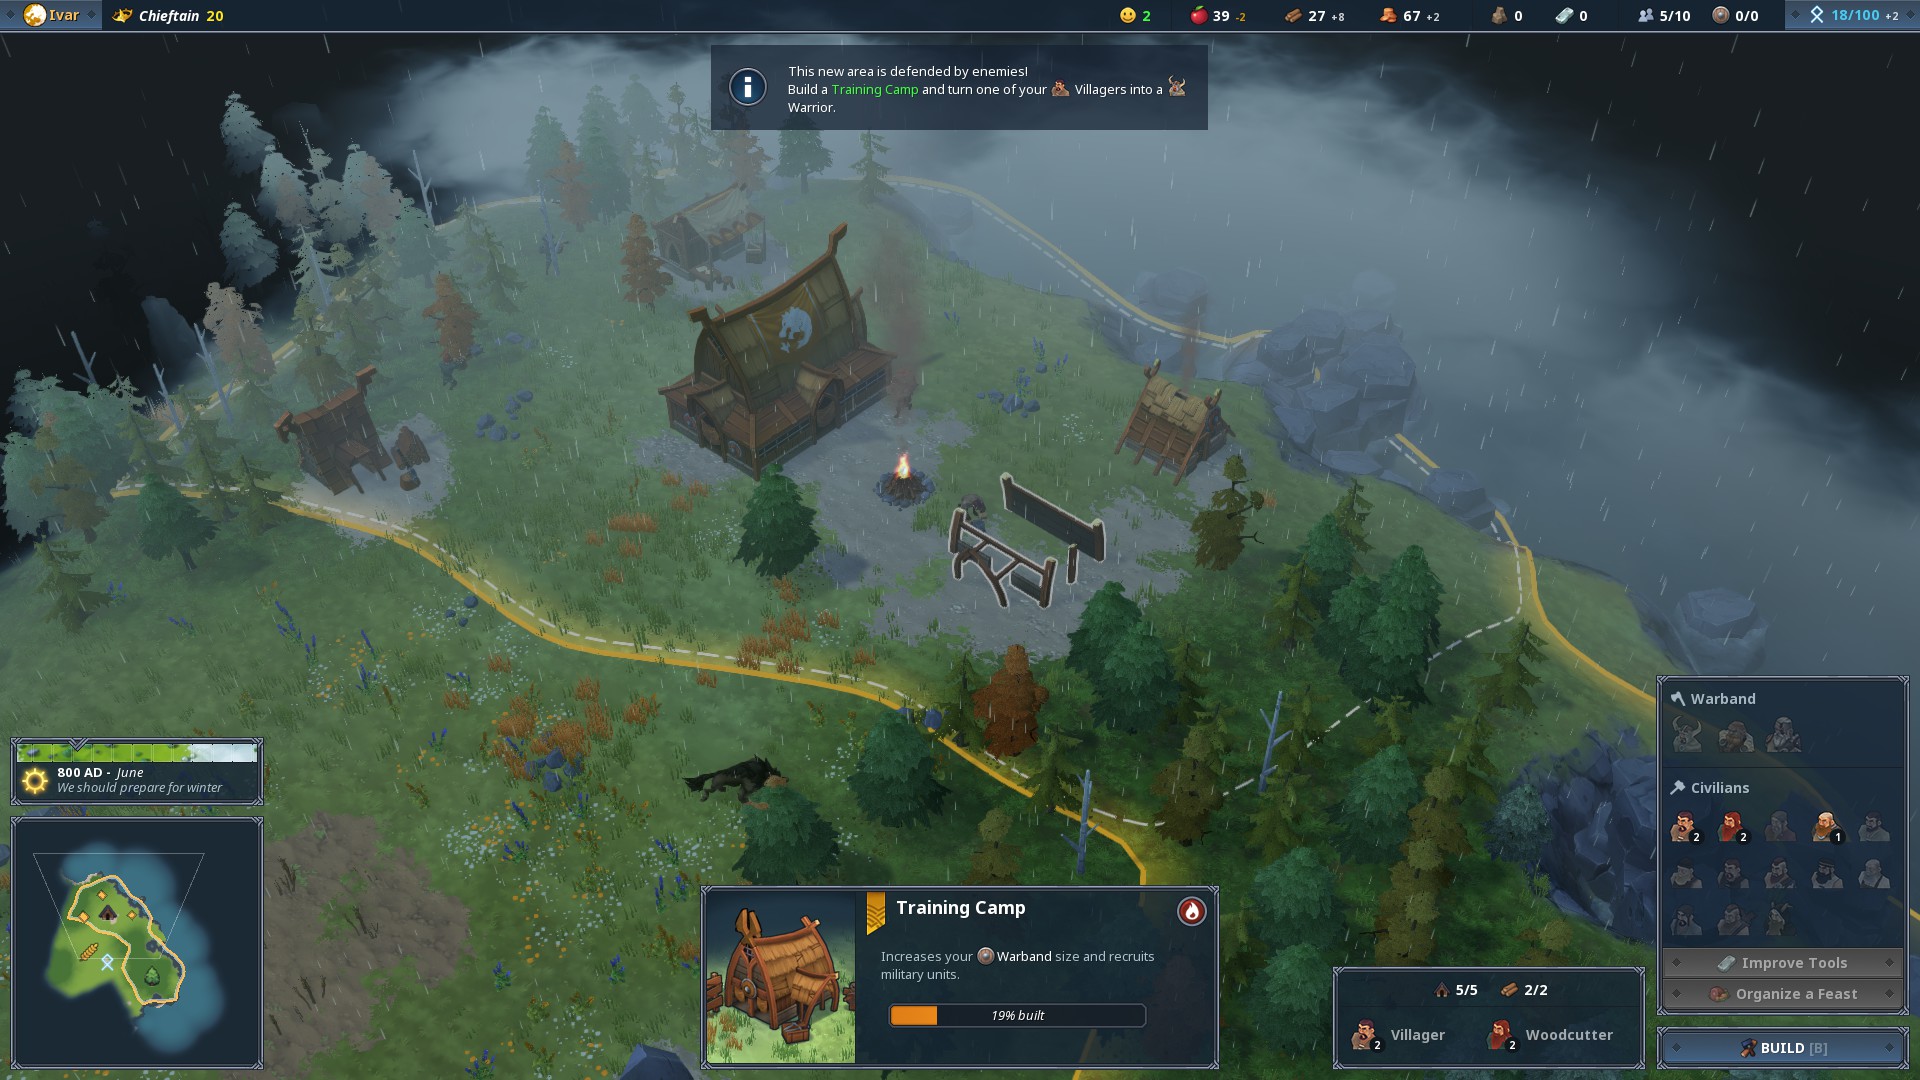
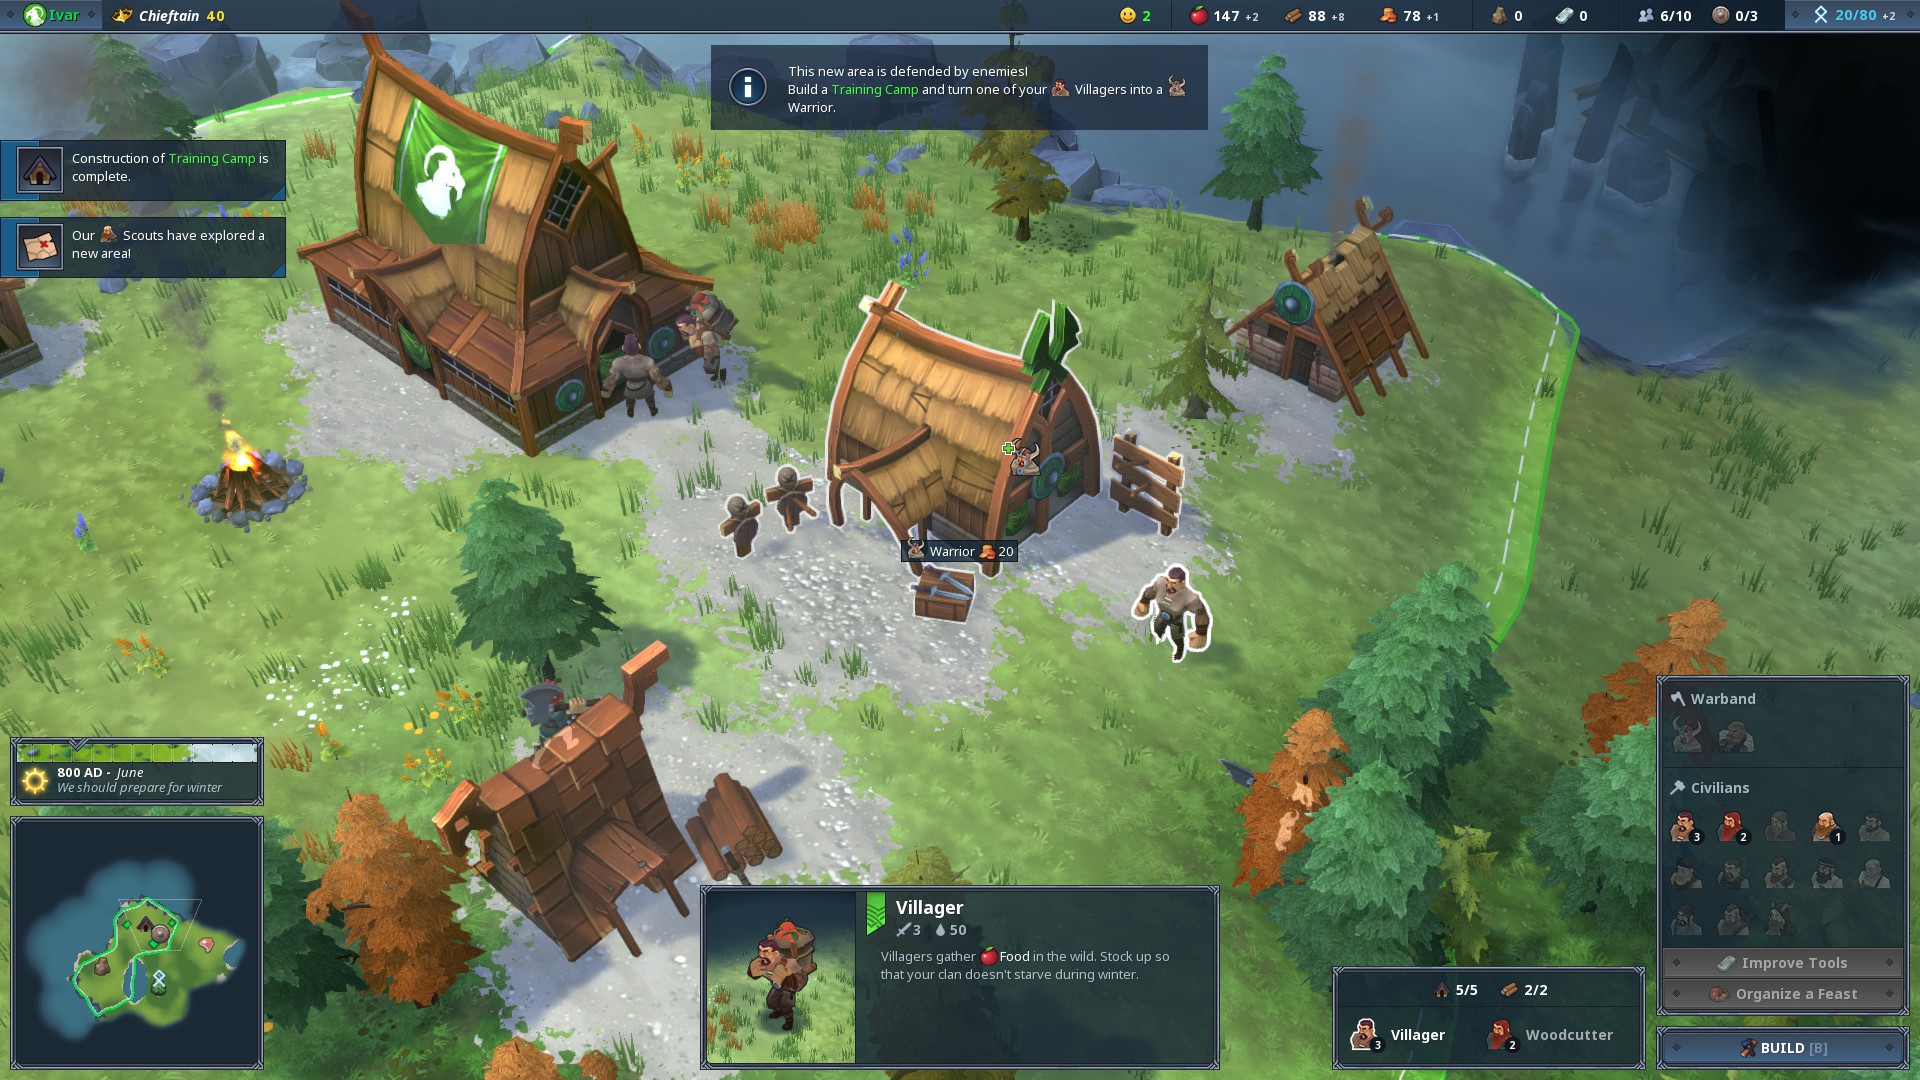
Once you’ve built your Woodcutter’s Lodge, you’ll have a choice: either build a Training Camp or a Trading Post. A Trading Post helps you gain more krowns, which you’ll need to pay your building upkeep and pay for your warriors. On top of that, krowns are also used (among other resources) to construct and upgrade buildings.
However, in the early game, you’ll automatically get +2 krowns every 10 seconds of so from your Town Hall, which means you’ll have a small-but-steady stream of krowns coming in – as a long as you don’t build too many buildings before you build your first Trading Post. That means you can get away with building a Training Camp at this point in the game, as well as convert a few villagers to warriors. The choice is up to you – just keep an eye on your krown consumption.
Winter in Northgard is Something You Want to Prepare For

At this point in the game, you’re most likely already moving into your first winter season in Northgard. This is when all resource production slows — meaning you’ll bring in less food and wood.
From here, you’ll want to think about building the following if you haven’t already:
- A Hunter’s Camp if you’ve found and colonized a territory that has deer
- A Fisherman’s Hut if you’ve found a lake that has fish
- (Note: The sea doesn’t necessarily have fish. In fact, I’ve yet to find other fish in the sea …)
- A Farm if you’ve found a plot of fertile land
- A Silo, which increases your food storage capacity, if you’re focusing on food production
- A Sheepfold if you began the game with sheep or have found a territory with sheep (doing so dramatically increases food production).
- A Mine if you’ve found stone or iron deposits
You can easily get through the early game (especially on lower difficulties) without building a Defense Tower or Healer’s Hut. These structures unnecessarily consume vital early-game resources that could be used for your winter stockpile or quickly expanding your territorial dominance.
You Won’t Survive a Second in Northgard Without Colonizing New Lands
As we mentioned above, the scout is your only way of discovering and colonizing new territories in Northgard’s wilderness. But there are just a few things you need to keep in mind after your scout’s pulled back the fog war.
You can control your scout.
This may seem obvious, but when you create a scout, he immediately runs off to chart new territories at random. If there’s a sector of the map you’d rather have him investigate, click him and make him go to edge of that region. He’ll automatically start scouting.
Your scout knows how much you can build in a region.
Remember: each region has a structure limit. Once your scout has found new regions, click on the region to see how many structures you can build on it, as well as what resources it contains. It may be that you want to move your Mine or your Woodcutter’s Lodge to this newly discovered location. But before you do…
Check to see how much food it will cost to colonize new territory.
At the beginning of the game, territories cost very small amounts of food to colonize. However, as your add more and more sectors to your empire, the amount of food required to do so steadily increases. Just be sure to not spend your winter reserves on annexing a piece of land you can’t immediately use.
Make sure you won’t have to fight for the land.
You can’t colonize new territories if enemies (human or otherwise) already inhabit those lands — unless you send warriors in first. In other words, you’ll have to clear any area of hostiles before your villagers will help bring that land into the kingdom.
Managing Villagers in Northgard is Essential to Early-Game Dominance
Making new units in Northgard is unique, if a little strange when compared to traditional strategy game mechanics. To create warriors, scouts, farmers, loremasters, fishermen, hunters, or any other type of unit (sans the Warchief), you’ll have to convert villagers to those units individually. Unlike traditional RTS games, you won’t construct or queue units from each building.
How to put villagers in roles:
- First, select a villager
Then, for example, if you want that villager to become a warrior (as in the screenshot above), you’ll go to your Training Camp and hover your cursor over the camp - You’ll immediately see a small avatar of a Warrior and a green plus sign
- Right click the Training Camp and your villager will now convert into a Warrior
To succeed in Northgard, you’ll need to constantly balance the roles of your villagers and workers in each region of your budding empire. Keep a close eye on your resources and don’t be afraid to reassign villagers and workers to new roles when needed.
How to change a worker to a new role (or back to a villager):
To change back into a villager (which is the only unit that can build new structures):
- Left click a worker
- Find a house and hover over it
- Right click the house when the avatar and green plus symbol appear
- Wait for your worker to convert back to a villager
To change the role of a worker (from a hunter to a merchant, for example):
- Select your hunter
- Hover over the Trading Post until the avatar and green plus sign appear
- Right click and your hunter will be converted to a merchant
Food, Wood, Krowns, and Stone – Dominating Northgard is All About Resource Management
As with any RTS, resource management is a fickle meta game you’re forced to play in order to win. And in Northgard, Shiro Games has added a few tweaks to the typical strategy game formula to spice things up. Let’s take a quick look.
Gathering Food
Each of your units consumes -1 food, unless you have certain in-game or clan-specific modifier engaged to moderate this effect. Conversely, each of your villagers produces +4 food, unless you have other modifiers active.
So, for example, when you first begin, you’ll see that you’re getting +8 (+12-4) food roughly every 7-10 seconds of game time. When you add another villager, you’ll see that you’re getting +11 food (or +16-5) every 7-10 seconds of game time. Understanding this consumption ratio can radically inform your early-game resource decisions.
Now, as the game goes on, certain modifiers and food producers (such as Farmers, Healers, Hunters, and Fishermen) invariably change this ratio, but understanding its core mechanics helps you determine how many food producers you must have at any one time.
Here’s a breakdown of how much food each type of producer makes:
- Villagers: +4
- Healers: +5
- Fishermen: +4
- Hunters: +5
- Farmers: +5
- Sheepfold +5 (+3 for each subsequent sheep)
You can also upgrade your buildings using stone and krowns to increase food production as you progress through the game. And remember: Food is an important resource as it helps you colonize new territory.
Gathering Wood
Compared to food producers, wood cutters are pretty straight forward. Each lumberjack produces +4 wood about every 10 in-game seconds. You will, however, have to account for -1 wood consumption for firewood in the early game, which increases as time goes on or as winter approaches.
Getting Krowns
As we’ve mentioned, krowns are an important resource for converting villagers to warriors, upgrading buildings, paying upkeep on buildings, and even constructing some buildings, such as Houses.
At game’s start, your Town Hall will provide +2 krowns. However, the Town Hall does not produce nearly enough krowns to sustain your needs. Building multiple Trading Posts will be necessary to sustain your empire. Build them as soon as possible – without neglecting your other early-game resources.
Note: Building a Trading Post and Marketplace in the same territory boost krown production in that territory by 30 percent. So, when possible, build each structure together for maximum output.
Mining Stone
Mining stone isn’t as important in Northgard’s early game as you might initially believe. You’ll primarily need it to upgrade buildings and construct carved stones in the game’s later stages.
However, if you come across a territory with stone, it would be wise to mine at least a portion of it early on as you need 10 stone to upgrade your Town Hall, which will help you construct some of Northgard’s more advanced buildings faster.
You can also buy stone with krowns after erecting a Marketplace.
—
Well that’s it for this Northgard guide. We hope these tips and tricks to building your first settlement help you get started quickly and easily. Stay tuned to GameSkinny for more Northgard guides and news.


Published: Feb 26, 2017 09:30 am