This guide will cover the positions of all the monsters in the Lancer tier 4 Hunter's Log. Tier 4 stretches through eight zones with some only having one or two targets. This tier is a lot of teleporting around, so make sure you have about 3k gil.
The Zones
- Central Shroud
- South Shroud
- North Shroud
- Eastern La Noscea
- Outer La Noscea
- Southern Thanalan
- Coerthas Central Highlands
- Eastern Thanalan
The Monsters
- Floating Eye: A
- Spriggan: B
- Lesser Kalong: C
- Dryad: D
- Large Buffalo: E
- Ringtail: F
- Basalt Golem: G
- Sundrake: H
- Smoke Bomb: I
- Ornery Karakul: J
- Snow Wolf Pup: K
- Downy Aevis: L
- Batelur: M
- Mirrorknight: N
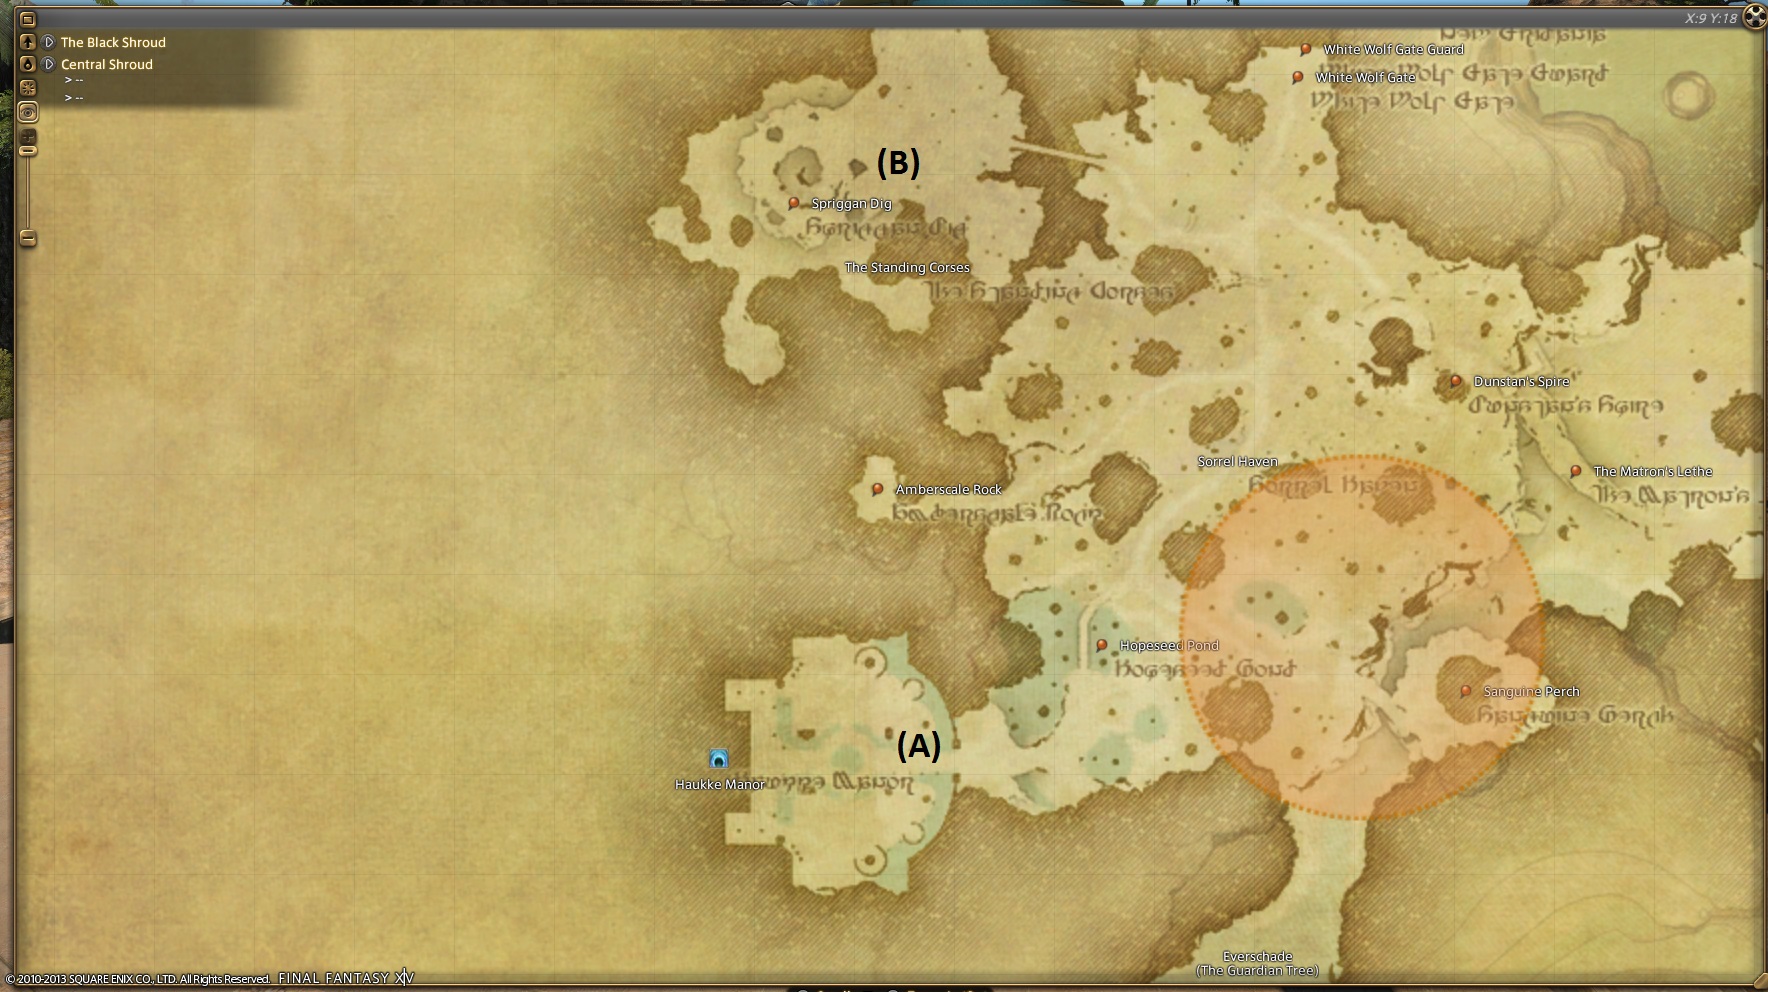
Central Shroud
If you've done the quest to unlock the extra gate in New Gridania, these two targets are easy to get to. However, if not, you have to go to Bentbranch and take the ramp up. It adds a bent of extra walking but that's it.
Floating Eye: A
The Floating Eyes are right outside the Haukke Manor entrance. So just go as if you were going to unlock Haukke Manor to get to them.
Spriggan: B
The Spriggan are in the northwest corner of the map so just take the path from Haukke Manor north.
South Shroud
South Shroud only contains one target, and it's easy to get to.
Lesser Kalong: C
Teleport into Quarrymill and go southeast. Just go until you reach the tunnel and the Lesser Kalongs will be inside.
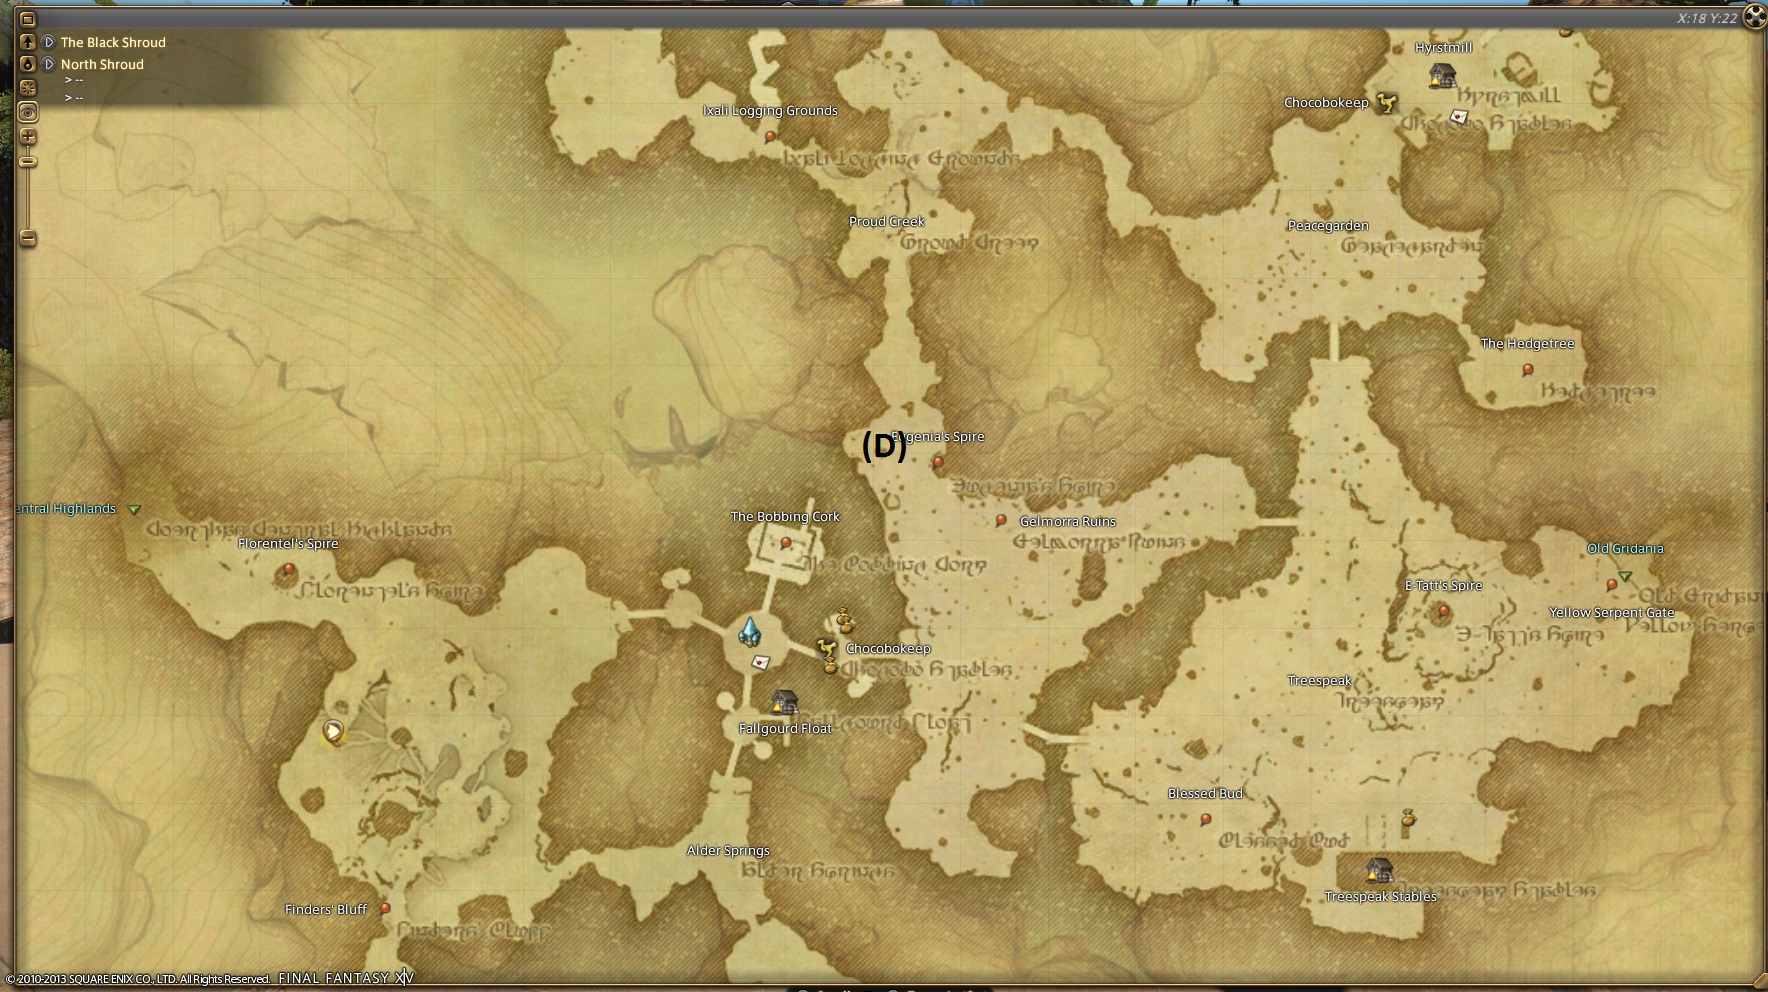
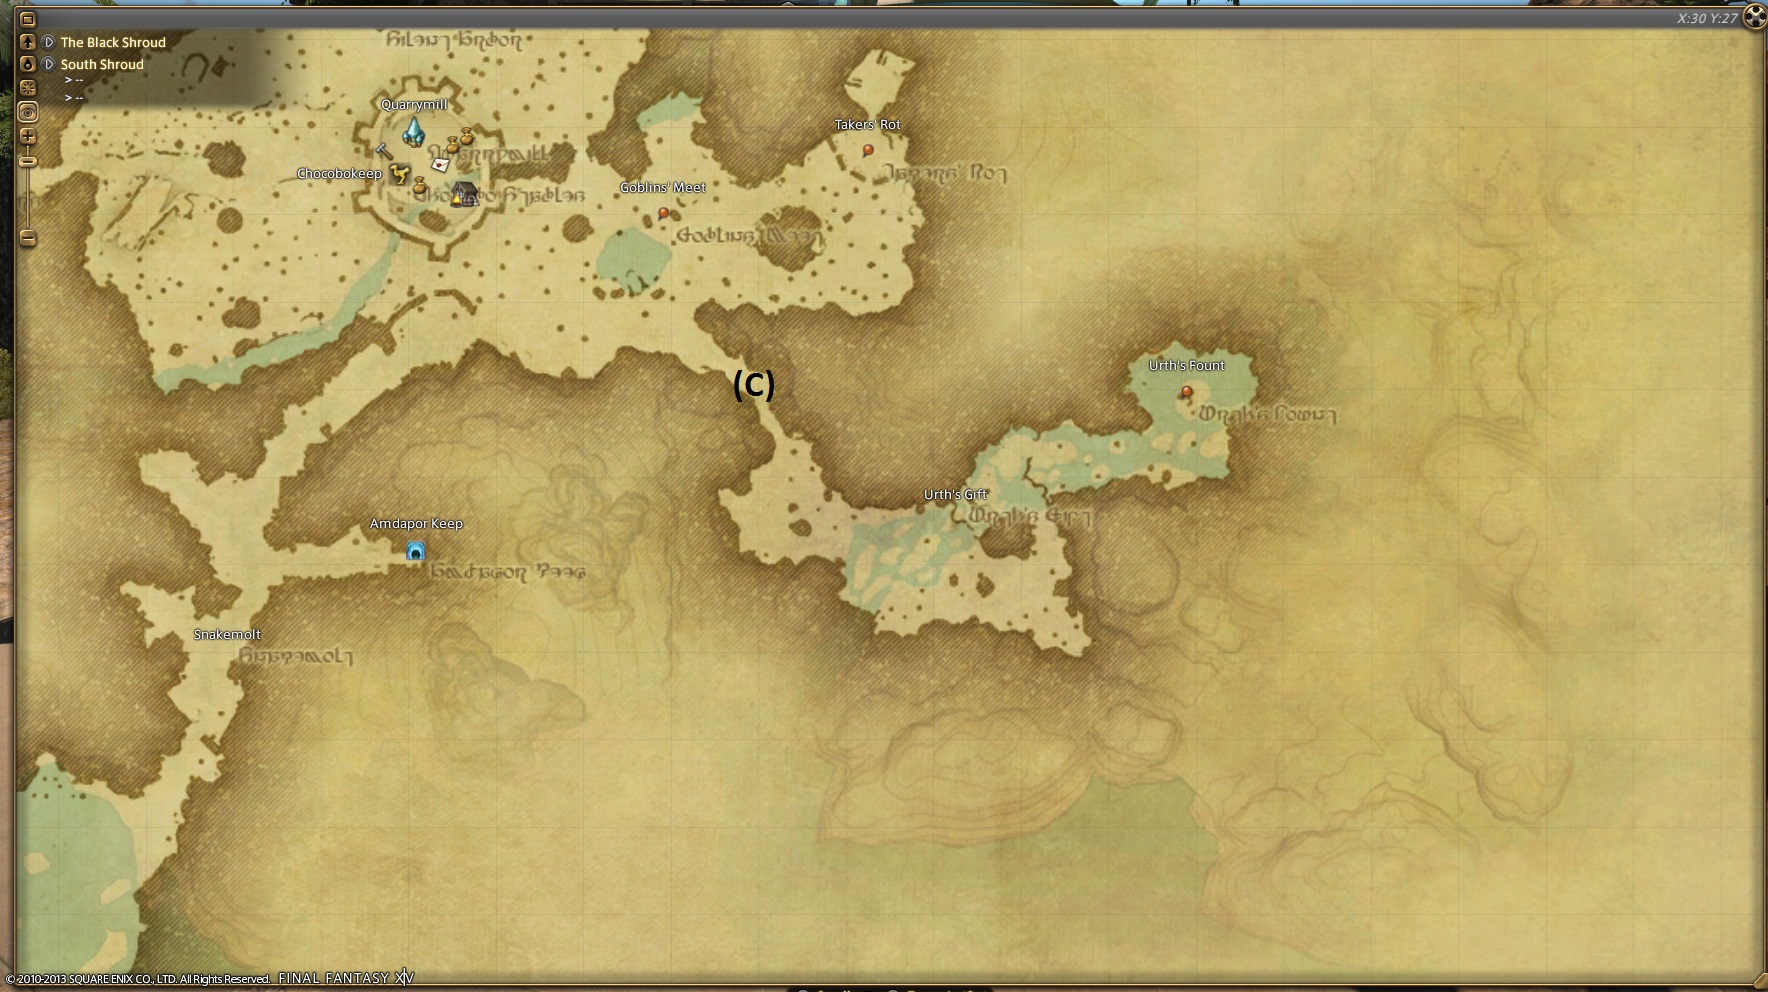
North Shroud
North Shroud also only has one target. Dryads are big walking trees so you can't miss them.
Dryad: D
Teleport to Fallgourd Float and take the east bridge out of the camp. Off the bridge, you will want to take a left and go north.
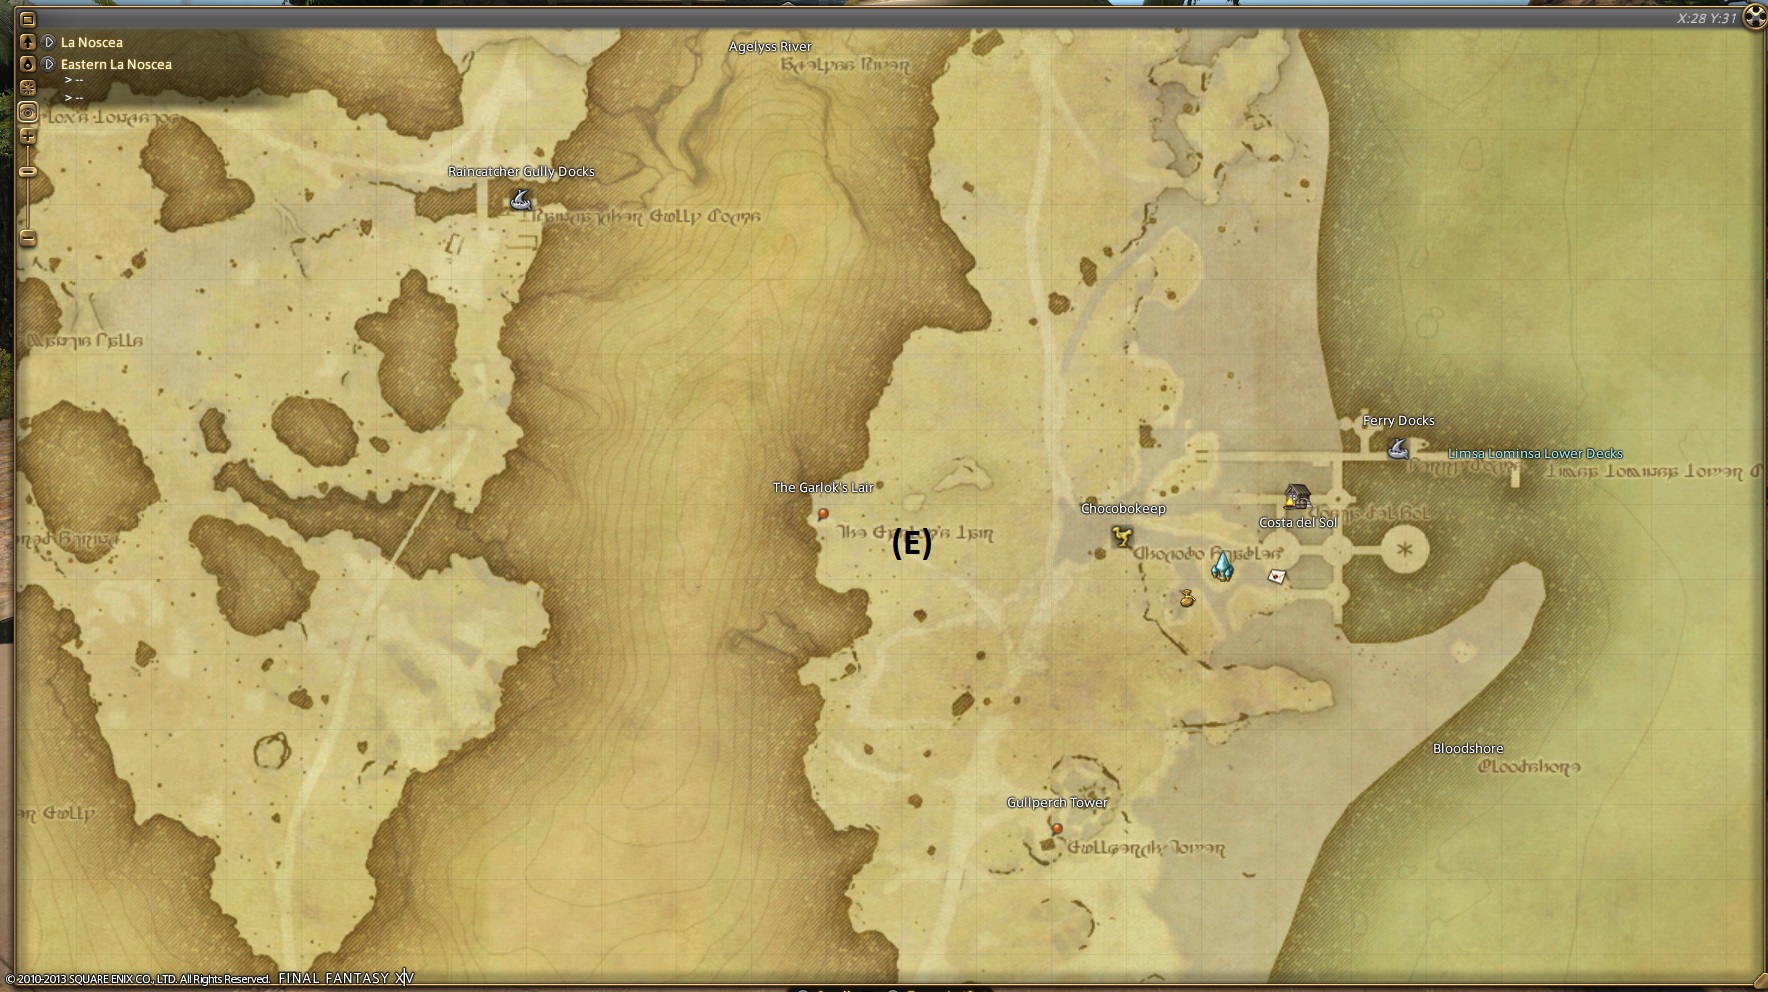
Eastern La Noscea
Large Buffalo: E
The Large Buffalo are spread out, but generally to the west of the Costa Del Sol telepoint.
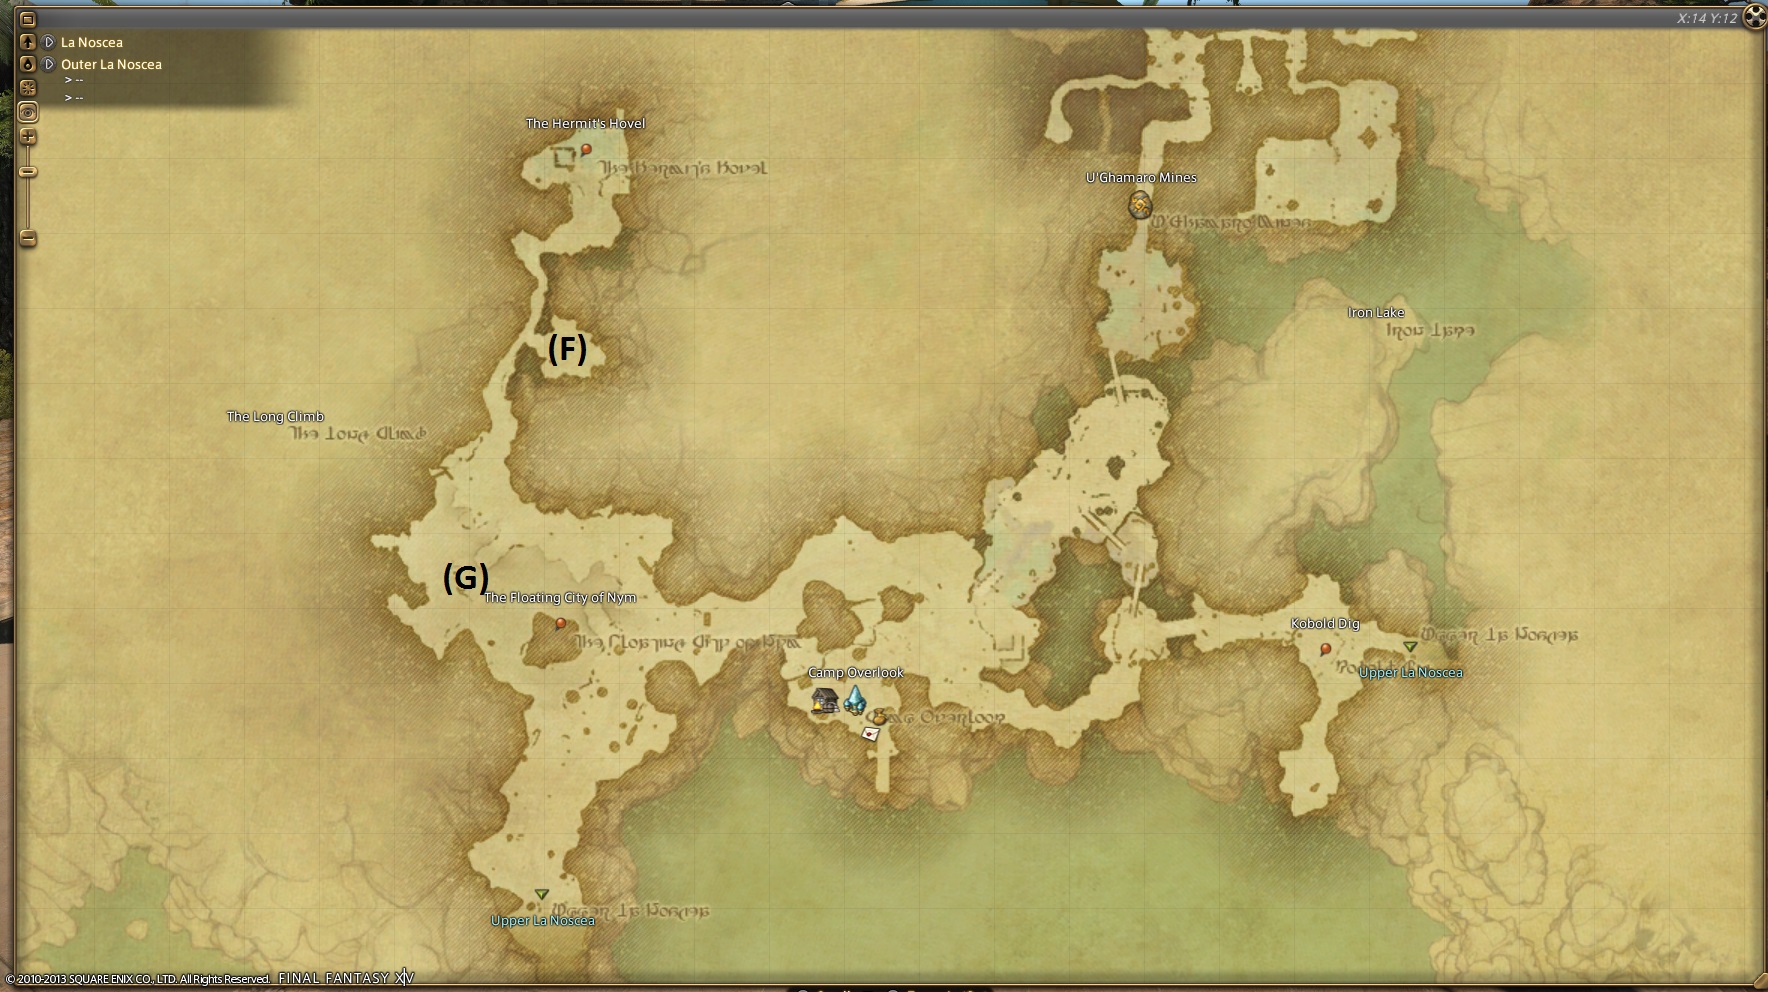
Outer La Noscea
Both targets here are on the west end of the map. After you go around the obstacles right outside Camp Overlook, you can go west following the right wall. The Golems will be to the south and the Ringtails to the north.
Ringtails: F
Go north after reaching the far west wall, and the Ringtails are tucked away in a little cubbyhole on the right.
Basalt Golems: G
After following the wall to the western edge, turn south and the Golems will be right in front of you.
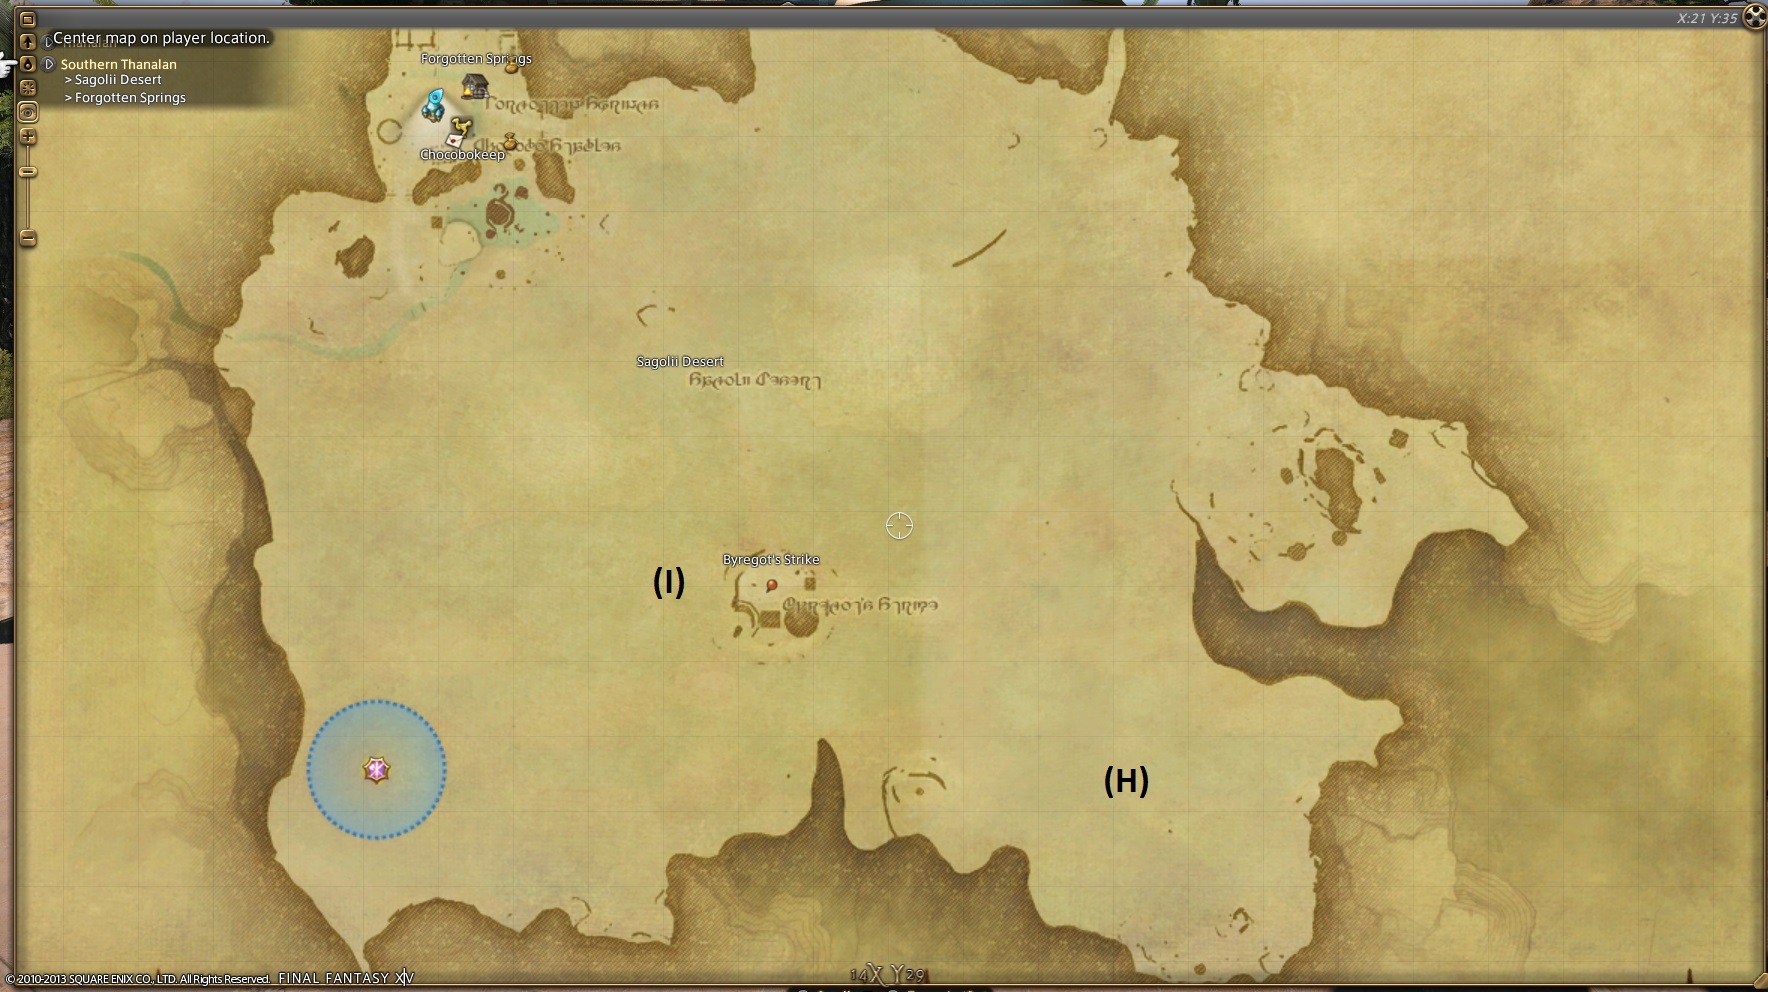
Southern Thanalan
For these two I am going to guide you to them in reverse order. They are both the same entry on the log so it doesn't change in difficulty.
Smoke Bomb: I
Teleport to Forgotten Springs. You want to take the southern exit out of camp. Once out of camp go southeast to reach the Bombs. The Bombs spawn all around the little encampment next to the (I), so even if there are multiple people killing them it shouldn't be hard to find more.
Sundrake: H
From the Bomb spawn point just travel southeast again until you run into the Sundrakes.

Coerthas Central Highlands
All of the monsters you need here are reasonably close to the telepoint. I'll be guiding you to eeach target from Dragonhead this time.
Ornery Karakul: J
This is the odd ball due to the fleece drop Square Enix has added additional spawns. There is a spawn in the southeast corner but that's well out of the way and usually farmed. The spot that is farmed the least is the one on the ledge. Go north as if you were going to the Svara FATE and take a left as soon as the left opens up a bit. From there turn south there are about three or four spawns right there.
Snow Wolf Pup: K
Go out the north exit of the camp and go northeast. You will see them a few feet out of camp.
Downy Aevis: L
Go north as if you were going to the Karakul spawn I lead you to earlier and instead of turning south turn back north. The Aevis are spread out a bit so just wander around to find them.
Batelur: M
Take the west exit out of camp and just continue west.
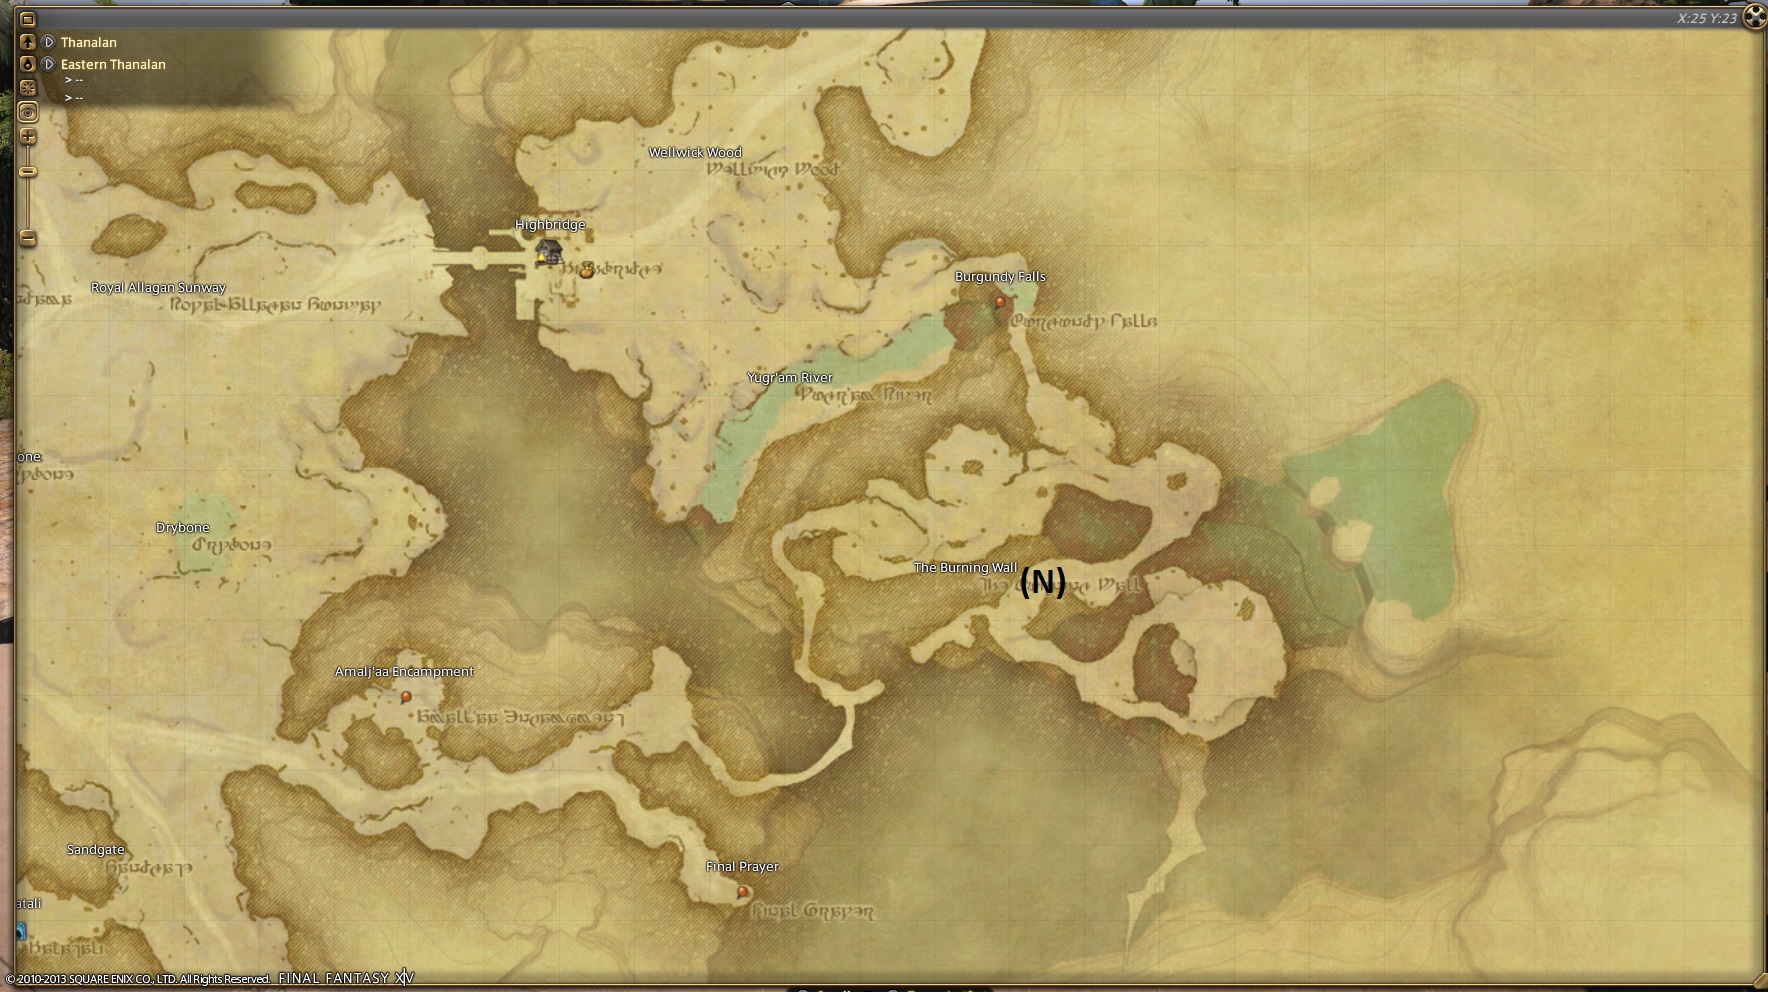
Eastern Thanalan
This spot is actually a pain to get to.
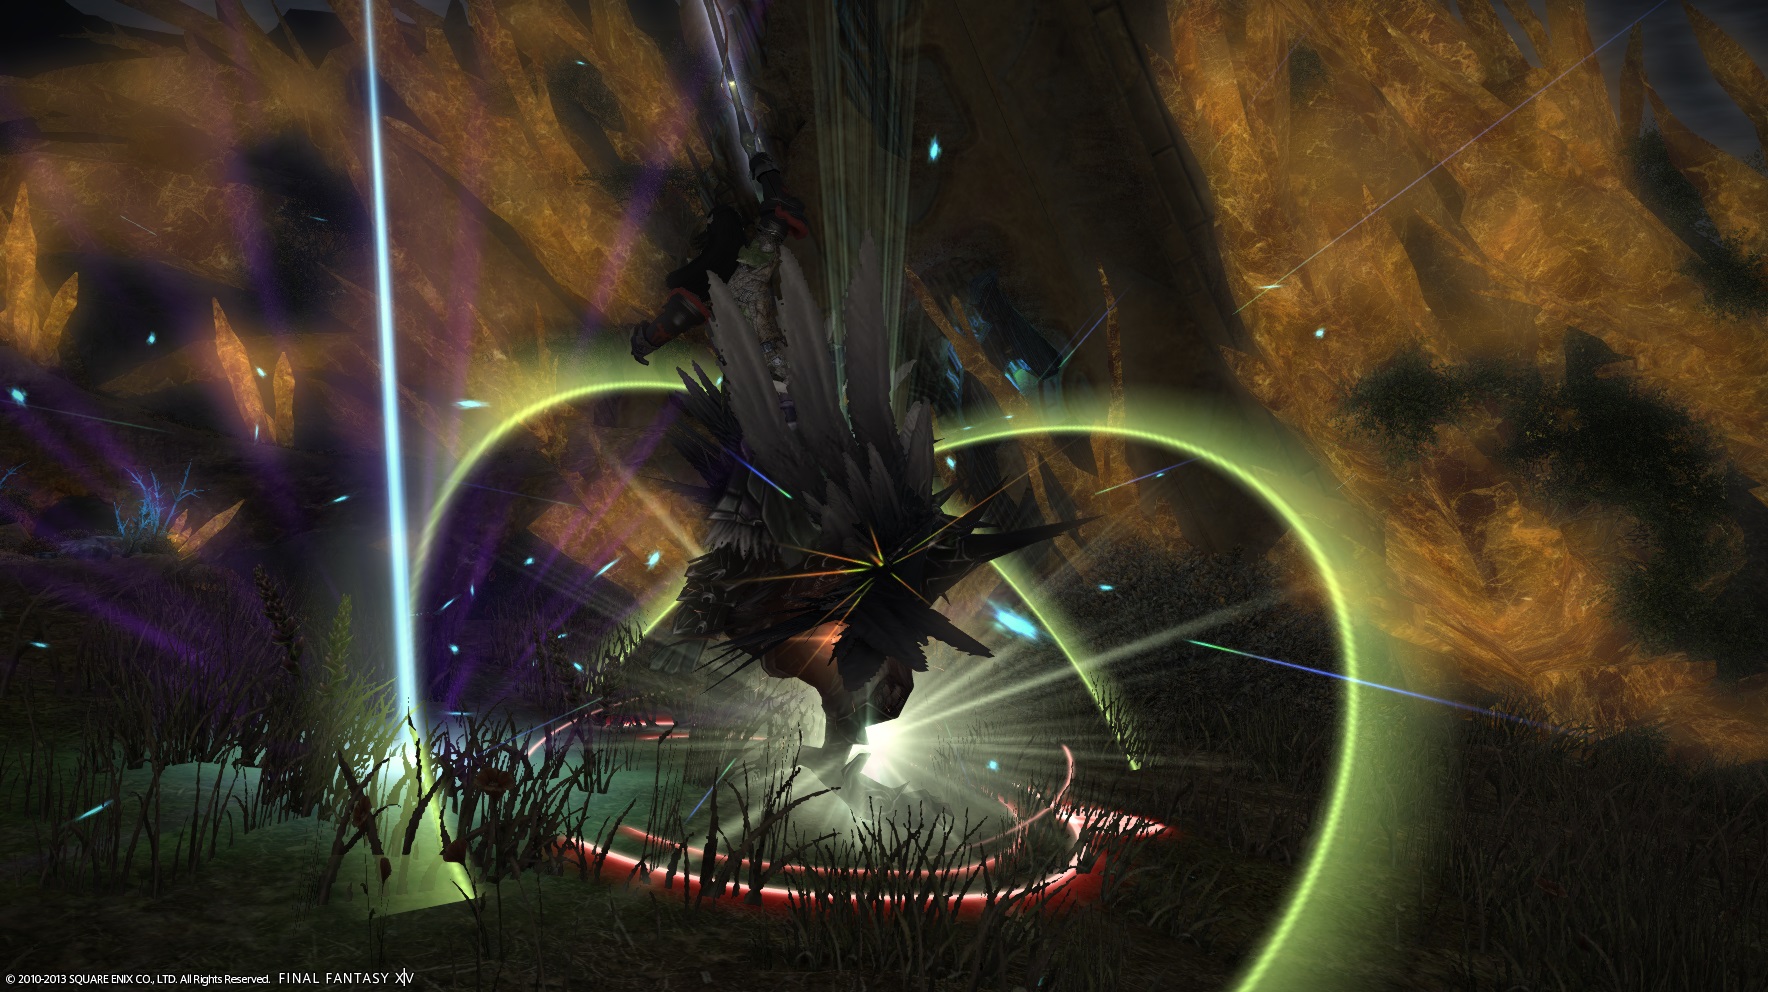
Mirrorknight: N
Teleport into Camp Drybone. From there you'll want to go northeast to the bridge. After the bridge turn southeast. When you get to the tunnel follow the left wall to get to the first Mirrorknight. From there just wander around or wait for respawns. Becareful because that area is a big maze.


Published: Nov 7, 2013 09:48 am