Rodeo Stampede may just be the most fun I’ve had with a free to play mobile game since my crippling year-long Puzzle & Dragons addiction. From Yodo1, the same publisher that released the super popular Crossy Road, Rodeo Stampede pretty much condenses the essence of F-U-N into a little ball of rodeo goodness.
The game is certainly simple at its core, but there are a ton of factors that affect how much fun you’ll get out of Rodeo Stampede. You can definitely just take it easy with the game but there is so much more to remember than “hop from one animal to the other” if you want to repeatedly beat your best scores and continue to net new animals.
These tips are based on the Savannah area, in which there are seven different types of animals total. The second area, the Jungle, has its own animal intricacies but they are not mentioned here.
With the above all said, on with the tips!
New animal species have different requirements to appear
Some new animals appear at random times, but others definitely have some hidden requirements. Some species won’t start to appear until you complete certain missions, while others are based on the time you play (such as the Cockadoodile in the Jungle area).
To make sure you are always getting an influx of new animal species out on the field, upgrade your zoo enclosures as often as you can. Non-rare species will be more frequent, and each animal gets more effective with each enclosure level up — and once you get an animal to level 8 two more rare species will appear on the field.
Be aware of each animal’s behavior
No two animals are the same! Some can ram other animals, some can fly, and others have abilities I won’t spoil for you.. but I am going to spoil the what each Savannah animal does once it’s enraged.
Every animal acts differently once it’s mad, and sometimes that can be used to your advantage. It’s best to know how they act once angry so you can make good use of it.
Here are what each Savannah animal does when it gets mad:
- Buffalo – Starts to buck wildly, making it harder to control (but not too hard)
- Zebra – Also bucks wildly, and is much harder to control than the Buffalo
- Elephant – Immediately bucks you off its back, tossing you very far forward
- Ostrich – Goes increasingly fast! You could theoretically ride an angry Ostrich for a long time, but there is a certain point where it will go too fast for you to be able to control well. Learn to jump to a new animal once your Ostrich starts to go too fast for you to handle
- Giraffe – Much like the Elephant, the Giraffe bucks you off as soon as it’s angry but it has the benefit of throwing you higher than the Elephant
- Vulture – Instead of flying high like it usually does the Vulture will start to bob up and down once angry, making you play it like a standard ground-running animal when it’s mad
- Lion – It just gobbles you up
Every animal in Rodeo Stampede is different, and not just with their enrage abilities.
The Elephant, Giraffe, and Lion don’t have to worry about other animals in their way as they rush through them (with the Lion just eating them), and the Elephant itself can be upgraded to crush large rocks as well.
The Buffalo, while a little bland, can be upgraded to charge right when you land on one. This charge can knock away other animals as well as break rocks.
The Vulture doesn’t stay happy long but it flies above rocks and other obstacles with ease.
Don’t jump from one animal to the other willy-nilly
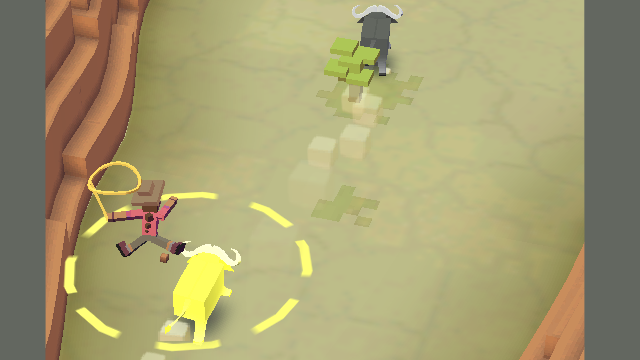
Lassoing and jumping from one animal to the next is pretty fun, but always be aware that each time you jump between animals your lasso target gets smaller.
This makes it tough to jump onto animals the longer you run, and if you jump from one animal to the next frequently at the start of a run you’ll probably not last as long as if you just took your time bouncing around.
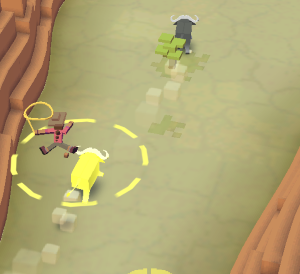 This is the largest size lasso, which you start with. It quickly shrinks to half this size.
Because of this the Ostrich is an especially valuable animal to start with if you’re aiming for a new high score. While all the other Savannah animals certainly have their benefits, the Ostrich is the only one you can stay on for so long — as long as you’ve practiced going fast.
Watching ads is annoying but brings too many perks to ignore
I don’t like watching ads, you probably don’t like watching ads — but I bet you’ve been doing it every time it asks just like I have.
The developers really did a good job of asking players to watch ads at the right time to line their wallets, but as a player it’s a cumbersome and irritating addition to an otherwise fun game that unfortunately can’t be ignored.

Rodeo Stampede asks you to watch ads to double when you get coins, to continue a run when you die, to get missions faster.. the list goes on and it’s very annoying, I have to admit.
If you hate watching ads but really want the perks of them, decide which perks you want regularly. Double coins on zoo visits and mission completion are kind of a no-brainer, but do you really need to continue once you’ve fallen once? Probably not, unless you see a new species.
The perks are nice, but it really wants you to watch ads way too often. If you’re not in a huge hurry, don’t bother with watching them to get missions faster either — but if you are, hey. Go for it.
If you pass a new animal or species on your run, immediately die
If you see a new animal or species on a run and somehow don’t jump onto it, immediately ram yourself into an obstacle or another animal.
Before you say I’m crazy:
- When you do this and haven’t used a continue yet, wait for the new animal or species to pass you on the screen.
- Once it passes you, agree to continue your run and you will be thrust right back into the stampede, behind the new animal or species
I’ve done this a few times and it definitely works.
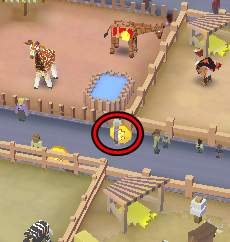
Sometimes you can also see new animals or species before a run even starts at this screen:
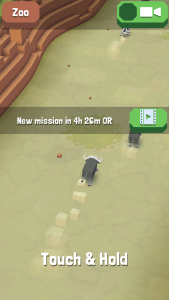
So keep an eye out!
The Cash Cow IAP is technically the best
A one-time purchase to get an ad-free version of Rodeo Stampede would be great, but unfortunately we don’t have that option.. yet.
For now we have the ability to purchase the Cash Cow, which gives double Zoo income, and coins directly. And the Cash Cow is definitely the best purchase.
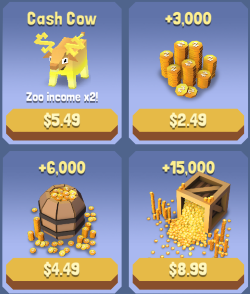
Getting a hefty dose of in-game money for a one time purchase will definitely scratch your itch to get a chunk of upgrades right away and avoid ads, but if you want to make a real money investment that never stops paying off, Cash Cow is the way to go.
The amount of money you get to start may seem too little to have bothered, but after you keep at the game for some time it will more than be worth the $5.49 investment. If you plan on playing Rodeo Stampede for a long time, it’s the best purchase you can make.
Check your zoo for money dropped on the ground
It’s easy to miss, but your zoo visitors drop money from time to time for you to pick up.
Keep an eye open each time you visit your zoo for dropped coins — it may not be a ton, but it’s definitely better than nothing.
Once you unlock the Jungle you can still go back to the Savannah to make money
Crates in the Jungle may give you more coins by default, but let’s be honest: the Savannah is way easier to traverse than the Jungle. This means you can ride more easily on animals you’ve leveled up to the point they give coins while you ride them when they’re angry.
This requires you separate your “money-making” time from your “get new animals” time but you need so many coins there’s no reason not to rotate between areas for easier money.
If you’d rather get some snazzy advice on using the Savannah animals well, check out my all Savannah animals guide. Happy wrangling!


Published: Jun 30, 2016 12:25 pm