Move over, Sekiro. One of the most devastatingly hard games of the year has arrived, and its name is Vambrace: Cold Soul.
Here’s the thing, though: no matter how much you think you know about Darkest Dungeon style games, you aren’t meant to survive the first expedition into the frozen paths of Icenaire. Or the second. Or the third.
RNG is a harsh taskmaster in this game, which will see you dying repeatedly. However, with the right strategy, you can mitigate the worst of it and make it through the first mission with your sanity intact…. maybe.
With the tips below, you’ll be ready for your expedition into the Entertainment District, where death is all but assured either from freezing solid or by the slash of a ghostly blade.
Navigating Rooms In Vambrace: Cold Soul
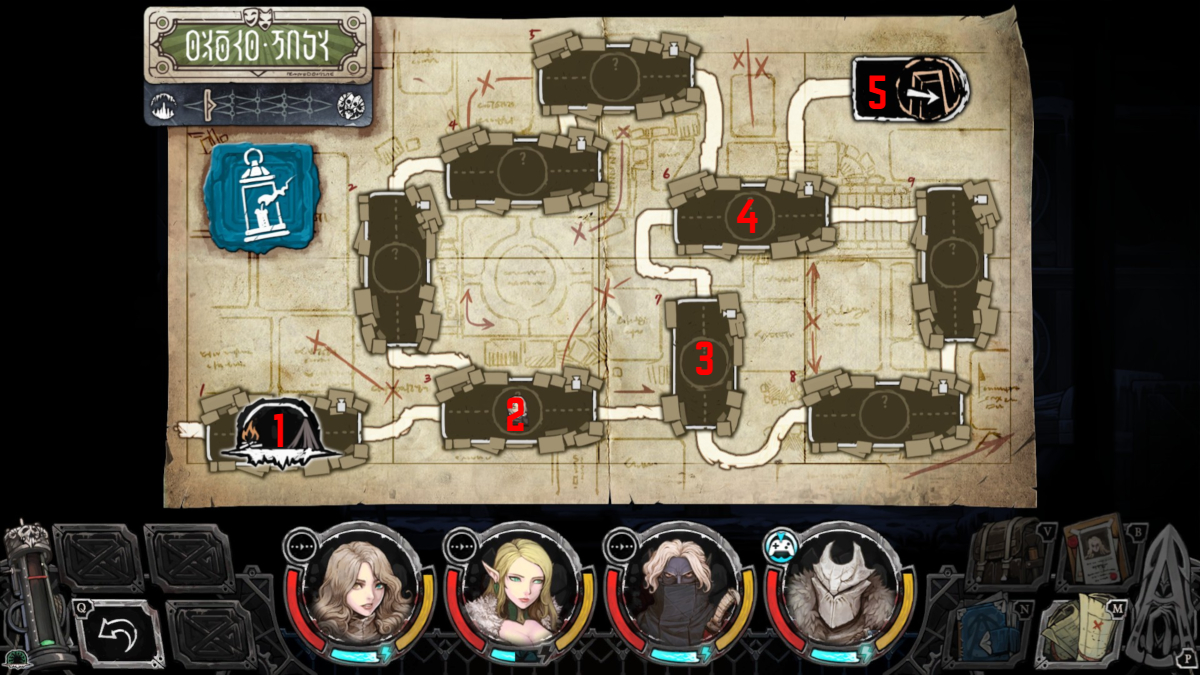 Taking the middle route shaves two rooms off your expedition
The biggest killer in this game isn’t a phantom warrior or a deadly trap. Instead, it’s traversing too many rooms. Entering any room reduces the vigor of all party members by one. Since you have limited vigor, and the ability to restore vigor is entirely dependent on whether or not a dungeon room randomly has a campsite, you can expect to repeatedly freeze to death just trying to get through the first two or three maps.
You also get to select which of two paths to take when first starting a mission and after completing any of that mission’s maps. Some of those paths are clearly more deadly than others. On the first mission into the Entertainment District, this is the path to take, which features the fewest rooms:
- Right (Road of Riches)
- Left (Hospital)
- Right (Spa House)
- Right (Dwarf King Inn)
- Forward (no choice to go anywhere else)
- Forward (no choice to go anywhere else, leads to the boss area)
Whether you go left or right at the beginning, the one area you want to avoid at all costs is Game Land. There are more rooms in this area, and the golem enemies are harder.
When you first enter any map, press “M” to bring up the overview and make a note of what route is the shortest. For instance in the map shown above, taking the top or bottom route adds an extra two rooms to your journey for a total of seven rooms. Going straight through the middle is only five rooms, which means there’s less chance of something going wrong, and less vigor to lose.
Every room you enter also raises the geist meter. When the geist meter is full, you will always have a combat encounter in every room with a full lineup of four enemies. That effectively means you can’t survive to the end of the map if you have more than just a handful of rooms left. Combat healing abilities also don’t work while the geist meter is full, so you can’t recover health.
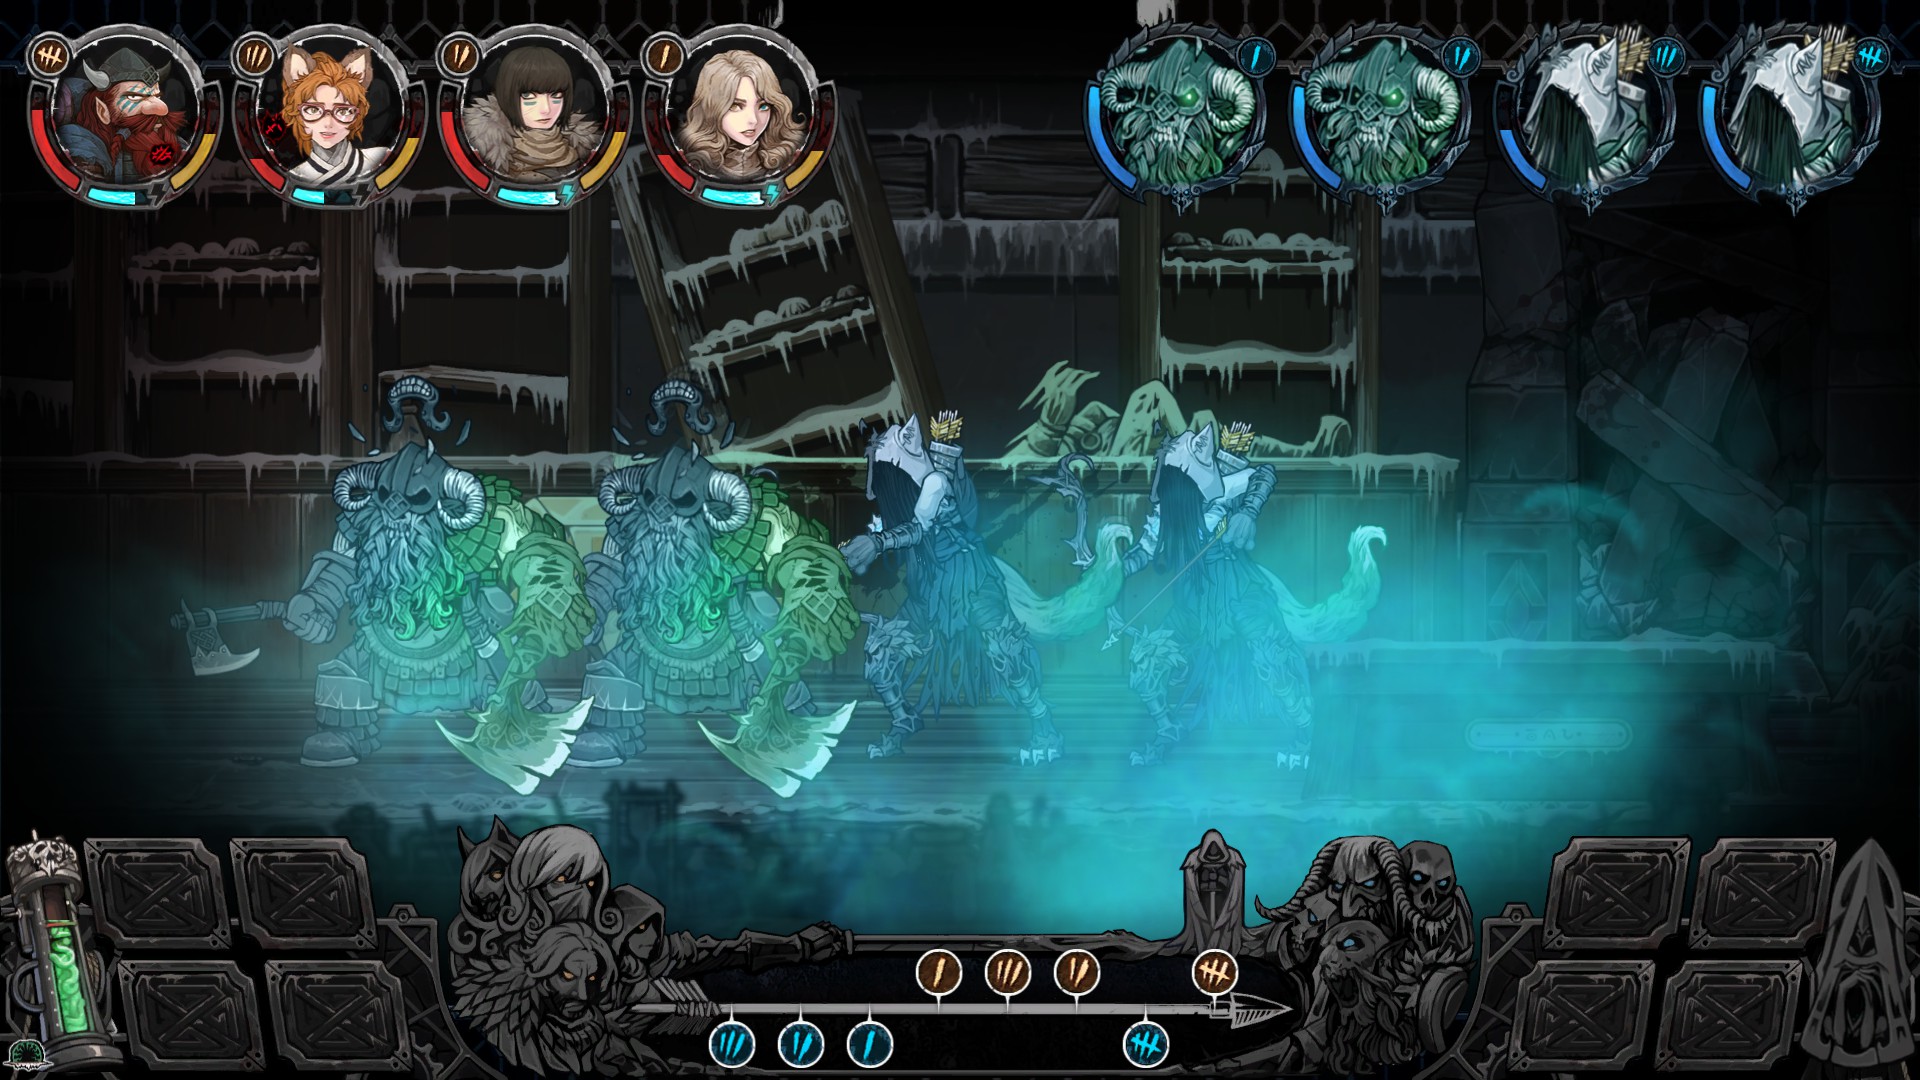 This pack of four enemies will appear in every room when the meter is full
To make a long story short, avoid extraneous rooms like the plague, and never, ever backtrack.
Unfortunately, going the shortest route in a map is complicated by the fact that the room exit arrows don’t always correspond to the actual direction you move on the map. Whether this is a bug that needs to be fixed or a purposeful design decision to reflect the twisting corridors of the frozen city (and make the game harder) isn’t clear.
To prevent backtracking, always check to the left and right of both the entrance and exit of a room! The way the room exits are setup is unnecessarily confusing, and you’ll often think there’s only one exit or that an exit goes up or down instead of forward when in fact there are other exits going the way you actually want to leave a room.
Dealing With Random Encounters And Room Types
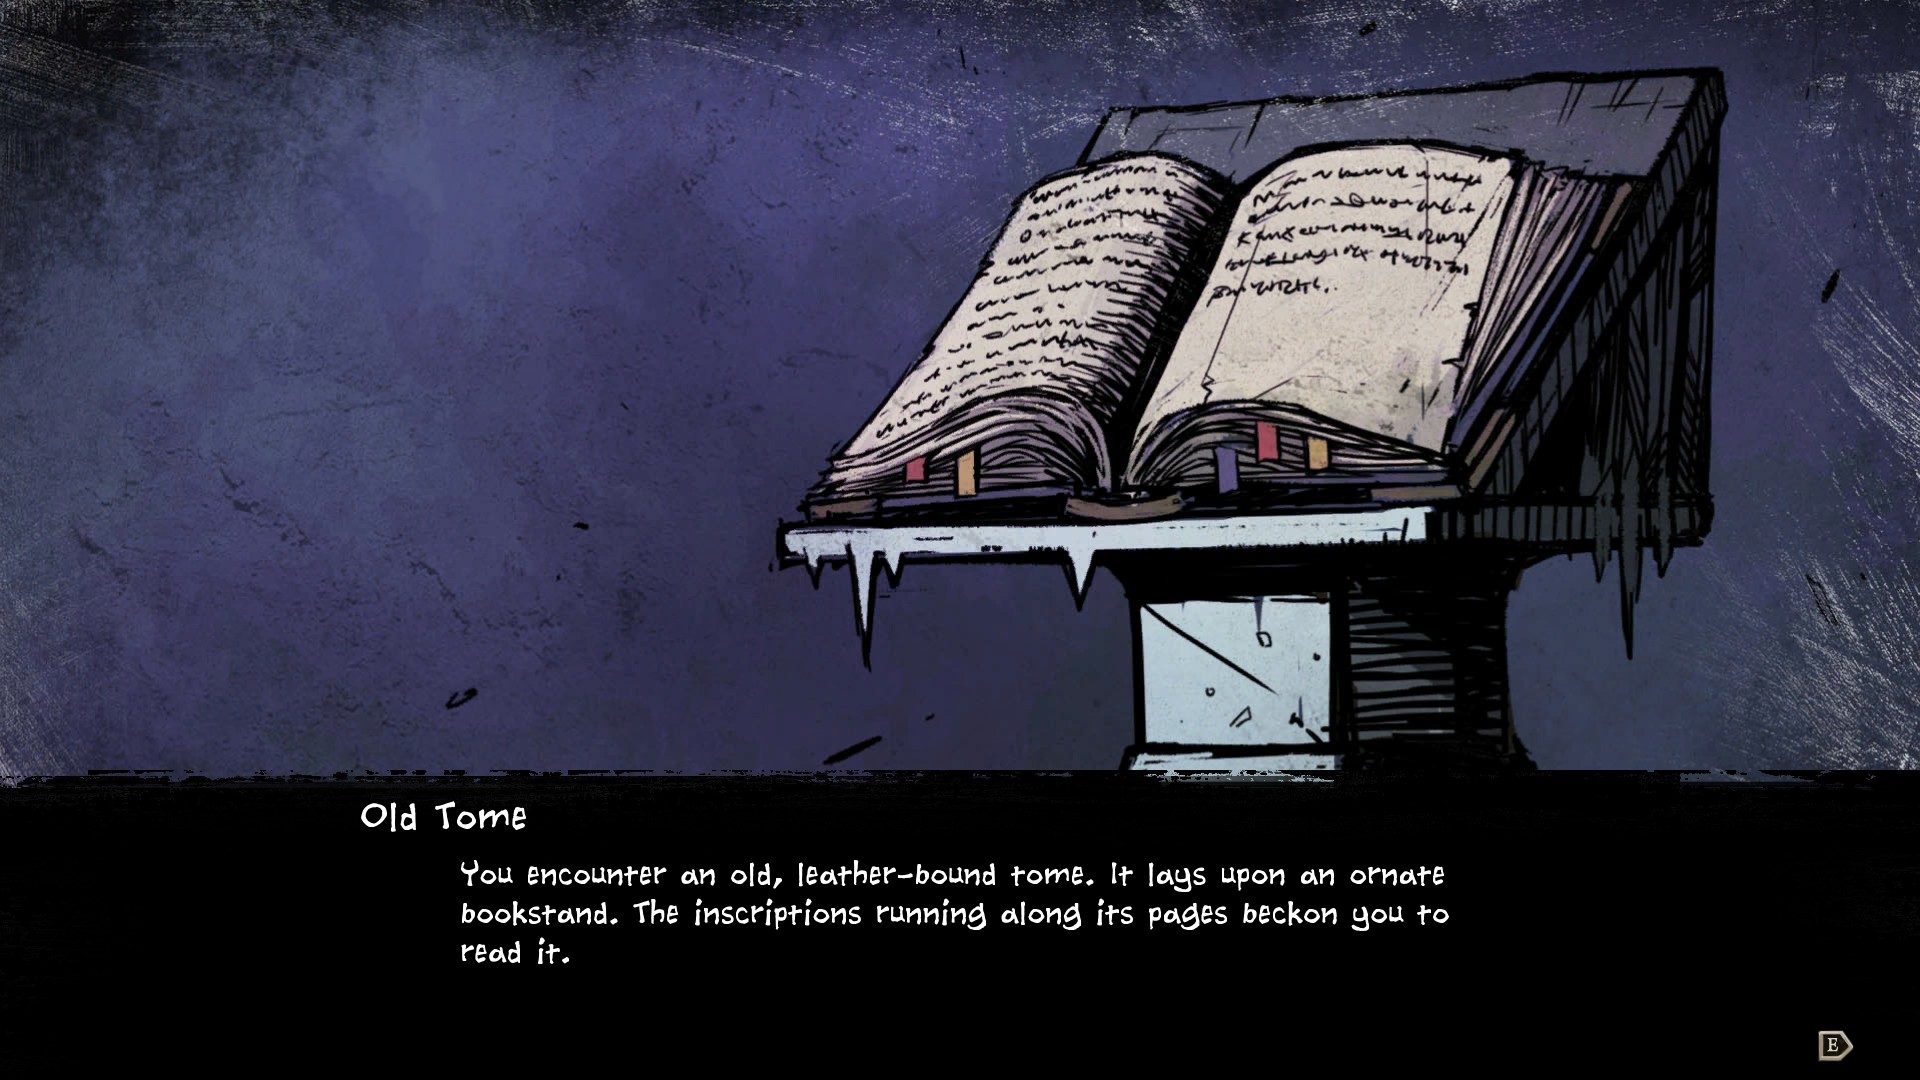 Sure, I’ll read the evil old ghost tome. What could possibly go wrong?
Unlike Darkest Dungeon, where you can avoid bad outcomes of random objects by using the correct item type, the chances of a bad outcome aren’t worth the trouble in Vambrace.
Let me make this clear: just avoid random encounters and objects entirely. Whether it’s a cave, a tight wall space, a ghostly hound, a moldy old spell book, a jewel clutched by a corpse, or an undead girl who wants candy… just say no to all of them. The risk isn’t worth the reward in the vast majority of cases.
The only possible exception here is if all of your team members are extremely low on vigor and will die in the next room anyway. In that case, it might be worth hoping for a good outcome to randomly increase vigor. In every other instance, though, getting no reward is better than the (very high) possibility of losing health and vigor to the event.
Note that this only applies for the first mission to the Entertainment District. After completing that story quest, you will need to start interacting with random encounters to acquire items like Chains to craft better equipment.
 Don’t open these!
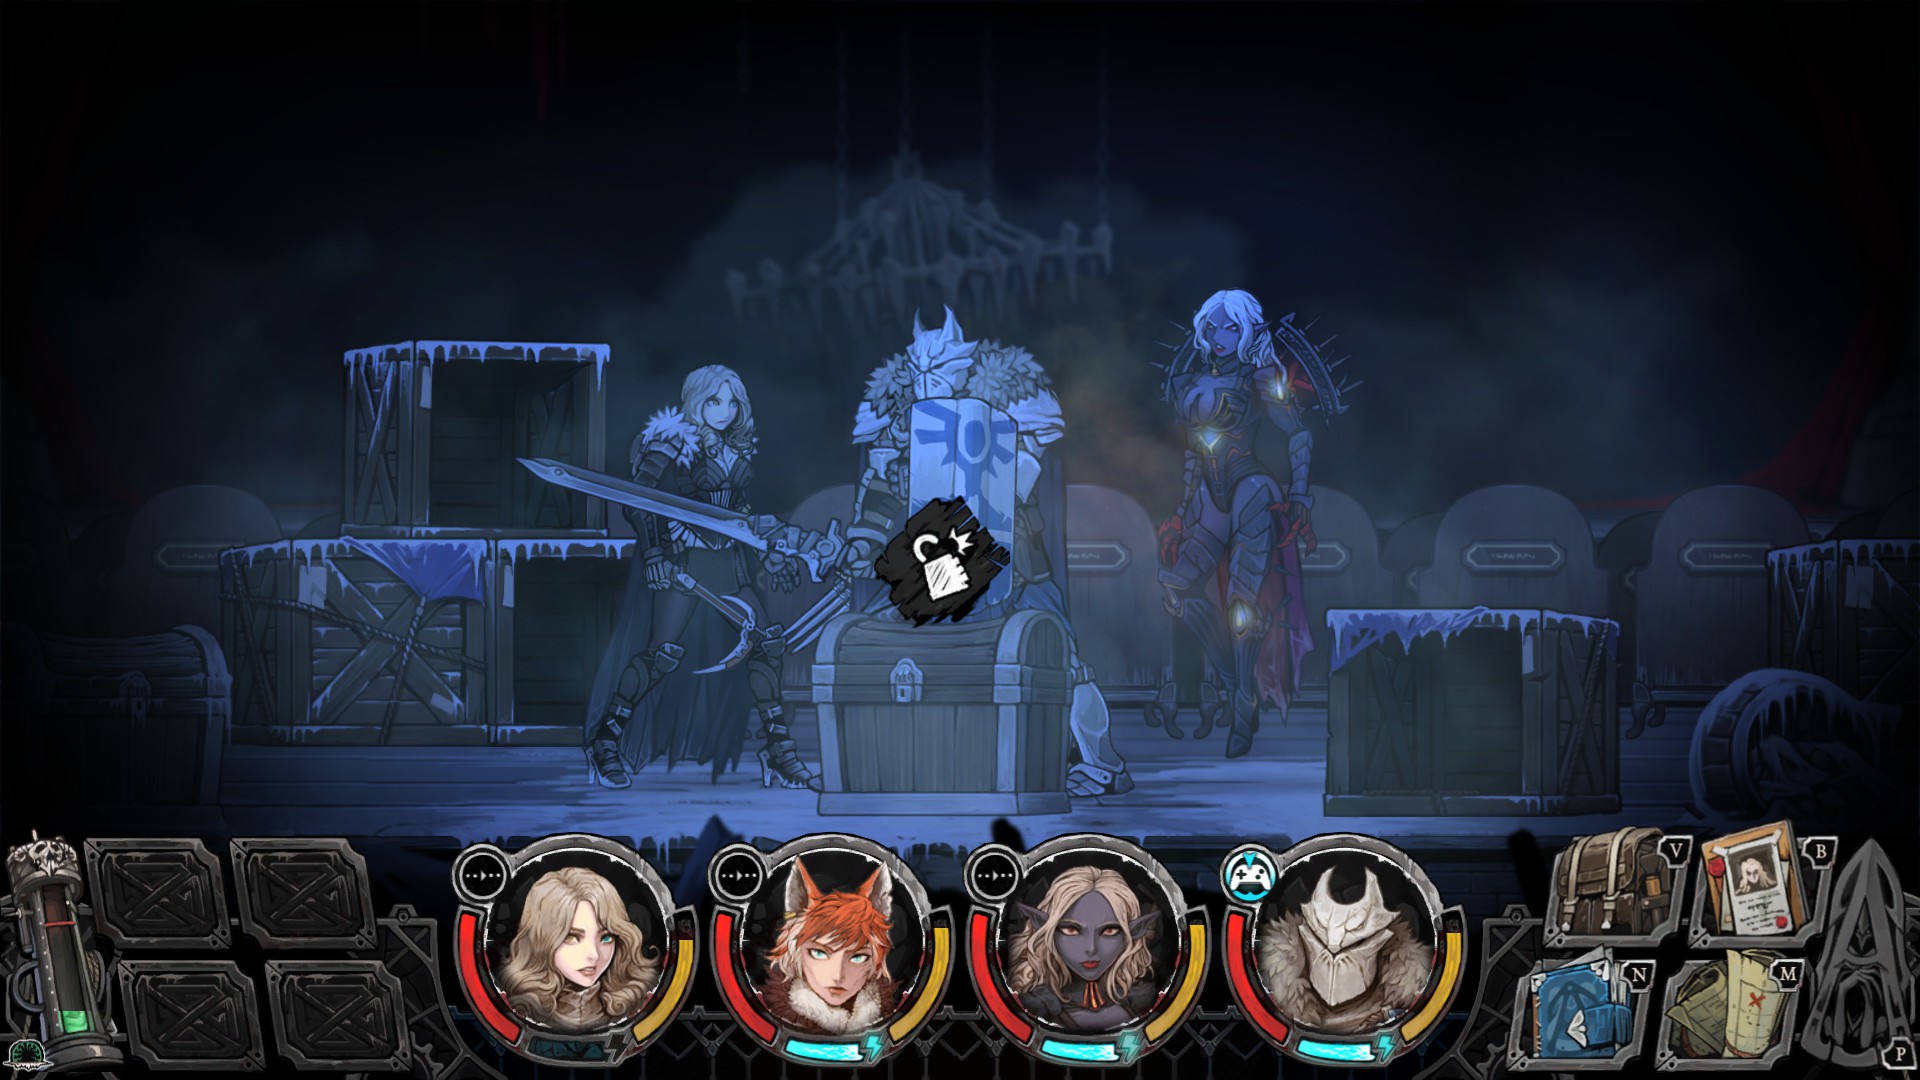
Aside from random encounters, there’s one other specific room type worth mentioning for its inherent danger: random treasure rooms.
The normal brown chests are the only objects that have the chance of becoming a mimic. If you’re worried about unexpectedly losing health and vigor, just skip them and open everything else instead. Crates, boxes, and black chests are never mimics, so open those freely.
Recovering Health And Vigor
 This room is the key to survival, which is why it will never spawn when you need it
Keep in mind that your goal in the first mission isn’t to reach the end and complete the quest to find Isabella on your first try. Instead, your goal is to find enough resources before dying to craft better equipment that will increase your vigor.
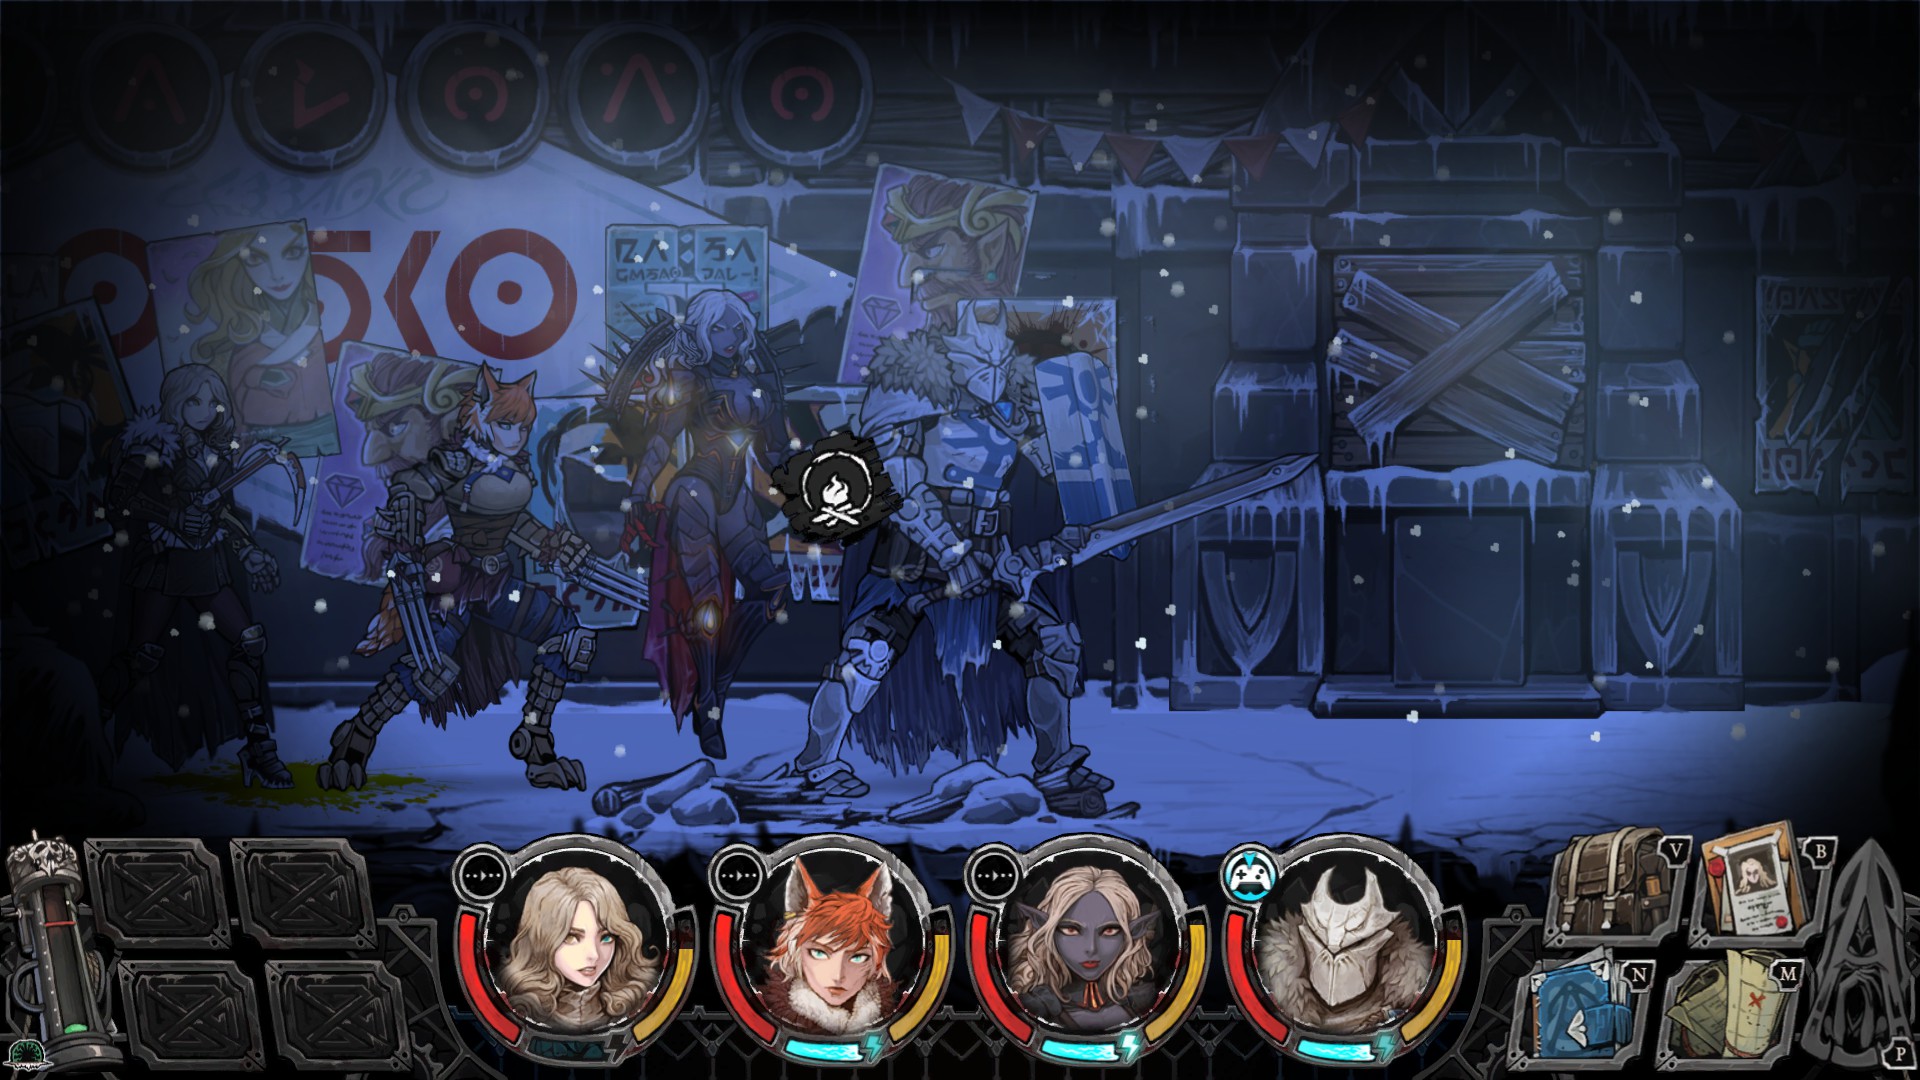
After your first trip to the Entertainment District, head to the blacksmith (the building on the far left side of town). After talking to everyone, inspect the forge to gain access to crafting and make crafting stations randomly available in dungeon rooms.

When you have the resources, buy a Vest for your three companions, and then craft a Fine Vest for Lyric using these components:
- Vest
- Needle & Thread X 5
- Splint X 3
Note that item selection at merchants is based on a random Merchant roll when you talk to them. Consequently, you may have to come back repeatedly after multiple expeditions to get enough Vests for everyone.
Other crafted items to raise Overwatch can also be helpful, but I found the Fine Vest to be the most effective at the beginning of the game since it keeps you alive longer on both the health and vigor fronts.
Keep in mind that when you are in a dungeon, your party can only use items at a campfire. Be sure to stock up on health and vigor items before leaving town if you have the funds, otherwise sell the random items you find to a merchant if you are lucky enough to randomly get one in a dungeon room.
Unlike other games of this style, the Overwatch skill isn’t used to prevent wandering monsters from interrupting your rest. Instead, it directly affects how much you can heal without using items at a campfire.
The Entertainment event raises all party member’s vigor by the selected companion’s Overwatch skill (assuming you don’t get a critical failure), while resting raises health by the Overwatch skill (ditto). Unfortunately, both also raise the geist meter by 5, whether they are successful for not.
You can do both events at a single campfire and get a big boost to survive… but you are much more likely to have the geist meter hit max level, which means a ghost battle every room. Only ever do both events at the same time if the campsite happens to be very close to the exit, or if you are on a map with a shorter number of rooms to travel.
Vambrace: Cold Soul Combat And Party Lineup
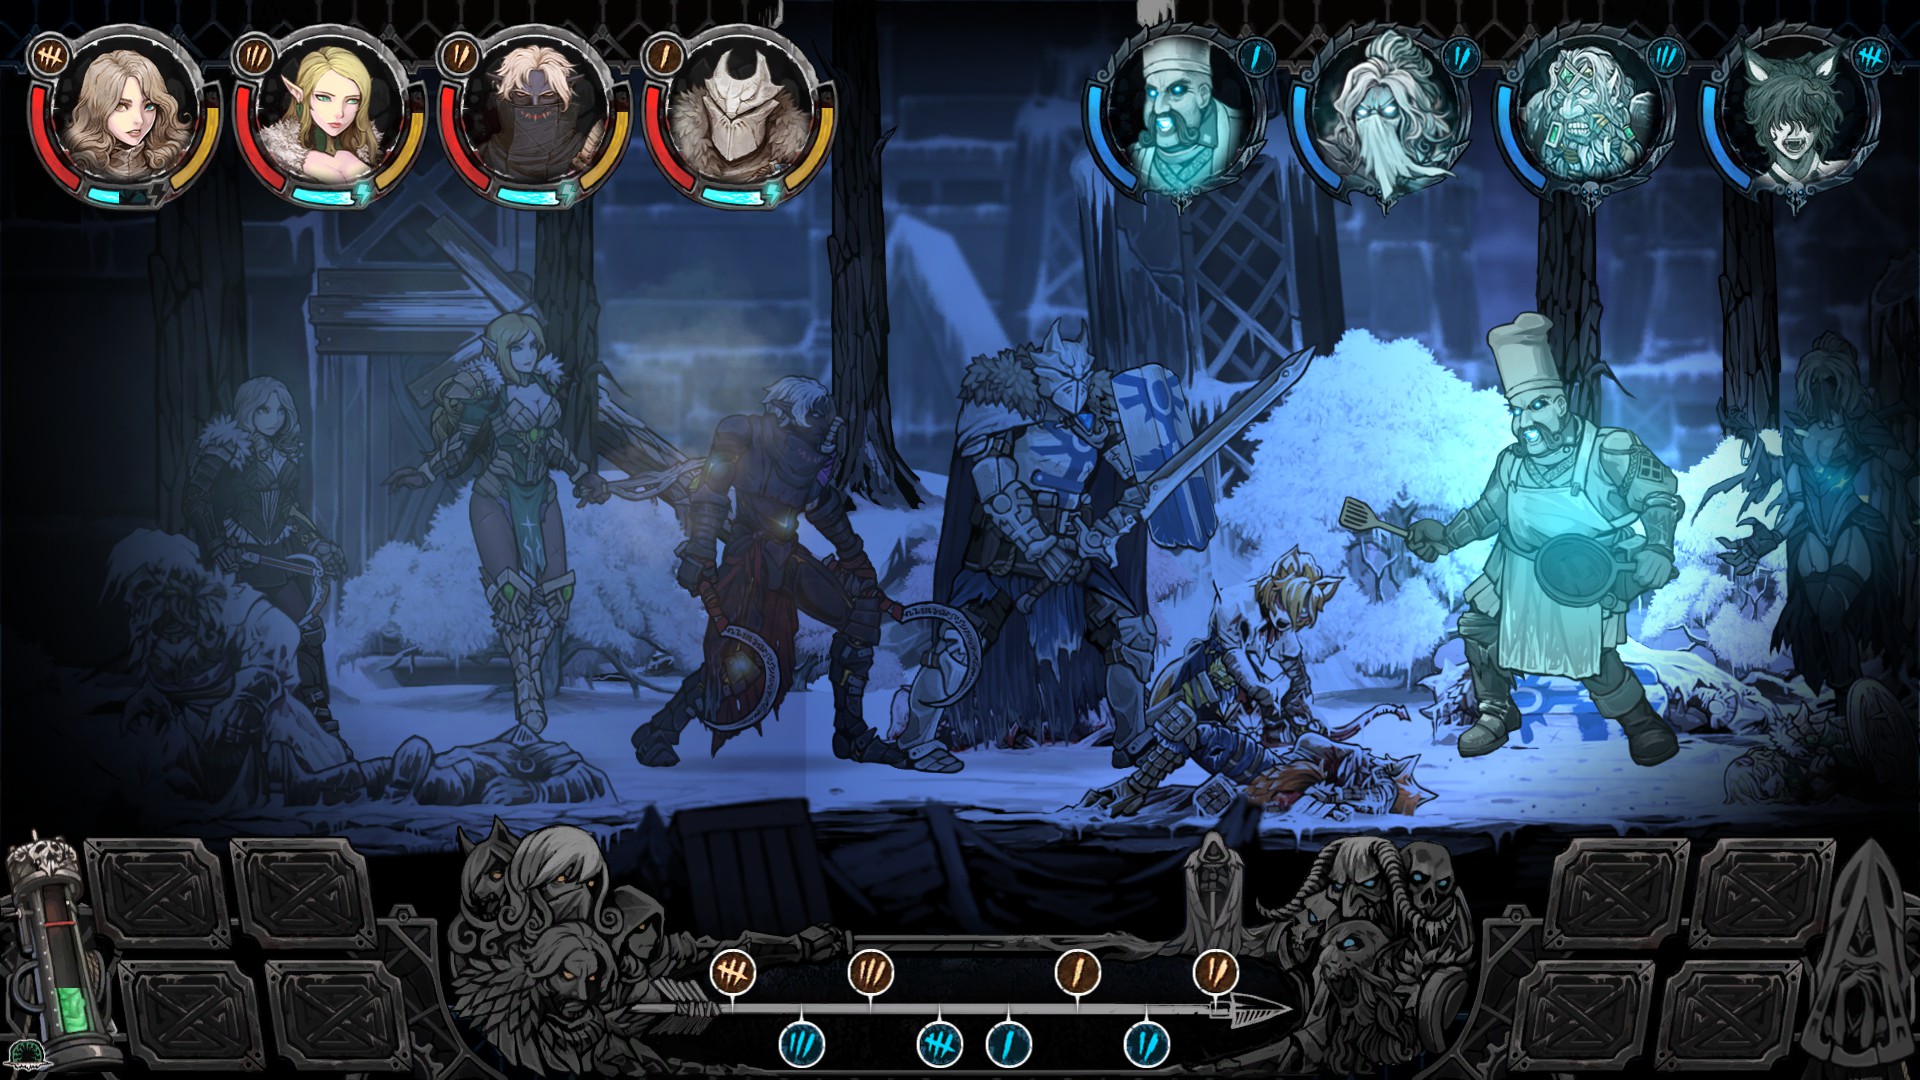
One element that makes Vambrace harder than Darkest Dungeon is that it has a main character who must survive every battle. If Lyric dies, you automatically leave the dungeon and have to start over, which you want to avoid.
To keep her out of harm’s way, put her in the far back position, and focus on taking out the enemies with ranged attacks first, especially if Lyric has low health. If only enemies who can attack at close range are left, they can’t target Lyric at all while the front three companions are still alive.
When your front two allies get low on health and there’s no campfire to use, swap out the 1st and 3rd or 2nd and 3rd positions for the next few fights. Let that third place ally take the brunt of the damage until you find the next randomized campfire room.
When running low on health and nearing the end of a map, there is an exploit that can be used to ensure your survival. If you enter a room that reverses your marching order from the previous room (walking left to right instead of right to left), running from combat is actually more beneficial than finishing the fight.
When you run, the party is thrown in the opposite direction they were walking. That means running from combat will place you at the opposite side of the room after having your walking order reversed (effectively bypassing the fight and getting to the exit door). This can be the critical difference between defeat and making it to the next area if the geist meter is full.
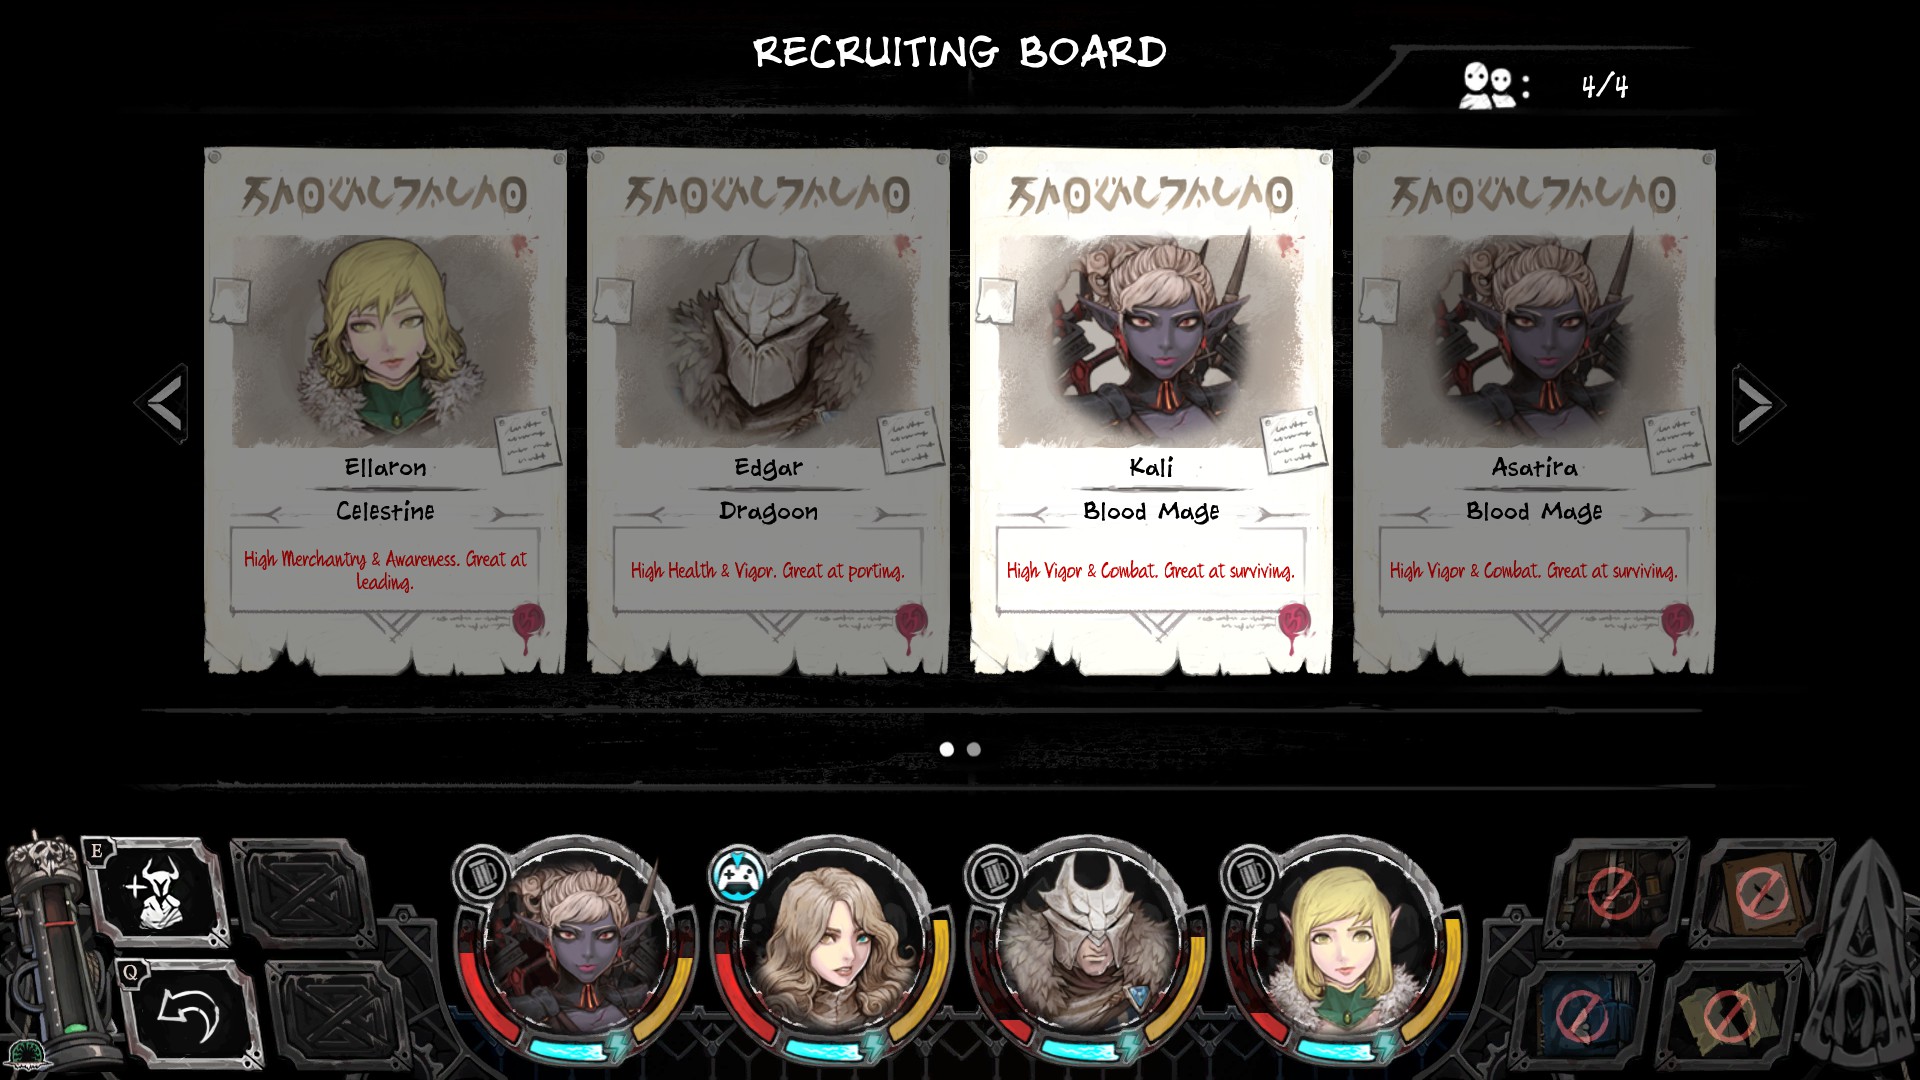
Which specific allies are available for conscription at the Hunter’s Camp before a mission is entirely randomized, so you can expect to die repeatedly based on unlucky combinations of available recruits.
Ideally, you want one ally with a high Overwatch skill for when you run out of recovery items, one with a high Combat skill and the ability to attack long range, and one who can either heal or provide a protective barrier.
If you want any expectation of surviving multiple battle rooms, one of the best lineups consists of:
- Lyric
- Shadowmancer
- Celestine (or Hedge Mage)
- Fusilier
At first, the Dragoon seems like the best frontman, but the Fusilier can hit targets in any position, and his special flourish ability deals significantly more damage. If you don’t get the Dwarf in the random party choices, a Dragoon or Berserker will serve as an acceptable replacement.
The Celestine is one of the best all-around options since she can give you a damage barrier but still deal damage to the enemy. If she isn’t available, take the Hedge Mage instead. Note that she doesn’t need the Combat skill since she deals no damage and only has healing abilities, so freely put equipment on her that lowers Combat.
The Shadowmancer’s usefulness is in both avoiding traps (which can kill you outside of combat quickly) and in the ability to deal consistent incremental poison damage to all four enemies at once. Poison damage is dealt at the start of an enemy’s turn instead of at the end, so it can effectively kill creatures and free your party up to attack other enemies if you pay attention to the turn counter.
As a last resort, if nothing else is available, the Blood Mage is a solid back row choice since she can hit targets in any position.
 If you make it here without smashing your computer to bits, congratulations!
With these tips in mind, your on your way to making to the end of the Entertainment District and fighting the game’s first boss!
How many tries did it take you, and what was your most effective party lineup and equipped item combo?


Published: May 15, 2019 06:47 pm