Just like the games that came before it, Ratchet and Clank: Rift Apart is rife with collectibles. To get the Nooks and Crannies trophy, as well as access to all of the game’s cheats, you’ll need to collect Rift Apart‘s Gold Bolts.
Gold Bolts are scattered around each of the game’s levels. Some are easy to get, while others are hidden in out-of-the-way places, requiring either cunning or a handy gadget to get. Below, we’ve detailed all of the Gold Bolt locations in Ratchet and Clank: Rift Apart so you can start collecting them before picking up the Map-O-Matic.
Spoilers follow below.
[Note: Aaron Bayne, David Carcasole, and Jonathan Moore contributed to this guide.]
How to Find All of Rift Apart’s Gold Bolts
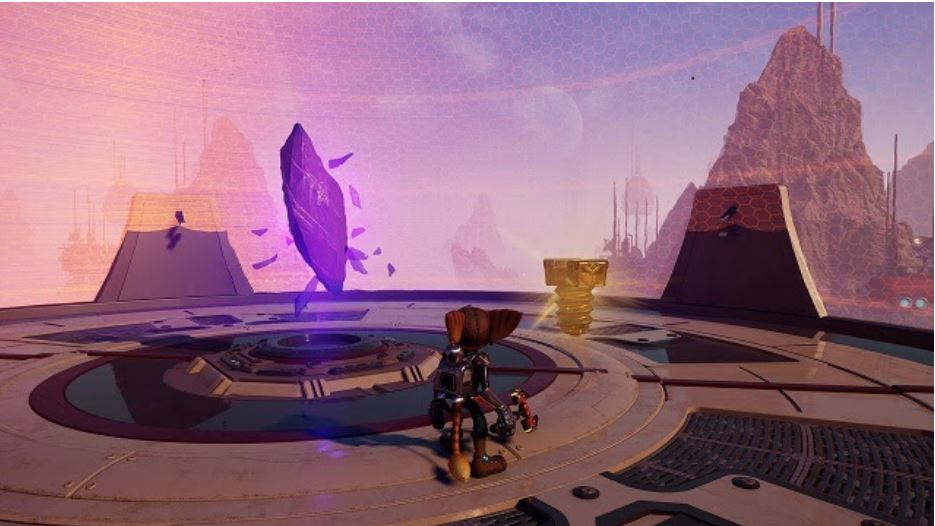
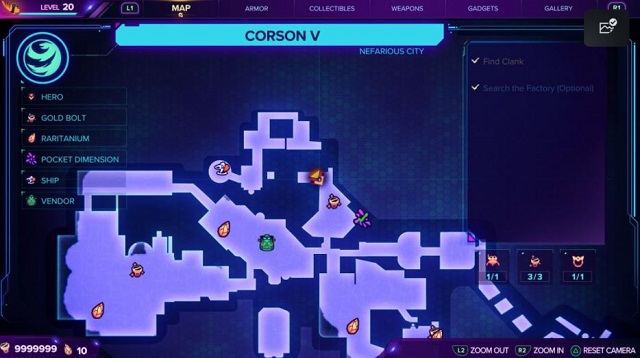
Corson V, Nefarious City
Nefarious City on Corson V is the first area you are able to explore in Rift Apart. In order to get every Gold Bolt in the level, you’ll need to play through the entirety of the first story mission and interact with the Phantom NPC to get the Phantom Dash gadget.
You can collect the first two Gold Bolts without the Phantom Dash gadget. However, you must have the gadget to get the third.
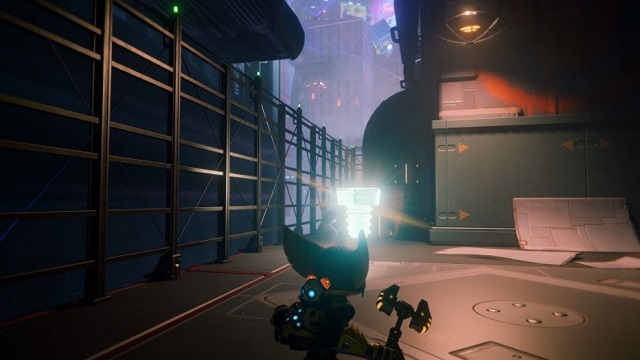
Gold Bolt 1
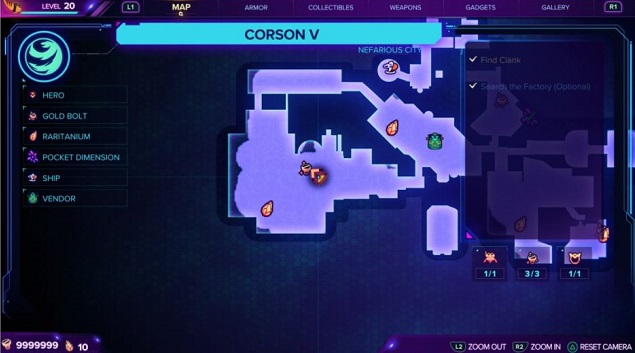
The first bolt, (Phantom Dash not required) can be grabbed at any time. It’s immediately after the cutscene with Ms. Zurkon in the Nefarious City Bazaar.
To the right of Ms. Zurkon’s shop is a path leading to a ledge looking out over the rest of the city. Follow the path to the end. Climb the wall on your right with the Magneboots.
Once you on the higher level, Ms. Zurkon will alert you that there is a Spybot up the stairs and at the end of the path ahead, which is also where you’ll find the gold bolt.
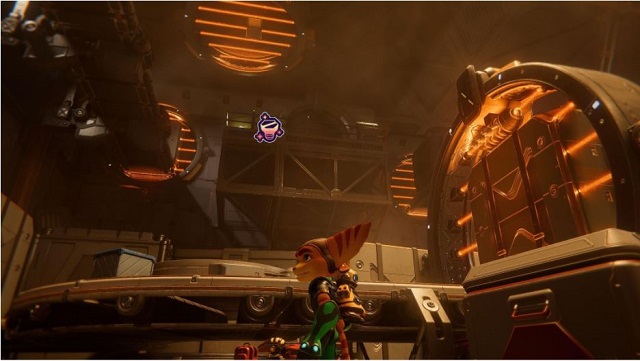
Get to the top of the stairs, and rift tether to the platform above and to the right of you. Open the door to the first shipping room you pass through. Climb on the boxes to get to the exit. Instead of leaving, jump on the conveyor belt, and use it to get to the other side of the room to find the first gold bolt.
Gold Bolt 2
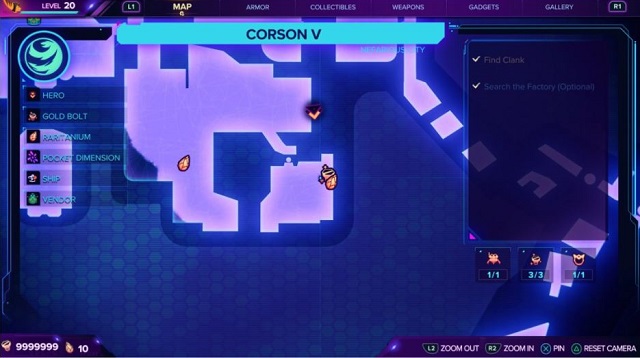
You don’t need the Phantom Dash to get the second Gold Bolt, either, but you’ll have to at least start the story mission first to find it.
Follow Phantom out of the club, and when you reach an enemy encounter in a park with holographic trees, look to the path on the right side of the holographic tree on the far right.
Follow the path to find two rift tethers, which lead you directly to the second Gold Bolt and some raritanium.
Gold Bolt 3
The third Gold Bolt can only be retrieved using Phantom Dash, so it’s likely you won’t get it your first time in Nefarious City.
When you return, exit your ship on the landing platform and look for a wall you can run along on your left. Using the Phantom Dash, run along the wall and land on the platform immediately below you, where you’ll find the final Gold Bolt for this area.
Sargasso, Outpost L51
You’ll find another three Gold Bolts on planet Sargasso, Outpost L51, the Mort’s Gelatonium Factory. Come back to Sargasso after having completed your first full mission, since it’s easier to grab two of the three Gold Bolts then.
Gold Bolt 1

The first Gold Bolt can be found before you leave Sargasso for the first time, but after you’ve completed the story mission.
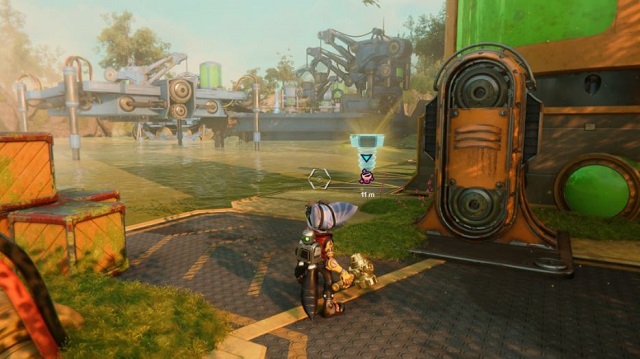
Go behind the Morts main building for the Gelatonium Factory, right where your ship is parked, to find a platform you can get to using your rift tether.
Gold Bolt 2
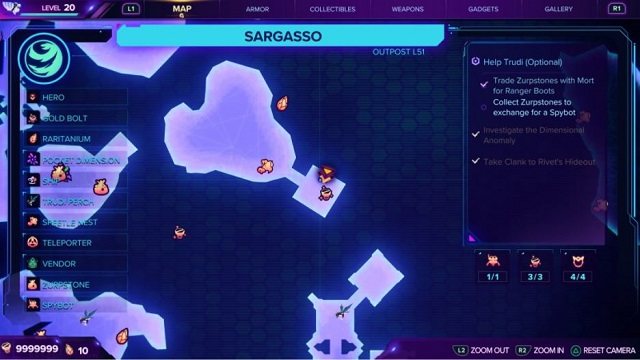
The second Gold Bolt can be found immediately in front of the Gelatonium Factory across the broken bridge. It’s at the end of the large area to your left, next to the water.
Head towards the small Gelatonium tower, and walk along the platform to the back of it.
Gold Bolt 3
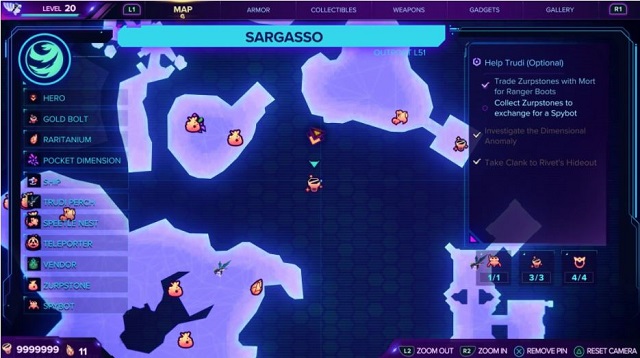
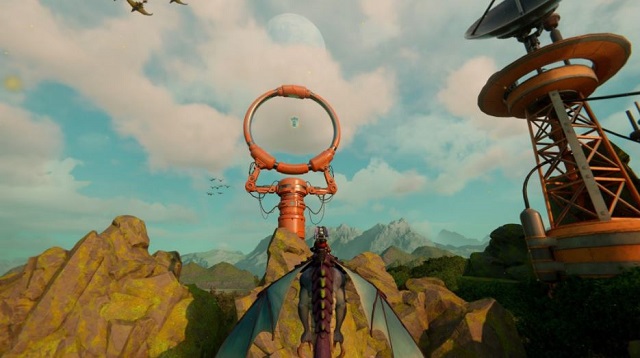
The third Gold Bolt takes the longest to get because you’ll need to help Trudi and collect some Zurpstones first.
It’s in the skies, in the middle of a ring not far from the main Gelatonium Factory.
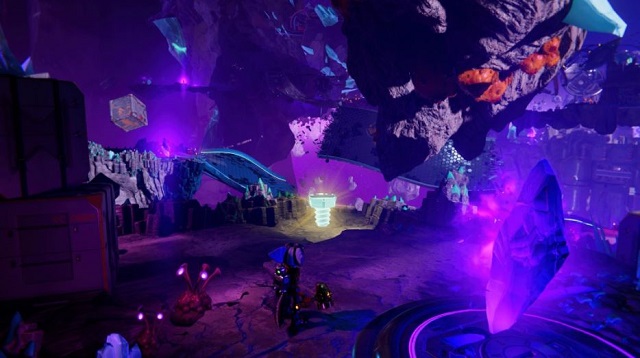
Scarstu Debris Field, Zurkie’s
The Scarstu Debris Field is where you’ll find Zurkie’s, as well as all of the arena challenges and three Gold Bolts. Two of the three must be won in the bronze and silver medal challenges.
The bronze-medal challenge is available when you get to Zurkie’s for the first time. You’ll have to revisit Zurkie’s for the silver-medal challenge, which becomes available a few story missions after your first visit.
Gold Bolt 1
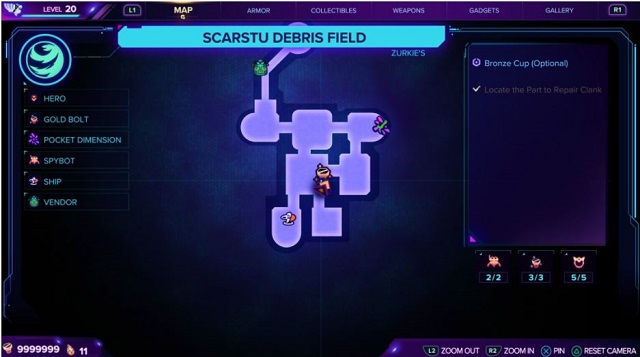
The only Gold Bolt you can find outside of the bronze- and silver-cup challenges is cleverly hidden underneath the platforms that hold up Zurkie’s parking lot, accessible only by using your Magneboots.
Land your ship, and head to the landing platform with a bright pink ship. It’s to the right and below from where you’re parked. There you’ll find a wall you can climb with your Magneboots.
This will take you below Zurkie’s parking lot. Once you round the corner, you should see the Gold Bolt. Jump over to the other magnetic platform to retrieve the bolt.
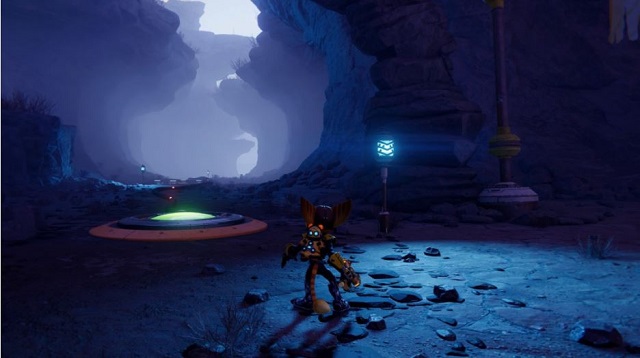
Savali, Urfdah Mesa
Savali is where you’ll get your Hoverboots, a key traversal gadget in Rift Apart. The Gold Bolts here are a little trickier to obtain than those in previous levels, mostly because they require multiple steps.
The third Gold Bolt won’t actually be available until much later in the game. Spoiler warning for the explanation of Gold Bolt 3 below!
Gold Bolt 1
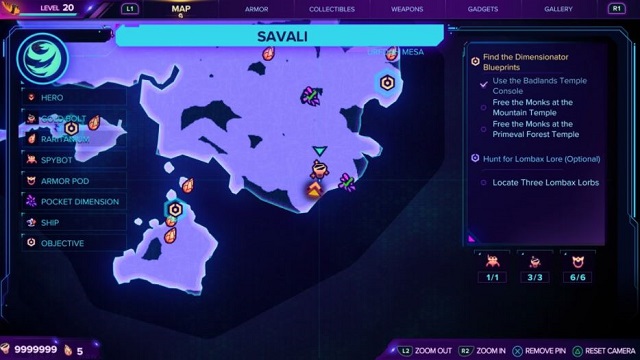
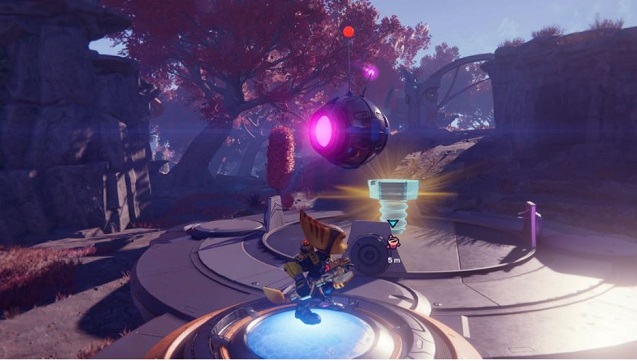
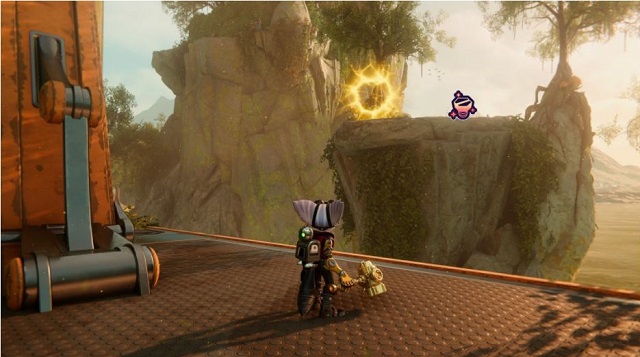
The first (and simplest) Gold Bolt to find on Savali is one that will be riding on the back of a hovering platform, towards the bottom right of the map. It’s right next to a Pocket Dimension.
Simply chase down the platform with your Hoverboots, and land on the big green button to disable the shield before grabbing the bolt.
Gold Bolt 2
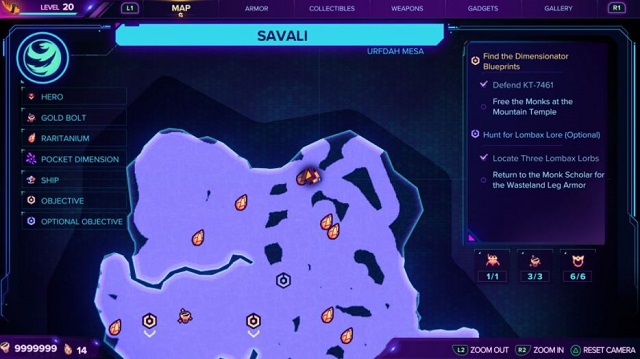
The second (and trickiest) Gold Bolt to obtain is one that is sitting in the middle of the map. But you can’t get it from there. You’ll need to go to the top right corner of the map where you’ll find a series of pressure pads with an archway at the start.
Use your Hoverboots to glide over each pad, following the wire to a portal. The portal will take you to the platform with the Gold Bolt, back in the middle of the map.
Gold Bolt 3
The third and final Gold Bolt on Savali is only accessible towards the end of the game, so here, again, is your spoiler warning.
On your return to Savali in an attempt to stop Emperor Nefarious from acquiring the dimensional map, you’ll need to access the underground temple where the monks have hidden it.
Clear Nefarious’ forces, and gain access to the temple. Before going into the temple, find the door behind you with a terminal infected with a virus. Use Glitch to solve the puzzle.
This is the final Glitch puzzle in the game, and also the most difficult, so fair warning it could take a couple of tries to complete. Once you’ve opened the door, you can get Savali’s last Gold Bolt.
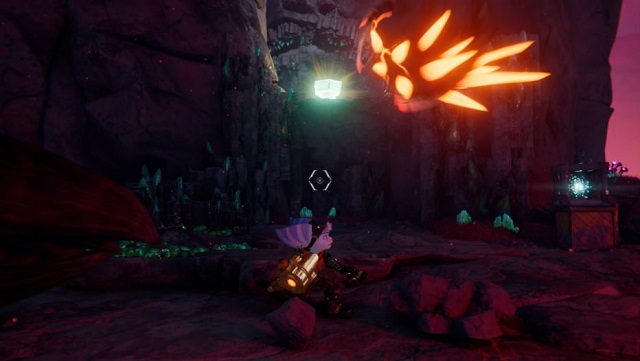
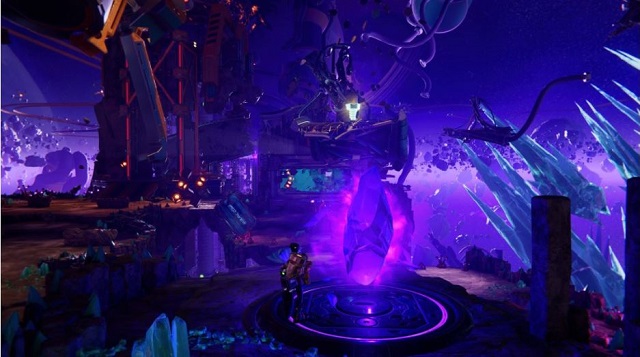
Blizar Prime, Blizon Mines
You’ll need to constantly switch between dimensions to navigate the Blizon Mines map properly and gather up all of the area’s collectibles.
Because you’ll need to access all areas of the map, it’s recommended you finish the story mission here and return to collect all the Gold Bolts.
Gold Bolt 1
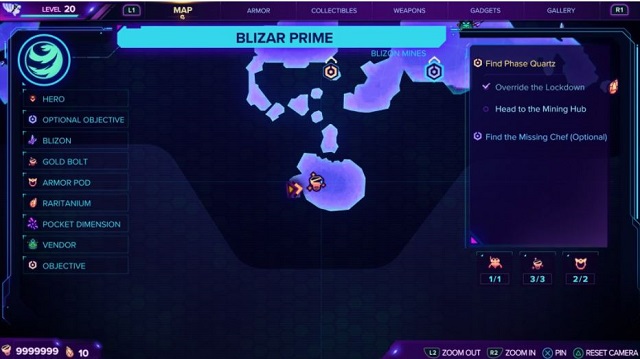
The first Gold Bolt is to the left of the landing pad, but in the dimension with the unexploded Blizar Prime. To get it, you’ll need to switch to the dimension with the mines, then switch back to the destroyed Blizar with the blizon next to Ms. Zurkon.
Follow the only path forward on the magnetic platforms. Go around to the room with another blizon crystal to smack and, for a final time, swap back to the version of Blizar with the mines.
Once you’ve swapped back, take the path left of the out-of-order bridge and stay left. You’ll find a small staircase to a secluded area with the first of three Gold Bolts.
Gold Bolt 2
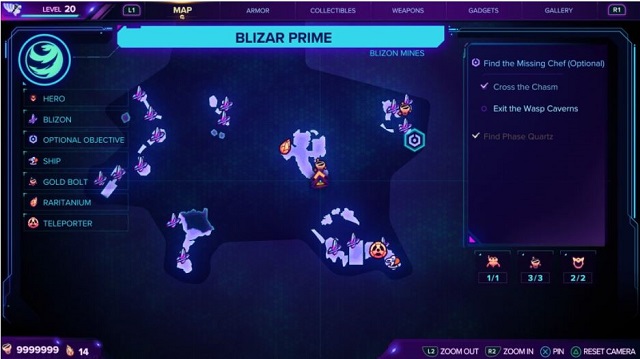
This Gold Bolt is in the destroyed version of Blizar Prime, so it won’t show up on your map if you are still in the non-destroyed version.
This one can be found in the Mining Hub, which you can teleport directly to from your landing pad. Go there in the non-destroyed version, and use the blizon sitting atop a rock, with some handy boxes to jump on to get to it.
When you switch back to the destroyed Blizar, you should see the Gold Bolt right in front of you, hovering over a magnetic platform.
There is a set of stairs on your left leading to a broken magnetic platform. Jump from one platform to the next using your Magneboots to reach the Gold Bolt.
Gold Bolt 3
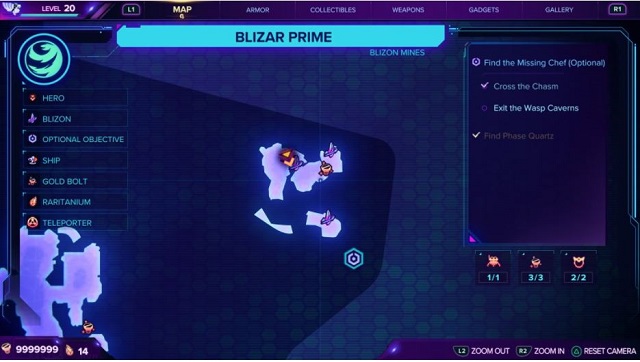
The third Gold Bolt can be found along the way to complete the side mission on Blizar Prime. Head towards the missing chef from the Mining Hub, and you’ll eventually find yourself in a large clearing with three blizon crystals.
After clearing out the local fauna, switch to the destroyed Blizar to once again use a series of magnetic platforms to get to the second blizon crystal. Hit it, and then use the rocks to navigate over to the third blizon crystal. Hit the third crystal, and you’ll have found the last Gold Bolt on Blizar Prime.
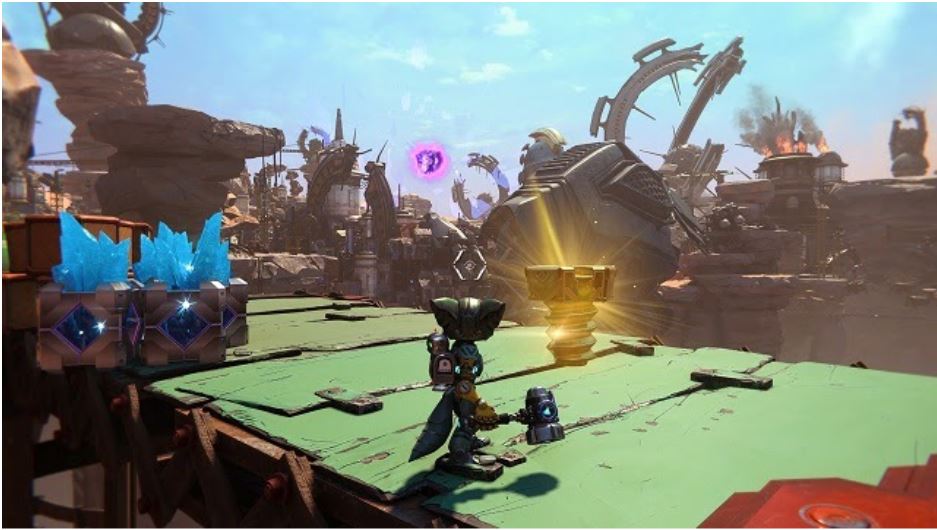
Torren IV, Molonoth Gulch
Torren IV is the land of The Fixer, but it is also home to two very appealing Gold Bolts. To access them, you’ll need the Hoverboots acquired on Savali.
Gold Bolt 1
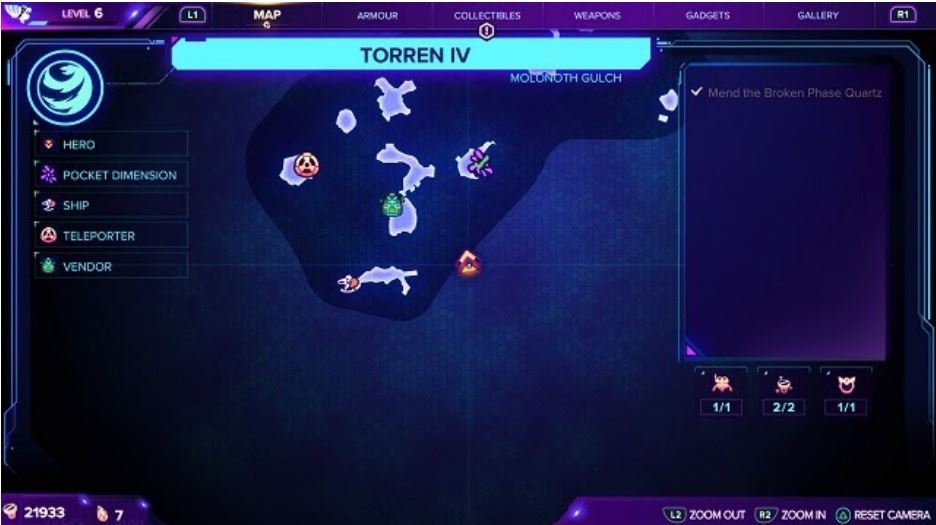
Acquiring the first golden bolt of Torren IV is just a short skate away from the landing platform. Following the path from your ship, you’ll have a quick fight with some Amoeboid. Rather than taking the sling towards town, veer right.
You’ll see a ramp. Using your Hoverboots, use the ramp to get over the small canyon, grind along the rail wall, use a sling, and land on the platform where you will find the first God Bolt.
Gold Bolt 2
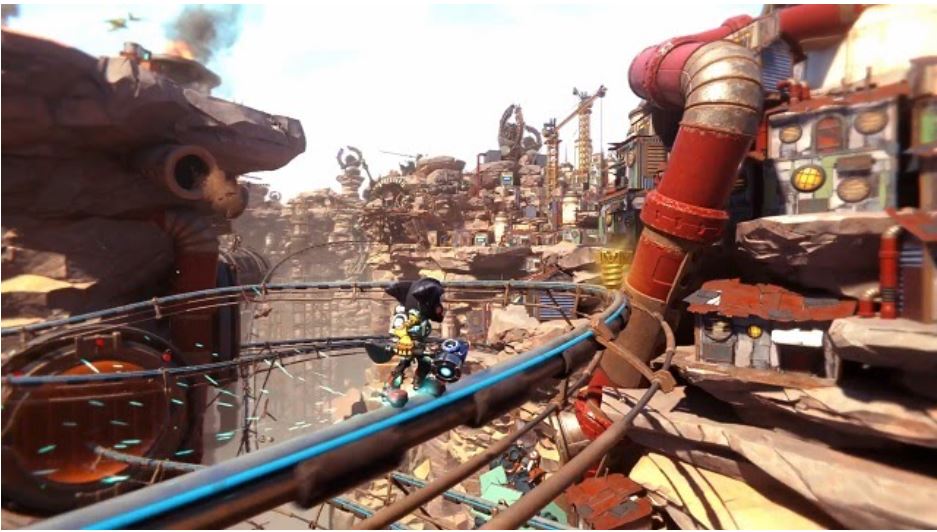
Make your way to the back of the town (towards the location of The Fixer), you will come across a set of rails. Jump on the rails.
You’ll have to jump between rails to avoid passing rail carts. Eventually, you will come to a blocked orange tube. Jump onto the rail on the left, and as you bend round to the right, a rift will appear on your left.
Pull yourself through the rift, and you will land on another railing. Stay on this railing, and it will take you straight to the collectible.
Cordelion, Kedaro Station
Cordelion is another of Rift Apart’s dimension-split levels, and it requires you to find blizon to access all of its collectibles.
Gold Bolt 1
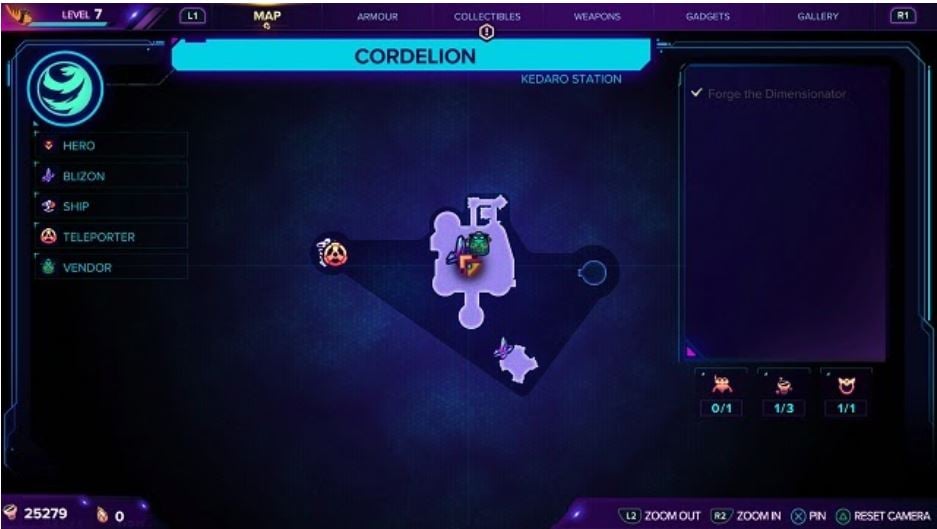
After arriving on the aquatic planes of Cordelion, you’ll have to fight your way through a wave of Nefarious’ robots, before you climb to the top of a short tower, shown in the map above.
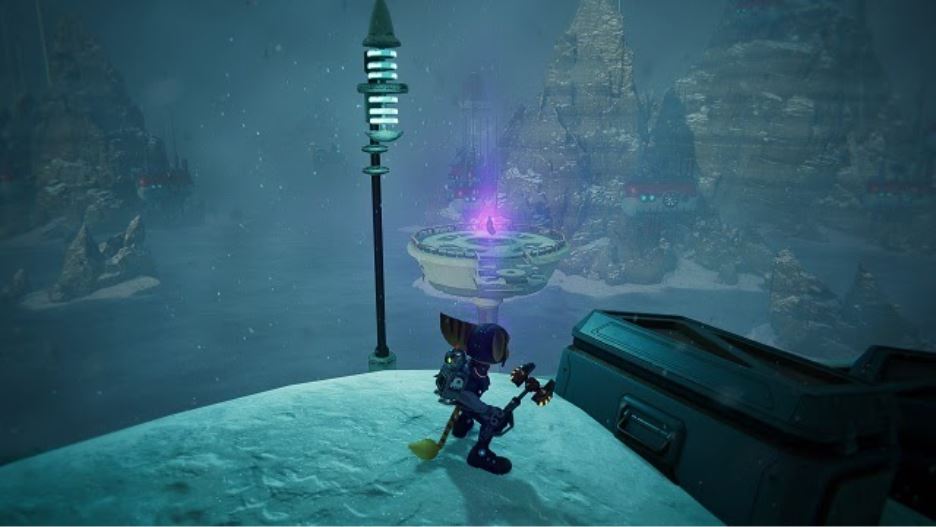
Some dimension swapping Blizon will be waiting for you to take a swipe, transporting you to an even wetter (and colder) version of Cordelion.
In the other dimension, go back down the stairs you used to climb up, and approach a mound of snow. Looking out to the sea, spot another platform with some blizon in the distance.
Go to the other side of the platform and use your Hoverboots to skate towards the snow mound. Leap into the air using your double jump. While your jump isn’t enough to reach the platform, a rift will allow you to teleport to the platform. Hit the blizon to reveal your first Gold Bolt in this area.
Gold Bolt 2
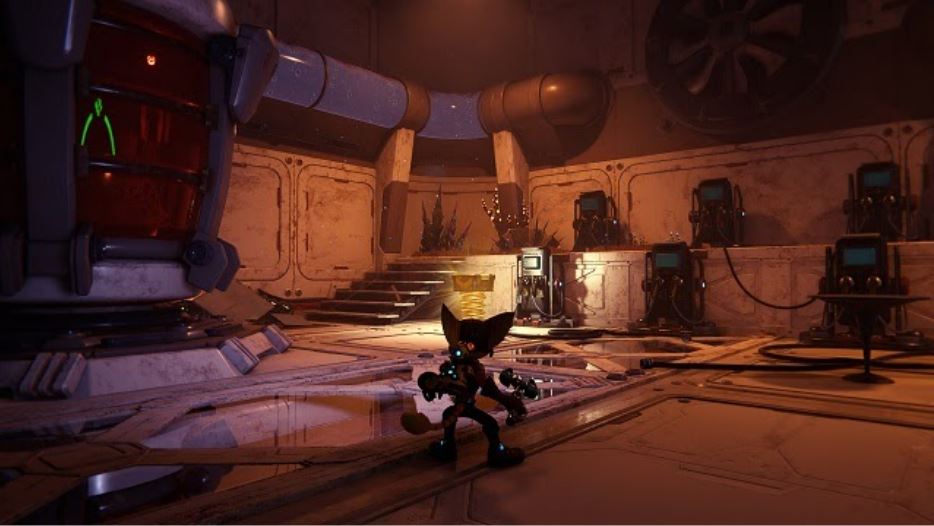
The second of Cordelion’s Bolts is quite easy to find. Once you’ve taken the elevator down into its underwater base, follow the corridor until you spot your first Amoeboid.
On your left, you should hear and eventually see a broken door struggling to open. You will see a rift on the other side of the door, allowing you to pull yourself through. The Gold Bolt is on your right.
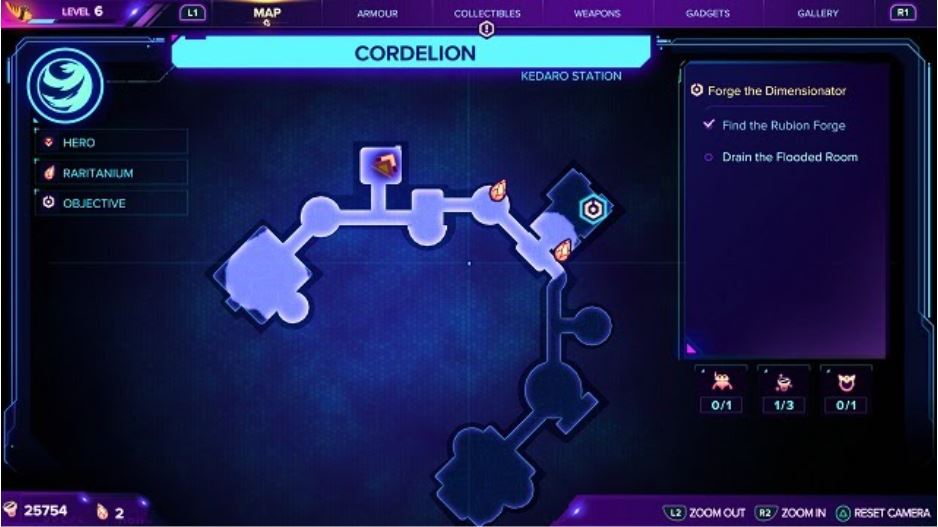
Gold Bolt 3
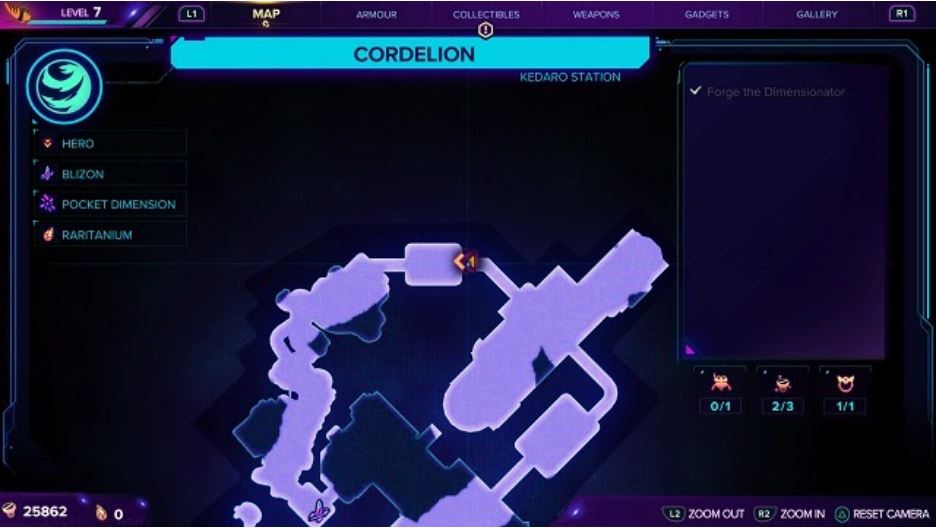
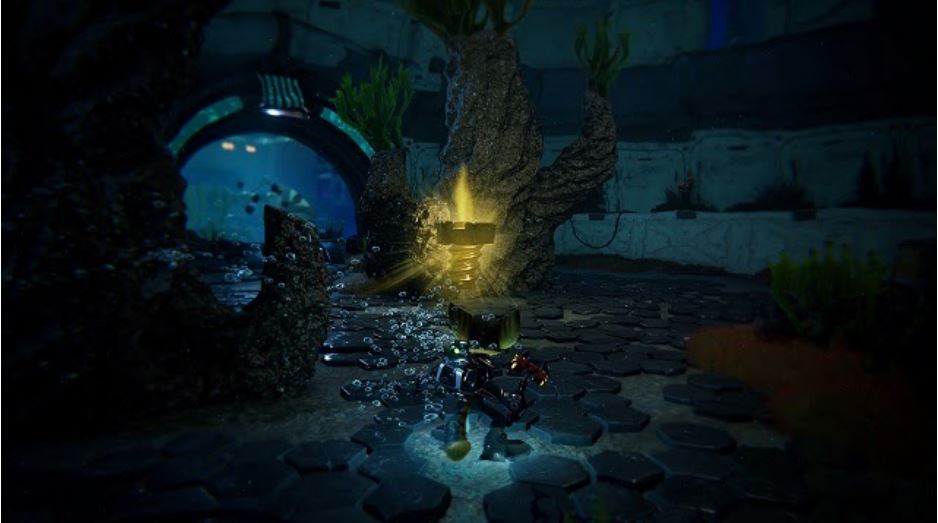
The third and final Bolt on Cordelion is the hardest to find. You’ll have to fight your way through most of the underwater base, avoiding the ever-terrifying monster Juice in the process. However, once you reach the point in the map shown above, make your way out into the water, and follow the magnetic paths.
The path will split. Keep an eye out for a propeller, where you can veer off to the right. You will then be able to jump onto a wall with your Magneboots, following it up and over onto a new platform. The Gold Bolt will be hidden behind some coral growth.
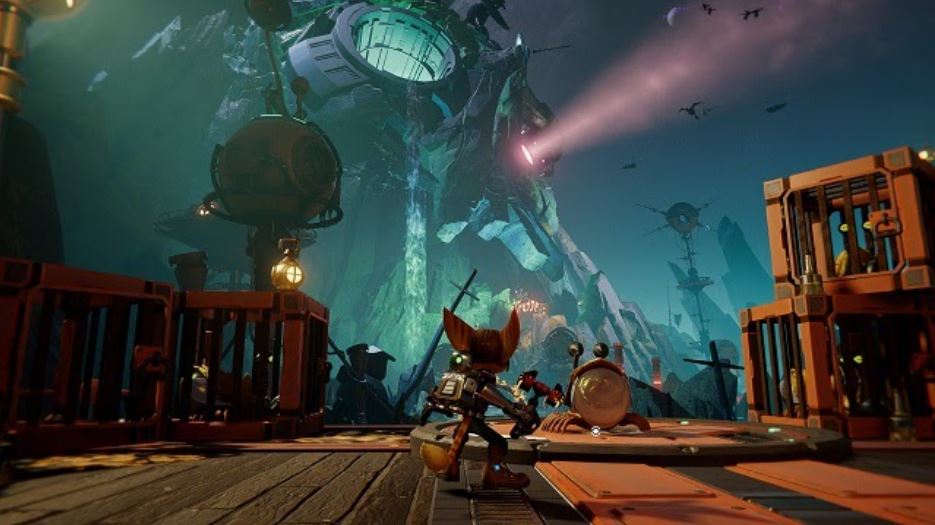
Ardolis, Pirate Base
Ardolis is the mechanical pirate haven in Rift Apart, where two Gold Bolts can be found. Finding both collectibles will require the Speedle, which are first encountered on Sargasso. You’ll also need to fight through another Glitch trial.
Gold Bolt 1
After saving Pierre, follow the docks in the direction of Skull Mountain. You will eventually come across a Speedle. Jump on the Speedle, but do not use its boosting abilities just yet.
Avoid the first speed ramp by slowly passing on its left, and then turn right into a slanted rock. Use the boost as you hit the ramp of the rock, quickly turning left (in the direction of Skull Mountain).
The Bolt is floating above some explosive crates, though your boost should send you soaring into it. Don’t worry if you hit the crates and die; your collection will still be counted.
Gold Bolt 2
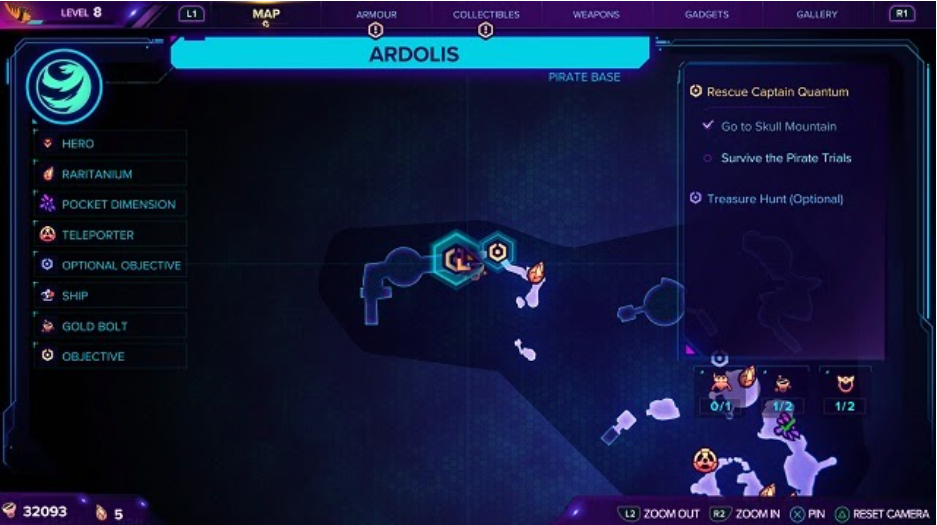
Continuing on your path with the help of the Speedle, you will eventually reach the Pirate Trails inside Skull Mountain. You will first be tasked with memorizing the order in which five mechanical pirates sing.
Once completed, a door will open. On the other side, you will be greeted by a Grunthor corpse. You can see the collectible on your left in a container, but it’s inaccessible. Look on the right is a box to start a Glitch segment.
In the trial, you’ll have to destroy 10 virus nests by finding key points that disable the nests’ shields. After destroying all 10, you will return to Ratchet, and the Bolt will be accessible.
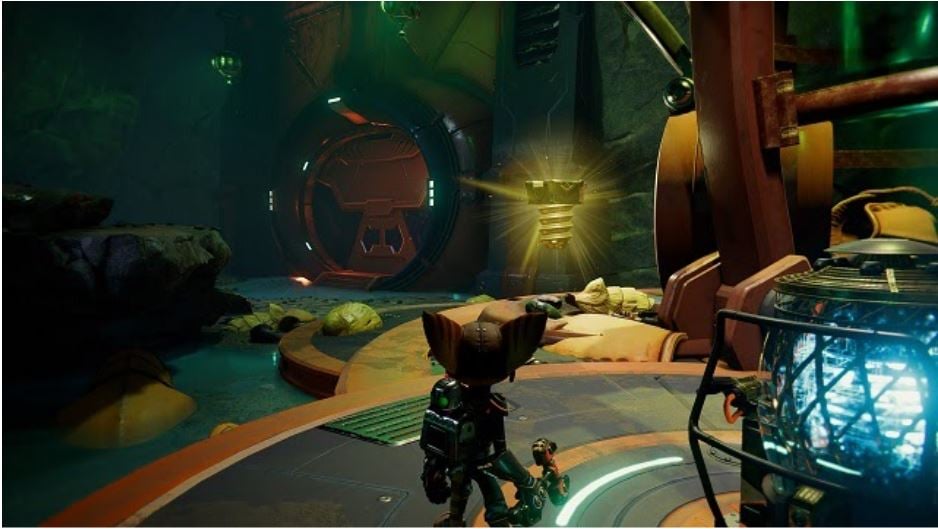
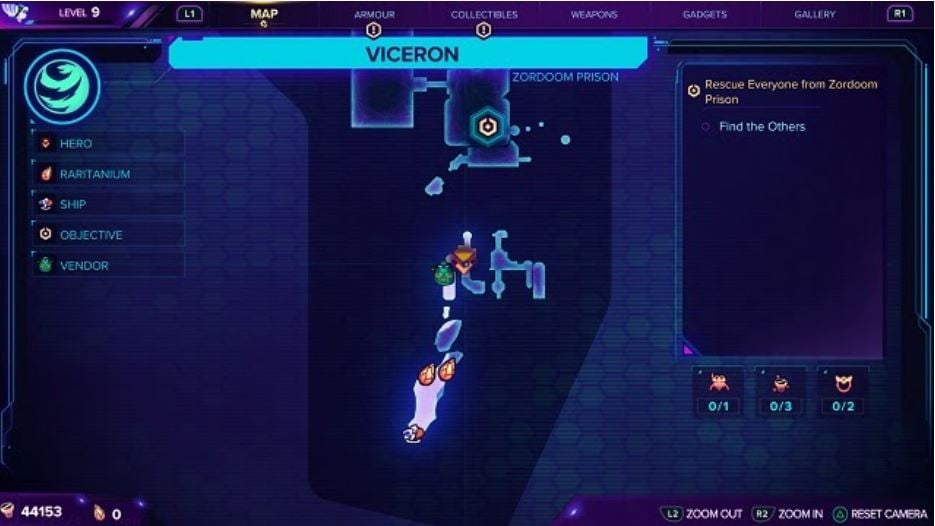
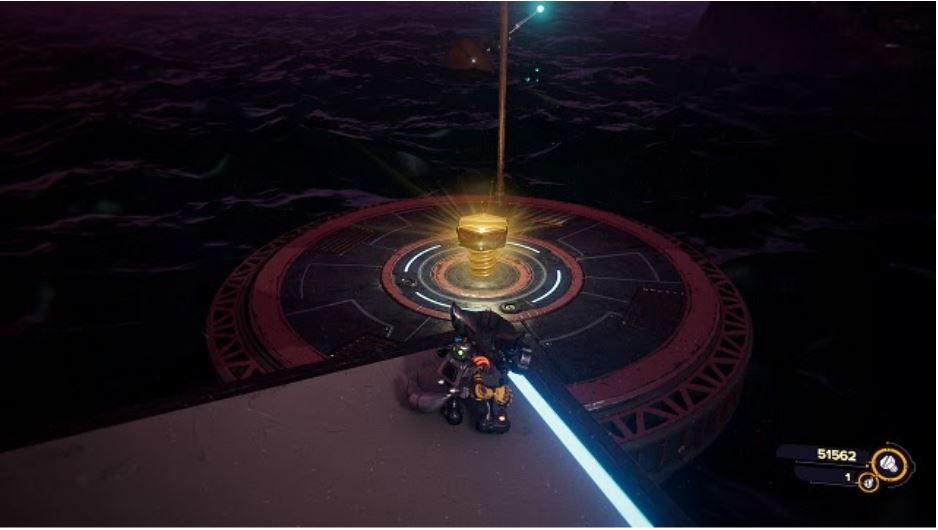
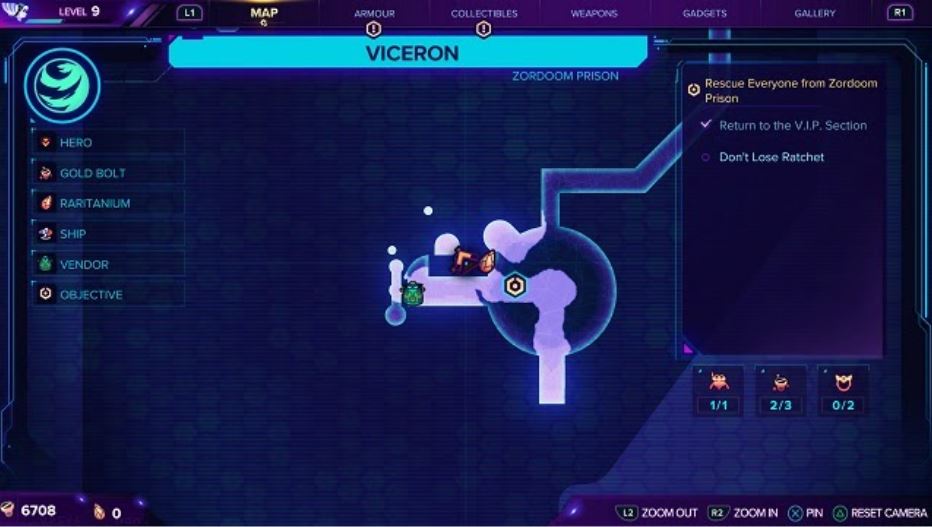
Viceron, Zordoom Prison
Viceron is the final location in Rift Apart’s campaign, and home to the Zordoom Prison, as well as three Gold Bolts.
Gold Bolt 1
The first Bolt is available in one of the early areas of Viceron, and you should start out at the point shown in the map.
Phantom Dash through a shielded gate, noted by the large “115” on the wall. Afterward, you’ll fight several enemies. After defeating them, follow the path to the left, then right, dashing through the gates in the process.
You will eventually see a pirate ship, with the Gold Bolt in the middle.
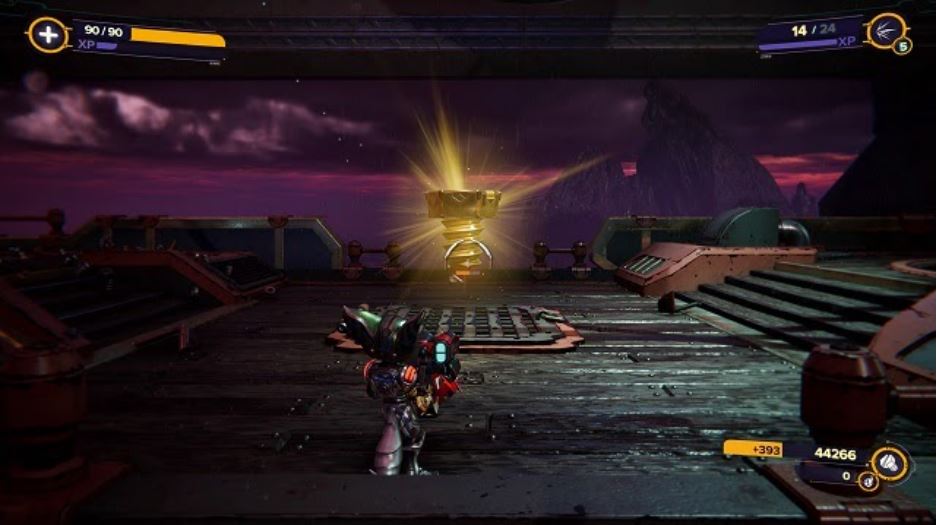
Gold Bolt 2
If you are playing through the campaign while looking for the Gold Bolts, the second in Viceron can be found after you have rescued Clank, and first see Ratchet and Kit in their cell.
Fight through the enemies, and turn diagonally right instead of heading straight towards the cell. Jump on top of a boxed crate to find the second Bolt hiding behind it.
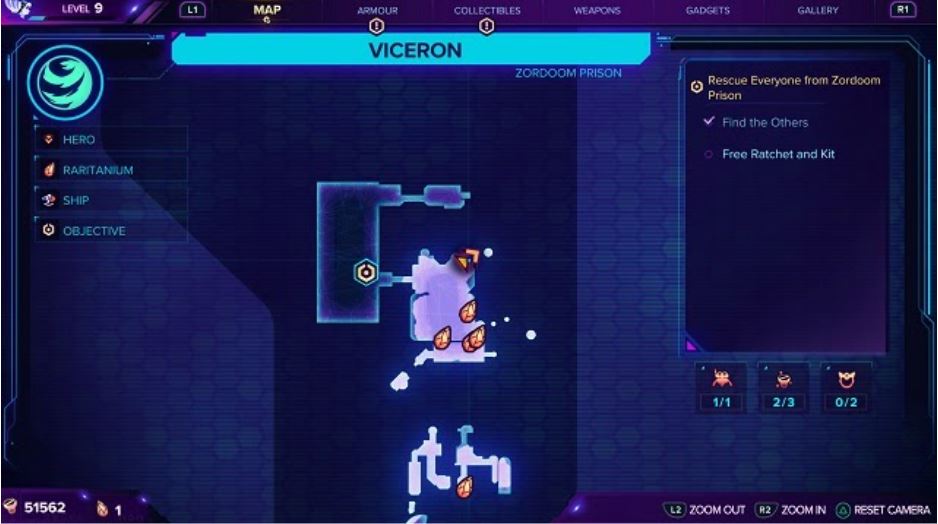
Gold Bolt 3

The last Gold Bolt in Rift Apart can be found in the main prison area. After finding Ratchet and Kit’s cell, you will have to disable the power source for the prison, unlocking all of the prisoners in the process.
Once you return to the cell area, run along the same platform to reveal the final Gold Bolt hidden in one of the cells.
And that’s it! You’ve collected every Gold Bolt in Ratchet and Clank: Rift Apart. You now have the Nooks and Crannies trophy, but more importantly, access to all of Rift Apart‘s cheats, like infinite ammo and more. For more tips, consider hacking out our other R&C: Rift Apart guides.


Published: Jun 30, 2021 06:50 pm