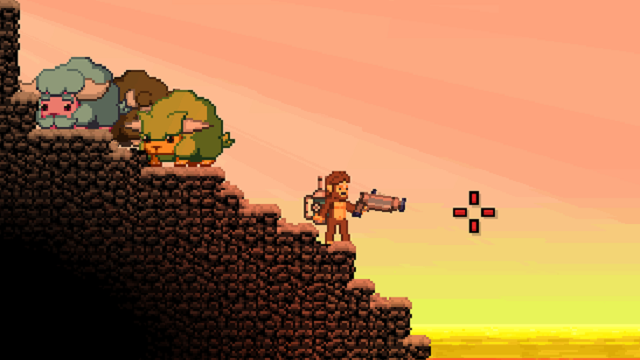
Before Starbound‘s version 1.1 update, many players hoped for a way to move farm animals and other peaceful creatures. Developer Chucklefish made their wishes come true with the Relocator gun.
The Relocator does exactly what it sounds like — it moves creatures from one place to another. While you cannot pick up hostile monsters, bosses, chickens, or NPCs, the Relocator is a very useful device. With it, players can create their own personalized zoo or aquarium.
How to Get the Relocator in Starbound
You can craft a relocator at Agricultural Station. You will need:
- 10 Durasteel Bars
- 4 AA Batteries
- 2 Silicon Boards
- 6 Copper Wire
What the Relocator Can Pick Up
As we mentioned above, the Relocator is only capable of picking up non-hostile animals and farm creatures. This includes:
- Critters
- Fish
- Certain fish must first be reeled in with a fishing rod.
- Bugs
- Punchy
- You can only find this creature in a Hylotl underwater city.
- Farm animals
- Fluffaloes
How to Use the Relocator
- Use your mouse cursor to point the Relocator at the creature.
- Right click to capture.
- Left click to release it.
Note: You can only capture up to three creatures at a time. The number of creatures in your Relocator is indicated by the number of circles on the side of the device. Each circle symbolizes one creature held. More than one Relocator can be used to hold more creatures.
When caught, creatures are not owned by the player. Once they are released, they’ll interact in the environment normally. Use a capture pod if you want to tame a wild creature to own.
Creatures caught and placed using a relocator should not despawn. If a player decides to use the /spawnmonster command instead, they will still need to use a relocator to prevent its eventual despawn.
—
That wraps up our Relocator guide! For more help with the game, check out these other Starbound guides on GameSkinny:
- Starbound: Some Helpful Tips for Beginners
- Starbound 1.0+: How to Craft Your First Set of Armor
- Quick n’ Dirty Starbound 1.0 Weapon Overview Guide
- Upgrade Your Starbound Ship Faster With These Tips
- How to Build a Space Station in Starbound Version 1.3
- Building and Using Mechs in Starbound 1.3

