
During the main missions of Starfield, you’ll learn about the artifacts, gather power in the temples, and encounter the Starborn. Halfway through, however, a serious choice must be made that changes the outcome of your playthrough. You’ll come across it in the High Price to Pay mission. Here, we answer the question: should you defend The Lodge or The Eye in Starfield? Major spoilers follow.
Should You Defend the Lodge or The Eye in Starfield?
Again, be warned that major story spoilers follow below. During the High Price to Pay mission, you’ll arrive at the Lodge with Barrett and your latest artifact acquisition. Noel, however, is in a frenzy, as communication with Vladimir at the Eye has been interrupted. A static-filled message makes it through, with him saying there’s been a Starborn attack on the satellite. An enemy called The Hunter has seriously injured Sam Coe and is now heading to the Lodge. Sam may be replaced with another companion as it’s based on whoever you have the highest friendship level with.
You must make a quick decision. You can stay at the Lodge to help protect the artifacts, or you can go to The Eye to help your Constellation companions in need. Choosing each location results in a different outcome. If you take too long to make a decision, one is made for you, as you’re forced to protect the Lodge against the assault of the Hunter.
Choice: Defend the Lodge
If you decide to stay in New Atlantis and defend the Lodge, you must wait for Noel to gather up the artifacts. Walter is attacked by the Hunter, who seems invincible.
Gather up the companions at the location and head down into the basement which connects to the Well. You’ll flee through the district up to the Staryard, where you can board your ship and fly out of the area.
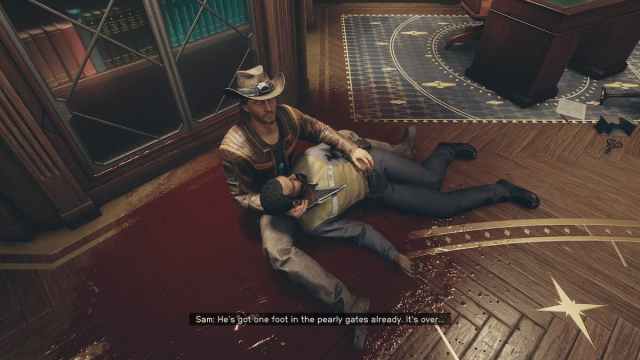
In space, you’ll be confronted by a Starborn ship, piloted by your enemy. After a brief conversation, dock with the Eye and rush inside. There, you’ll find a hysterical Cora Coe next to Barrett as he looks over the body of Sam. You didn’t make it in time, and Sam has died from his injuries. Talking to Cora only makes things worse, as her anger toward you is almost palpable.

This was a hard choice to make, and I personally blubbered a bit at the death of the space cowboy. Thankfully, I knew this wasn’t the decision I wanted to stick with, so I loaded up a prior save and returned to the beginning of High Price to Pay.
Choice: Go to the Eye
If you decide to head to the Eye, you’ll want to head to the door of the Lodge as quickly as possible. Before heading out, you must confirm with Barrett that this is your decision. Go through the doors and reach the space yard to fly up to the Eye in time.
When you get there, you’ll be able to find Sam and Cora where you left them working on the wiring in the right hallway. You have a chance to cure his wounds before you need to find the other members of Constellation on the satellite. Once you do, you and Sam will fly back down to New Atlantis in an attempt to save the Lodge.
When you make it back, however, you’ll soon learn you can’t save everyone. Vasco is in a heap but easily repairs himself. Walter was choked out but will be okay. Noel is nowhere to be seen. The worst of it all is finding Sam cradling Barrett’s body near a bookshelf. Instead of Sam dying, this decision results in the character with the second highest friendship dying.
After a brief moment of outrage, you and Sam head down into the Well to find Noel, where you’re attacked by the Hunter. Once again you have to flee through the districts of New Atlantis to your vessel and up to the Eye.
High Price to Pay Rewards
Whichever location you decide to defend, you’ll end up encountering the Hunter in his ship, the Scorpion. After a terse conversation, he’ll tell you to continue finding the Artifacts. He also gives you a rare laser rifle, Unrestrained Vengeance. It deals 18 energy damage and uses 3KV LZR rounds. It has the following traits:
- Hitman: +15% damage while aiming
- Long Barrel
- Recon Laser Sight
Regardless of your decision, one of the main companions in Constellation will end up dying during High Price to Pay. So, should you defend the Lodge or the Eye in Starfield? The choice lies with the companion you want to save the most. For me, it was Sam. Either way, the main story just took a dark turn. If you’re in need of assistance with other quest decisions, where to find crafting materials, or how to sell contraband, check out our guides hub.


Published: Sep 15, 2023 12:12 pm