They Are Billions may only have survival mode at the time of writing, but it’s enough of a challenge to keep most players busy for hours on end. Your colony has to survive waves of the living dead until the final wave, in which the zombies are really in the billions.
For the RTS gamer or even tower defense fans, They Are Billions poses an interesting challenge: Can you build a colony that will be able to withstand the massive assault looming on the horizon?
These tips are for newer players to this stress-fest of a game, whether you’re new to the RTS genre or not.
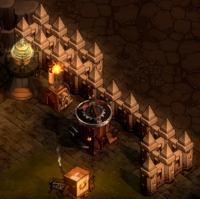 Double up your walls
This is a pretty simple tip, but it’s one that will help you literally every time you play the game: double the walls, double the defense.
Though you can’t triple-stack walls, you can double-stack them to give the hordes two barriers to have to break through.
Press the Tab key to rotate gates
Straightforward tip here.
Keep an eye on your resources and plan ahead
The last thing you want is to run out of food, energy, or workers at the wrong time.
In order to get your defenses up in time before the final wave, you need to make the most of your time building your colony. This equates to a lot of little things, but the one aspect that always looms is balancing your economy.

Always build food, energy, or worker buildings before you run out of any of them. Gold is a little harder to come by and should be your primary bottleneck for the first half of a survival game, rather than the other resources.
This rule also applies with wood, stone, iron, and oil. These are used to construct buildings and train units, with some consuming those resources continually (and hence reducing your overall yield).
The difference between wood, stone, iron, and oil and the aforementioned resources is you have constant gains. In order to maximize production, you must secure new sources for these resources as quickly as possible throughout the entirety of a game.
Sell excess materials on the market
You can click on the market building to actively sell resources you have a surplus of, so use it liberally. Selling wood and stone early on makes the gold burden a little lighter.
If you’re not having trouble with gold and have a surplus of wood, find somewhere and build some walls. You can never have too many walls.
Always construct buildings, train units, and expand
You never want to stop expanding. Ever.
In order to survive the zombie hordes, you must set up choke points and walls (manned with units in towers or defensive structures) as defenses from the heart of your colony out to as far as you can build them.
The more blockades and defenses, the better. You’ll need at least half of the map set up with defenses to even have a chance to survive the final wave.
But that’s not all you need to do.
You have to keep inside your colony bustling as you expand, and resource costs climb as you get to more advanced buildings.
In this vein, there are two very easy rules of thumb to follow:
- Always be building homes for new colonists and workers
- Always be training new units
You are absolutely going to want more than one soldier center to keep your unit production high. The more units you have, the safer you’ll be, provided you make use of and position them well.
As for homes, once you start getting tight on space, it’s recommended that you shift from placing tents to upgrading your current ones to cottages. They save space and grant higher colonist and worker yields — but just build tents if you need more workers, are low on resources, and have the space.
Clear out the map
How does spawning work? Well, here are a few tidbits you need to know:
- The zombies on the map are finite and do not just spawn in the middle of nowhere
- Villages of Doom house a finite amount of zombies
- Additional zombie groups will spawn at the sides of the map
- Any zombies you have not wiped out before the final wave will join the final assault
This all means you need to wipe any threats out, the sooner the better.
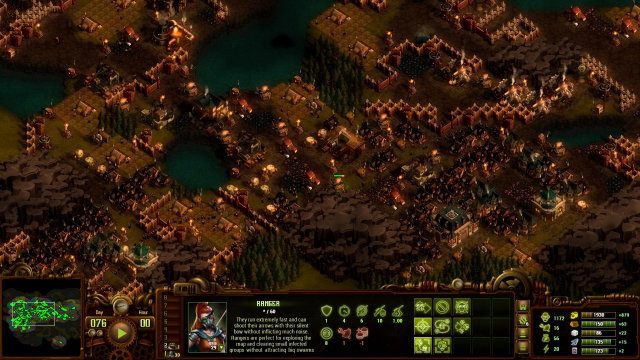
Rangers are your best friends when clearing out the map early on. A group of at least 10 can slowly but steadily start chipping away at the larger hordes surrounding the colony.
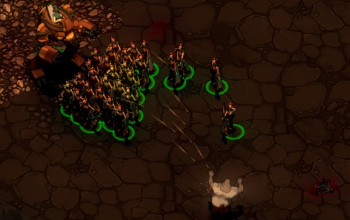
You’ll have an easier time clearing out surrounding zombies with more units, but the caches of resources lying about the map make it well worth exploring sooner rather than later.
Snipers > Rangers > Soldiers
High-tier units like Titan, Thanatos, and Lucifer are pretty obvious in their benefits. Not so much with the three lower-tier units.
Soldiers are the least effective of the standard units. They have the shortest range of the three, their guns are loud, and neither their damage nor HP are high enough to warrant using them instead of Rangers or Snipers.
Rangers are great for speeding across the map and clearing out large waves of zombies due to their fast movement speed, long range, and silent attacks.
Snipers should be your go-to for manning towers, as they boast higher HP and damage than the Ranger, but are exceedingly slow.
Set attack priorities
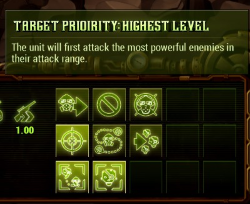
Be sure to set some of your units to attack the highest-level enemies rather than just the closest. Some zombies, like the spitter or harpy, can be devastating to groups of your units.
I like to set all of my Snipers to attack the highest level, and use defensive structures to clear out the weaker zombies.
You can set a unit’s attack priority to highest level by clicking it, then clicking on the very last button in their panel.
Make good use of defensive structures
Defensive structures in this case being structures like the X that attack zombies on their own accord.
The Shocking Tower, Great Ballista, and Executor are the three structures in particular. The first specializes in area damage while the other two are more general purpose (with Executor being the upgrade of the Great Ballista).
Place these structures behind your walls rather than in front.
Build your colony’s homes near each other & near banks
You need to think about where you’ll be placing your colony’s tents from the very start of the game, and not just because of the zombie threat.
Your gold income comes from your colonists, and nothing gives a boost to that income like a well-placed bank.
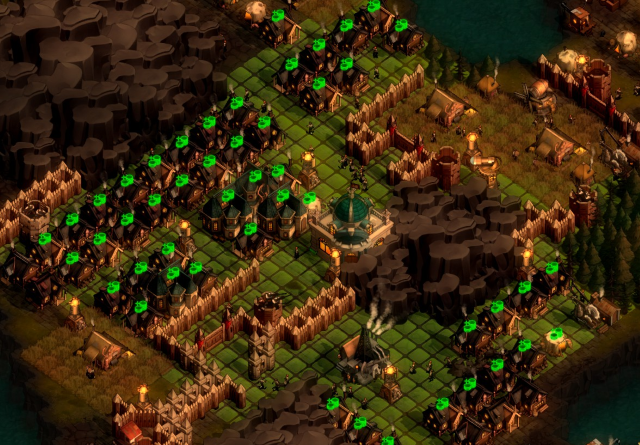
In order to foster a healthy gold economy, you need to make sure you have some prime real estate set up for your colony’s homes and banks. This can be a little difficult depending on the terrain around where you’ve started, and you may have to accept that your primary housing section won’t be right next to your command center, but a little planning goes a long way on this front.
You can double-click on structures and buildings alike to select all
Select all in this sense being the selection of every same structure or unit of that type within vision.
This isn’t just useful for controlling your units — it makes upgrading your walls from wood to stone a total snap.
Have at least one mobile unit squad
Whether Snipers or Rangers, it doesn’t matter: Have a squad of units dedicated solely to bouncing from one part of your colony to the other to defend.
Those Rangers you had clear out the map early on come in handy at the end, as you can send them from defensive point to defensive point to lend a hand.
These tips will get you by in survival mode, but what strategic conundrums await us in the upcoming campaign mode? Who knows — I don’t, but I definitely want to. For now, let this advice help you survive your way through the four maps available in survival mode and crush those brain-thirsty bastards.



Published: Dec 24, 2017 08:28 pm