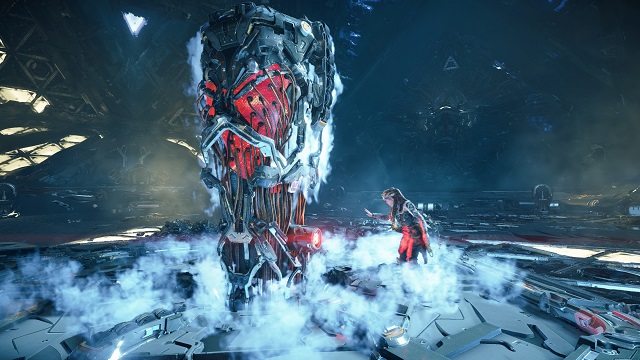
Finding all of the Cauldrons and their locations in Horizon Forbidden West gives you access to machine overrides that can be useful both in combat and in exploration. Reaching the Core of a Cauldron and interacting with it rewards you with machine overrides, allowing you to turn machines to your defense or act as mounts.
There are 6 Cauldrons (plus Repair Bay Tau) spread across the lands of the Forbidden West. You can uncover their locations yourself by playing through the campaign and activating Tallnecks if you want. Once you’ve overridden all of the Cauldron Cores, you’ll not only get all machine overrides but also the First Core Overridden bronze trophy and All Cores Overridden silver trophy.
Remember: You can’t leave a Cauldron until you complete it, so come prepared. The game will warn you before going too far. What’s more, the Notebook entries for each of the machines show which Cauldron to complete for their overrides on the left side of each entry.
Finally, some of these overrides will be corrupted, and you’ll have to repair them at the Fabrication Terminal at The Base. More on that below.
Where to Find All Cauldrons for Mount Overrides in Horizon Forbidden West
Repair Bay Tau
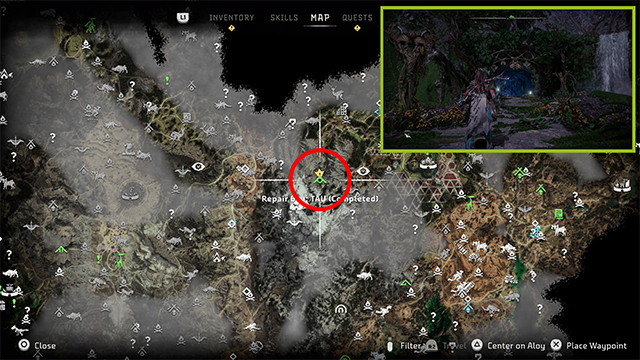
Ok, so Repair Bay Tau one isn’t technically a Cauldron and doesn’t count toward the trophy, but you’ll go here during The Dying Lands quest and unlock overrides for a few machines. Repair Bay Tau also gives you access to the Fabrication Terminal in The Base. You’ll need this later to repair corrupted overrides you find at other Cauldrons.
Consequently, the overrides you pick up in Repair Bay: Tau are entries for:
- Bristleback (corrupted)
- Plowhorn (corrupted)
To use the Fabrication Terminal in The Base’s Lab (located on the western side of the hub), interact with it, and “pay” the required parts for each machine. These parts are always from the machines themselves.
Cauldron MU
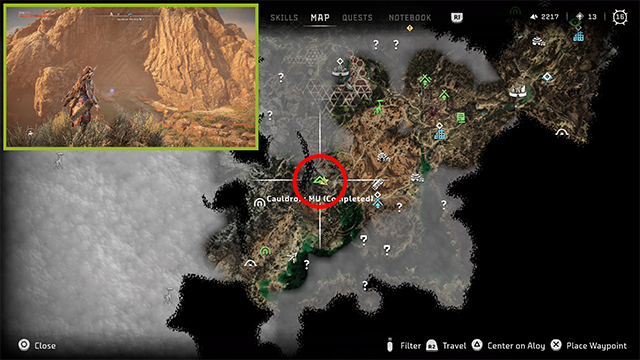
Cauldron Mu is likely the first Cauldron you’ll access in Horizon Forbidden West (unless you’ve gone straight through the story and accessed Tau and Gemini); the rest are locked by the story beyond this point.
Its map location will show up during the Death’s Door story quest; you don’t have to climb to the top of the nearby Tallneck in Cinnabar Sands to ping it. If you’re having trouble finding Cauldron Mu, it’s about 625 meters southwest of the Cinnabar Sands Tallneck, nestled up in the mountains below a black, inaccessible spot on the map.
When you make it to the Cauldron Core, you’ll fight 2 Widemaw, who are weak to Purgewater damage and strong vs everything else outside of standard kinetic or melee. You’ll get these overrides for completing the Cauldron:
- Burrower
- Fanghorn (corrupted)
- Grazer
- Scrapper (corrupted)
- Scrounger
- Widemaw (corrupted)
Cauldron Gemini
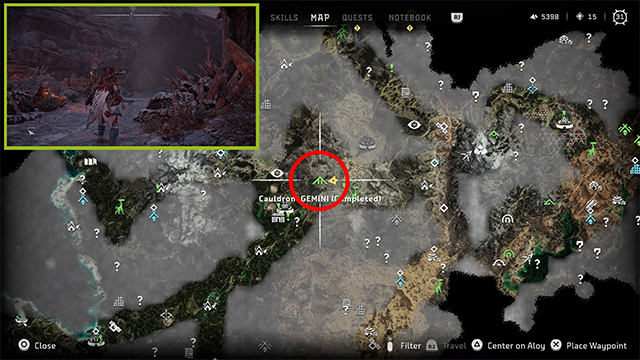
You’ll come to this Cauldron location, just northeast of The Memorial Grove, during the Gemini story quest near the end of the Horizon Forbidden West campaign. Complete this mission, and you’ll automatically complete this Cauldron, getting the (awesome) Sunwing override.
Cauldron Iota
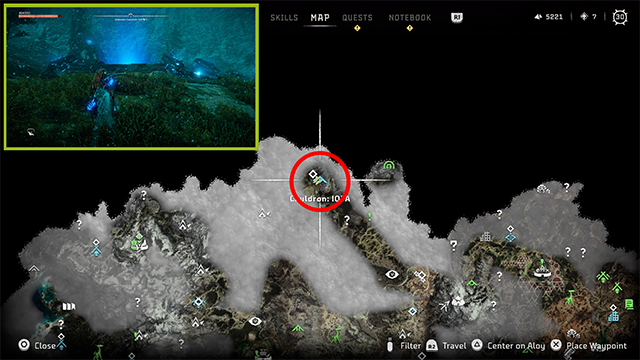
Cauldron Iota is the extreme northern portion of the Forbidden West, about 500 meters northeast of Salt Bite and about 2,000 meters northwest of Plainsong; it’s roughly in the center-north of the in-game map.
When you arrive at Cauldron Iota, you’ll find the initial entrance is a shaft leading down instead of a door like the others; Aloy will remark on the difference, and a new map marker will appear slightly to the northwest marking the true entrance.
Go northwest up the slope and through the trees until you reach the snow-covered rocks on the edge of the mountain. Look down to find a crevasse. Jump or glide down, and go into the smaller crevice marked with the blue lights and a bent tree.
Follow the critical path to the Cauldron Core to unlock overrides for:
- Leaplasher
- Glinthawk
- Lancehorn
- Longleg
- Clawstrider
- Skydrifter (corrupted)
- Bellowback (corrupted)
- Ravager (corrupted)
- Snapmaw
- Rollerback
Once you override the Core, the Tallneck body inside the chamber will drop down. The new exit is below the Core. Follow it to another override door, then continue along the path until you reach the Tallneck head further into the Cauldron.
Drop down, and fight the machines here before climbing up the wall in the back, southeastern side. Use the Metal Carriers (flying machines) to get over to the Tallneck head, then ride it to the energy shield further down. Use your Pullcaster to jump over to the platform on the right just before the shield, then override another door to reenter the Tallneck area. Climb over to activate the Tallneck and exit the Cauldron.
Cauldron Kappa
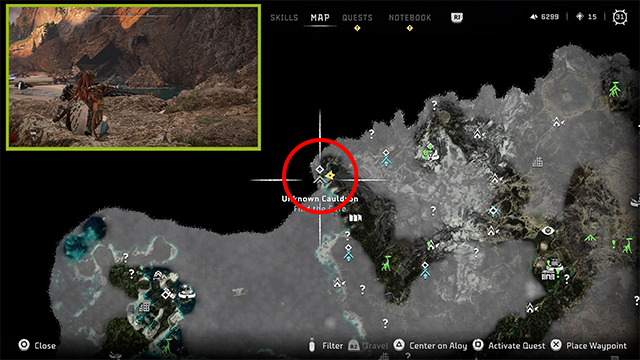
Cauldron Kappa is located in the extreme northwestern portion of the map, along the coast east of Landfall. It’s about 860 meters west of The Bulwark. Having the Diving Mask found in The Sea of Sands story quest is required to complete this area.
The main door for this Cauldron is in the mountain wall across the small inlet, and it’s guarded by some relatively tough machines, specifically a Shellsnapper and Snapmaw. Dive below the water at the door to find an entrance at the bottom, then swim to the middle of the next area (beware the Snapmaw here) to find a shaft leading down to an override door.
You’ll fight an Apex Tideripper at the end of Cauldron Kappa, so come prepared with Frost and Shock weapons. When you access the Core, you’ll get overrides for:
- Dreadwing
- Rockbreaker
- Slaughterspine
- Slitherfang (corrupted)
- Stormbird
- Thunderjaw (corrupted)
- Tideripper
- Tremortusk
Cauldron Chi
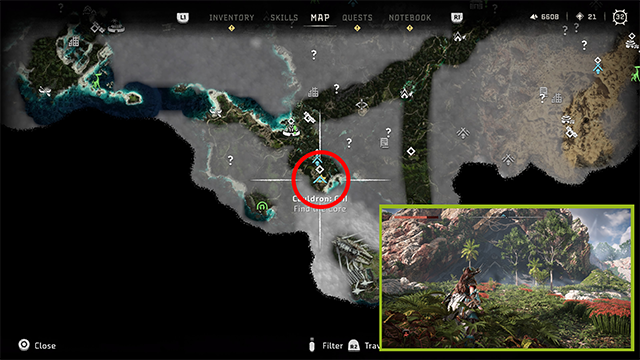
Cauldron Chi is located in the southwestern portion of the map, around 350 meters south of Thornmarsh near the western coast. Once you arrive, you’ll find the door blocked by the backside of a Firegleam; the real entrance is just to the northwest, up on the cliff by the waterfalls.
Make sure to repel down the shaft inside, not fall to your death. Once down at the bottom, smash the yellow-glass window to the right to gain entry.
If you’ve found this one before Cauldron Gemini, you’ll need to use the Pullcaster on the purple node below the first override door to climb up. This is just the first of many such nodes in this Cauldron.
Cauldron Chi is pretty straightforward, but when you reach the Core, you’ll have to eventually get a crate out from behind an energy shield. The entrance to the crate is to the left of the energy shield.
A little further into the Cauldron, you’ll need to carry a regulator component back to the regulators at the Core. After you pick it up and override an energy shield, you’ll find yourself back in the initial room with the mechanical arm and crate. Use the Pullshot to pull the crate and the arm toward the platform by the energy shield.
Put the regulator component on the crate, then jump down. Clamberjaws will spawn here, so take them out before pulling the crate and arm to the platform on the other side (the one you previously used to get to the elevator). Note: be careful on the crate because you can fall off with the regulator and have to start over.
Carry the component down to the regulator in the Core, defeat the Slitherfang, and get the following overrides:
- Frostclaw
- Redeye Watcher
- Shell-Walker
- Clamberjaw
- Behemoth
- Stalker (corrupted)
- Shellsnapper (corrupted)
- Spikesnout (corrupted)
- Scorcher (corrupted)
- Fireclaw (corrupted)
And those are all of the Cauldrons and their locations in Horizon Forbidden West. Now you have machine overrides for everything from mighty Tremortusks to nimble Burrowers — not to mention the All Cores Overridden silver trophy. For more tips, head over to our HFW guides hub.


Published: Feb 21, 2022 02:02 pm