
Breaking with standard genre conventions — in a whole lot of ways besides just saving — the freshly unleashed Nier: Automata (read our full review) features no automatic saving system, unlike most AAA current gen titles.
Instead, saving can usually only take place at terminals that typically are guarded by enemies and must be freed before they are available to use.
It’s important to note that there are no save points of any kind until about an hour into the game, so keep that in mind before firing up Nier: Automata for the first time — especially if you are buying from the PS Store and decided to start the game before it’s fully downloaded!
There isn’t actually a save terminal at all during the opening mission available prior to a full download, so you’ll end up having to leave the game on in the background for hours while waiting for the 46 gigs to install. While the option is there, this is one game that’s better to finish downloading before trying out.
How To Save In Nier: Automata
After completing the opening mission, you can save by running up to the black terminals in the hallway of the orbital moon base. Saving is also available from the menu screen in any location on the base when the “Saving Possible” icon appears in the upper-right corner of the screen.
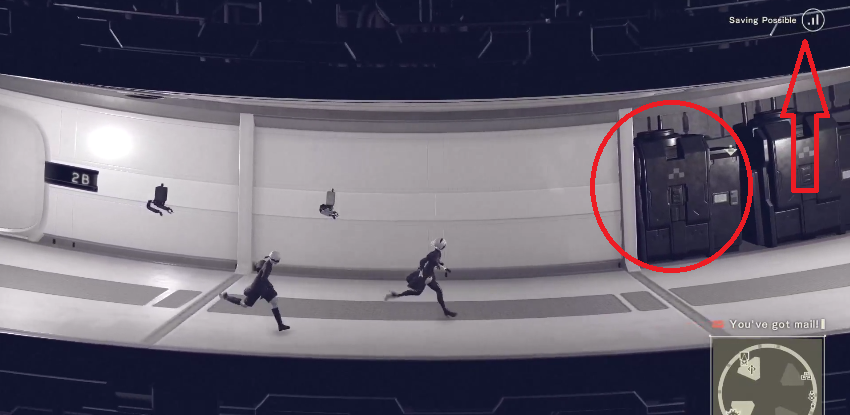 Saving at the orbital moon base
Saving your game in Nier: Automata is quite a bit different on the surface of the Earth, however. Before you can save, first you have to locate large access point computers hidden in out-of-the-way locations across the open world map.
These access points are guarded by a handful of killer robots that must first be dispatched before the red laser guard system goes down, allowing 2B to interact with the terminal directly.
After you kill the guards, not only do you have a place to save your game, but you also gain new map data to help you orient yourself in the post-apocalyptic city sprawl. Access points further allow you to receive emails from command, and also fast travel to other locations on the world map after you reach a certain point in the game’s main story.
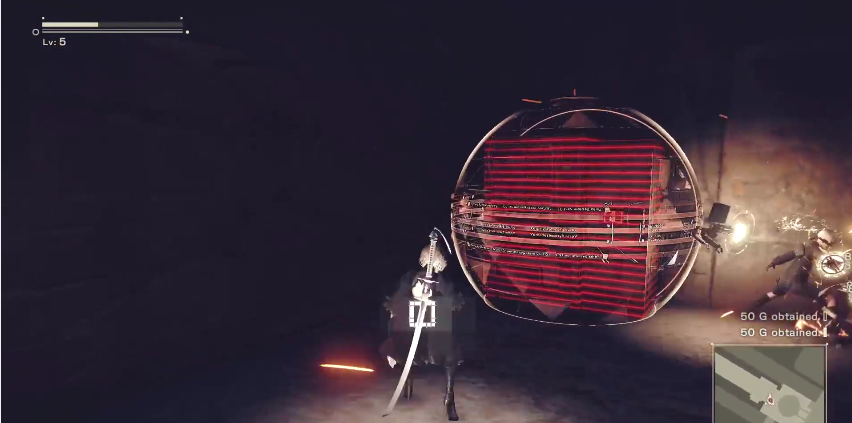 Locked Access Point
There’s a catch even when you do unlock these computer access points though — opening the computer interface by pressing the Circle button only gives the option to “quick save,” rather than bringing up the full save menu.
Besides limited availability, there’s another important issue to always keep in mind: the “quick save” option overwrites whatever save slot you used most recently, so don’t do this if you are using the three separate save slots for finding different endings.
After unlocking access points, keep an eye out for the “saving possible” icon to occasionally appear on your screen — in these areas you can perform a “full” save from the menu rather than actually interacting with the access point directly for a quick save. This lets you choose which slot to use if you want a backup for selecting different options during the story.
Be on the lookout for as many access points as you can find — the more you have unlocked, the less area you have to hike across before saving and quitting when you’re done playing! While many are actually out in the free roaming open world areas, a few are also located in populated settlements.
What do you think of the game’s old school save system? Would you prefer regular auto-saves or do you dig the classic save point style worked directly into the gameplay?
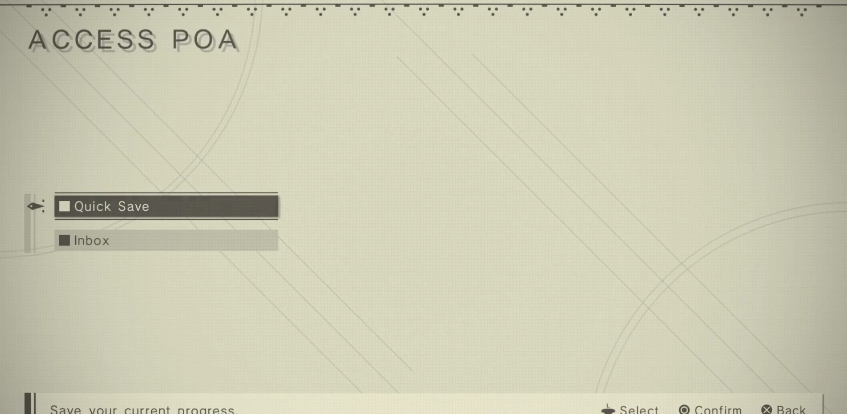 The Save Screen
Need more help with Nier: Automata? Don’t forget to check out our complete guide to tracking down all 26 endings right here!


Published: Mar 7, 2017 05:39 pm