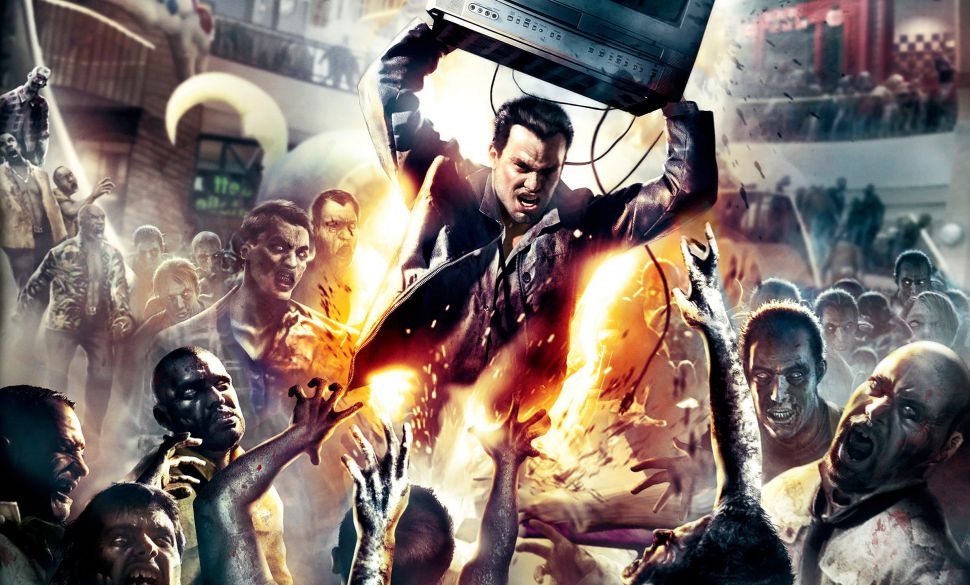
The dead walk again as the Dead Rising HD remaster shambles onto consoles today. Trapped in an infested shopping mall, photojournalist Frank West must survive for three days and uncover the mysterious source of the zombie outbreak.
With Dead Rising 4 on the way, this is a fantastic opportunity to get into the series for the first time; or to return to an old favorite.
Dead Rising can be quite a tough game and can take some getting used to, especially if this is your first experience with the franchise. Willamette Mall is literally crawling with zombies and psychopaths looking to rip you to shreds in all manner of ghastly ways, and there’s a cocktail of unusual mechanics to take stock of.
But never fear! We’ve got five top tips that will help you avoid becoming zombie food while you find your footing.
1. Understand the Timer
Dead Rising’s whole story campaign takes place over a three-day period, and the clock is constantly ticking whilst you play. One in-game day is two real hours long, so to some extent you’ll need to keep your eye on the clock over the course of a six-hour playthrough.
If, like me, you hate timed sections in games, this might be enough to put you off Dead Rising altogether; but start to understand the timer and you’ll grow to love it. The game is all but built for multiple playthroughs and your stats will carry over if you restart (more on that in a bit).
The key here, however, is that you can spend those 72 in-game hours however you like. Follow the story-driven Case Files to discover the truth behind the outbreak, or ignore that completely and run around collecting silly outfits and weapons for whacking zombies in style. Heroically rescue survivors stranded around the mall or coldly stand by and watch them get devoured by the undead — it’s all up to you.
This timed system also means that many events and missions have an expiration date and will only be available for a certain window of time. As such, you might find yourself prioritizing one hostage rescue over another. Thankfully the game alerts you to each new mission and displays handy countdown bars to show you how much time you have left for each event.
However you choose to spend your time in Willamette, just remember that your timer will end after 72 in-game hours (or six real hours) – so plan ahead if you have certain goals.
2. Level Up Early
Sometimes it’s nice to have the chance to grind for experience points and get ahead of the curve early in a game. Dead Rising’s leveling system calls XP ‘Prestige Points’ (PP), and PP is awarded for completing all sorts of activities from slaying hordes of zombies to rescuing survivors and taking good photos (and a hundred other ways to boot).
Dead Rising can be extremely tough, and the skills you can acquire by leveling up will make the whole process much less painful. Increased health, inventory space and crowd-clearing skills are just some of the invaluable benefits from gaining levels. These boons can mean the difference between laughing your way through the game and tearing your hair out (or is it the zombies doing the tearing?)
As I stated above, in Dead Rising you can maintain all of your hard-earned PP, skills and level progress across playthroughs. If you die at any point you’ll be given the option to revert to your last save (“load game”) or start over (“save status and quit”). If you choose this second option, you’ll restart the game with your current level and abilities.
This is hugely useful and exploitable early in the game. To get a good repeatable run going, start the game and do the following:
- Snap photos of big crowds of zombies in the opening helicopter sequence. Be sure to get action shots when you see people involved as well — and have your camera ready when you get to the gas station for a huge PP boost.

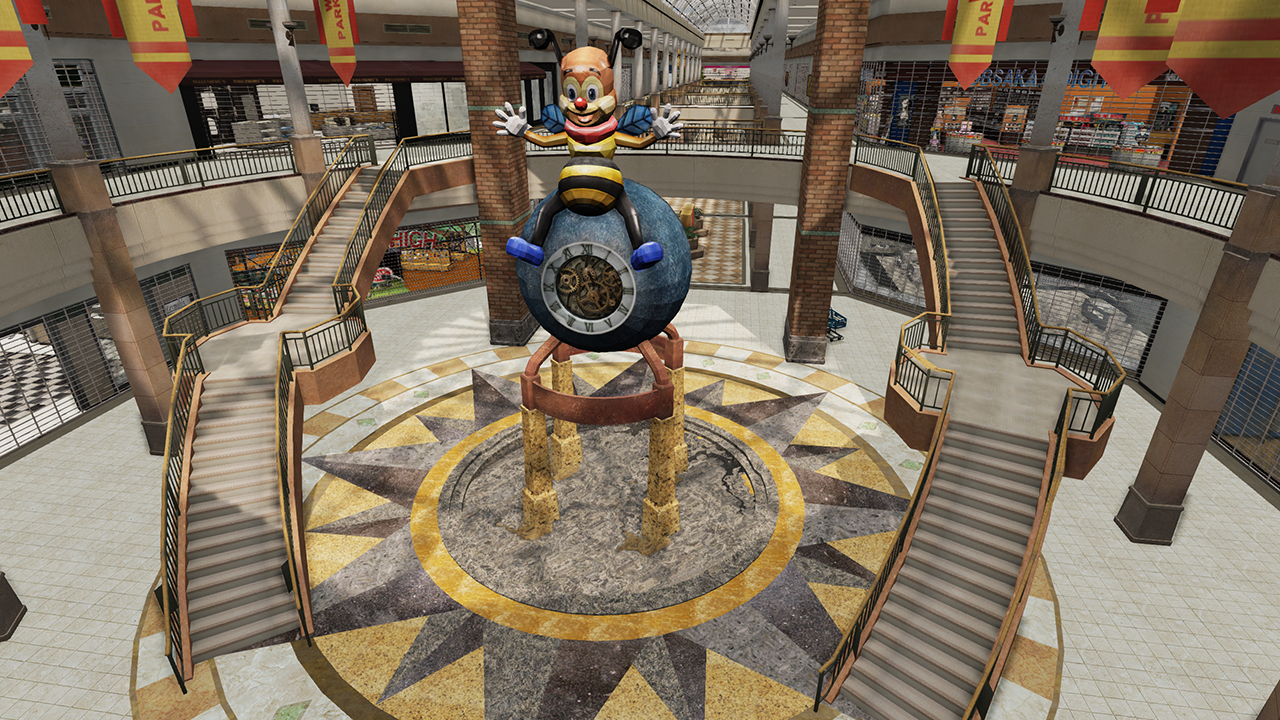
- Once you reach the mall entrance for the first time, head straight upstairs and take a picture of the big clock with a bee on it. You can photograph the survivors for some easy PP too, but if you want some serious bonuses then be sure to get pics of the carnage once the zombies break in.
- After leaving the safe house to venture into the mall for the first time, you’ll come to the roof. Instead of continuing straight downstairs, you’ll be able to find your first survivor to rescue standing behind the large elevator to the right. His name is Jeff and he’s looking for his wife.
With him in tow, simply stroll around to the left side of the roof to see his wife Natalie standing in the corner. Their apparent inability to walk a few meters to find each other makes this the easiest rescue you’re going to get in the whole game. You’ll get 5,000 PP for finding and talking to each of them; then simply jog back into the safe house for another 10,000 PP each. That’s 30,000 PP total — more than enough to jump a whole level in the early stages. 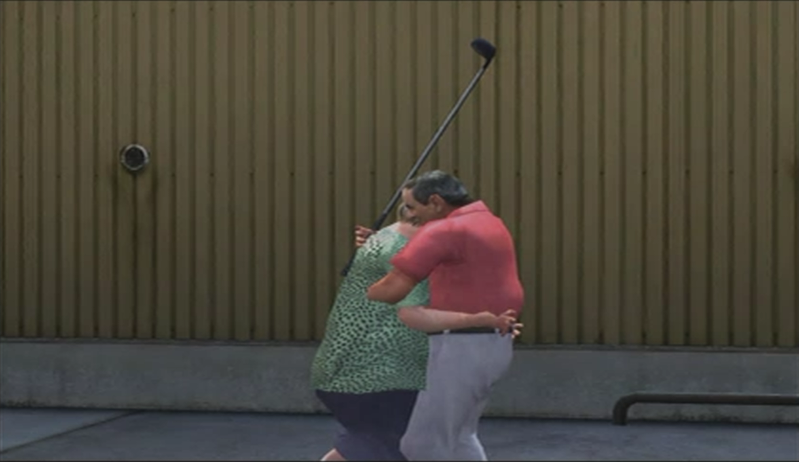
- If you want even more PP, have your camera ready when you reunite Jeff and Natalie. If you’re trained on them you’ll be notified of a “photo opportunity” as they hug. Snap a sweet pic of their heart-warming embrace for a bonus of up to 10,000 PP!
- “Save and Quit”, then rinse and repeat to your heart’s content (or until you get bored).
All of this shouldn’t take much more than 20 minutes and can be done with ease once you know what you’e doing, giving you a super useful PP advantage before tackling the game proper.
Trust me, the skills and bonuses you’ll get for doing this will really help you enjoy the rest of the game!
3. Geography Lesson!
If you’ve ever watched The Walking Dead, you’ll know how dangerous it is to be unaware of your surroundings when there are zombies about. And when you’ve just survived a horrific encounter with a psycho and can’t bear to face going through it again, it pays to know where the save points, shortcuts and safe house access points are.
The safe house his your hub for this open world. It acts as a save point and one of the few places where you can take a breather knowing you’re not going to get chomped on. Bathrooms/public toilets also act as save points, so take note when you find one of the four or so in the mall as you’ll want to be saving often.

You’ll get a nice handy map in your menu, so get to grips with it to start learning how the mall connects together and the shortcuts that will save you time and sanity.
Most weapons and food items also respawn in the same locations in Dead Rising, so when you find a good one it’s worth remembering where it was, so you can grab another later. This leads on to our final two points.
4. Armed to the Teeth
This is possibly the most important step of all if you want to succeed in Dead Rising.
At its heart, Dead Rising is all about killing thousands of zombies, and to do that you’re going to need quite an arsenal. Thankfully the mall is packed with instruments of destruction, from baseball bats and chairs to lawnmowers and lightsabers.
Weapons have limited durability and will break after a certain amount of use — not to mention your starting inventory is small — so having powerful instruments and knowing where to go to find more is tantamount to success.
Being properly equipped is vital. There’s nothing worse than being mobbed by zombies or unexpectedly running into a chainsaw-wielding psychopath with nothing but your fists to defend yourself. Thankfully there are some powerful weapons available to you fairly early on and snagging these (with that awesomely expanded inventory space you got from leveling up) will set you up to take on any horror.
Paradise Plaza is a great area for this. Located just to the right of the main safe house entrance you’ll be using for most of the game, it has a number of cool weapons:
- Go upstairs and to Colombian Roastmasters café. If you look over the balcony you’ll see a yellow-orange awning, and if you jump onto that you’ll be able to pick up a Katana. Whilst its durability isn’t great, the Katana does huge melee damage making it invaluable against dangerous psychopaths.
- As you walk towards Paradise Plaza from the safe house, you’ll notice that there’s an overhang above the shops on the right. There’s a submachine gun (SMG) up there that you should grab. You can get up there by going up the stairs to the right. Turn around halfway up and jump and climb onto the first overhang, then make your way across past a huge teddy bear by hugging the wall/jumping gaps when necessary. The SMG is another damage-dealing weapon that you’ll find very useful early on in the game.
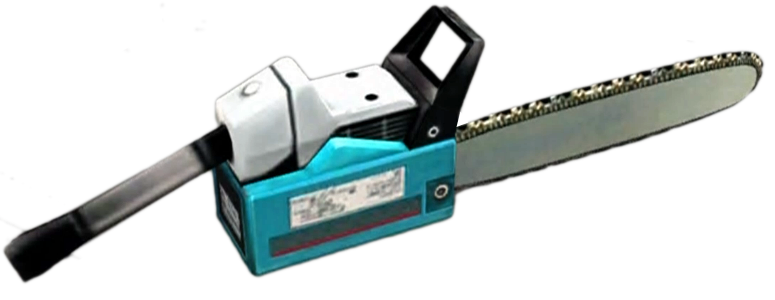
While you’ll soon learn that Dead Rising’s variety of weapons is one of the game’s greatest features, there’s only one more you need to worry about getting early on, and that’s the small chainsaw. This thing is one of the most powerful weapons in the game and with it in hand, you’ll be able to carve through even the toughest opponents.

In order to get the small chainsaw, you’ll need to kill Adam MacIntyre, a psycho clown (yes, he’s terrifying) in Wonderland Plaza. Keep your eye out for a scoop mission titled Out of Control which becomes available on your first night during the mall — and make this mission a priority as it’s the only chance to get the chainsaw.
Adam, like most of the psychos, is one tough cookie to crunch. He’s fast, he has chainsaws, and he’s a clown. Urgh. If you’ve got your SMG and katana though, it shouldn’t be much of a problem. Wait until he starts blowing up a balloon. When he does this, shoot him. The balloon will burst and he’ll choke on the gases inside, stunning him and giving you a chance to slice him up with your katana before dodging out of the way and repeating.
Once Adam’s dead, you’ll have a nice shiny small chainsaw with which you’ll be able to kill any enemy with just a few hits; and what’s more, the chainsaw will respawn at that location for the rest of the game!
With these weapons in your inventory, you’ll be in the best possible position to dominate Willamette Mall through sheer firepower.
5. Choose Your Poison
Alongside weapons, food and drink items are littered around the mall. As you might expect, these can be consumed to restore varying levels of health.
However even more potent than this are drink combinations. Bars and restaurants often have blenders which can be used to combine foods into mixed drinks with special properties. Not only will these drinks make you right as rain, they’ll give you temporary bonuses like super speed or invulnerability.
Again, these can mean the difference between success or failure in boss battles.

The easiest of these can be made in Paradise Plaza (I told you that place was awesome!) Head back to Colombian Roastmasters where you’ll find a whole case of pies which can be hoarded infinitely. Blend two of these pies in the blender on the counter and you’ll get an “Untouchable” drink which will prevent zombies from being able to grab you. This is extremely helpful when you’re trying to navigate the mall without having your health chipped away by the hungry undead and their annoying clingy hands.
Take these tips to heart and you’ll have no trouble in Dead Rising. No matter how you choose to play the game, keeping yourself well-equipped and aware is a recipe for success. Now go and enjoy the hell out of this awesome, gruesome and often hilarious game!


Published: Sep 13, 2016 12:29 am