Can you hear it? The clink of gold. The swish of suitcases full of money. The smooth sound of your hands on trophy after trophy.
Fafnir can.
Built sturdier than a mountain in Asgaard and hungrier than Jormungandr when it comes to cash, Fafnir has swan dived into SMITE Season 3’s fountain of blood money like a murderous Scrooge McDuck. Follow us deep into this mountain of tips and tricks though and soon you, too, can be rolling in riches.
Getting Golden with Fafnir
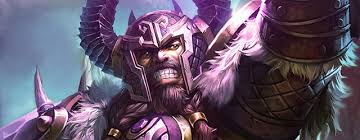
Fafnir, SMITE‘s ferocious, fun-sized frontliner and newest addition to the Norse pantheon, is a powerful Guardian with both fantastic defense and much-needed mobility. While his support-role predecessor Ymir certainly packs more of a punch overall, Fafnir’s ability to sustain himself and (more importantly) keep up with both valuable targets and teammates thanks to his leap certainly puts the Lord of Glittering Gold heads and shoulders above the Father of Frost Giants.
Where other recent guardians (Season 2 Xing Tian, looking at you here) had the damage output to keep up with other, more damaging classes, this greedy dwarf is more in line with the “classic” Guardian performance. His damage isn’t much alone, but his ability to help secure important targets in teamfights, peel incoming damage from high priority teammates with his stun and disarm, and buff the damage of a teammate (or later teammates) allows Fafnir to dwarf most of the competition when it comes to supporting his carries.
Fafnir might not be the easiest Guardian in the game to handle, but his survivability and natural defenses can make up for some of the difference when you’re just starting to build your hoard of victories. Careful positioning and game awareness is paramount, as always, but with practice using the abilities we cover below, well…you can get a little greedy, if you want.

Abilities
Endless Greed
Fafnir gains 4 bonus gold from all minions, structures, kills and assists. Fafnir also gains bonus Protections based on the amount of gold he is currently holding. The bonuses gained from this ability are capped at 1000 gold in hand.
Bonus protections: Up to 30 physical and magical protections
The first passive of its kind, Endless Greed gives Fafnir a unique incentive to hold out for “big buys”, or fully upgraded items, and rewards him for staying in lane longer, rather than heading back to the fountain to buy at every opportunity.
While gods and goddesses in SMITE can lug around thousands of gold, it’s not really doing them any good sitting in their pockets – but Fafnir can fight away as his treasure trove grows (up to 1000). As a Guardian, most of his item upgrades are defensive in nature (physical and magical protection), and some of them will actually reduce his protections when purchasing the tier 2 piece.
As an example: Sovereignty, the classic “first armor” item of Supports game-wide, offers 100 health and a sturdy 20 Physical protection in its tier 1 item Iron Mail. Steel Mail, the next step up, offers 100 more health (total 200), but retains its 20 physical protection – for a cost of 675 gold. Since Fafnir’s passive roughly translates to 33 gold = 1 phys/mag protection, you’re actually giving up a little over 20 protections for a measly 100 health. It doesn’t take a greedy dwarf to know that’s a bad deal.
Cursed Strength
Fafnir hurls his hammer forward, dealing damage to enemies in its path. If Fafnir hits a god the hammer stops short and Stuns them for 1s. The Stunned god also radiates out a cursed pulse, Slowing them and nearby enemies for 3s.
In dragon form, this ability deals increased damage that ticks every second for 3s. Also, the cursed pulse shreds Protections in addition to Slowing.
Damage: 100/140/180/220/260 (+50% of magical power)
Dragon Damage per tick: 50/70/90/110/130 (+25% of magical power)
Slow: 20/25/30/35/40%
Dragon Protection Debuff: 20/25/30/35/40%
Cost: 60/65/70/75/80 mana
Cooldown: 15 seconds
A strong Crowd Control lineshot with respectable damage (and your primarily leveled ability), Cursed Strength is a powerful tool for a Guardian as well as an introduction to another of Fafnir’s core concepts — when it comes to abilities, Fafnir is filthy rich. Each of his primary abilities is strong enough on its own to be part of a Season 3 kit, but when his Ultimate is activated, they each gain additional effects.
Here, Cursed Strength goes from an incredible single target peel or securing tool to an area of effect nightmare for the enemy team. While the applied cursed aura isn’t huge in range, it certainly can affect clusters packed tightly around objectives or in jungle hallways. The AoE slow in his dwarven form is powerful enough, but at maximum rank and in his Dragon form, Cursed Strength shreds a whopping 40% of protections on the target and any nearby enemies.
For reference, a fully stacked Executioner debuff shreds 32% physical protections, a full 8% less than Draconic Cursed Strength.
Coerce
Fafnir coerces his allies into fighting harder, boosting Attack Speed for 5s and healing himself. While Coerce is active Fafnir does additional bonus Magic Damage whenever the affected ally damages an enemy.
In dragon form, This ability has a larger area of effect and can buff multiple allies.
Attack Speed Buff: 10/20/30/40/50%
Self Heal: 50/80/110/140/170 (+40% of your magical power)
Bonus Damage: 5/10/15/20/25% of the target’s power
Cost: 50 mana
Cooldown: 13 seconds
Greedy as he can be, Fafnir continues to fit as many different abilities as he possibly can into each skill slot with Coerce, your secondary priority to level up. One button gives you a relatively fine self heal, a powerful attack speed steroid, and a significant damage buff to yourself or an ally. Even better, Dragon form allows you to (strangely) share the wealth and spreads this buff to a respectably large AoE of friendlies.
Because it’s Fafnir actually dealing the damage rather than his patsy teammate, any on-ability effects Fafnir has (such as Gem of Isolation) can proc from this bonus damage.
Mostly built to be applied to his Hunter partner in lane, and either the Hunter or a particularly aggressive jungler like Kali in the mid to late game, be aware that Fafnir can Coerce himself in desperate times to get the last few basic attacks in — or just for a necessary self heal. Just because you can give your teammates a helping hand doesn’t mean you have to, after all.
(Non-Dwarven Disclaimer: You should, though. You absolutely should give this buff to teammates whenever possible.)
Underhanded Tactics
Fafnir leaps to a target location and executes a despicable strike, dealing damage and disarming enemies in front of him for 2s.
In dragon form, Fafnir can leap much further. Also, this ability deals increased damage that ticks every second for 3s and Fafnir Stuns the enemy closest to him for 2s in addition to Disarming.
Damage: 80/120/160/200/240 (+60% of magical power)
Dragon Damager Per Tick: 40/60/80/100/120 (+30% of magical power)
Cost: 70 mana
Cooldown: 18 seconds
As mobility continues its power creep sprint in SMITE Season 3, more and more fights are being defined by who can actually get to where they need to be – and who can keep up. Luckily Fafnir can cover as much ground as he wants (approximately “all of it forever”) with Underhanded Tactics, moving onto high priority targets in the back – or turning around from a running engagement to disarm the assassins and hunters attempting to tear through his back line.
While the damage is roughly on par with his Cursed Strength, Fafnir’s Underhanded Tactics will usually have 1 point in it by level 4 and then be left for last. The benefits of a powered-up Coerce far outweigh the increase in damage here.
Be sure to keep an eye on your surroundings and know when its time to use a few dirty tricks to secure an enemy target, and when it’s time to cheat a little, and turn that 1v1 behind you into a 2v0 as the enemy’s weapon drops.
Something to note is that Underhanded Tactics doesn’t have a static movespeed – targetting an area closer to you will move Fafnir faster, while his airtime significantly increases at longer distances.
Draconic Corruption
Fafnir transforms into a terrifying dragon and is untargetable during the process. When he emerges in dragon form, nearby enemies are poisoned, taking damage every second for 3s. He remains in this form for a duration or until the ability is activated again. As a dragon, his abilities have additional effects and his basic attack changes to a Dragon Breath that deals damage 3 times per second. Dragon Breath can not proc item hit effects.
Damage Per Tick: 80/100/120/140/160 (+40% of magical power)
Dragon Breath Damage: 10/15/20/25/30 (+10% of magical power)
Duration: 20/25/30/35/40s
Cost: 100 mana
Cooldown: 90 seconds
One role from The Hobbit wasn’t enough, apparently, as the dwarf lord also puts on his best Smaug impersonation when he activates his ultimate, Draconic Corruption. Giving him a potential third Damage over Time effect in dragon form (when combined with Dragon Cursed Strength and Dragon Underhanded Tactics), Draconic Corruption offers him brief CC immunity frames as well as tons of potential damage.
The most important thing to note about Draconic Corruption (other than the hoard of bonus abilities we covered above) is that once Fafnir gets access to these new abilities, the greedy dwarf wants to use them. Now.
And he can.
Draconic Corruption not only boosts your three non-Ultimate abilities, but also resets their cooldowns. This encourages Fafnir players to burn their first line of abilities before ascending to their cursed dragon form, then wreaking havoc on the enemy team all over again.
His basic attack keeps the enemies seeing fire by turning into a poison green flamethrower in this form, hitting three times a second (faster than the current maximum attack speed of 2.5). This makes a fantastic way to apply damage while your skills are down, and even comes with a bonus of absolutely obliterating Kumbhakarna’s sleepy passive.
Items and Gameplay

Fafnir is ability rich and solid gold when it comes to survivability, but he’s still a very traditional Guardian like Khepri or Athena. Despite his paranoid, psychotic nature and the fact that it means sharing the loot, Fafnir is at his absolute best when paired up with a physical hard carry like a Hunter (in lane), an Assassin (later in the game), or occasionally a mage that acts like one (Freya, Chronos).
Start with Watcher’s Gift (or Mark of the Vanguard against more aggressive laners like Medusa and Xing Tian) to start the gold rolling in and keep your passive growing quickly. Shoes of Focus will let you keep up and start you towards the Cooldown Reduction cap of 40%, while Sovereignty and Heartward Amulet will keep you (and your allies) in the battleground even longer.
Typically, Breastplate of Valor would come next (to give you additional mana and CDR), followed by either Winged Blade or Mantle of Discord, and capped with Bulwark of Hope, Spirit Robe, or whichever of the previous two you didn’t pick up.
Here’s the TL;DR:
Shoes of Focus > Sovereignty > Heartward Amulet > Breastplate of Valor > Winged Blade > Bulwark of Hope
Unlike more set in stone roles like Assassin, where many of your item slots are accounted for, Fafnir (as a Guardian) is a much more reactive builder. Rather than following any strict guide, you’ll have to approach each game (and enemy team composition) with a different plan, and counteract their strategies (and bolster your own role in the game) with different items.
Breastplate of Valor isn’t going to be at its best against a team that has 3 or 4 magic damage on it, and likewise you’d probably rather have Hide of the Nemean Lion instead of Winged Blade if an enemy basic attacker (like a X’balanque or Kali) has gotten out of control.
Keep your wits about you and play to your strengths — mobility and survivability. Peel for your carries, keep vision (wards) up on the map as much as you can, and realize that while you can certainly be the star of the show, your numbers in any given area (outside of damage mitigated) will very rarely be the highest. After all, you have a perfectly good squad of gullible idiots wonderful teammates to order around work pleasantly with… why should you have to do all the heavy lifting?
Of course, at level 20, a full rotation of Dwarven form abilities, a Draconic transformation, and a full rotation of Draconic form abilities can dish out nearly 1800 damage (plus 395% of magical power) before protections (but not counting additional damage from protection shred or Coerce), so when that Poseidon in the back leaves himself open…I mean, it would be greedy to go for it.
But greed is good.

Now that you’ve learned how make sure your enemies die tonight (and all die together), go forth and conquer! But be sure to stop back and tell us how you cut the competition down to size with Fafnir, the Lord of Glittering Gold.


Published: Jun 14, 2016 02:52 pm