The islands of Animal Crossing: New Horizons are finally open to the world. If you play your cards (and the game) right, you can upgrade your tent to a full house on Day 2 and start really living in the lap of luxury.
But as you start to better define your life in Animal Crossing, discover where the best resources are located, and get used to things on your new island, you might start to regret where you initially set up your tent. Luckily, you’re not stuck there forever.
Let’s go over everything you need to know about getting a house and then relocating to wherever you want.
How to Get a House in Animal Crossing: New Horizons
When you first arrive on your island in Animal Crossing: New Horizons, you will get to pick the plot for your tent, and it automatically springs up on the spot once you do.
Eventually, the real game starts as the game world syncs to the real world, but thankfully, it doesn’t take long to get your house after that.
Tom Nook will require you pay him back in the form of 5,000 Nook Miles for the moving and transportation expenses to the island, which doesn’t take very long at all. You can complete Nook Mile achievements from the app on your phone for doing things like catching fish, collecting fruit, selling things, crafting things, and so on. Basically for playing the game.
It shouldn’t take more than an hour or two.
After you do that, trade-in your 5,000 miles to Tom Nook and he’ll offer you a home for the tidy sum of 98,000 bells. That’s a lot, but you can pay it off on your own time in small or lump-sum payments. Once you agree, house construction begins, and your new home will be ready the following day.
Days are defined by sunrise as far as I can tell, not actual calendar days from midnight to midnight, thankfully. So you can collect everything you need to get your house, then go to sleep and when you wake up the next morning, your house should be done.
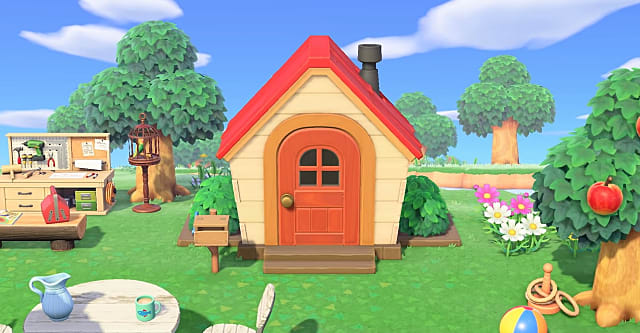
Once you have a house you can do things like set the floor and wall design, upgrade the size over time, and even pick the roof color, and more.
How to Move Your House and Other Buildings in Animal Crossing: New Horizons
Now that you have a house, chances are you might want to move it. Maybe you realize it’s way too close to some neighbors. Perhaps you don’t like how far it is from the closest river. Or maybe you would rather be near the town center for convenience. Whatever the case may be, thankfully, you’re not stuck where you pitched your tent at the very beginning of the game.
To move your house, you need to reach a certain point in the game’s progression. After about a week or so of playing, you’ll have a full Resident Services building that replaces the tiny tent Tom Nook sets up at the start of the game. This will have the same ABD machine and other services, including the ability to relocate your home.
The island upgrades required before you get the full-size Resident Services building is getting:
- A house
- A museum
- Three new residents on the island
- A bridge
- The Nook’s Cranny shop
- Resident’s Services building
Once this is built, go talk to Tom Nook about infrastructure changes. From there, you can talk to him “About my home” to move your own house for 30,000 bells. Additionally, you can move the homes of other residents, shops, and other buildings for 50,000 bells each, or
And that’s it! If you progress through the game naturally, you should have a small starter house built and ready to go by the start of your second day and should have a Resident Services building that lets you move buildings by the end of your first week playing.
For more tips and guides on Animal Crossing: New Horizons, check out some of these other articles down below:
- Animal Crossing New Horizons: How to Change Roof and Mailbox Colors
- Animal Crossing New Horizons: How to Get Iron Nuggets
- Animal Crossing New Horizons: How to Make Bells Fast
- Animal Crossing New Horizons: How to Get the Pole Vault
- Animal Crossing New Horizons: Flower Breeding and Hybrids Guide
- Animal Crossing New Horizons: How to Get a Mirror
- Animal Crossing New Horizons: How to Catch Fish
- Animal Crossing New Horizons: How to Plant Fruit and Pricing Guide
- Animal Crossing New Horizons: How to Time Travel
- Animal Crossing New Horizons: Turnip Buying and Selling Guide
- Animal Crossing New Horizons: Multiplayer Guide
- Animal Crossing New Horizons: How to Sleep
- Animal Crossing New Horizons: How to Save


Published: Mar 20, 2020 04:28 pm