There are 60 lore collectibles in Trek to Yomi that add bits of lore to the overall world. None of the artifacts unlock anything else in-game. However, finding them all will give you the Leave No Stone Unturned trophy on PlayStation and achievement on Xbox and PC. Some story/location spoilers follow.
Where to Find All Trek to Yomi Lore Collectibles
Chapter 1 Artifacts (7 Collectibles)
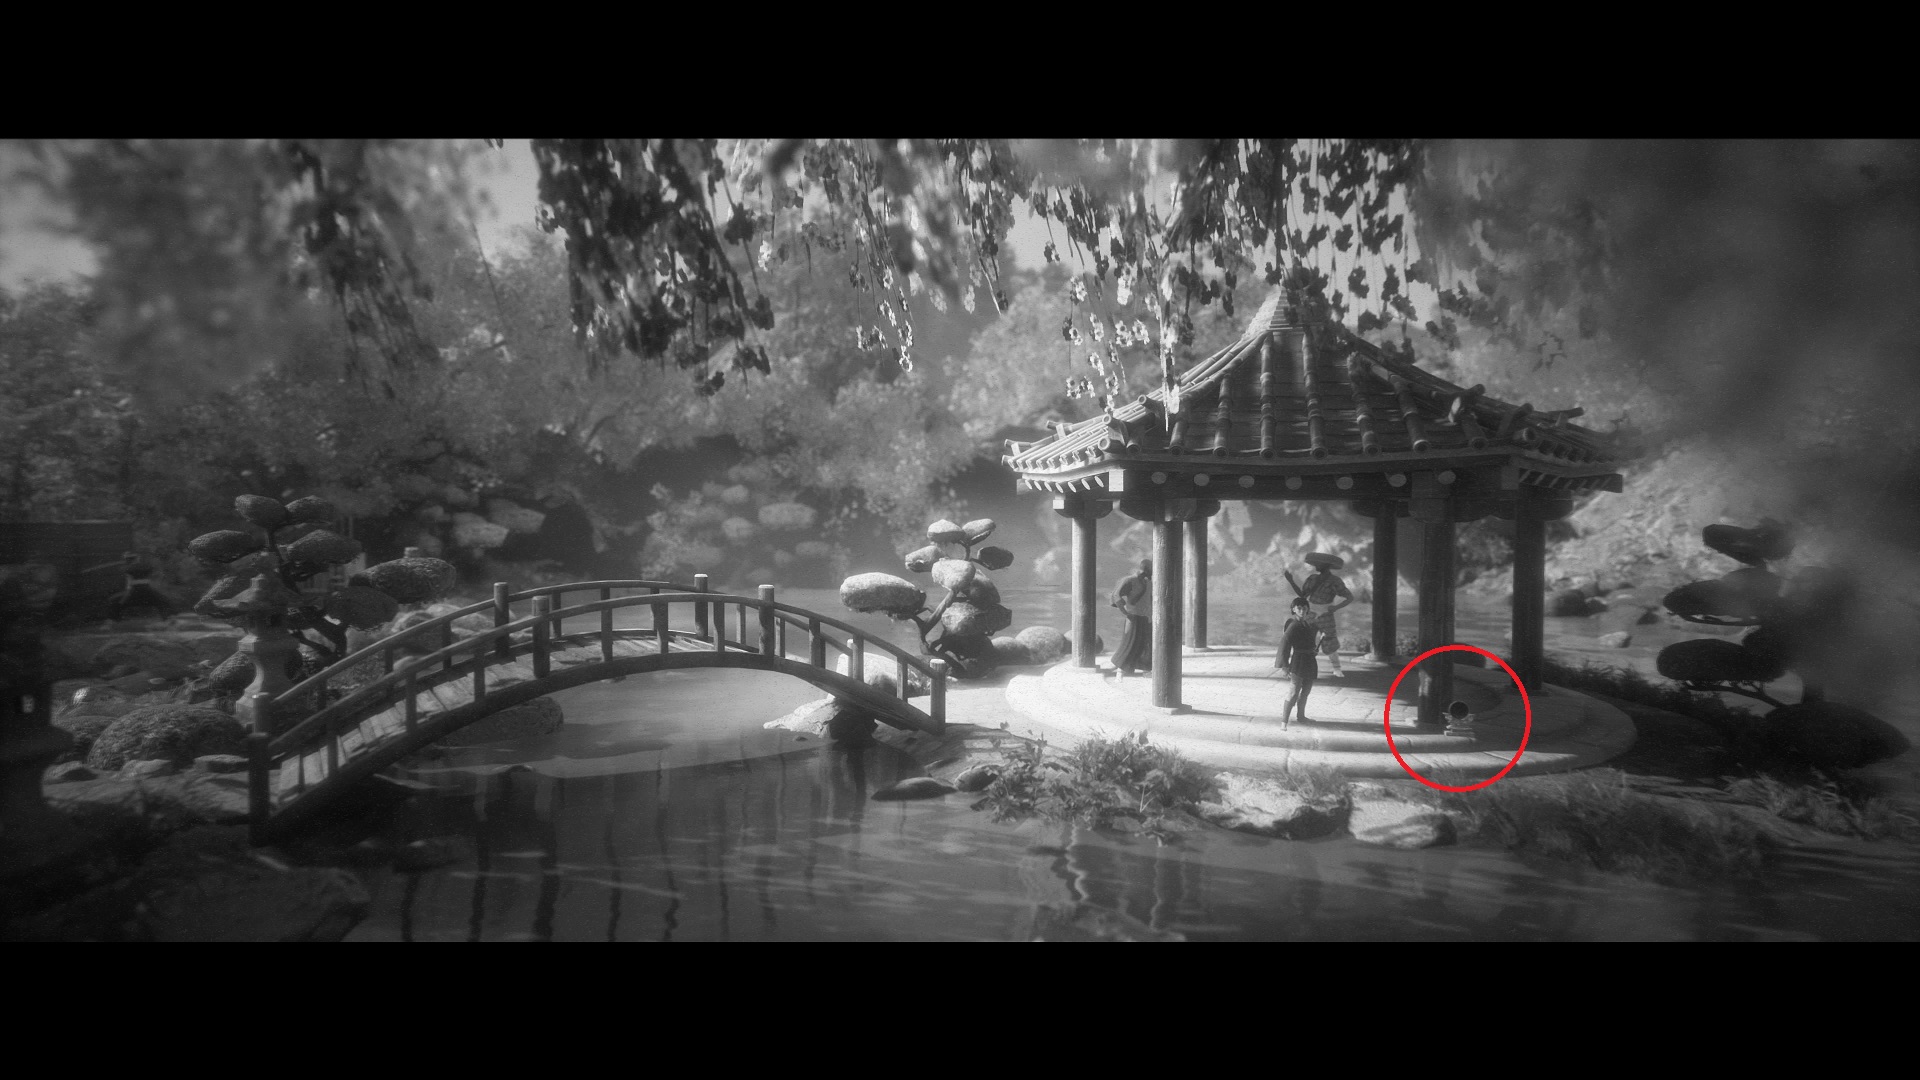
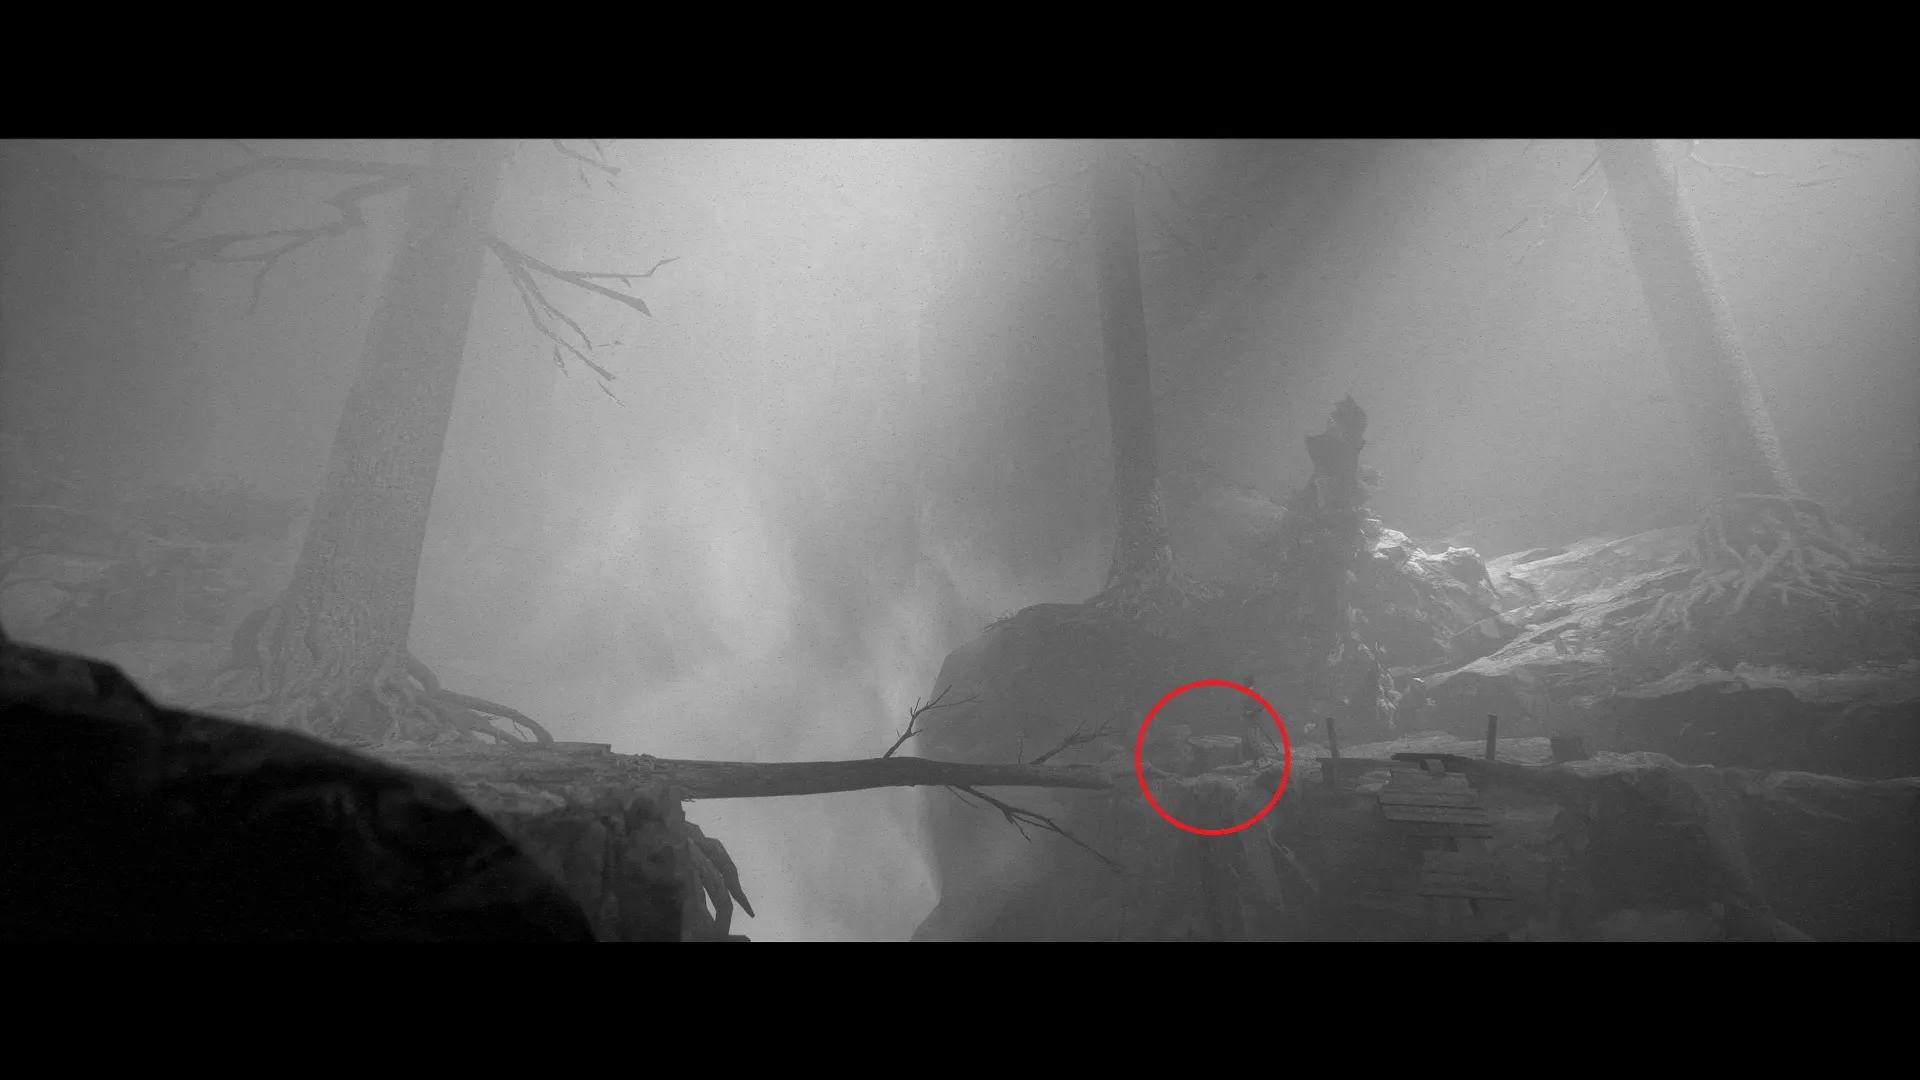
Tamaya Mirror — Go back into the dojo and through the back door. Cross the bridge to the Pavillion with two NPCs to find it against a column on the right.
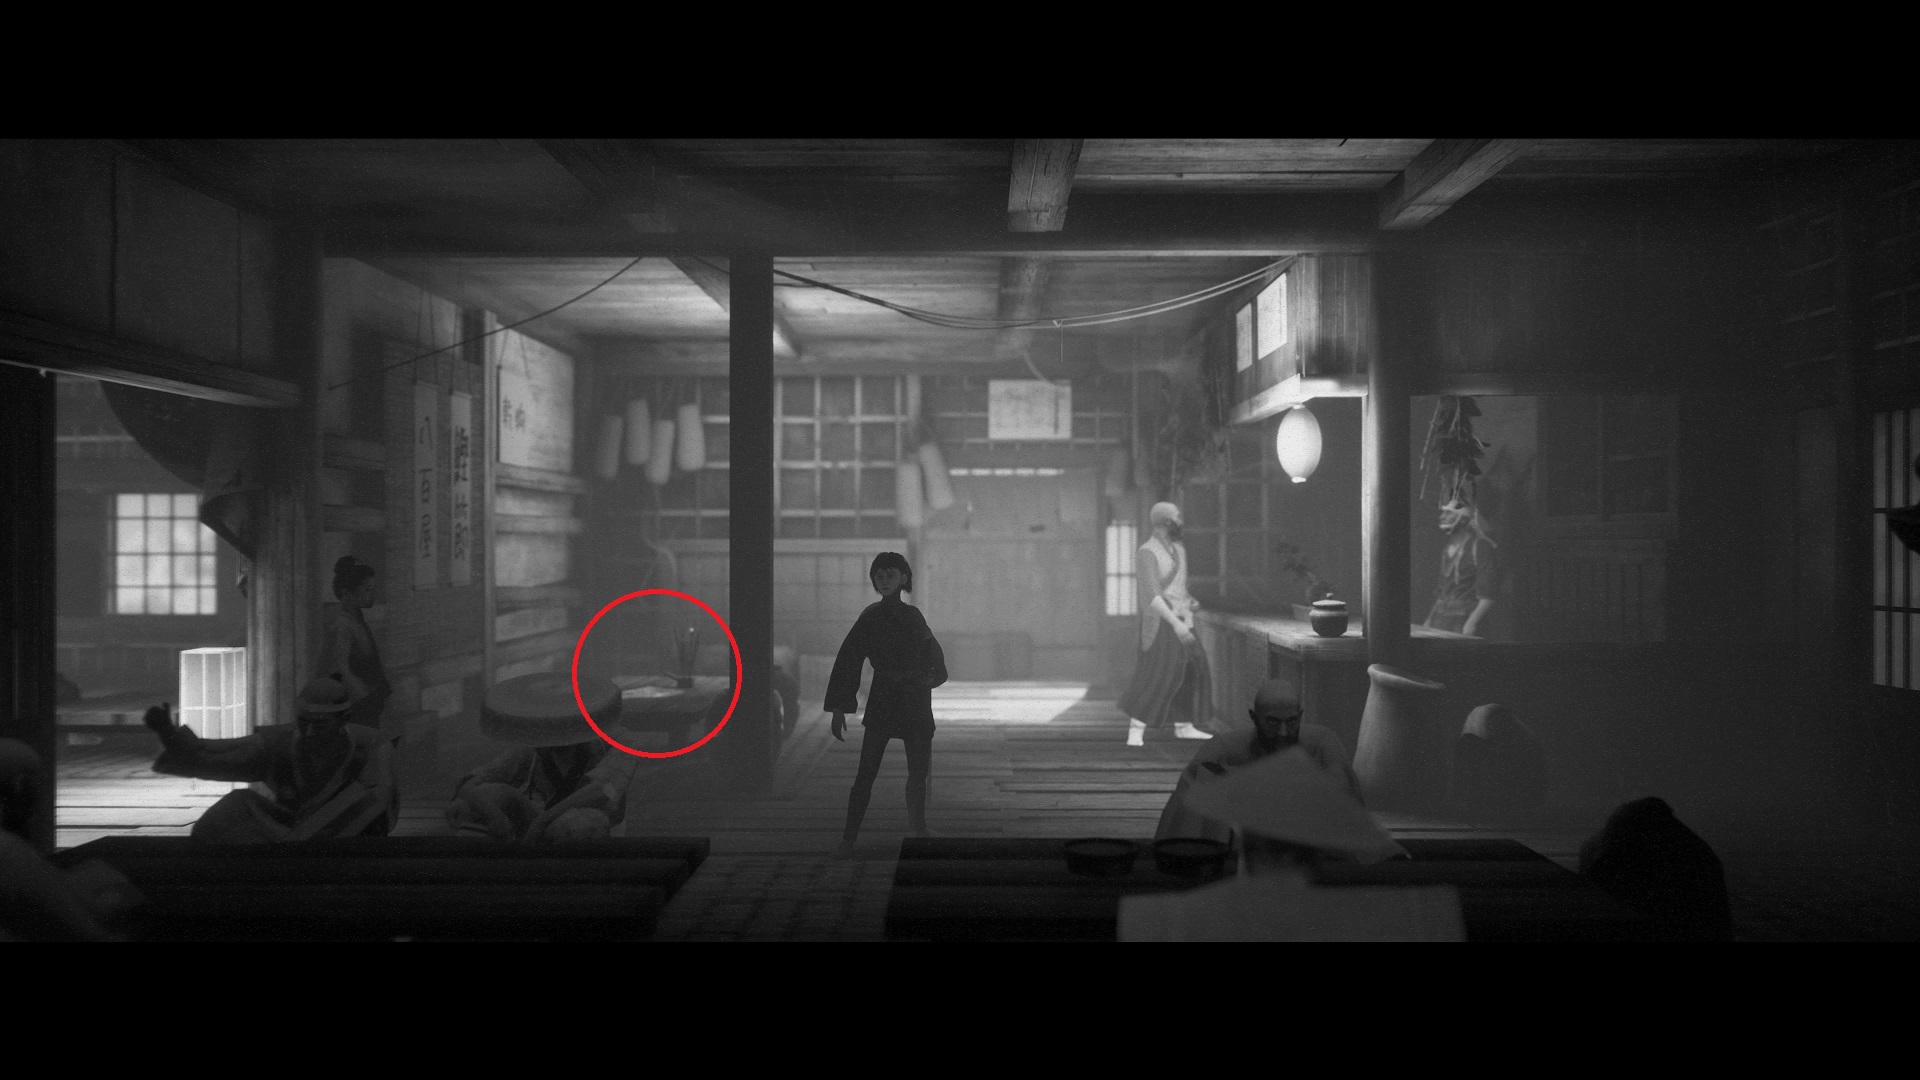
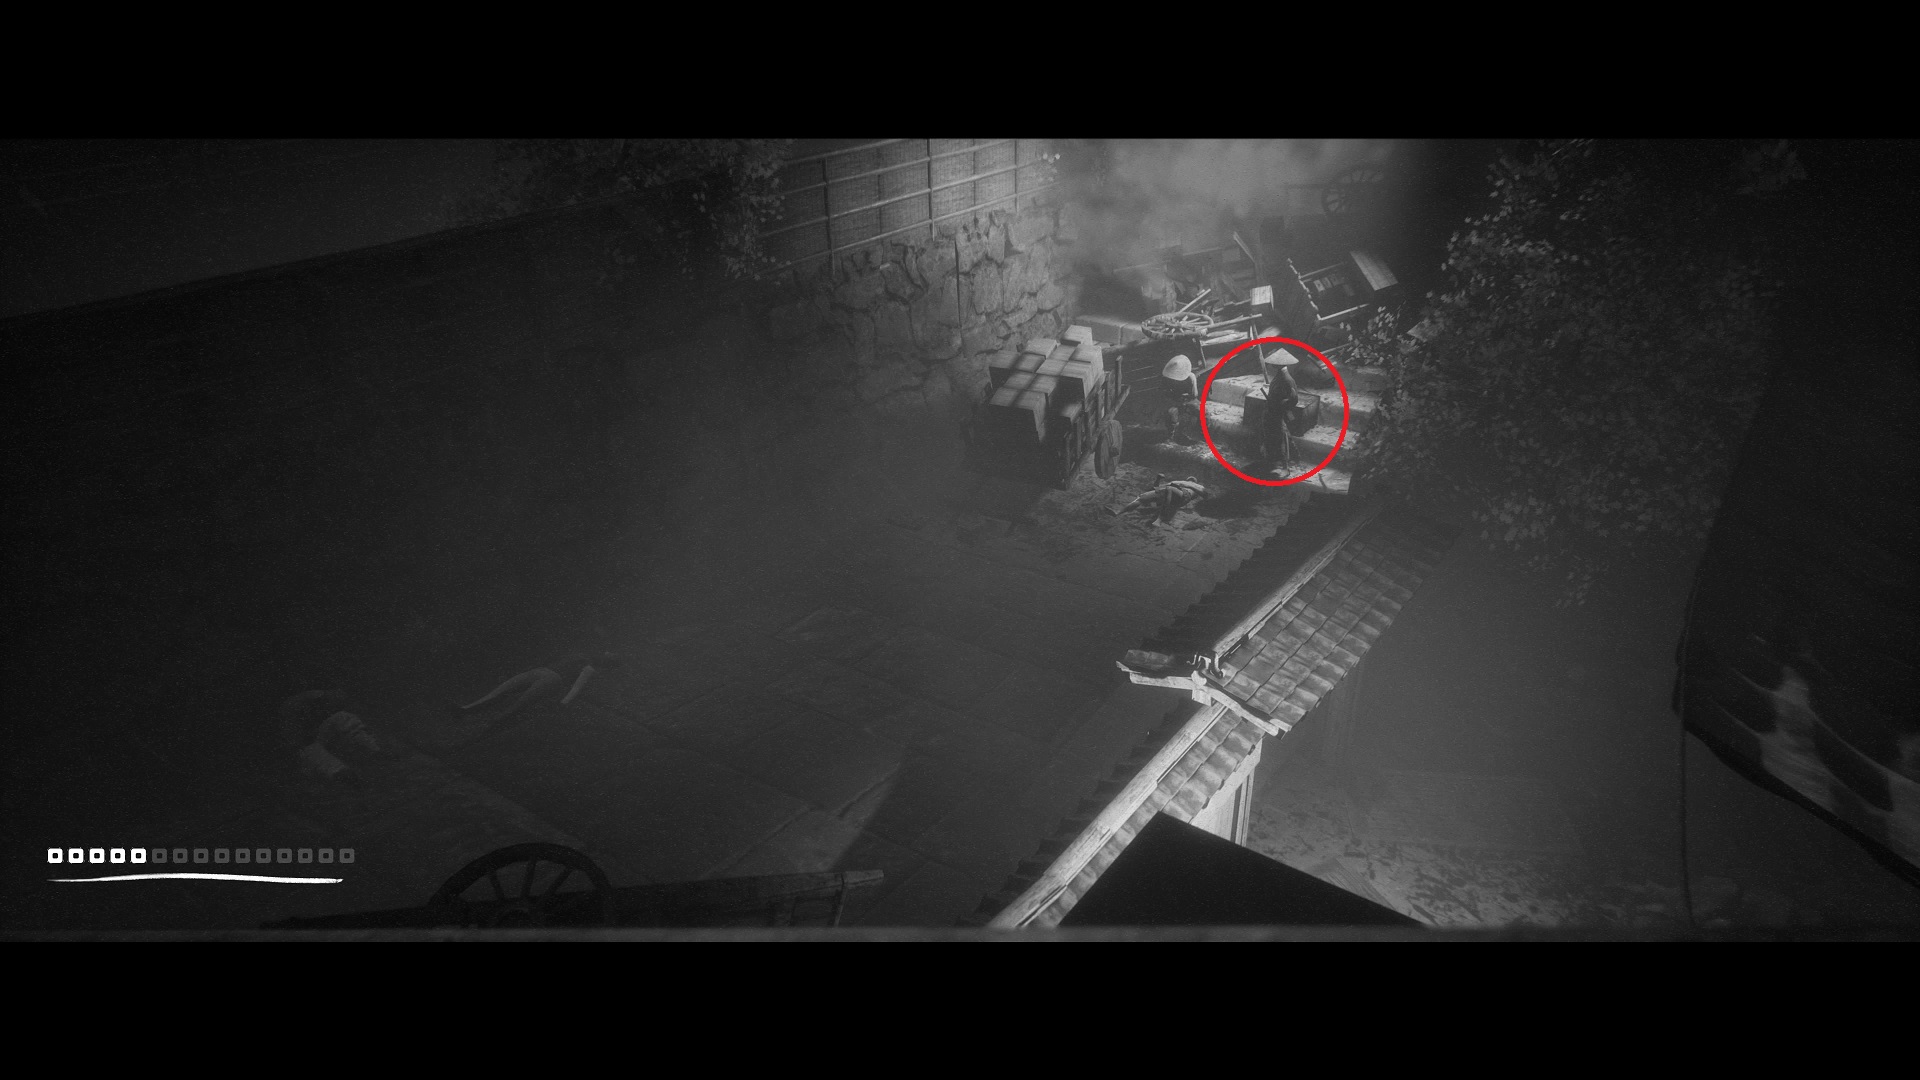
Izanagi Print — After moving the cart to make a path, go up the stairs and into the building to the left. This one is on a table to the left.
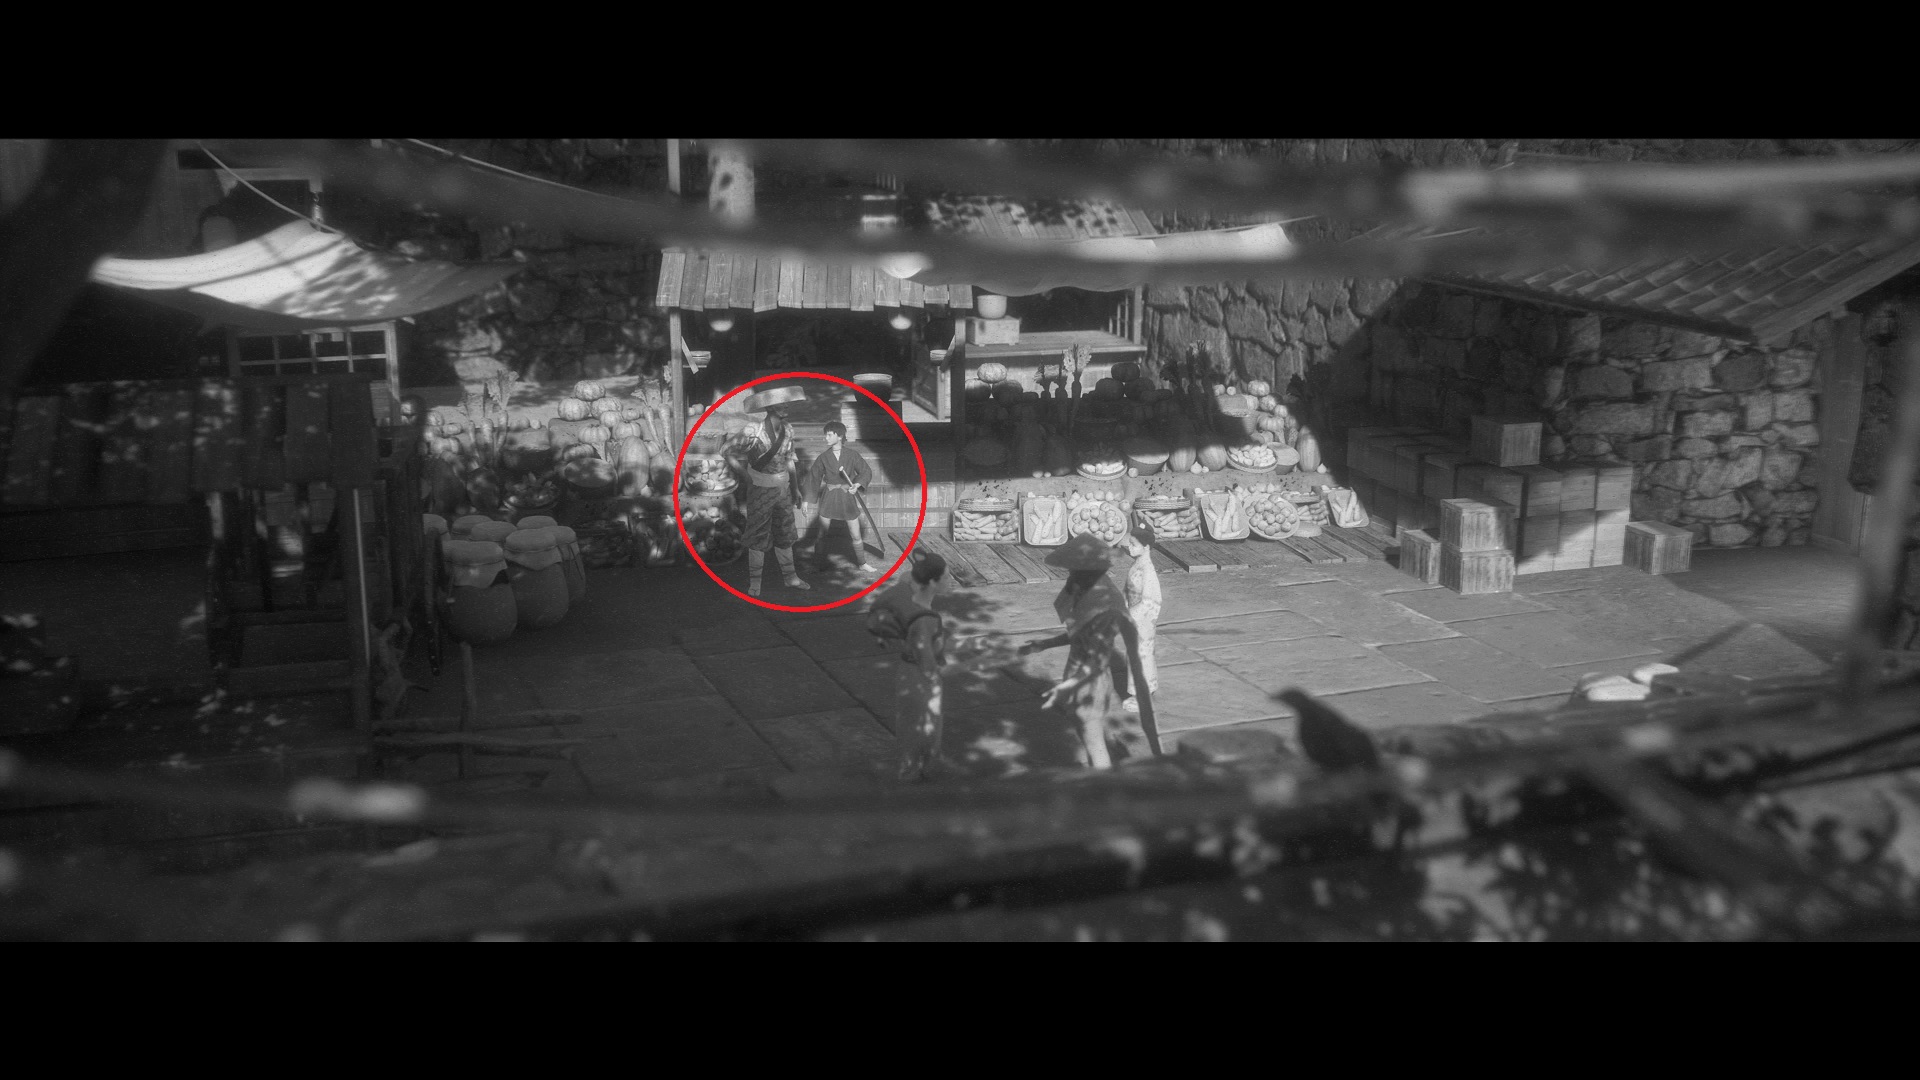
Kai-Awase Shell — After entering the warehouse, go downstairs and out the left door. Speak with the merchant in the upper left.
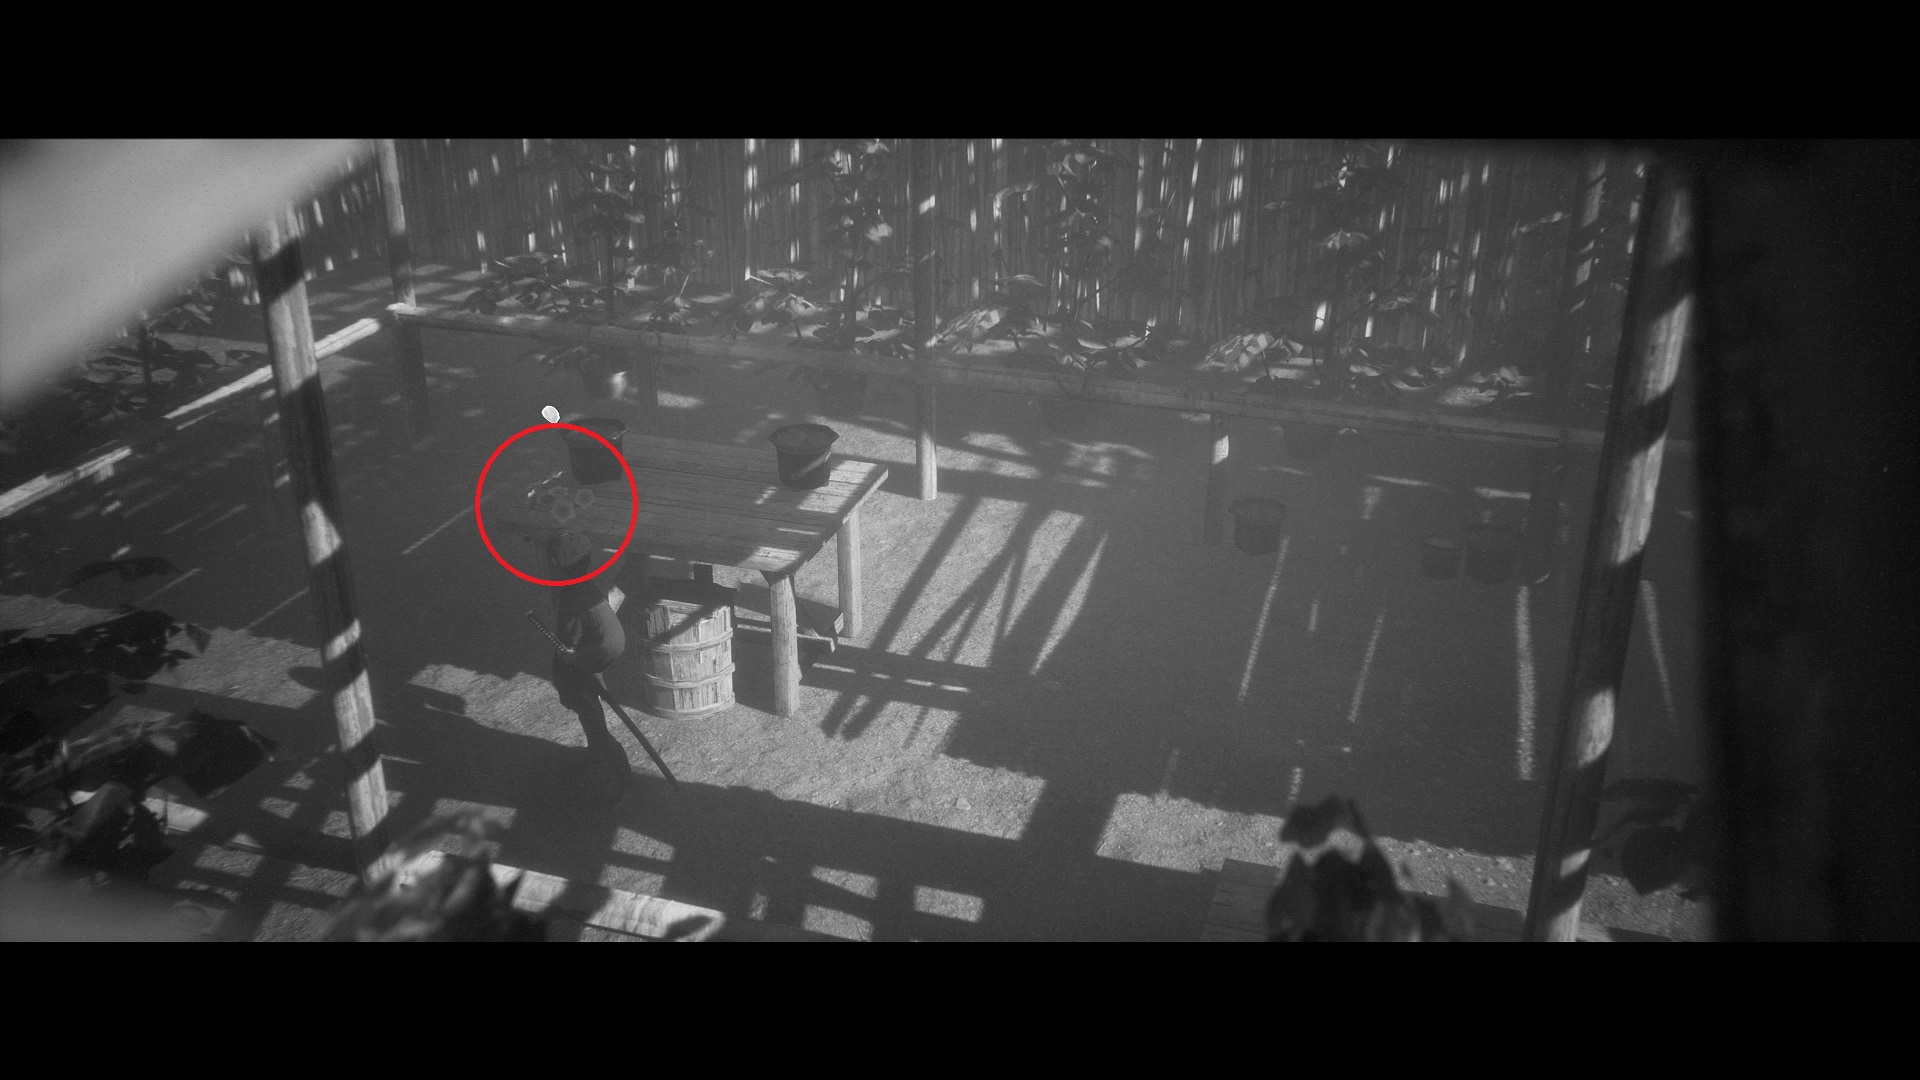
Sakura Bloom — After getting the tooltip for sprinting near the bamboo fence on the way to Sensei, turn left. In the next area, you’ll find this one on a table.

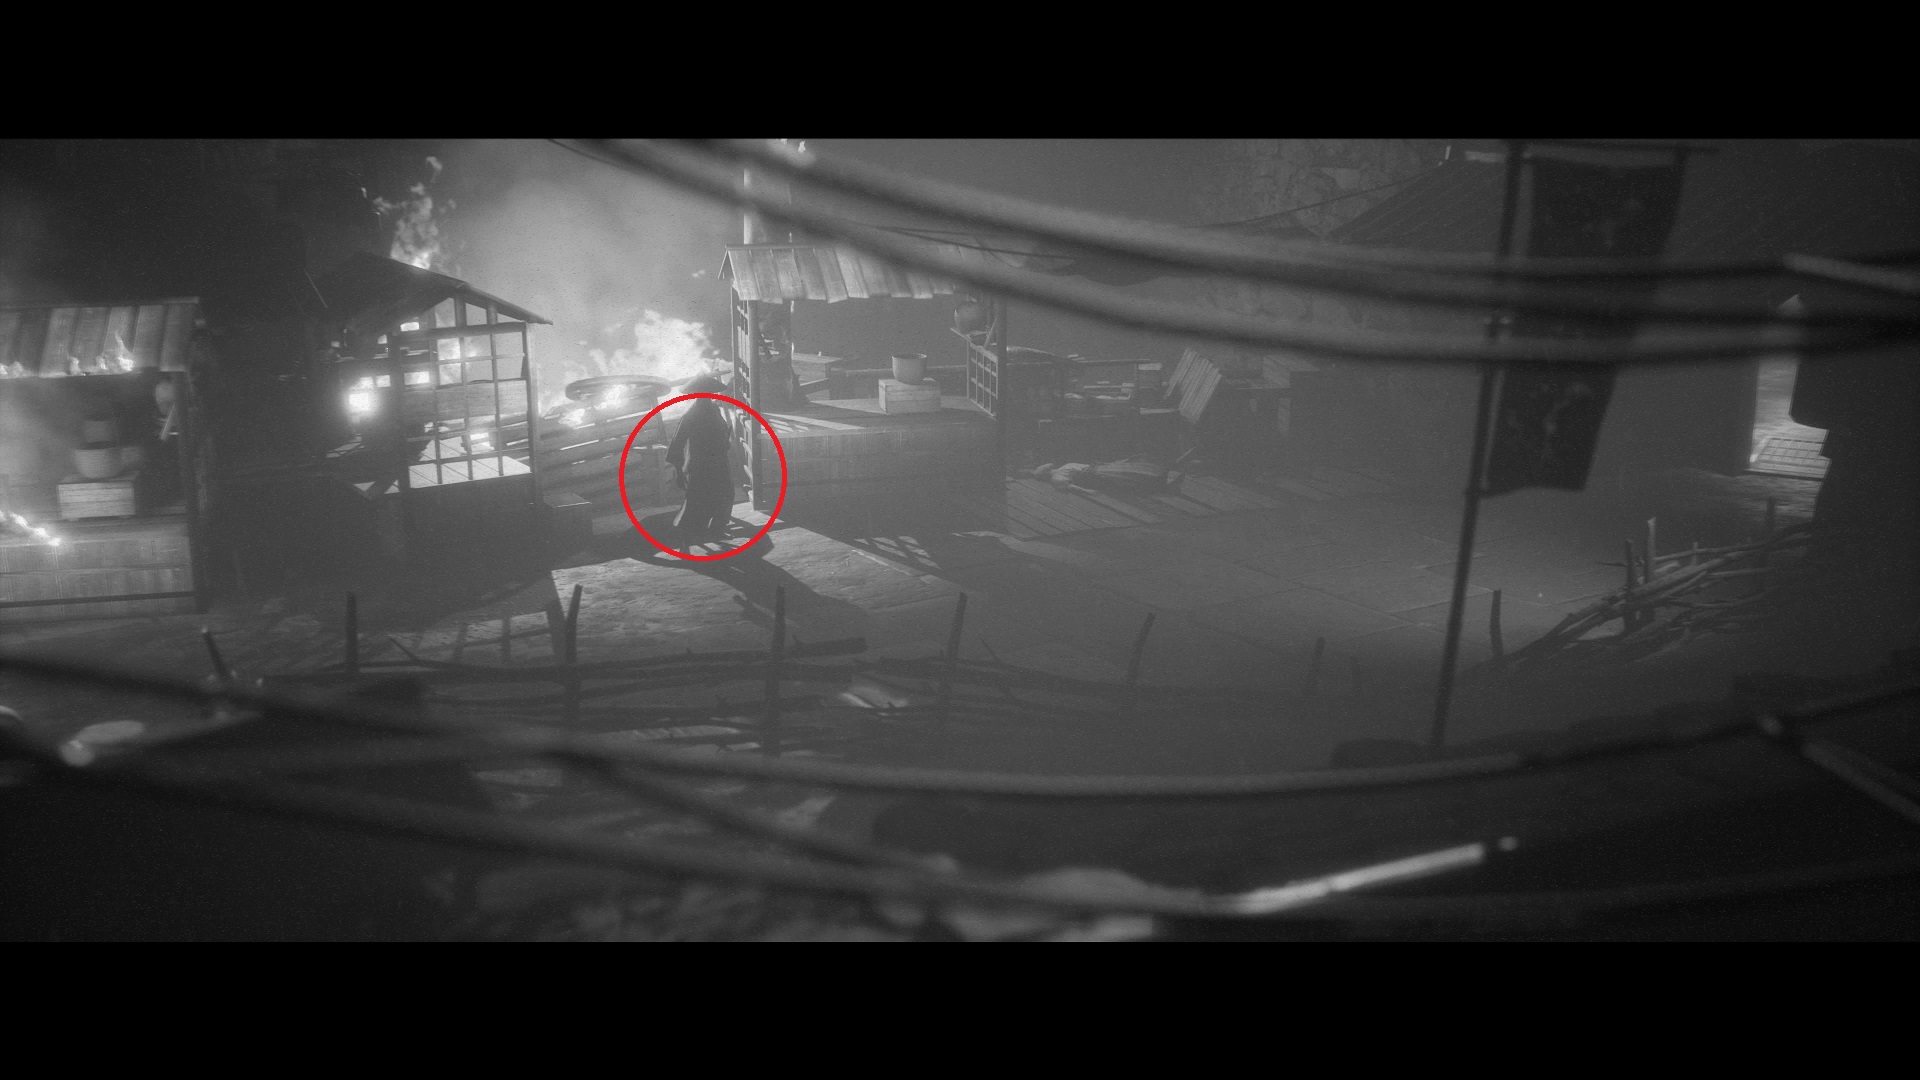
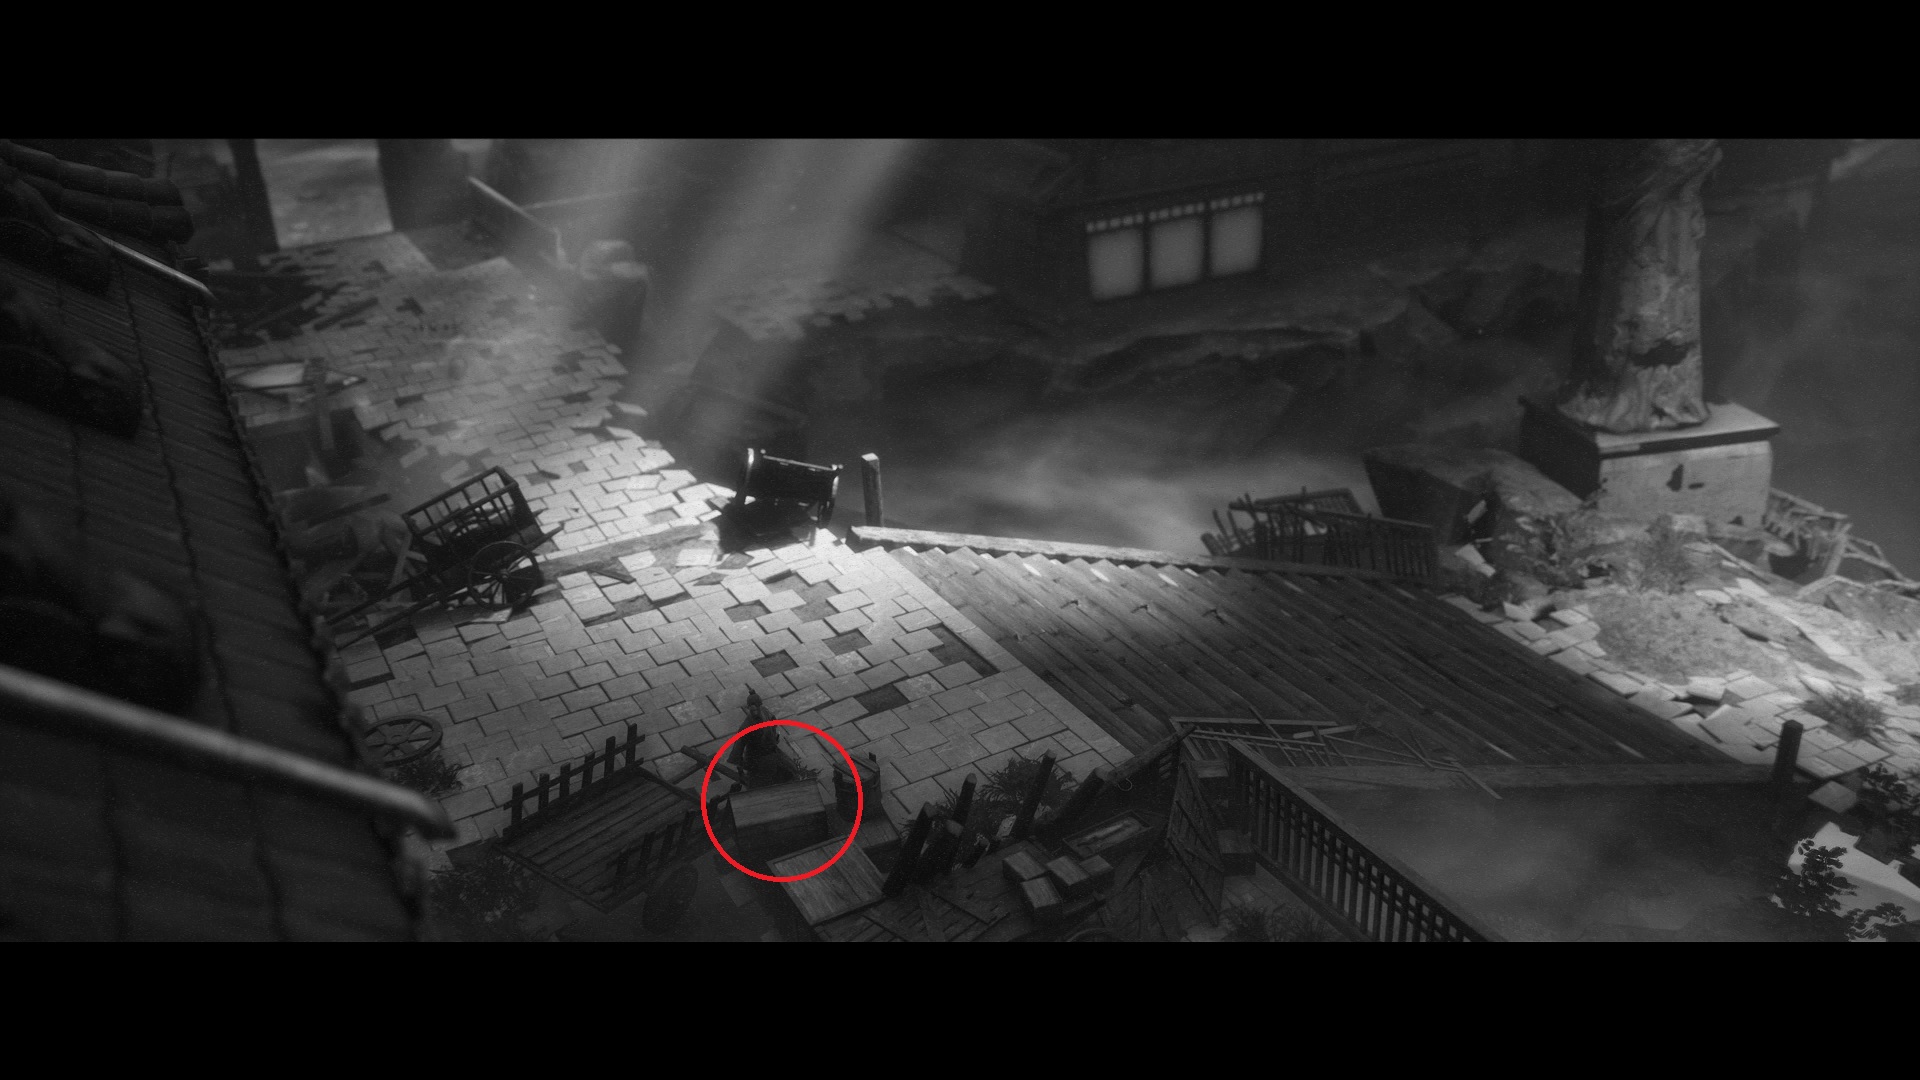
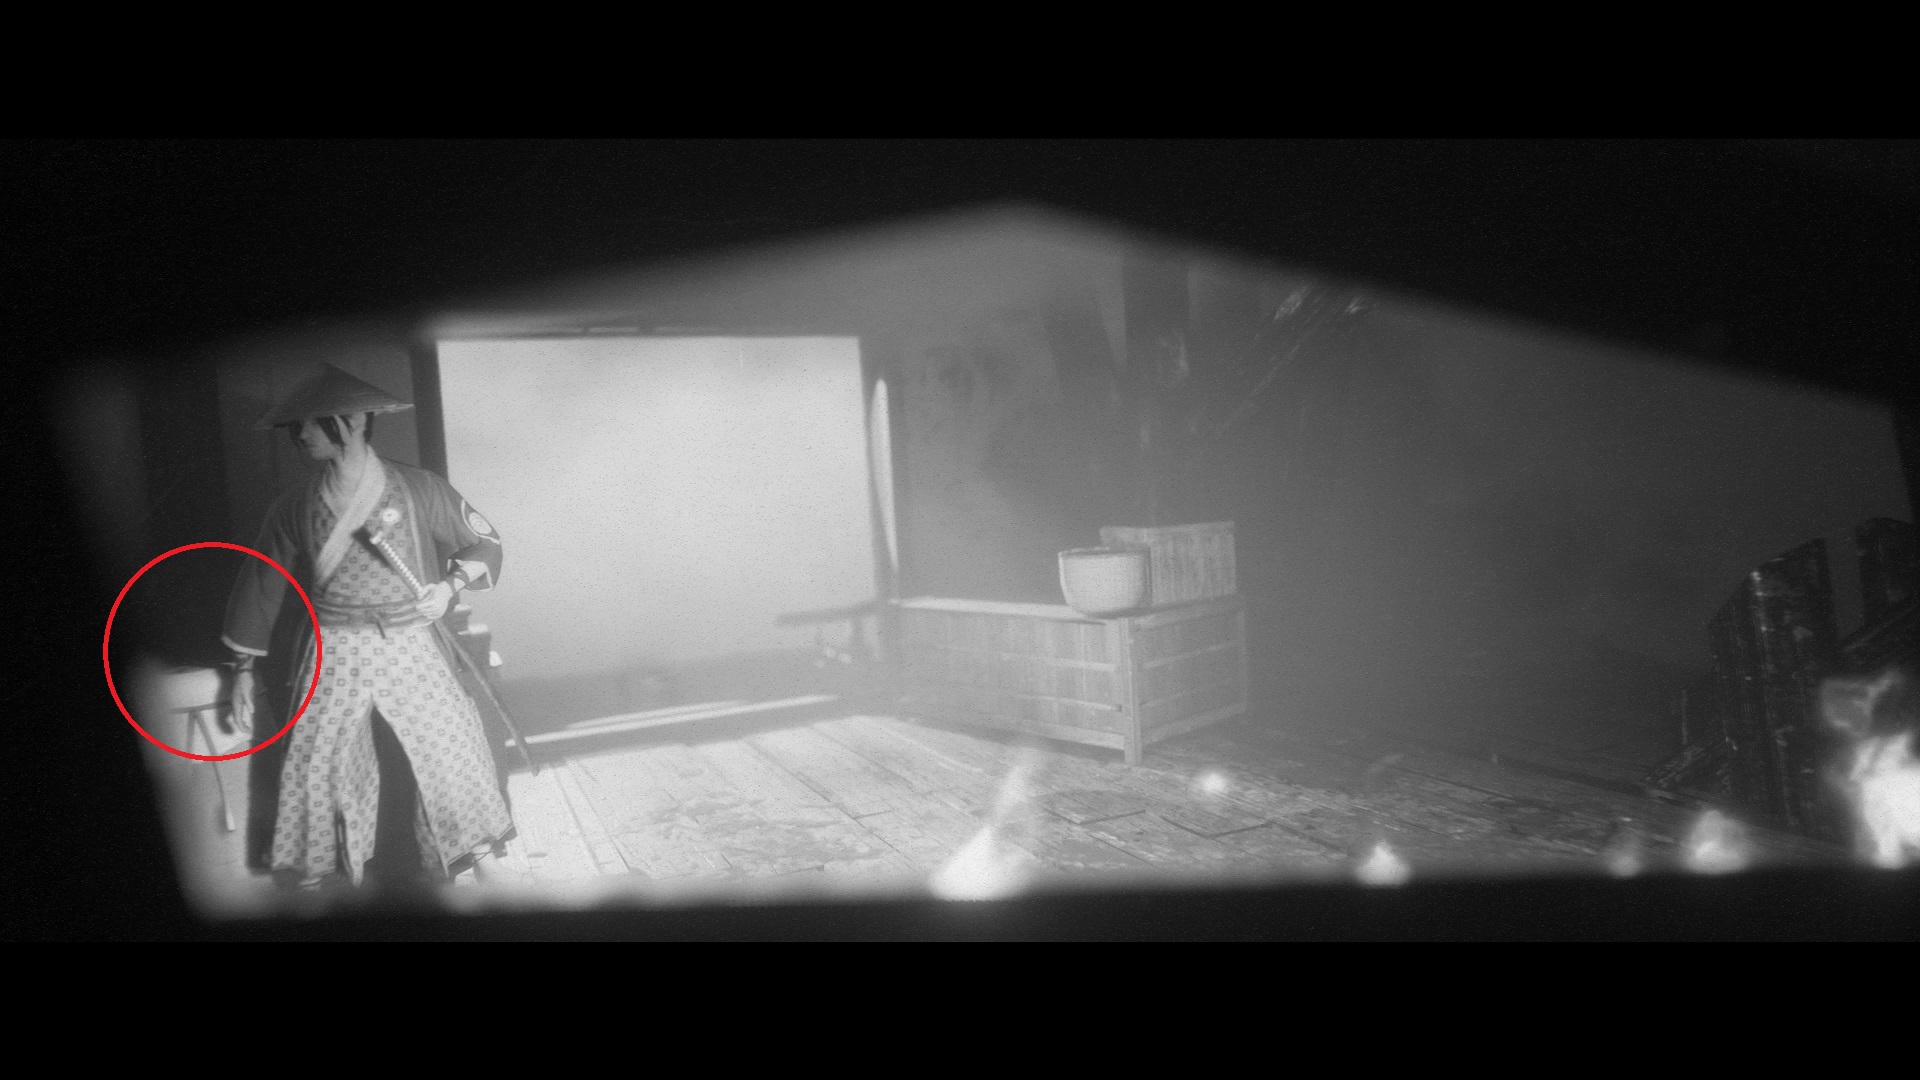
Field Mouse Sculpture — After you kill your first three enemies, you’ll see a shrine between two houses. Go behind the shrine (up and right where you see the stone wall) to find this one on a table.
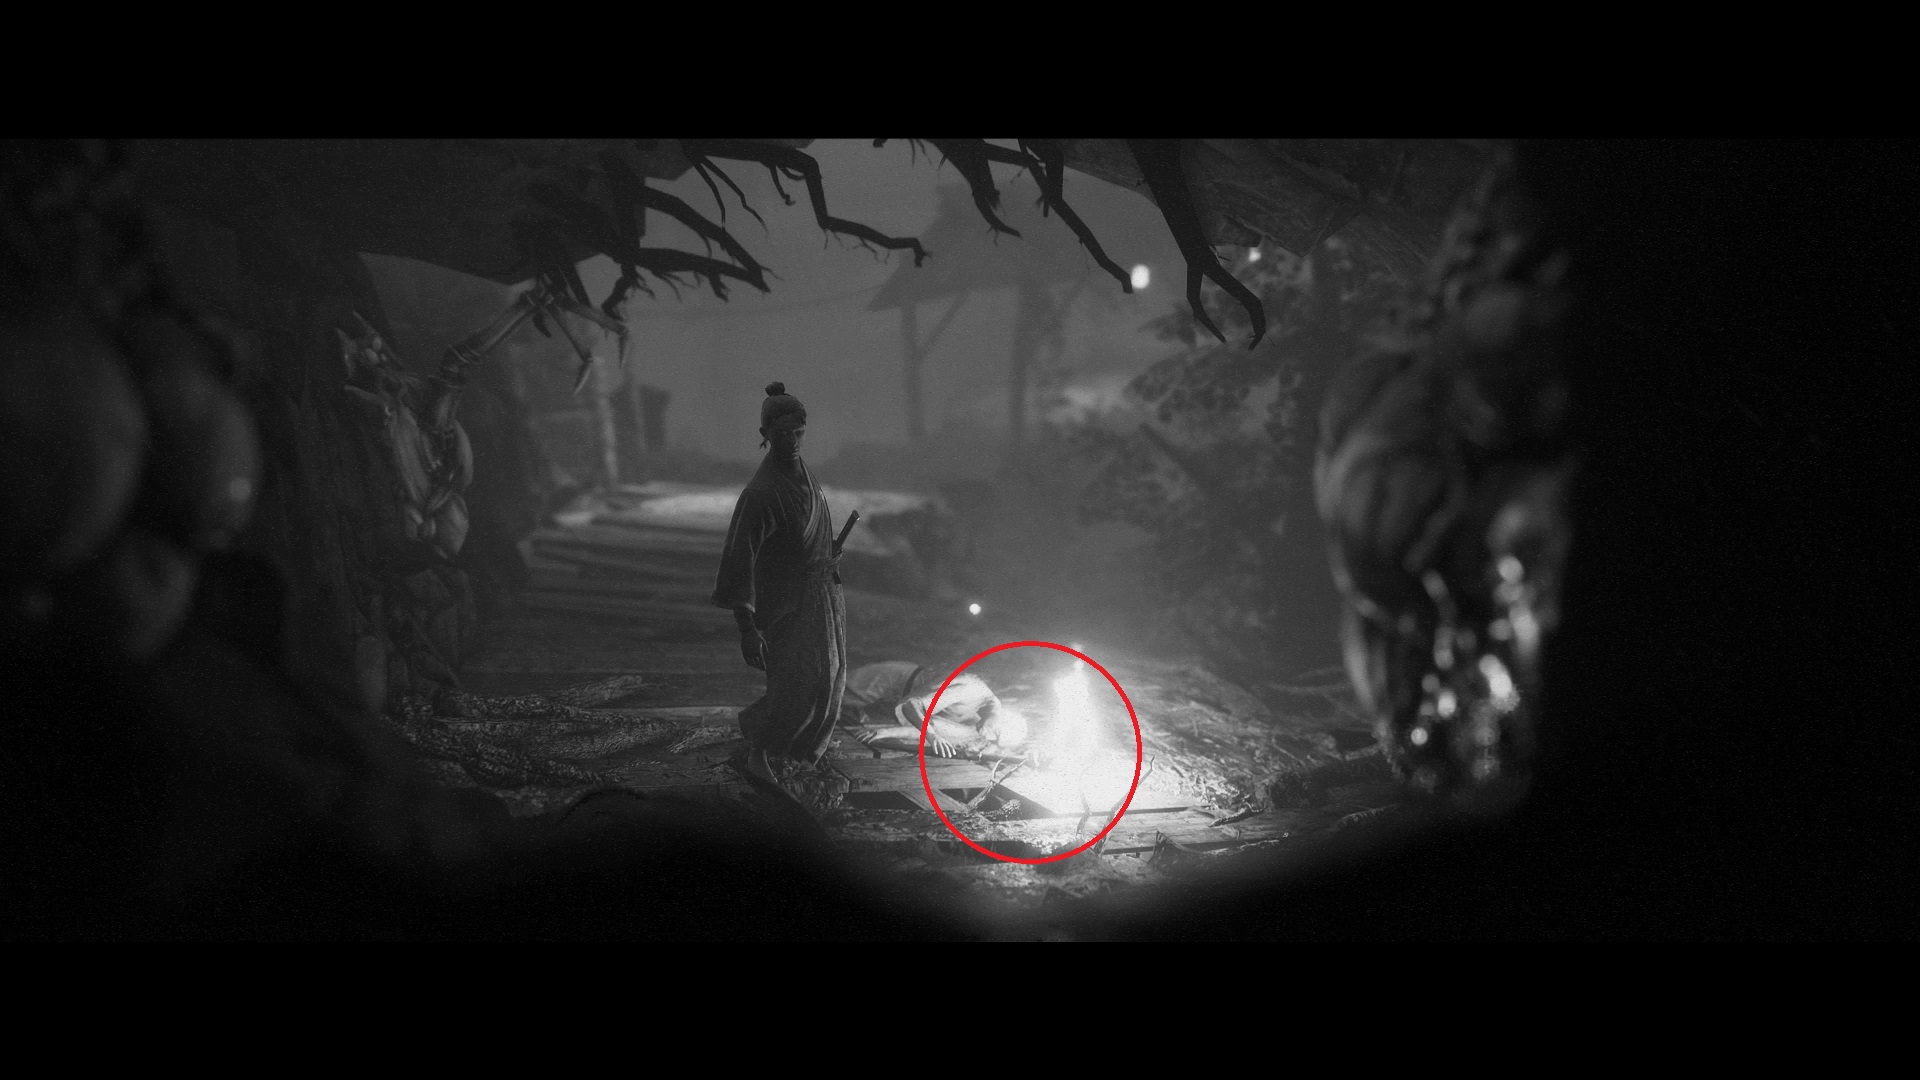
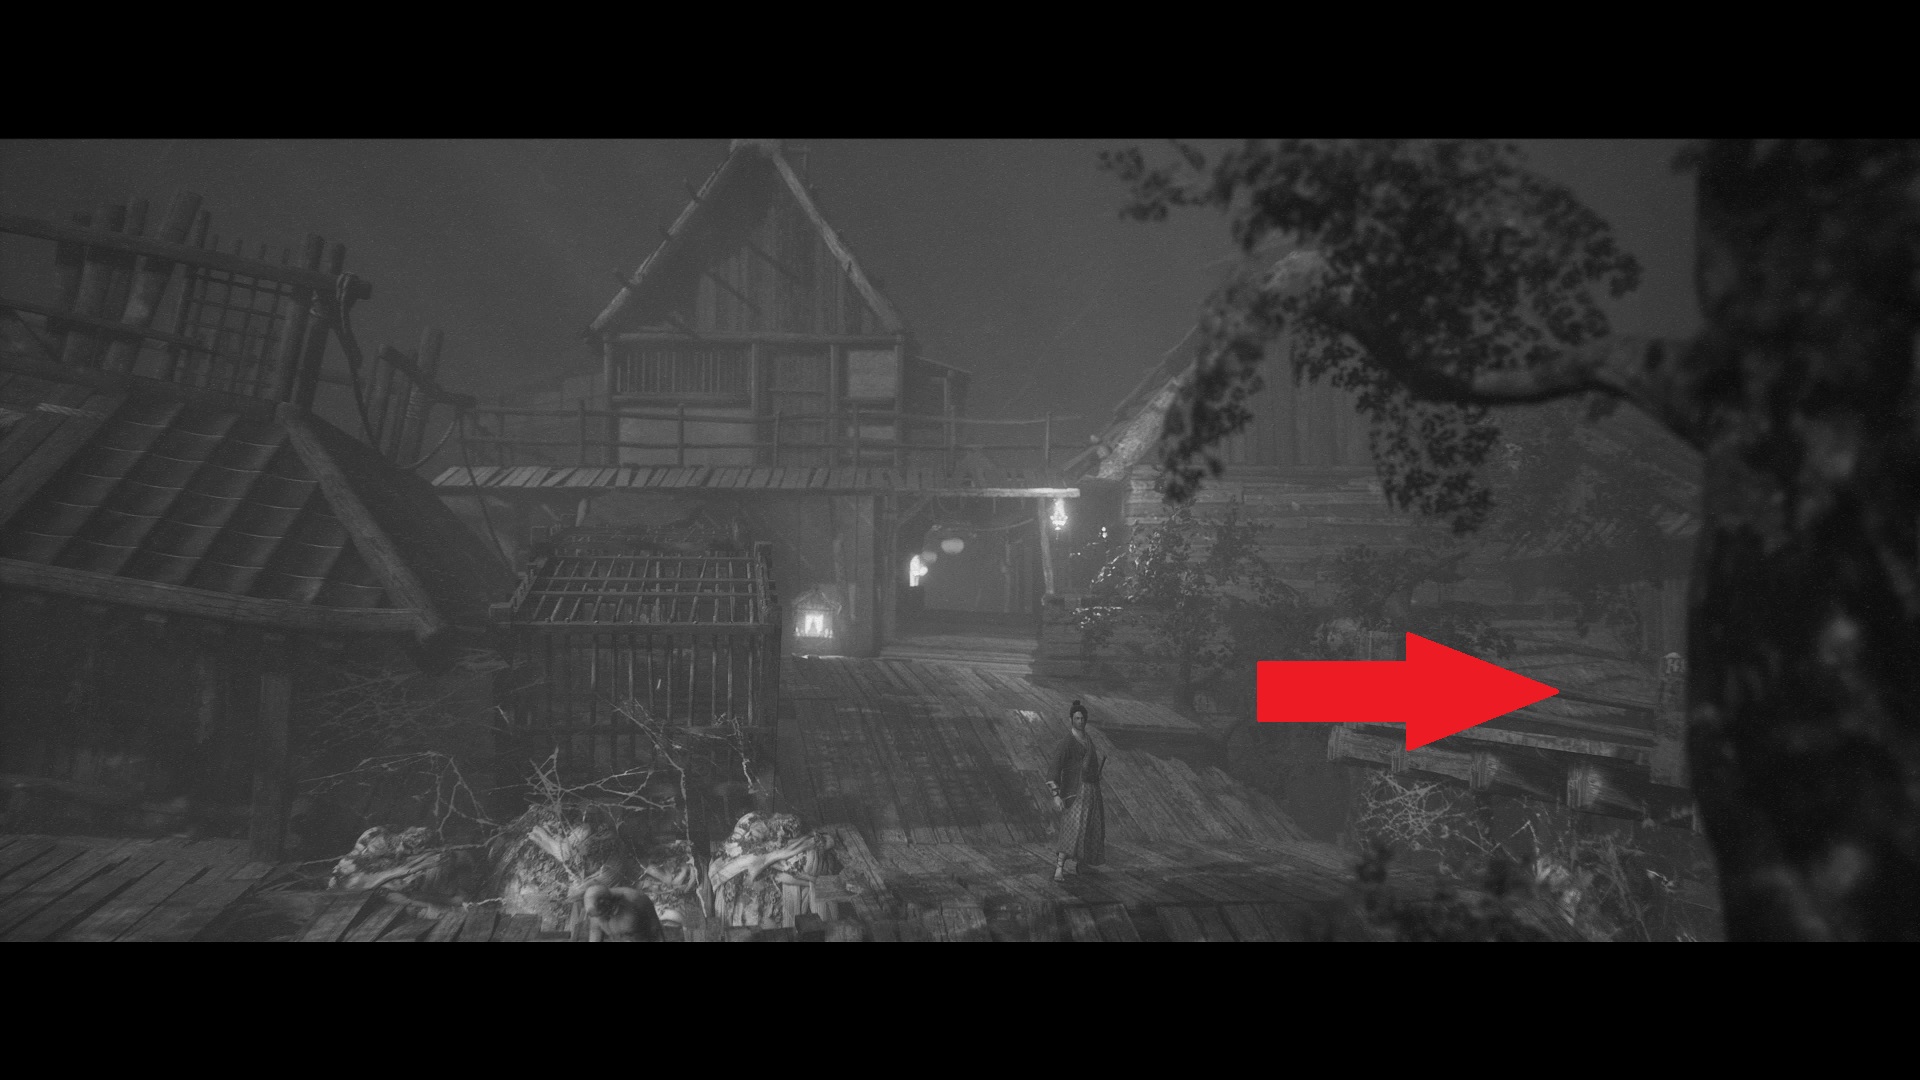
Kakute — Eventually, you’ll go along a dirt road through a field. Go down the hill past the shrine in the next area and cross a bridge into a ransacked village with dead villagers in the path. There’s a house on the right with a wounded villager out front. Go inside the house to find this one on a corpse.
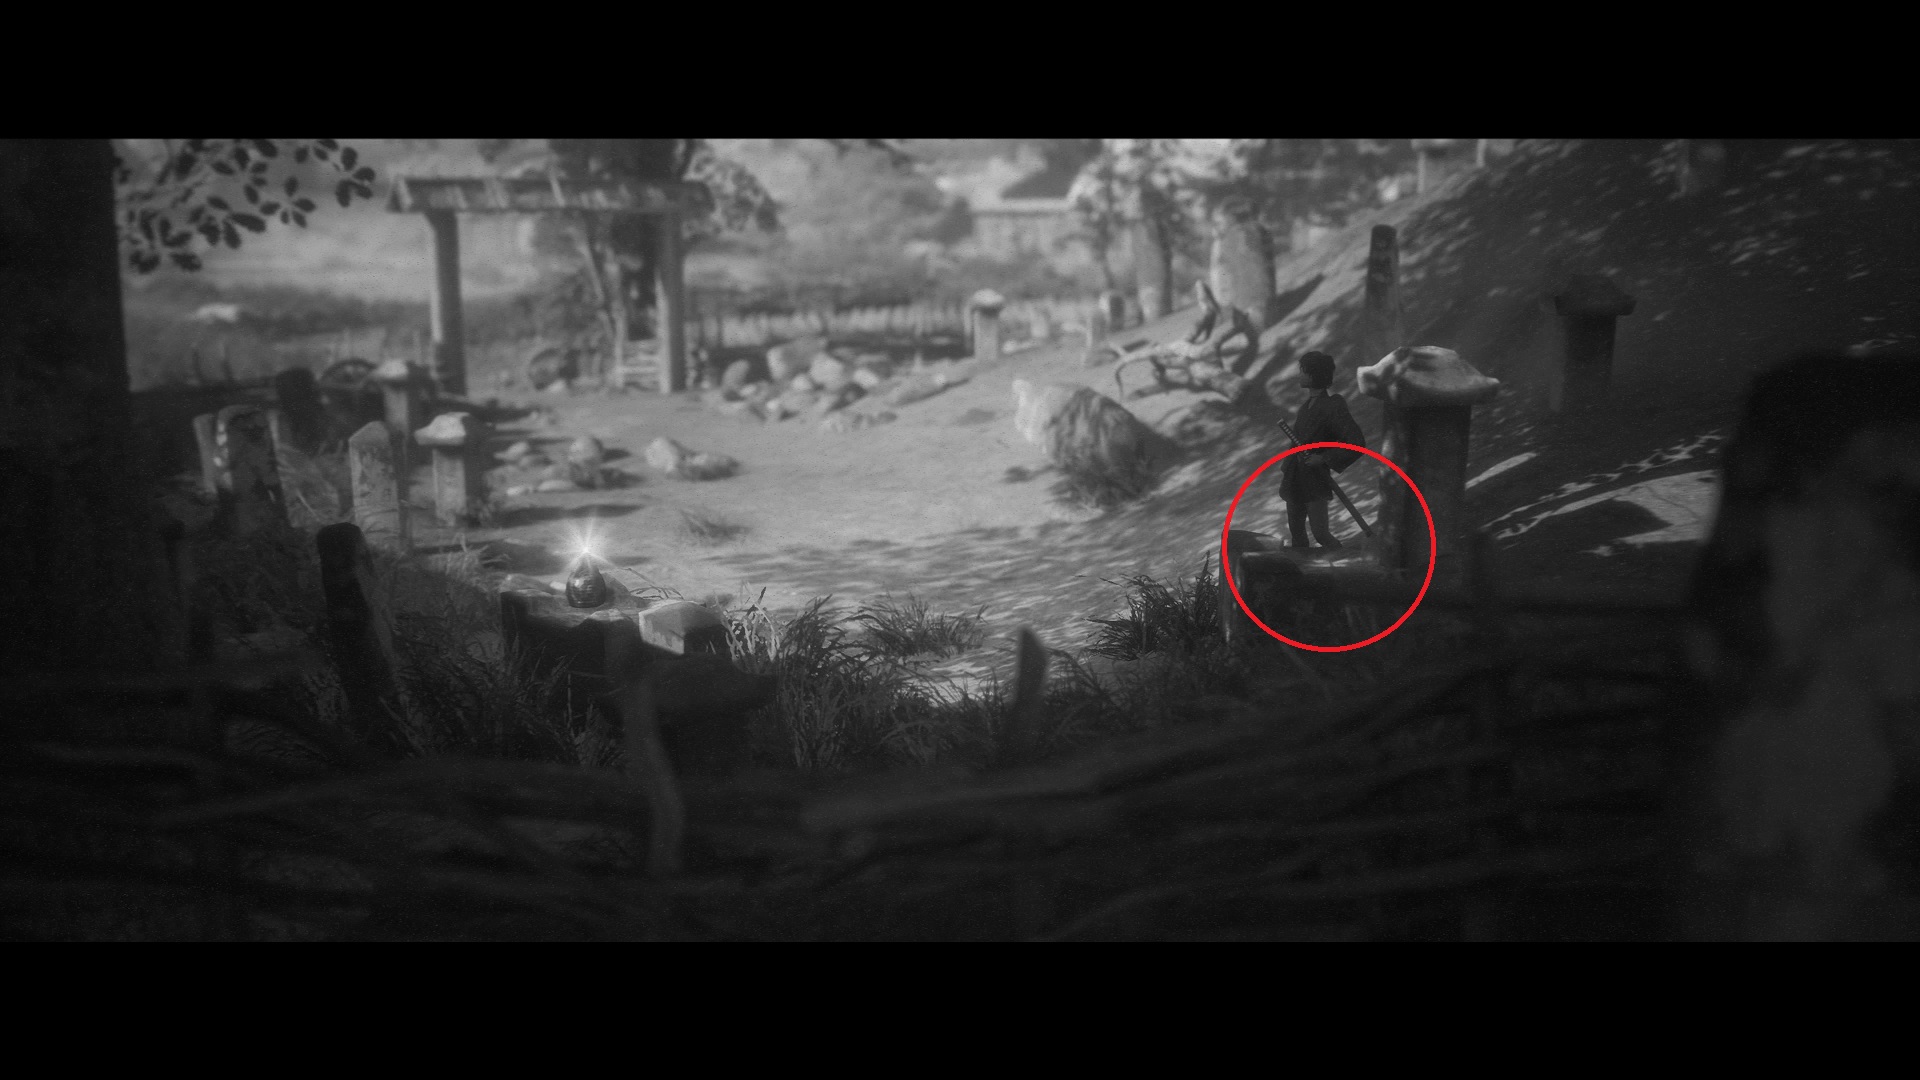
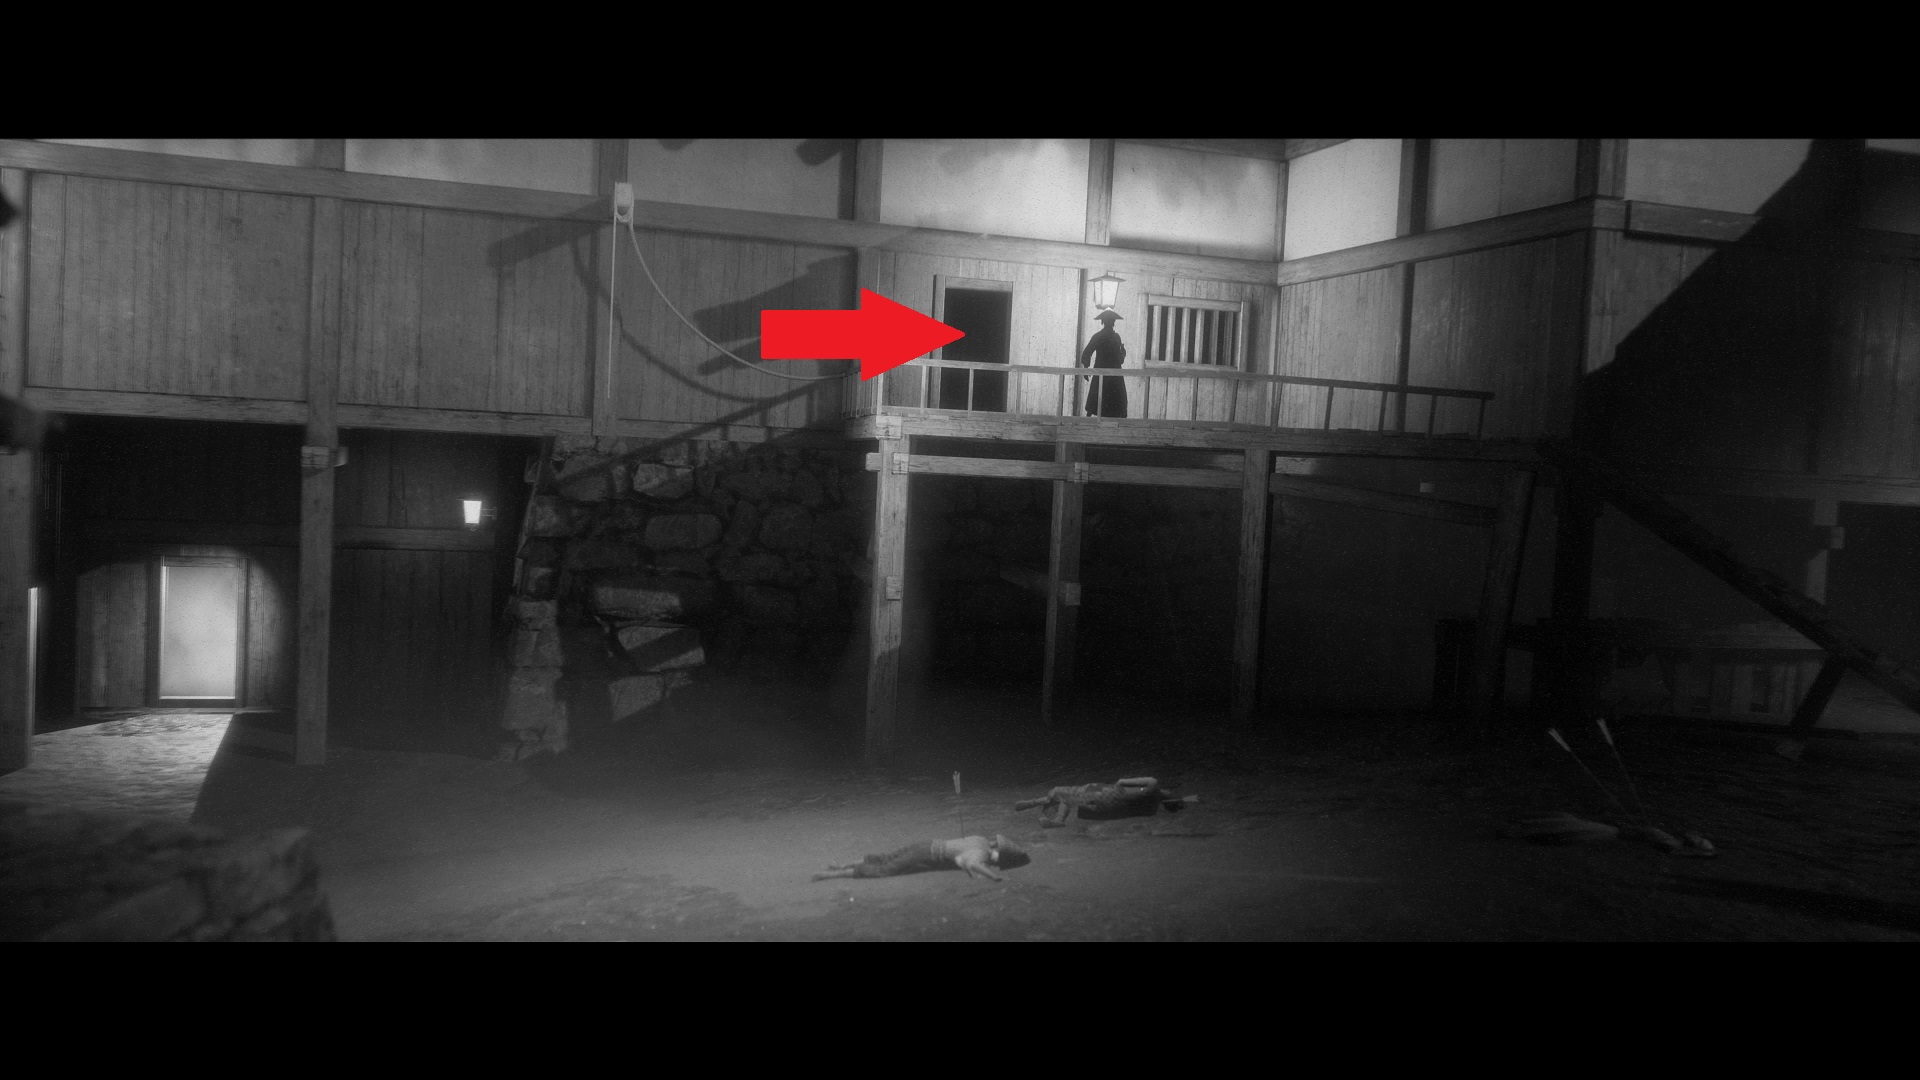
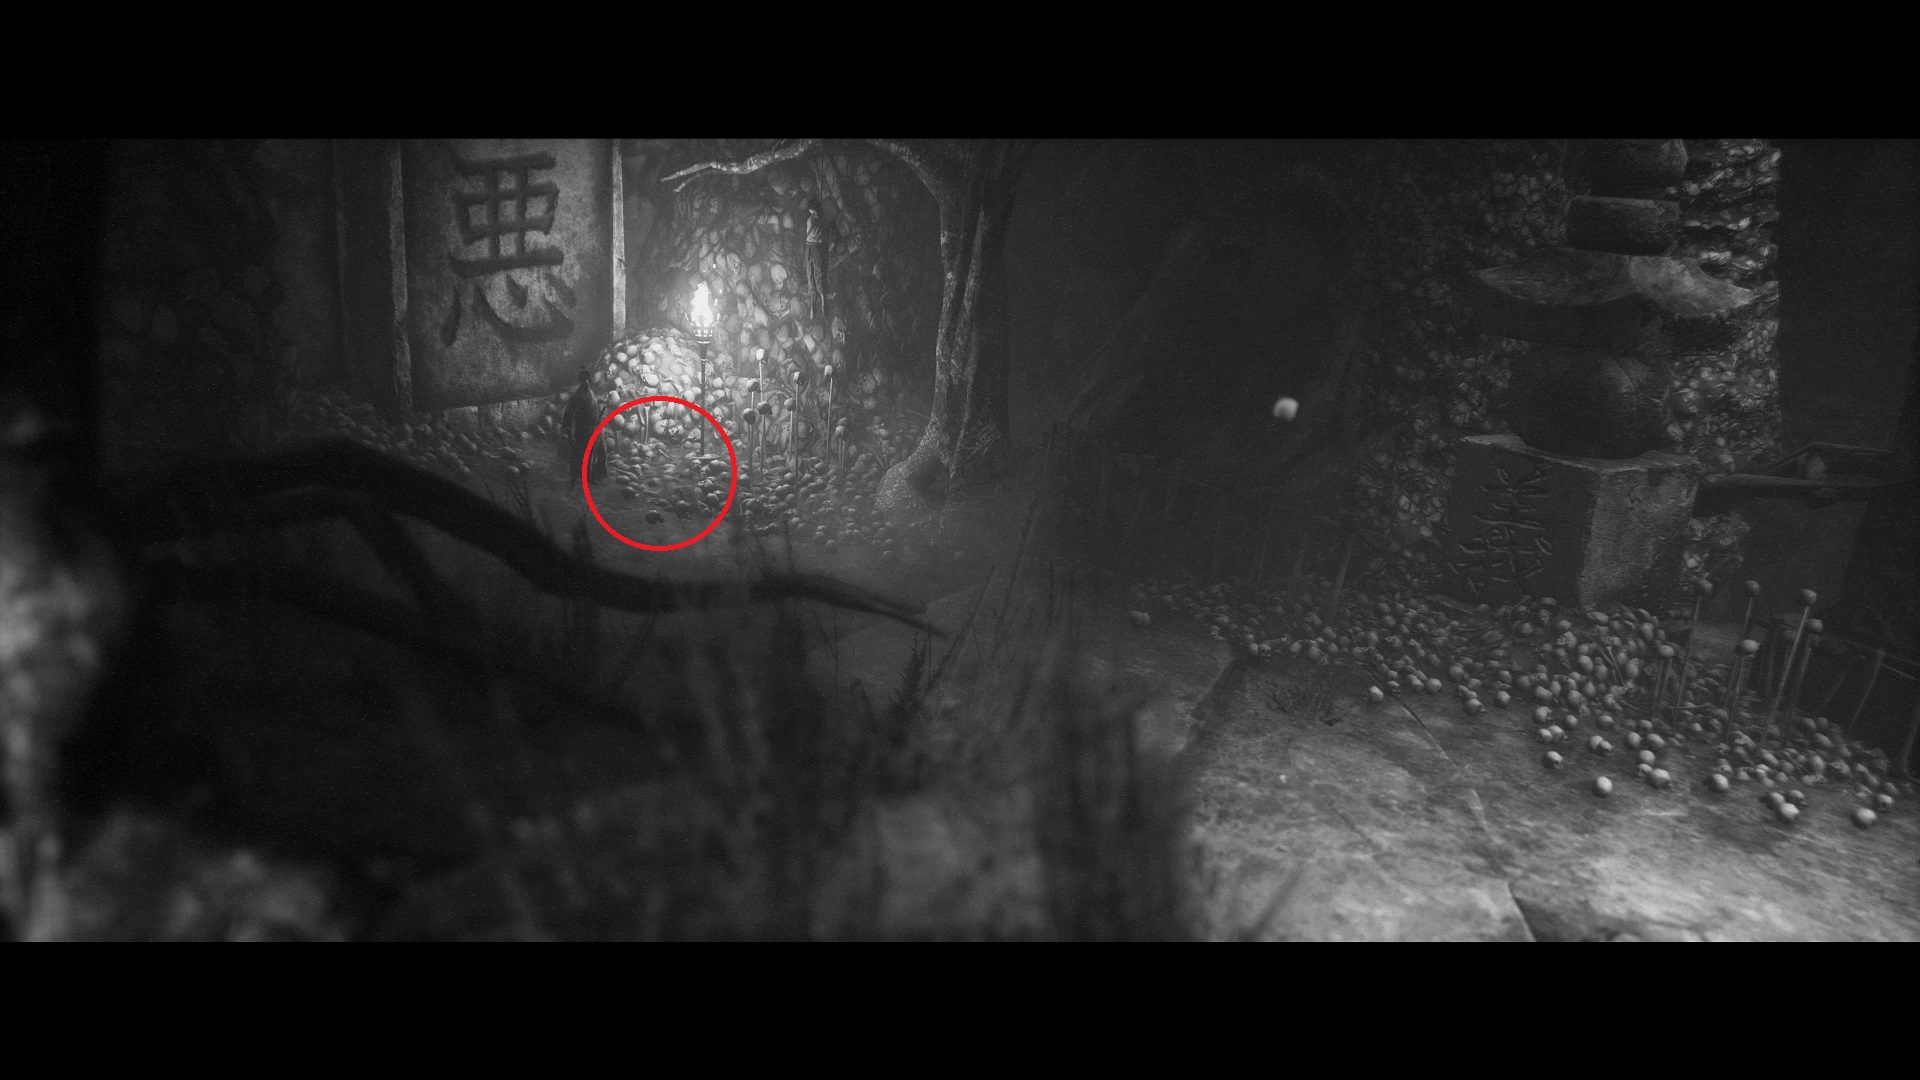
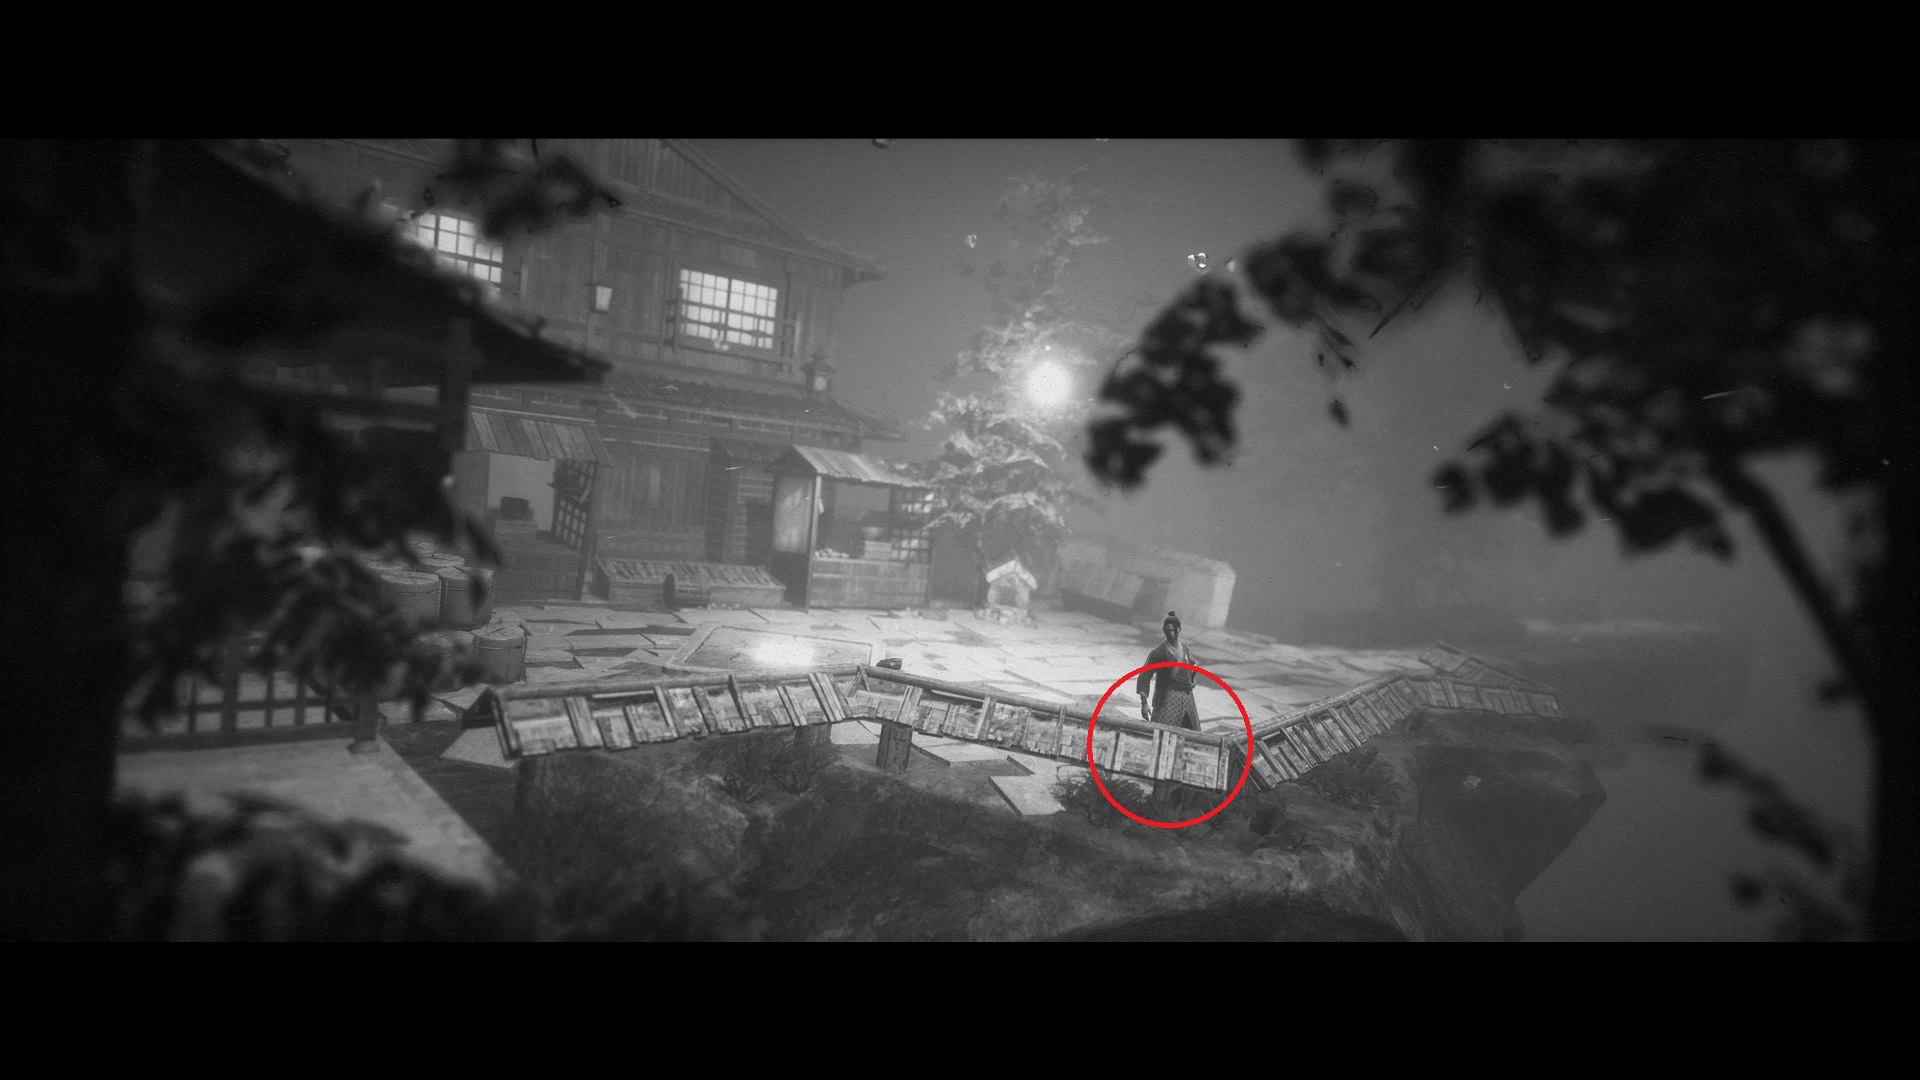
Izanami Print — Once you reach the outskirts, follow the path from the gate. Go right at the end. Enter a cemetery and fight three bandits. Keep going right to the end and interact with the grave.
Chapter 2 Artifacts (6 Collectibles)
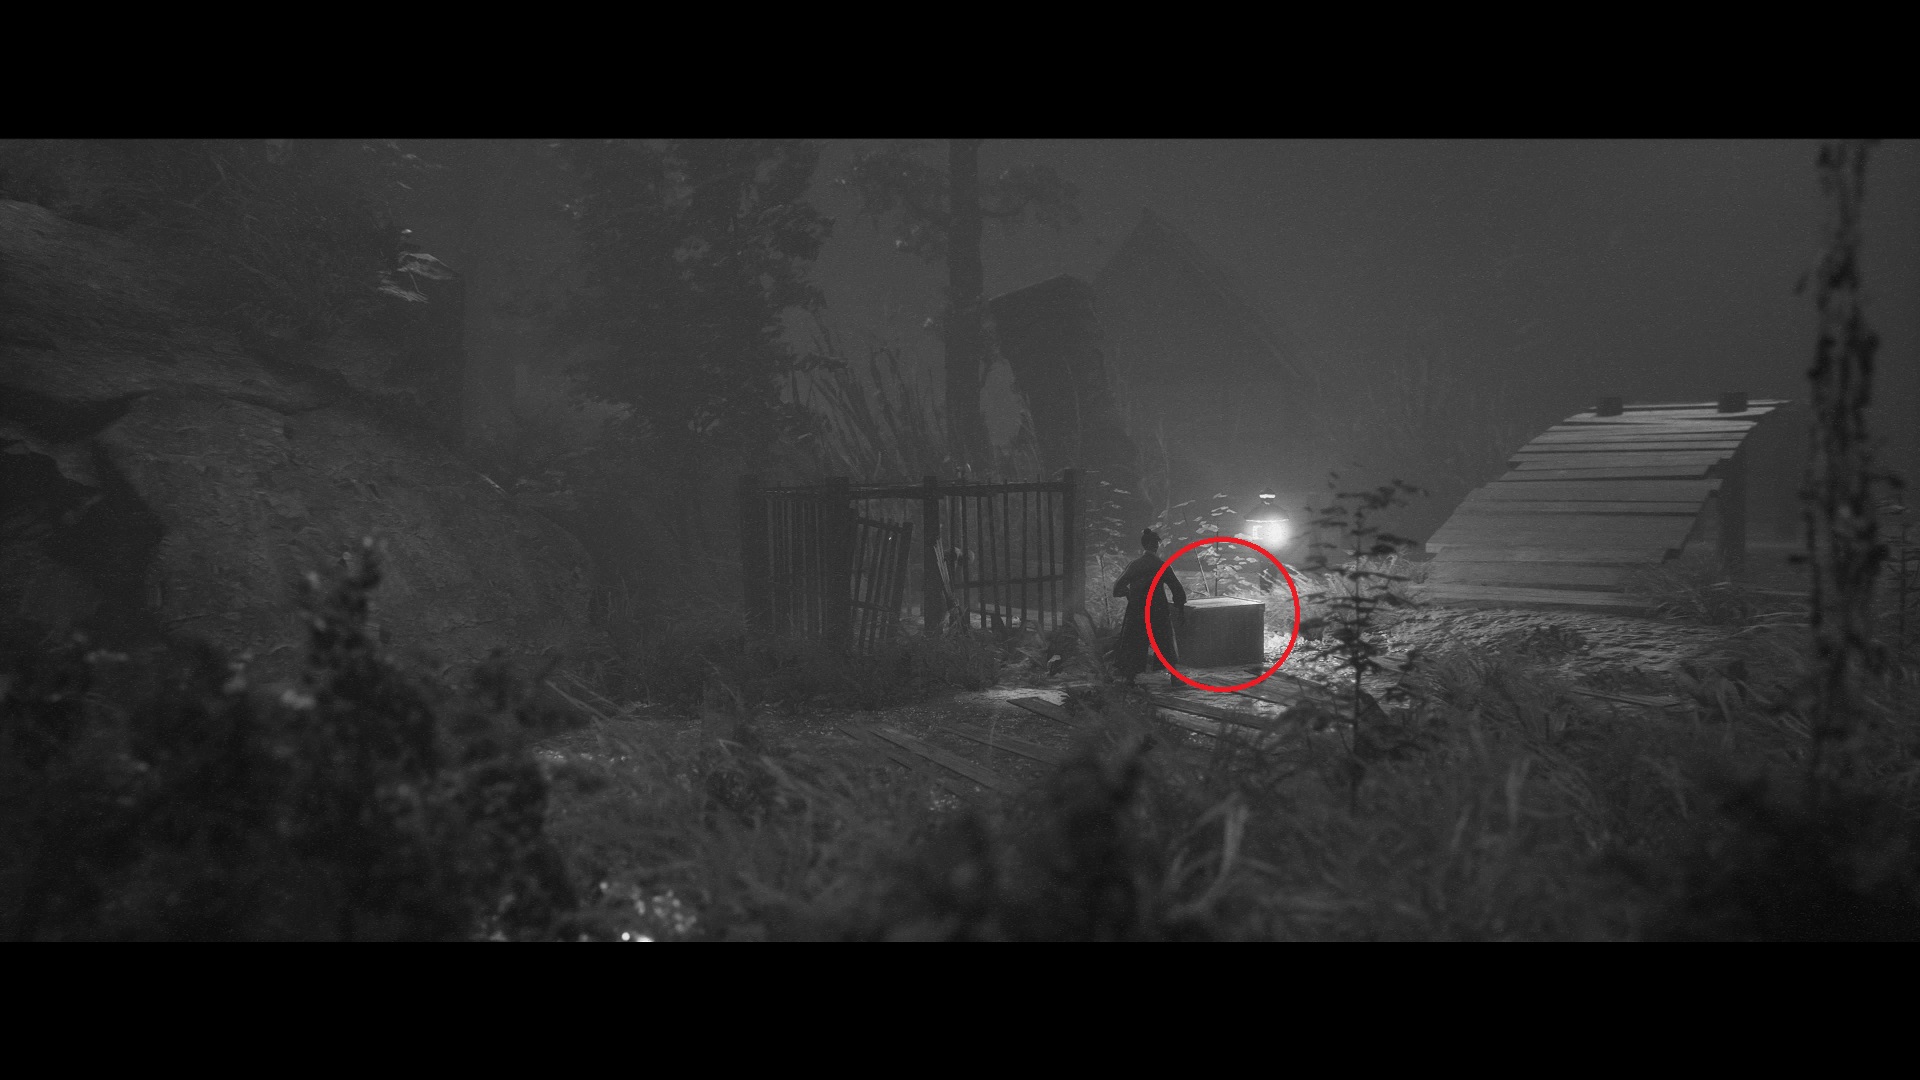
Discarded Kami Carving — After fighting the bandit in shadow, go down a hill and climb up the right side. In the next area, a fox will cross the screen by a shrine. Go right into another area to find this one leaning against a shelter.

Crude Tekko — After entering the cave and saving the prisoner, take the elevator up, and go left at the top. Create a path at the end by pushing the beam down. Cross over for this one in a bucket.
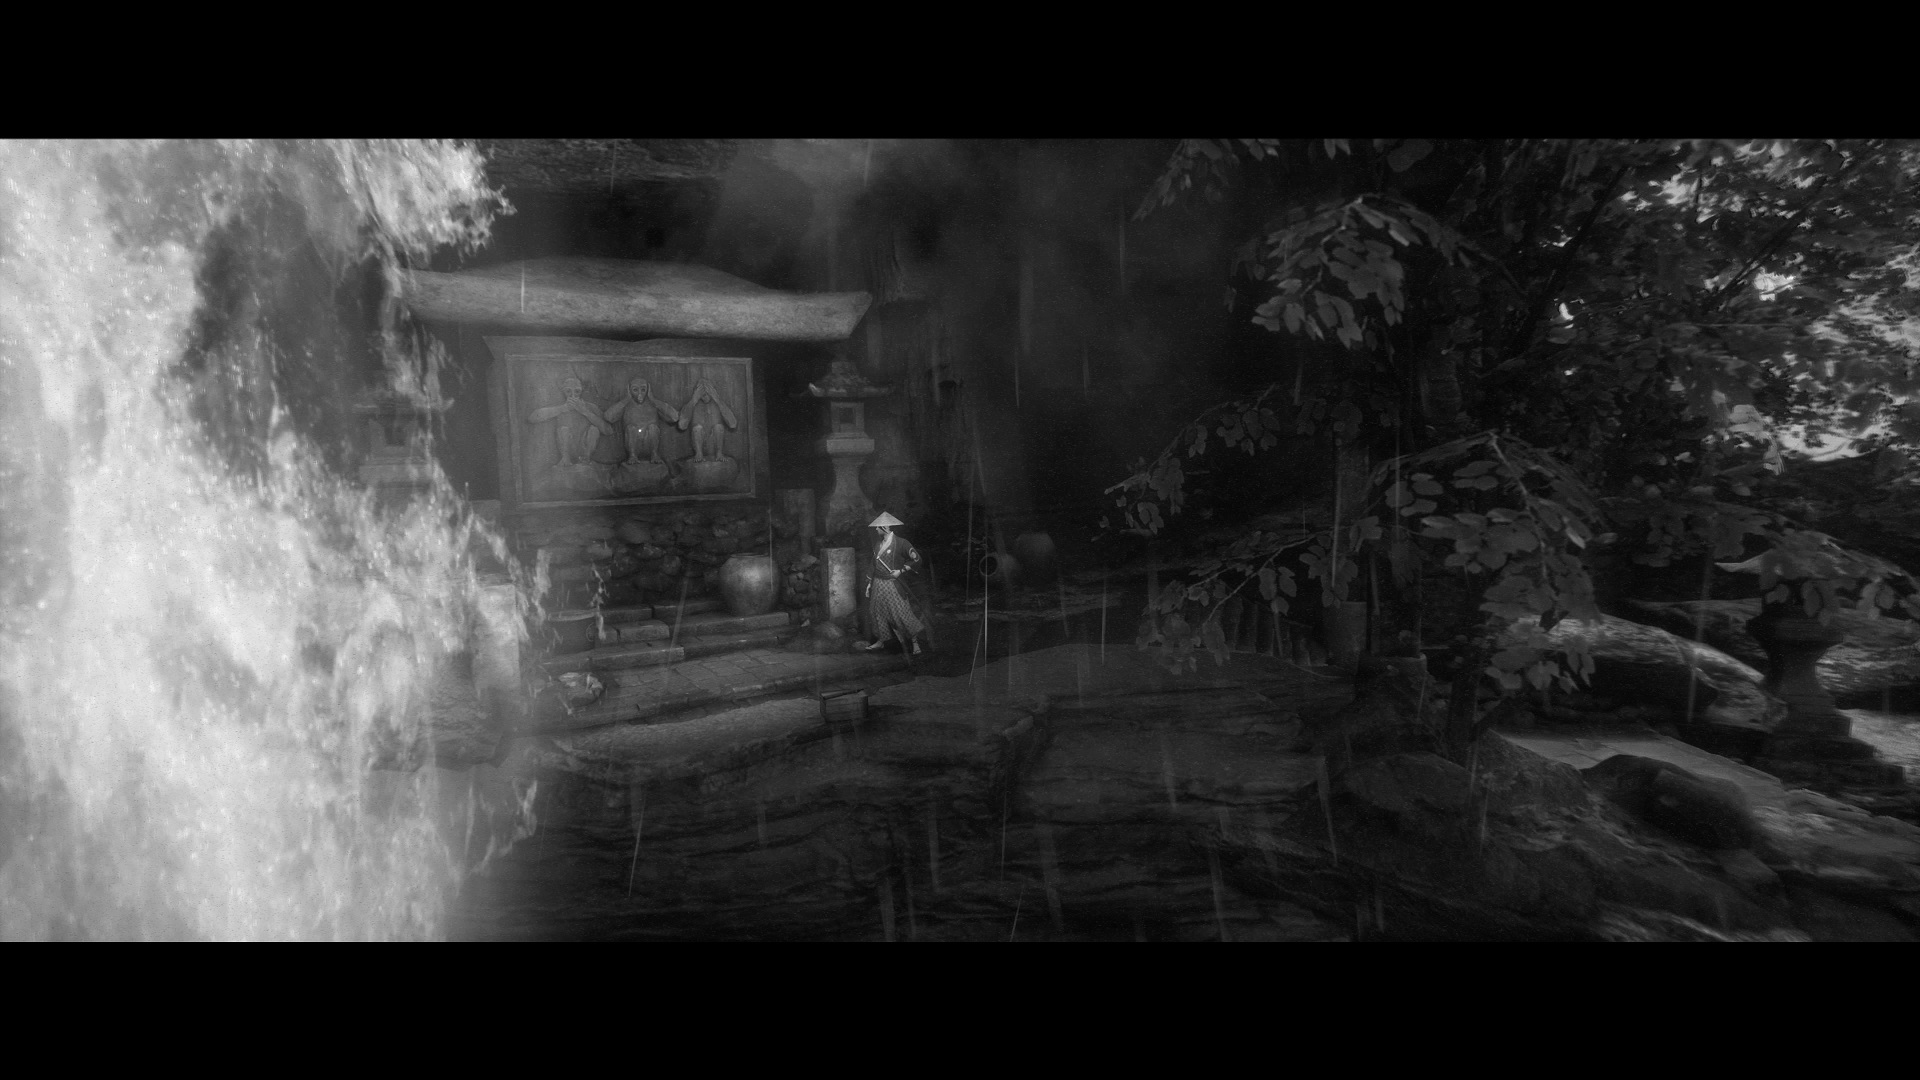
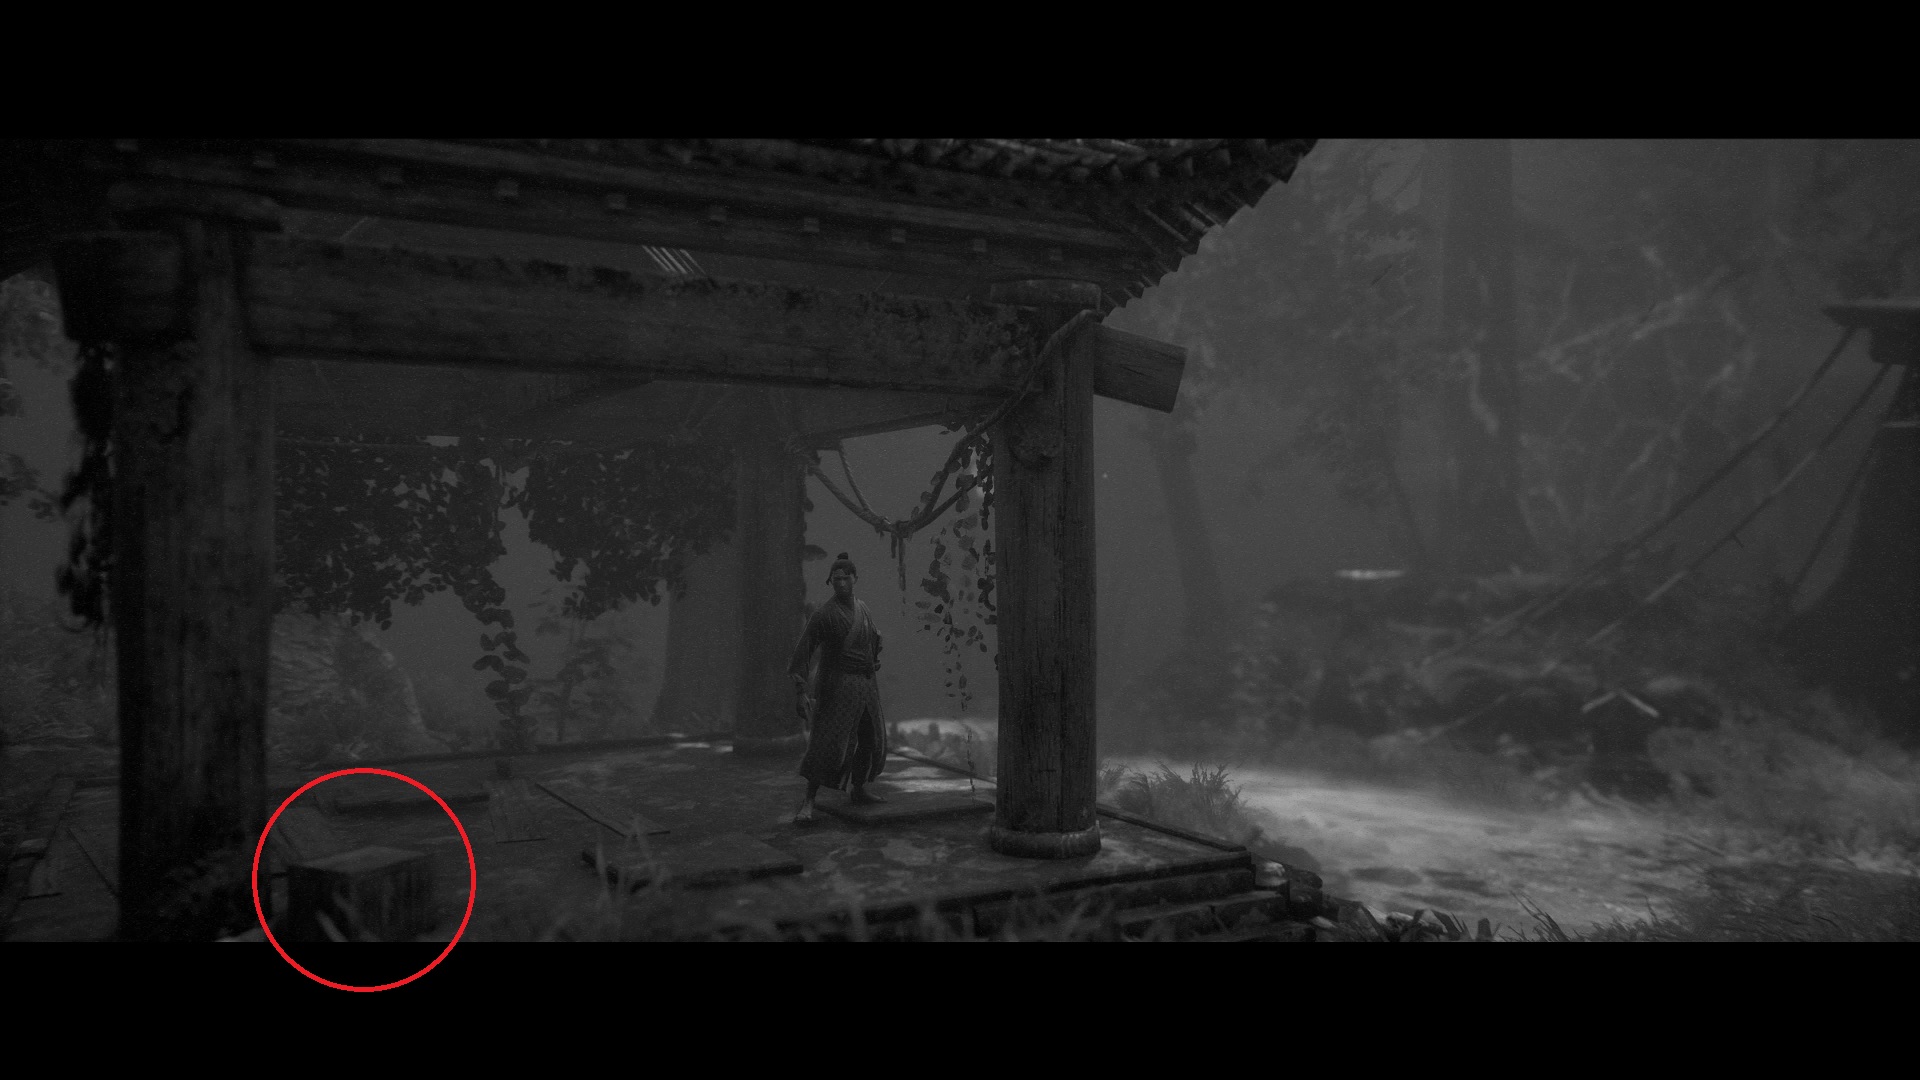
The Three Monkeys — After crossing the tree by the waterfall (it breaks behind you), go left through the torii gate in the next area and interact with the stone carving at the end.

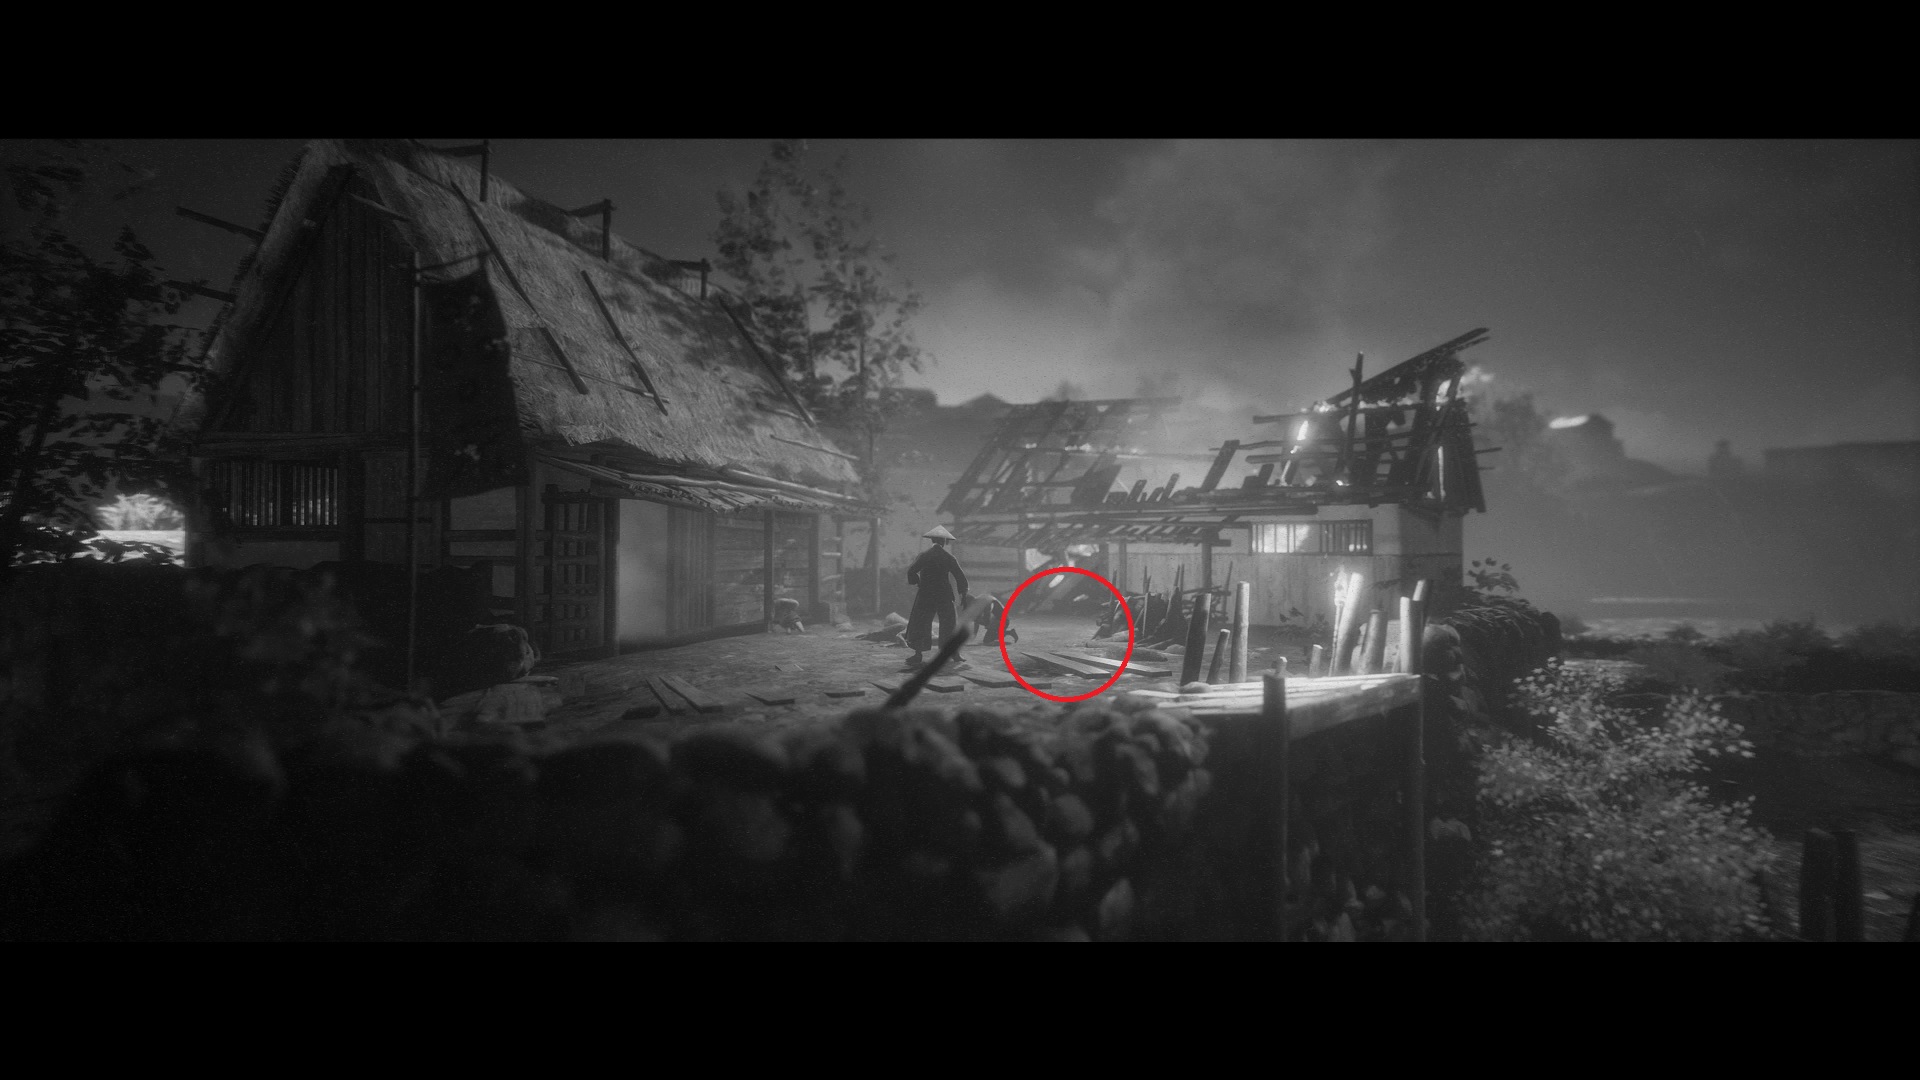
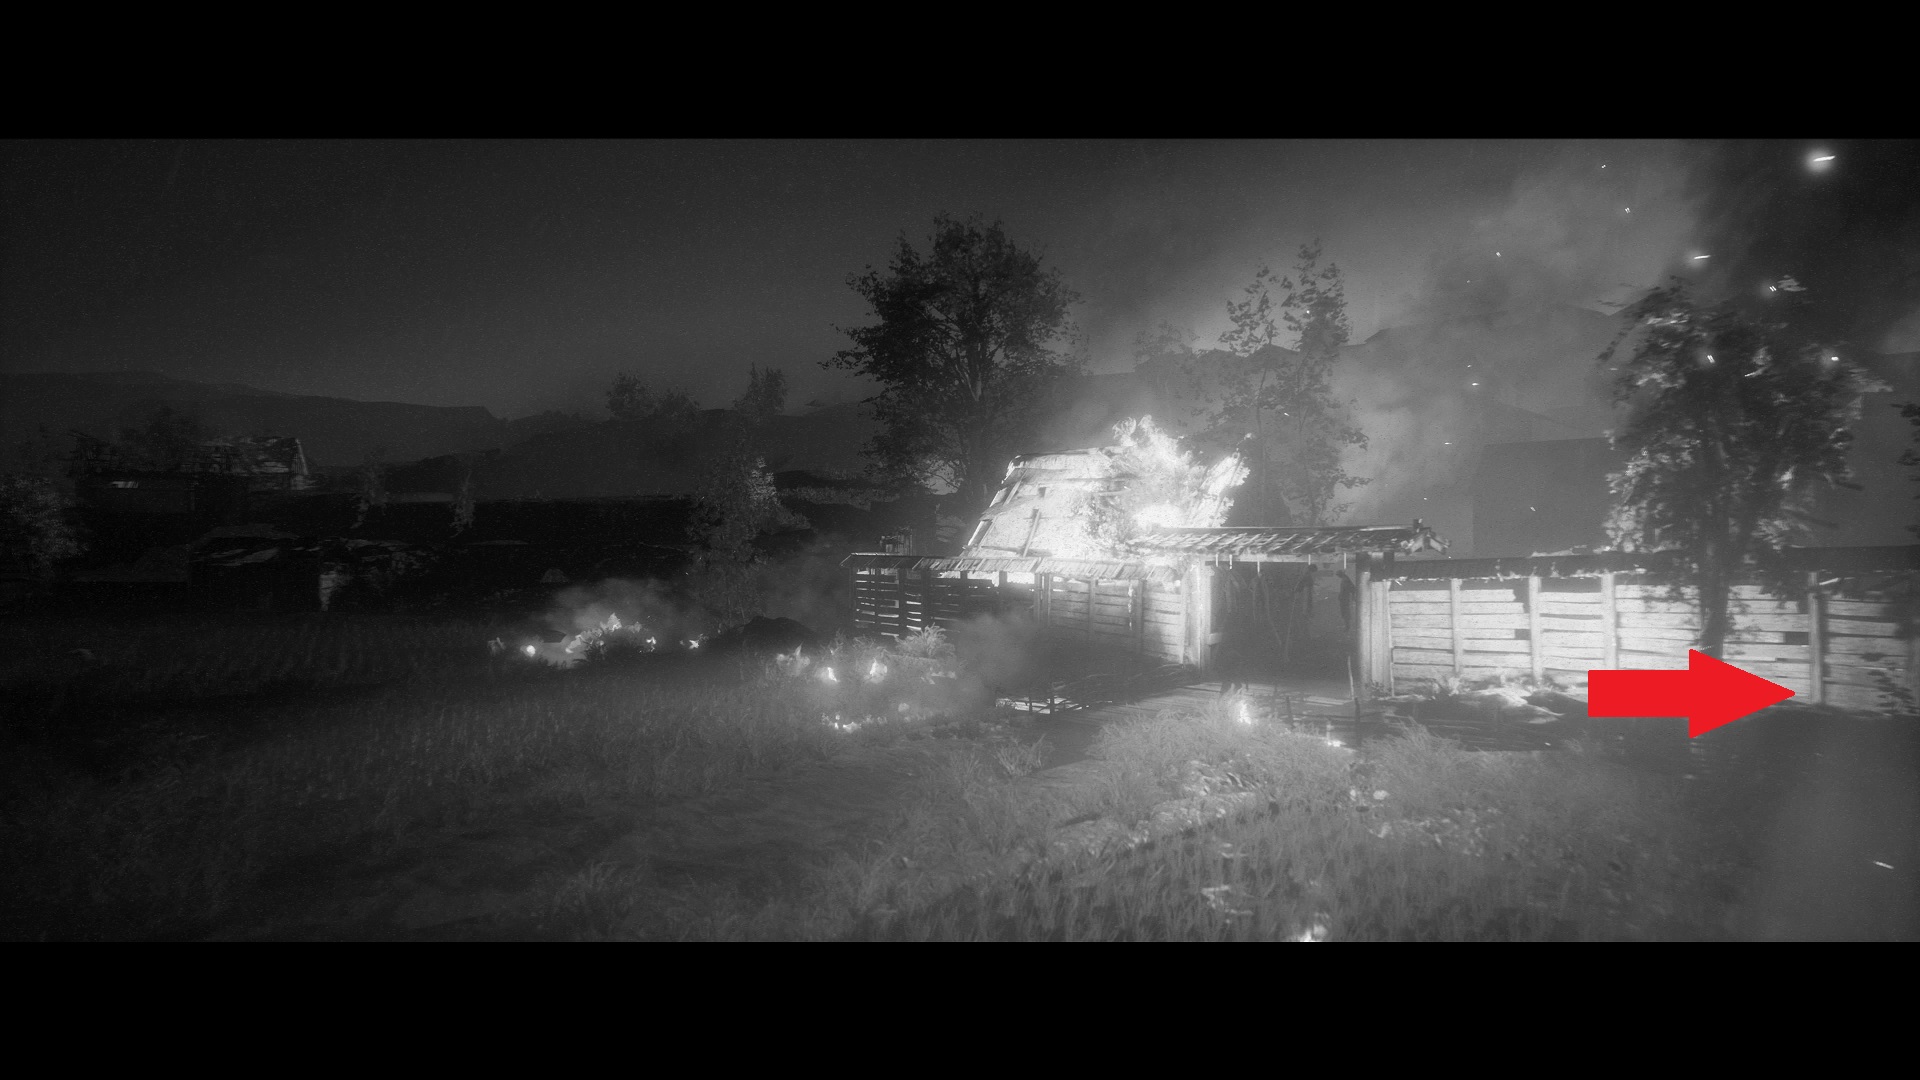
Ema — When you save the villagers, follow the path to the end and move the flaming cart. Go right, and stay left in the next area with the house with the burning roof. There is a pile of wheat on the left side with this on it.
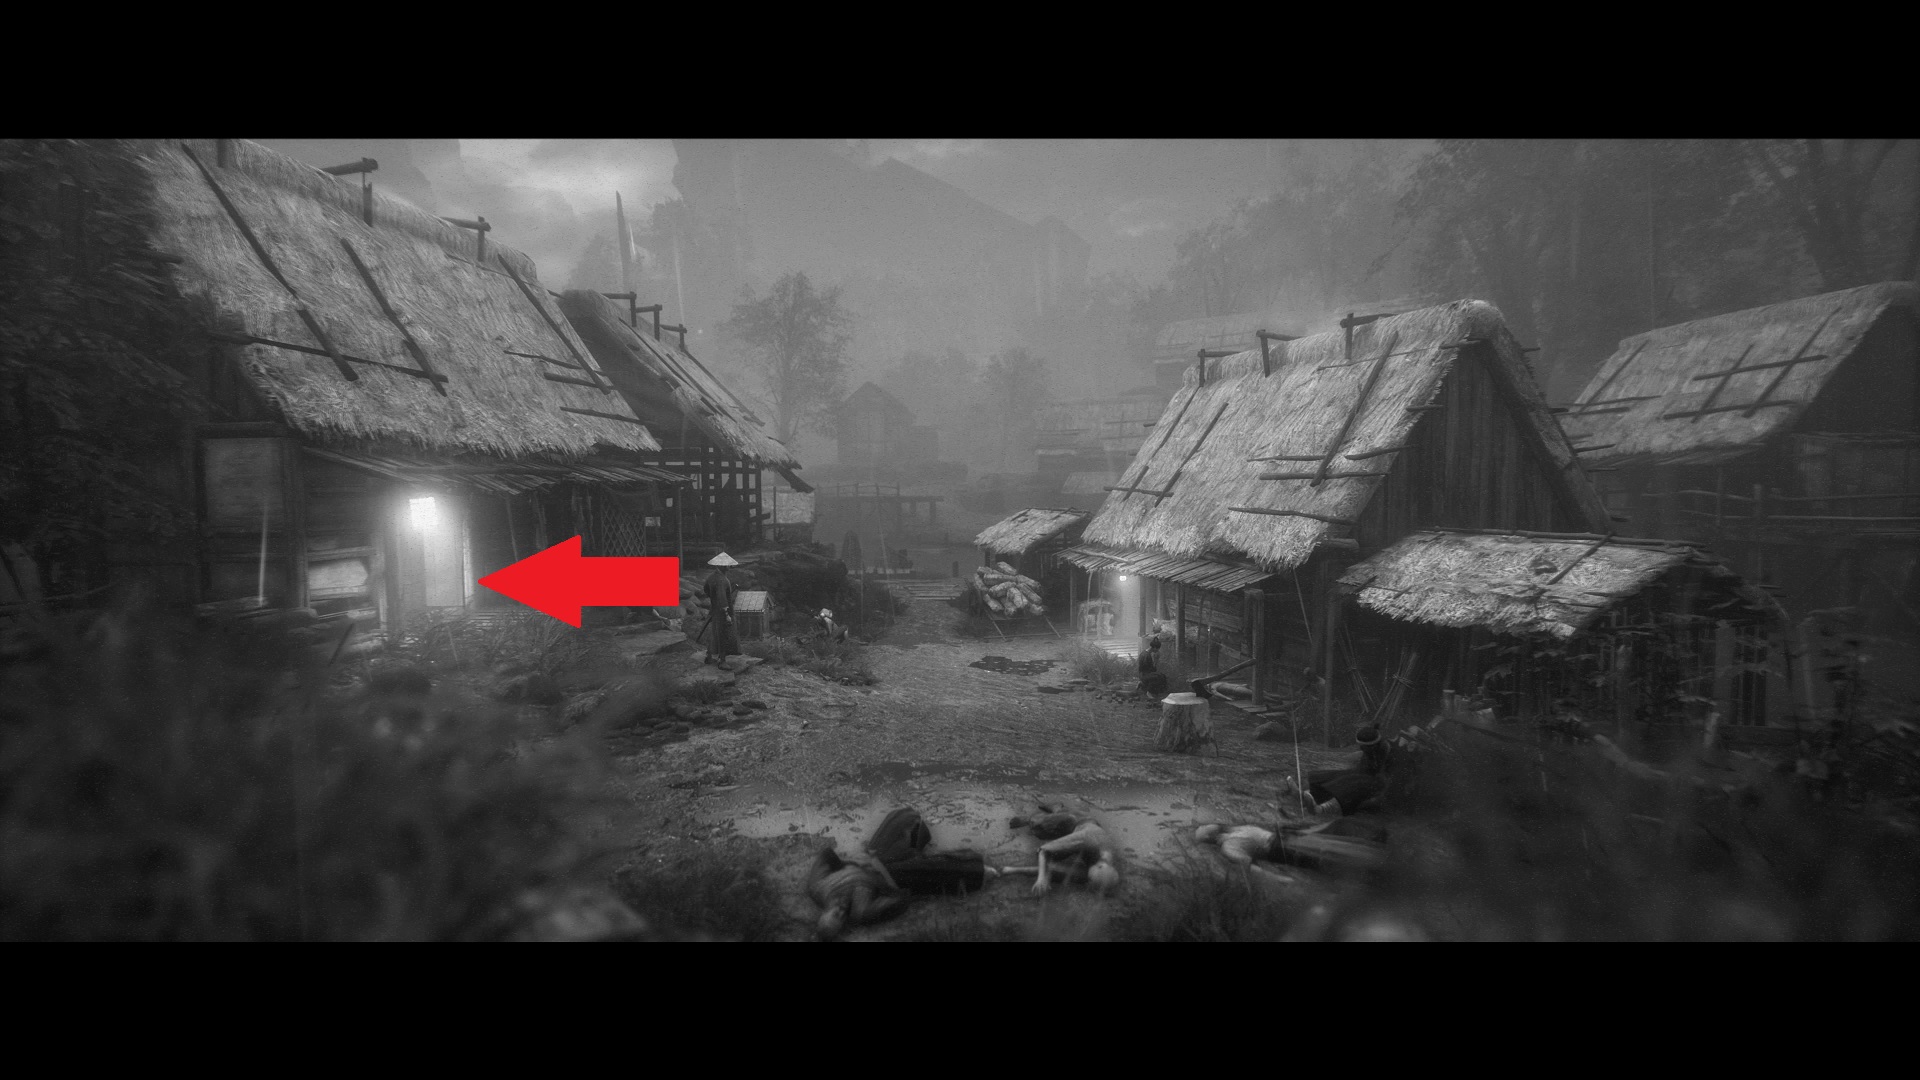
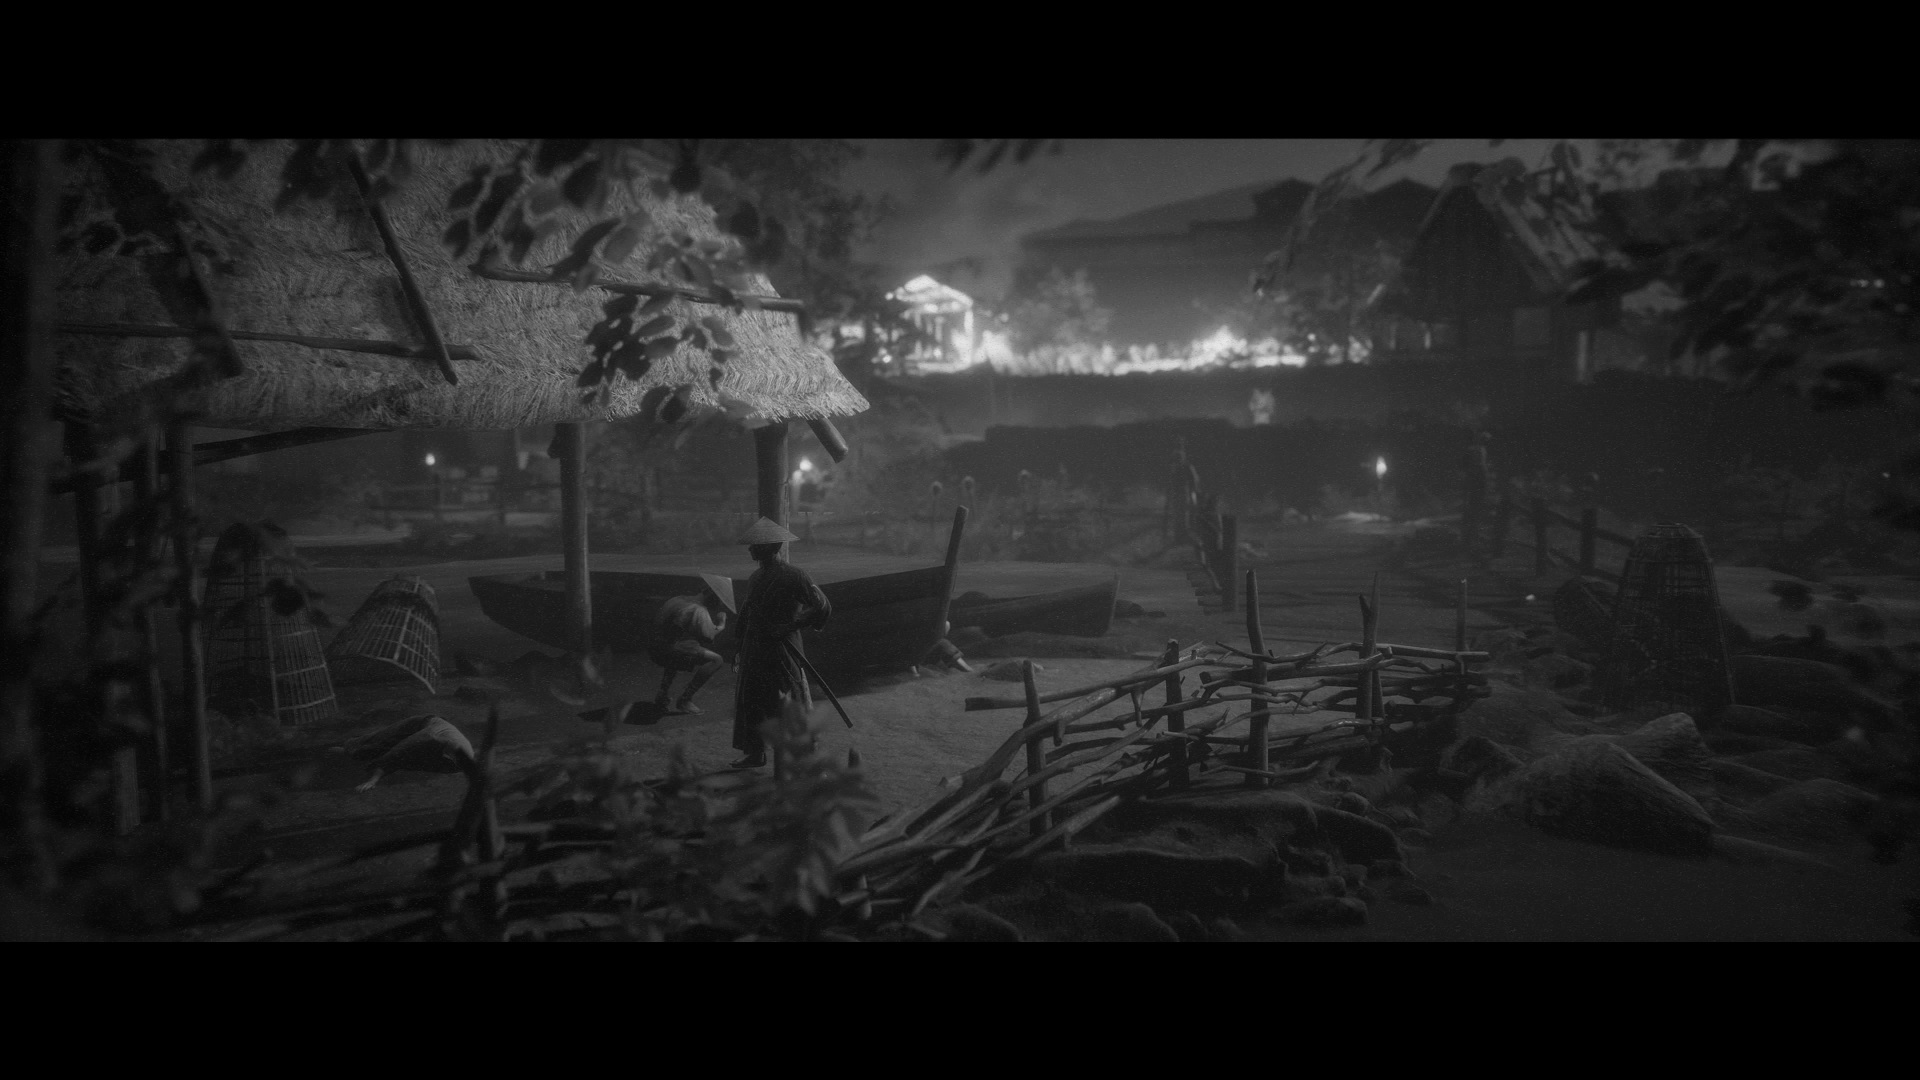
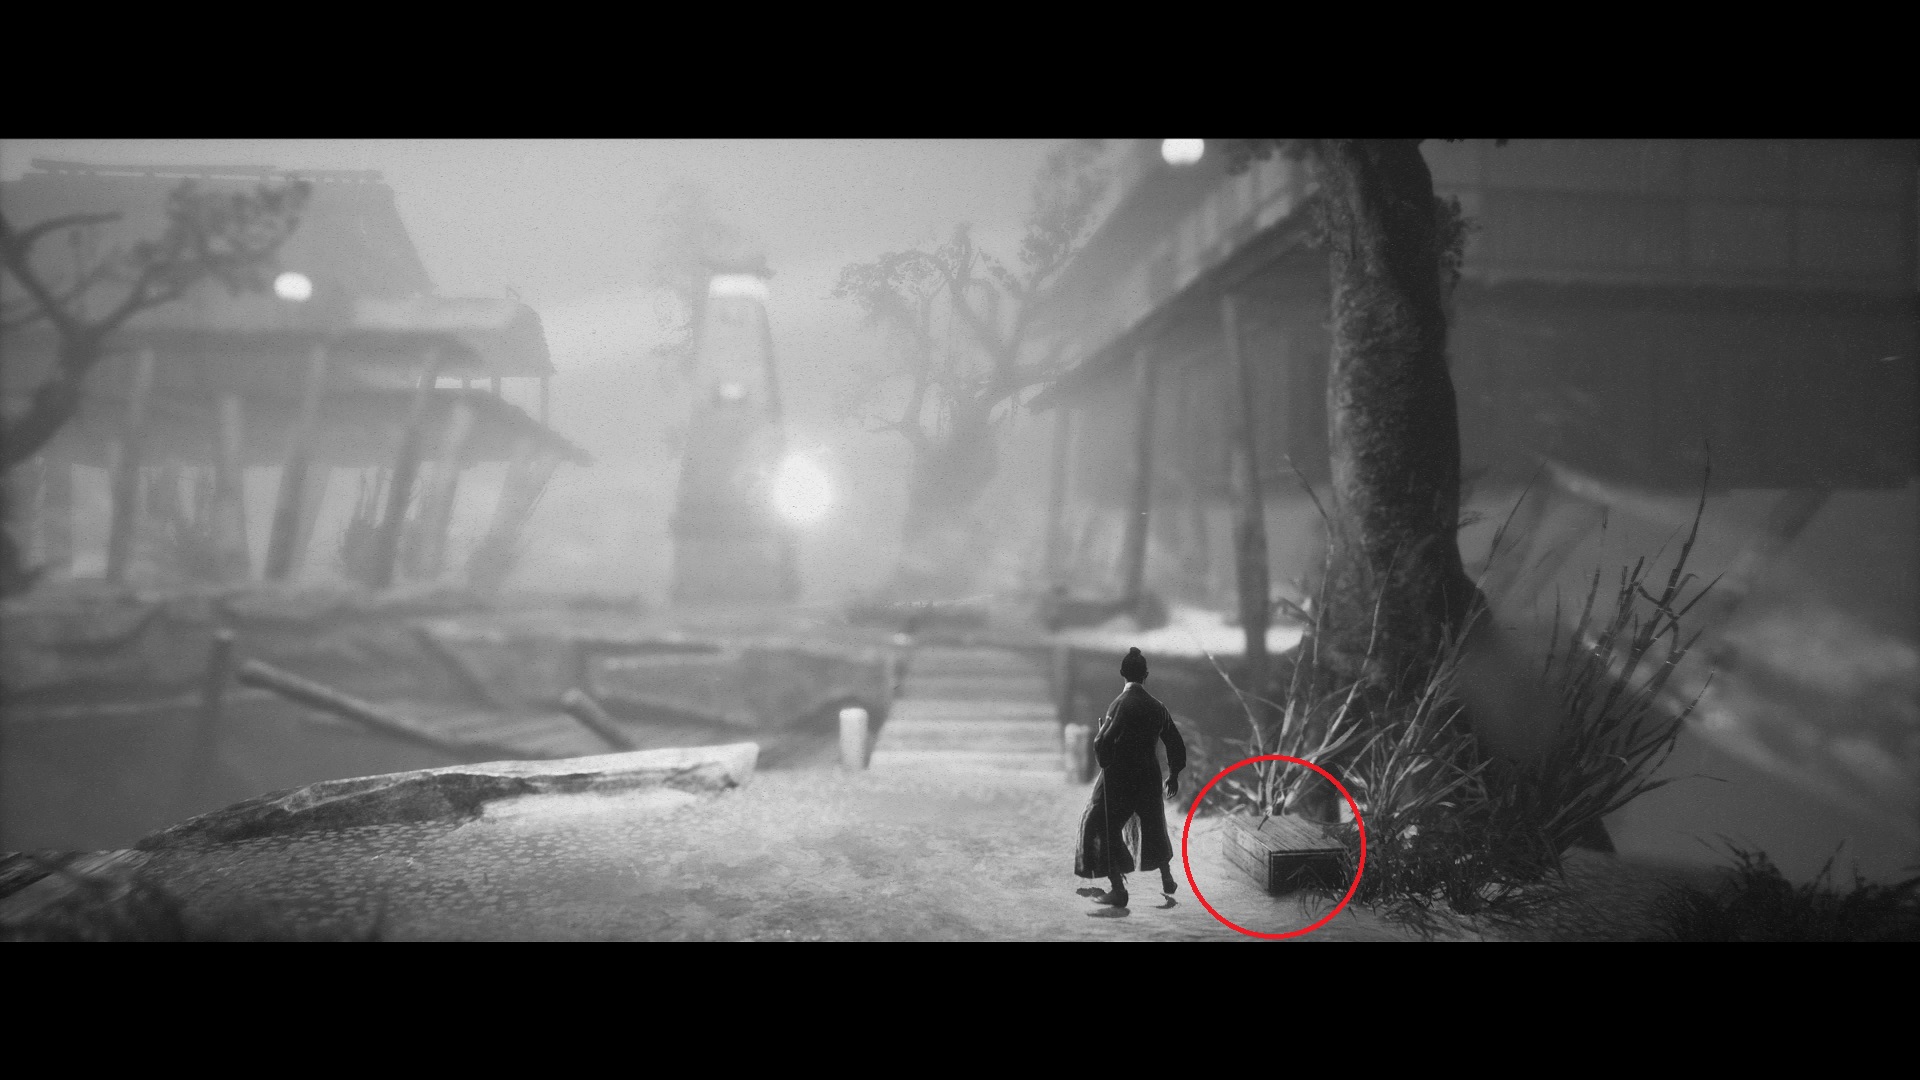
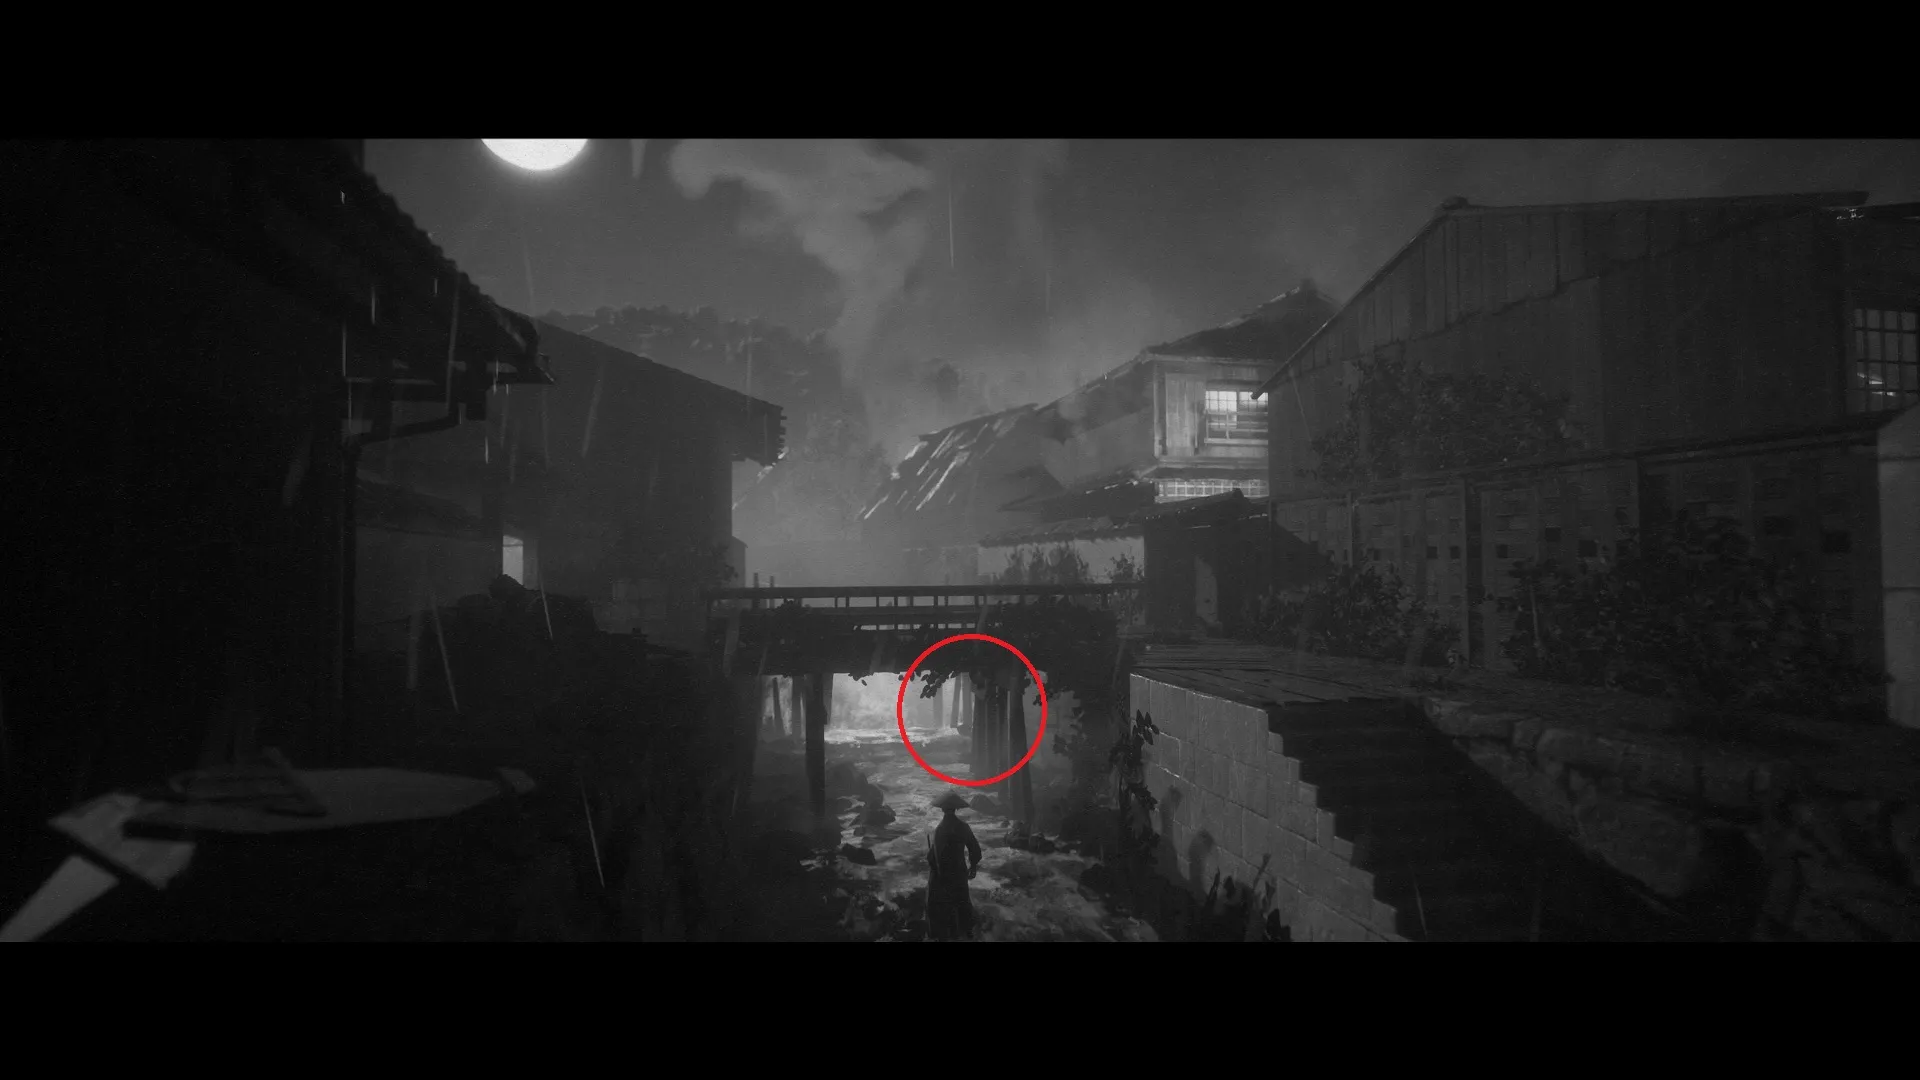
Lost Love Letter — Eventually, you’ll drop down into the docks area, signaled by a flaming cart slamming into a hut. Cross the bridge and stay left instead of crossing the planks over the boats. Go past the shrine and into the house on the left for this one on a table.
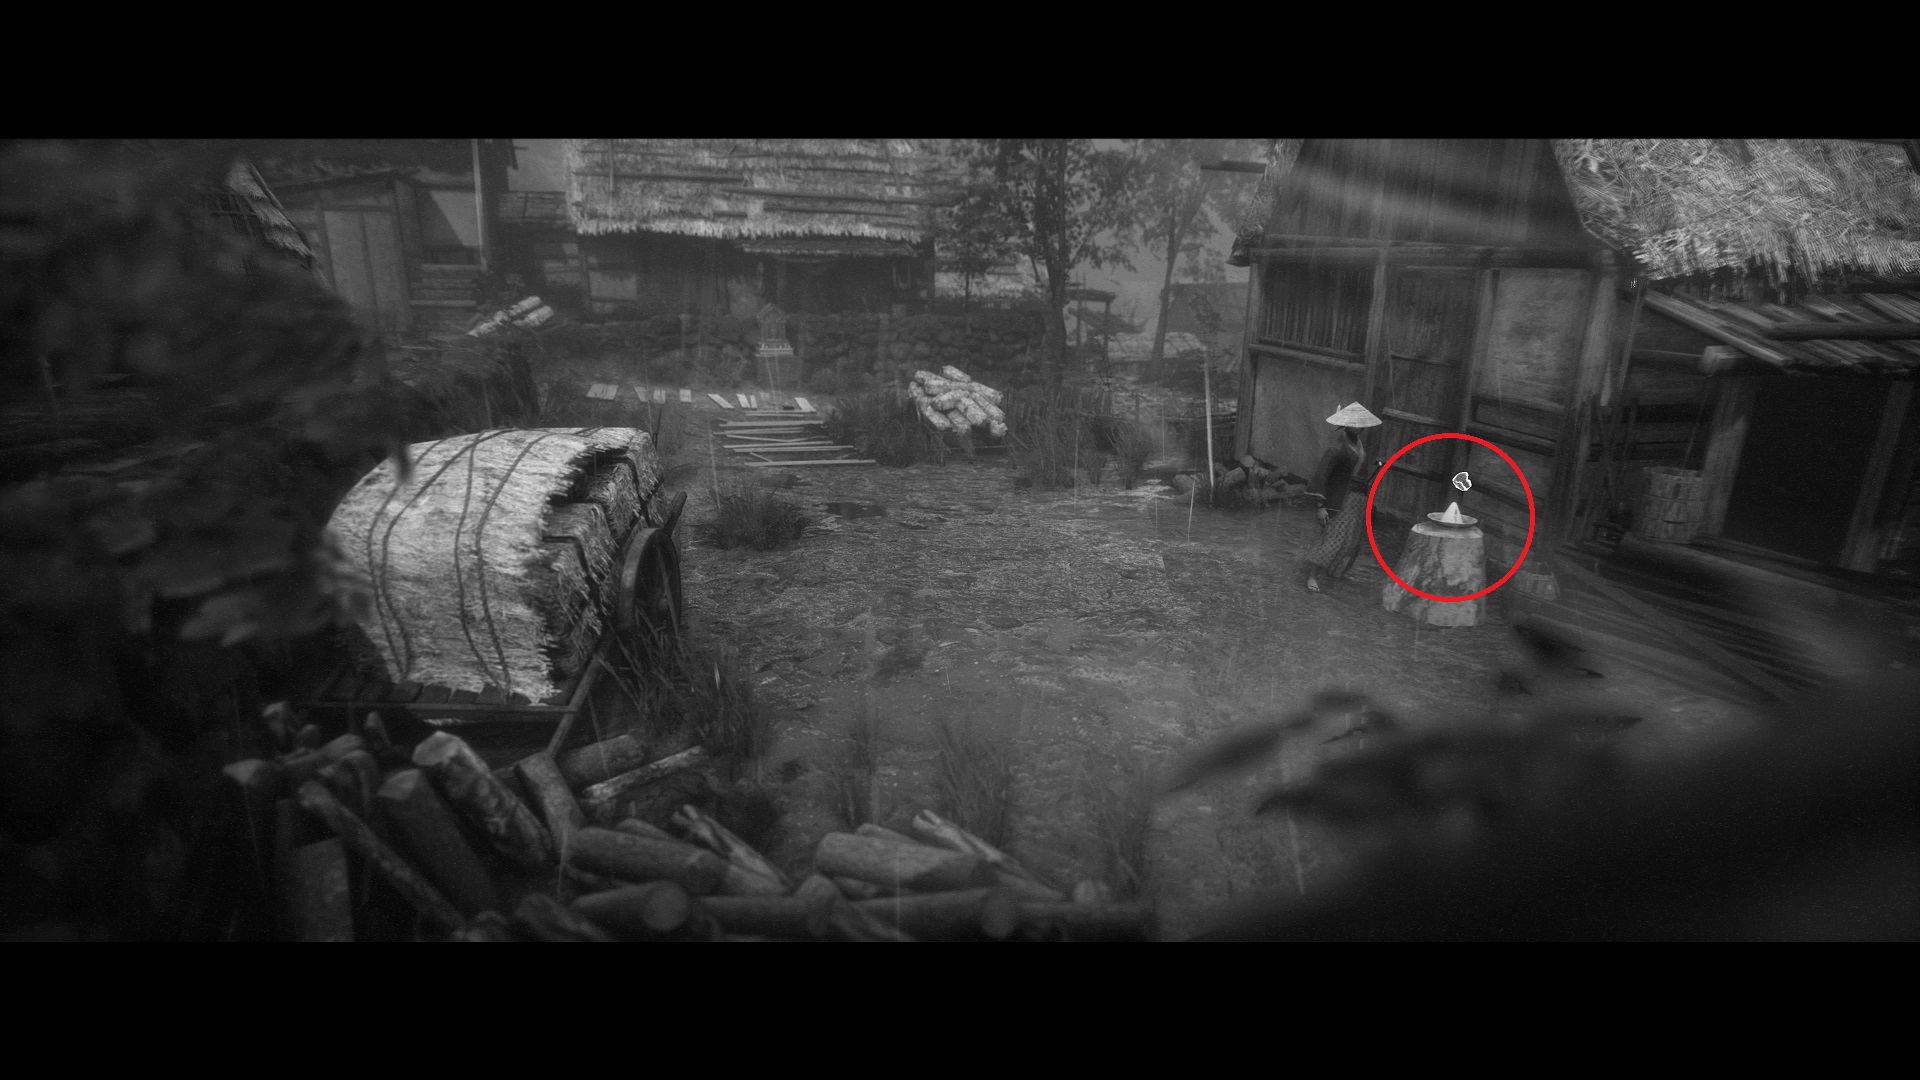
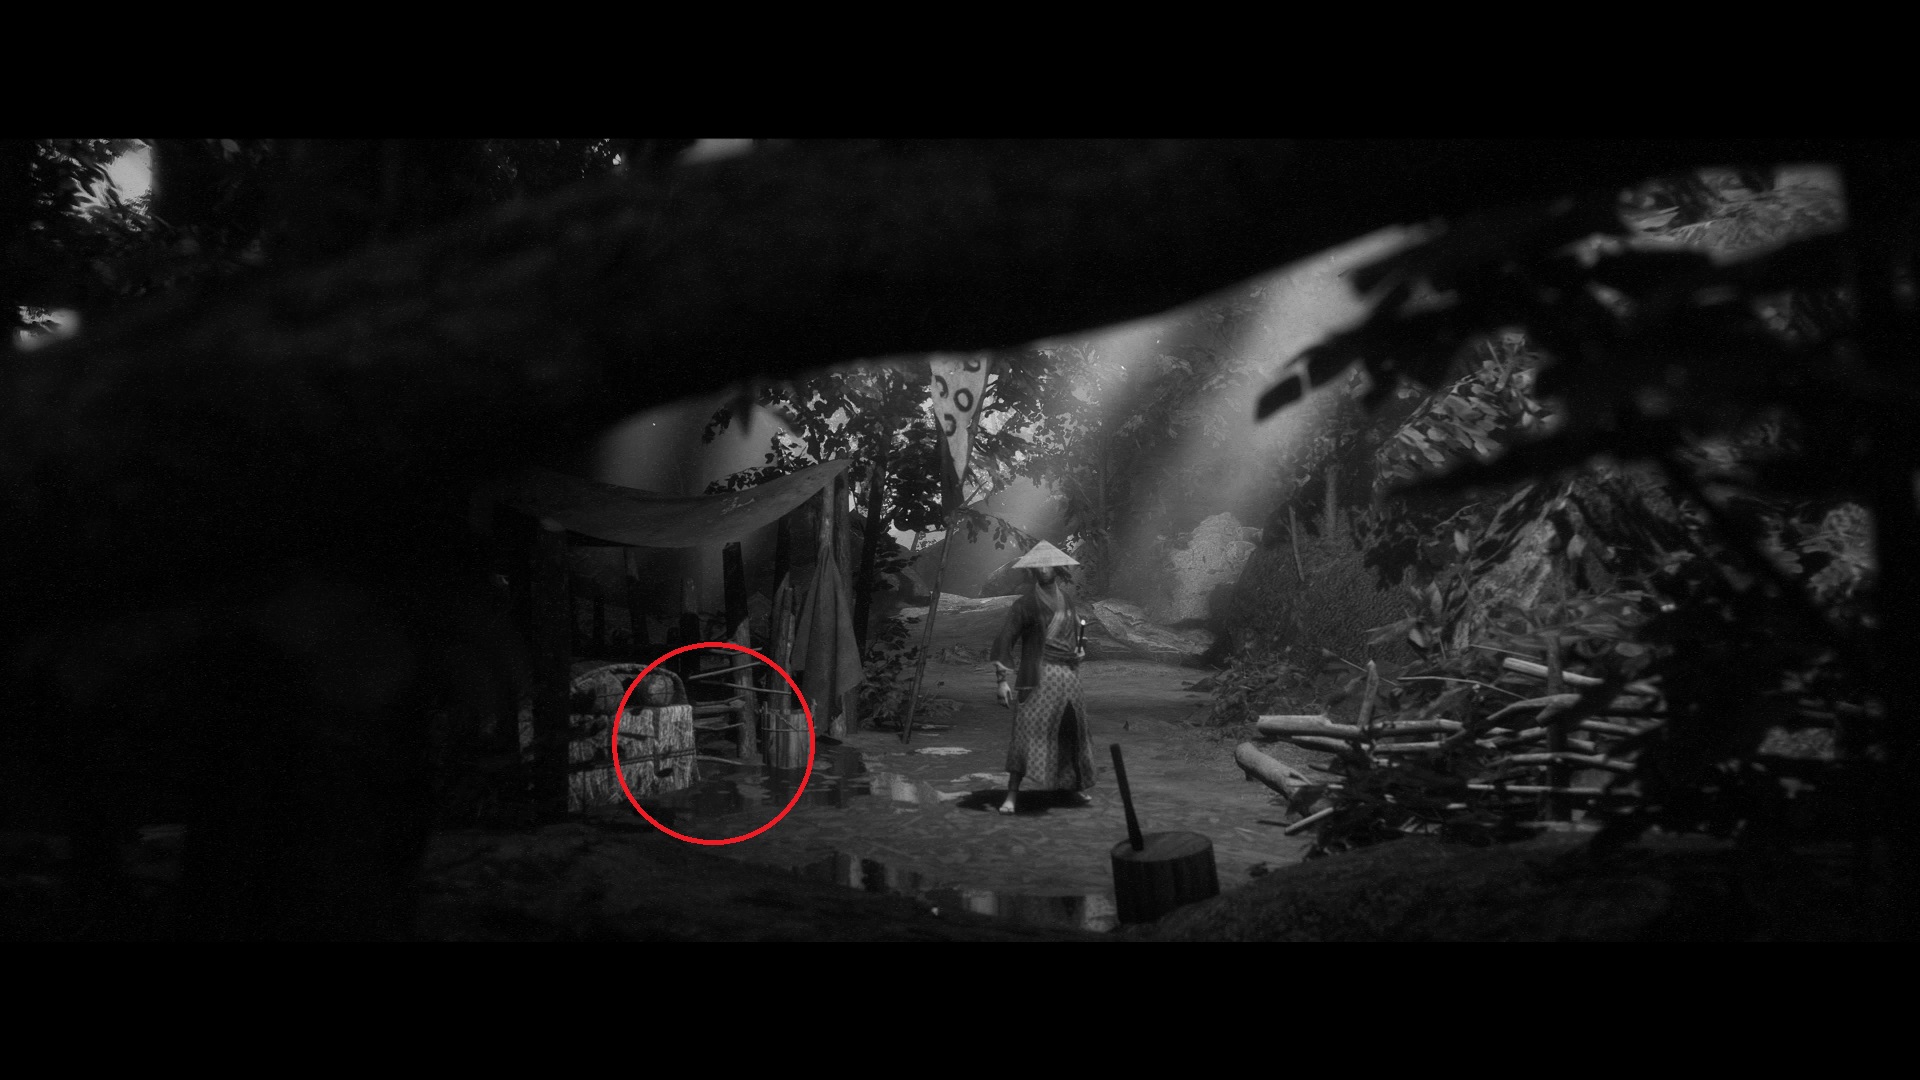
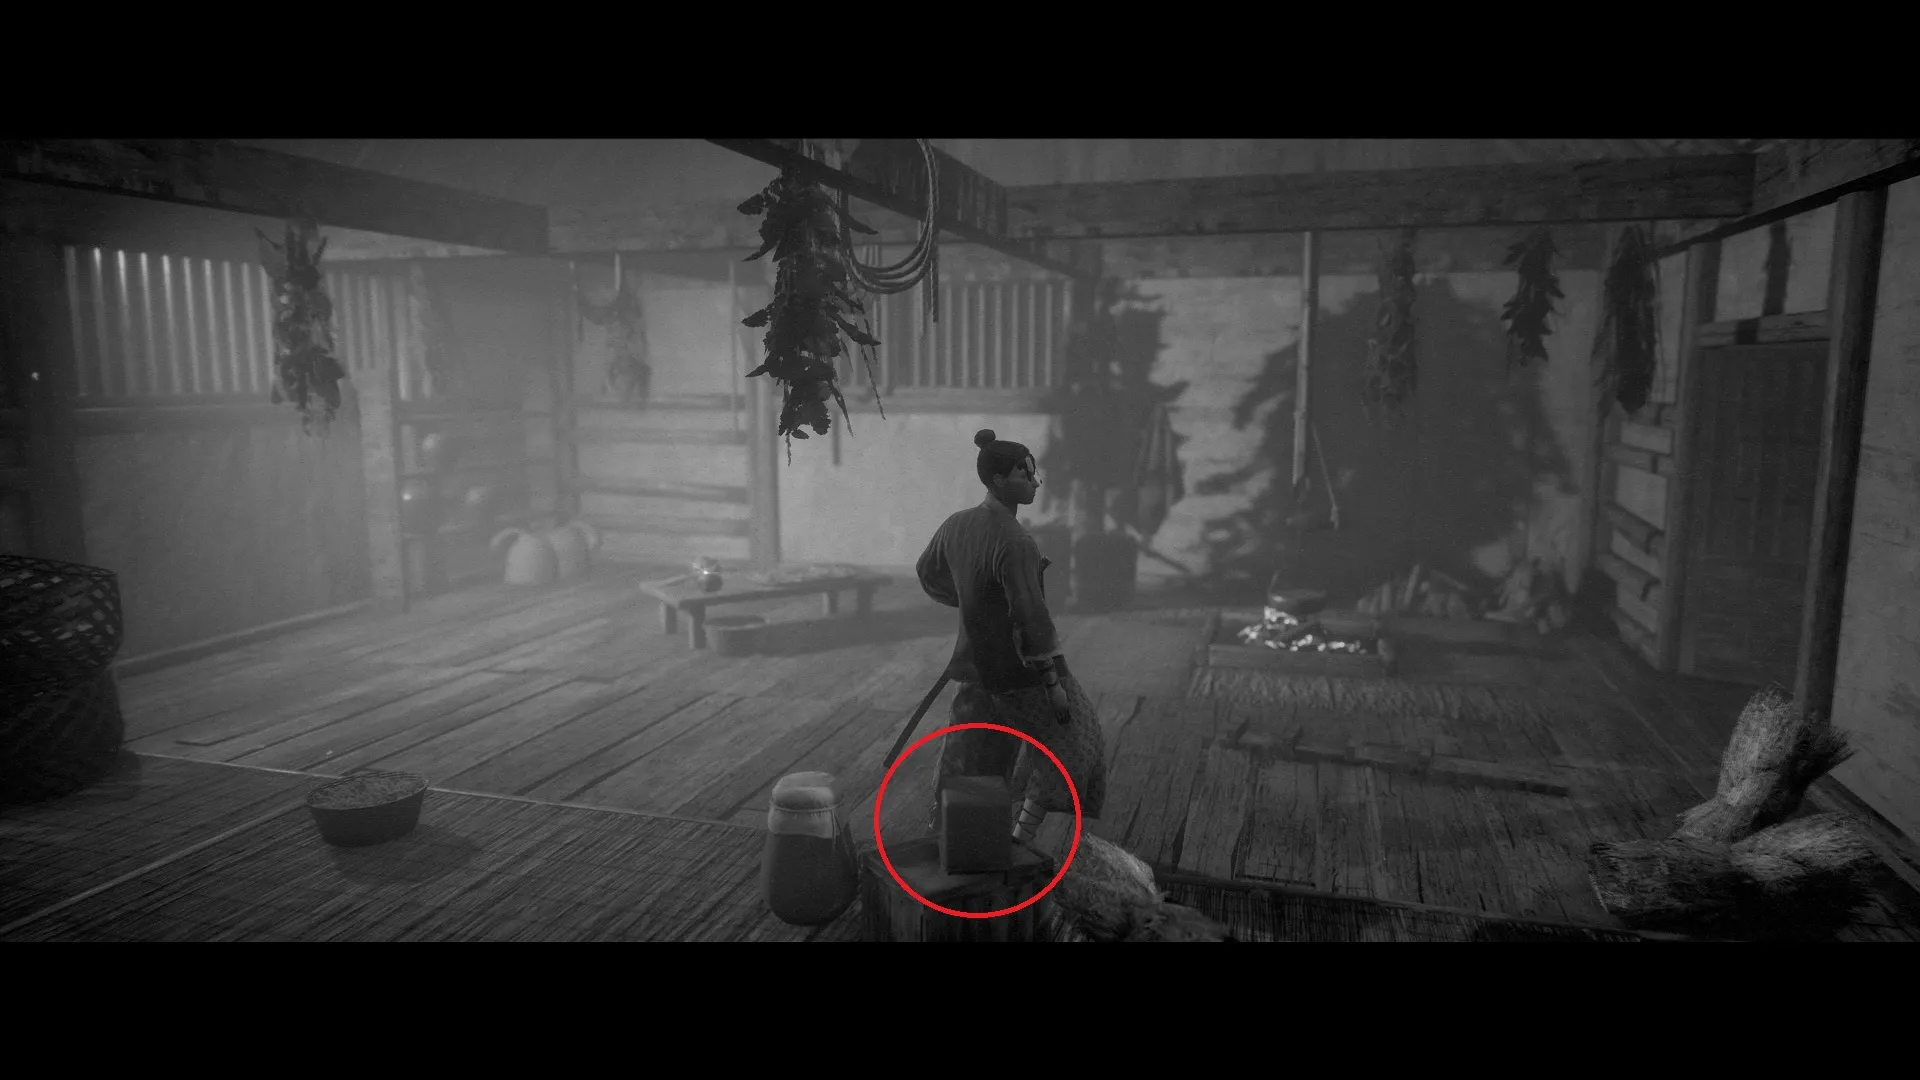
Mori Shio — After picking up the first Fury collectible for the double-sided block and parry, go into the next area and take the path leading down from the shrine. This will be on a tree stump outside the house on the right.
Chapter 3 Artifacts (10 Collectibles)
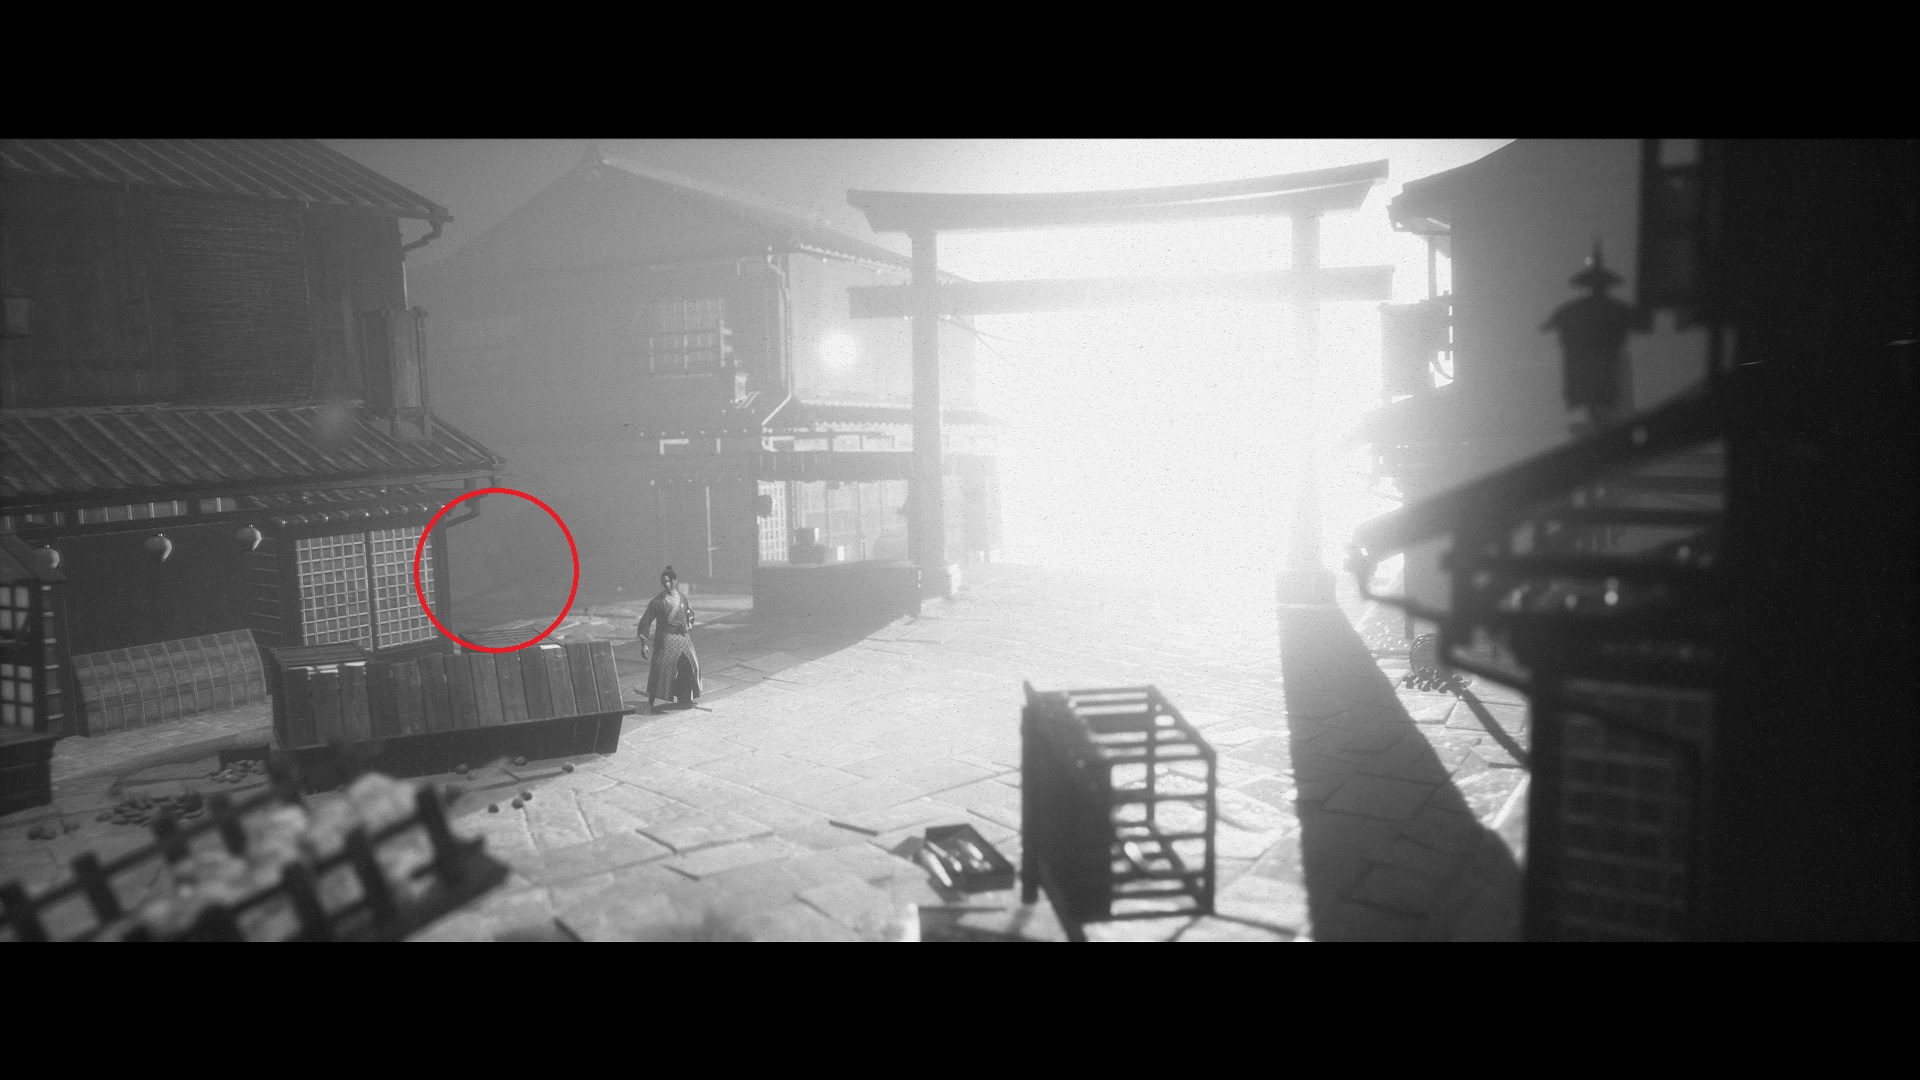
Swordsmith’s Hammer — At the start, go up the steps into the village. Continue straight and pass the fiery rubble in the street on the right (past the rickshaw on the right). You’ll see a section of building on the left that’s not on fire (between two that are). This one is leaning against the building. If you climb up, you’ve gone too far.
Dove — Continue through the next combat encounter, then down the stone stairs. Kill the bandits on the bridge. Cross it and go inside the dark second-story door to find this one on a crate near a shrine.
Magatama Bead — When you leave the wheat barn, go through the area where you take cover from arrows. The path will fork straight and left by a torch. Go left and kill the bandits. Go toward the burning house for this one to the right of the crouched, crying man.
Fujin Print — Drop down from there, and go left. Then go down (towards the screen) at the first torch, where the bodies are tied to poles. You’ll meet an NPC at the end of the path, and this one is on the ground.
Fishing Pole — Continue and descend the hill past the burning cart. At the bottom, go left past the shrine and through the gate. This one is on the right just inside the gate (there’s a woman waving a spear in this area).
Ugajin — After fighting the cavalry, go through the field toward the main gate. Just before the gate, go right down a hidden path in front of the wall for this one near the end.
Bronze Mirror — Go through the gate, and fight the bandits. Climb up, and go right through the burning building. As soon as you exit, inspect the crates to the left.
Inarizushi — Fight the spearman, and enter the house. Go all the way to the right for this one on a box with a light on it.
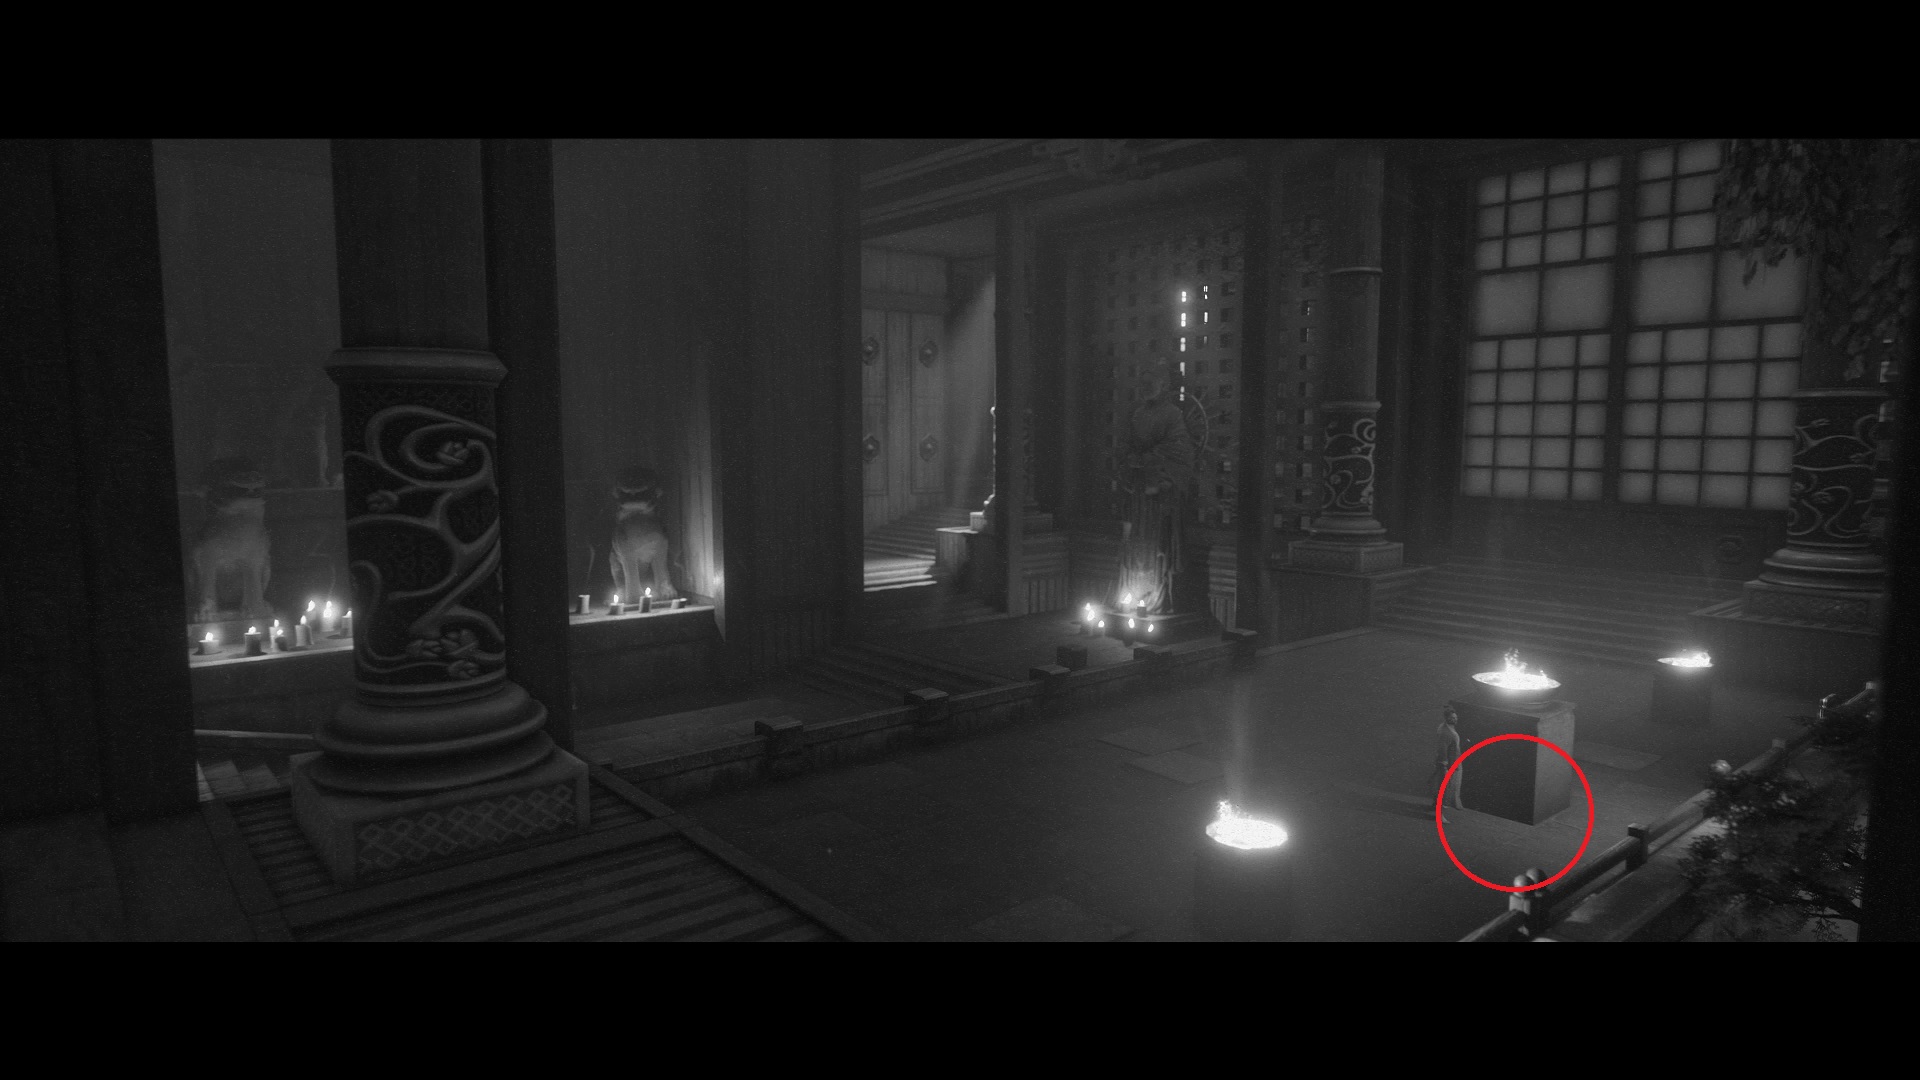
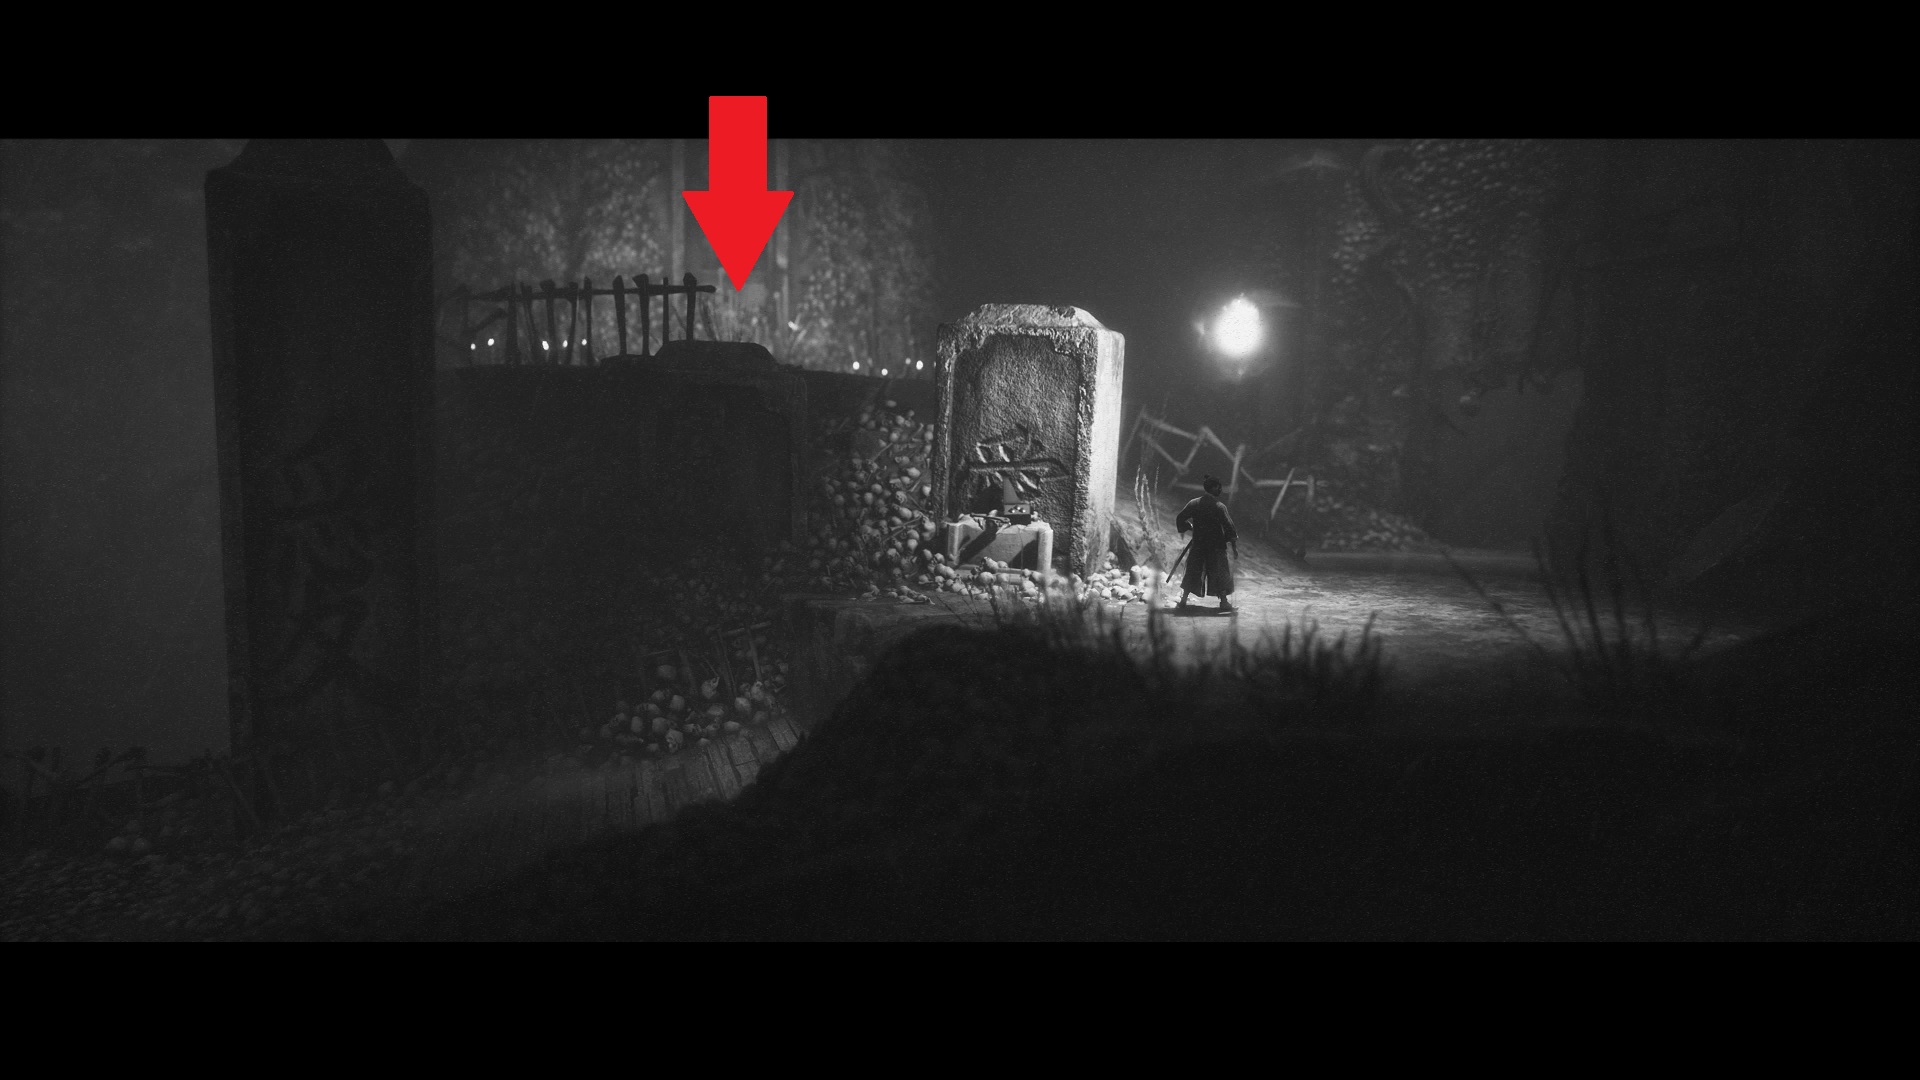
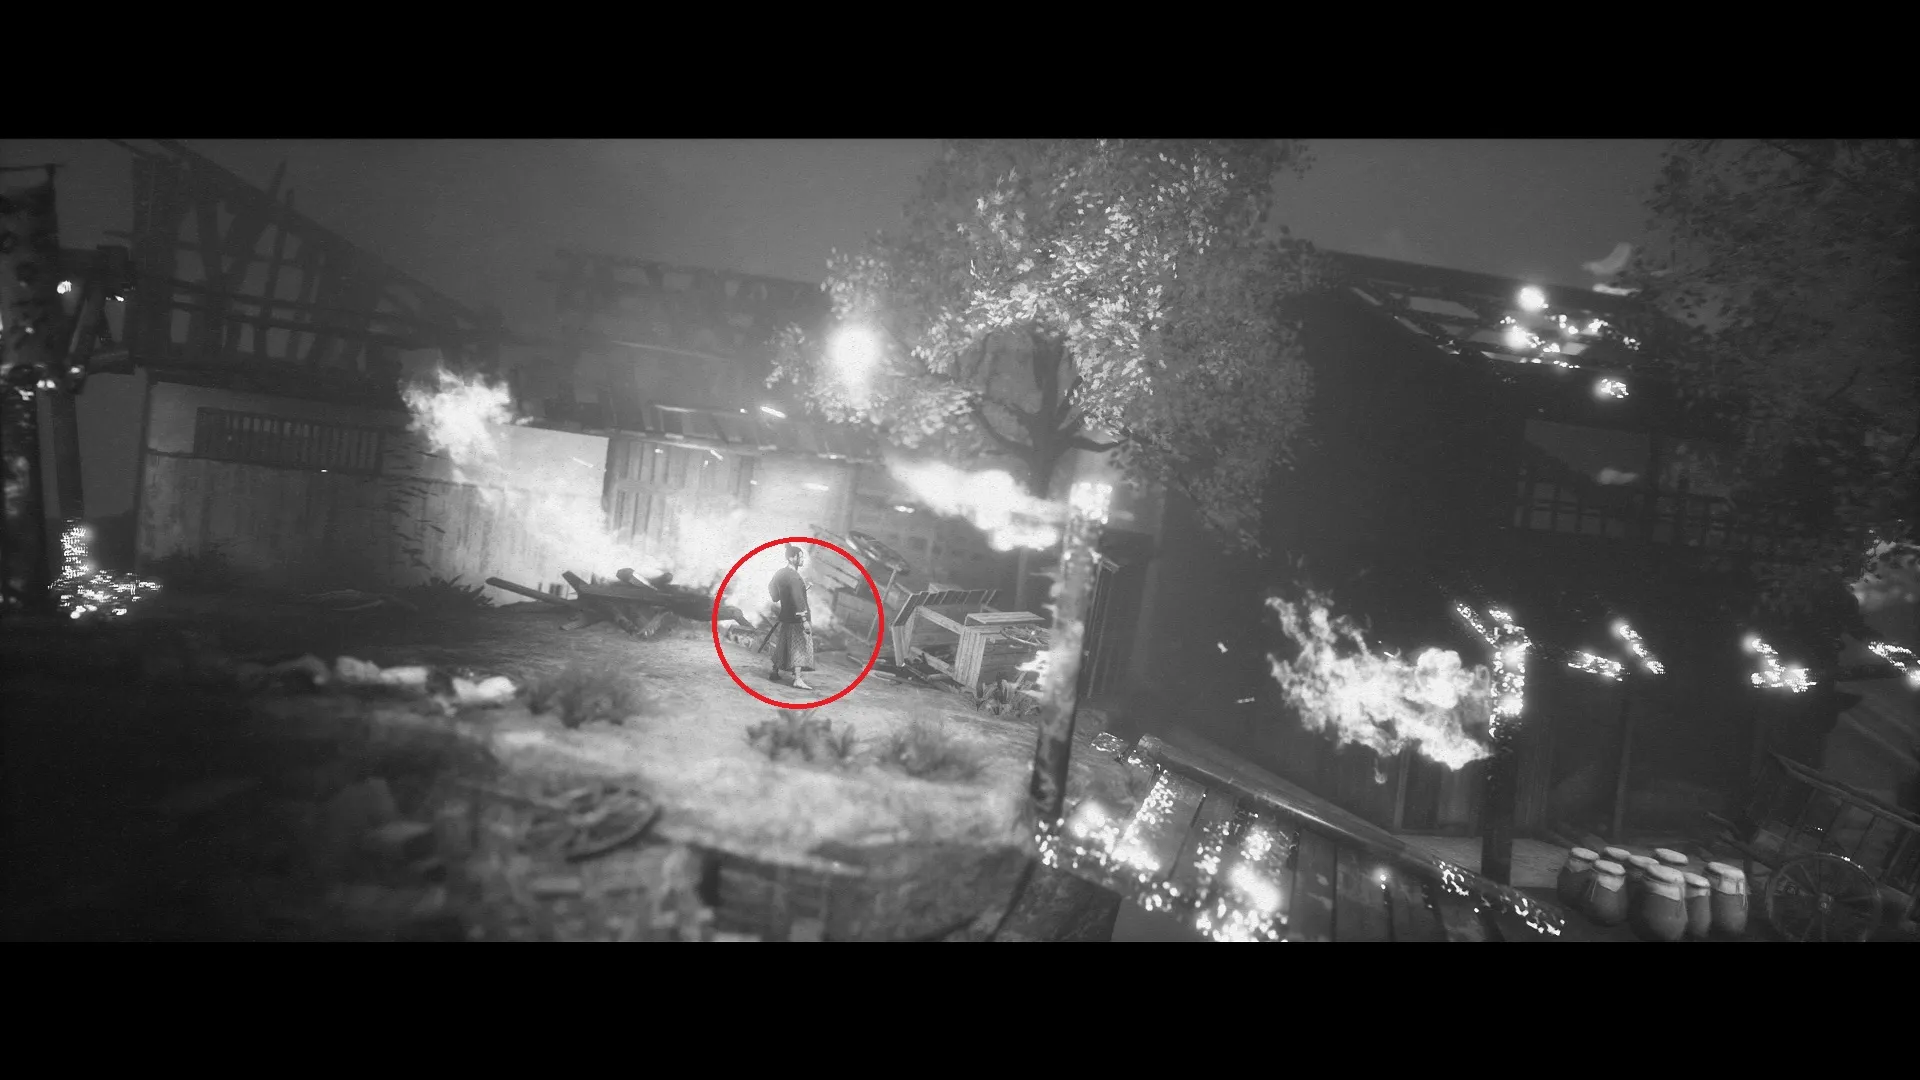
Moon Flask — After fighting the bandits on the rooftops, you’ll eventually ascend a long set of stairs with burning banners on the left with a shrine at the top. Go to the back of the area and right to find this one near the flaming rubble.
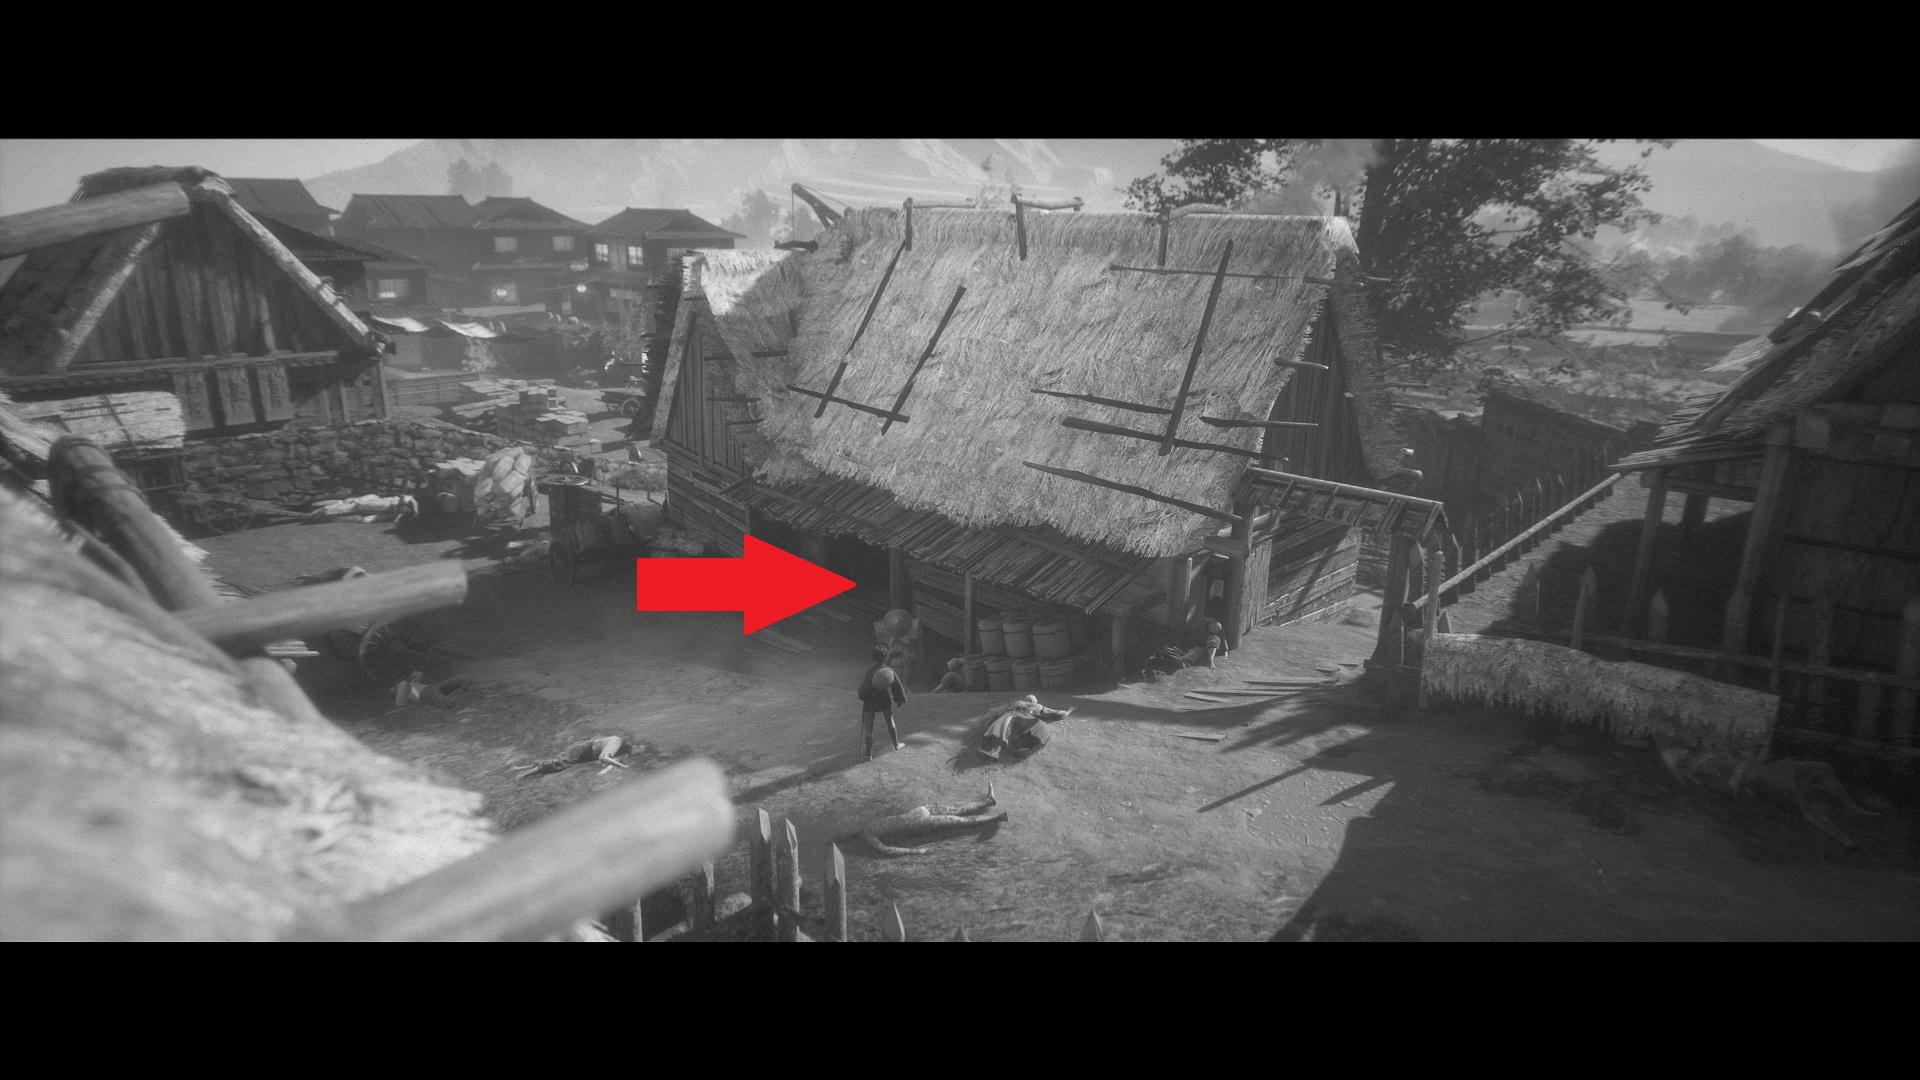
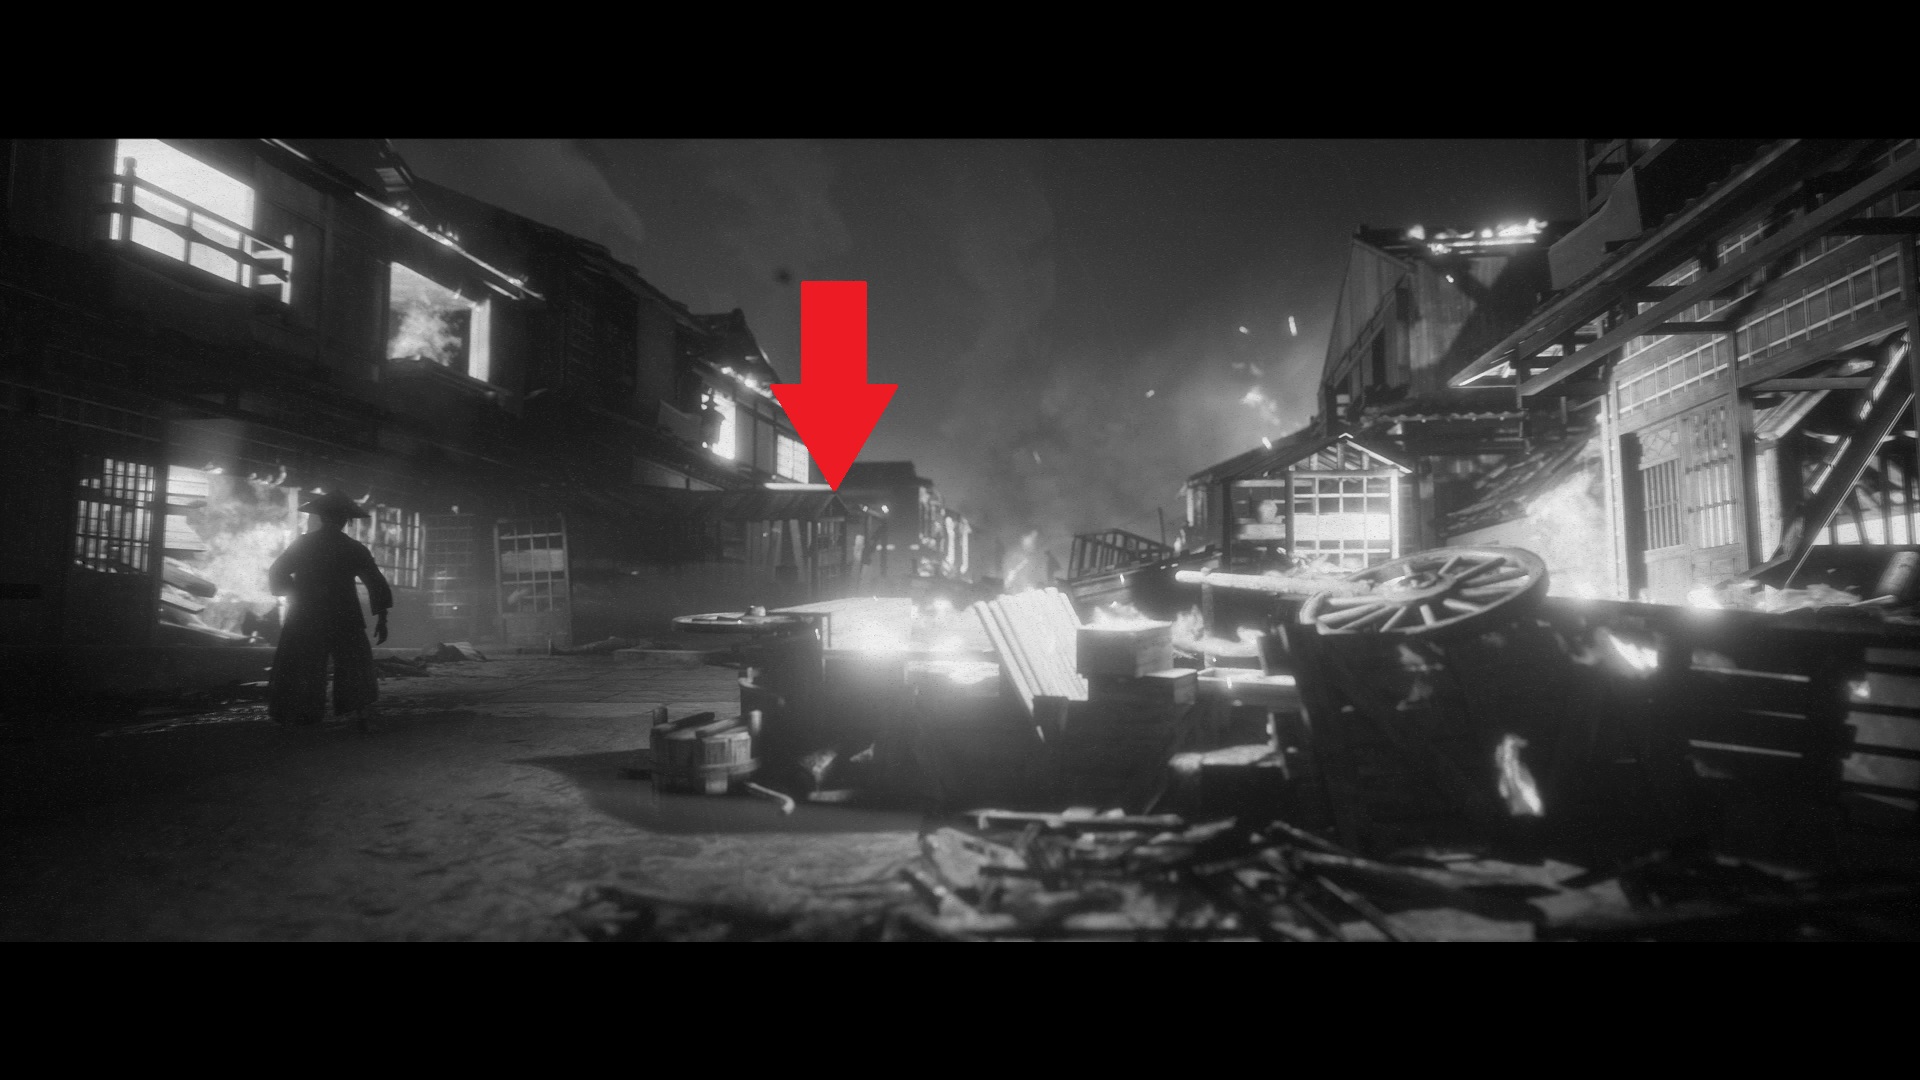
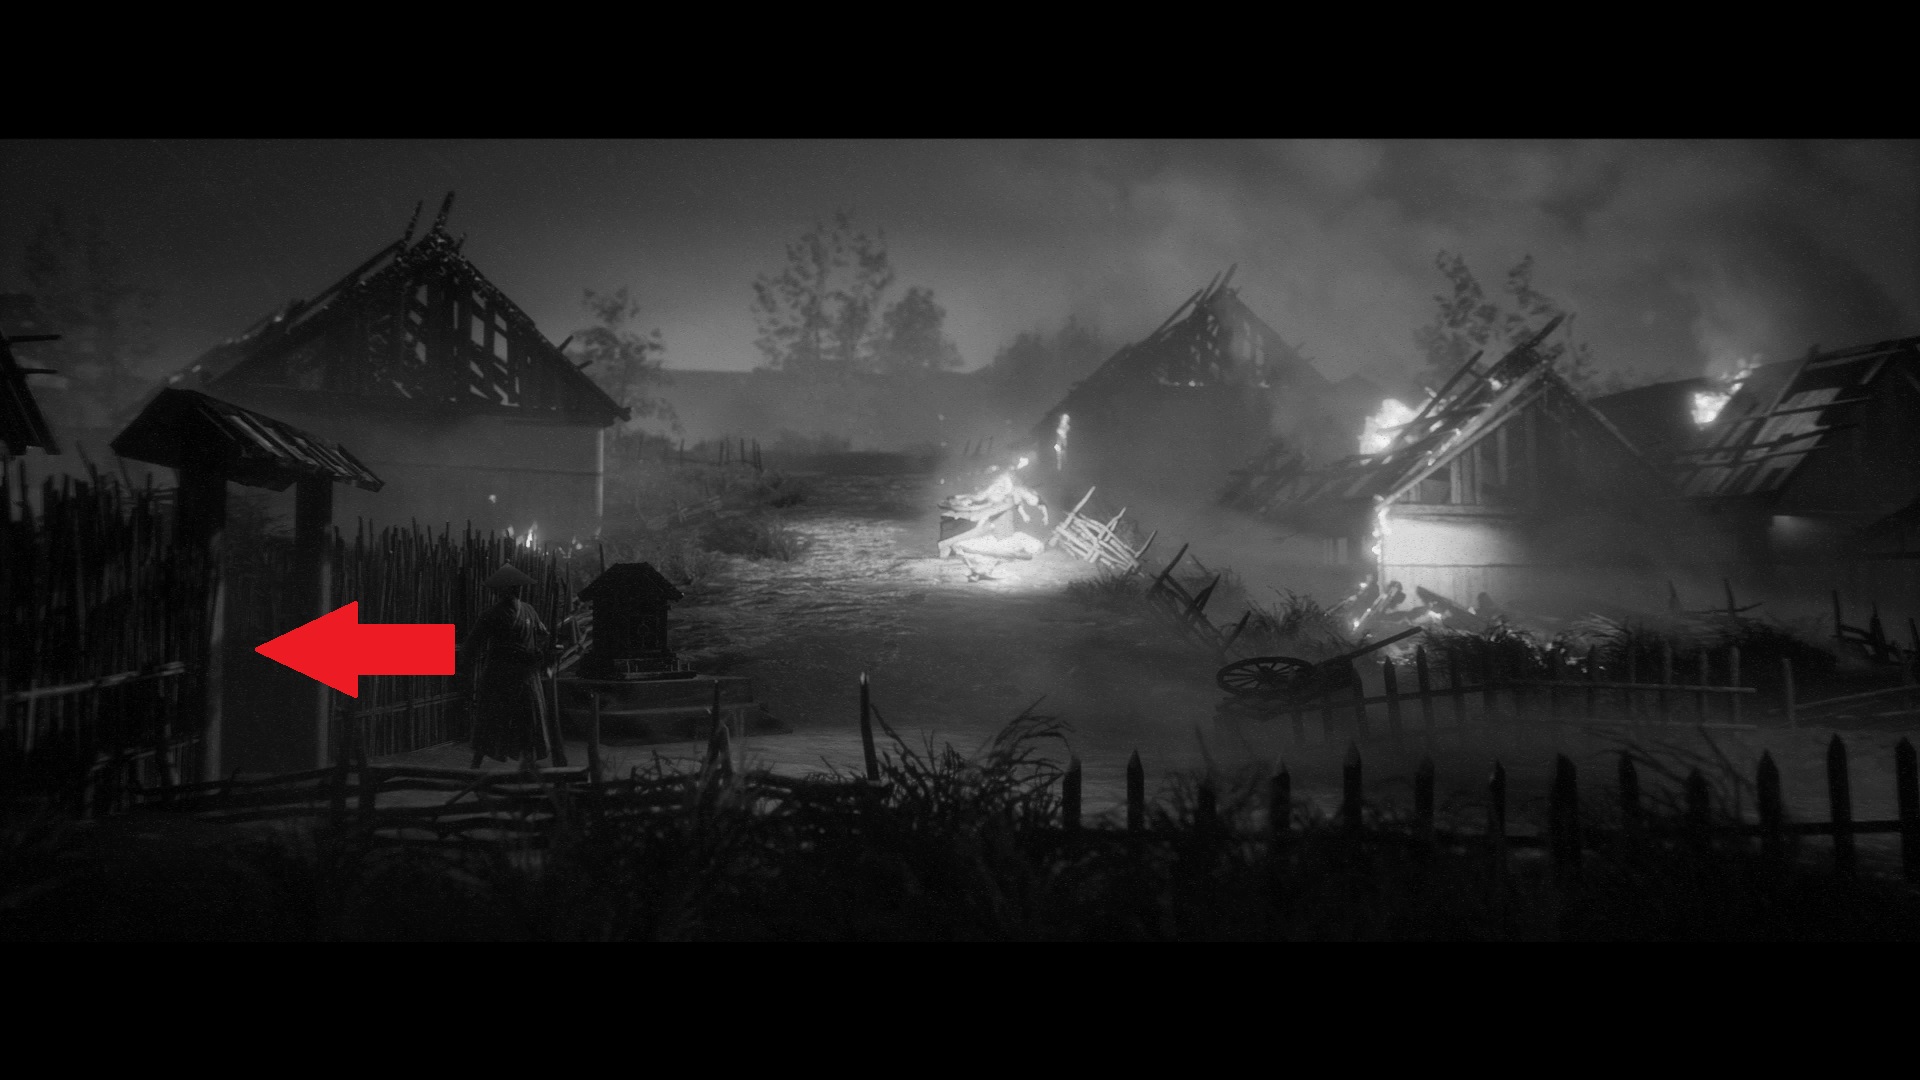
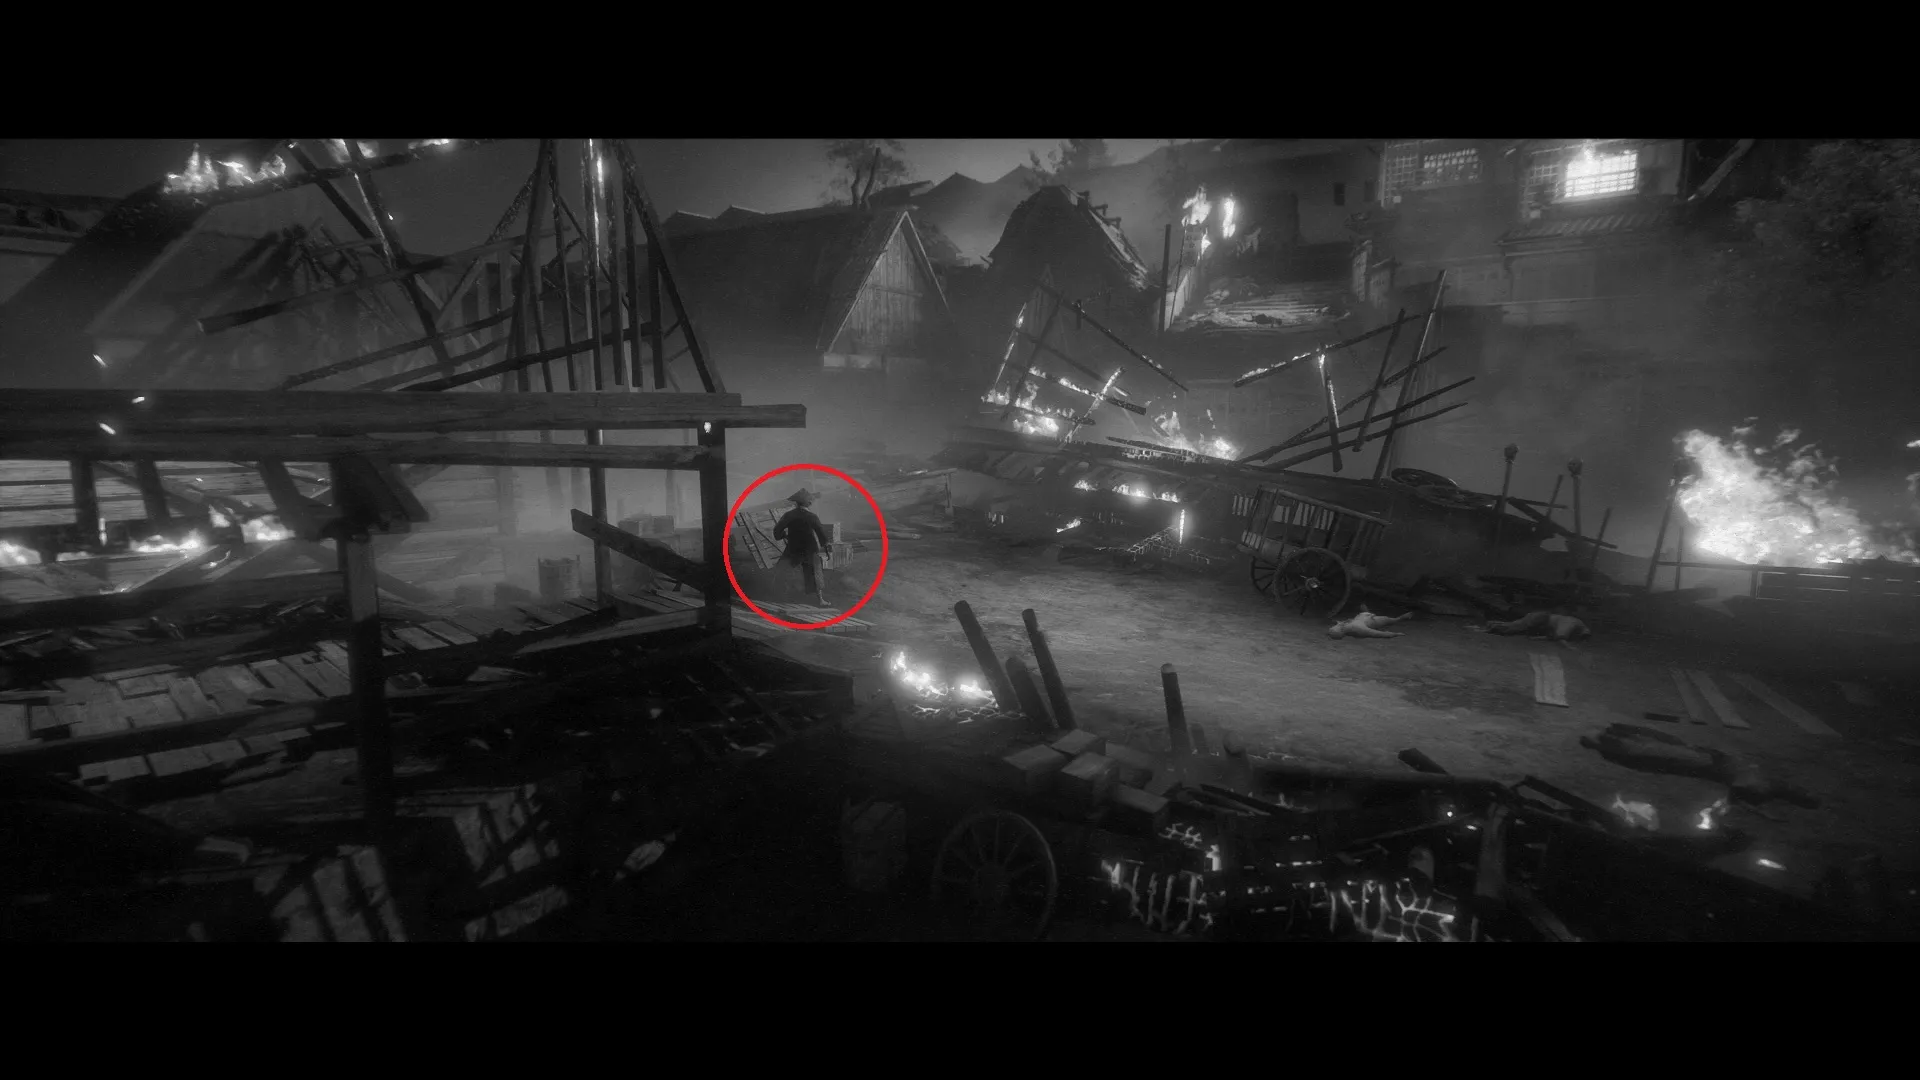
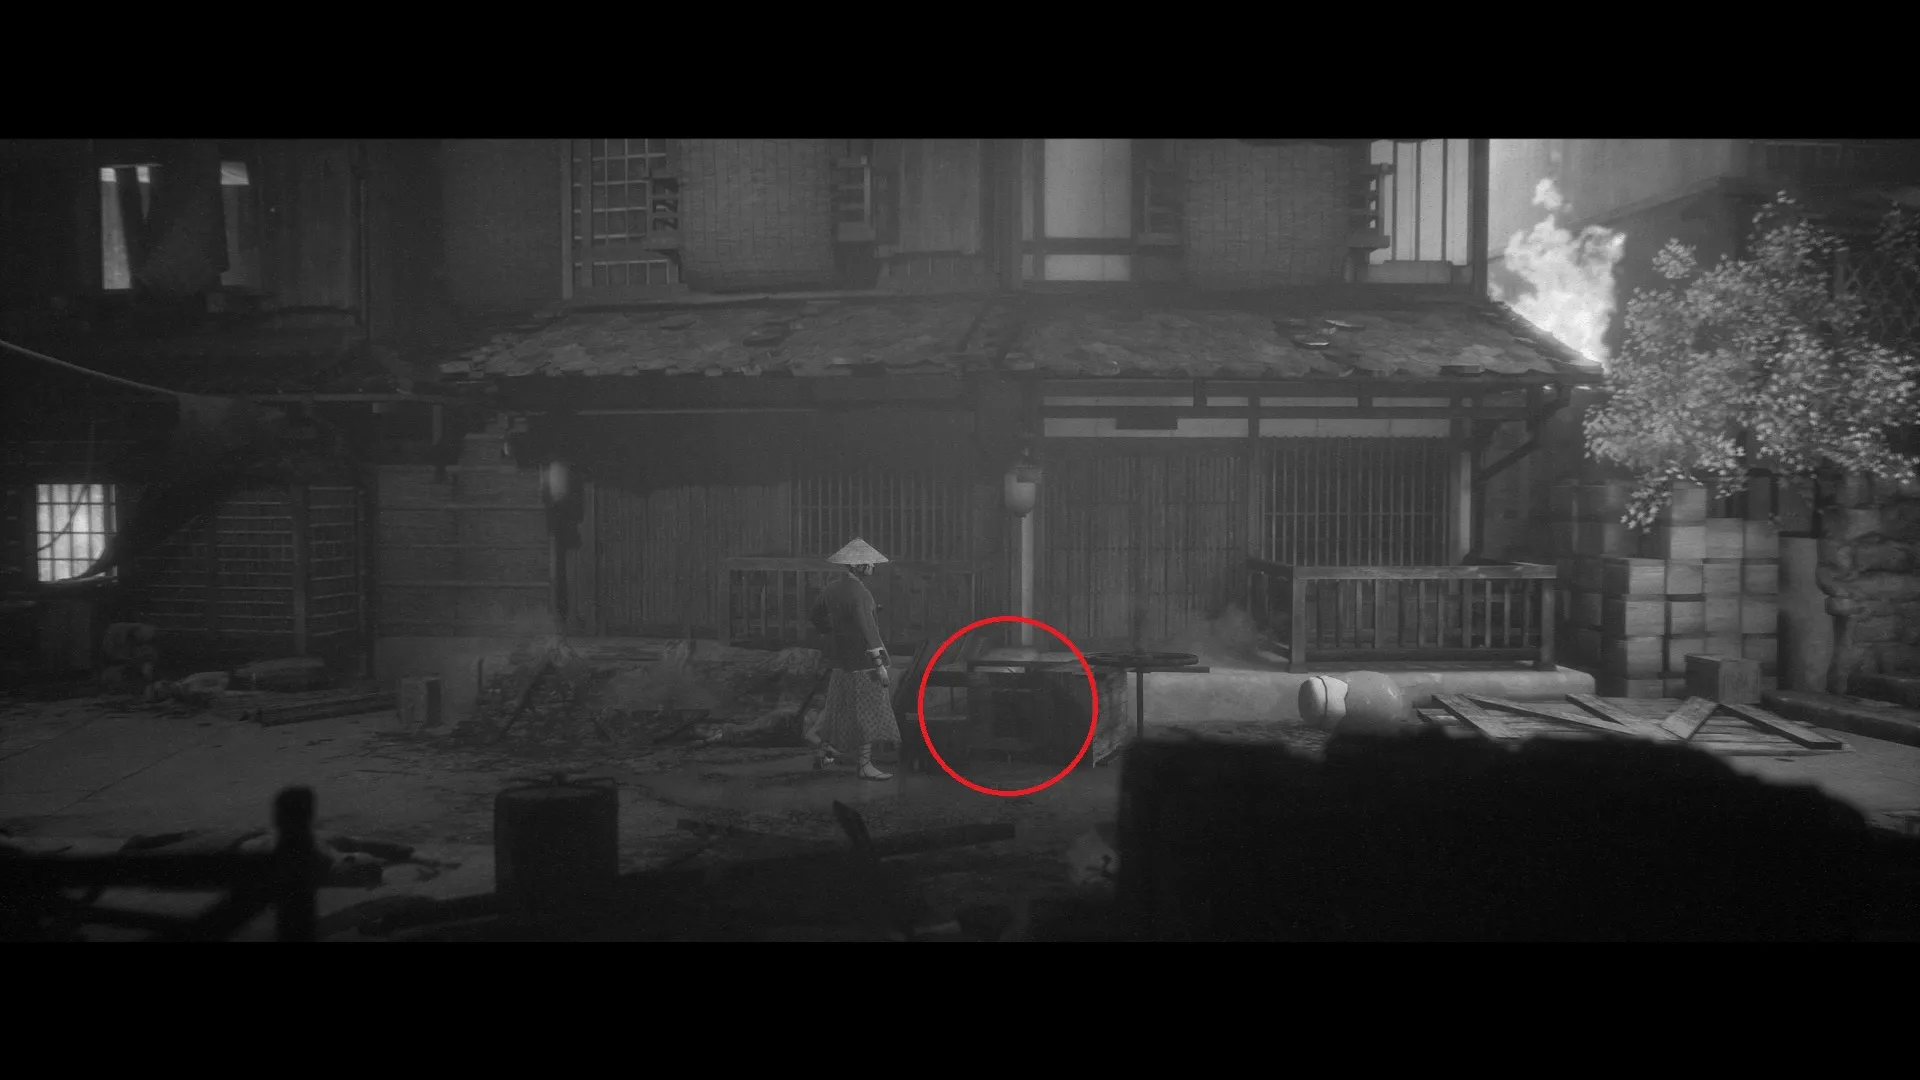
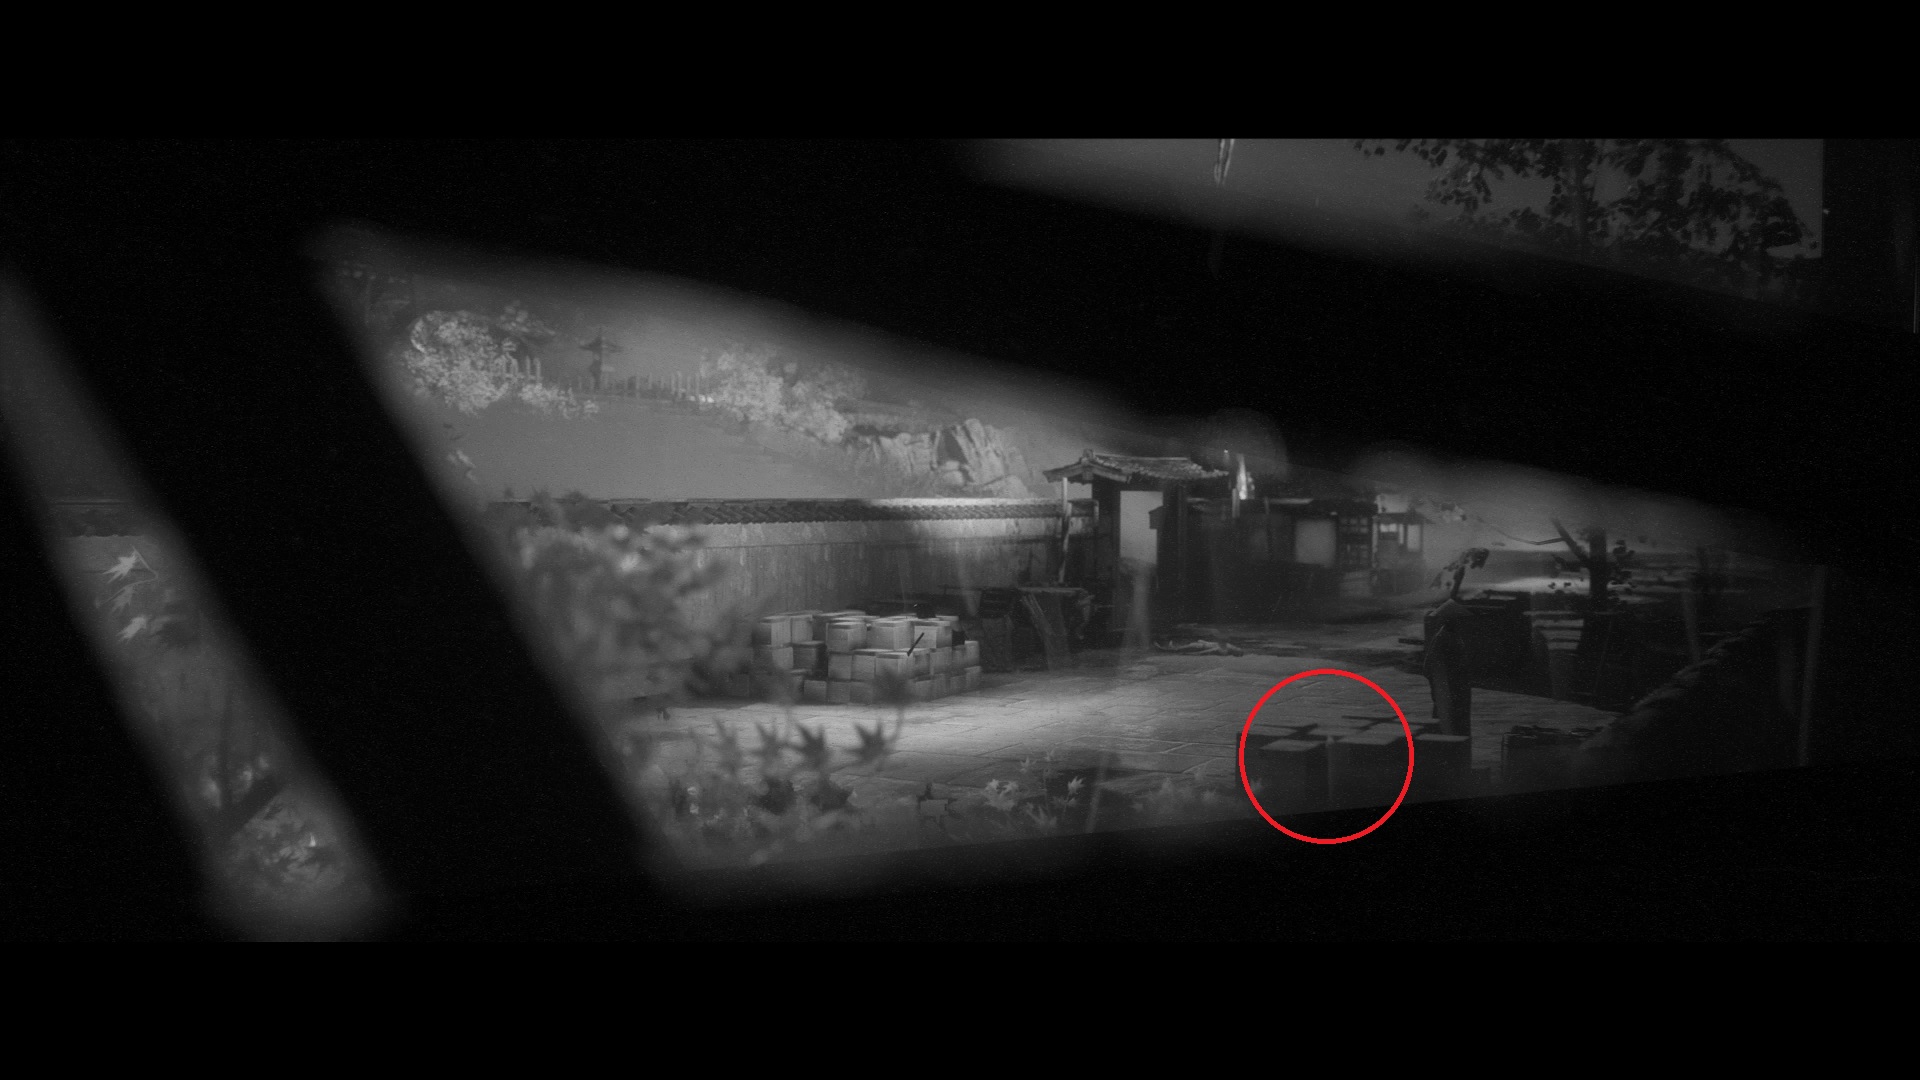
Rice Bowl — Near the end of the chapter, you’ll fight four or five bandits in the same warehouse you pass through in Chapter 1, but now it’s on fire. Exit the warehouse, and you’ll see a cart on fire at the top of the screen. Inspect it.
Chapter 4 Artifacts (10 Collectibles)

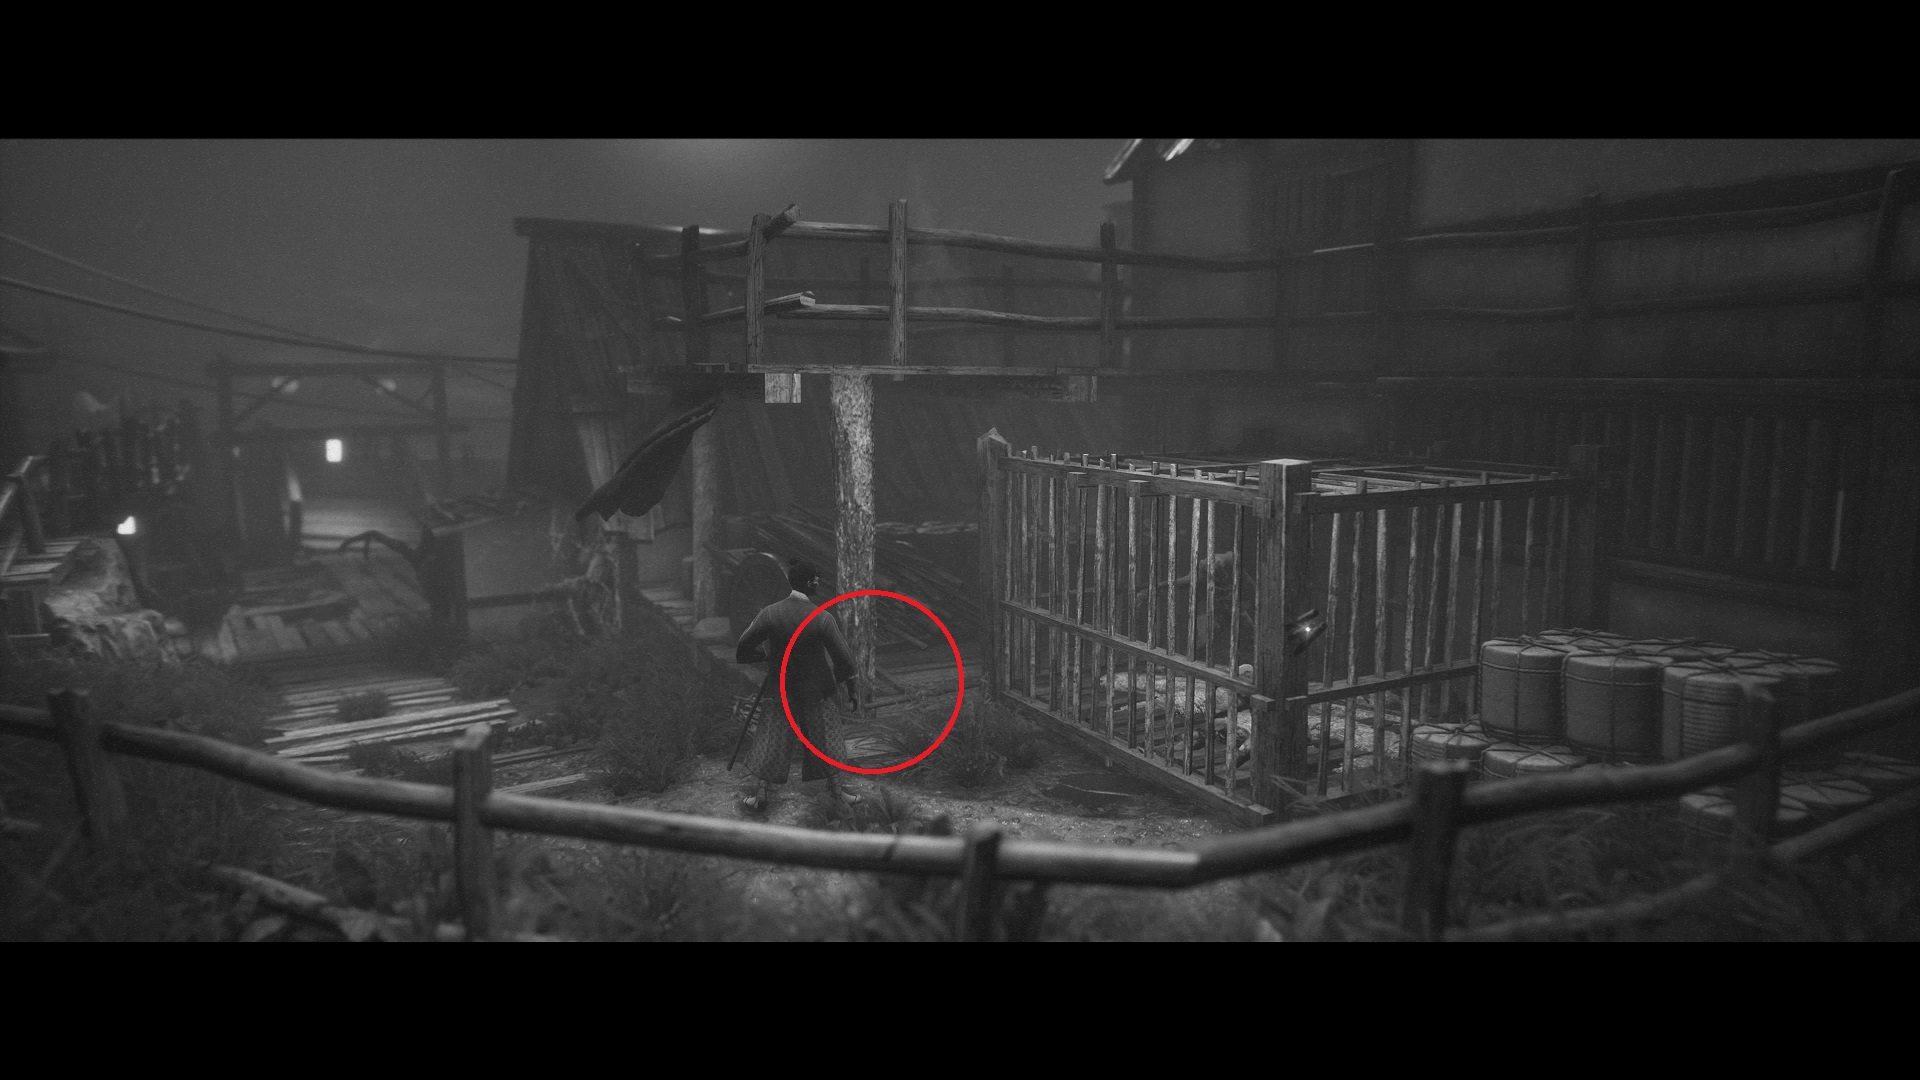
Onyudo — As you go through the forest, you’ll reach an area with NPCs and two cages near a village with a bonfire. Go to the far right cage for this one.
Noppera-bo — At the Bonfire, go into the house on the left. This one is on a table in the foreground.
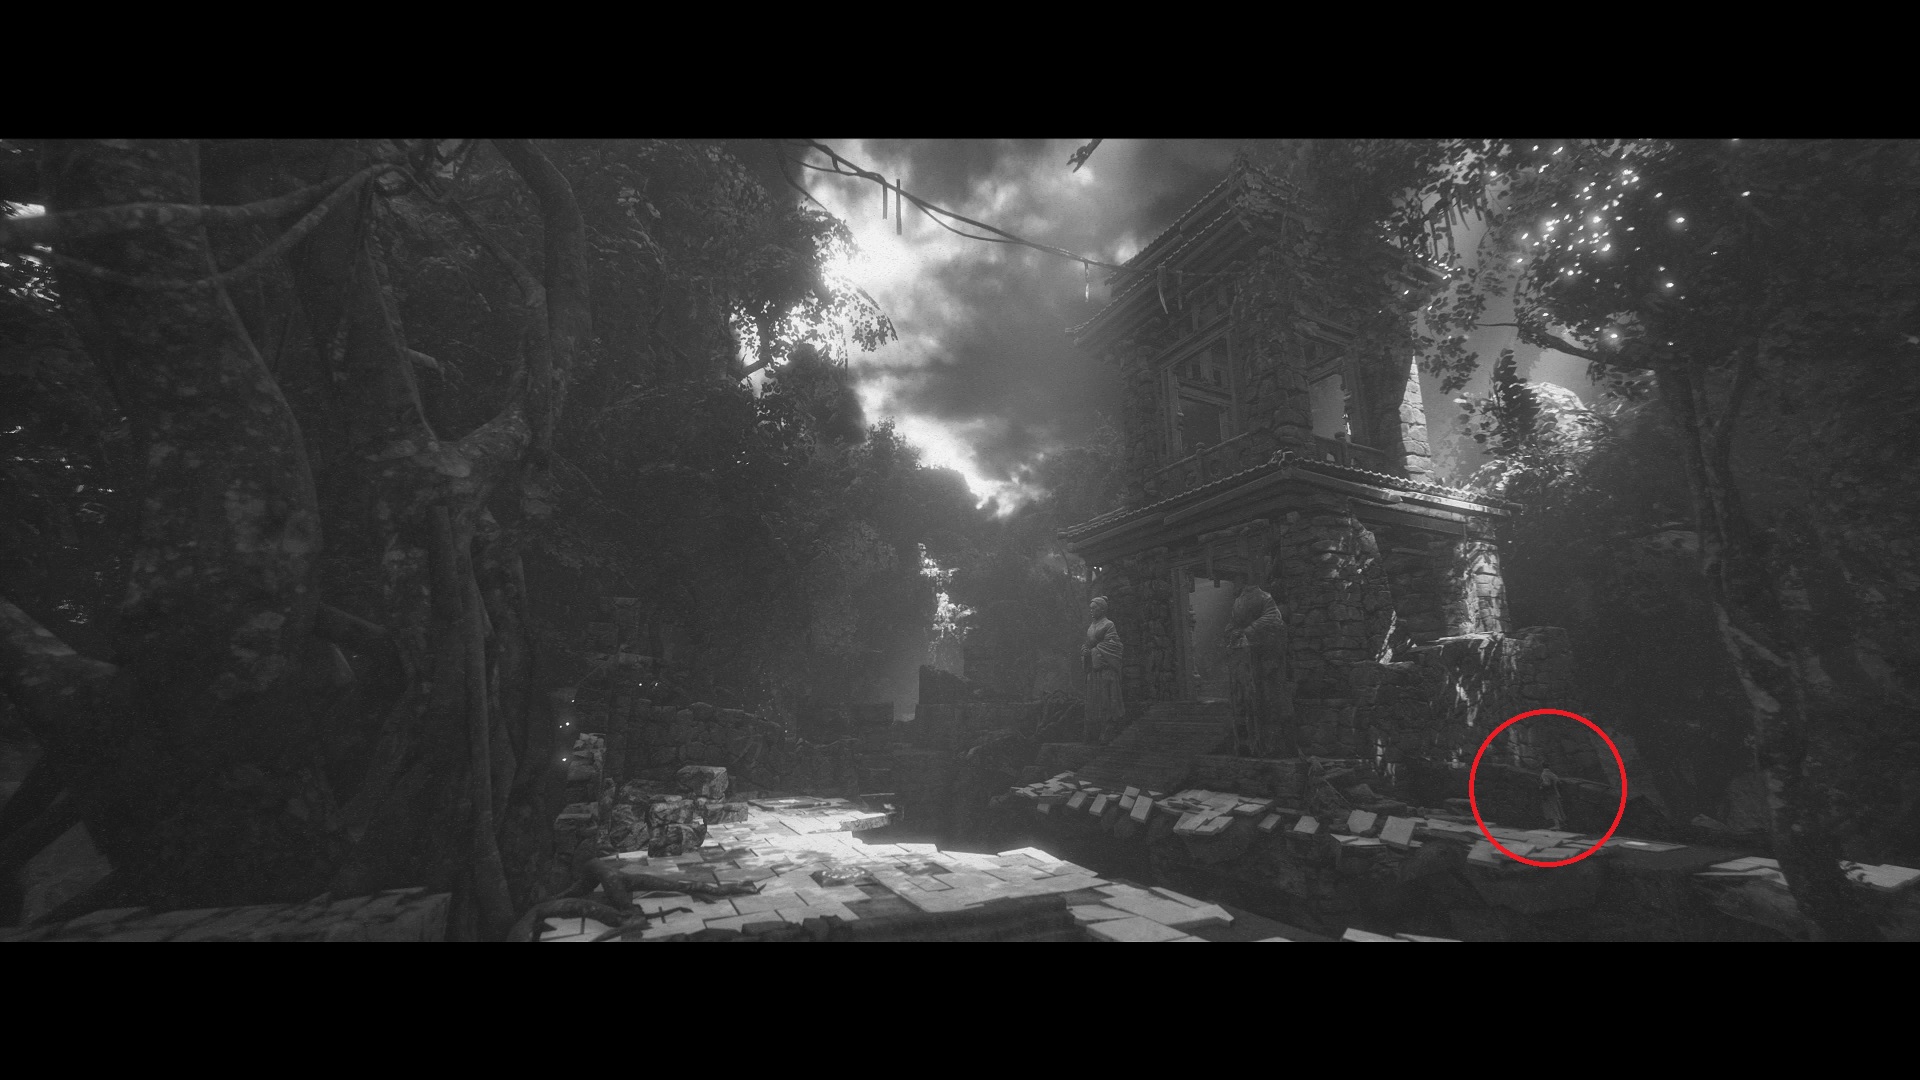
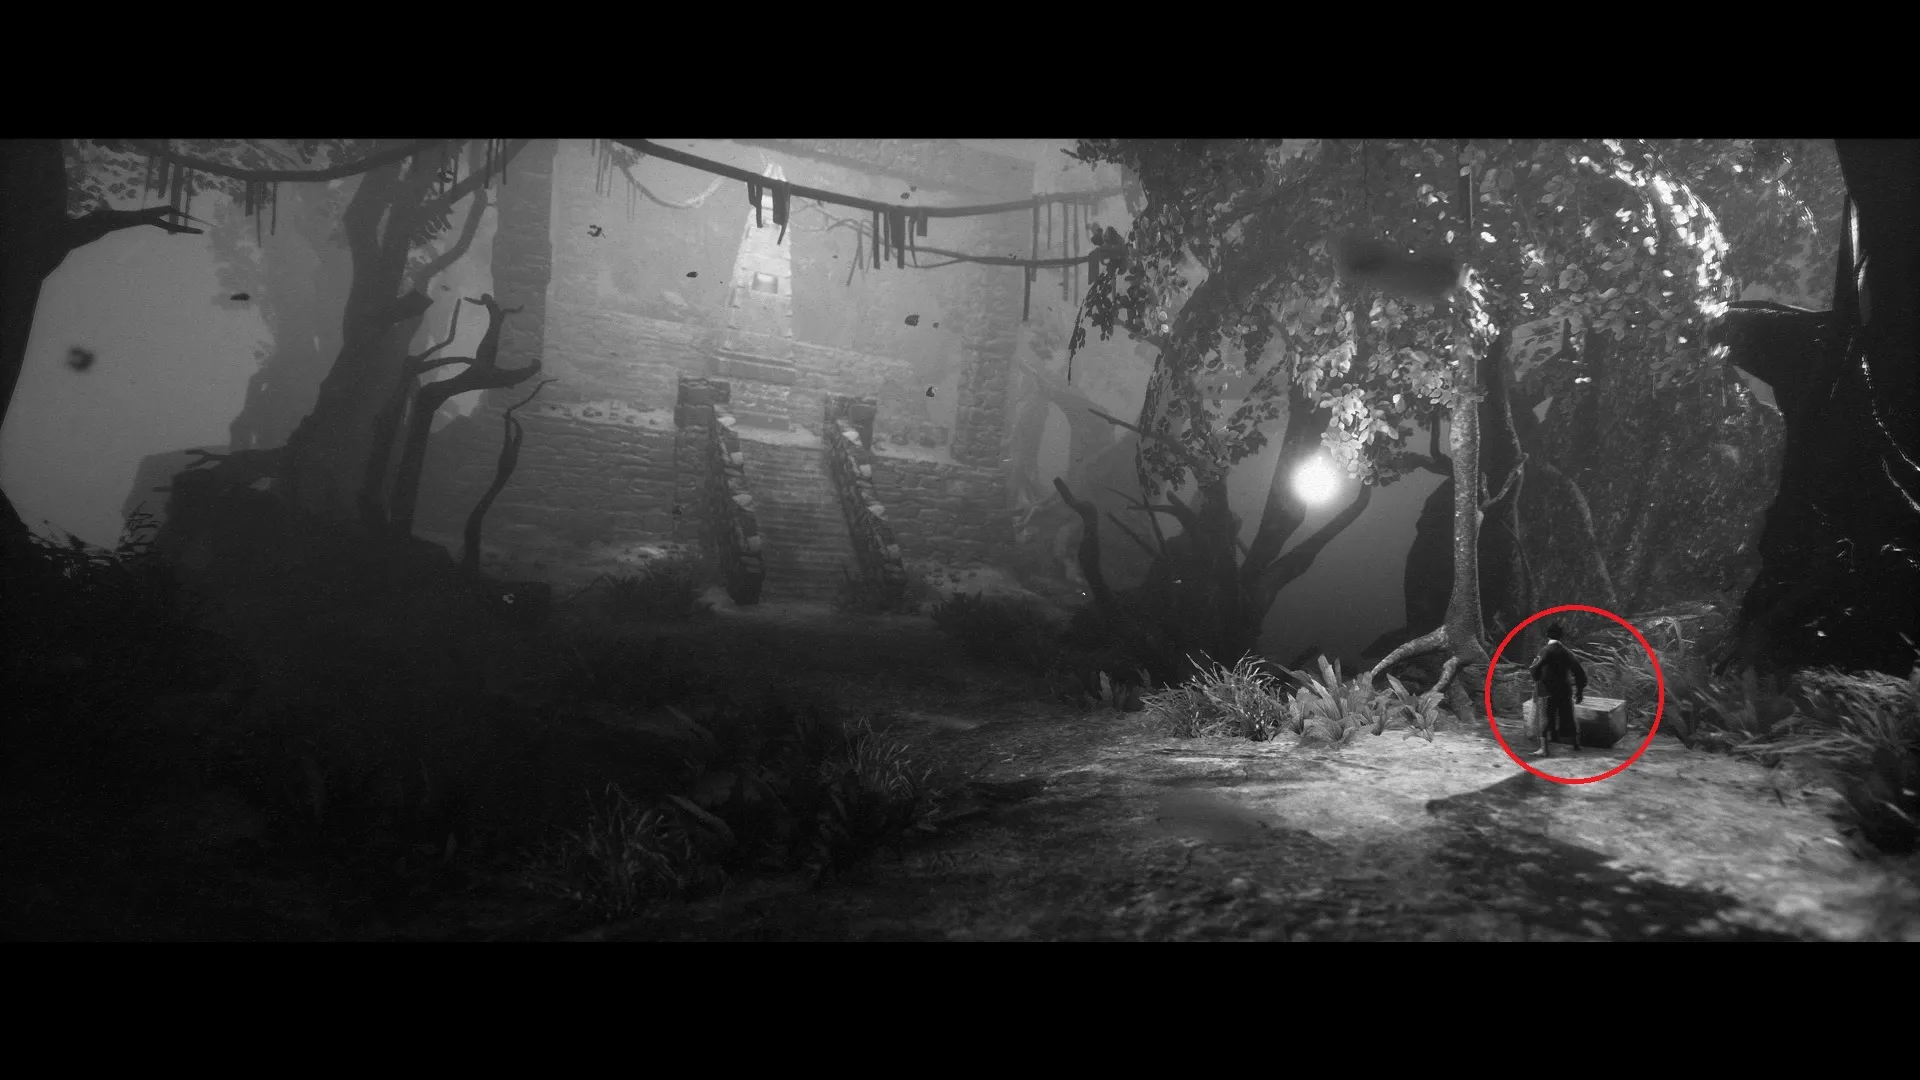
Otoroshi — Continue on for a while until you climb into an area with a shrine, and large torii gate on the right, and a pagoda on the left. Go into the pagoda for this one on a wooden box.
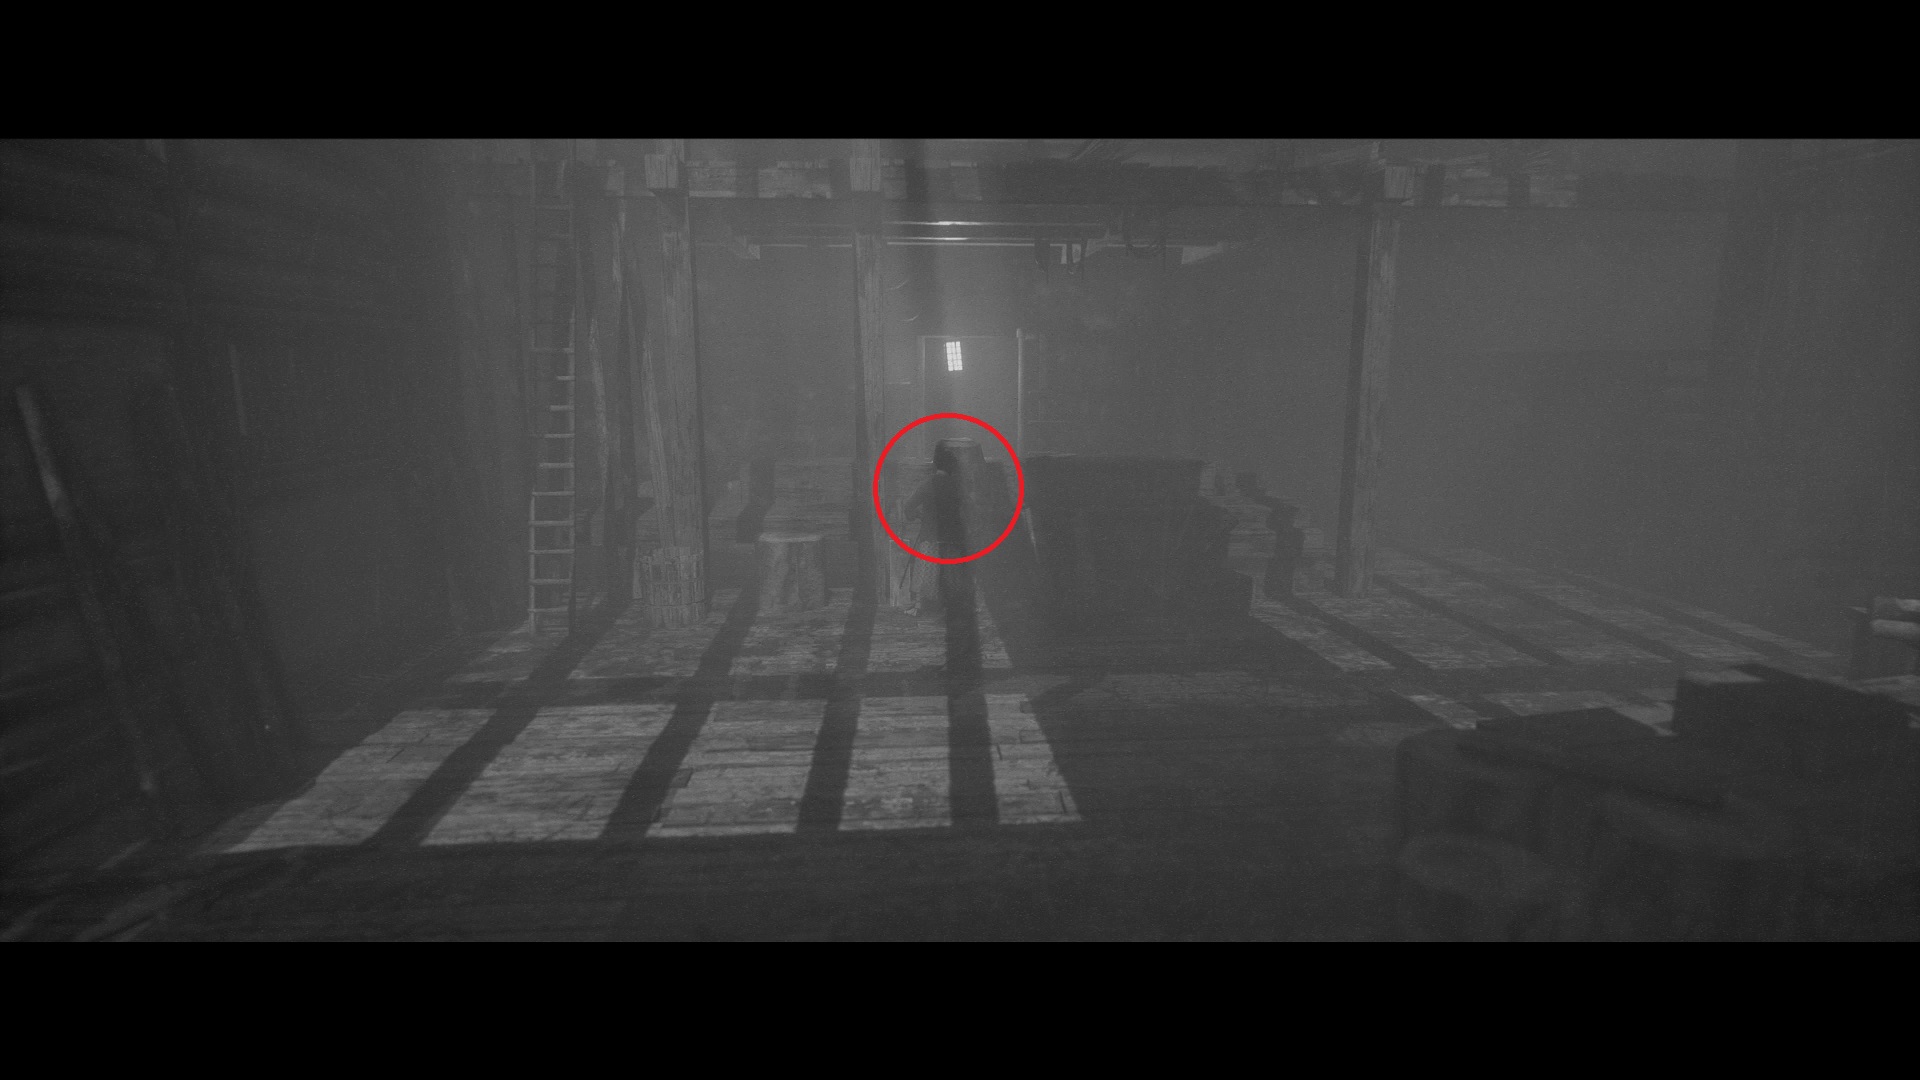
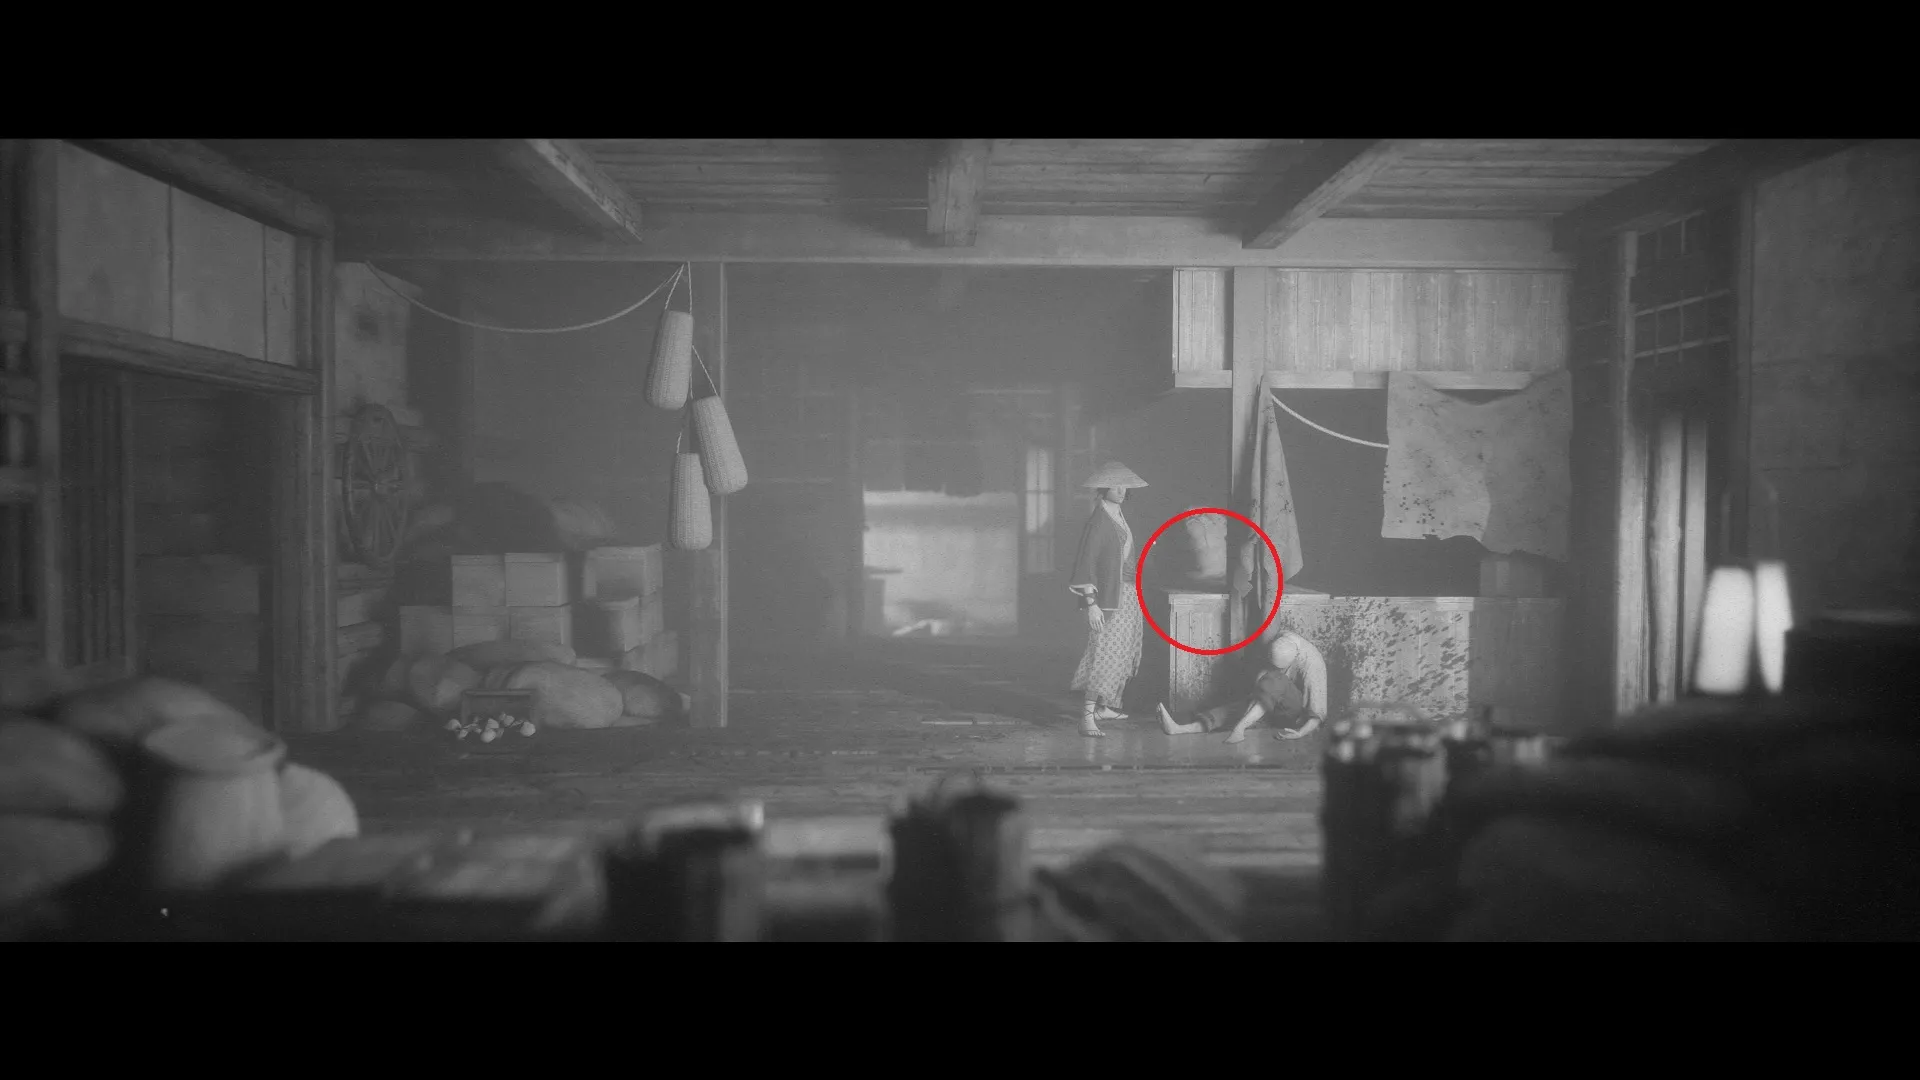
Hitotsume-kozo — Go inside the building near the dam, and inspect the boxes on the first floor in the middle.
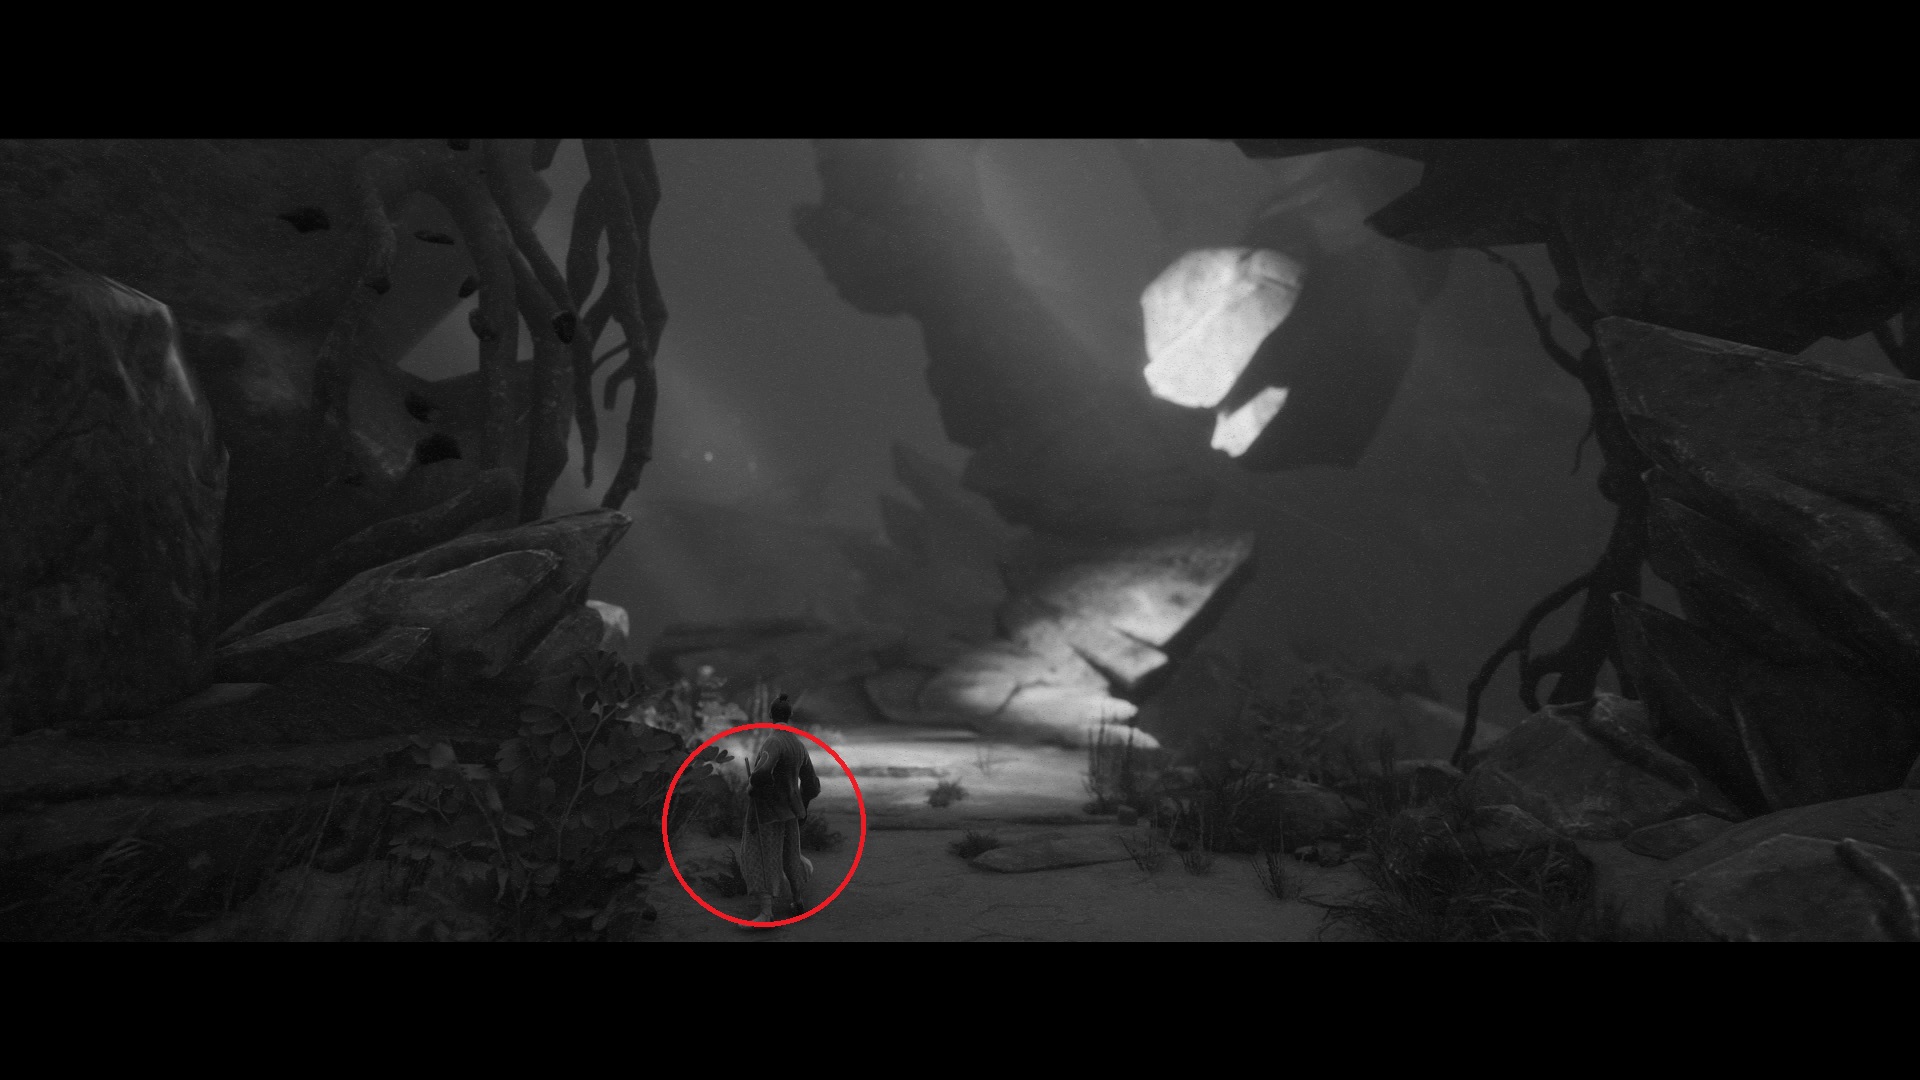
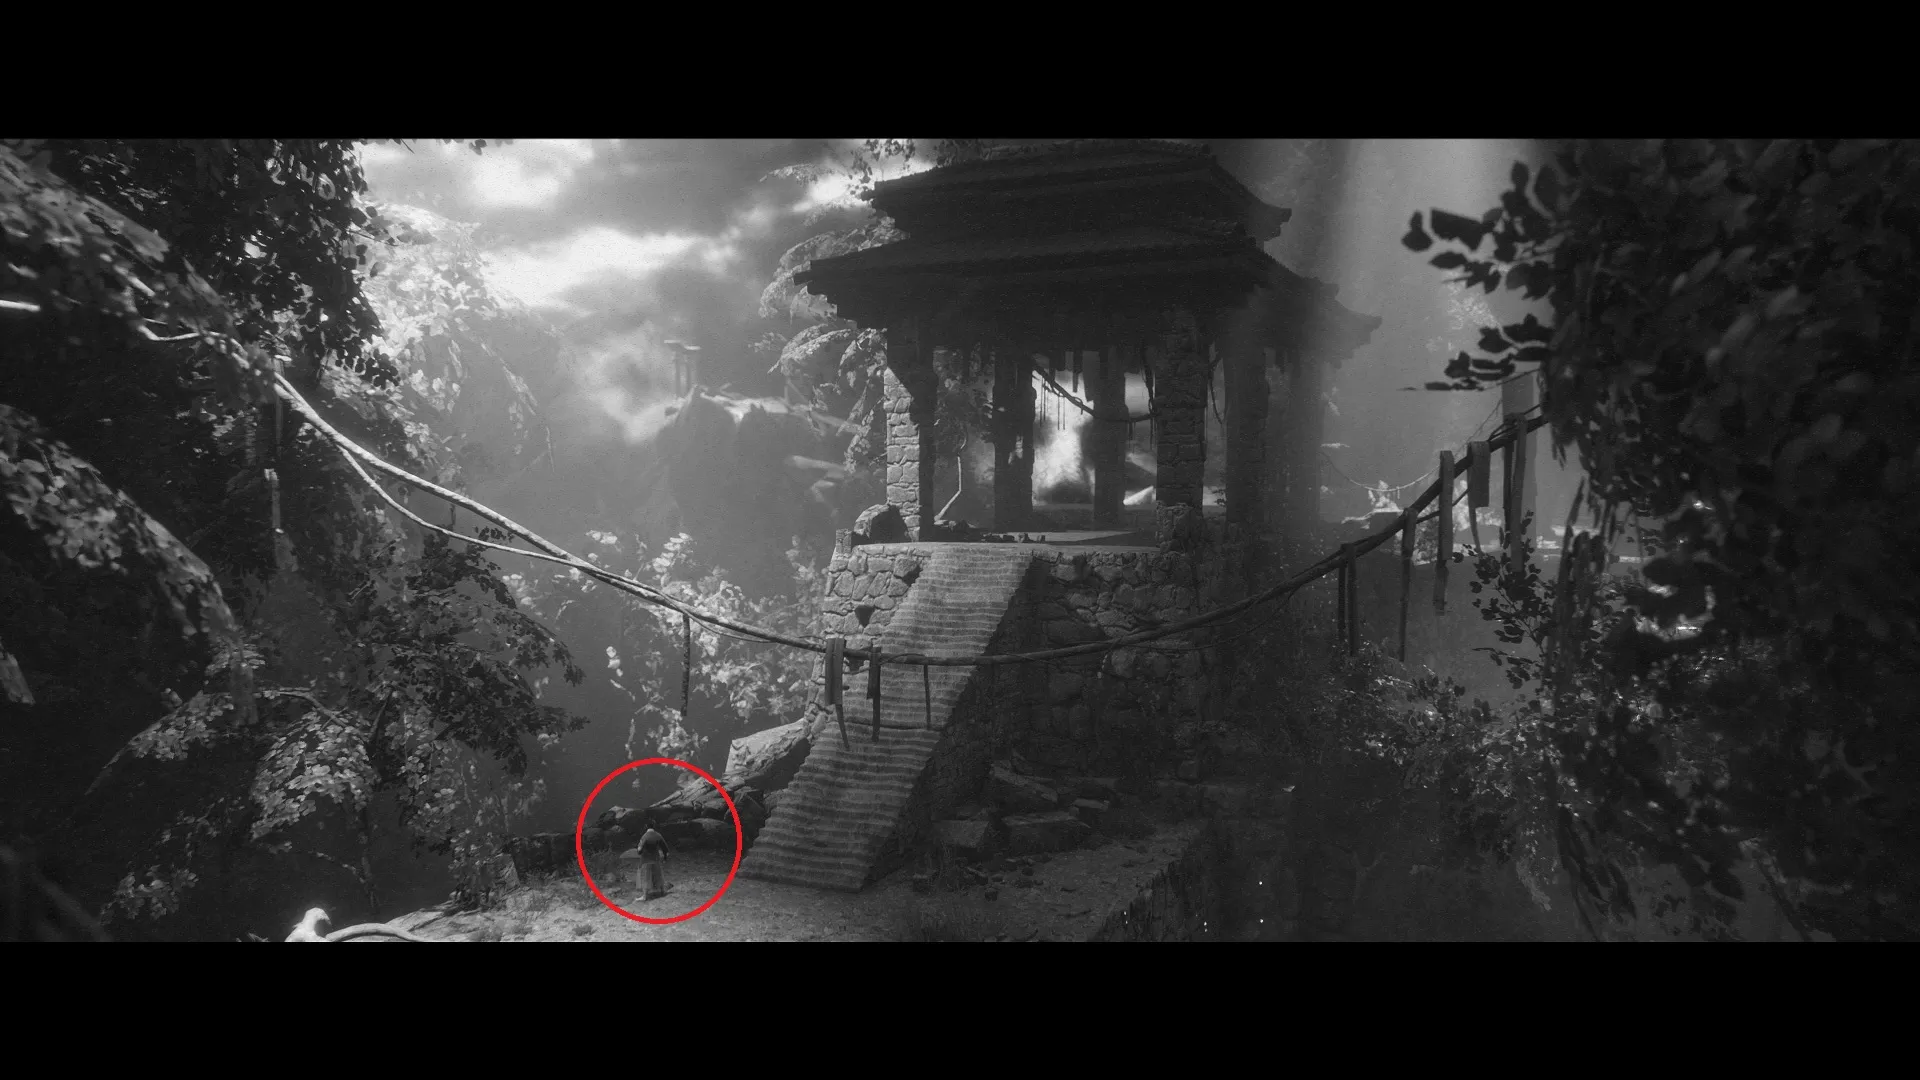
Yurei — Fight the samurai on the rope bridge in the cavern and pass the large face carved in the mountain. Go through the swamp, and climb up. Follow the path right and up. Past the shrine, push the tree down at the waterfall, and walk to the other side to find this one on a tree stump.
Uwan — After fighting the samurai on the wooden covered bridge, go up the hill on the other side instead of right. You’ll find this one on a corpse by a fire.
Nuppeppo — Go through the house with the spiders coming in the walls, and climb up the ledge outside. The path to the right goes toward a bridge. Go left instead to find this one by a cage at the end.
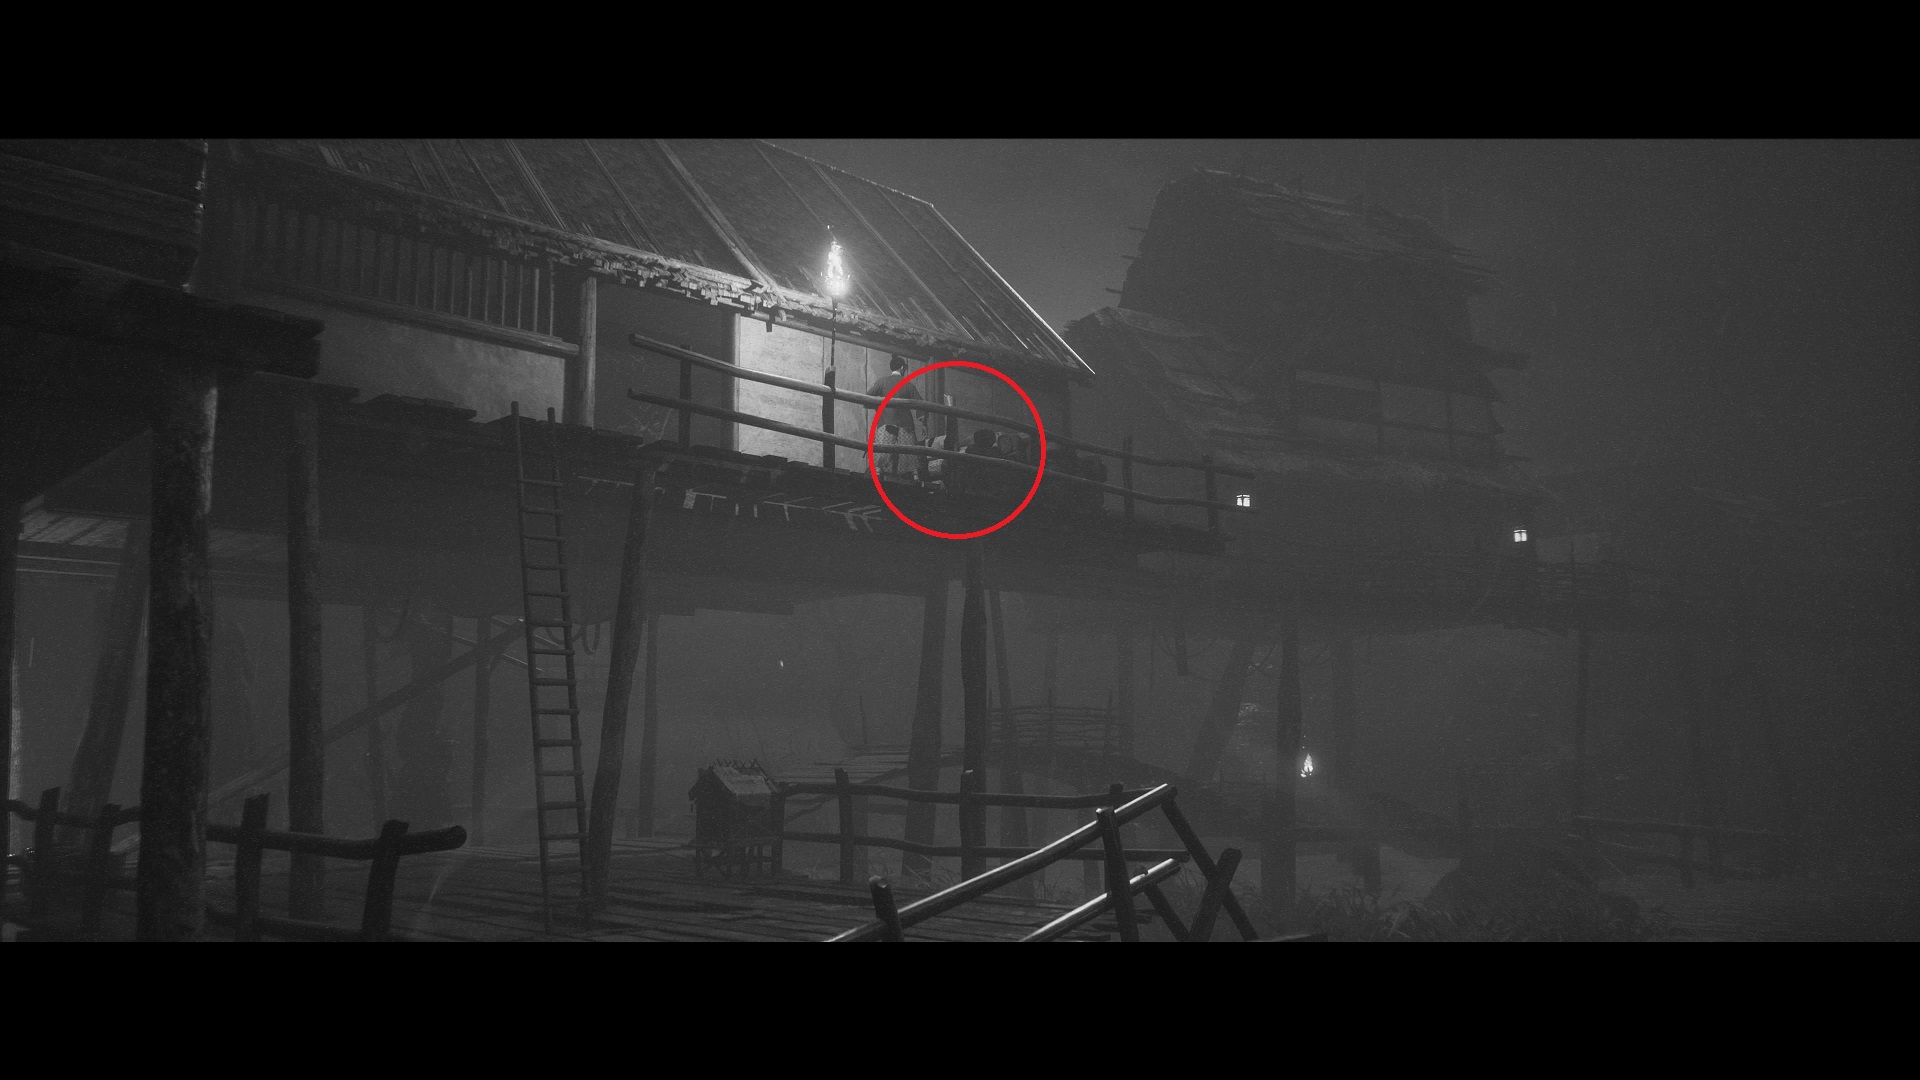
Inugami — Cross the lake and fight the samurai. You’ll arrive at a village shortly after. Go left for some upgrades, then right across the bridge. There’s a shrine on the other side and a ladder leading up. Climb it and inspect the woodpile past the torch.
Ushi-Oni — After running across the collapsing bridge, you can go up toward a shrine or climb up a broken bridge section to the right. Climb up to find this one on a wooden box.
Yamawaro — Continue up through the small village, and push the beam down to make a path. Follow it around, and slide down the hill. This one is on a small crate by a cage.
Chapter 5 Artifacts (8 Collectibles)
Great Thunder — At the start, descend the hill into Yomi and find this collectible by the rocks on the left side.
Cleaving Thunder — Defeat the first ghost, and exit the hall. Stay left and go into the bottom left corner for a small box.
Earth Thunder — Solve the second puzzle, and go up the stairs through another combat encounter. Follow the path to the end to find this one at the end on a crate by a cart (across from some stairs leading down).

Black Thunder — After making a second alternative path with the movable blocks, go right through a dojo combat room into a room you can freely move in with a shrine. Continue right through another combat room with a statue. Keep going right to find a large urn at the end of the path, with this at its base.
Couchant Thunder — You’ll come to a room with a shrine and tiger statues on the left. Go up the right side to find this one behind the square (middle) brazier.

Roaring Thunder — Defeat the boss, and continue through the large door that opens. In the hall with the two large pillars, turn left before the second large door to find a shrine and this collectible on a crate.
Young Thunder — Complete the third puzzle, and press the switch at the top of the area to create a way across. You’ll see this one shining on the ground to the right of the tower.
Fire Thunder/Raijin — Go through the tower and down the stairs. Use the shrine, and continue right through the combat area. Go up two sets of stairs. At the base of the third set, look left for this one by the wall.
Chapter 6 Artifacts (10 Collectibles)
Yutsu-Tsuma-Gushi — At the start, go up to the shrine to find this one to the left of it.
Maggots — After teleporting the second time, you’ll slide down a slope and climb up a ledge along the path. Follow the path up to the left into an area with candles and skulls for this one.
Ebikazura Grapes — Go through the portal and the combat area with archers shooting at you. You’ll see a shrine with a rock outcropping to the right with this collectible.
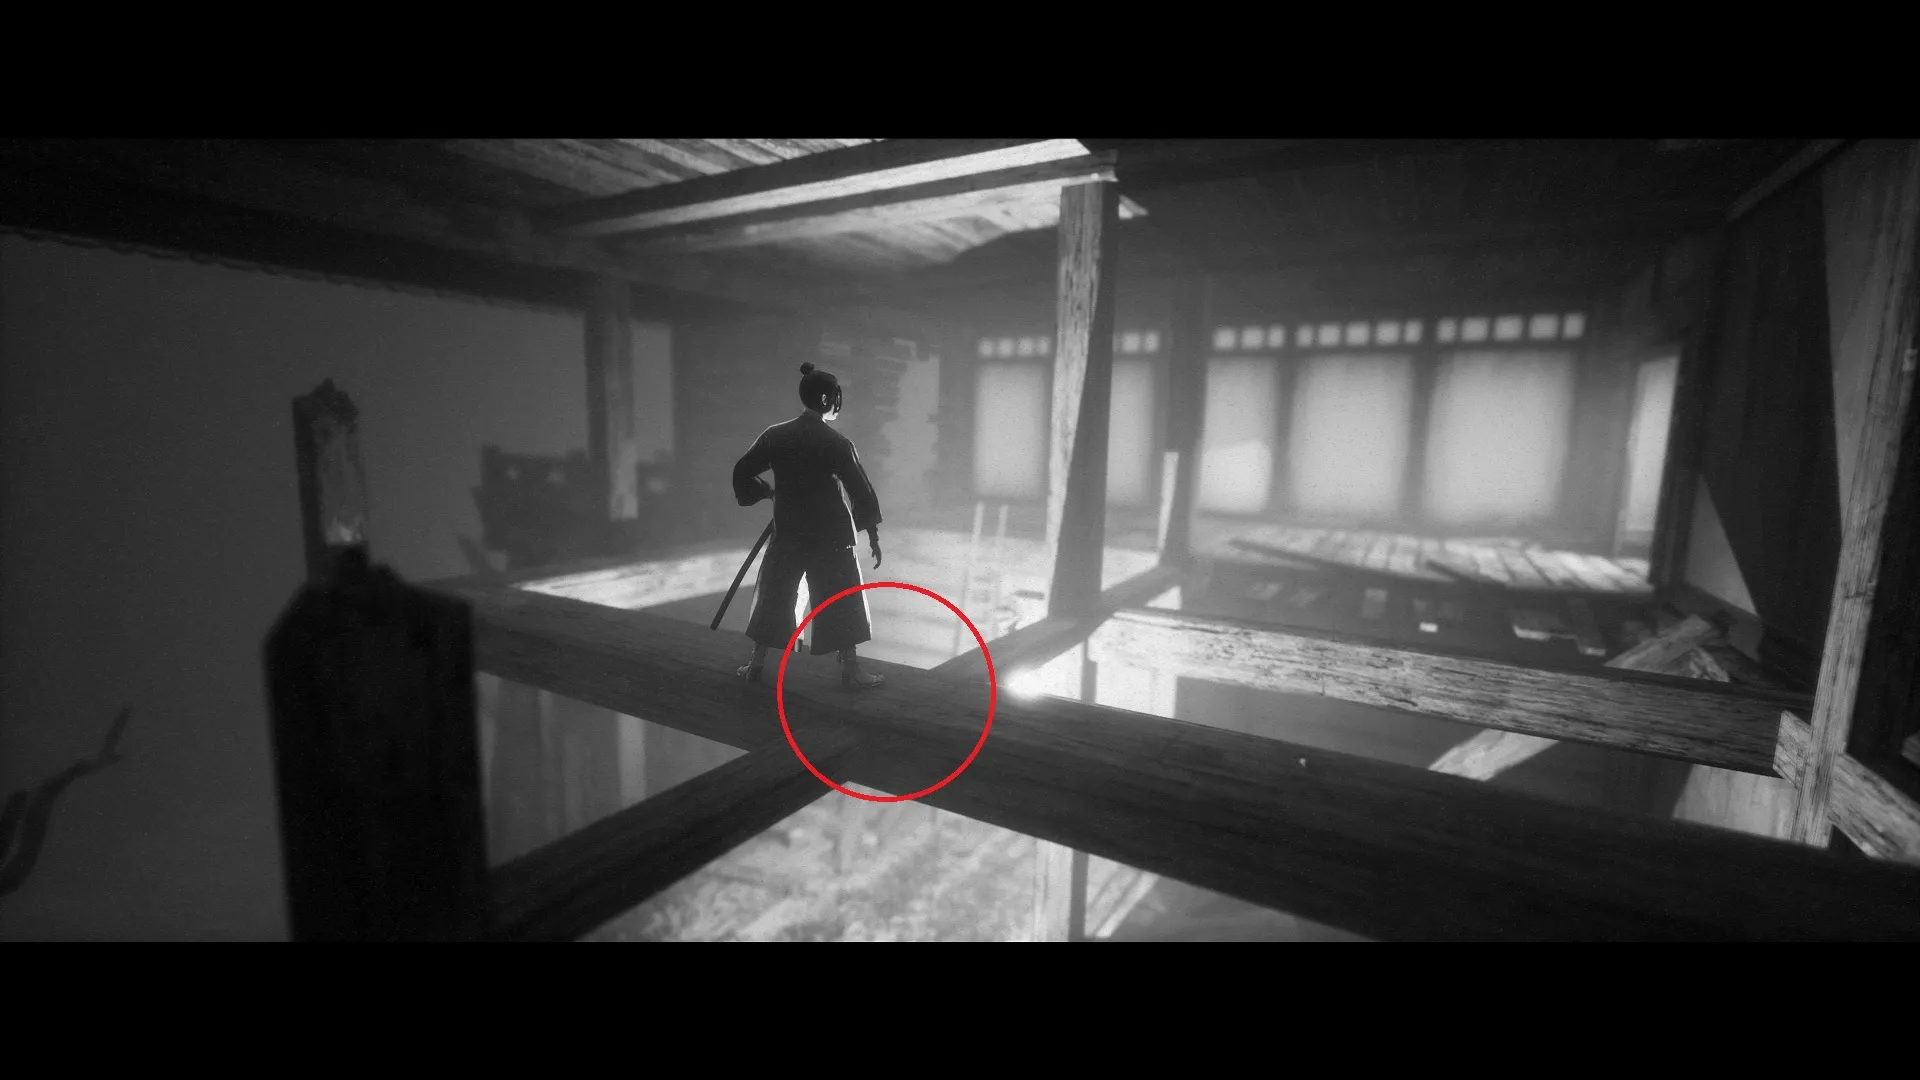
Thunder Drum — Complete the combat zone in front of the giant snake skull, and enter the house. Climb the ladder, and walk onto the beams in the foreground for this one.
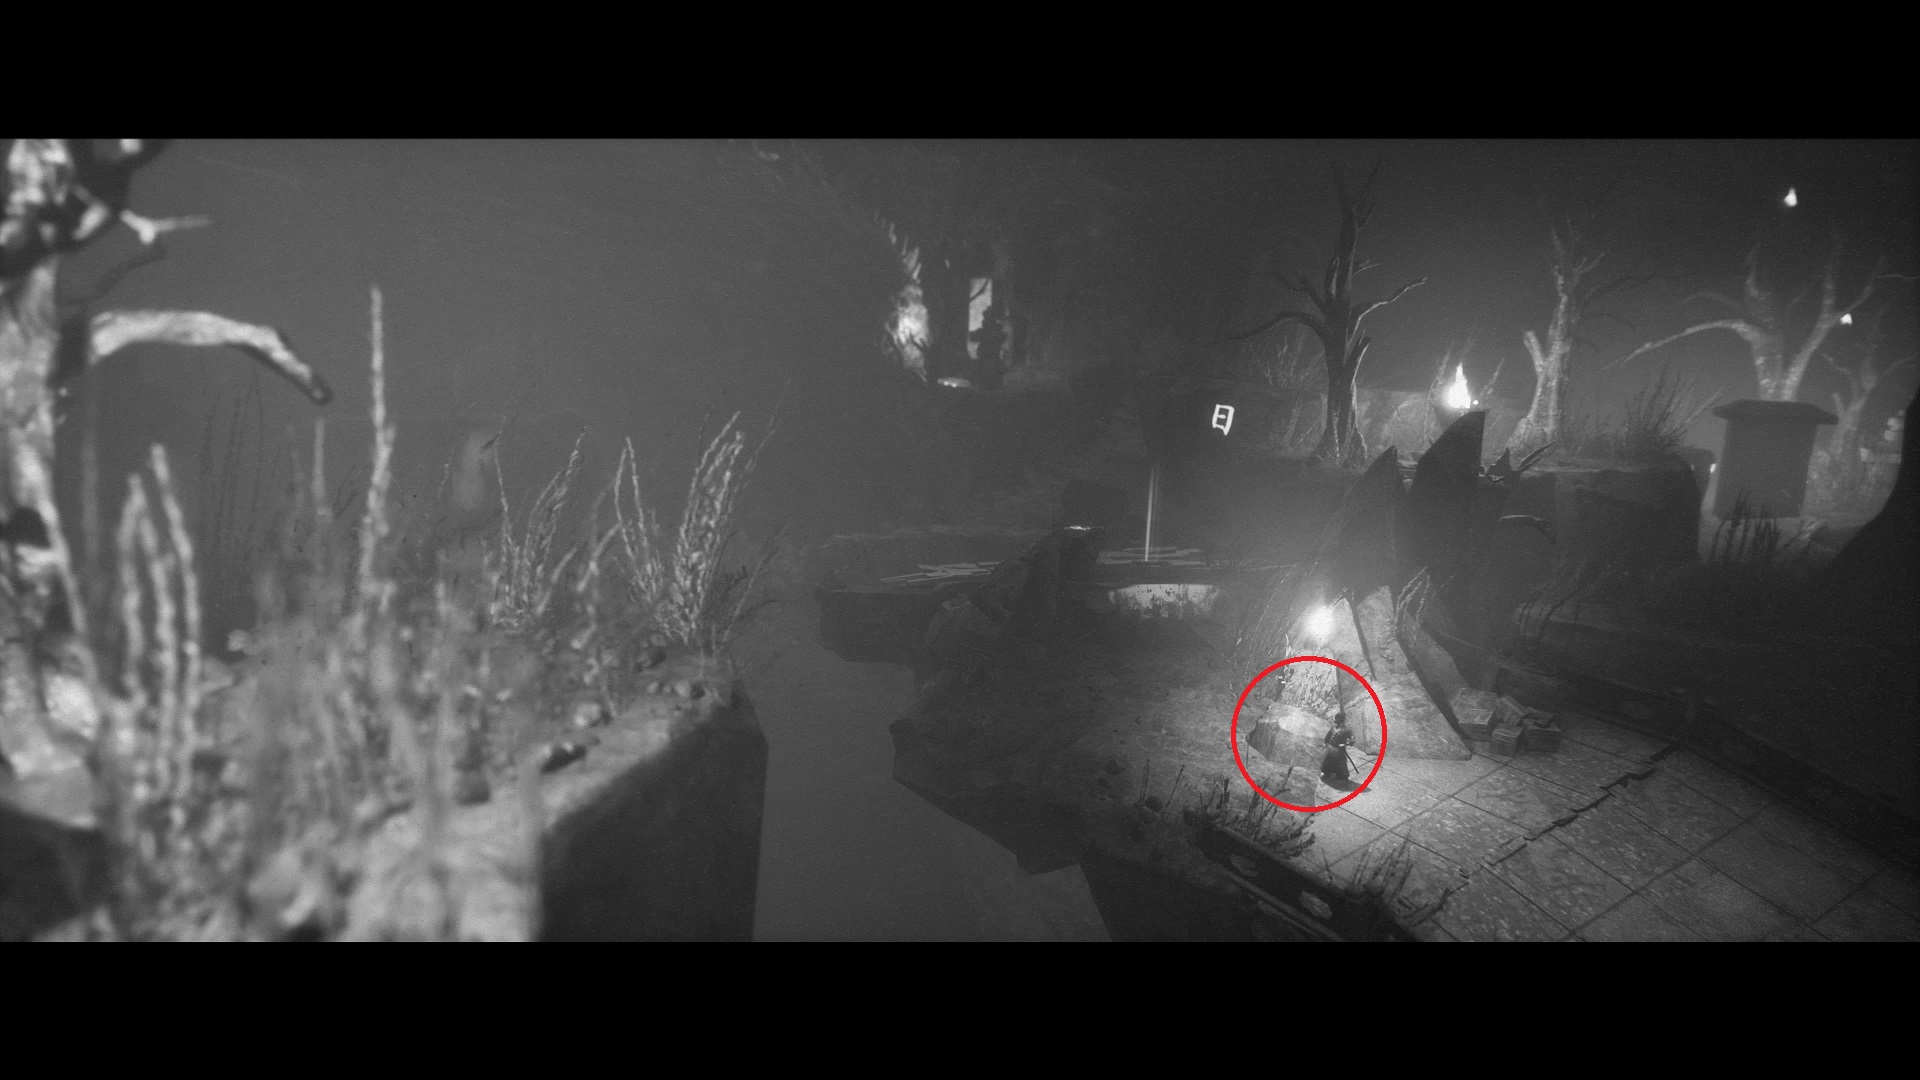
Ookamuduminomikoto — Go through the portal at the obelisks, then into the whirlpool. Go through the next combat area, and then to the far right of the screen to find this one on a crate by a tree.
Totsuka-No-Tsurugi — Teleport using the next obelisk at the jungle temple, then go through the next combat area spanning the wooden bridge. Go all the way to the right to find this one on a small box under a tree (an obelisk is in the background).
Naginata Tip — Teleport to the burning village, and complete the combat area that spans more bridges. At the end, search the burning pile of rubble at the top of the screen (before the area slopes down to the right).
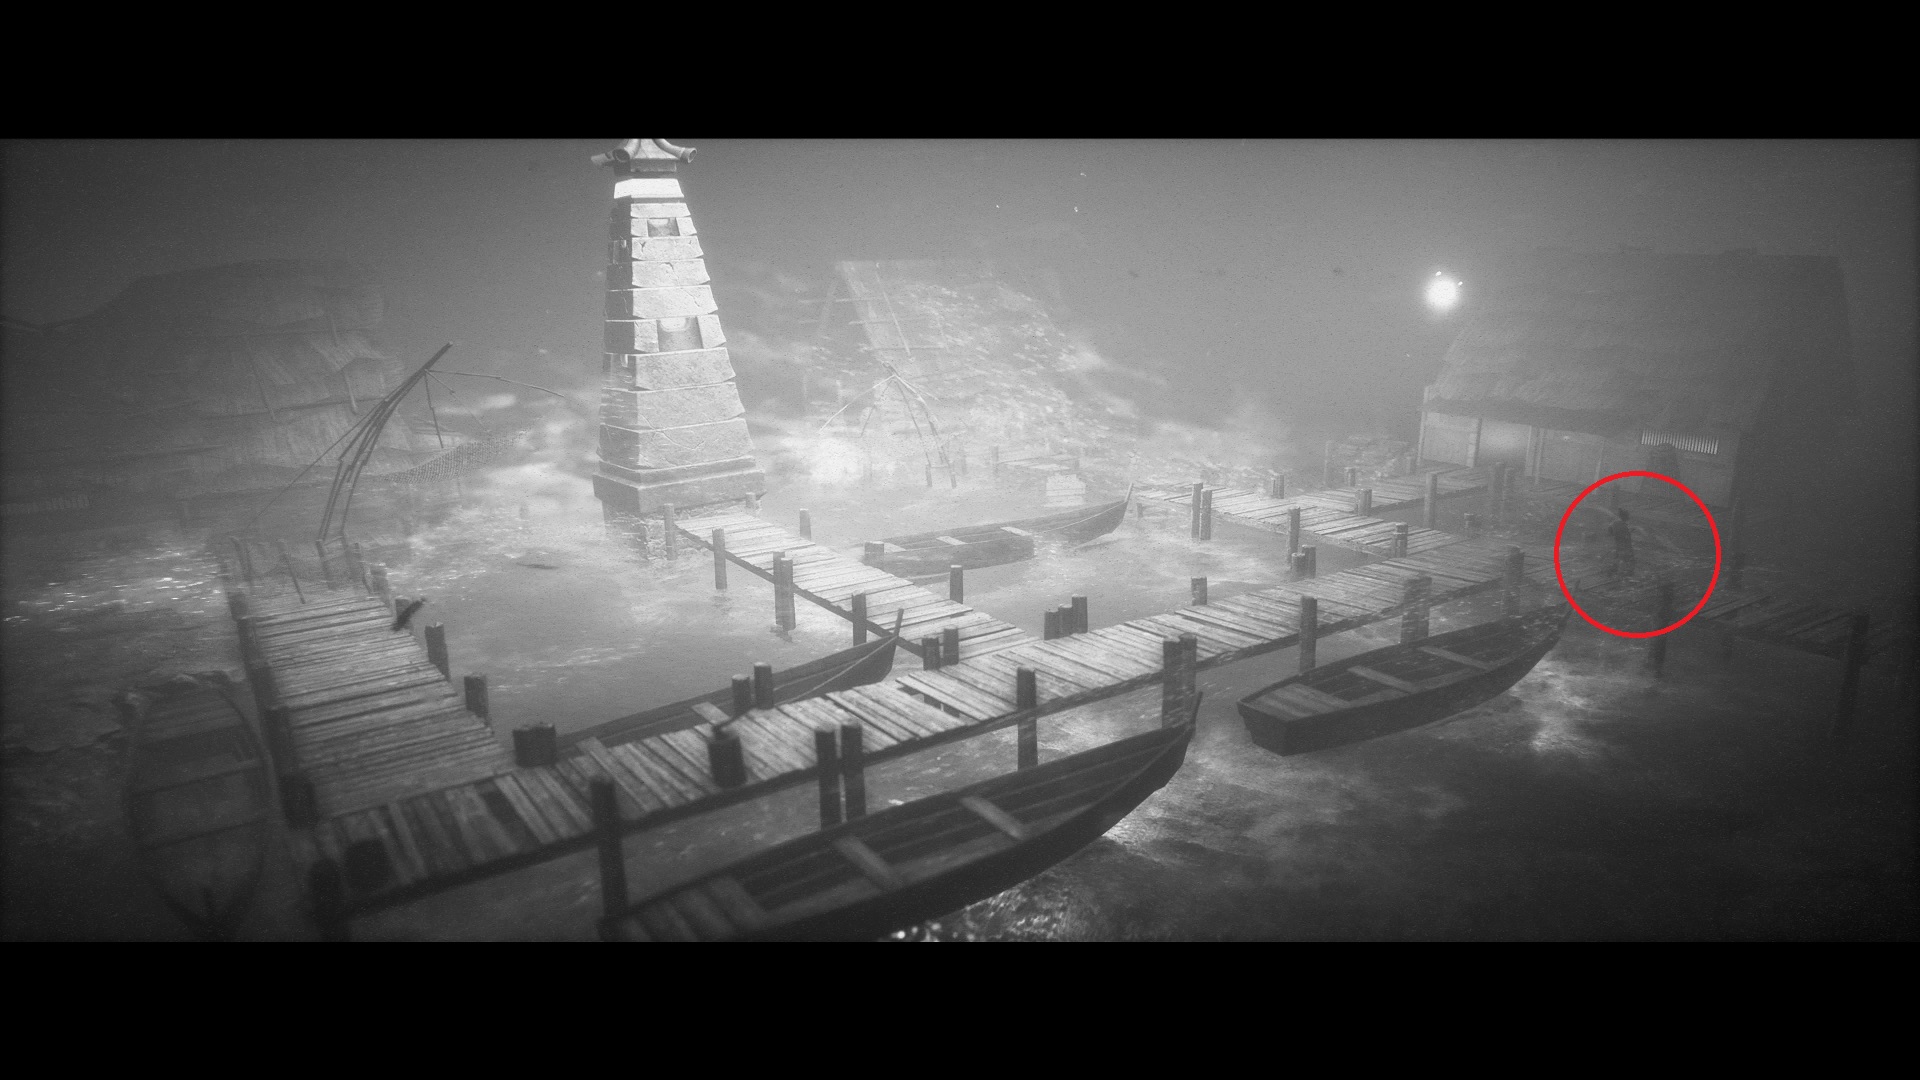
Tainted Clothing — Teleport again to a forest. Continue until you reach a stormy dock area. Go to the far right portion of the dock for this one.
Hirasaka — Use the dock teleporter, and go right when you spawn to pick this collectible up from the barrier at the edge of the cliff.
Onusa — Before going into the bright light at the Torii gate at the end of the same area, go to the left of the gate to this one by a cart.
Chapter 7 Artifacts (9 Collectibles)
Matching Kai-Awase Shell — When you return to the village from Yomi, go right to find this one about halfway down the path, before it slopes up.
Hiogi Remnant — Continue on the path and up the stairs into the building where you found the Izanagi Print in Chapter One. This one will be on the counter to the right.
Kiseru Remnant — Go through the same building, down the stairs, through another building, and a combat area in a small courtyard. Beyond, you’ll see two wounded villagers by a cart and debris at the top of the screen. Inspect the steps.
Death Warrant — After falling through the roof, climb down, and go right to climb over a short wall. This one is in the foreground on a crate.
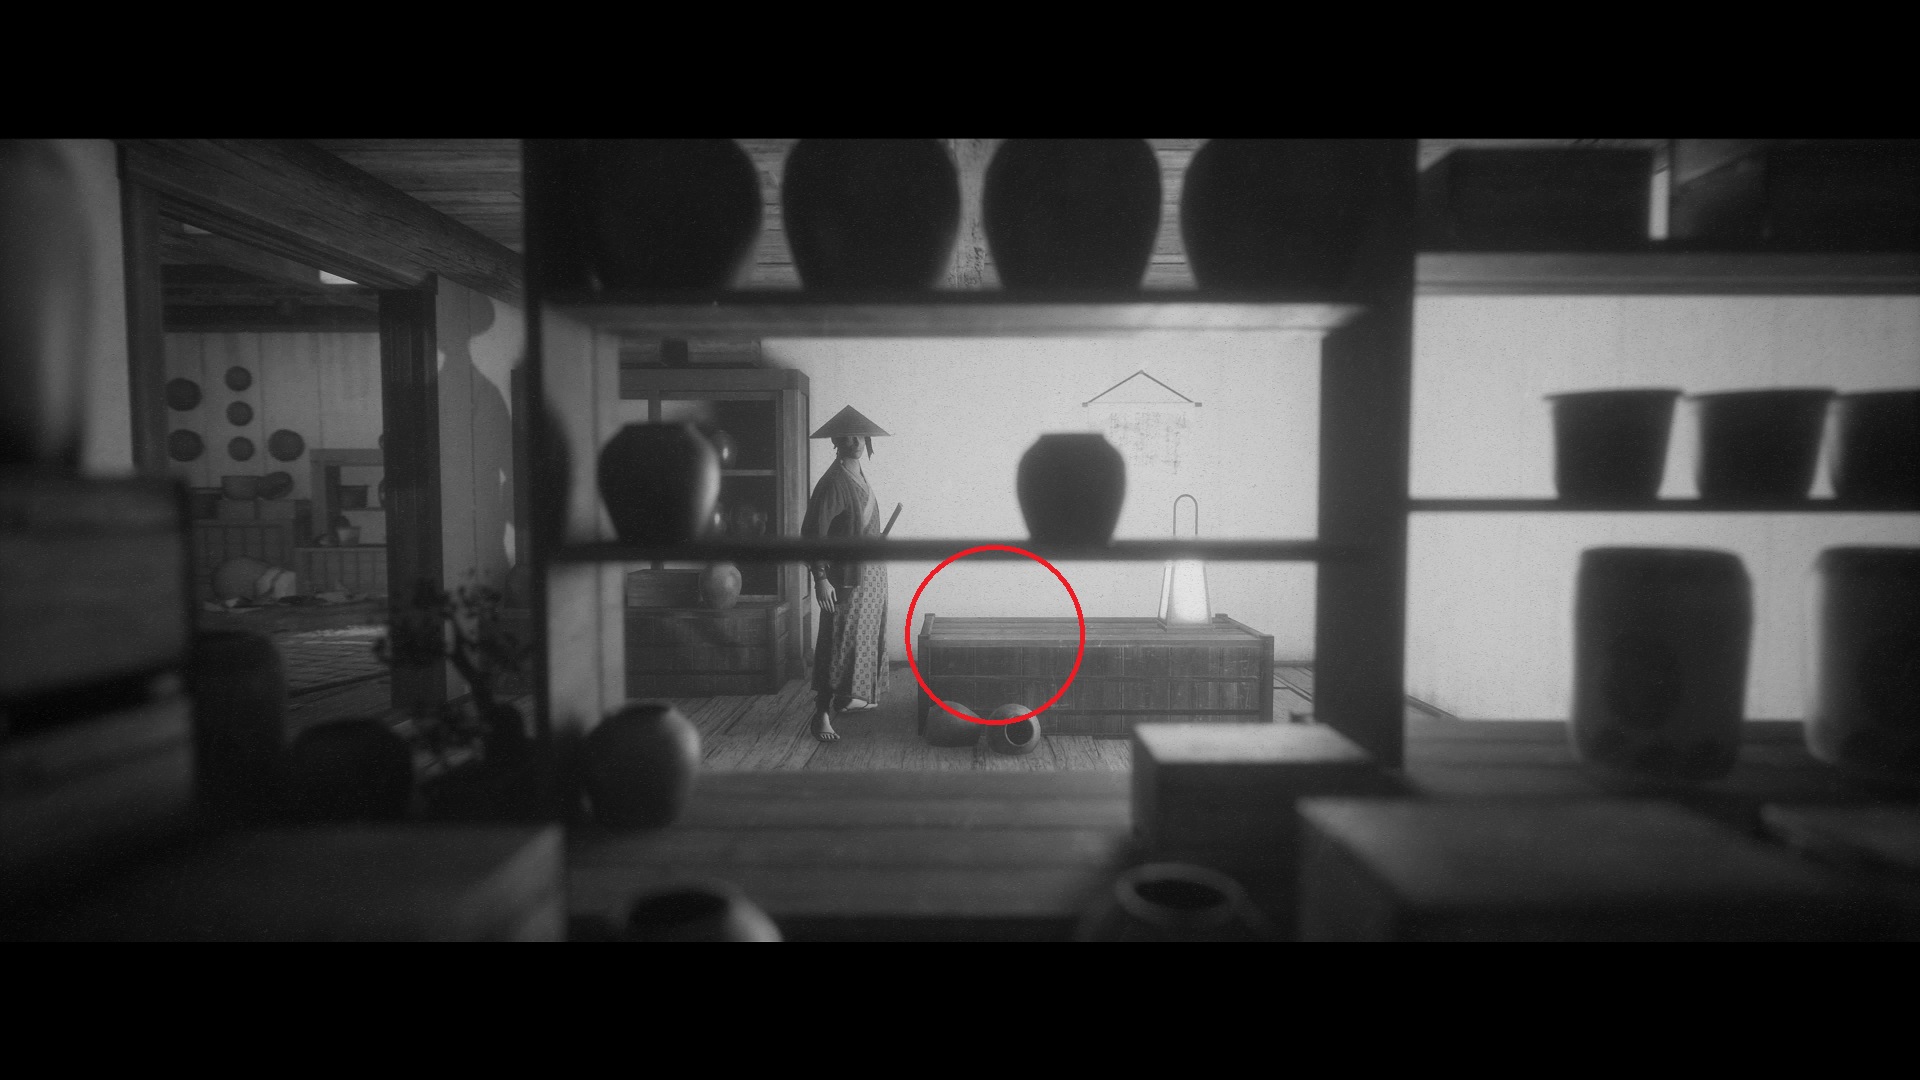
Omoikane Mask — Defeat the general, and enter the next house. This one is on a cabinet to the left as soon as you enter.
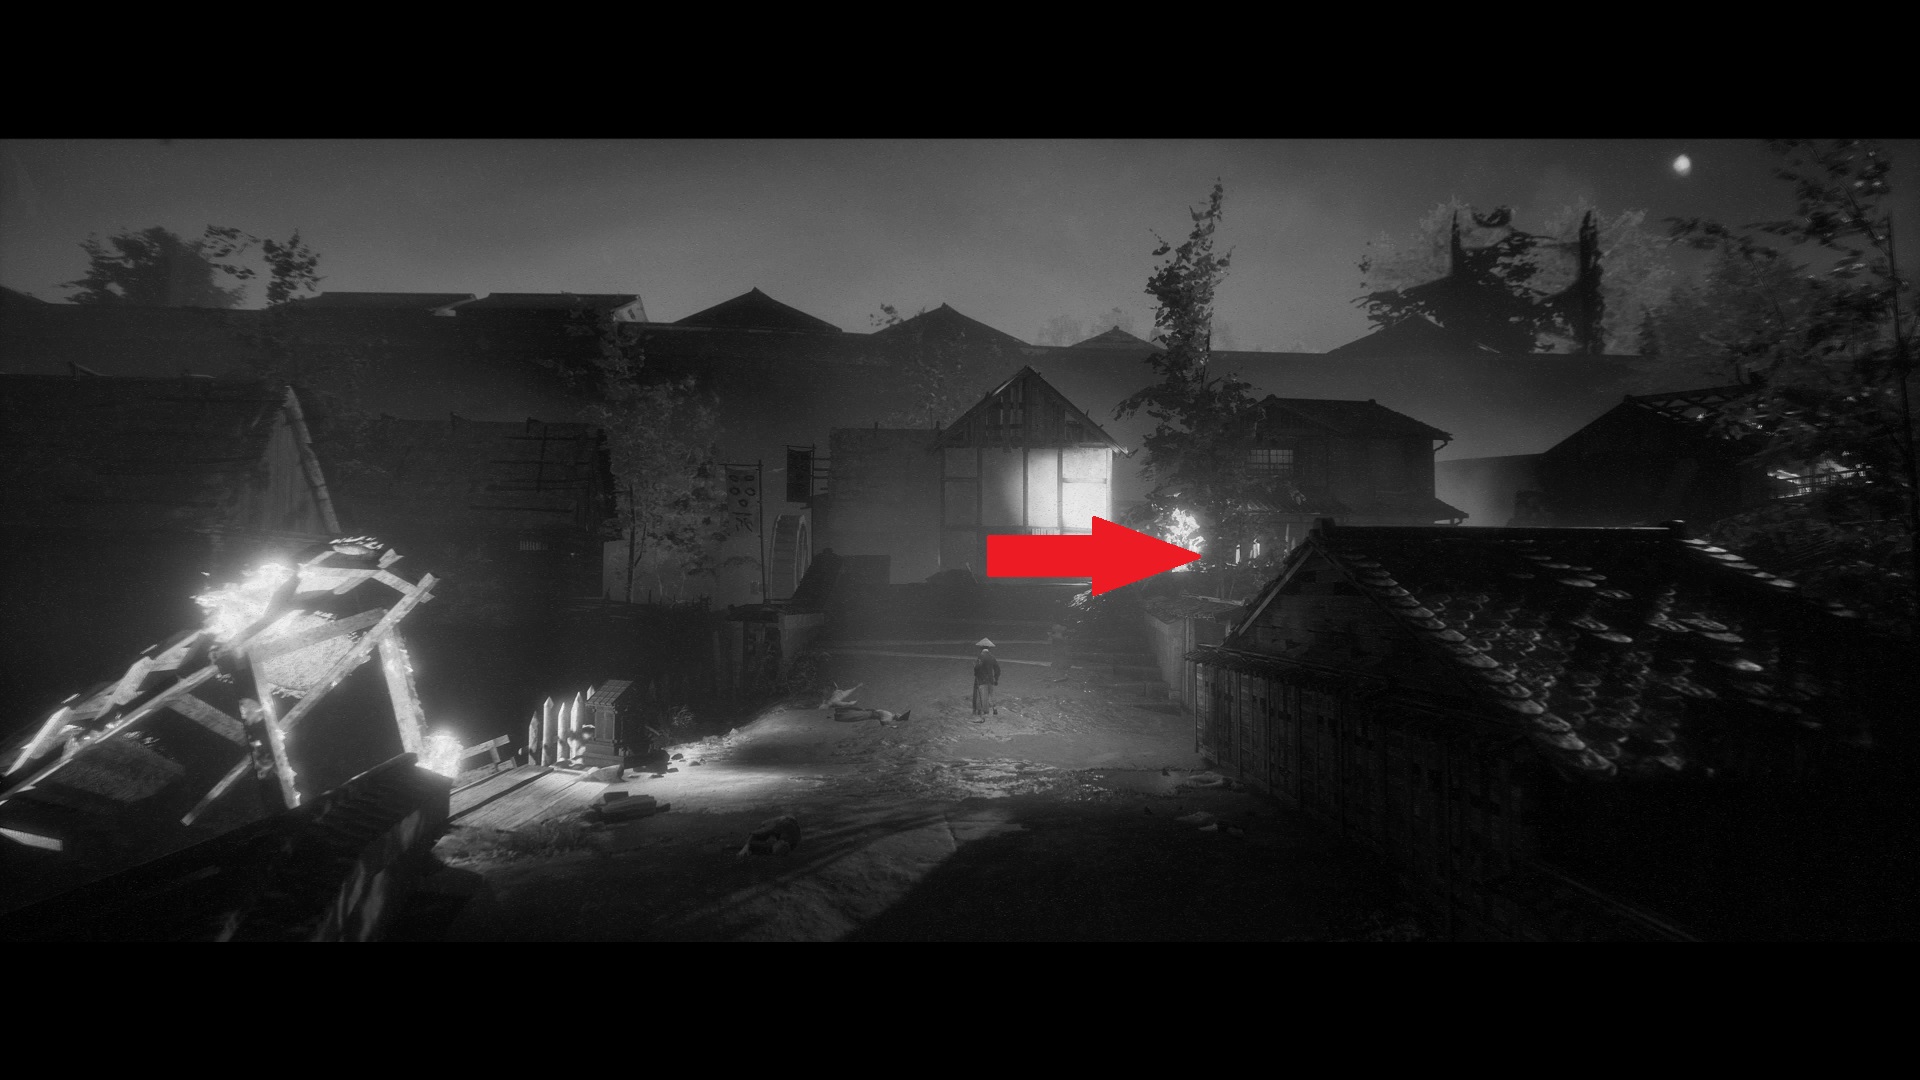
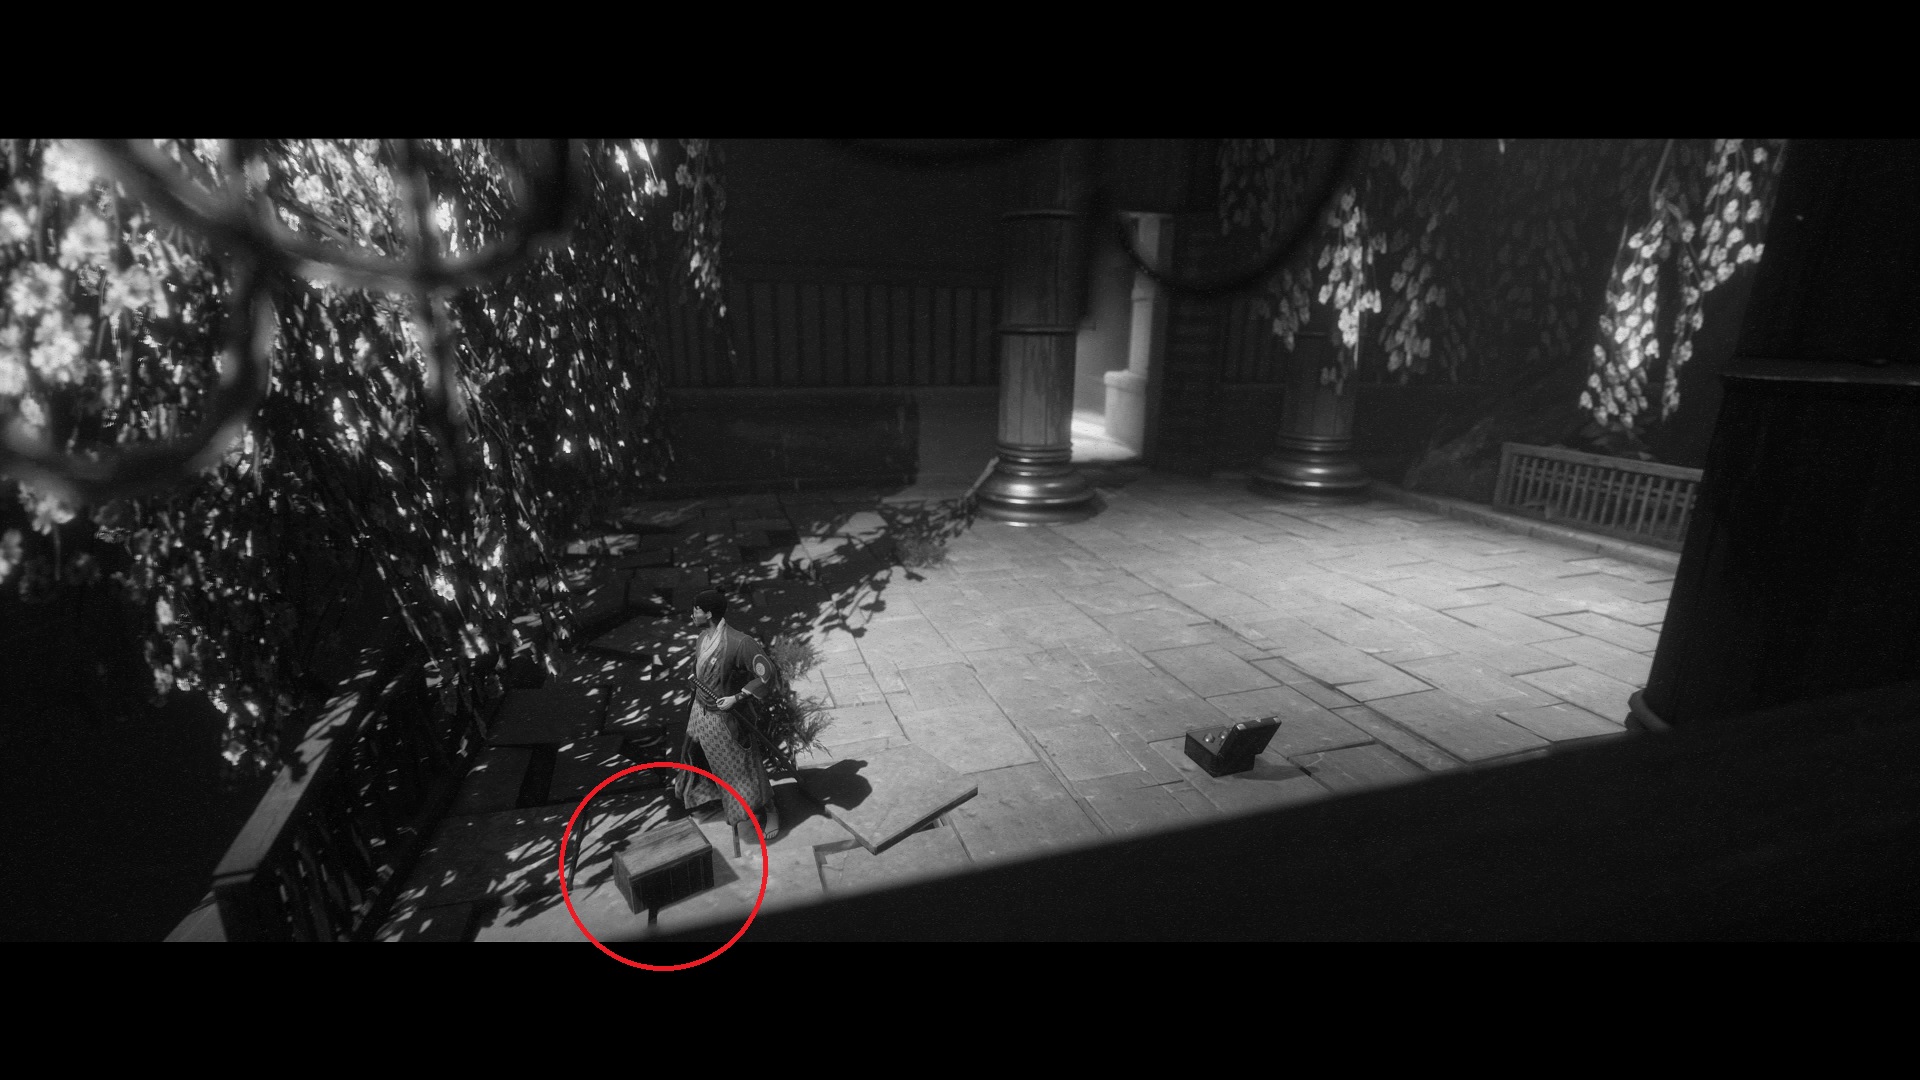
Tsurugi — You’ll reach a part of the village where a large explosion blocks your path. Go through the house combat area and then the outside combat area. Squeeze through the crates, and jump over the obstacle in the next house to find this collectible on a table.
Kanke Koshu — Go upstairs in the same house to find this one on a barrel at the top of the stairs (to the left of the door).
Kagami — After the timed challenge with the fire and fireworks, you’ll arrive at a stream. Go underneath the bridge to find this one in the rocks on the right side.
Sake Cup — Follow the path up, past the shrine, and past the gate and stairs leading up to the flaming dojo. When the camera shifts, you’ll see a stack of boxes at the bottom of the screen. Inspect it.
Those are all of the lore collectibles and artifact locations in Trek to Yomi. For more, check out our review, and stay tuned for more guides.


Published: May 5, 2022 03:05 pm