If you’re after the CMISRS Asset trophy or achievement in Aliens: Fireteam Elite, you’ll need to find 39 pieces of intel in the game’s four campaign chapters and hub, the Endeavor. The logs are hidden fairly well, and whether you’re playing multiplayer with friends or solo with bots, you don’t want to spend your time looking in every nook and cranny to find them.
Once you find the pieces of intel, you’ll need to deliver them to specific NPCs back at the UAS Endeavor hub. There will be yellow icons leading you to their locations.
Note: The trophy/achievement description says to return 39 pieces of intelligence, but it tracks progress by pages of NPC dialog/text from them.
When you return one of these collectibles to an NPC at the Hub, you’ll go through various pages of NPC dialog/text before a conversation is over. How many you go through is tracked out of a total of 100.
For example, the first I returned had two pages of text, the second three, and the third two. My trophy progress said I had 7/100, even though I had only “found” three logs in the game to that point. There is no way to see how many pages each has until you’ve turned it in and checked the trophy’s progress.
UAS Endeavor Intel
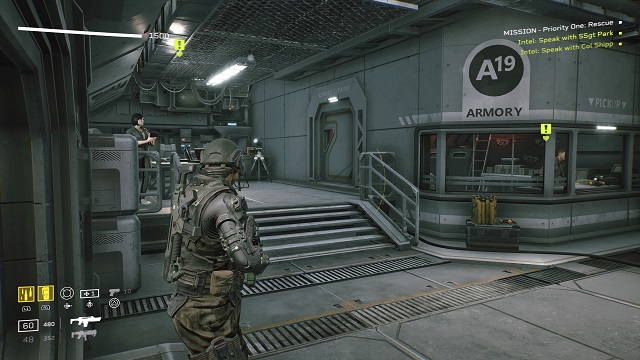
UAS Endeavor Plaque (Tientsin Class Assault Ship)
With your back to the armory, go up the stairs on the right. Go past the soldiers playing cards and the soldier performing repairs on the ship. When you enter the next room with Colonel Shipp, turn left immediately. Interact with the small plaque on the wall next to the vertical computer terminal.
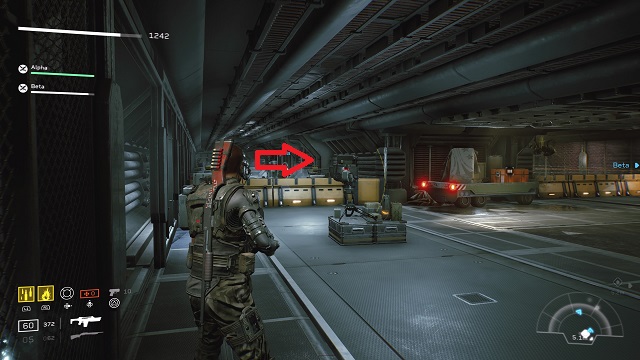
Fulminium Alloy Powder (Field Fabrication)
Go back down the stairs and past the armory. Stay along the left side of the hangar, between the wall and the line of munitions and crates to the left of the aircraft. You’ll see a red wheel with wire on it at the second set of crates covered in mesh. There’s a small crate on the ground behind the wheel with the log on it.
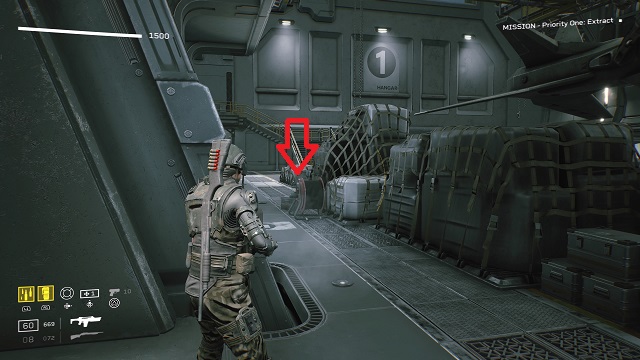
Battle Streamers (United Americas Colonial Marines)

Now go to the back of the hangar. Behind the aircraft, you’ll see an ammo refill crate on the right side. It’s on the ground behind that, back against the wall, to the right of a stack of crates.
Priority One Ingress: Mission 1 Intel
Katanga Flight Recorder
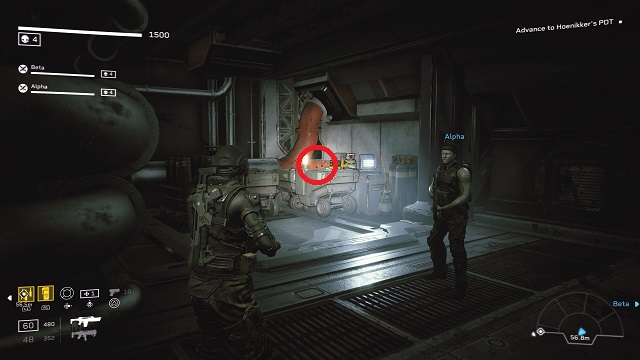
After you download the refinery plans and get the objective “Advance to Hoenikker’s PDT,” follow the path left and toward the new objective. Pass through the tight corridor and through the door. (SSgt Herrera will ping Hoenikker about the Colonial Marines).
Continue toward the objective, and go left in the next room. When the path branches left and right, go left again. Turn left at the end of the hall to find the log on a mobile crate next to a work light.
Dead Facehugger (Xenomorph XX121)
Eventually, you’ll reach the objective “Run Startup Sequence” at a computer terminal in a large room. Before you initiate the sequence and start the battle, go down the stairs on the left side (if you’re facing the computer).
Continue along the left side, and you’ll see some junk piled up near a door. There is a facehugger corpse on the ground behind the junk.
Colonial Indenture Contract (The Outer Rim and Frontier)
You’ll enter a large room with red pipes and a square platform in the center; Herrera will mention getting to the Core Lift Elevator. There are two fuel tanks under the platform. Look to the left of the platform and the fuel tanks to find a desk with a file on it.
Priority One Rescue: Mission 2 Intel
“Eye on Seegson” Magazine (Seegson Company)

Exit the elevator at the start of the mission, and go straight through the door. Go down the corridor and into the first room on the left. There is a small, round table on the left-hand side of the room (to the left of an orange frame sign on the floor). It’s on the table.
Liquid Replenishment Latex (Synthetics)
After opening the door locks, go toward the objective. You’ll come to a stairwell that goes down. Go in the door on the right, about halfway down. The Liquid Replenishment Latex is in the back right corner of the room, near the “Deck 41” door, on a crate next to a deactivated synthetic.
Seegson Maintenance Jack (Working Joes)
A little while after you escape the pump room, you’ll get the objective to “Unlock Inner Door.” When you reach the objective marker at a computer terminal in the middle of a room, go past the terminal, out the door, and stay left. You’ll see a workbench behind some synthetic charging stations. It’s on the workbench.
Priority One Extract: Mission 3 Intel
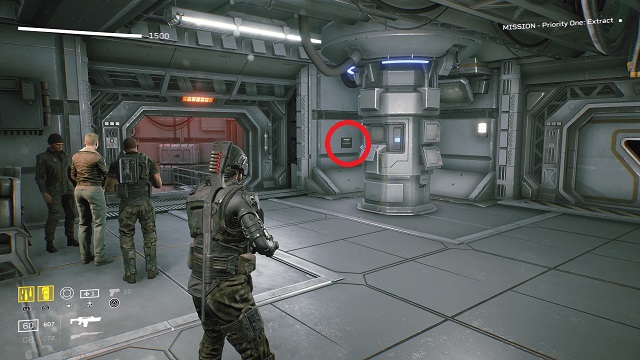
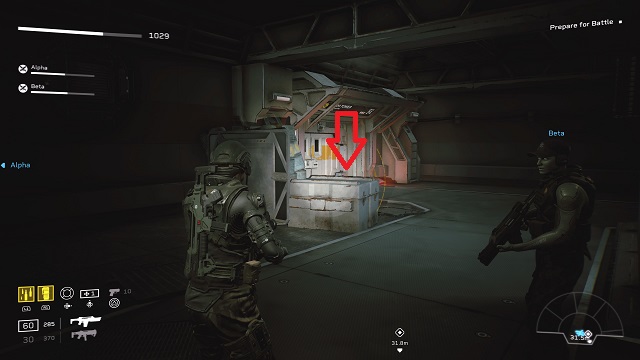
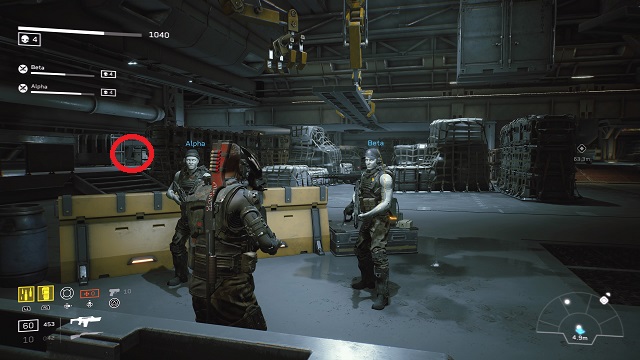
Hoenikker’s ID Badge (Employee Record: Hoenikker)
![]()
Go to the back of the elevator when you start the level. The log is on the floor by a small computer terminal and an orange frame sign directly behind the elevator.
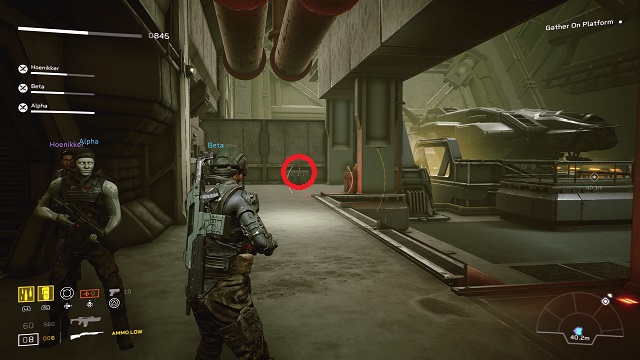
Cargo Manifest (Cryogenic Pods)
At the end of the Waste Processing area, you’ll go up a stairwell and exit toward the hangar. You’ll see a blue sign low to the ground in front of you that says Beltway. Look for a traffic cone and barrel directly behind the sign.
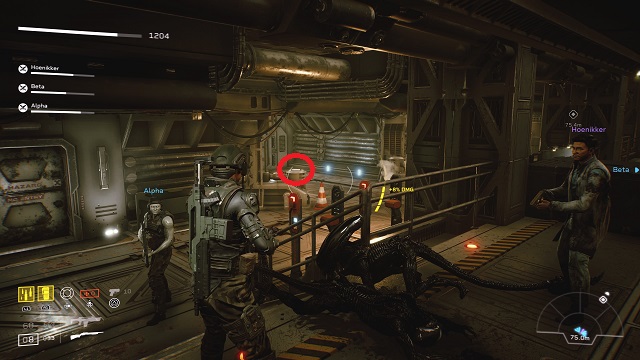
Cracked Roots Squadron Cap (Condor Dropship)
As you make your way through the hangar, you’ll get the objective “Gather on the Platform” near the end of the level. You’ll see the dropship in the distance as you pass through a door, but don’t go down the platform to it yet. Instead, go left to find it on a green crate.
Giants in the Earth Insertion: Mission 1 Intel
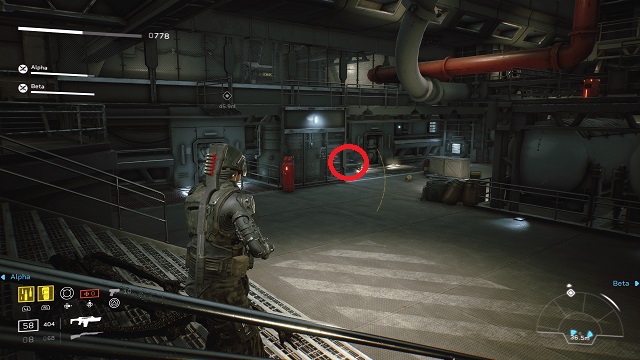
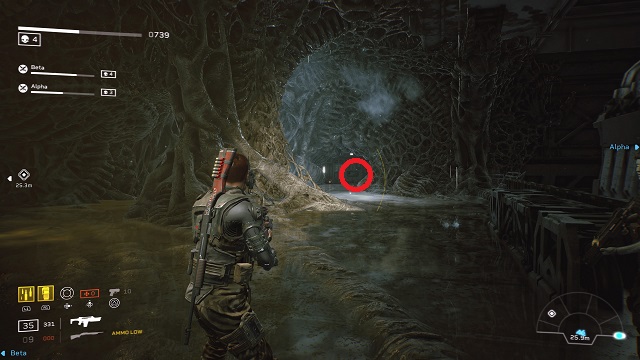
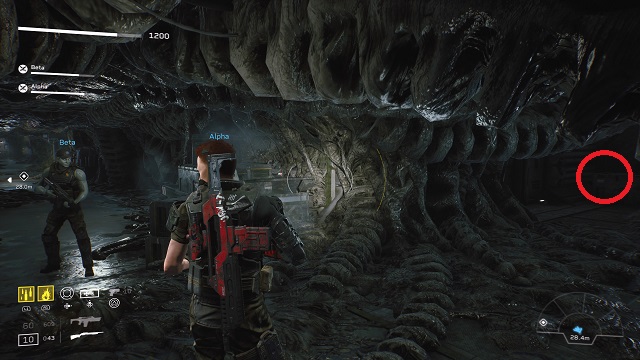
Empty Can of Aspen (Wyeland-Yutani Corporation)
![]()
Start the level, and go down the stairs to the right. Fight off the Xeno horde and continue through the first part of the camp. Go underneath the low-hanging stone structure by the scaffolding.
Once underneath the structure, you’ll see a tent and a forklift on the right side. It’s inside the tent on a crate.
Colonial Protection Act of 2187
After you complete the “Examine Control Boards” objective inside the structure, follow the critical path until you emerge into a large, ruined area with vegetation. Fight through the waves of Xenos pouring from the ruins.
At the back of the area, you’ll turn left to go toward the objective. Instead, turn right to find a Weyland-Utani trailer and two crates in the back corner. It’s on the crate on the right.
Pilot’s Cowboy Hat (Sanriku Interface Craft)
When you get to the end of the level, you’ll lower a bridge and cross it before an airstrike hits. Once you reach the other side, take out the Xeno swarm, then look behind the forklift on the left side. There is a small, round table wedged between the large boulder and the crates behind the forklift. It’s on the table.
Giants in the Earth Contact: Mission 2 Intel
CMISRS
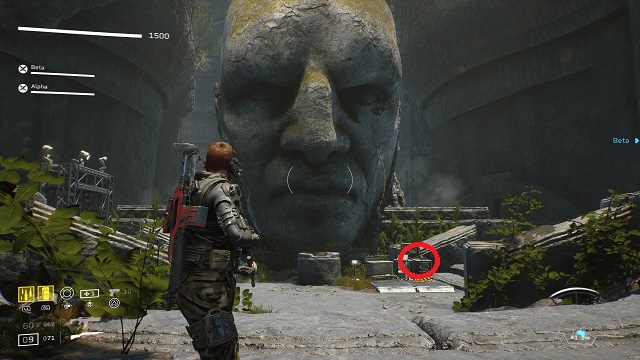
Start the mission, and follow the critical path through the structure. When you re-emerge outside, you’ll see a large stone face in front of you. Go to the base of the sculpture to find the log on a crate to the right.
The Frontier War
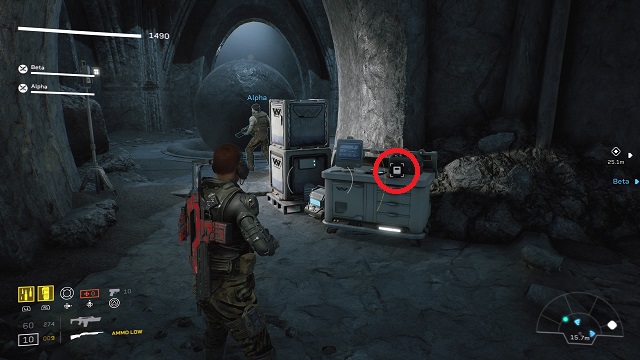
After you complete the objective “Gather at the Exit Door,” follow the critical path down. At the bottom of the stone stairway, you’ll come to a large sphere in the middle of the room. Go to the right of the sphere to find it on a rolling cart with a computer.
Weyland-Utani Ballcap (Security Synthetics)

Eventually, you’ll enter a large outdoor area with two large Engineer sculptures (it’s your third fight against the synthetics). Go up the left side of the area and toward the objective. Once you reach the marker, go down the right side of the area, toward where you entered. It dead ends, and you’ll find the collectible on the ground next to a Weyland-Utani cart.
Giants in the Earth Evacuate: Mission 3 Intel
Hoenikker’s Signed NDA (Pala Station / Site 2)
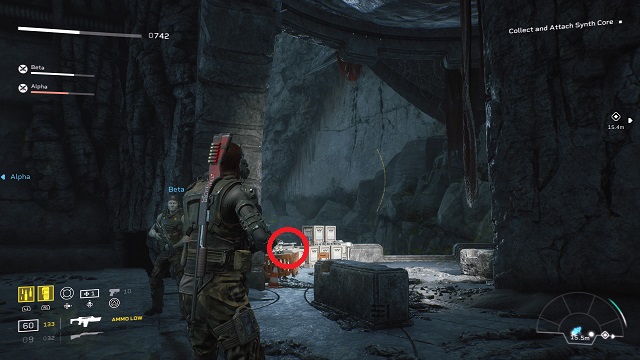
When you get the objective “Collect and Attach Synth Core,” you’ll enter a large room with stairs leading down and a higher tier on the right side. Go down the stairs and stay left. There will be a tattered red banner hanging from a wide support column and a flood light shining on some crates and equipment to the left. It’s on one of the crates.
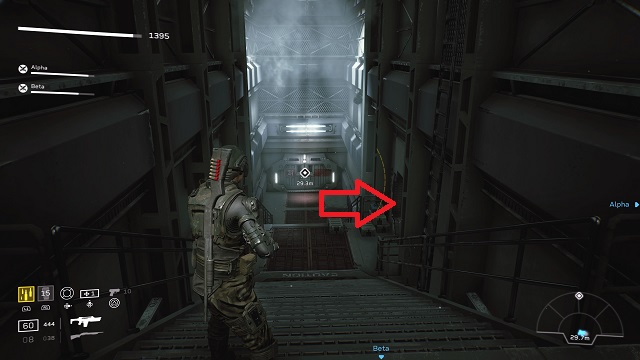
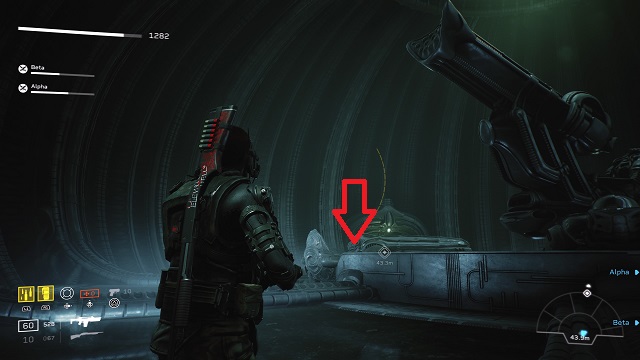
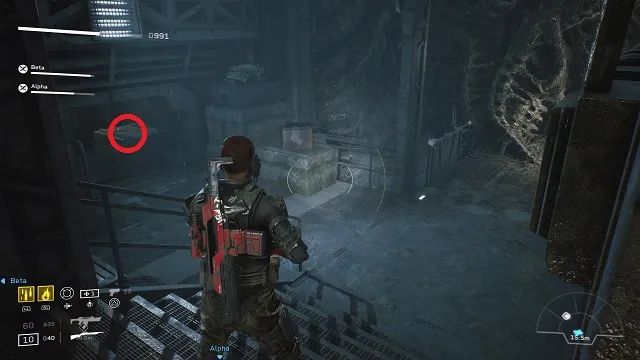
Rodriguez’s ID Badge (Employee Record: Rodriguez)
![]()
For this collectible, you’ll enter an area with a large generator suspended above the middle of the room between two red banners. There are dozens of synthetic “worker joes” and their charging stations here.
Stay left, and go past all of the charging stations. When you reach the top of the stairs on the opposite side, turn left to find the log on a crate next to a work light.
Server Panel (MU/TH/UR/ Systems)

In the final area with the two tall Engineer statues in the back, you’ll get the objective “Secure SN/TH/YA Mainframe. You’ll need to attach two Synth Cores to a station on the left side of the area. The collectible is underneath the station on a crate on the right-hand side by a light.
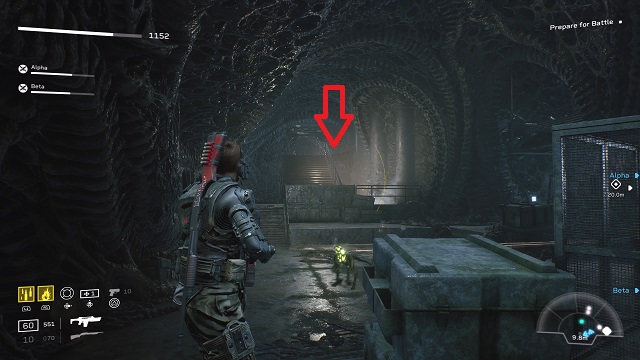
The Gift of Fire Recon: Mission 1 Intel
40th Marine Expeditionary Unit
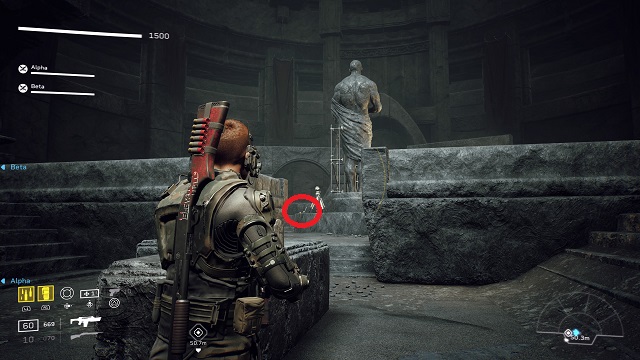
Turn around at the start of the level, and go to the statue in the back. The collectible is a computer on the left side of the statue’s base.
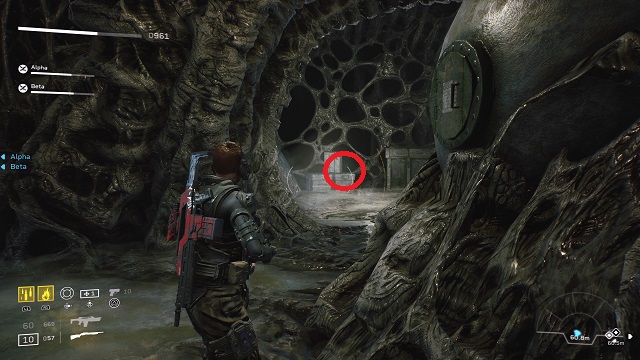
Issue of “Unexplained Universe (Elizabeth Shaw and Charlie Holloway)
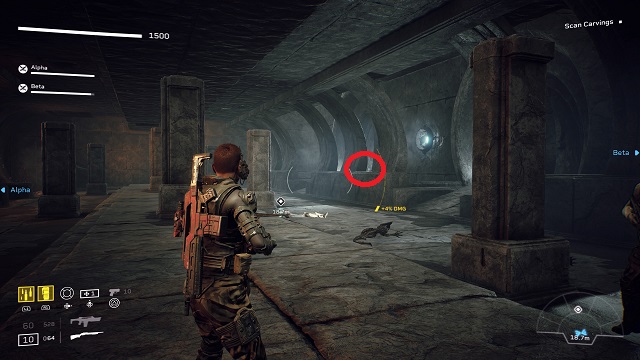
Before you scan the second carving, go past the objective marker (the “dead” synthetic on the floor) and to the second closed door on the right. The log is on a crate next to an orange traffic cone.
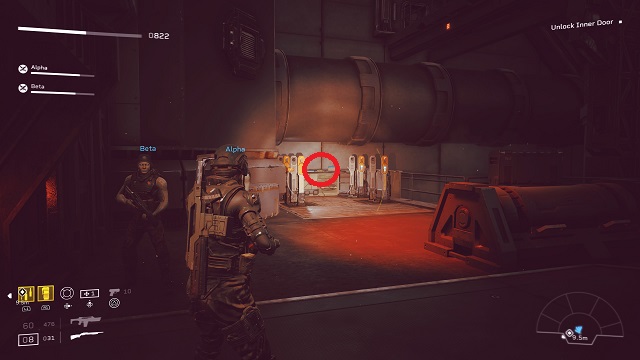
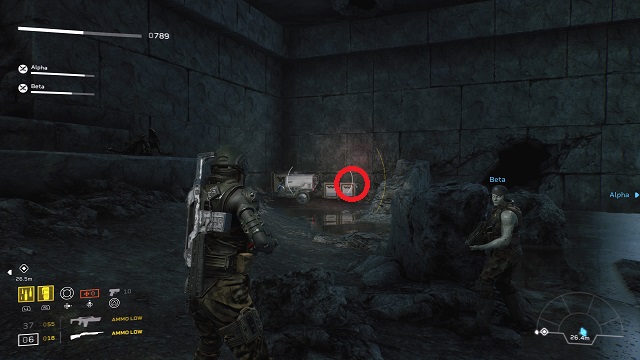
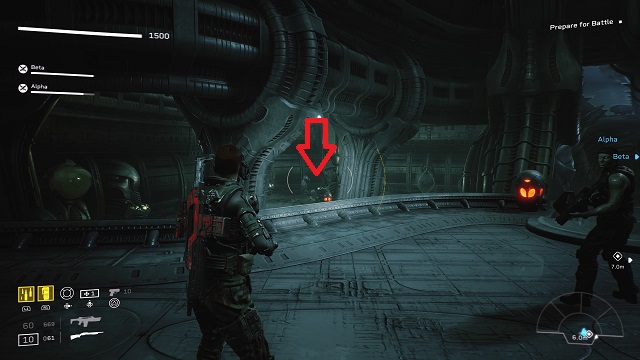
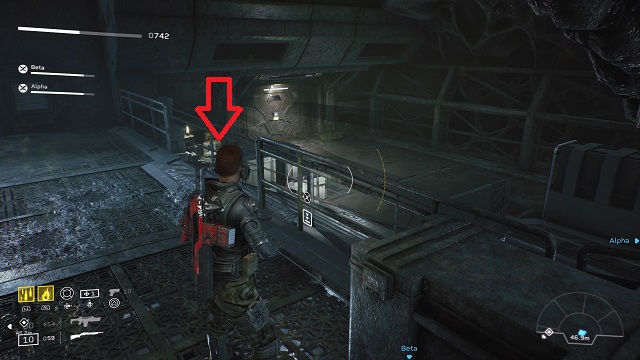
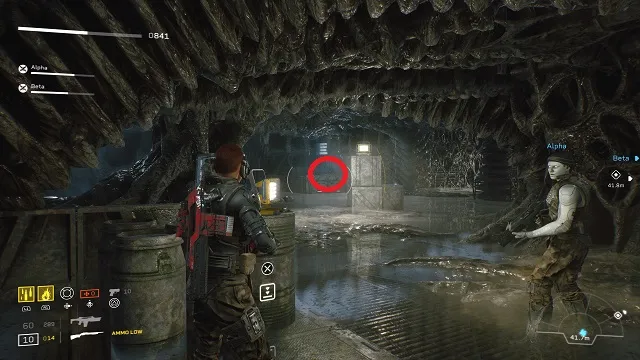
Empty Pathogen Ampule (Pathogen)
![]()
When you reach the third scanning objective, you’ll see a massive stone face carving in front of you and three objective markers. It’s on the ground directly behind the stone face carving, next to an overturned jar (it’s to the right of the objective behind the carving).
The Gift of Fire Advance: Mission 2 Intel
Scientist’s Notepad with Glyphs (LV-895 Ruins)
After fighting through the second main encounter (in the room with the green pipes on the ceiling), follow the objective through the tunnel. When you exit the door, look left immediately for a small rise and some equipment. Climb up to grab a hidden cache (if RNG wills it) and it on a crate.
Gateway Station
After clearing the room with the generator, head through the door and short tunnel toward the objective. Exit the tunnel, and instead of going left, go right and up the ramp. The collectible is on a small cart with a computer and a light.
Dead “Popper” (Pathogen Mutants)

In the next room, go left and up the ramp. At the top of the ramp, turn left. It’s a small, dead Xeno on the ground.
The Gift of Fire Boarding: Mission 3 Intel
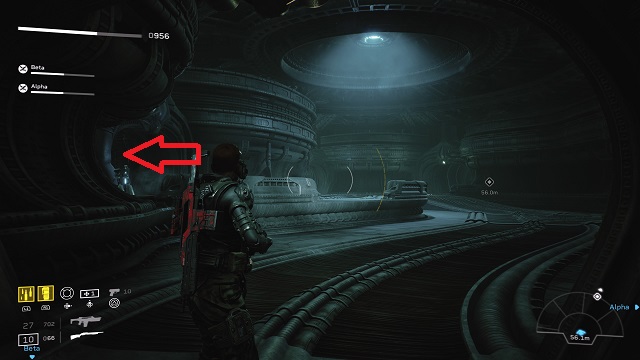
Strange Helmet (The Engineers)
While going to the objective “Rally at Gangway,” you’ll pass a large hologram of an Engineer ship. Shortly after, you’ll see two sets of four pilot chairs connected to vertical terminals on the right side. The log is on one of the chairs in the left-side set.
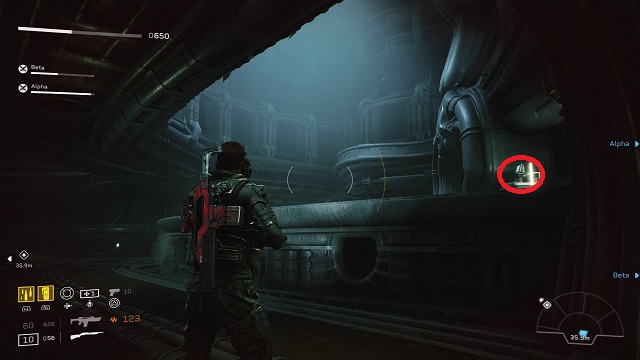
Severed “Stalker” Tentacle (Leon 895 / Pathogen Stalker)
When you reach the objective “Download Memory,” where you download the memory of a destroyed synthetic lying in the middle of the floor, you’ll see more pilot chairs in the back-left corner of the room. It’s on the ground between two chairs on the backside of the column.
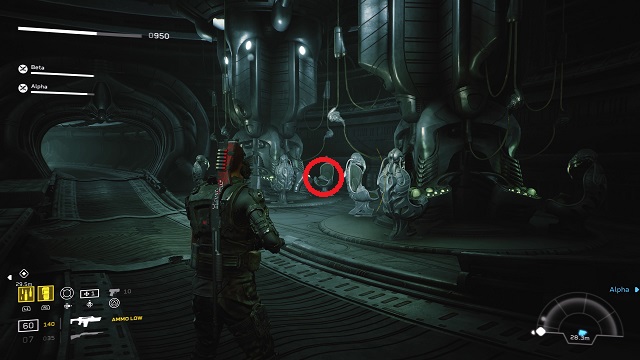
Control Flute (Engineer Ship)
When you reach the room with the telescope-like device in the middle, go left. This one is on the first computer station at the base of the device, resting on a control panel.
The Only Way to Be Sure Breach: Mission 1 Intel
UA Centennial Poster (United Americas)
Eventually, you’ll have to restock the turrets in a large cargo bay with yellow cranes overhead and full of crates covered in mesh. Go left and stay along the wall to find a small table with two chairs and a laptop. The collectible is next to the laptop.
Salivary Gland from Spitter (Xenomorph Spitter)
When you reach the first outer hive area (Esther will say you’ve reached it), stay right, and go into a small alcove. There will be a locked door, and this one should be on the ground on the right side of the door.
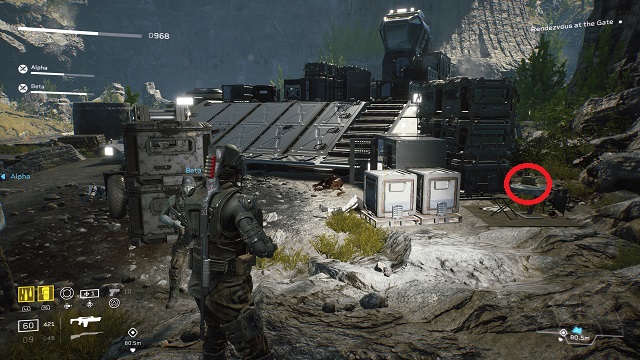
Armat Weapons Case (Armat Battlefield Systems)
Note: This one is a bit strange. I replayed this mission 5 times and only once pulled the room with this one; it’s the first time that happened the entire game. It appeared before the other two above when it finally showed up, so you may find this one sooner.
At some point, you’ll enter a room with two corridors on either side and need to restock the turrets aiming down them. Once you defeat the Xeno horde, go down either corridor a look for an open section in the middle. It’s on a U.A.C.M. crate.
The Only Way to Be Sure Search: Mission 2 Intel
Partially Dissolved Helmet (Xenomorph Burster)
Early in the mission, you should come to a narrow corridor taken over by the hive. Near the end, there will be two red lights on either side and a floodlight on the left. Go all the way to the end of the corridor, and turn left. The log is on a crate in the corner.
Hyperdyne Weapons Catalogue (Hyperdyne Systems)
After going through the core of the hive (the huge open area with the red hive structure in the middle), you’ll come to a stairwell leading down. Go down four levels, and turn left. The collectible is on a crate in front of a locked door. For reference, the next level down is the bottom of the stairwell.
Union of Progressive Peoples
After you take the first dog tag, you should enter an area with catwalks (Herrera will comment on the catwalks). Go up the first set of stairs, and go right. Follow the path, and take the next right. This one is to the left of the door on a barrel next to the stairs you just went down.
The Only Way to Be Sure Regicide: Mission 3 Intel
Drone Shedding (Xenomorph Praetorian)
When you reach the room with dozens of eggs on the floor and battle supplies (the objective is to access a terminal in the room near the supplies), there is a metal stairwell that goes up the left side. Go up three levels, and turn right. It’s on the ground.
Three World Empire
You’ll enter a room with catwalks taken over by the hive. There will be three eggs to left as you enter and battle supplies directly in front of you. Go just to the right of the supplies, and follow the ramp slightly up.
Keep left. You’ll see a metal sphere stuck in the hive wall to the right and eggs on the ground in front of you and to the left. Thisone is to the left on a crate in the corner.
Corporal Shipp’s Dog Tags (Personnel Dossier: Shipp)
After you restore the elevator, you’ll come to a room with low ceilings and a synthetic stuck to the hive wall in front of you. To the left, you’ll see several barrels with a work light on top of them. Stay left, and go straight back, past three crates with a work light on them.
Behind the crates is a barricade in the back corner. The log is on the barricade.
—
And those are all of the Aliens: Fireteam Elite intel locations. Finding them all will give you the CMISRS trophy/achievement! It’s not game over yet, though. There are plenty more Xenos and Synthetics to wipe out. Check out our tips and tricks guide for more.


Published: Aug 20, 2021 02:23 pm