The normal battles in any given area of Darkest Dungeon can be deadly, so obviously the bosses are absolute nightmares.
One of the greatest difficulties of the boss fights isn’t actually the boss itself, but rather going through a medium or long dungeon to find that boss first. The quicker you reach the boss, the better your chance of survival.
If all the party is already over 100 stress and you are out of provisions by the time you stumble on the boss, your chances of survival are much lower. To counterbalance this, always keep the light level up around 100% (which gives a scouting bonus), equip trinkets that increase your scout chances, and swap out your camping skills so everyone has a scouting bonus option available.
Another important aspect that leads to frustration for players who are thinking along traditional RPG lines is not realizing that defeat is part of this game. It’s better to flee, learn from how you got trounced, abandon the quest, and come back again with a better party tailored to the situation.
There are three distinct variations on each boss (except for the final boss fight) that you will have to fight over time, each of which will go up in health and have increased stats from their previous iterations. Each subsequent battle reveals ever more damning secrets about your ancestors’ unhealthy interest in hidden arcane arts.
For the most part, the strategies remain the same in every iteration of a boss – since you too will have upgraded heroes facing off against them – but in same cases tweaking your lineup may be required. At the highest levels, it can actually be more advantageous to go with a no-healer party and instead focus on trying to kill the boss quickly rather than keeping everyone alive each turn.
If you need more help in surviving the unholy horrors set loose by your ancestors, be sure to also check out:
- Darkest Dungeon combat survival guide
- Darkest Dungeon curios guide
- Darkest Dungeon party building guide
- Darkest Dungeon hero class guide
- Darkest Dungeon beginner’s strategy tips
- Darkest Dungeon mods you need to install
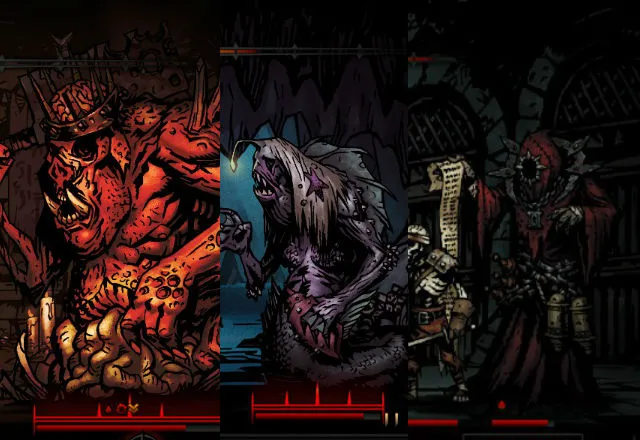
Darkest Dungeon Ruins Bosses
Necromancer
Unless you have a truly bad run of luck with misses and criticals (or your entire party is already on the verge of insanity and/or death before entering the room), the Necromancer will be the easiest boss battle you face in the game. By “easy”, of course, I mean you probably won’t have a total party wipe.
First and foremost, you should have a Crusader — as is the case with any expedition into the ruins, since his Smite ability already deals bonus damage against the Necromancer. If you can fit two Crusaders into your party and equip them both with Unholy Slayer Ring trinkets, you’ll be golden.
Nothing is ever completely easy in Darkest Dungeon though, and the problem will be getting your Crusaders into position to strike, as the Necromancer constantly spawns skeletons and moves himself to the back row. In each of the three versions you’ll face of the Necromancer, the specific type of undead summoned increases in health and power.
Due to his low move resistance, your strategy should be to manually pull him into the front row using skills like Come Hither (Bounty Hunter) or Daemon’s Pull (Occultist) if you can’t kill the skeletons fast enough to also get in a strike at the boss (will become more likely in the second and third tier battles).
The Necromancer’s bleed resist is also quite low, so even if you have trouble keeping him in the front row, using any bleed skill will whittle down his health while you focus on the skeleton minions. The Hound Master or Hellion are good choices on that front. His stun resist, on the other hand, is exceedingly high, so while you might get lucky and pull it off, usually focusing on this status effect is a waste of time.
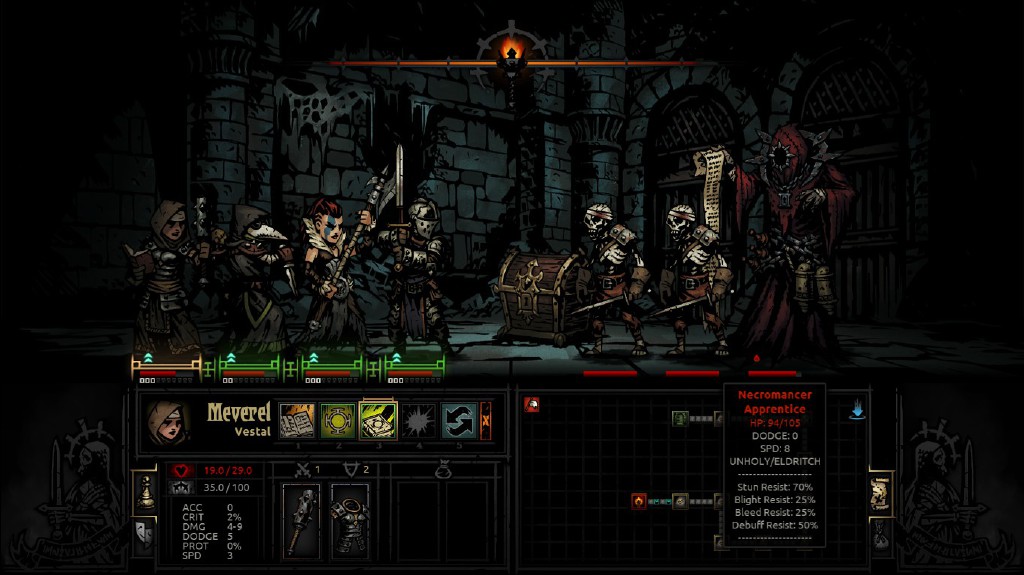 Necromancer Boss
Prophet
With an extremely high move resistance, there’s little chance you’ll get the Prophet into range of your front row melee attacks, so you need to equip everyone with the skills that hit the back row. Unlike with many other boss fights, there’s only one enemy here actually dealing damage to you, so a party focused on marking and then dealing extra damage to marked creatures (specifically with the Arbalest and Bounty Hunter) will make quick work of the boss.
The Prophet frequently uses attacks that cause stun or blight. If you are focused on taking the Prophet down quickly, the blight damage might not be a major threat, but stunning is definitely of concern. Before heading into this battle, its a good idea to equip trinkets like the Stun Charm, Immunity Mask, or Wilbur’s Flag.
This crazed fanatic is susceptible to both bleed and blight himself, so if you hit him with a double whammy of both and then focus on long range back row attacks, taking him out won’t actually take too long. The trouble is, you may want to drag this fight on longer than necessary.
Although he’s the only one doing any damage, the Prophet isn’t alone in this battle – the front three enemy lineup slots are filled with inanimate church pews. The more pews you destroy, the more money you’ll earn at the end of the quest. But they have inordinately high health. If you are willing to risk dragging the battle out instead of going straight for the kill, bring out heroes who can debuff the Prophet’s damage, such as the Vestal or Occultist, to keep your party from getting wiped out.
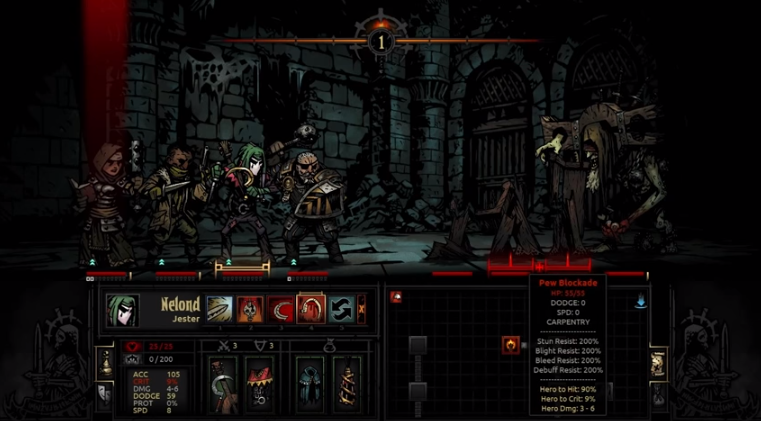 Prophet Boss
Darkest Dungeon Cove Bosses
Siren
Like with the Hag in the weald, this is a battle where you will frequently be down to only three members, as the Siren constantly steals one. Unfortunately in this case, that hero will actually fight against you.
There’s no point in hitting your charmed hero – that damage remains when the hero returns to your ranks automatically in 2 – 3 rounds, and killing the character won’t stop the Siren from entrancing another hero the next turn.
Between charming your heroes and summoning backup fish monsters, the enemy lineup is going to constantly be in flux, so it’s a good idea to have a full lineup that can hit any enemy position. You don’t want to be wasting time moving your characters around, since by the time you are all in the proper position, the enemy lineup will have shifted again.
The best strategy here is to ignore both your charmed hero and the summoned monsters, as more will always be on the horizon. Just go straight for the Siren with everything you’ve got. If you are taking too much damage from your charmed hero, however, stunning them is an excellent option. Trinkets like the Debuff Charm and Debuff Amulet can also raise the chance the Siren’s charm won’t work at all.
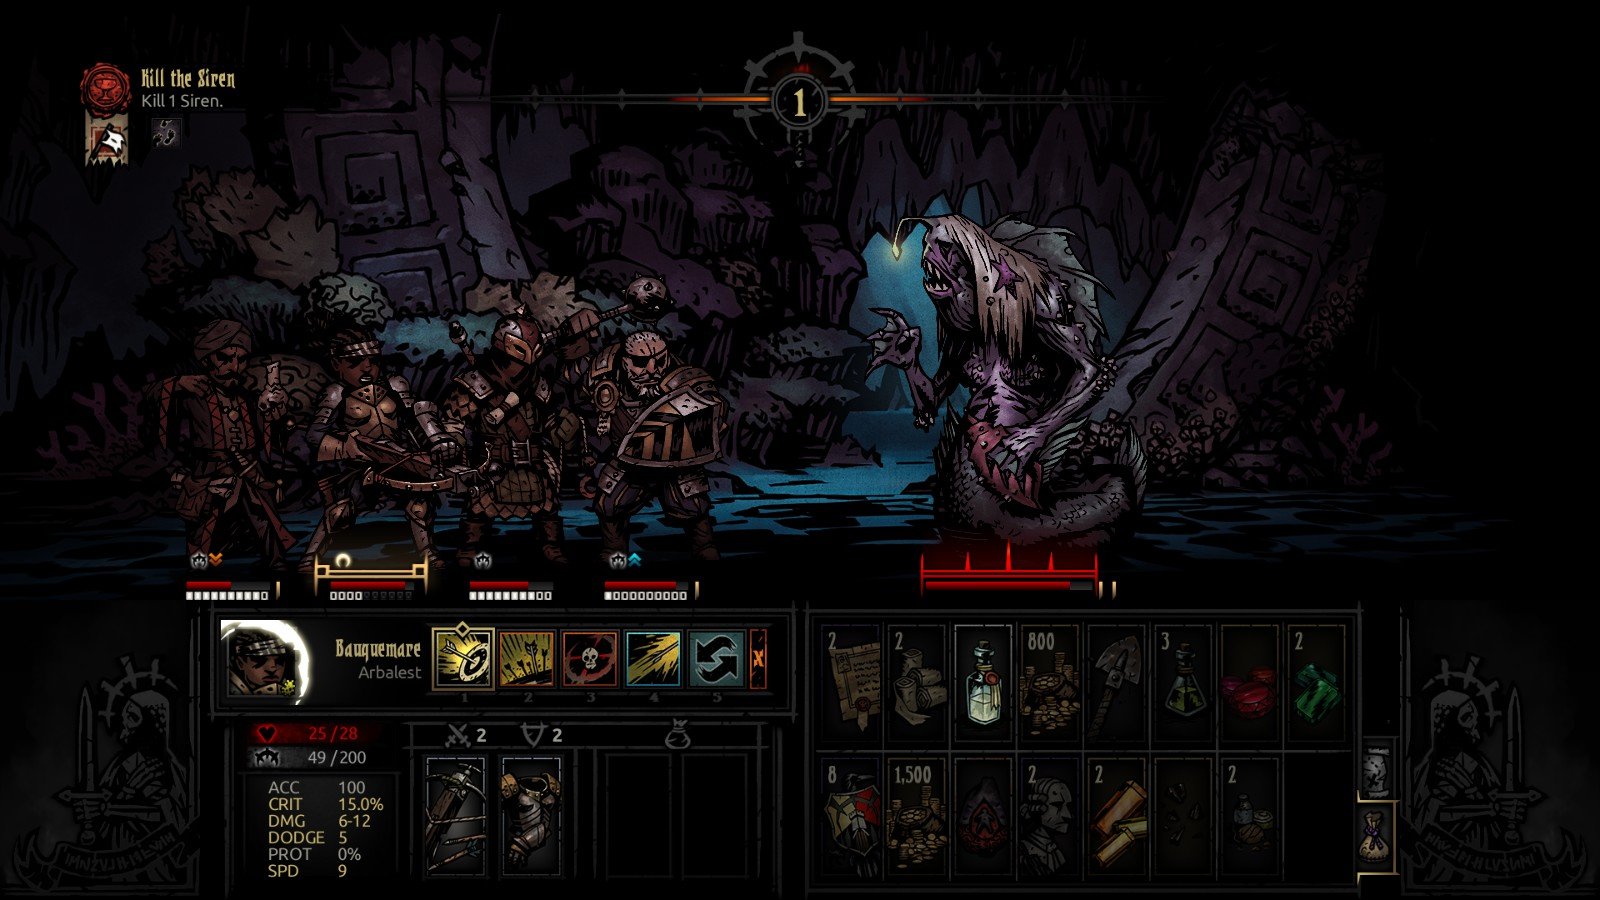 Siren Boss
Drowned Crew
This frustrating battle will see the undead pirates messing up your formation by dragging a back row character up to the front, so make sure you have a backup skill on each character so they hit from the front as well.
The Drowned Anchorman will also freeze your front line character in place and rapidly raise their stress level, while simultaneously regenerating the rest of the Drowned Crew’s health constantly. Killing the Anchorman ends the effect, but a new one will be summoned shortly.
Avoiding the Anchorman’s attack is the best way to prevent an infuriatingly long battle, so equipping trinkets that increase your Dodge skill on the front line fighter is a must. Stunning the Anchorman can also be useful for getting a few attacks off before he can hit your front hero and start the healing process again.
Keep in mind that killing the Drowned Crew also kills the Anchorman, so whenever possible, your attacks should be focused on the main boss.
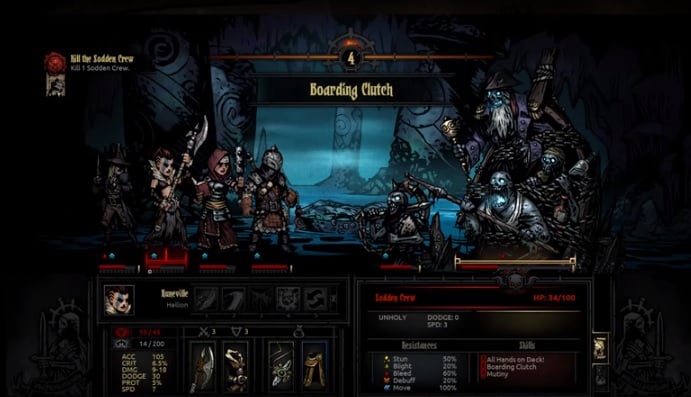 Drowned Crew Boss
Darkest Dungeon Warrens Bosses
Swine Prince
A nod to both The Dunwich Horror and Wilbur the pig from Charlotte’s Web, the terribly mutated Swine Prince occupies the first three slots of the enemy lineup while his miniature aiming tool Wilbur occupies the far back row.
Wilbur will mark your characters so they take more damage, and of course the Swine Prince focuses his attacks on those marked heroes, so you have a good idea of who you need to heal up ahead of time. Wilbur can also stun your heroes, so it’s a good idea to equip trinkets that increase your stun resistance ahead of time.
Although he’s a major annoyance, do not attack Wilbur at all until the Swine Prince is dealt with, or you will receive a massive retaliation strike.
Skills like the Arbalest’s Rallying Flare can remove Wilbur’s marking so you take less damage, although that uses up a turn you could be dealing damage instead. Your main focus should be on taking down the Prince as fast as you can with attacks that target the front row.
The Prince is also susceptible to blight, bleed, and debuffs, so it’s possible to both lower his attack damage and constantly lower his health each turn, even if you get stunned by Wilbur.
After the Prince is down, you may want to let Wilbur get in some shots before crushing him if you are an achievement hunter with no regard for the life of your troops. There’s actually a secret Steam achievement if you let a party member get killed by Wilbur!
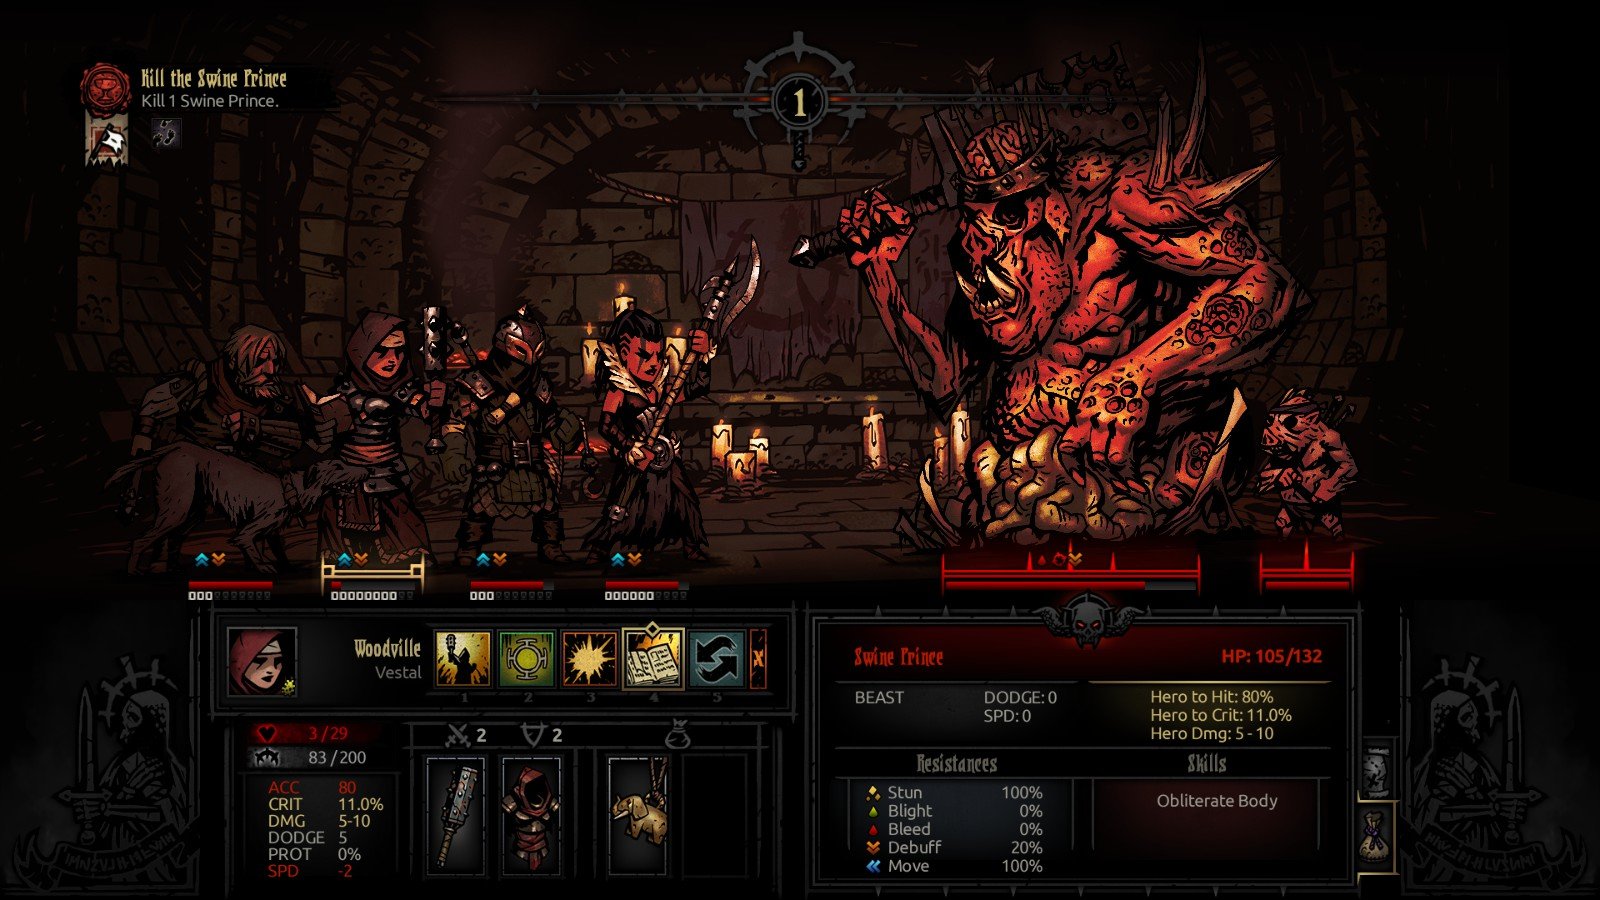 Swine Prince Boss
Flesh
A big, disgusting mass of cast-off swine parts from your ancestor’s failed experiments, the Flesh consists of four different parts — each taking up a spot in the enemy lineup, but all using a single health total. Hitting any part of the lineup will damage the boss, so you are pretty open in terms of attack types.
Each part will change into a different type over time, with the four available types having varying resistances. The one type you most want to see is the heart, and always target that whenever possible, as it has a much lower Protection stat.
You will want the ability to heal the front two spots of your lineup or have them heal themselves, as they will take significant damage (in addition to the bleed effect) during this battle.
The Occultist’s Abyssal Artillery attack is particularly effective here, as it does extra damage against the Flesh and hits two spots at once. Bleeding effects, such as the Houndmaster’s Hound Harry, can also be quite useful to overcome the high Protection of each piece of Flesh.
 Flesh Boss
Darkest Dungeon Weald Bosses
Hag
This enormous and cannibalistic witch takes up the back two spots in the enemy lineup, while her gigantic pot for seasoning human meat takes up the front two rows. Make sure you have at least three characters who can target the back row, as the Hag has an extremely high move resist and won’t be pulled to the front row by your movement skills.
Much of this battle will only feature three of your heroes, as the Hag will quickly throw one into the pot, where that character will take damage each round. You can hit the pot a few times to set that hero free, although in the next round or two the hag will snatch up another hero.
Remember how I said you should run if things are going badly? That’s a less useful strategy here, since any character stuck in the cauldron will die when you flee.
Your main focus should be whittling down the Hag’s health. Only focus on the pot if you either have a character who can’t hit the back row, or if you truly need that captured hero back to deal more damage. The Hag’s bleed resistance is low, so utilizing a few bleed attacks in a row can give you time to set your captured companion free from the pot while still dealing damage.
 Hag Boss
Brigand Pounder
A very unusual boss, this fight is actually against the gigantic cannon itself, while the bandits who show up to use it are just the minions!
The cannon has very high resistances against everything, so for the most part there’s no point in bothering trying to hit it with any status effects. That’s a problem, because it also has a very high Protection stat, so all your attacks will be doing much less damage than normal.
This fight is further complicated by how the Pounder’s attacks work – to deal its most devastating attack, a Brigand Matchman must be alive and able to act. Your focus should be first on killing all the brigands (or barring that, stunning the Matchman if possible and then killing him the next turn) and then dealing any remaining damage straight to the cannon.
A good mix of area affect and straight melee damage powers is very helpful here, as you want to be both taking out the minions and damaging the Pounder at the same time, if at all possible. Since you won’t be taking as much damage if you consistently kill the spawning bandits each turn, you can get away without bring a Vestal or any dedicated healer into this battle.
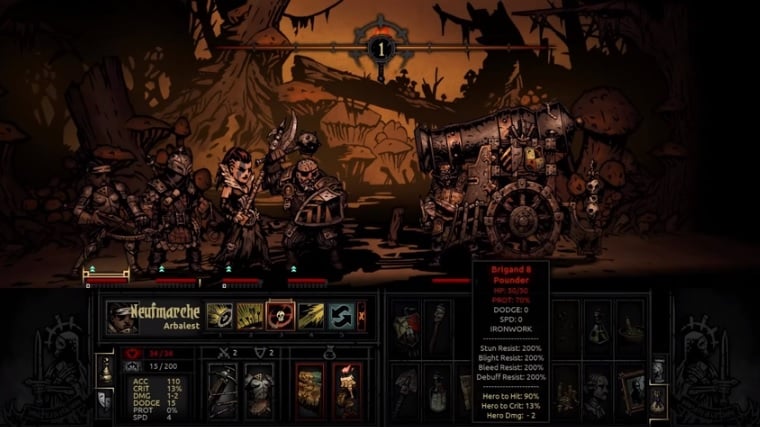 Brigand Pounder Boss
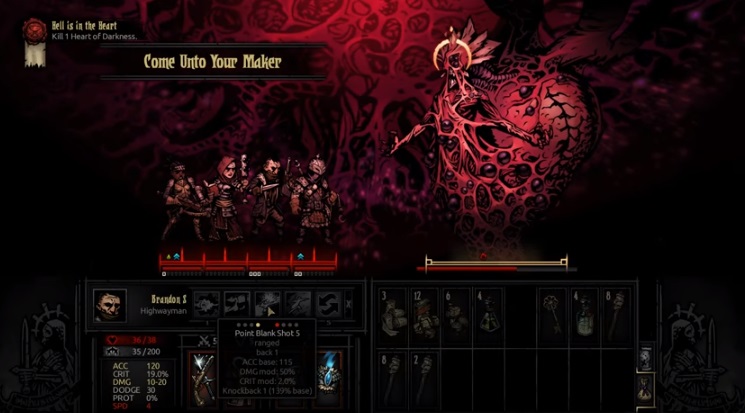
Darkest Dungeon Final Boss
The final boss is actually your ancestor himself, who goes through numerous forms before finally turning into the Heart Of Darkness.
The most difficult element of this fight is the Come Unto Your Maker attack, which is used twice during the battle and each time forces you to pick one character to die, permanently, regardless of their health level. The choices you make there will determine whether you win or lose.
Your best bet is to kill off your utility or healing characters, and leave your main damage dealers alive. To ensure they stay alive and can keep dealing damage, be sure to equip those front line damage dealers with stunning and blight resistance trinkets, and then just get off your strongest attacks until the Heart Of Darkness finally goes down.
 Heart Of Darkness Boss
Got any other strategies for taking on these infuriatingly difficult Darkest Dungeon boss battles? Let us know how you beat each boss!


Published: Feb 10, 2016 01:50 pm