
Building a safe, prosperous, functional settlement in the post-nuclear apocalypse can be a daunting task, especially with so many options. Fallout 4 offers a lot of personalization when it comes to building settlements, but that isn’t something new players should worry about right away.
Yes, it can be pretty awesome to deck out one “master suite” house where your character calls home, but settlements are about more than that in Fallout 4. Think of yourself as a the veritable mayor of the Commonwealth. You’re in charge of a lot of areas, a lot of people, a lot of crops, water supplies, power supplies, defense; you get the idea.
This guide is all about providing necessities to your disciples, and crafting better settlements from the ground up.
Step One: Find A Settlement

Okay, this one is pretty obvious. You can’t just build anywhere. Mind you, you can build a lot of places. Most areas will require a quest to unlock.
If you’re exploring the wilderness and come across a red workbench, labeled “Workshop” when you scroll over it, congratulations, you can build there! Now all you have to do is figure out how.
Speak to NPCs (Non-player Characters) in the general vicinity. A lot of times farmers need help with raiders close by or are looking to receive a certain “special item”. Once you complete these quests, you’ll gain allies, allowing you to build on their property (most of the time).
Step Two: Clean It Like You Mean It.

When you first arrive at a new settlement to do some work you’re gonna realize two things:
- Nobody, I repeat, nobody keeps things neat and orderly in the post-nuclear apocalypse.
- As a result of number 1: You’ve got your work cut out for you, kid.
Just like an episode of Flip this House, the first thing you need to do is tidy up the place. There are two methods for doing this, though you can only use one or the other for certain objects.
Scrapping
The method I personally prefer, scrapping involves a total cut down of all nearby junk. Scrapping can be done to any object but food.
Essentially, you can grab any functional part of the world and tear it down to its base ingredients to be placed in your workshop. Remember: if you scrap items, you receive less than its full value in ingredients. For example, if I scrap a wooden wall that takes 8 wood and 2 steel to build, I’ll only receive 4 wood and 2 steel in return.
Use this teardown method if you want nothing to do with the original plan for the area. Rip down all manner of objects and start 100% fresh with a clean looking area, ready for your crafty touch.
Moving + Storing
A different method is to partially use what the developers have left for you. This involves leaving the furniture, fences, trees, and other pre-standing objects alone, and adding your own touches to them. Rather than scrapping items, you can grab objects and move them to other areas, or store them in the workbench.
A lot of materials can be stored, but not reapplied to your area. For example, if you want to store a box of Dandy Boy Apples, you can take them from your workbench, but never reapply them.
A lot of materials can’t be moved either. Trees, rubble piles, certain landmarks, etcetera, can’t be moved to a different location. Some items can’t even be selected for storage.

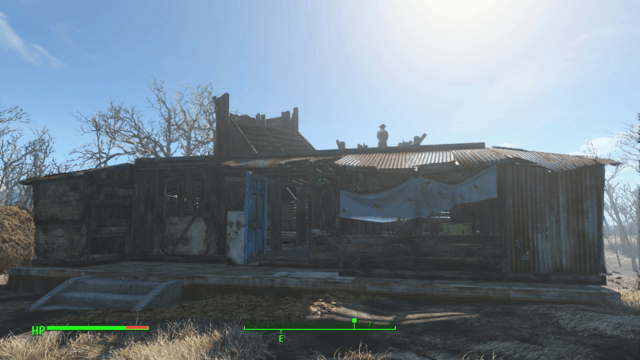
This ugly old ran-down house can’t be scrapped, stored, or moved.
Depending on the theme of your new location, what you scrap and what you store can be a strategic decision. I generally try to store any furniture, so I don’t need to use all of my resources on it, and scrap everything else.
Make sure you don’t scrap workstations such as cooking, chem, or weapons tables. You’ll need a hefty perk to reapply those to your area.
Step Three: Give It A Rest

Although the player character in Fallout 4 is super-human and doesn’t actually need sleep, water or food to survive, NPCs do. The first thing you should craft in your new settlement is a number of beds equivalent (preferably higher) to the number of people living there.
Nine times out of ten, there will be enough beds already. But in the odd case that there isn’t or if you’re inviting new settlers to your area, you’ll need to build some more. Beds will cost you 4 steel and 5 cloth to make. You can invest in a mattress or sleeping bag, for 6 or 3 cloth respectively, if you don’t have the steel.
Try to keep your beds in a sheltered location to keep your settler’s happy. If there isn’t a sheltered area, go ahead and build a small shack out of wood or metal and throw a few mattresses on the floor. We’ll get into crafting houses later.
Step Four: The Best Offense Is A Good Defense

A ton of settlements in Fallout 4 are farms. A great thing about farms, and a lot of other settlements in Fallout 4, is that they already have food and water supplies ready to go. Unfortunately, farmers don’t make great fighters, so farms neglect to come with homemade defenses. That’s where you come in.
Settlements need a defense rating equal or higher than the sum of food and water supplies. Bandits and other baddies will attack your settlements from time to time and it will devastate your people, ruin your items, lower the place’s happiness level, and generally piss you off. Defense tends to negate these effects.
Defense comes in three forms: Guard Posts, Turrets, and Traps.
Guard Posts
Guard Posts are great for a settlement with lots of people and ground to cover. If you have 10 settlers that are just sitting on their asses, you can get them to stand watch on your posts. Without people assigned to each Guard Post, these won’t add any defense to your camp. However, settlers can be assigned to more than one Guard Post at a time.
I prefer the elevated posts, so your people have a better chance of spotting incoming enemies.
Guard Posts fit perfectly with a junk fence if you want to build a protected compound. More on that below.
Turrets
Turrets are your most useful line of defense, especially Machinegun Turrets. Instantly producing 5 defense, the Machinegun Turret can be placed practically anywhere to watch over your settlement. They require 8 steel, 1 circuitry, 2 gears, and 2 oil. The best part about Machinegun Turrets is that they require no power, no perks, and no people.
The second best Turret is the Heavy Machinegun Turret giving players 8 defense. This Turret requires a few more ingredients and the Gun Nut perk, which is fairly easy to grab.
Traps
Traps require power, so I don’t recommend them for beginner craftsmen. They work in conjunction with small entrances to your compound, keeping enemies that don’t know their whereabouts out.
The Secret Defense: Walls

Although they won’t boost your defense rating, a great way to realistically defend your compounds is to install “Junk Fences” around the perimeter. They’ll keep your population safe and sound by forcing raiders to enter at specific locations, where you can place the entirety of your defense mechanisms.
Note: Remember how I said that Guard Posts blend in with Junk Fences? In the image above, the part of wall on the right of the gate is an elevated Guard Post.
Step Five: Food + Water

Food
The next big project for you and your settlement is to build a garden. Find some vegetables in the wild, either by picking them out of the ground or a raider’s pocket. Find a big patch of dirt and start planting. If you can keep your vegetables in a row (having all of your veggies one type will help), they will fit better.
Most vegetables in Fallout 4 provide 0.5 to your overall food rating. Try to keep your food rating equivalent to the number of people at your settlement. No one is happy on an empty stomach.
You don’t need to build a fence around your garden, though I would recommend it. Fallout 4 is filled with little glitches where your settlers will suddenly be nowhere to be found. If you assign people to be farmers, then throw a fence around the crops, they’ll tend to actually work the land rather than getting lost.
Water
There are multiple ways to get the water you’ll need for your settlers. Water Pumps are handy, but if you have a nearby water source it’s way more beneficial to have a Water Purifier.

A small generator can power a Water Purifier, which will instantly raise your water rating to 10, providing water for ten thirsty patrons. Don’t worry about using up the water, it never actually dissipates.
If there is no water source within the bounds of your settlement, find a long, narrow patch of dirt and place two or three Water Pumps.
Step Six (Optional): Power

As ridiculous as it sounds, power really isn’t that important for your settlements. Unless you want to install a Water Purifier or special defensive equipment, I’d skip this step entirely.
Sure lights, jukeboxes, and other bits and bobs can be a neat idea, but the resources it takes to make those items, as well as a generator, just aren’t worth it for the time you’ll spend at your settlements.
Step Seven: Structures
Of course, no settlement would be complete without actual places to settle. Although the crafting system isn’t 100% user-friendly, once you tinker with buildings a little bit you’ll figure out just how to build houses the way you want.
Make sure you watch your Size rating in the top right corner of the Workshop Menu. If you build too much, it will fill and prevent you from building anymore. If you’re building individual houses, keep the size of each to a bare minimum; if you build a large house, make it interconnected with many levels and rooms for people to call home. Using these techniques, you can build the establishments you want while keeping size and material costs in mind.
Step Eight (Optional): Furniture
The only furniture that you’re required to build is a bed for each settler. Where’s the fun in that? I’m not going to tell you how to decorate your pad. I will tell you that when you start decorating, the Size meter fills up. QUICK. So don’t save your special room until the end.

Head into the area you’re going to call home and make it perfect. Put up your cute cat paintings and bobble head stands, and then fix up everyone else.
Step Nine (Optional): Crafting + Stores

Building a crafting or trading post is entirely optional, and rightfully so as to build any stations or stores you’ll need the second tier of the Local Leader perk that requires level 14 and 6 charisma.
Some settlements, such as Sanctuary, come with every crafting station already available, so you can fast travel there any time you need to craft things. That being said, a set of crafting tables at every settlement could be extremely handy.
Caravans will travel through certain settlements so traders aren’t 100% necessary, though, as above, they could be handy.
Step Ten: Get Out There And Get It Done
Fallout 4 crafting takes a long, long time. If you want to make headway with your settlements, the best thing you can do is try. Get out there and start building. It’ll take hours to finally make the perfect settlement for you, but it’ll be worth it in the long run.
You’ve learned valuable Fallout 4 skills today people! Now fly you fools!

For more information on the Fallout 4 settlement system check out the full Settlements Info and Tips article here on GameSkinny.


Published: Nov 18, 2015 05:13 pm