Being able to hotwire cars in Project Zomboid is one of the most important things you can learn how to do. While it may not be as vital to your survival as other tasks (you can certainly stay alive without it), hotwiring vehicles allows you to drive them without keys, meaning you won’t have to spend time looking for car keys — and put yourself at risk of getting munched.
This Project Zomboid guide will provide you with all the tips you need for how to hotwire cars. You will have to learn two essential skills before being able to hotwire vehicles, but once you get these skills, everything else is straightforward. Click the links below to jump to specific sections:
- How to Increase Your Electrical Skill Level
- How to Increase Your Mechanics Skill Level
- How to Hotwire Cars
Project Zomboid Vehicle Hotwiring 101
How to Increase the Electrical Skill in Project Zomboid
Before you can hotwire cars or vehicles in Project Zomboid, you must have two crafting skills: Electrical Level 1 and Mechanics Level 2.
You can also choose to start the game with the Burglar occupation, which has hotwiring already available. But since you start the game as a Burglar with -6 points, it’s not the best occupation to pick from the beginning.
Here’s how to level the Electrical skill, with steps for leveling the Mechanics skill in the next section.
Dismantle Electronics
The best way to level up your Electrical skill is to dismantle electronics with the screwdriver tool, which can be found inside:
- Hardware stores
- Tool sheds
- Garages
- Warehouses and storage facilities that contain storage crates
- Various vehicles
Try to pick up as many screwdrivers as you can, since this tool cannot be repaired; once it breaks, all you can do is find another one.
You can dismantle a number of electronic items found in the world, but not all of them. Here is a list of electronic devices you can dismantle to increase your Electrical skill:
- CD Player
- Cordless Phone
- Digital Watch
- Earbuds
- Headphones
- Video Game
- Speaker
- Home Alarm
- ValuTech Radio
- Premium Technologies Radio
- Toys-R-Mine Walkie Talkie
- ValuTech Walkie Talkie
- Premium Tech Walkie Talkie
- Tactical Walkie Talkie
- US Army Walkie Talkie
- Premium Technologies Ham Radio
- US ARMY COMM Ham Radio
- Antique Television
- ValuTech Television
- Premium Technologies Television
Once you’ve discovered one of these items, you can dismantle it by following these steps:
- Pick up an Electronics item.
- Open your inventory.
- Right-click on the item you wish to dismantle.
- Select the “Dismantle” option.
If your screwdriver breaks during the dismantling process, you will need to equip a new one and repeat the process.
Watch VHS Tapes
Another way you can quickly gain Electrical Skill Level 1 is to watch VHS tapes. There are two types of VHS tapes in the game: Retail VHS and Home VHS. Only watching Home VHS tapes will provide you with Electrical skill XP, and only the following two:
- Muldraugh AV Club
- TV repair
These tapes can be found inside houses (wardrobes, side tables, desks), Fossil buildings, gift stores, storage units (shelves, counters), and vehicles (glove boxes, seats).
Use Skill Books
You can also increase the speed at which you gain XP for the Electrical skill by choosing either the Electrician or Engineer occupation, and by reading Electricity skill books and Electronics magazines, which can be found inside mailboxes and on the bookshelves inside houses and libraries.
Here is the list of skill books that grant Electrical skill XP:
- Electricity for Beginners
- Electricity for Intermediates
- Advanced Electrical
- Expert Electricity
- Master Electricity
You can also use the following magazines:
- Electronics Magazine Vol. 1-4
- Engineer Magazine Vol. 1-2
- How to Use Generators
- Guerilla Radio Vol. 1-3
How to Increase the Mechanics Skill in Project Zomboid
Re-Install Vehicle Parts
The best way to get the Mechanics Level 2 skill is to start the game with the Mechanic occupation. But if you have already started Project Zomboid with a different occupation, then you need to learn how to uninstall and re-install various vehicle parts before you can hotwire a car.
This can be a daunting task and may take a lot of time, but in the beginning, you don’t have many other options. To gain Level 1 in Mechanics, you need to collect as many light bulbs as possible.
You can find light bulbs in the following places:
- Lamps
- Wall-mounted lights
- Vehicle headlights
- Vehicle taillights
Light Bulbs also become available after dismantling electronics with a screwdriver. Some of the electronic items, such as TVs, radios, and walkie-talkies give you more than one light bulb per item.
To remove the light bulbs from a lamp, you only need to right-click on the lamp and select the “Remove Light Bulb” option. If you try to do the same on the vehicles, you will also need a screwdriver with the same option being available.
Once you collect between 20-30 light bulbs in your backpack, you need to approach your vehicle and do the following:
- Open up the hood.
- Right-click on a headlight.
- Select the “Uninstall” option.
- Select “Install“, choosing the bottom light bulb in your backpack.
- Repeat steps 4-5 until all of your light bulbs are used.
You can do this with all your other cars to make it to Mechanics Level 1.
You can also use the same process with the car radio, the battery, brakes, or suspension, but finding these items is a lot harder than light bulbs, which are abundant in the world.
In any case, when you have reached Mechanics Level 1, you will now have the option to re-install the car seats by doing the following:
- Right-click on the “Driver’s Seat“.
- Select the “Uninstall” option.
- Select the “Install” option.
- Repeat steps 1-3 for “Front Right Seat”, “Rear Left Seat”, and “Rear Right Seat”.
When all four seats have been re-installed, you can move on to another car and repeat the same procedure to quickly gain Mechanics Level 2.
If you decide to re-install suspensions, then you will also have to uninstall and re-install wheels, and in the case of brakes, you must also remove tires, which takes a lot more time.
Watch VHS Tapes
As is the case with the Electrical skill, you can more quickly increase Mechanics leveling with the help of VHS Tapes. But unlike the Electrical skill, you can learn Mechanics by also watching Retail VHS, such as:
- Carzone E1
- Carzone E2
- Carzone E3
As for the Home VHS options, you have the following tapes to consider:
- OSCC ’92
- Stock Cars
Read Profile Magazines
There is also a set of magazines that can help you level up the Mechanics skill, including:
- Laines Auto Manual – Standard Models
- Laines Auto Manual – Commercial Models
- Laines Auto Manual – Performance Models
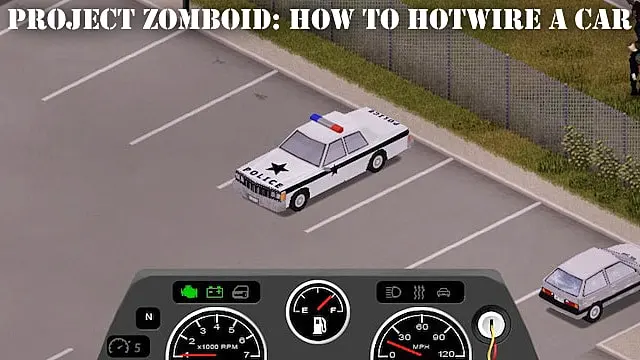
How to Hotwire a Car in Project Zomboid
After gaining Electrical Level 1 and Mechanics Level 2 skills, you can finally start hotwiring cars. The dedicated option will appear in your radial menu, so you need to do the following:
- Take a seat behind the wheel of a car.
- Press the “V” key to open the radial menu.
- Select the “Hotwire Engine” option.
- Wait for the gauge to fill up.
This may not work every time, so you just need to repeat steps 3-4 until it works. Once it does, you will see two cables sticking out of the keyhole in the vehicle menu. If you hover your mouse over the keyhole, it should say “Hotwired”, which means that your hotwiring was successful.
Now all you need to do is start the engine by pressing the “Engine Status” button. If the vehicle has some gas in the tank, it will start the engine, and you can safely drive it away.
That’s all you need to know on how to hotwire a car in Project Zomboid. Also, be sure to read our Project Zomboid review right here.


Published: Jan 13, 2022 10:14 am