Like its predecessors, Shadow Of The Tomb Raider has a whole lot more than just crypt puzzles and gun battles. If you want to fully complete 100% of the game, you’ll need to search out hundreds of hidden challenges and collectibles.
The game’s very first area — Cozumel — is already packed with a variety of survival caches, treasure chests, relics, documents, and more! Let’s dive in and get started tracking them all down.
Be sure to check out the rest of our guides at the bottom of this page.
Cozumel Collectibles Guide
Most of these collectibles and challenges can be grabbed at the beginning of the game — before the tsunami.
To fully complete the area and get all the collectibles, however, you have to return later via fast travel after getting both the lockpick and the upgraded hardened knife.
You need the knife to removed the braided rope barriers in the area and the lockpick to access certain chests. If you haven’t found it yet, the hardened knife is acquiring by buying the $2,900 knife upgrade from the merchant in the Hidden City after completing the Trial Of The Eagle puzzle.
Selling gold or jade pieces can get you that amount of money pretty quickly, or you can take the skill to lower merchant prices. You can also buy the lockpick from a merchant in the Hidden City.
Whistle In The Dark Challenge

Death Whistle 1
From the first campsite, run into the hallway where you have to duck underneath the spears. In the first room on the right after that hallway, the first Death Whistle is in front of you and slightly above by the open ceiling.
Death Whistle 2
From the previous whistle, crawl through the tunnel with the low ceiling into the main room of this area with the water pool. As soon as you exit the tunnel, look to the right and upward to see this Whistle hanging from the stone structure on the east side of the room.
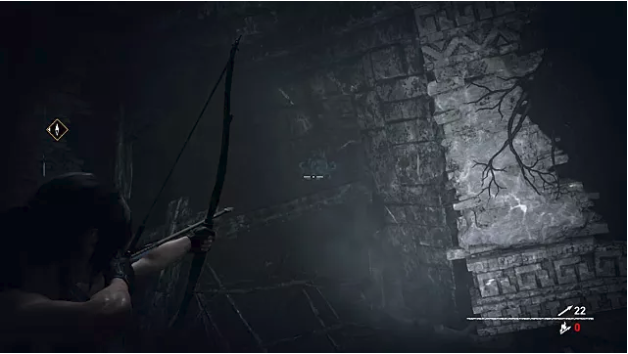
Death Whistle 3
On the other side of the room from the previous whistle carving, go through an opening where you should see a doorway with two impaled bodies on your left and a pool of water on your right. Look above the pool of water to see the third Whistle against the wall.
Death Whistle 4
The next two are both in the Tidal Caverns area near the second campfire in Cozumel (the section with the cart puzzle).
The easiest way to hit this one is actually from the campfire. Just walk forward to the edge (before jumping across to the main section of this room) and look up and to your right. You can hit it here.
If you missed it from that location, proceed through the area until you jump across the platforms to the opposite side of the room. From there, turn around and you can see it much closer to you.

Death Whistle 5
After firing a rope arrow and climbing across the chasm, you will need to duck under a wall with some spears. From there, you can jump onto the first bell platform to make your way towards the cart puzzle. From that platform, look up towards the ceiling to find the last whistle carving.
Cozumel Relics
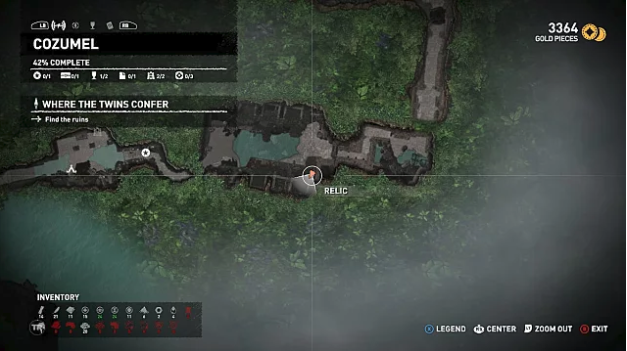
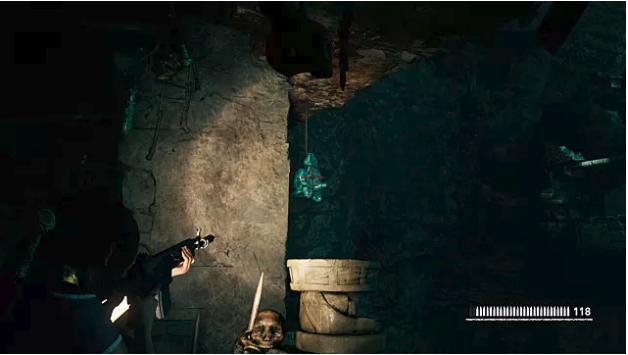
Relic 1
In the room with the large water section and the braided wood door, look in the southeast corner near the floor to find the first relic.

Relic 2
In the main water room after going through the low hanging tunnel, dive into the pool and swim down underwater. You will find a box containing the relic at the bottom sitting on a small stone block.
Cozumel Documents
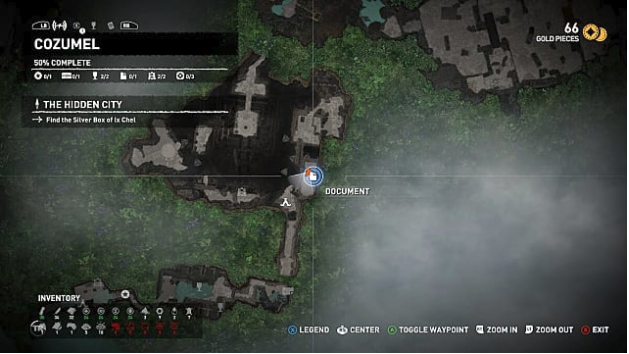
Document 1
To reach this area, head into the room with the large water pool and jump up on the stone structure on the left side of the area. Go forward and use the hardened knife to destroy the braided wood door.
From there, you can find a series of hallways with an archivist map and various other resources. Proceed toward the large area with the cart puzzle, where you should pop out above the campfire. The document is sitting by the wall to the right.
Cozumel Murals

Mural 1
The first mural is right by the first campsite and can be seen against the wall before you go through the tunnel with the low hanging ceiling.
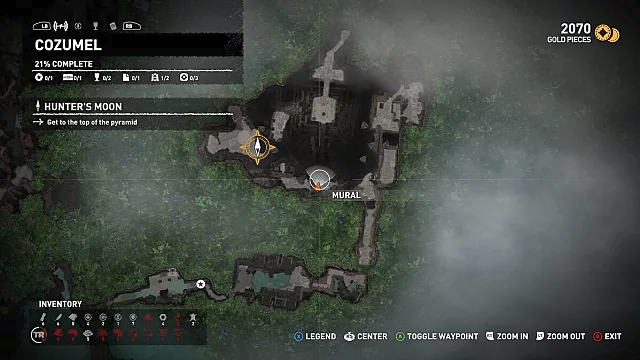
Mural 2
In the large cavern with the cart puzzle, look for this mural against the wall after you climb across the rope bridge.
Cozumel Treasure Chest
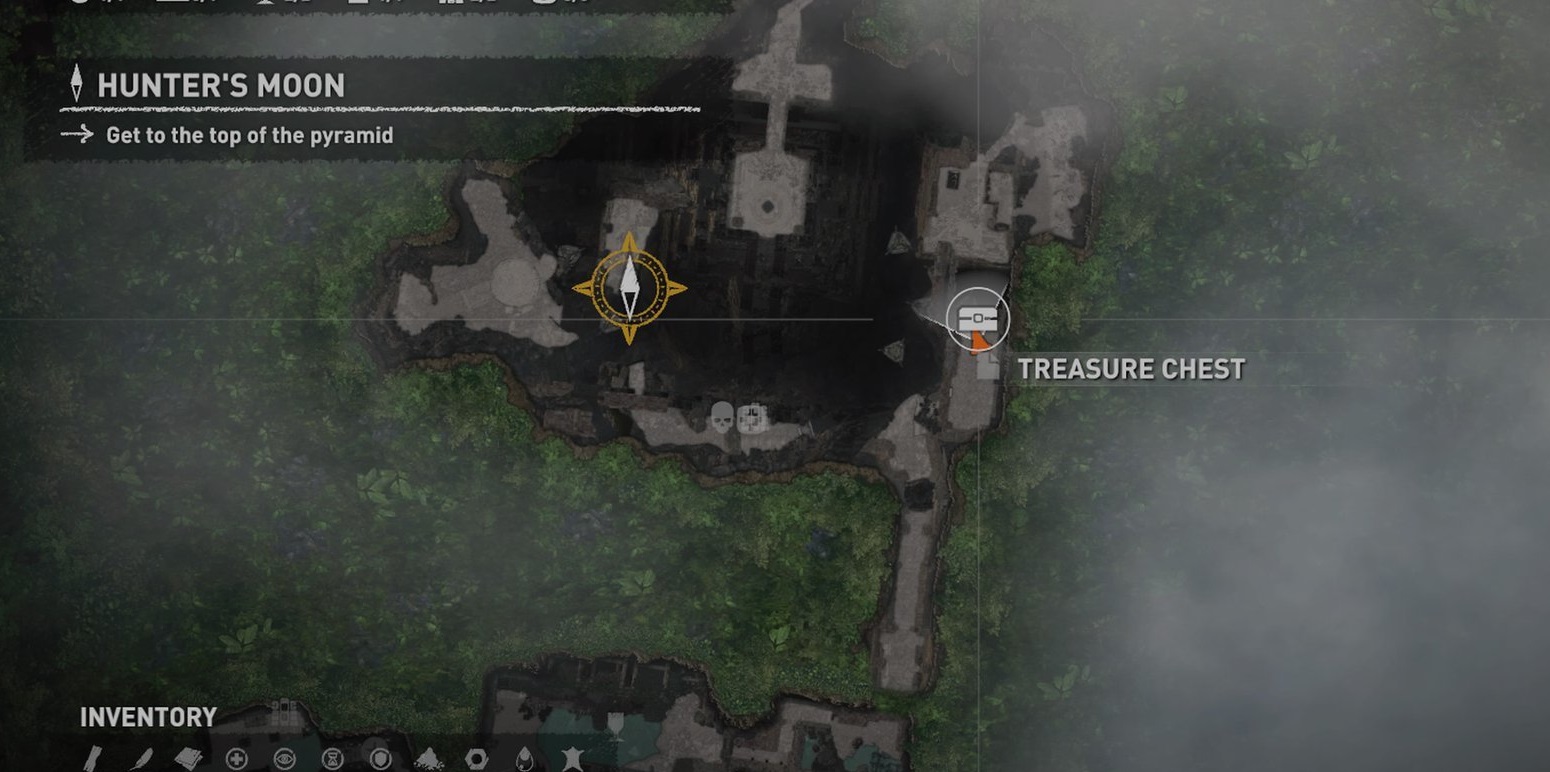
Treasure Chest 1
This one is deviously placed and requires changing an element of the room with the cart puzzle. When you come to the Hunter’s Moon area and begin to ascend the pyramid, you’ll find several hanging bells you’ll use to get to the end of the area.
Cross over the first two you come to. When you get to the ruined area right after, climb the stairs and ascend the next two. Once you get to the other side of the gap, continue down and use a rope arrow to make a tether across the chasm.
On the other side, turn immediately around and look for the tether point up above where you just came from. Use a rope arrow and cross.
You can now climb up to a previously inaccessible area to find the treasure chest. Note that you can’t actually open the treasure chest until finding the lock pick much later in the game.
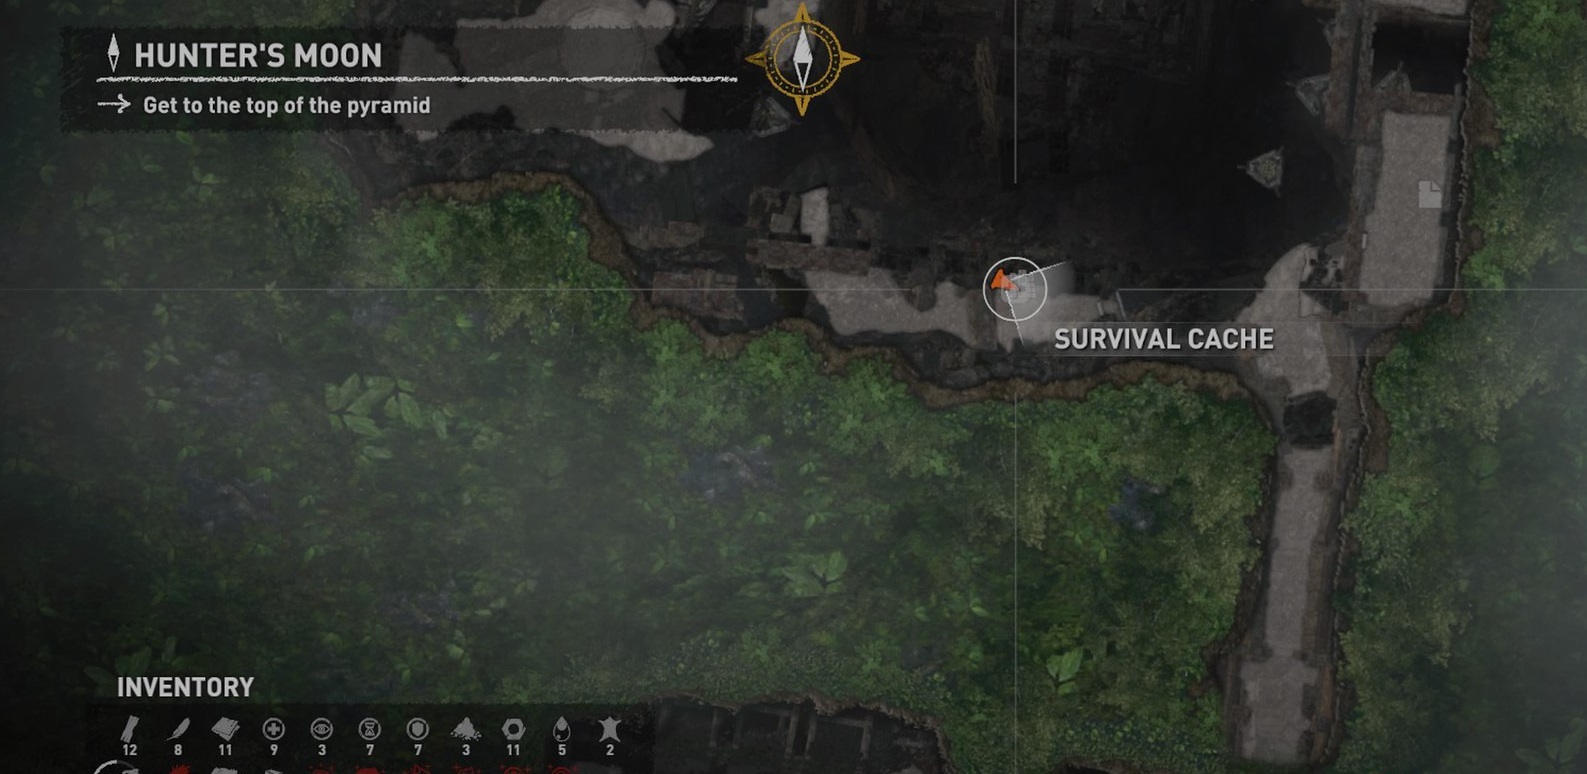
Cozumel Survival Caches
Survival Cache 1
The first cache is in the southeast corner of the water room in a small alcove right up against the wall.

Survival Cache 2
The second survival cache is underwater. You have to jump into the pool and swim to the map marker location, then look for the cache icon to appear up against the wall.
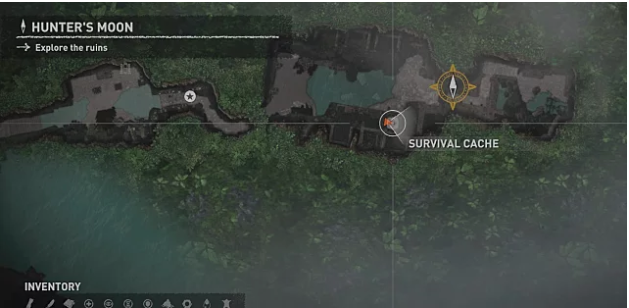
Survival Cache 3
The third cache is in the large cavern room with the cart puzzle. After climbing across the rope bridge, rappel down the cliff side to this section and the cache icon should appear on the ground.
Looking for more help with the puzzles and collectibles? Check out our full list of Shadow Of The Tomb Raider walkthroughs.
Related Content:
- Shadow of the Tomb Raider Review
- Trial of the Eagle Collectibles Guide
- Peruvian Jungle Collectible Locations
- Best Skills in Shadow of the Tomb Raider
- Head Of The Serpent Puzzle Guide / Collectibles
- All Shadow of the Tomb Raider Crypt Locations


Published: Sep 12, 2018 03:57 pm